
 |
Register or Log In To remove these advertisements. |
|
|
|
|||||||
 |
|
|
Thread Tools | Display Modes |
|
|
|
|
#1 |
|
Registered User
Join Date: Aug 2014
Location: Texas
Posts: 46
|
How To: Deluxe Heater Control Lever Replacement
Hello All!
Thought I would put together a quick tutorial on replacing the levers and cables on a Deluxe Heater Control unit. Pretty simple job that can be accomplished in about an hour once the control unit is out the truck. Hope this helps! The problem - broken soft pewter control levers in the deluxe heater control unit 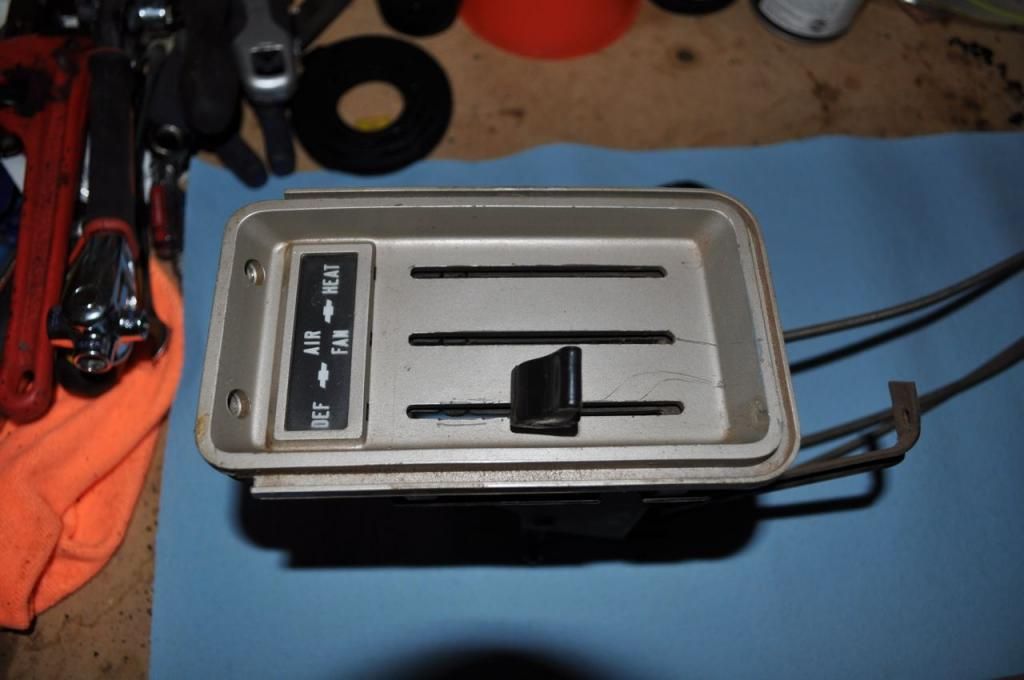 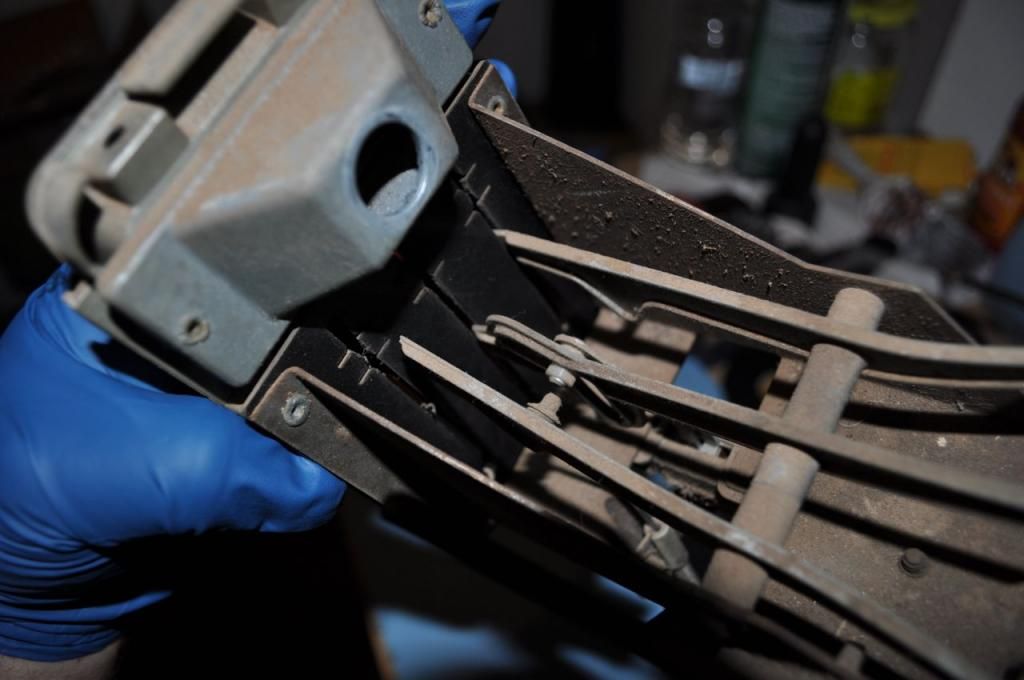 The solution - replacement steel levers from Old Air and new control cables (I purchased both through LMC). 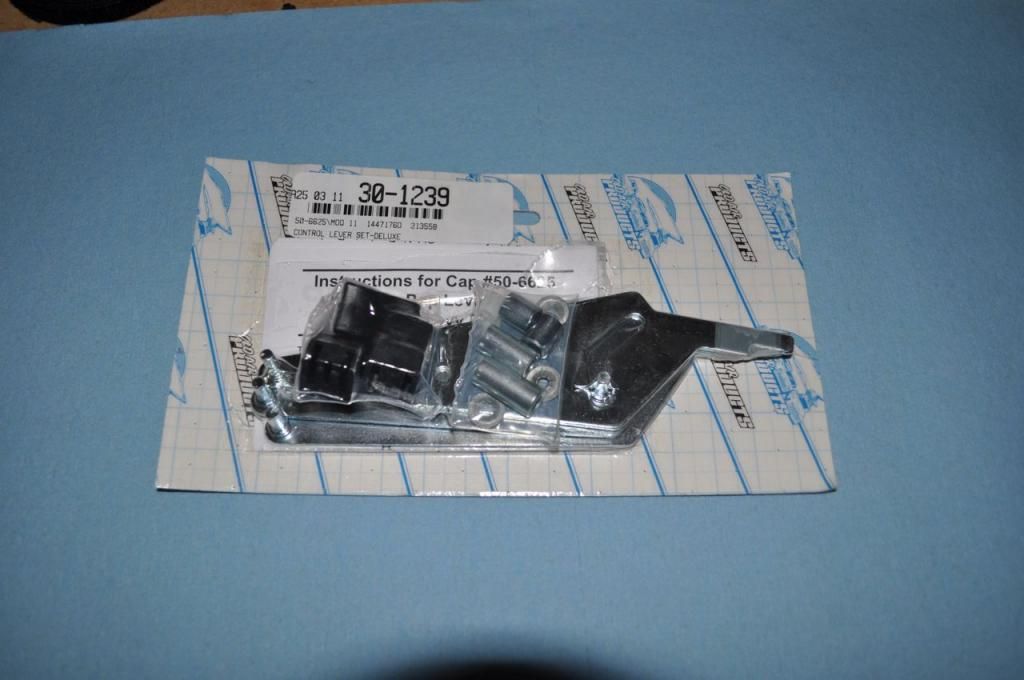 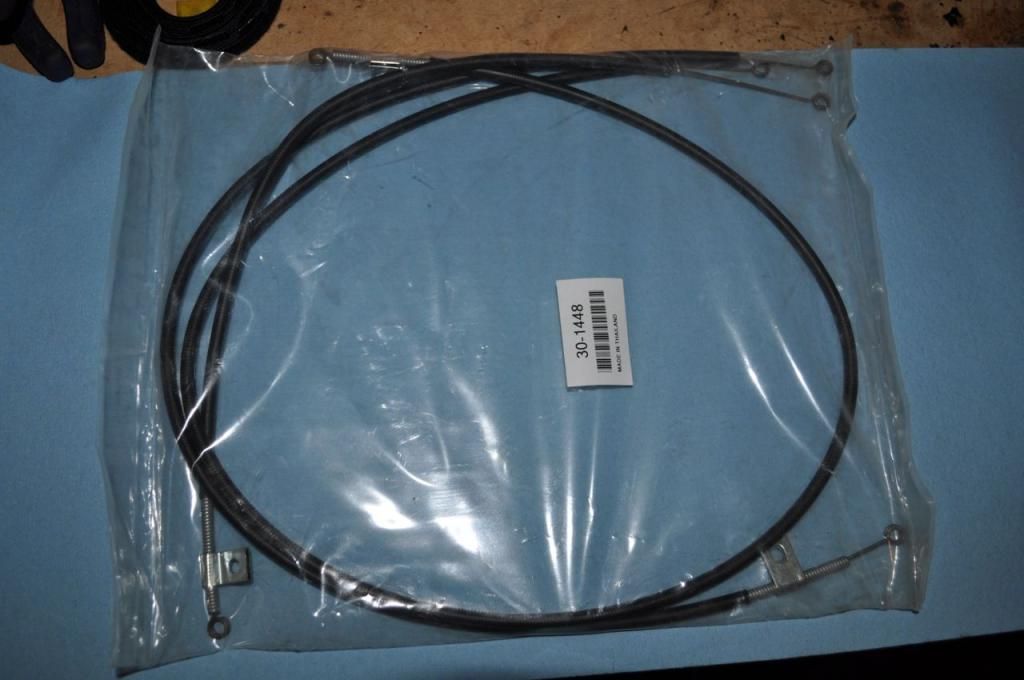 Step 1 - Remove the old cables by removing the 1/4" fasteners and retaining clips. 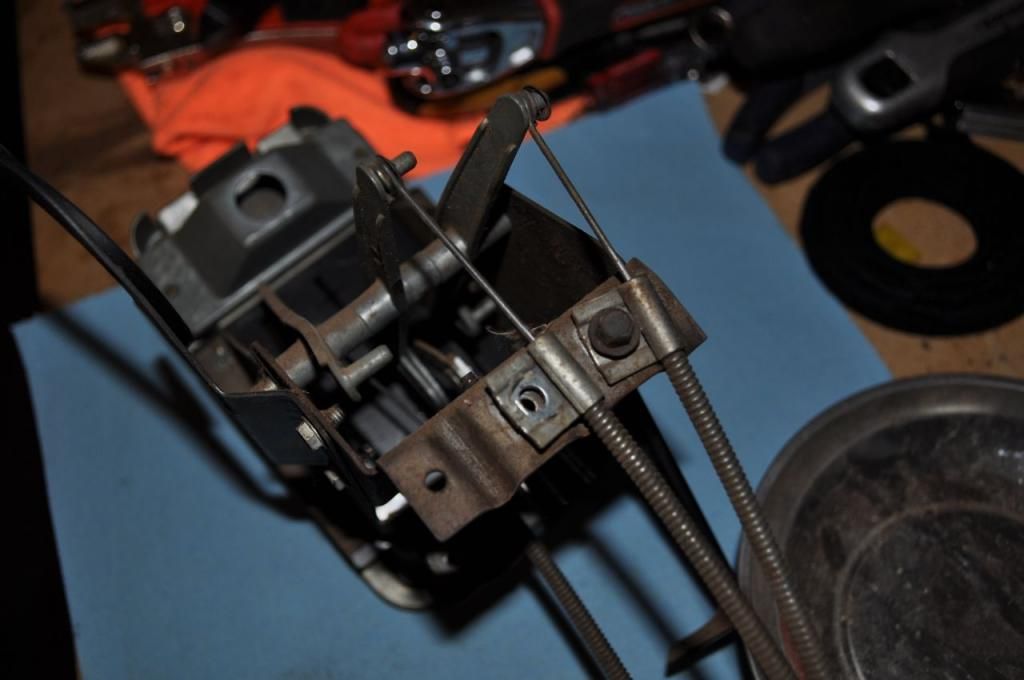 Note - One cable connects to the front half of the lever near the control face. It is kind of pain to get to. 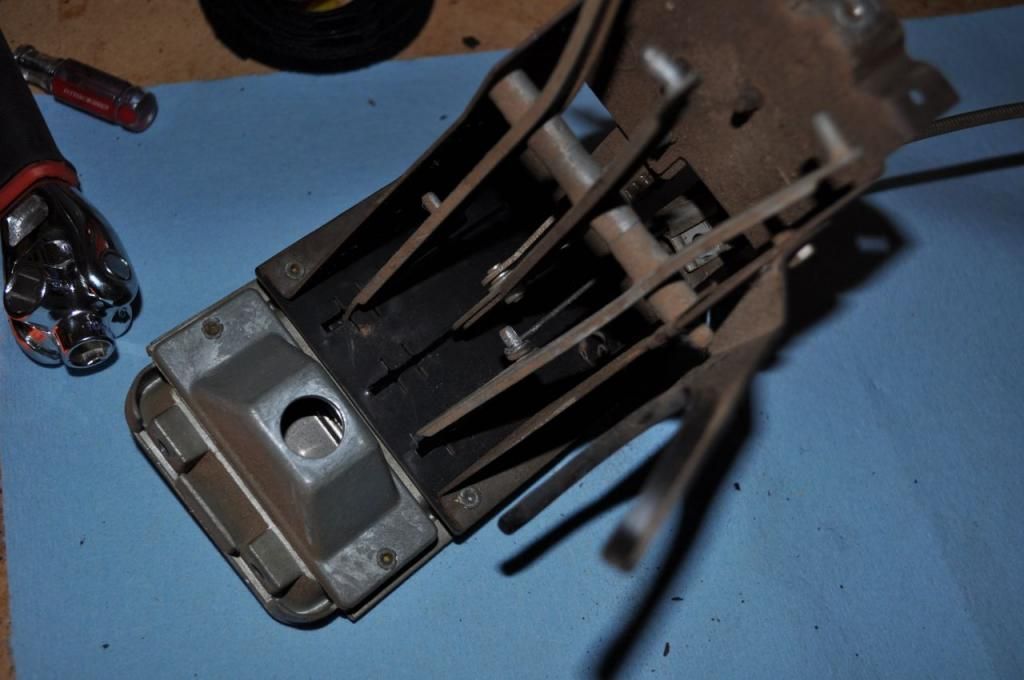 Step 2 - Remove the Defrost Hose Bracket to gain easy access to lever fulcrum pin. 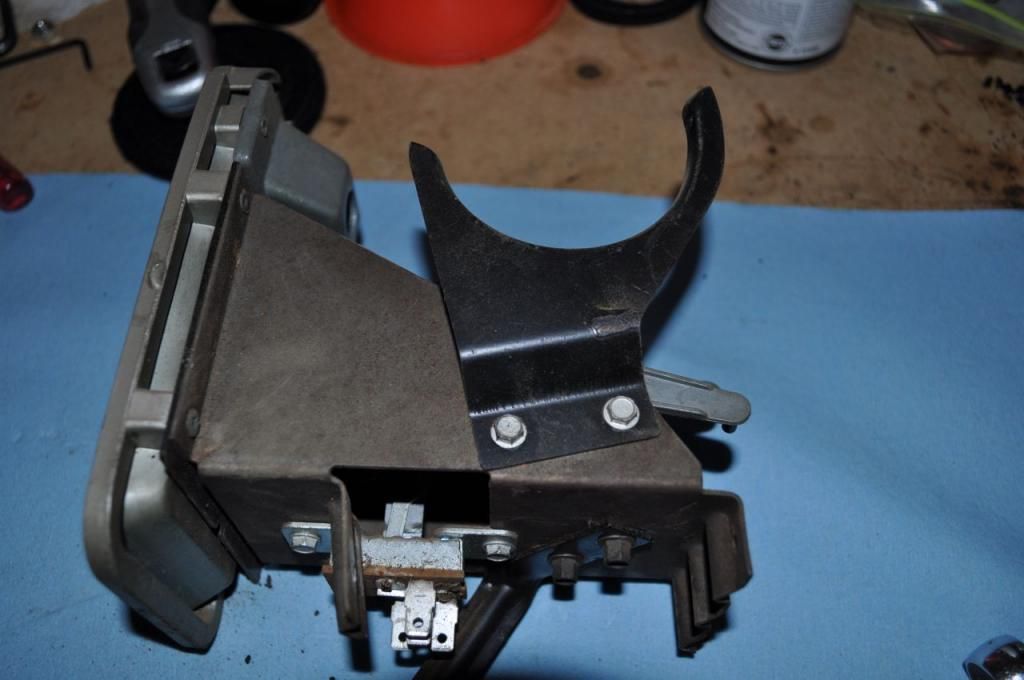 Step 3 - Remove the lower bracket and blower switch (the switch connects into a groove in the middle lever). 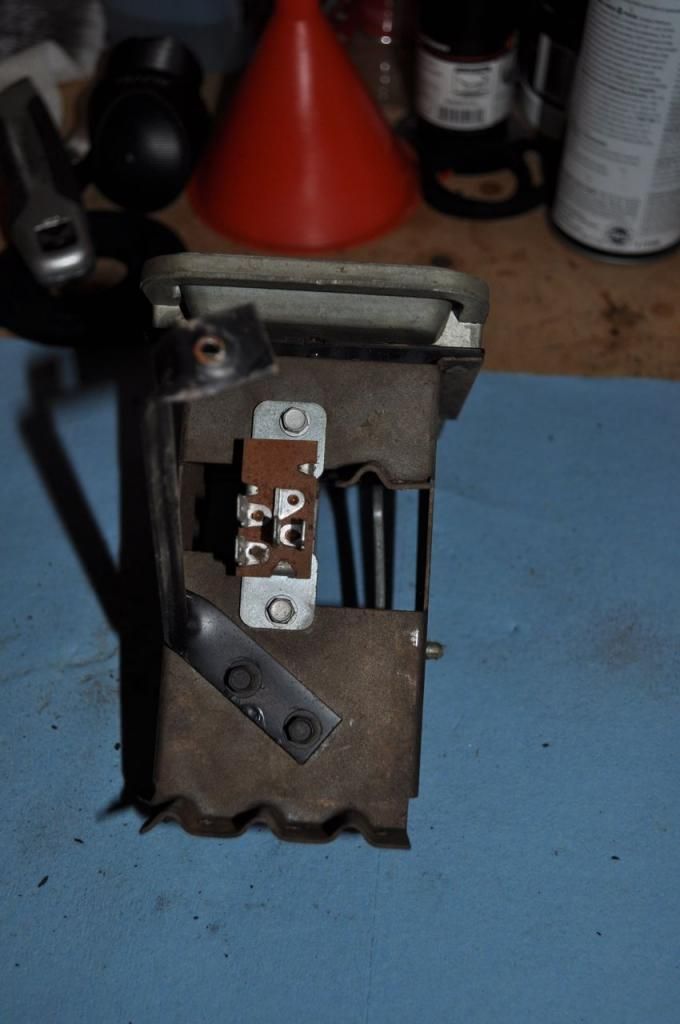 Switch Removed 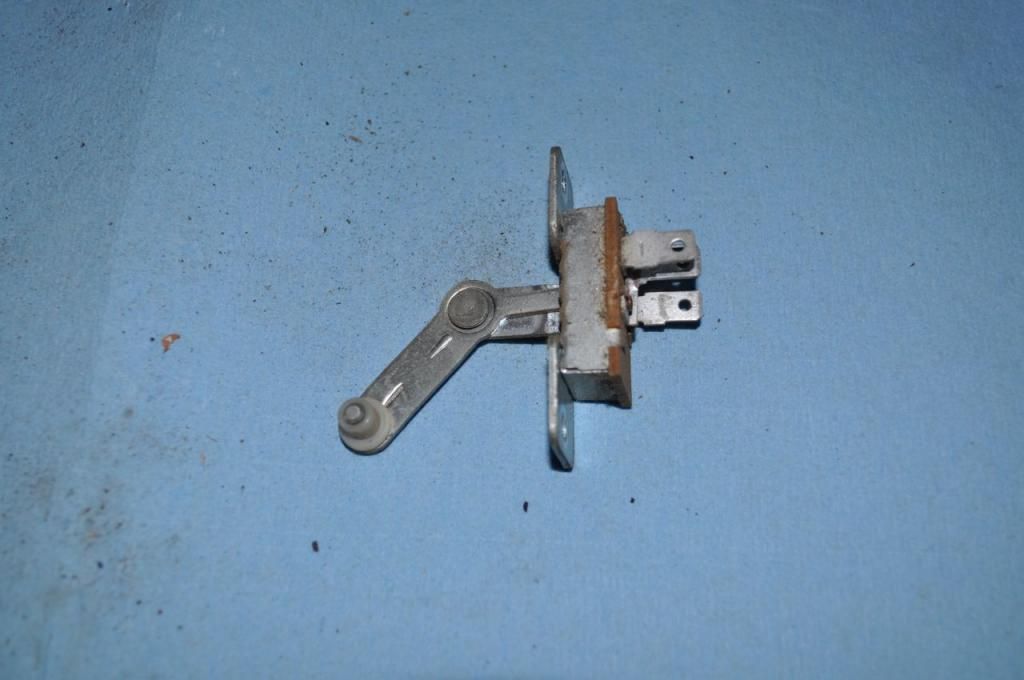 Pay attention to the bushing - the Old Air kit comes with a new one but don't lose it if yours does not. 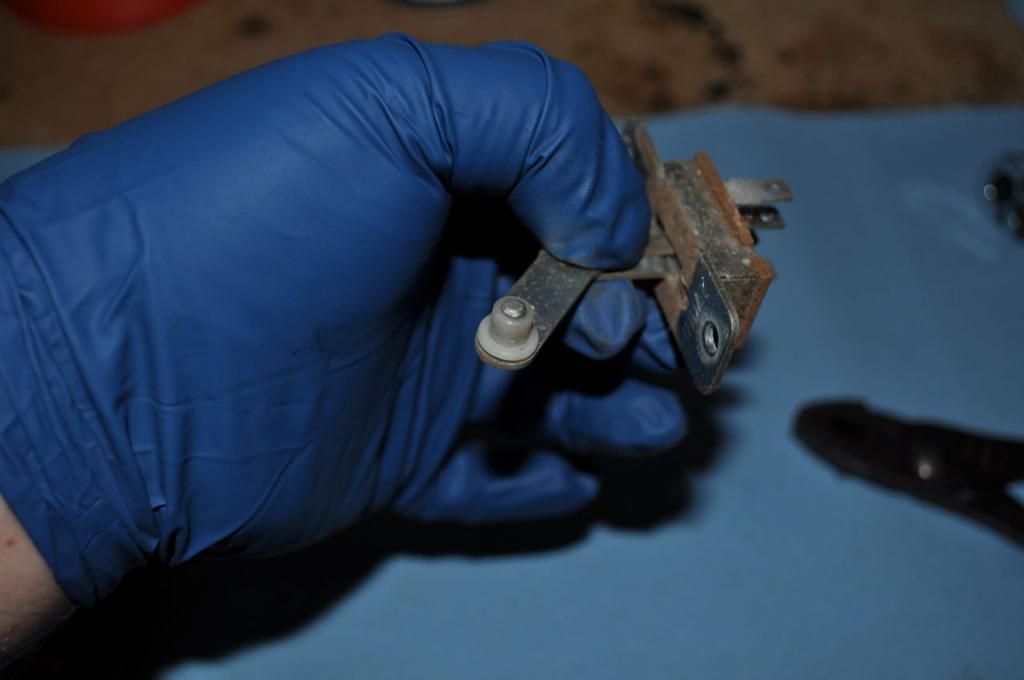 Step 4 - Remove any remaining knobs (may have to brake them to remove them). 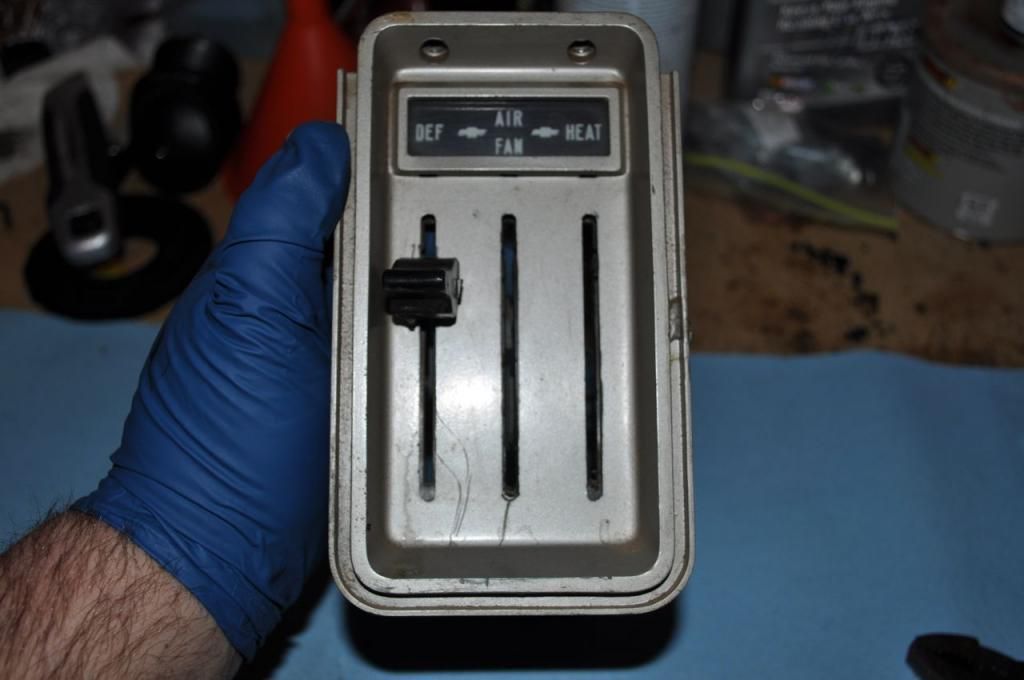 Levers ready to be removed - notice the distortion in the soft metal. 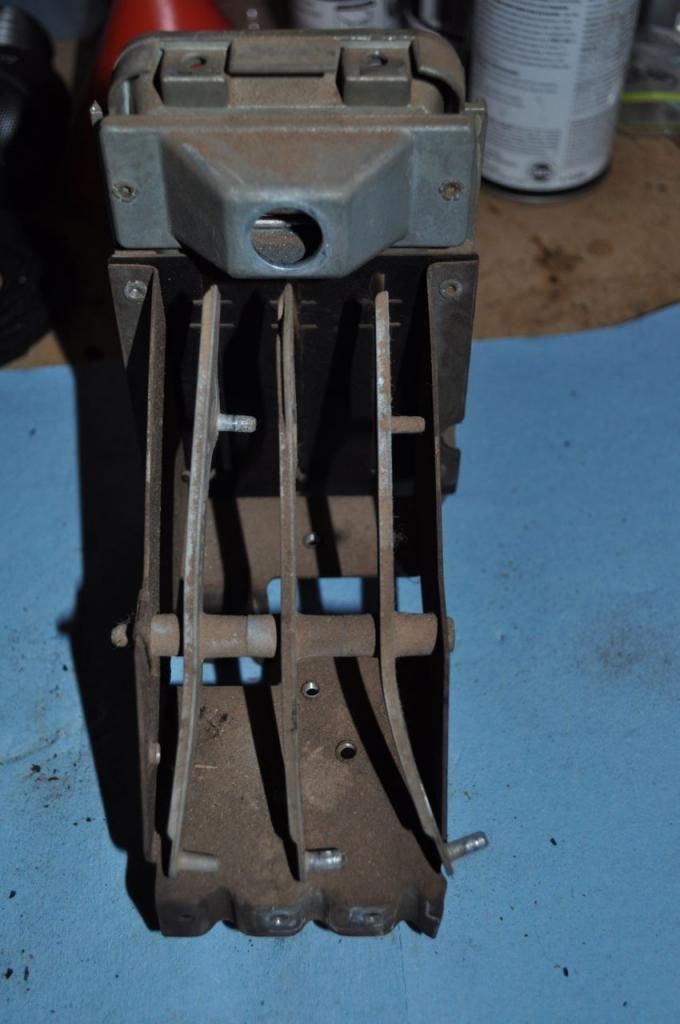 Step 5 - Drift out the fulcrum pin (a few taps on the pin is all it takes) 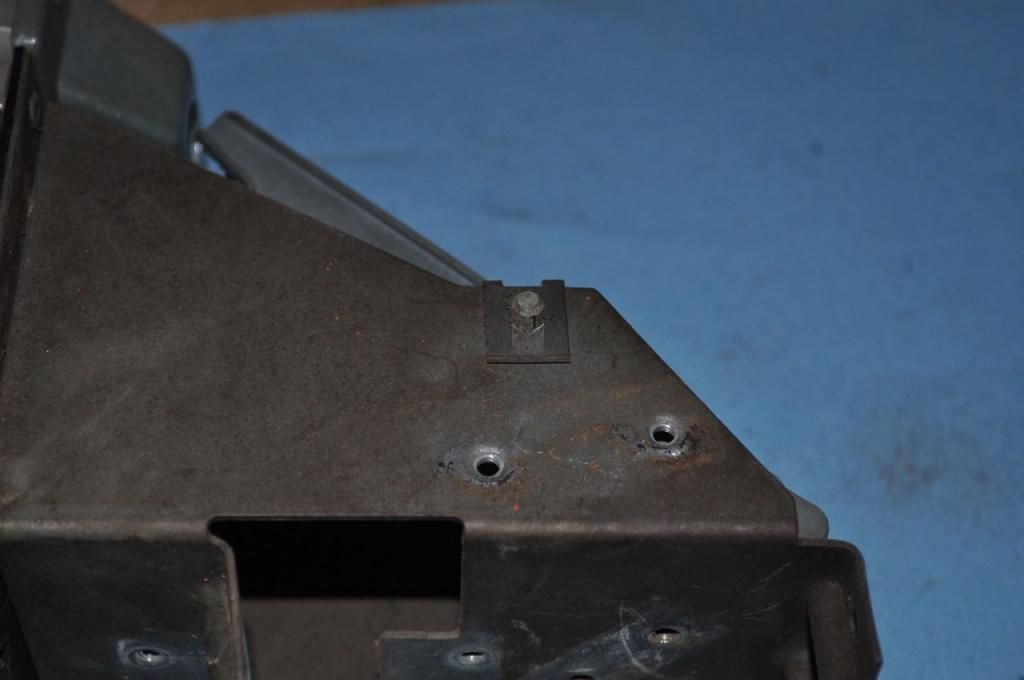 Components removed. 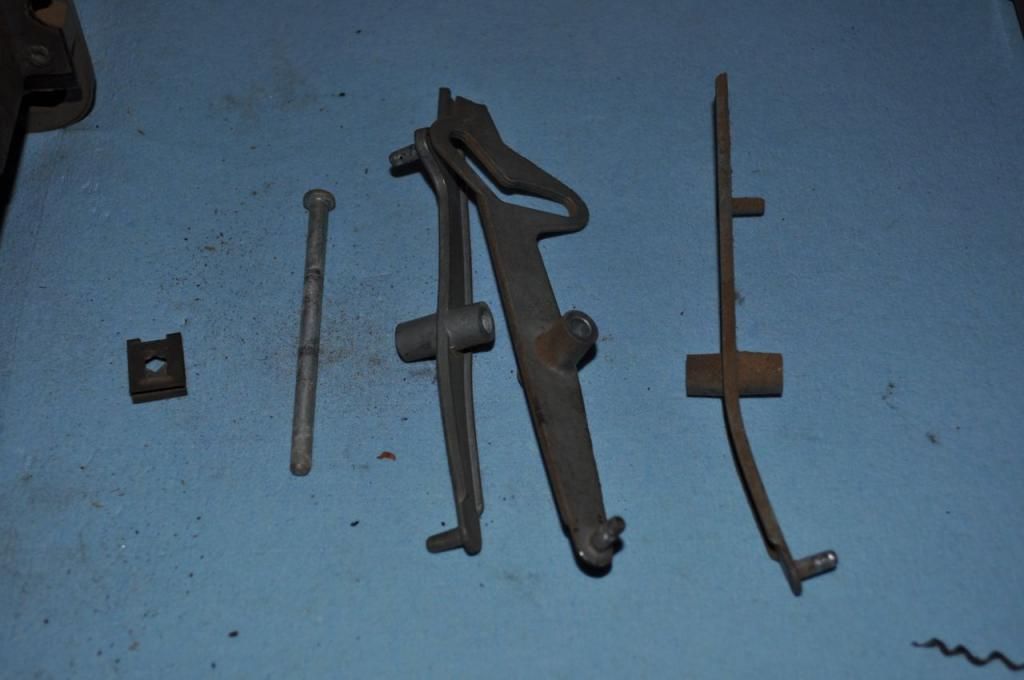 Control Unit stripped down and ready for reassembly. 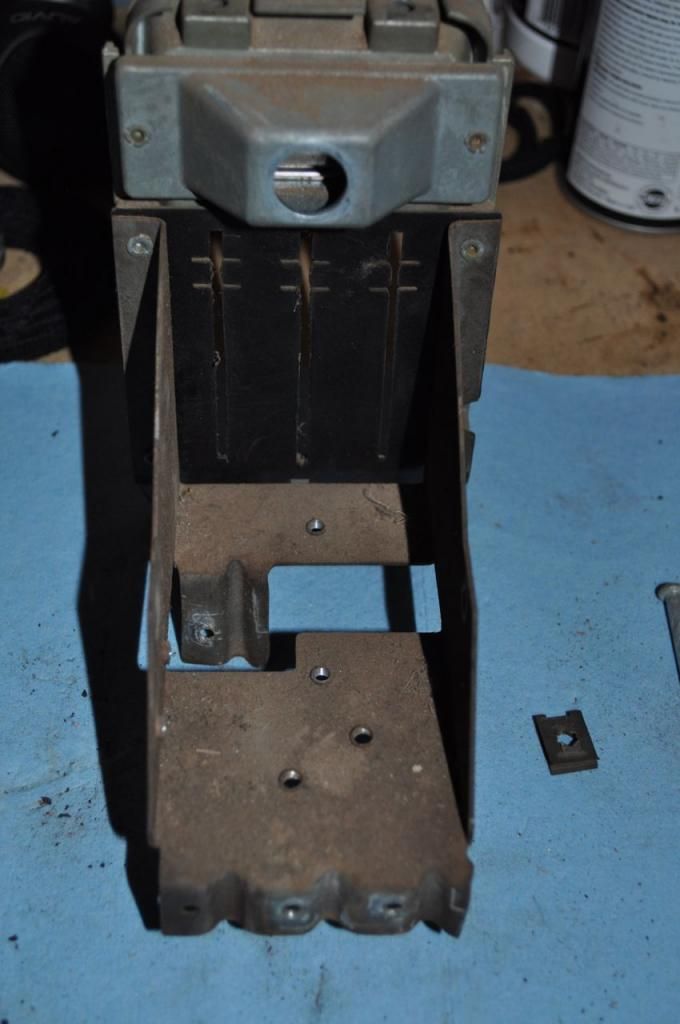
|
|
|

|
|
|
#2 |
|
Registered User
Join Date: Aug 2014
Location: Texas
Posts: 46
|
Re: How To: Deluxe Heater Control Lever Replacement
Part 2 - Going Back Together
Here are the parts in the kit from Old Air. It is complete and the levers are much more rigid than the original ones. 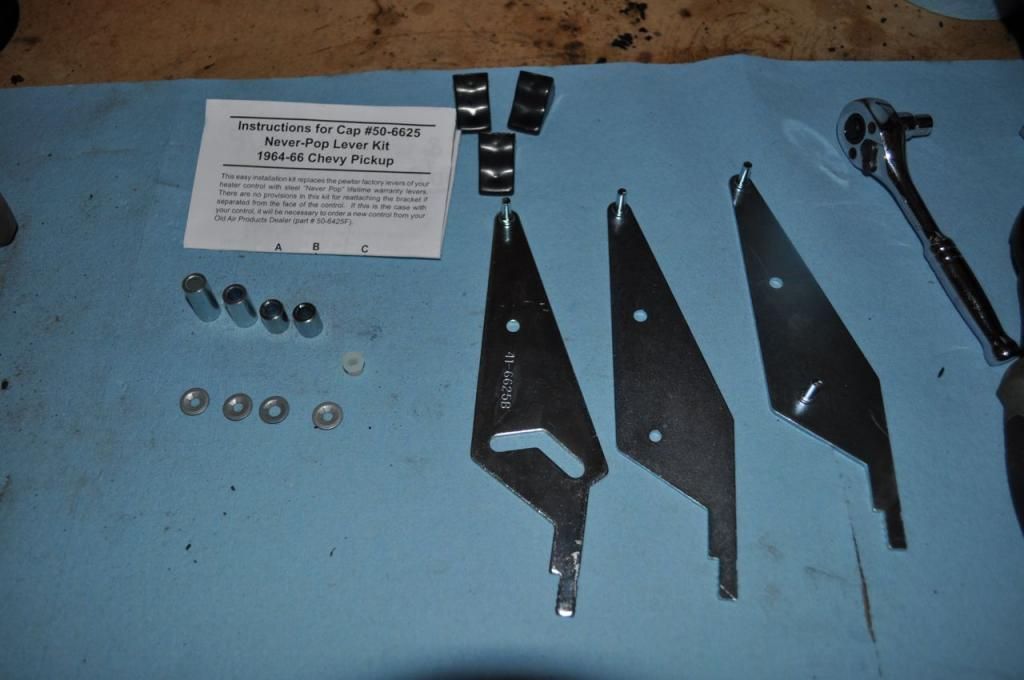 Step 6 - Assemble the lever arms and spacers. The provided instructions are good and provide adequate detail. 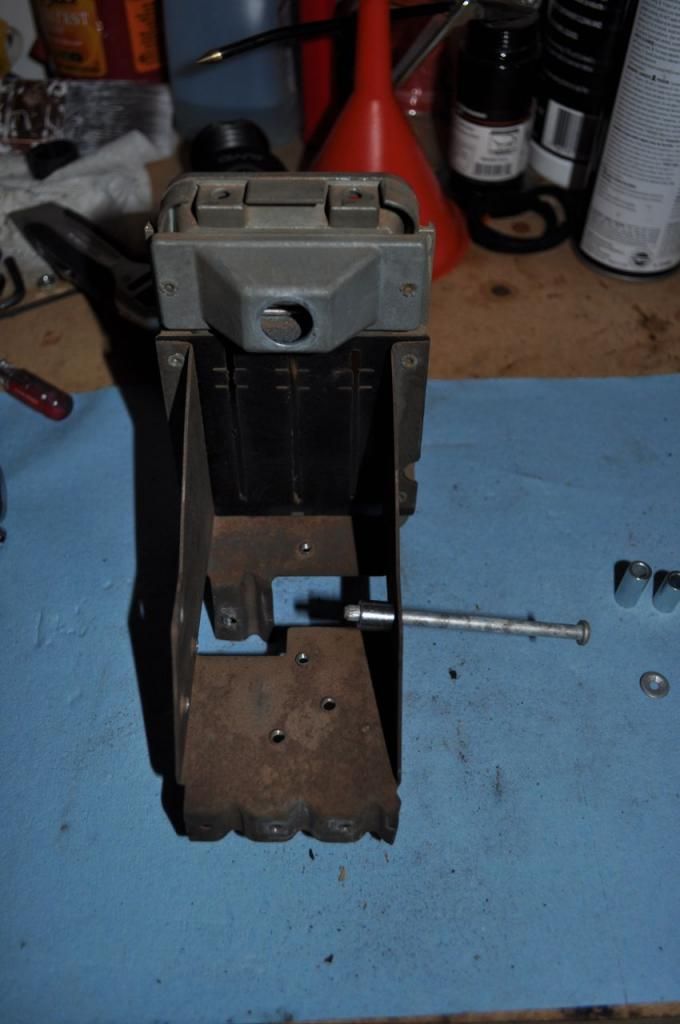 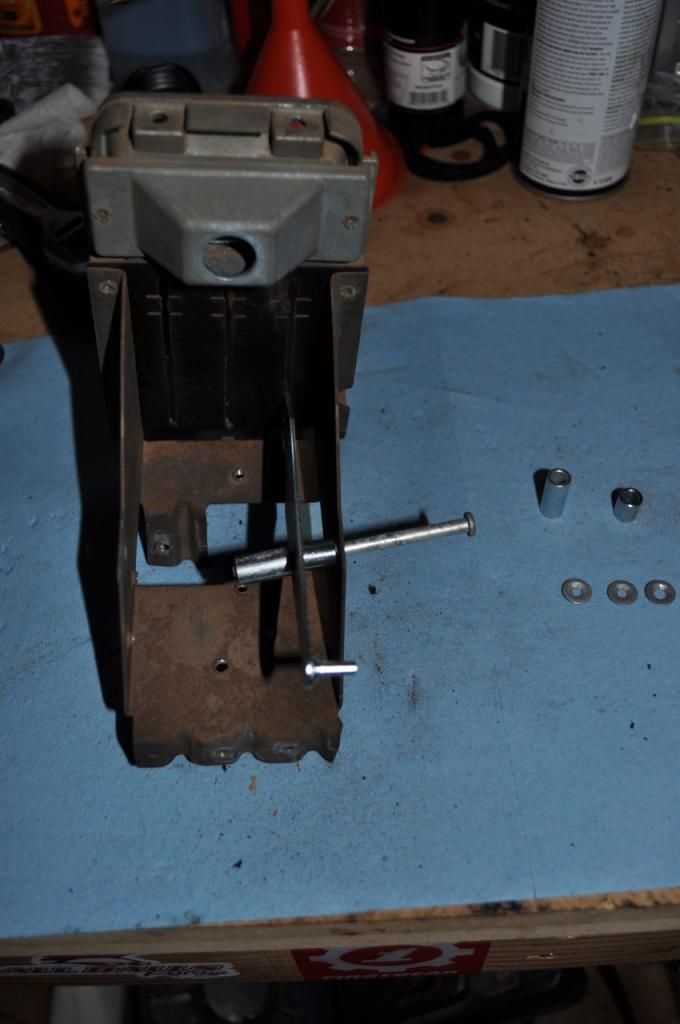 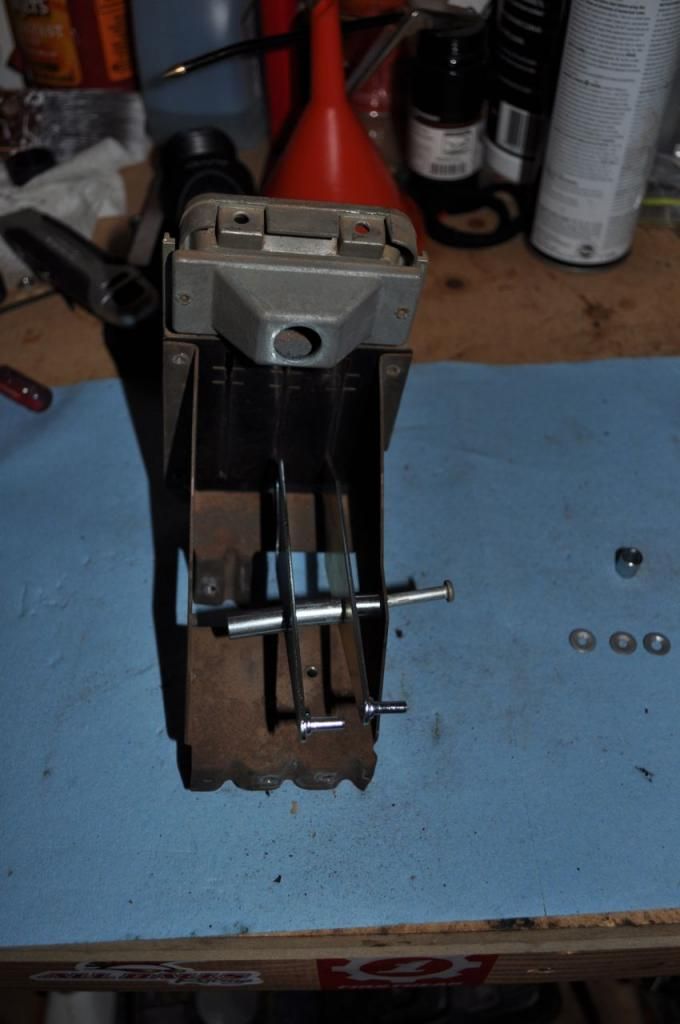 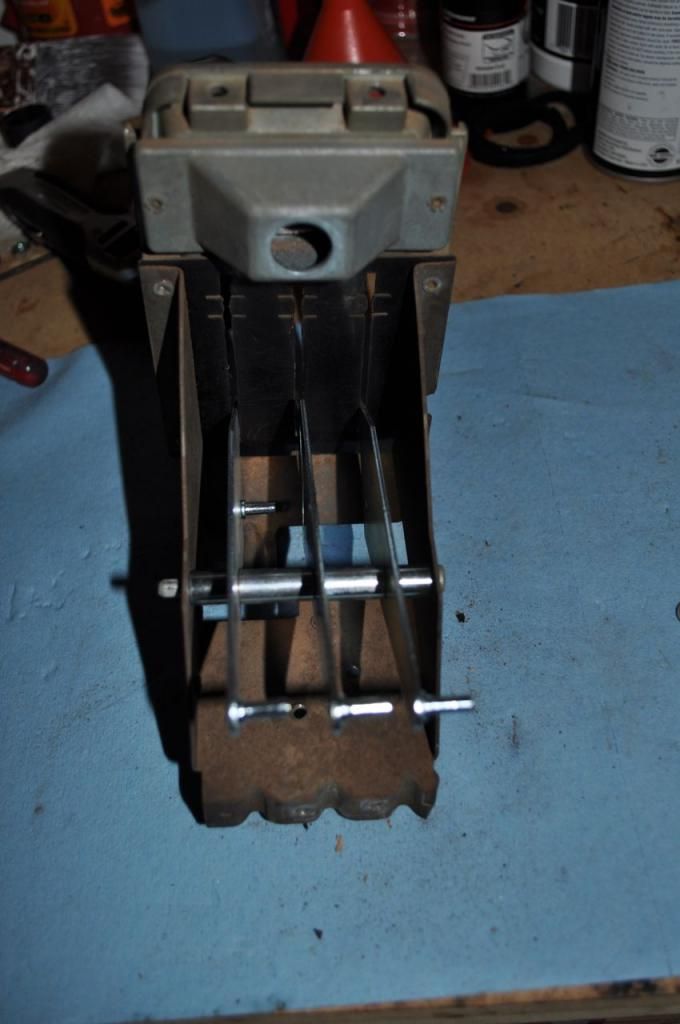 Step 7 - Install the new knobs (mine fit tightly on the new levers) 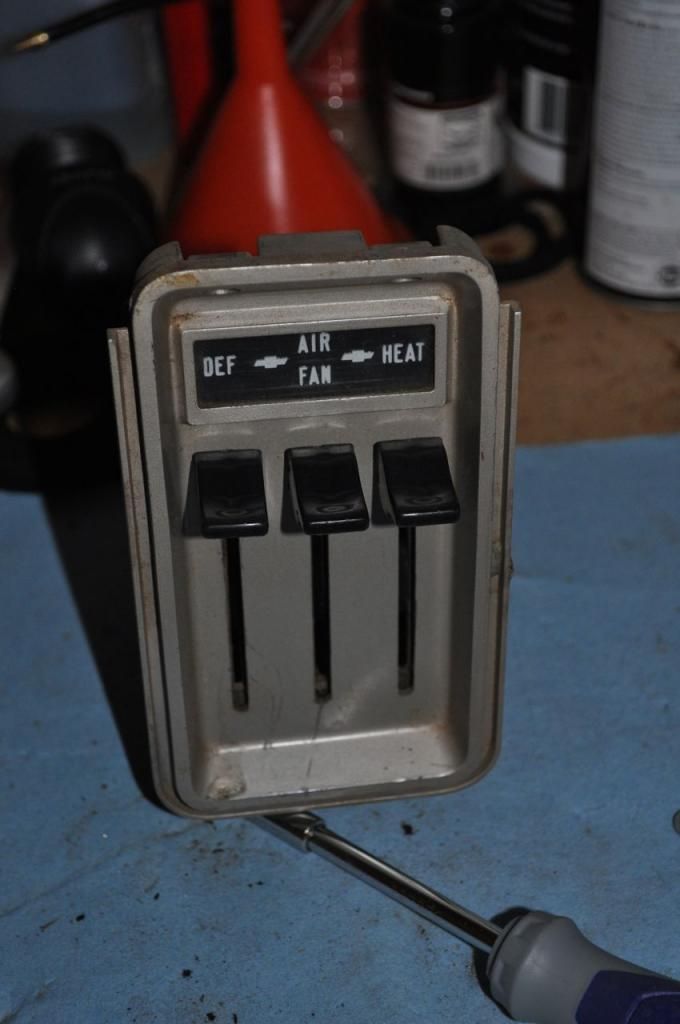 Step 8 - Install new cables and reinstall blower switch and brackets . The new cables are much smoother but the cable end clamps suppled were inadequate. They did not match up well with the channels in the control unit. I ended up reusing the cable ends from the original cables on the truck. Also - the cable attachment on the front half of one of the levers is a pain! 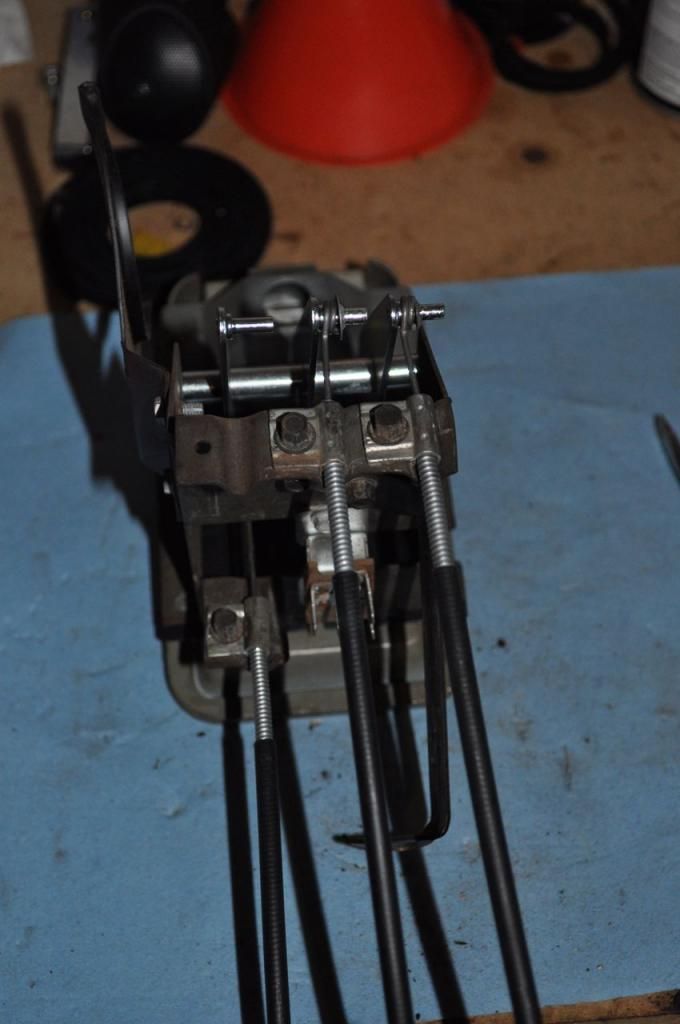 Complete and ready for reinstallation. A simple, easy improvement to get the heat working properly! 
|
|
|

|
|
|
#3 |
|
60-66 Nut
  Join Date: Mar 2007
Location: Coeur d'Alene, Idaho
Posts: 23,252
|
Re: How To: Deluxe Heater Control Lever Replacement
Thanks for taking the time to put together this nice write up

__________________
Power Steering Box Adapter Plates For Sale HERE Power Brake Booster Adapter Brackets For Sale '63-'66 HERE and '67-'72 HERE and '60-'62 HERE and "60-'62 with clutch HERE Rear Disc Brake Brackets For Sale. Impala SS calipers HERE Camaro Calipers HERE D52 Calipers HERE 6 Lug HERE Hydroboost Mounting Plates HERE |
|
|

|
|
|
#4 |
|
Registered User
Join Date: Sep 2012
Location: Leander, TX
Posts: 969
|
Re: How To: Deluxe Heater Control Lever Replacement
Nice writeup. I will be using this when I rebuild mine later this year.
Bret
__________________
64' Build Thread http://67-72chevytrucks.com/vboard/s...d.php?t=586955 |
|
|

|
|
|
#5 |
|
Registered User
Join Date: Aug 2014
Location: Texas
Posts: 46
|
Re: How To: Deluxe Heater Control Lever Replacement
Thanks for the kind words CaptainFab!
bj383ss - Hopefully it will be a help to you. I looked for similar information before I did mine but didn't find anything so I thought it might be useful. |
|
|

|
|
|
#6 |
|
Registered User
 Join Date: Mar 2005
Location: apple valley, ca
Posts: 2,670
|
Re: How To: Deluxe Heater Control Lever Replacement
Outstanding write-up! I like the pictures and the attention to detail. This really needs to be included in Woogeroo's How-To thread. Maybe you could shoot him a PM? I think that he would be glad to include it. If you haven't checked out that thread, you need to check it out. It's awesome!
__________________
Check out my latest endeavor: https://roundsixpod.com My build threads: '55 Chevy: http://67-72chevytrucks.com/vboard/s...d.php?t=247512 '64 C-20: http://67-72chevytrucks.com/vboard/s...d.php?t=446527 |
|
|

|
|
|
#7 |
|
Never Ending Projects
Join Date: Jul 2006
Location: San Diego, CA
Posts: 3,836
|
Re: How To: Deluxe Heater Control Lever Replacement
Outstanding tutorial. I will be referencing this when I rebuild mine.
Since this was very good, I have added it to the FAQ for the 60-66 area. Thanks!!!
__________________
. 1965 C10 Panel,  Tiki Express http://www.67-72chevytrucks.com/vboa...d.php?t=506580 SOLD Tiki Express http://www.67-72chevytrucks.com/vboa...d.php?t=506580 SOLD1968 Chevy C10, Long, Fleetside, Hot Rod Hauler http://67-72chevytrucks.com/vboard/s...d.php?t=313233 SOLD 1965 Chevy C10, Long, Fleetside, Hot Rod C10 http://67-72chevytrucks.com/vboard/s...d.php?t=415702 SOLD We were given two ears and one mouth for a reason... listen twice as much and speak half as often... |
|
|

|
|
|
#8 | |
|
Registered User
Join Date: Aug 2014
Location: Texas
Posts: 46
|
Re: How To: Deluxe Heater Control Lever Replacement
Quote:
Thanks chevy_mike! I have taken more than my fair share of info from this site so it is nice to contribute a little! |
|
|
|

|
|
|
#9 |
|
Registered User
Join Date: Oct 2009
Location: Durham, NC
Posts: 33
|
Re: How To: Deluxe Heater Control Lever Replacement
How does this control mount on the bottom? I retrofitted to my non-deluxe 66 and it's just flopping around when I adjust the controls. The top screws were easy enough, but I can't figure out how it's supposed to get fixed at the bottom? I'm probably missing some parts?
|
|
|

|
|
|
#10 | |
|
Registered User
Join Date: Aug 2011
Location: Montrose, CO
Posts: 972
|
Re: How To: Deluxe Heater Control Lever Replacement
Quote:
|
|
|
|

|
 |
| Bookmarks |
| Thread Tools | |
| Display Modes | |
|
|