
 |
|
|
|
|
#1 |
|
Registered User
Join Date: May 2005
Location: Hendersonville, TN
Posts: 134
|
Project TN 20
I've had a '64-'66 of various sorts for most of my driving life, from the '65 4x4 I bought at 16 to the latest...
I've read a lot of threads, and have the utmost respect for those that can do a full frame off and continue through to completion. That would be my preference, but due to not enough garage space, not enough patience, and 3 kids that will throw rocks at anything pretty, I'm going for a 20' driver. Don't get me wrong, no desire to half way do anything here, the intent is to do it all right, and one day she'll be there. Each project will be done with the goal of getting her back on the road and driving as soon as possible, to keep interest and not get into project hell. I've been there, I'm not going back to that place  No show queen, but a truck I can drive every day and enjoy, and not worry about a paint chip or two. Also a project to keep the little ones busy, idle hands you know. So the story starts with chasing down a Craigslist add that simply stated "66 Chevy." Two pics, and no other information than "sounds good." After a lot of chasing, I found a truck that had sat in a barn for 7 years, but looked to fundamentally be a great starting place. Probably a late 80's or 90's resto, already has disc brakes, 5 lugs, etc. Oh yeah, and a lot of bondo. 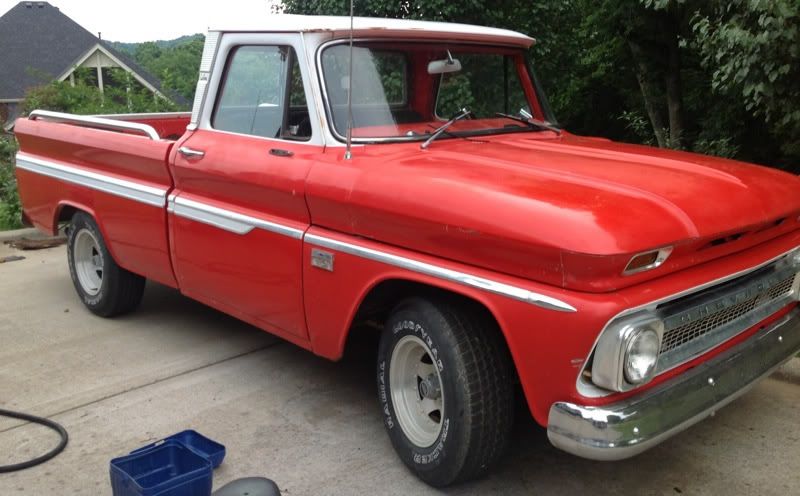 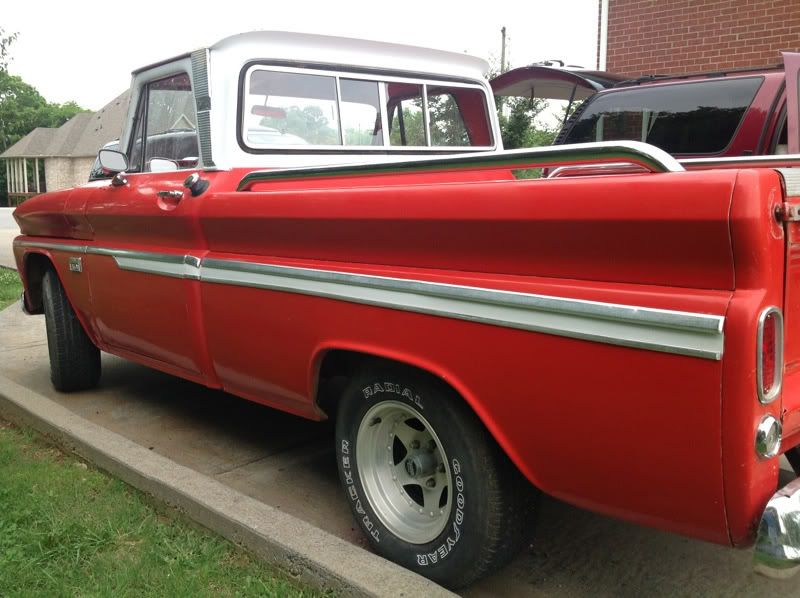 There she is basically as I picked her up. I thought the paint was way too oxidized to save, but to my surprise after hitting the hood with some Maguires paint cleaner, polish, and then wax she actually might make the 20' rule. 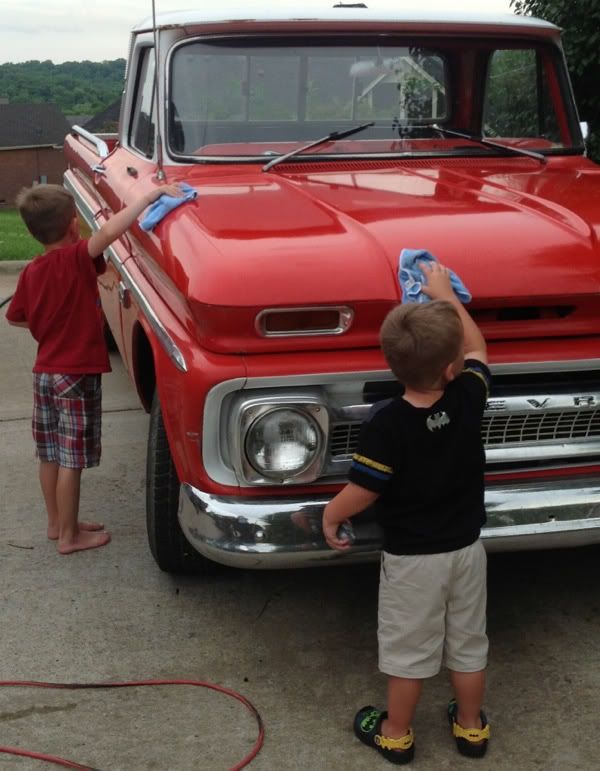 Posted via Mobile Device Posted via Mobile Device |
|
|

|
|
|
#2 |
|
Registered User
Join Date: May 2005
Location: Hendersonville, TN
Posts: 134
|
Re: Project TN 20
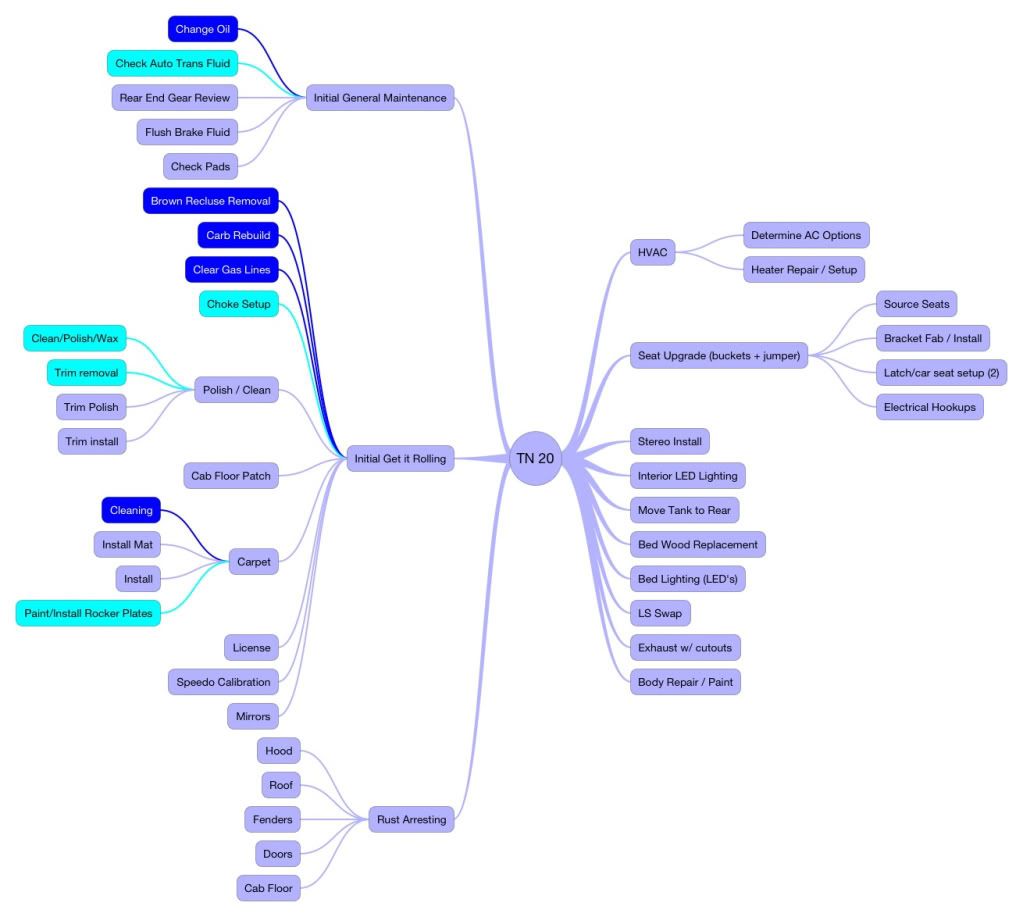
Here is the project plan. It is in an odd format, but that is kind of how my brain works. Dark blue is completed, light blue in progress, everything else is just a dream. Stuff on the left is shorter term, stuff on the right is longer term, and it is kind of laid out in order I'll tackle it. I'm very open to thoughts for order, etc from those that have already been there.
|
|
|

|
|
|
#3 |
|
Registered User
Join Date: May 2005
Location: Hendersonville, TN
Posts: 134
|
Re: Project TN 20
Also hold for more...
Posted via Mobile Device Posted via Mobile Device |
|
|

|
|
|
#4 |
|
Registered User
Join Date: Feb 2013
Location: Genoa, IL
Posts: 387
|
Re: Project TN 20
 aboard! Good looking truck. Sounds like a lot of the good stuff is already done. Your project plan looks good. You might want to tie together the bed wood with the gas tank move. A lot of rear tanks are filled through the bed so its good to do them at the same time. aboard! Good looking truck. Sounds like a lot of the good stuff is already done. Your project plan looks good. You might want to tie together the bed wood with the gas tank move. A lot of rear tanks are filled through the bed so its good to do them at the same time. What motor is in it? As you probably know, we love pictures so keep them coming. Good to see you have helpers!
__________________
Jeff Simplify Life! My build thread: http://67-72chevytrucks.com/vboard/s...d.php?t=566533 |
|
|

|
|
|
#5 |
|
Registered User
 Join Date: Dec 2006
Location: Gallatin, Tn
Posts: 676
|
Re: Project TN 20
Welcome. I'm in the Gallatin / Hendersonville area myself. Looks like a real nice truck.....
|
|
|

|
|
|
#6 |
|
Registered User
Join Date: May 2005
Location: Hendersonville, TN
Posts: 134
|
Re: Project TN 20
|
|
|

|
|
|
#7 | |
|
Registered User
Join Date: May 2005
Location: Hendersonville, TN
Posts: 134
|
Re: Project TN 20
Quote:
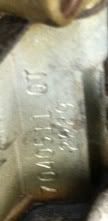 7040511 Quadrajet, 1970's Cali model 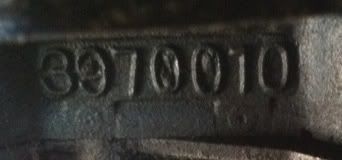 3970010 Block '69 to '79 350 (detailed number in front of heads was milled off by whoever built it before).  333882 Heads 70' - '80 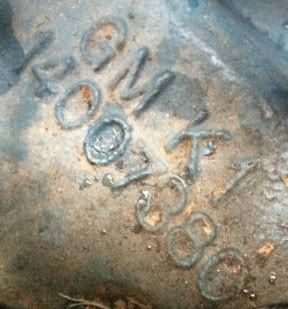 14007380 Intake late '70's. So all in all, nothing special. I suppose nothing a few part swaps wouldn't fix, like the engine or something. I plan to get it running smoothly and worry about something sexy later. It did give me a chance to rebuild a quadrajet. The good news is it doesn't seem to leak, or at least not much, and doesn't seem to smoke. Posted via Mobile Device |
|
|
|

|
|
|
#8 |
|
Registered User
Join Date: Apr 2012
Location: Searcy, AR
Posts: 4,203
|
Re: Project TN 20
 and welcome aboard... Looks like you are off and running... Enjoy and get them little ones hooked early and hopefully you will avoid a majority of the idle hands stuff!!! and welcome aboard... Looks like you are off and running... Enjoy and get them little ones hooked early and hopefully you will avoid a majority of the idle hands stuff!!!  
__________________
DON Proverbs 27:17  US Air Force Retarded errr Retired My '65 Stepper Build:http://67-72chevytrucks.com/vboard/s...d.php?t=533920 My '60 Rusty Patina Build:http://67-72chevytrucks.com/vboard/s...66#post7402266 My '72 http://67-72chevytrucks.com/vboard/s...59#post7204359 SOLD |
|
|

|
|
|
#9 |
|
Registered User
Join Date: May 2005
Location: Hendersonville, TN
Posts: 134
|
Carb Rebuild
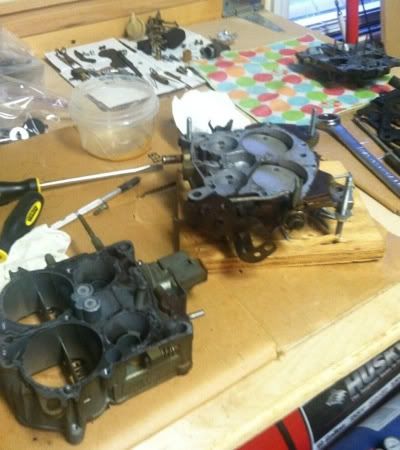 Rebuilt the quadrajet. I had all the same issues everyone has, and relied on these two links to get through it: http://www.hotrodders.com/forum/roch...el-190558.html http://vetteprojects.com/kstyer/quadrajet.htm I also realized (after rebuilding the carb) that it was not matched to my intake  This does not easily allow me to use a choke, since the divorced one won't work. That thread is here: This does not easily allow me to use a choke, since the divorced one won't work. That thread is here:http://www.67-72chevytrucks.com/vboa...07#post6129207 Posted via Mobile Device Posted via Mobile Device |
|
|

|
|
|
#10 |
|
Registered User
Join Date: May 2005
Location: Hendersonville, TN
Posts: 134
|
Re: Project TN 20
Sometimes the PO leaves you a nice gift, I had hoped to pull the pumpkin cover and find a POS. Instead, I found sludge
 : :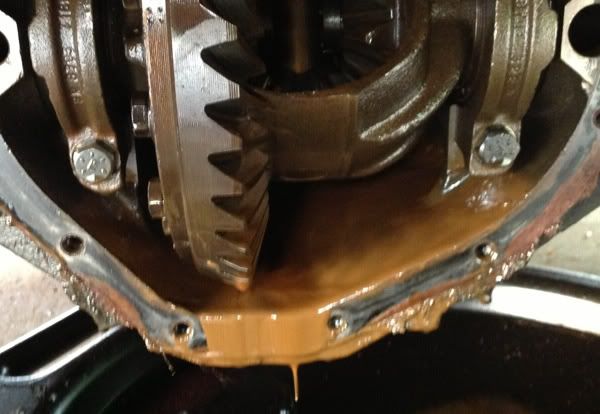 41 on the ring and 11 on the pinion for a 3.73. Posted via Mobile Device Posted via Mobile Device |
|
|

|
|
|
#11 |
|
Senior Enthusiast
Join Date: Feb 2007
Location: Spokane Valley, WA
Posts: 8,356
|
Re: Project TN 20
Wow that is nasty looking! The overall truck looks very nice. I like your plan for bringing it along without getting over your head. I've been through project hell a few times and it's a great learning experience - of how not to do it in the future. Looking forward to the progress updates.
__________________
My Build Thread: http://67-72chevytrucks.com/vboard/s...d.php?t=444502 |
|
|

|
|
|
#12 |
|
Registered User
Join Date: May 2005
Location: Hendersonville, TN
Posts: 134
|
Put that boy to work
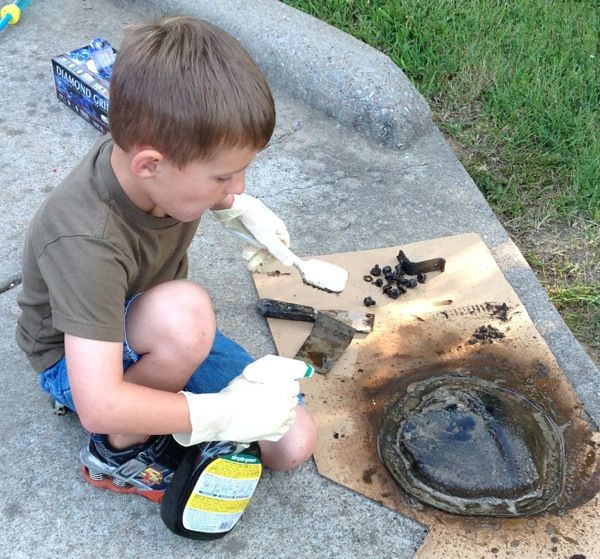 Boy seemed to enjoy the greasy part, don't tell his mom. 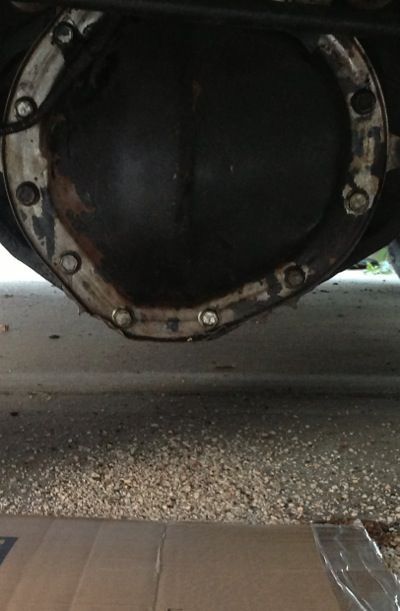 No Leaks overnight. I used 220 grit to clean the surfaces, and a blue Felpro gasket. Put the oil in with a small hand pump (and the neighbors 12 year old). It ain't pretty, but it should be functional til the day it all gets stripped and painted. Posted via Mobile Device |
|
|

|
|
|
#13 | |
|
Registered User
Join Date: May 2005
Location: Hendersonville, TN
Posts: 134
|
Re: Project TN 20
Quote:
DNR = 0 Days left to get rolling (DLGR) = 60 Posted via Mobile Device |
|
|
|

|
|
|
#14 |
|
Registered User
Join Date: May 2005
Location: Hendersonville, TN
Posts: 134
|
License Plate
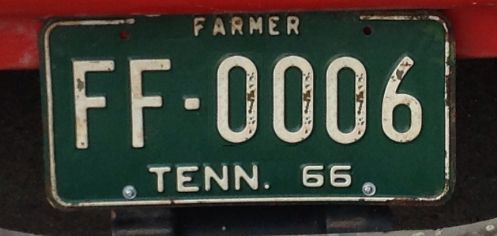
I had heard but could not find official confirmation on the net that if you have a plate that matches the year and state of your vehicle you can us it as your official plate. So I found a cool one on Ebay, and went in to the county clerk to try it out. Since it is a farm plate she had to make a call, but much to my happiness, here it is
   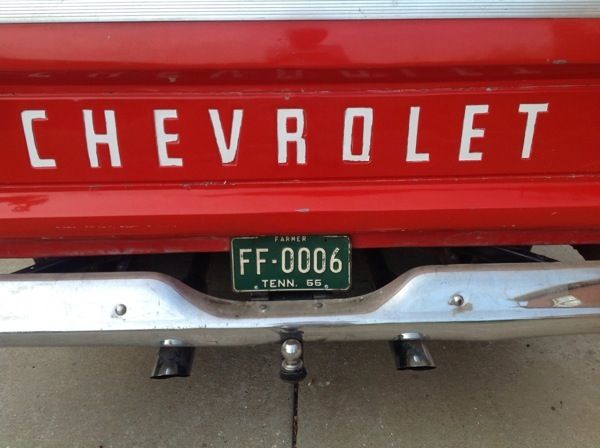  Posted via Mobile Device Posted via Mobile Device |
|
|

|
|
|
#15 |
|
Registered User
Join Date: Dec 2012
Location: Rochester, KENT
Posts: 10,583
|
Re: Project TN 20
I do like your truck and also the bumper.
Posted via Mobile Device
__________________
MY BUILD LINK: http://67-72chevytrucks.com/vboard/s...585901]Redneck Express - 1966 C10 Short Fleetside MY USA ROADTRIPS http://forum.retro-rides.org/thread/...2018-humdinger IF YOU CAN'T FIX IT WITH A HAMMER, YOU'VE GOT AN ELECTRICAL PROBLEM MATE. |
|
|

|
|
|
#16 |
|
Registered User
Join Date: Nov 2011
Location: fayetteville nc
Posts: 10,338
|
Re: Project TN 20
Nice score and sounds like you already have well laid plans for it. Its great that you can get the kids involved...they will never forget the experiences. Keep us posted on pics and progress.
__________________
1963 Short bed step side SBW 427 big block and borg warner T-16 HD 3 speed manual http://67-72chevytrucks.com/vboard/s...d.php?t=519869 1963 Short bed fleetside BBW 348 1st gen big block w/Powerglide http://67-72chevytrucks.com/vboard/s...d.php?t=619024 1964 Short bed trailer |
|
|

|
|
|
#17 |
|
Registered User
Join Date: May 2005
Location: Hendersonville, TN
Posts: 134
|
Choke
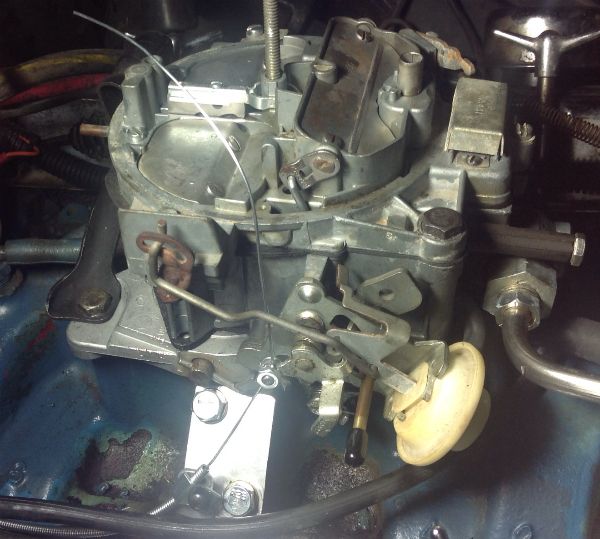
Fixed my choke issue. Since the carb and intake don't match, my only real solution was to go manual choke. Don't skeer me, so I did it. I fabbed a plate to cover the warming tunnel of the intake, and left a tab to attach the cable at the appropriate angle. I don't recommend aluminum as I used, as the tab wants to crack when bent, but it was all I had readily available. Pic of plate and cable before cutting:
 PO left me a hole in the dash, so I just used that for now. Good location, but I'll weld that up one day... 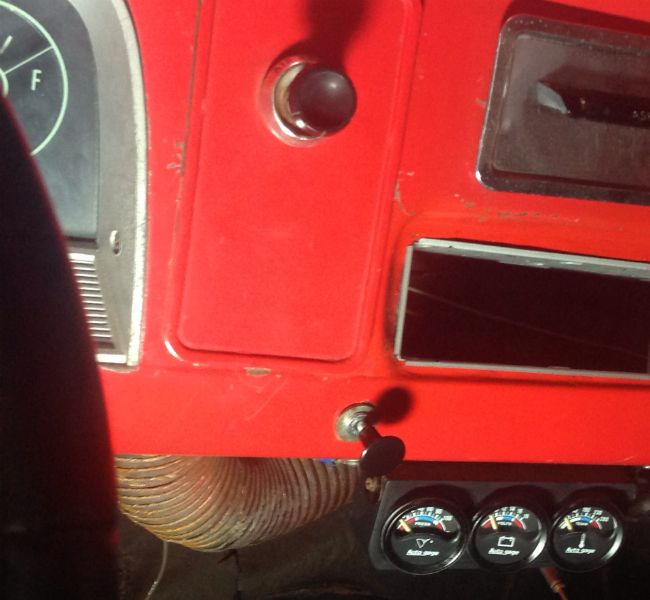 Two pedal pumps, pull the choke, and she fires right up. Starts better than my 2005 'Burb. Posted via Mobile Device Posted via Mobile Device |
|
|

|
|
|
#18 |
|
Registered User
Join Date: May 2005
Location: Hendersonville, TN
Posts: 134
|
Re: Project TN 20
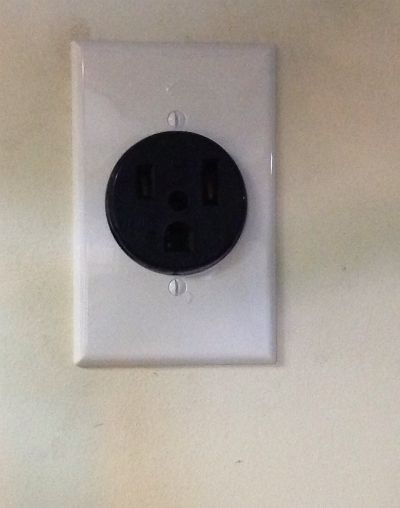
This morning I got up early and wired in a 240V plug in the garage for the welder. Had power back on before the family had a clue...
 Boy number 1 went with me to pick up the welder 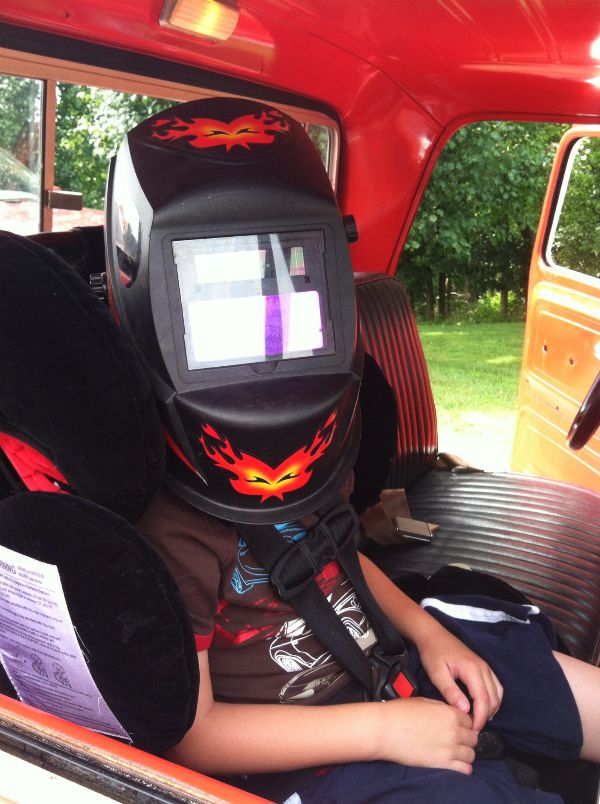 Posted via Mobile Device Posted via Mobile Device |
|
|

|
|
|
#19 | |
|
Registered User
Join Date: May 2005
Location: Hendersonville, TN
Posts: 134
|
Re: Project TN 20
Quote:
My 6 year old went on a part buying trip, and on the way home said, "now this will be a childhood memory." Posted via Mobile Device |
|
|
|

|
|
|
#20 |
|
Registered User
Join Date: May 2005
Location: Hendersonville, TN
Posts: 134
|
Time to check the brakes
So this project started with "I'm only going to bleed the brakes."
   Someone along the line upgraded to discs, and the pedal feel was really good, so I assumed a quick brake fluid flush and I would be good to go. Not so much. I managed to loosen and crack open the left rear bleeder, and out came.....nothing. So I called the minions in to pull the back wheel: 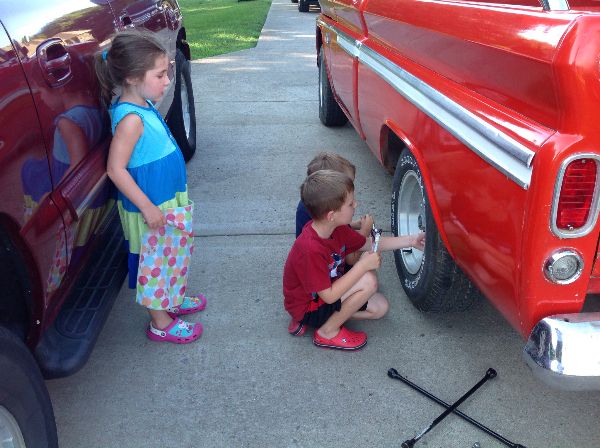 The brake line fitting going into the wheel cylinder was already stripped, and had almost no chance of coming out easy, so I just cut it, and pulled out the wheel cylinder, to find what one would expect, more sludge. 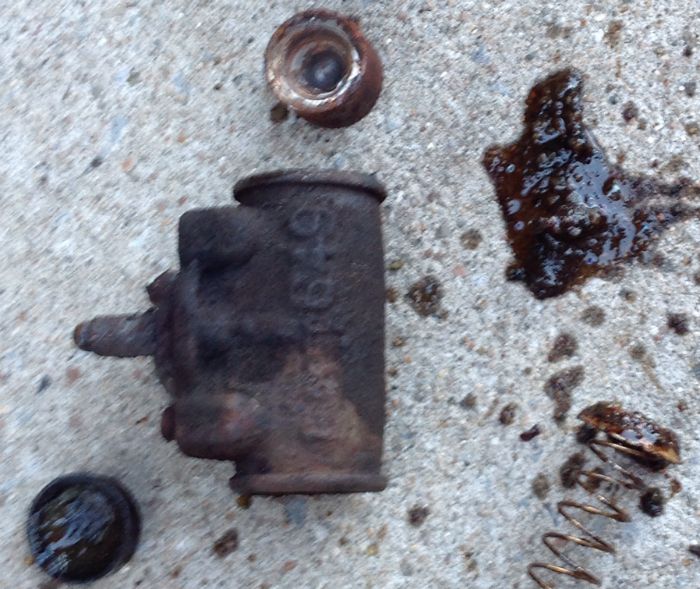 If you have old fluid, this is what lurks inside for you. I started investigating backwards where the fluid would flow, and figured it was the rubber hose running to the rear end. Much to my surprise some PO left me two for the price of one! 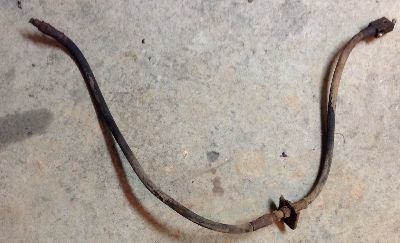 It looks like the rear end was at some time swapped to a 67-72, I suppose to get to 5 lugs. Like any good mechanic would, you can get the hoses to work by just screwing the 60-66 hose into the 67-72, no need to do any custom work or anything... I've always wanted to give tube bending a shot, so I thought this is my chance. The 60-66 brake hose terminates in front of axle and drops to roughly the midpoint of the passenger side. 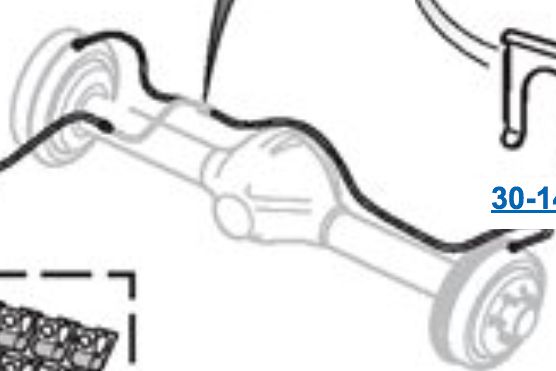 Then there is a long tube to the driver's side and a short one to the passenger side wheel cylinder. 67-72 terminates a little further back, and the hose drops to the center/right of the diff cover. 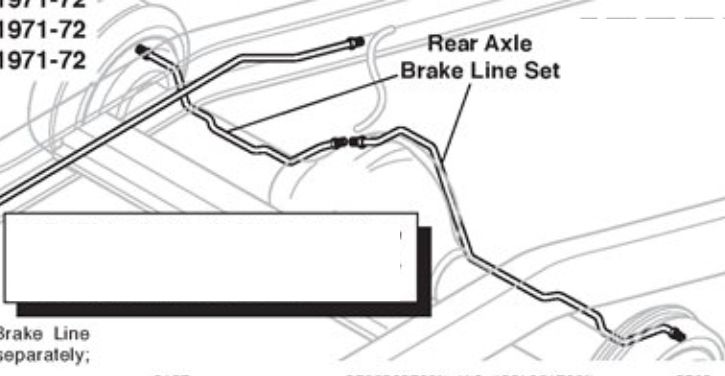 Since the 67-72 frame location is not available on my truck, I decided to route it to the cross member right behind the axle, and drop down to the 67-72 location.  Old vs new routing 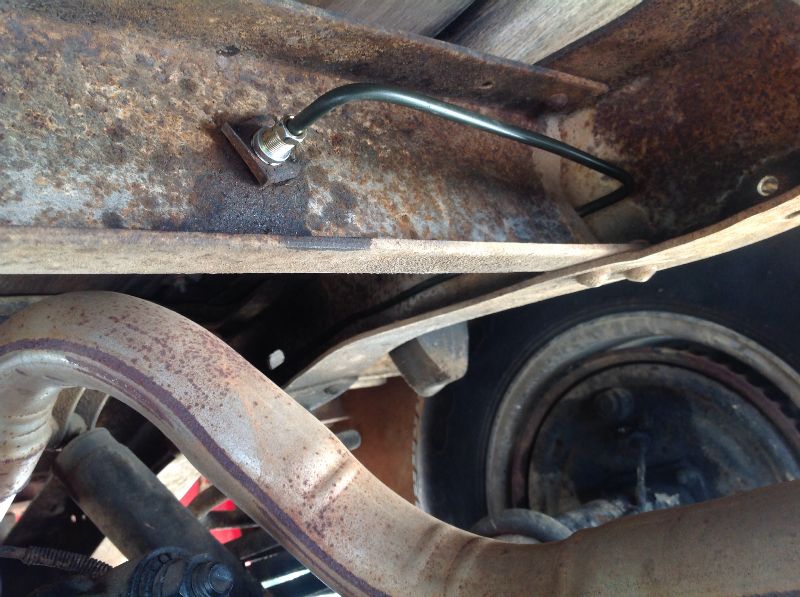 Hose hookup location 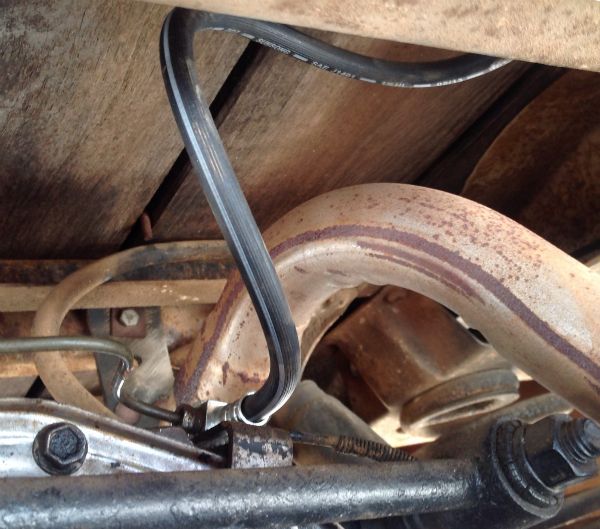 And a '72 hose running to the '72 location 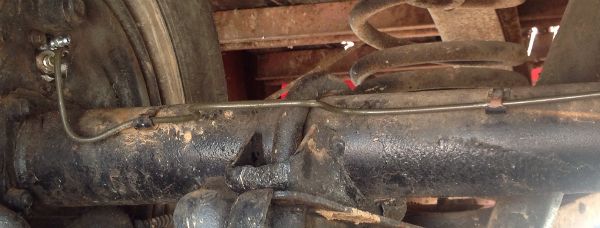 Re-run of the drivers side line I started cutting the old hose to find out where I was not getting flow, and found it plugged with either swelling or a chunk of rust 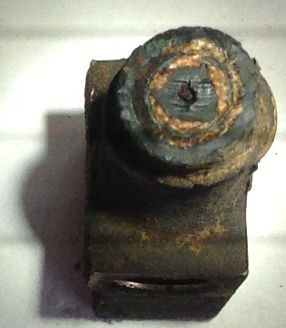 This shot of the master cylinder with the rear flushed and the front not shows the reason to do it, look at the murkiness of the front fluid... 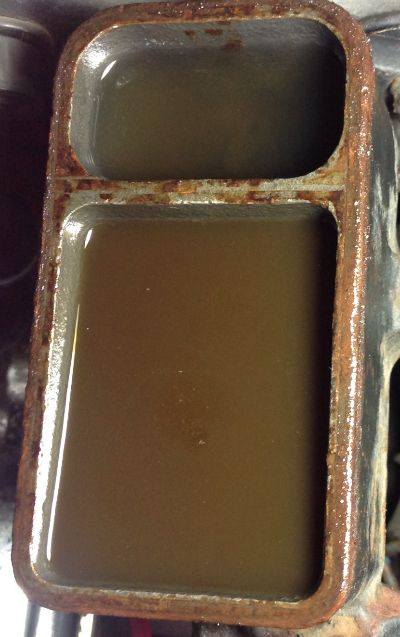 In the rear you can now see all the way down to the port. Luckily the front flushed good, and now I can move on to my last few projects before driving season... Days Not Running = 0 Days Left to Get Running = 38 Posted via Mobile Device |
|
|

|
|
|
#21 |
|
Registered User
Join Date: May 2005
Location: Hendersonville, TN
Posts: 134
|
Time for more parts
Found a local forum member that had a frame for sale...as a bonus it came with some cab bits, some of which I can use (pull the dash for shaping then just swap it into mine, etc). Again, part of my keep it running while I can do projects. I'll do the frame all up then I can just swap my body over...
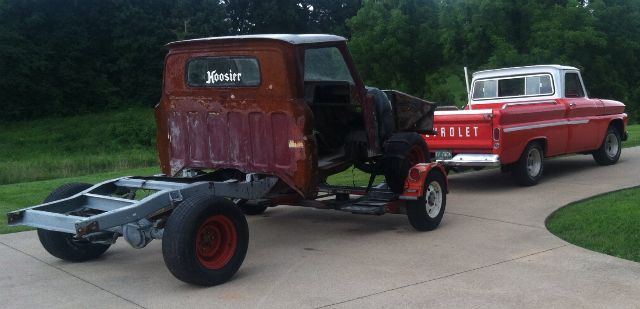 Pretty pleased with how well she towed her home. Could have done it with something newer, but it wouldn't be near as cool. To get the U-haul website to accept the tow dolly I wanted, I had to pick a lightweight front wheel drive car. A '64 frame and cab was not an option...When the U-haul guy asked what I was really doing his only comment was, "dude, you could have picked something cooler to put in the website..." 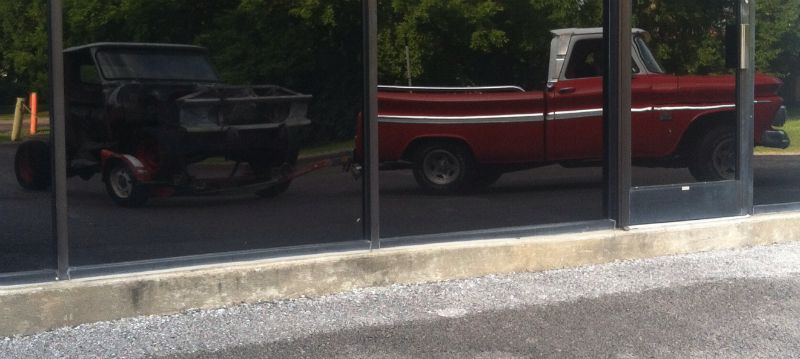 Then me and the boy stopped for a milk shake... 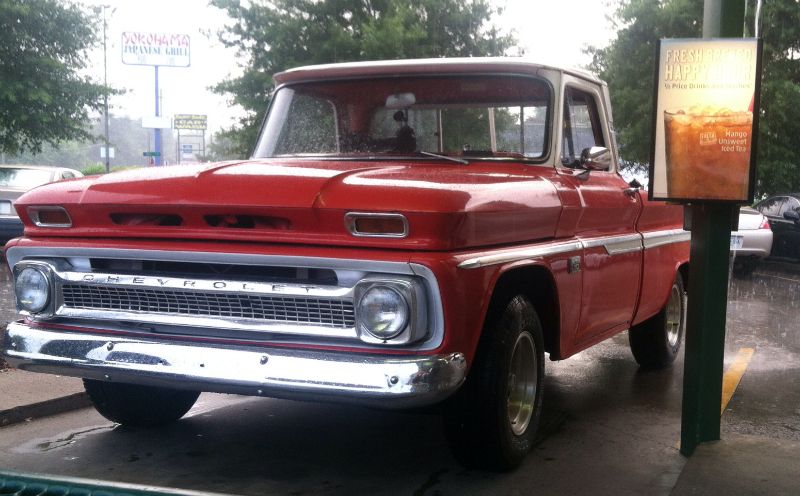 Posted via Mobile Device Posted via Mobile Device |
|
|

|
|
|
#22 |
|
Registered User
Join Date: Apr 2012
Location: Searcy, AR
Posts: 4,203
|
Re: Project TN 20
Nice!
Posted via Mobile Device
__________________
DON Proverbs 27:17  US Air Force Retarded errr Retired My '65 Stepper Build:http://67-72chevytrucks.com/vboard/s...d.php?t=533920 My '60 Rusty Patina Build:http://67-72chevytrucks.com/vboard/s...66#post7402266 My '72 http://67-72chevytrucks.com/vboard/s...59#post7204359 SOLD |
|
|

|
|
|
#23 |
|
Registered User
Join Date: Apr 2012
Location: Searcy, AR
Posts: 4,203
|
Re: Project TN 20
Nice score! Millshakes...Mmmmmm!
Posted via Mobile Device
__________________
DON Proverbs 27:17  US Air Force Retarded errr Retired My '65 Stepper Build:http://67-72chevytrucks.com/vboard/s...d.php?t=533920 My '60 Rusty Patina Build:http://67-72chevytrucks.com/vboard/s...66#post7402266 My '72 http://67-72chevytrucks.com/vboard/s...59#post7204359 SOLD |
|
|

|
|
|
#24 |
|
Registered User
Join Date: May 2005
Location: Hendersonville, TN
Posts: 134
|
Re: Project TN 20
I've had a couple lucky ones lately. The board member is 5150. He was really helpful, he's working on a 70's bagged burb with an LS swap that is going to be incredible...
Posted via Mobile Device |
|
|

|
|
|
#25 |
|
Registered User
Join Date: May 2005
Location: Hendersonville, TN
Posts: 134
|
Never go half way
I knew better. When I rebuilt my brakes in the back, I put a new wheel cylinder on the driver's side, new tube on driver's side, new hose, new line half way up the frame. I didn't replace the wheel cylinder on the passenger side because I got it to bleed and "saved some time."
   Never leave a weak link on an old brake system. After a night of taking boy to baseball practice and some ice cream, the next morning I found a new puddle on the floor.... What is that... It's not gas, oil, trans fluid, rear gear oil... It's... 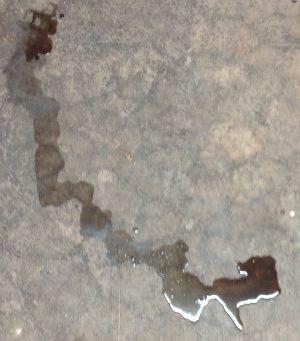 Brake fluid. So I pulled the wheel cylinder, took a torch and got the bleader and old line loose, honed it, and rebuilt it. 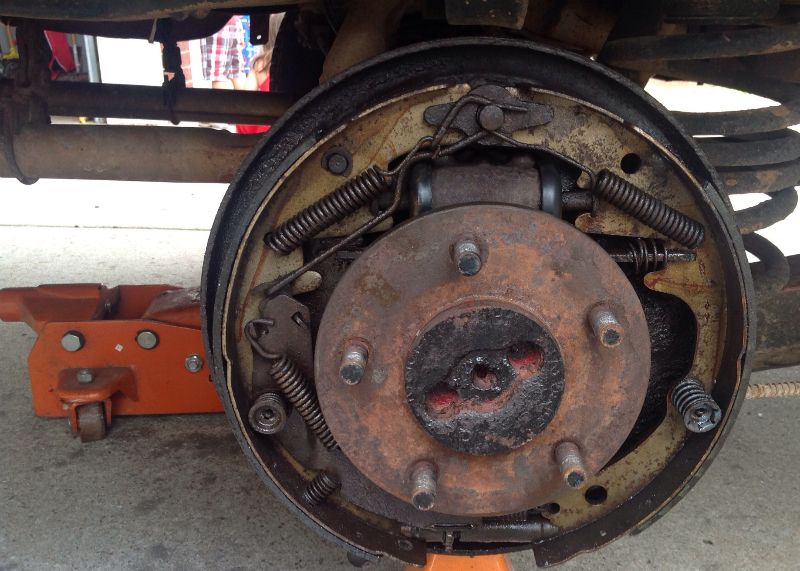 While I was at it I bent and replaced the passenger brake line. For those that wonder what it looks like to drive with a leaky wheel cylinder, here you go: 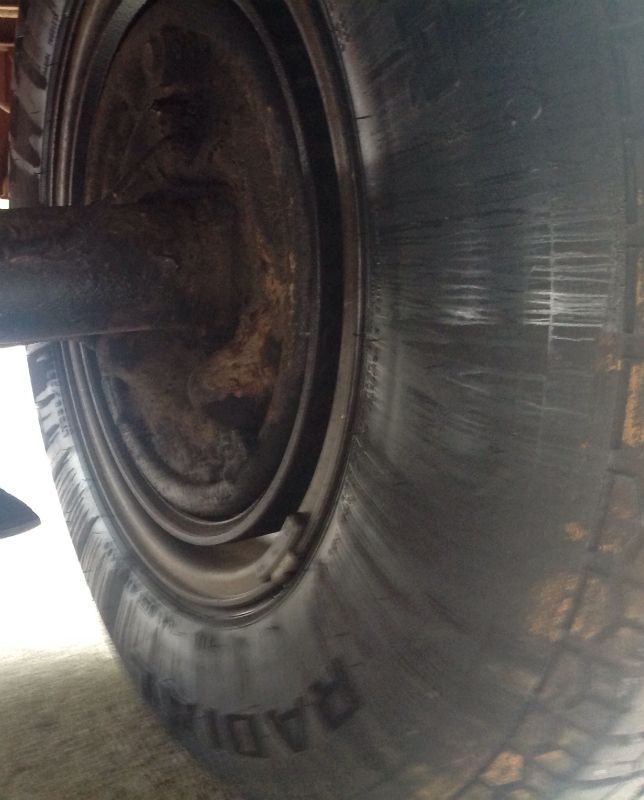 Posted via Mobile Device Posted via Mobile Device |
|
|

|
 |
| Bookmarks |
| Tags |
| driver, project, tn 20 |
|
|