
 |
|
|
#226 |
|
Registered User
Join Date: Nov 2011
Location: Winnipeg, Manitoba
Posts: 164
|
Re: 46 pickemup in NJ "the Rebuild"
I've never seen holes beside the handles like that before. I doubt that they are supposed to be there.
|
|
|

|
|
|
#227 |
|
SAVING ONE TRUCK AT A TIME
 Join Date: Feb 2010
Location: sherwood oregon
Posts: 1,141
|
Re: 46 pickemup in NJ "the Rebuild"
Not sure what the holes would be for. not factory.
__________________
53-suburban (99% done) 40-pick up (99.9% done) 12-cc lb dually D-max (dd) 61-crew cab D-max "PAY LESS FOR WHAT YOU NEED PAY MORE FOR WHAT YOU WANT" 53 BURBAN BARN FIND:http://67-72chevytrucks.com/vboard/s...d.php?t=404091 1940 PROJECT MOON SHINE:http://67-72chevytrucks.com/vboard/s...d.php?t=551088 1961 CREW MAX: http://67-72chevytrucks.com/vboard/s....php?p=6957999 |
|
|

|
|
|
#228 |
|
Registered User
Join Date: Dec 2010
Location: washington NJ
Posts: 766
|
Re: 46 pickemup in NJ "the Rebuild"
So I was planning on proving to you guys that a 53 year old man can still Yank his crank.
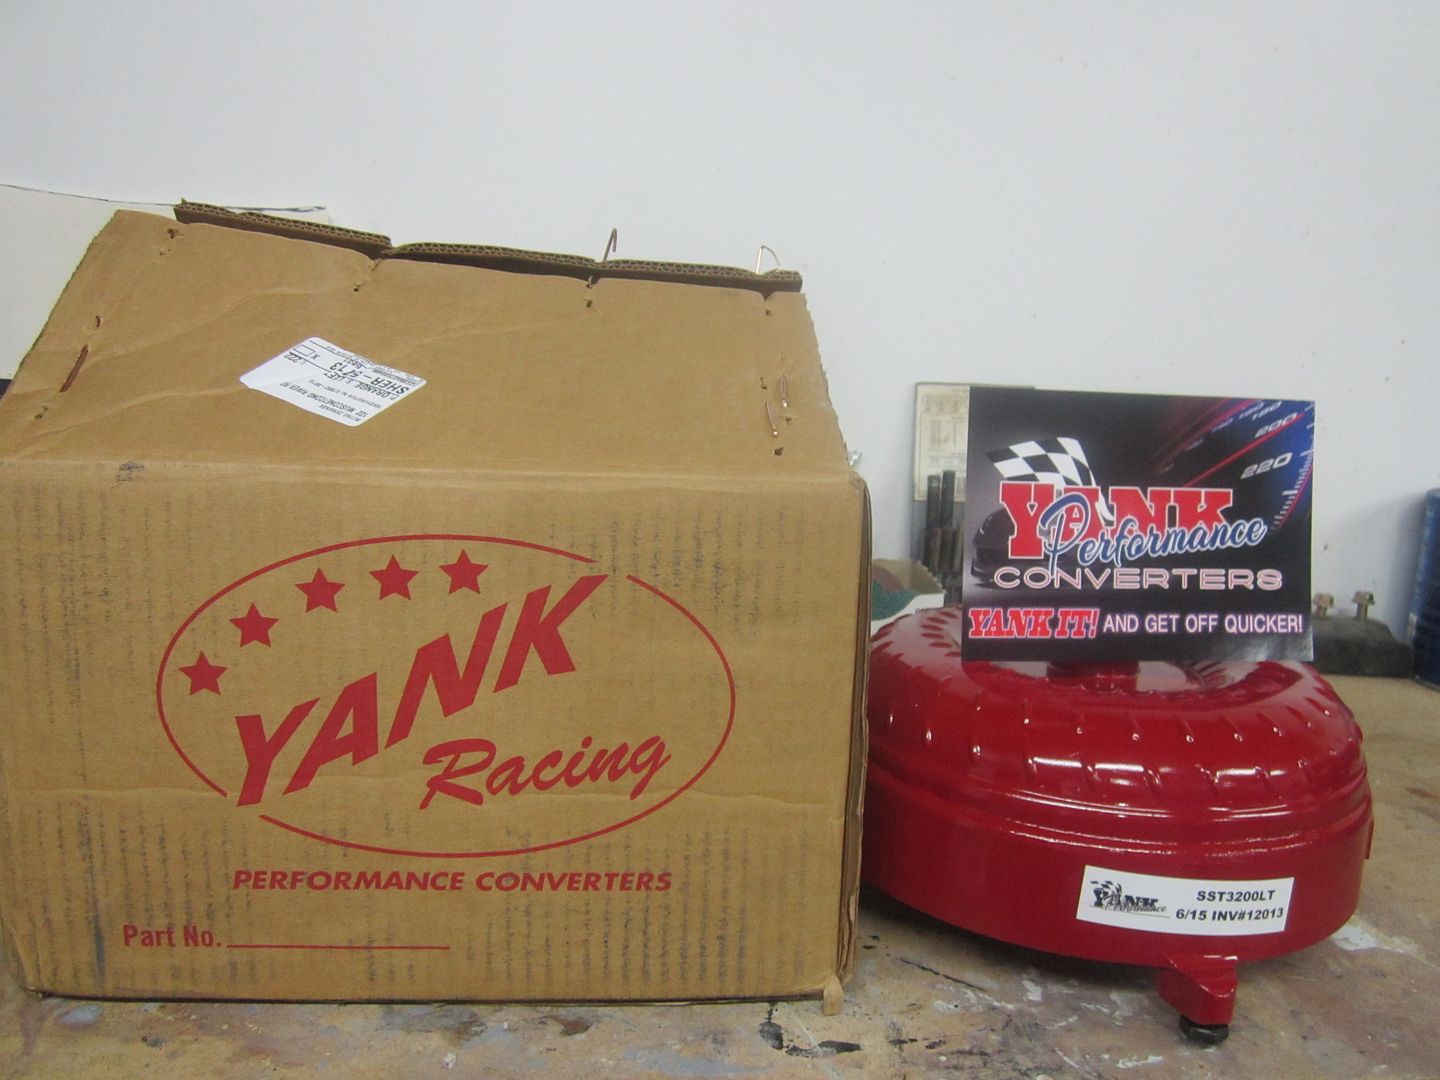 [/URL] [/URL]But after spending nearly 2 hours trying to Yank my crank (in the privacy of my own garage mind you), I failed miserably. I thought perhaps I was getting to old....I finally ended up going to a transmission shop to have them help me Yank my crank. Only to find out that I was trying to Yank my crank with a converter for a 4L60e Trans. Instead of a 700R4. So now i will have to wait about 2 weeks until i can try and Yank my crank again.  Sorry I just had to do it..... Sorry I just had to do it.....
|
|
|

|
|
|
#229 |
|
Registered User
Join Date: Dec 2010
Location: washington NJ
Posts: 766
|
Re: 46 pickemup in NJ "the Rebuild"
And the problems keep on coming......While I am waiting for Yank to send the right converter I decided to pull my windshield glass out so I can paint the frame. Well here's how it went spent all afternoon trying to get the 2 sides of the frame pulled apart from the dowel pins with no success. From what I have read on the web, it seems my dowels are rust frozen on the inside of the frame.
From what I have read over on stovebolt, I can cut out a section in the back of the frame to allow access to the dowels and then hopefully be able to pry them out. Then weld patches back in place to fill the holes. Has anybody run into this problem? I certainly don't feel like spending 500 on a new frame.  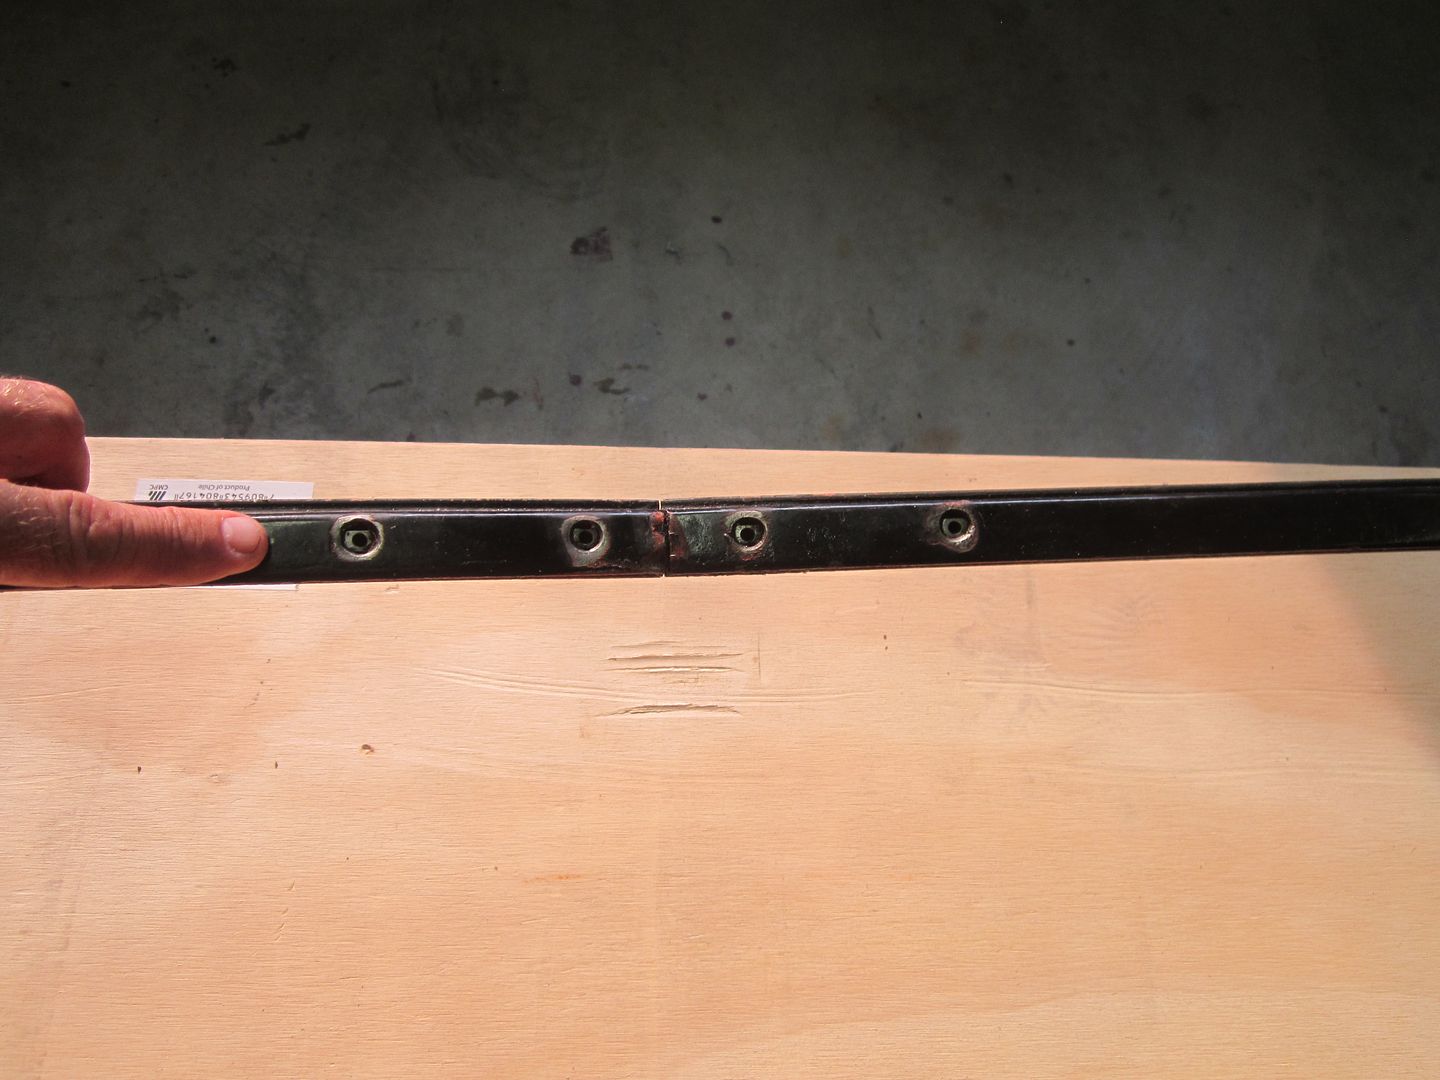 [/URL] [/URL]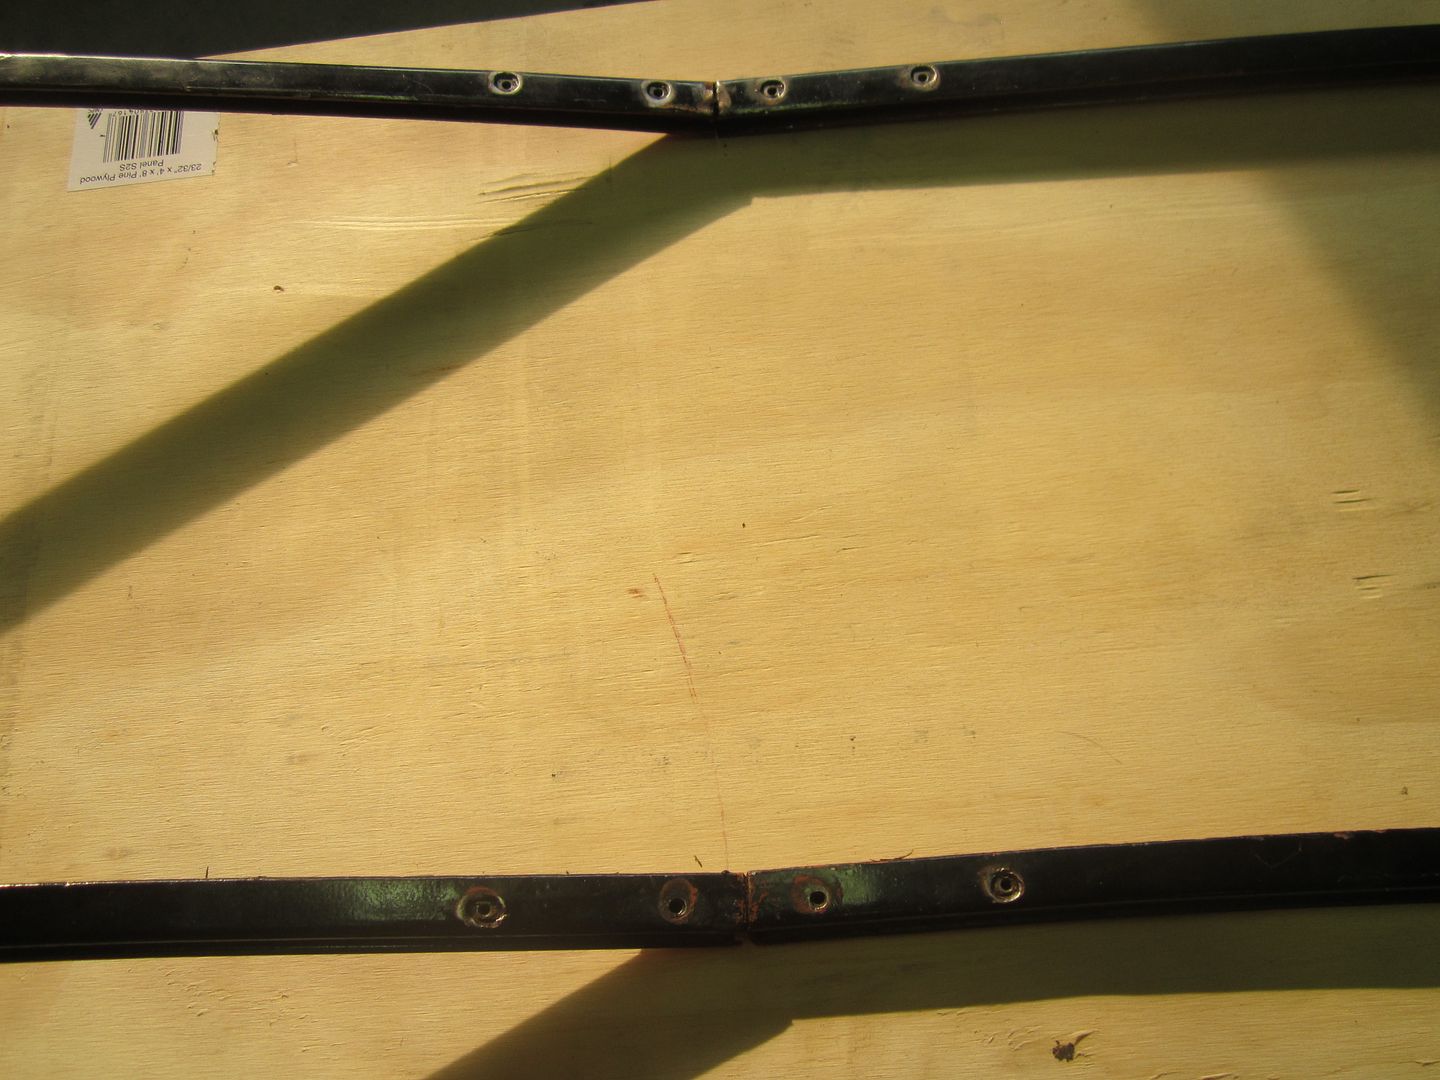 [/URL] [/URL]In the meantime the paint man keeps on blocking and primming, blocking and priming etc. etc. etc. |
|
|

|
|
|
#230 |
|
Registered User
Join Date: Aug 2010
Location: Lafayette In.
Posts: 252
|
Re: 46 pickemup in NJ "the Rebuild"
Mine was frozen too. If I remember right, I bought the replacement inserts, cut the frame at the v to try to get better access. I then tried to tap on the inserts to break them free. This didn't work, but they would only go back farther in the frame, so I drove them all the way inside the frame until they were out of the way, put the new inserts in, screwed them together, and I was done. This is the way I done it, it worked for me, maybe it can work for you.
|
|
|

|
|
|
#231 | |
|
Registered User
Join Date: Dec 2010
Location: washington NJ
Posts: 766
|
Re: 46 pickemup in NJ "the Rebuild"
Quote:
Cut dowel pin: 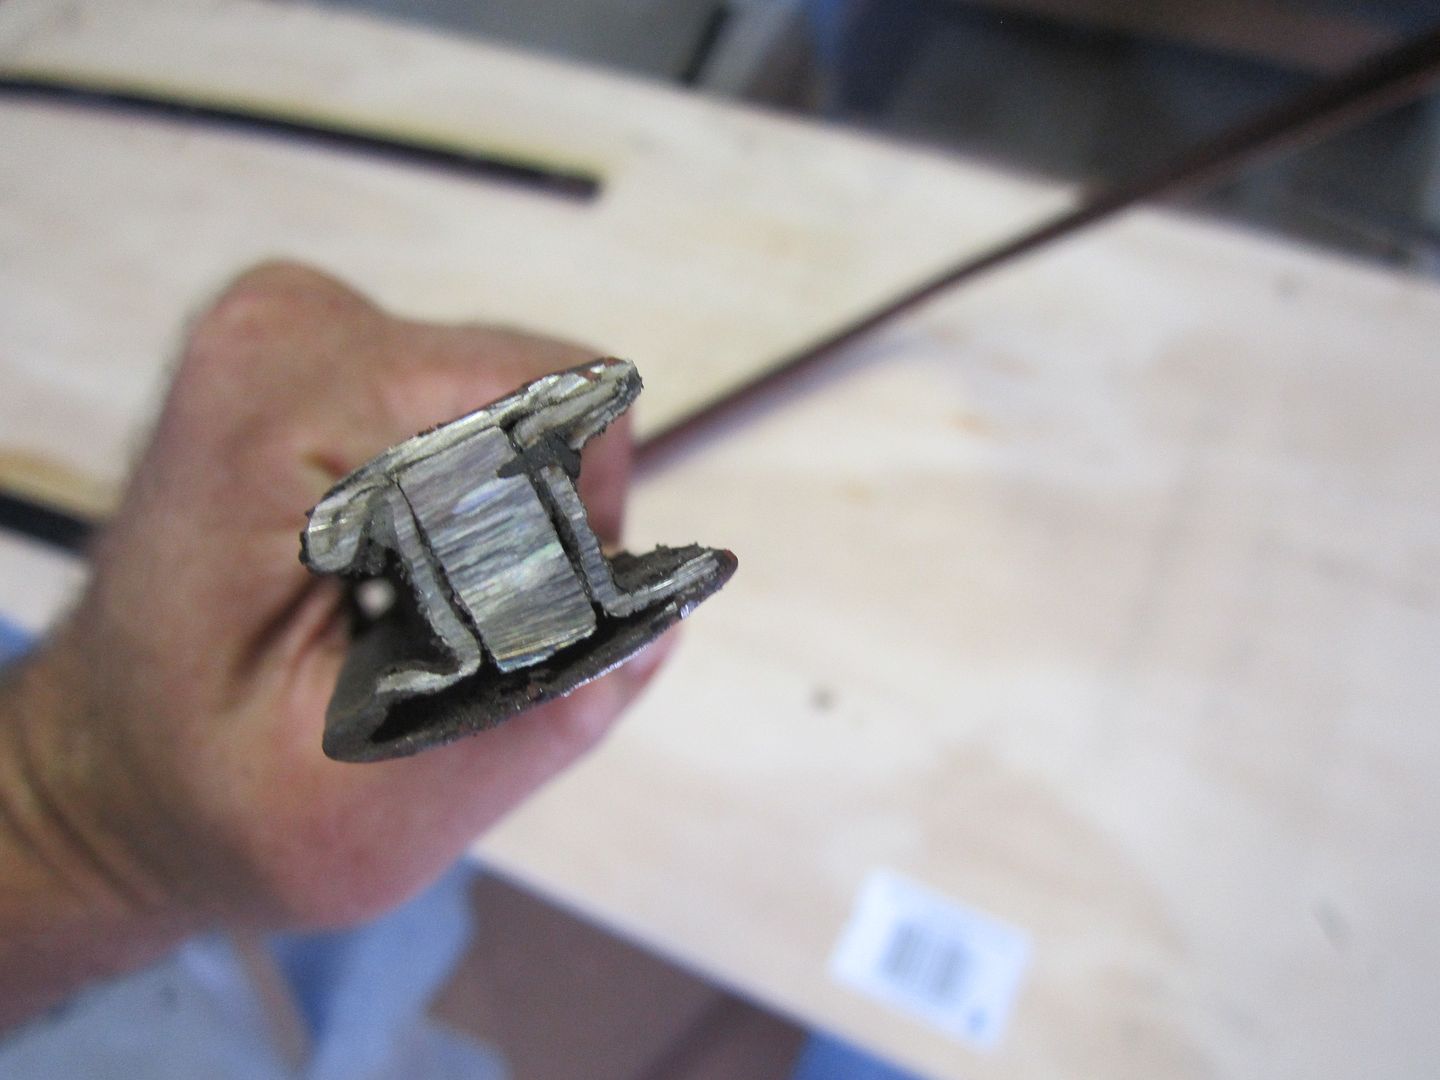 [/URL] [/URL]Bye bye: 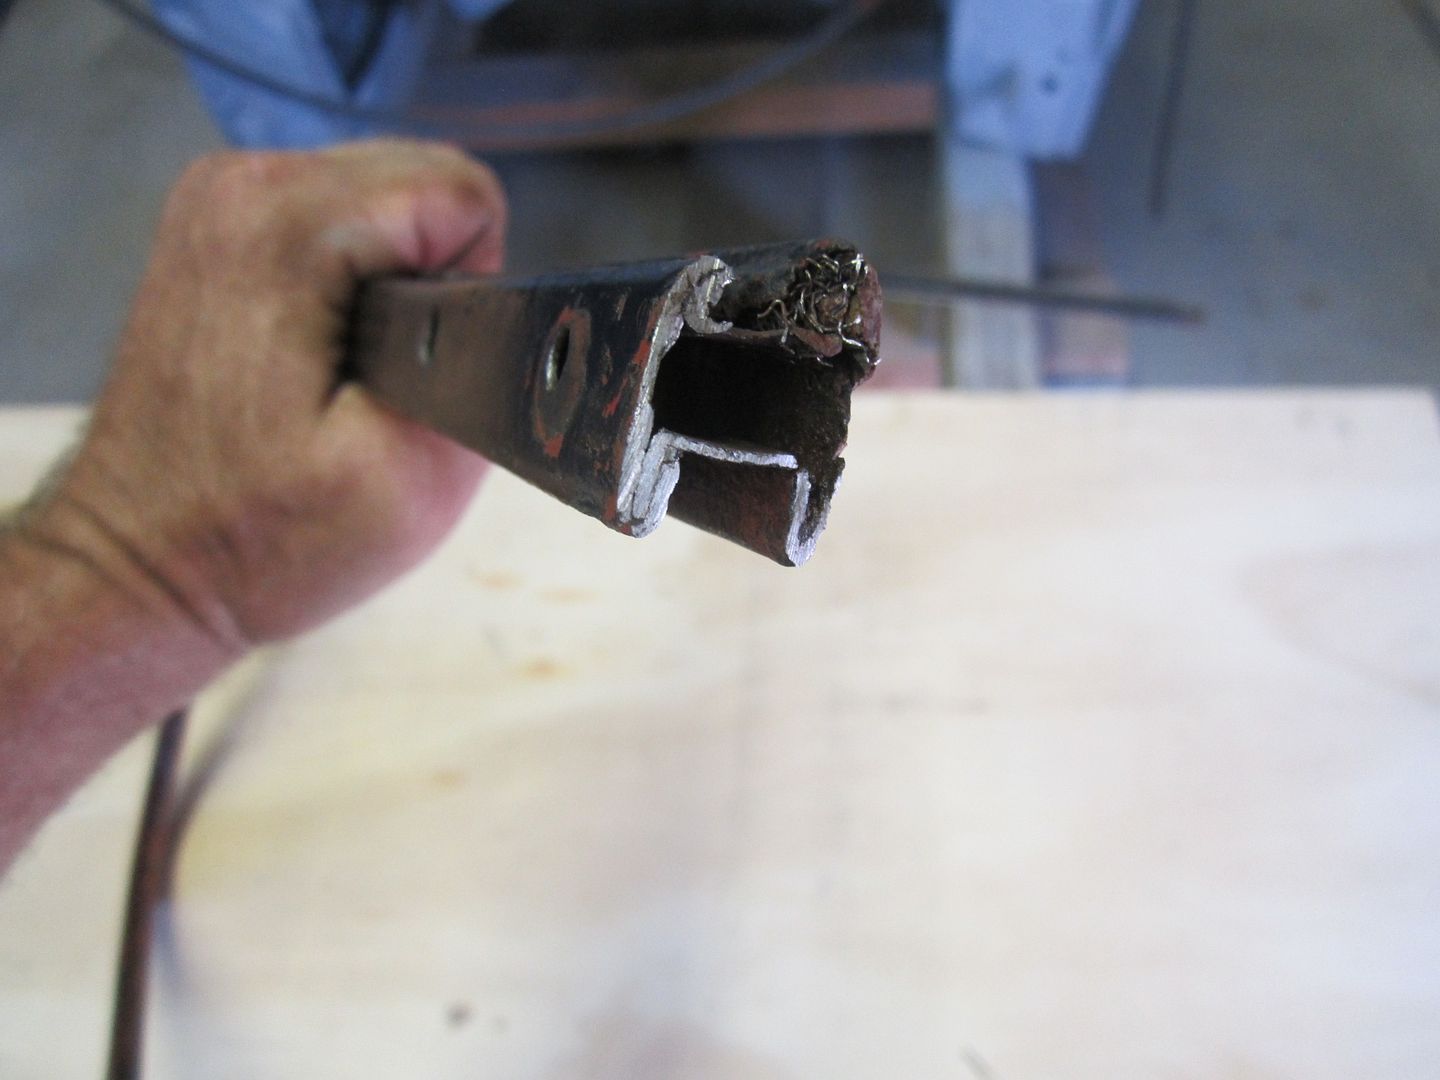 [/URL] [/URL]
|
|
|
|

|
|
|
#232 |
|
Registered User
Join Date: Nov 2011
Location: Winnipeg, Manitoba
Posts: 164
|
Re: 46 pickemup in NJ "the Rebuild"
I'll have to remember that one! Mine are rusted in there too.
|
|
|

|
|
|
#233 |
|
Registered User
Join Date: Aug 2010
Location: Lafayette In.
Posts: 252
|
Re: 46 pickemup in NJ "the Rebuild"
Glad I could help guys. The one that came with my cab was all rusted out, so I found another one at Hershey. Paid $100.00 for it, then it was frozen there, and it had to come apart for the new windows. I was about sick thinking I wasted 100 bucks, and seeing what a new one would cost. So we all ended up happy!
|
|
|

|
|
|
#234 |
|
Registered User
Join Date: Dec 2010
Location: washington NJ
Posts: 766
|
Re: 46 pickemup in NJ "the Rebuild"
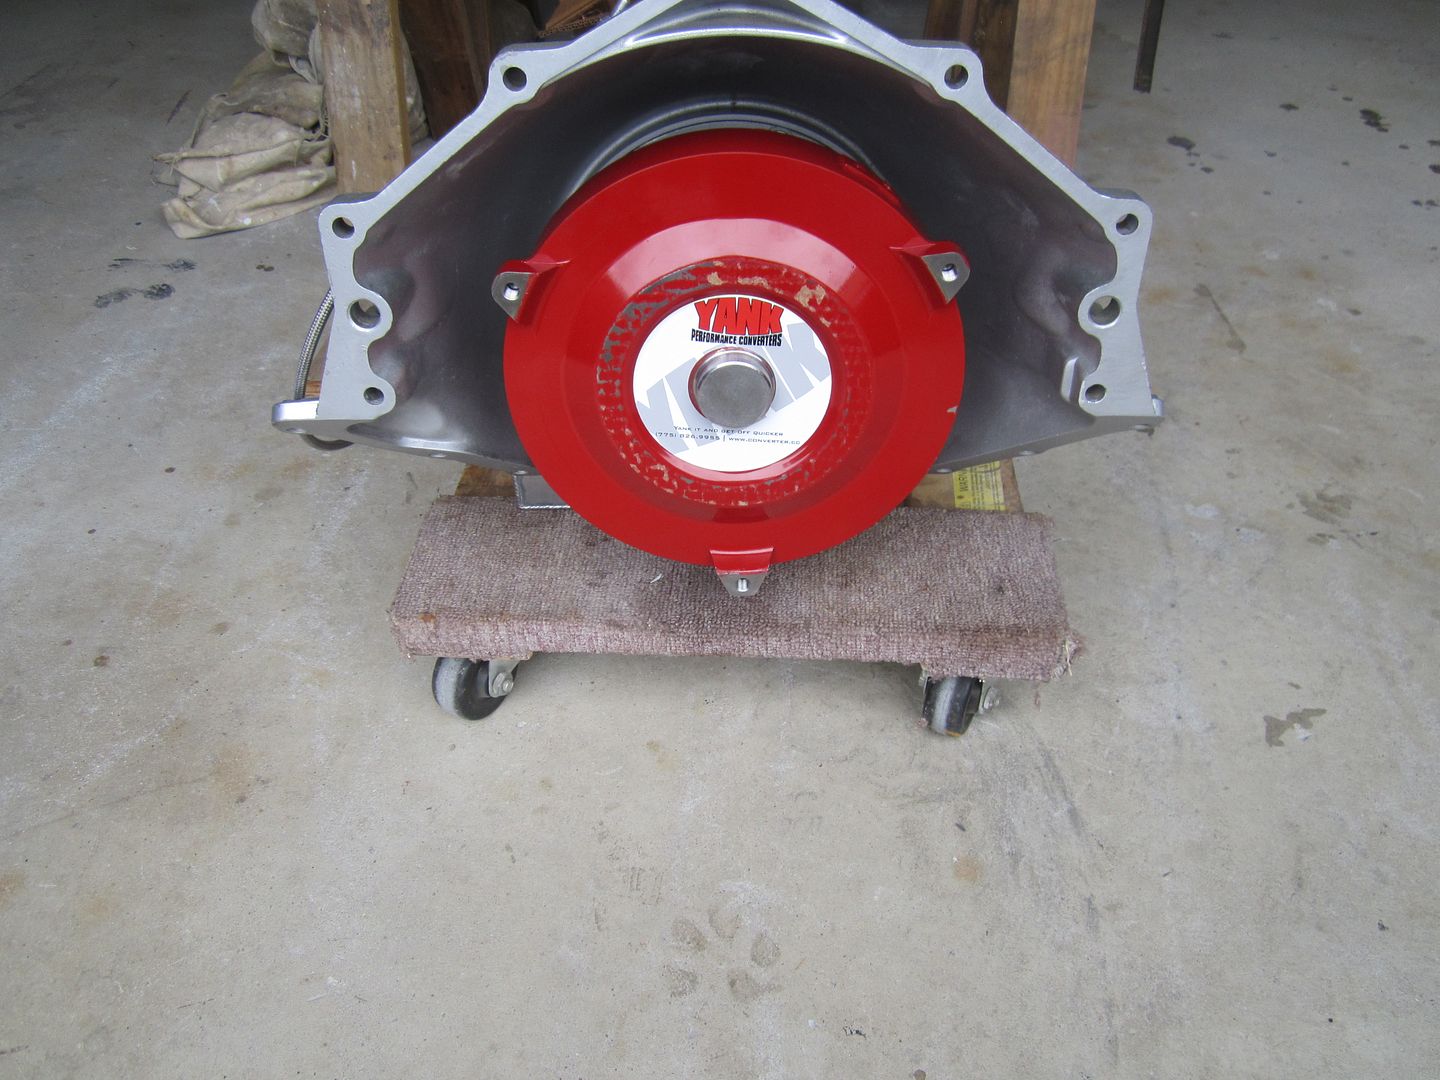
Crank is Yanked. Wow if feels like I am over the hump and things are starting to go back together. Thanks to Dave Myers out at Yank converters, I had the proper converter sent to me within a week. As previously mentioned the first converter they sent me was for a 4L60E, and after numerous attempts I could not get the converter to set into the pump splines. Well the new one dropped right in on the first attempt!!!!
 [/URL] [/URL]So that meant I was able to free up a lot of space in the garage by getting the motor in!!!!!!!!!!!! 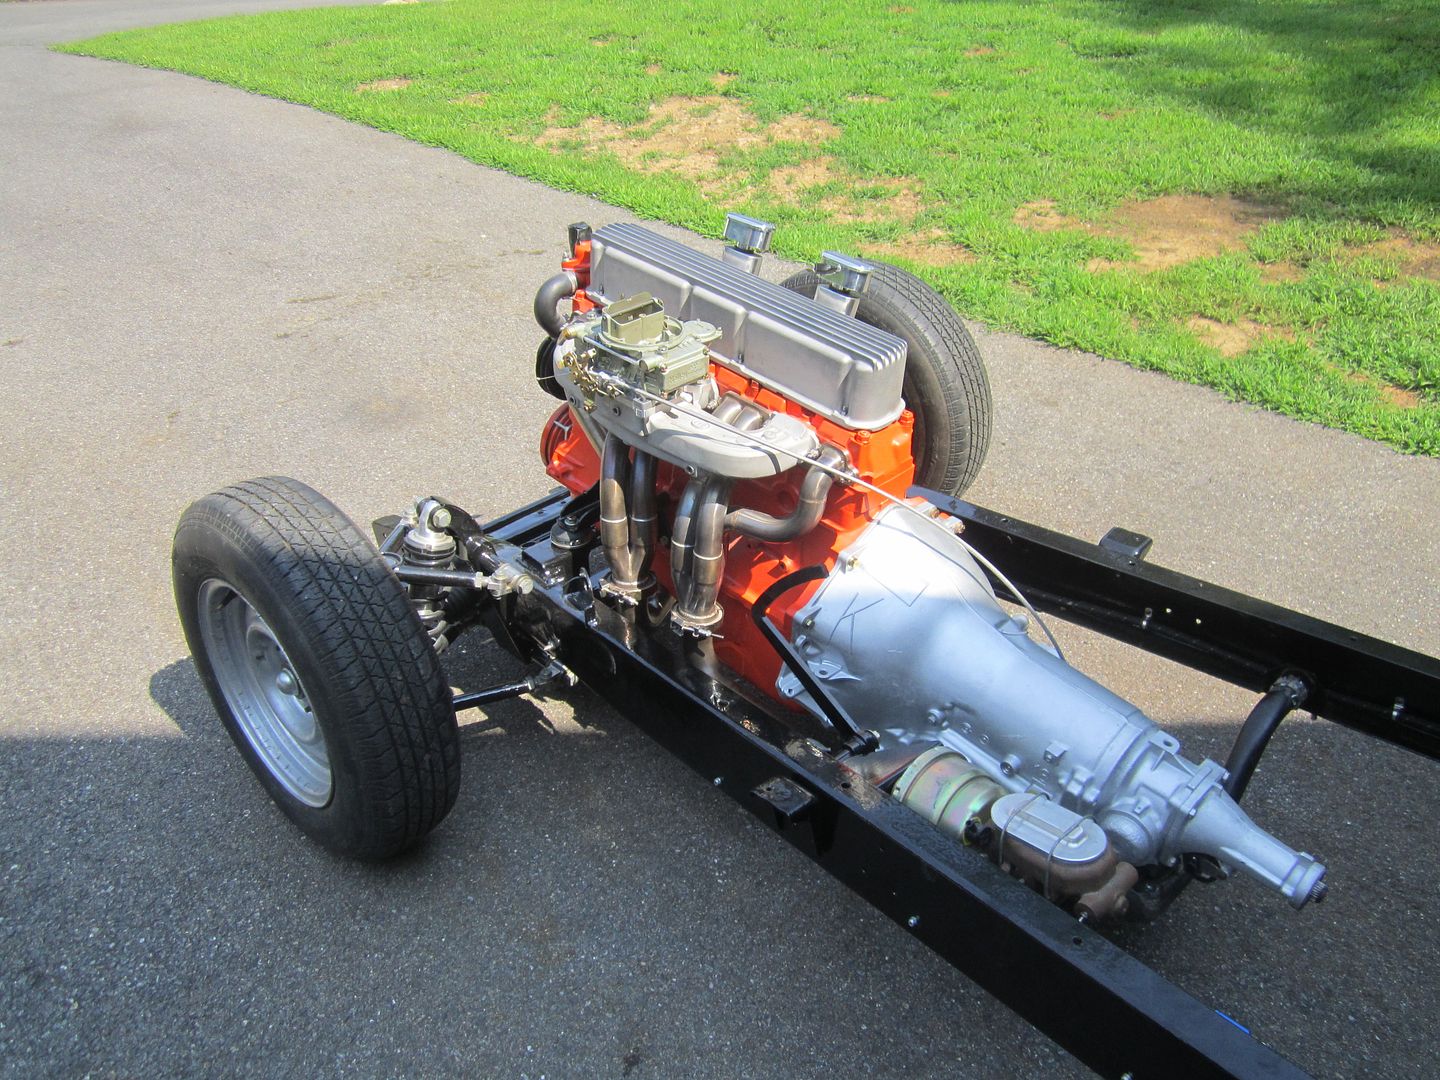 [/URL] [/URL]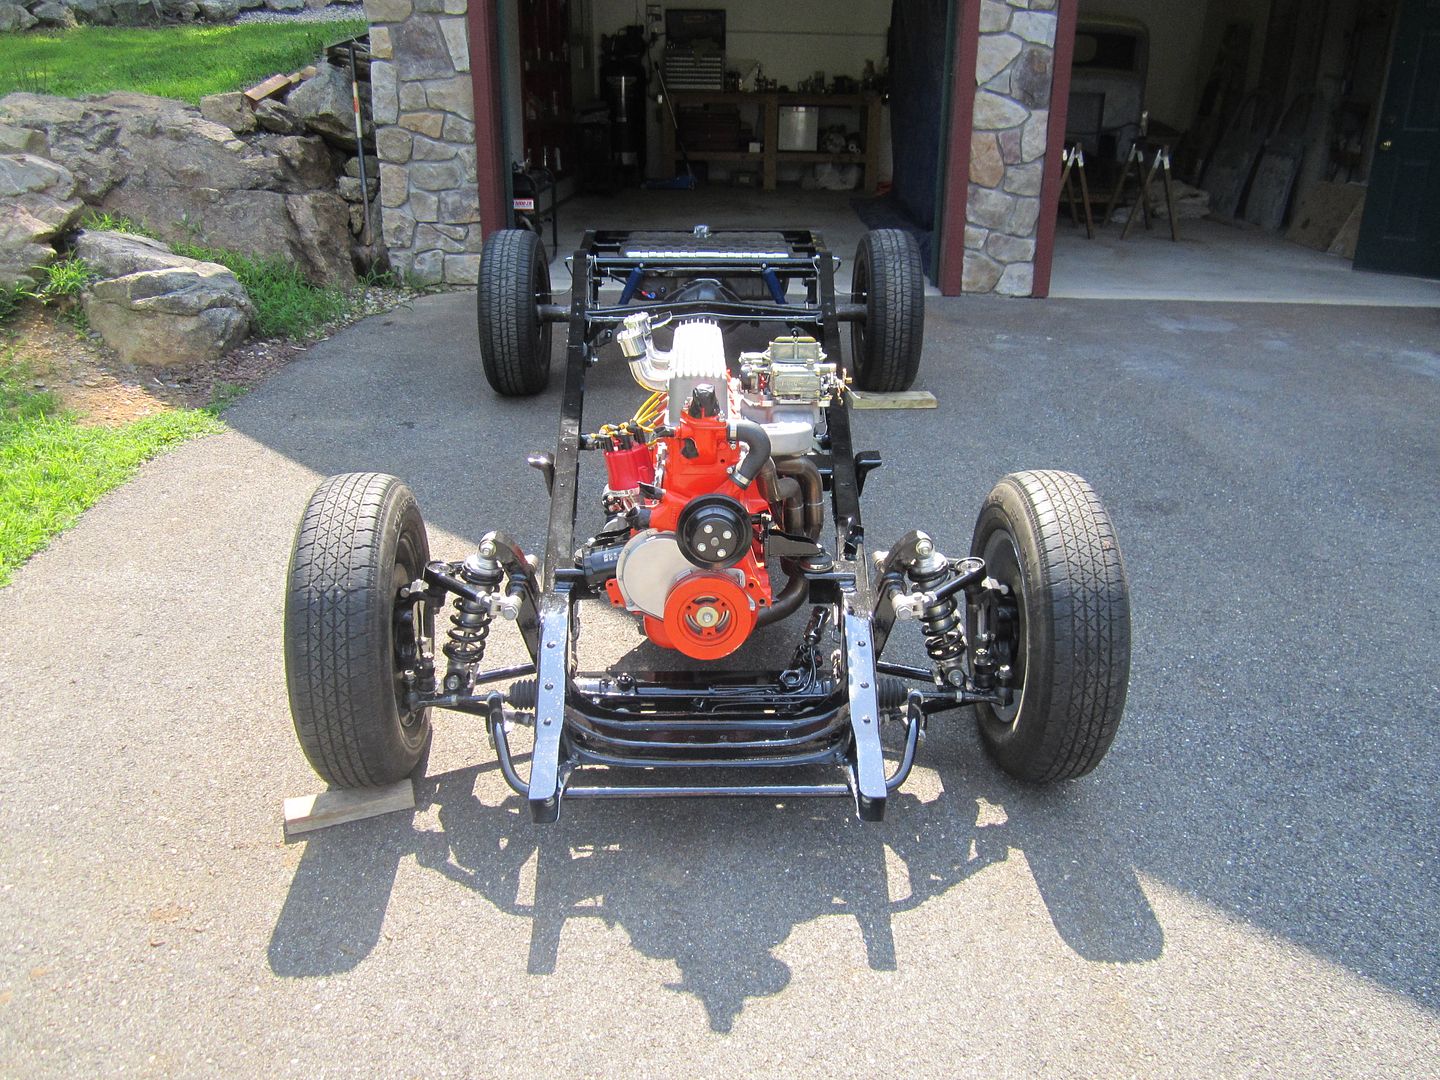 [/URL] [/URL]There's a lot of talk about just how to get a flex plate, state and auto trans hooked up to an inline six. Here's how I did it. My motor is from a 70 or 71 milk truck which meant I had the larger 1/2" crank flange holes. So I took a TCI 168 tooth dual pattern flex plate and had the motor shop open up the 7/16 the hole to the proper size. Then I used a CSR mini starter with the straight across bolt pattern. Done! 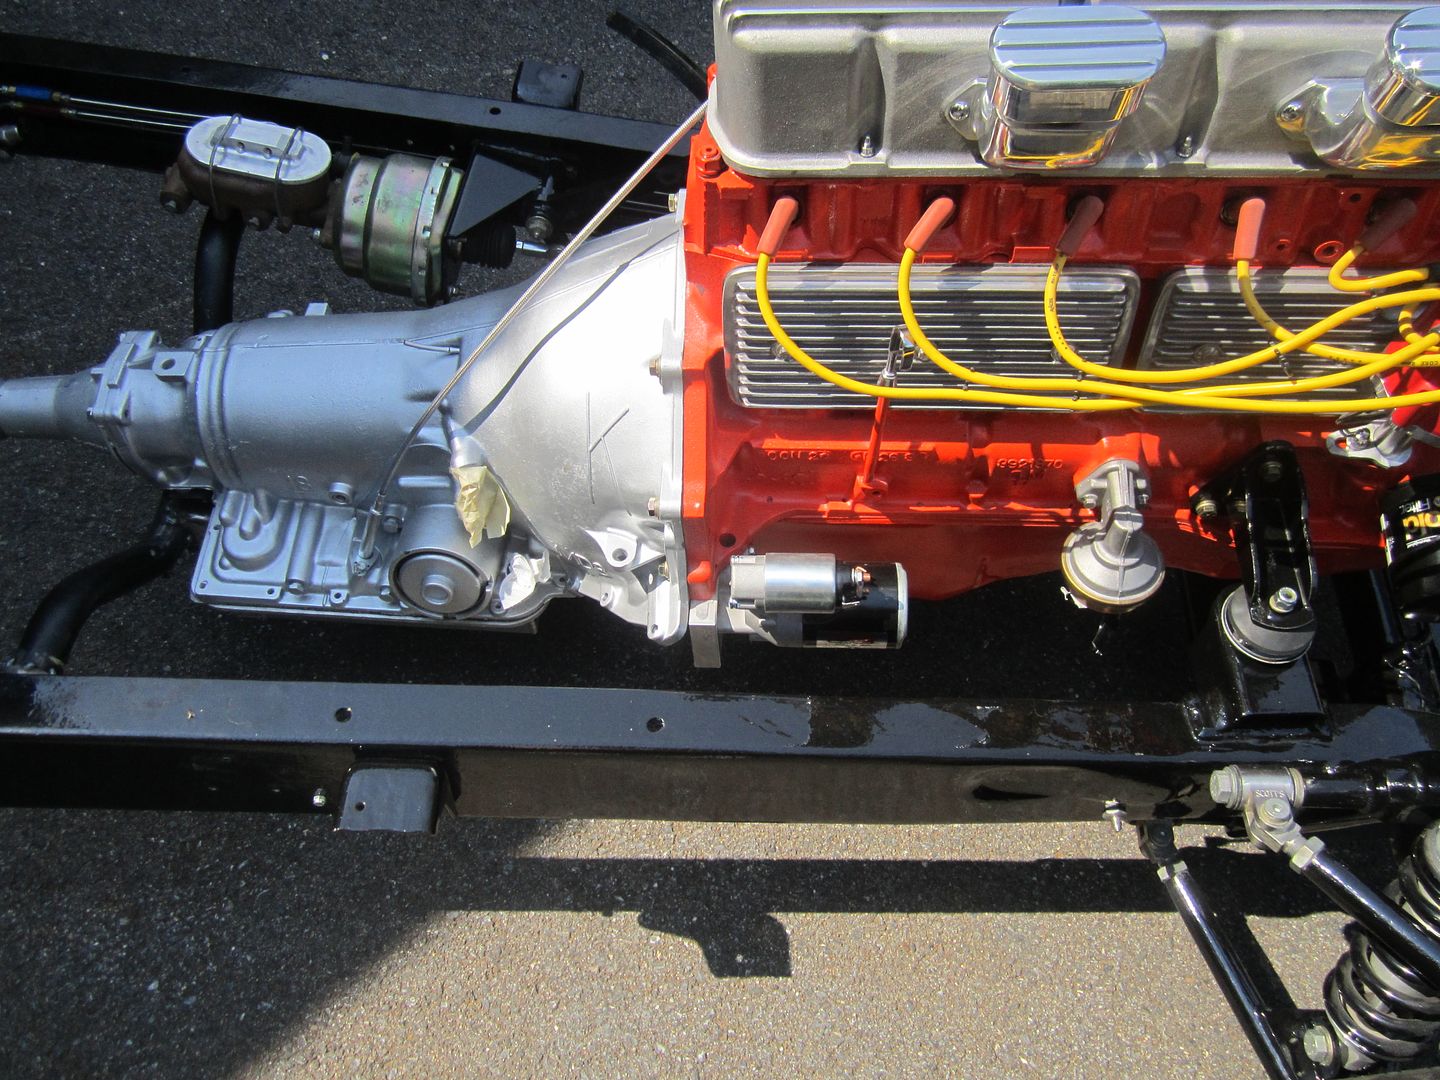 [/URL] [/URL]The other hurdle I had to overcome was the tranny cross member. When I was doing the mock up of the motor mounts I just couldn't find a cross member with the right drop and fit I wanted to get the correct angle of the drive shaft. After crawling under the truck a 100 times with the cab on,just to be frustrated, I figured I would deal with the problem when I was at this stage. So I ended up chopping up 2 cross members that I had laying around to make the one I wanted. This one will give me the 3 degrees down angle on the motor, clears the master cylinder (with a wack from a big hammer  ), and gives me a nice opening to run my exhaust pipes through. ), and gives me a nice opening to run my exhaust pipes through.I know the cross member looks to low to the ground in this pic but it's just the angle of the photo. I actual have about 10 inches of clearance. 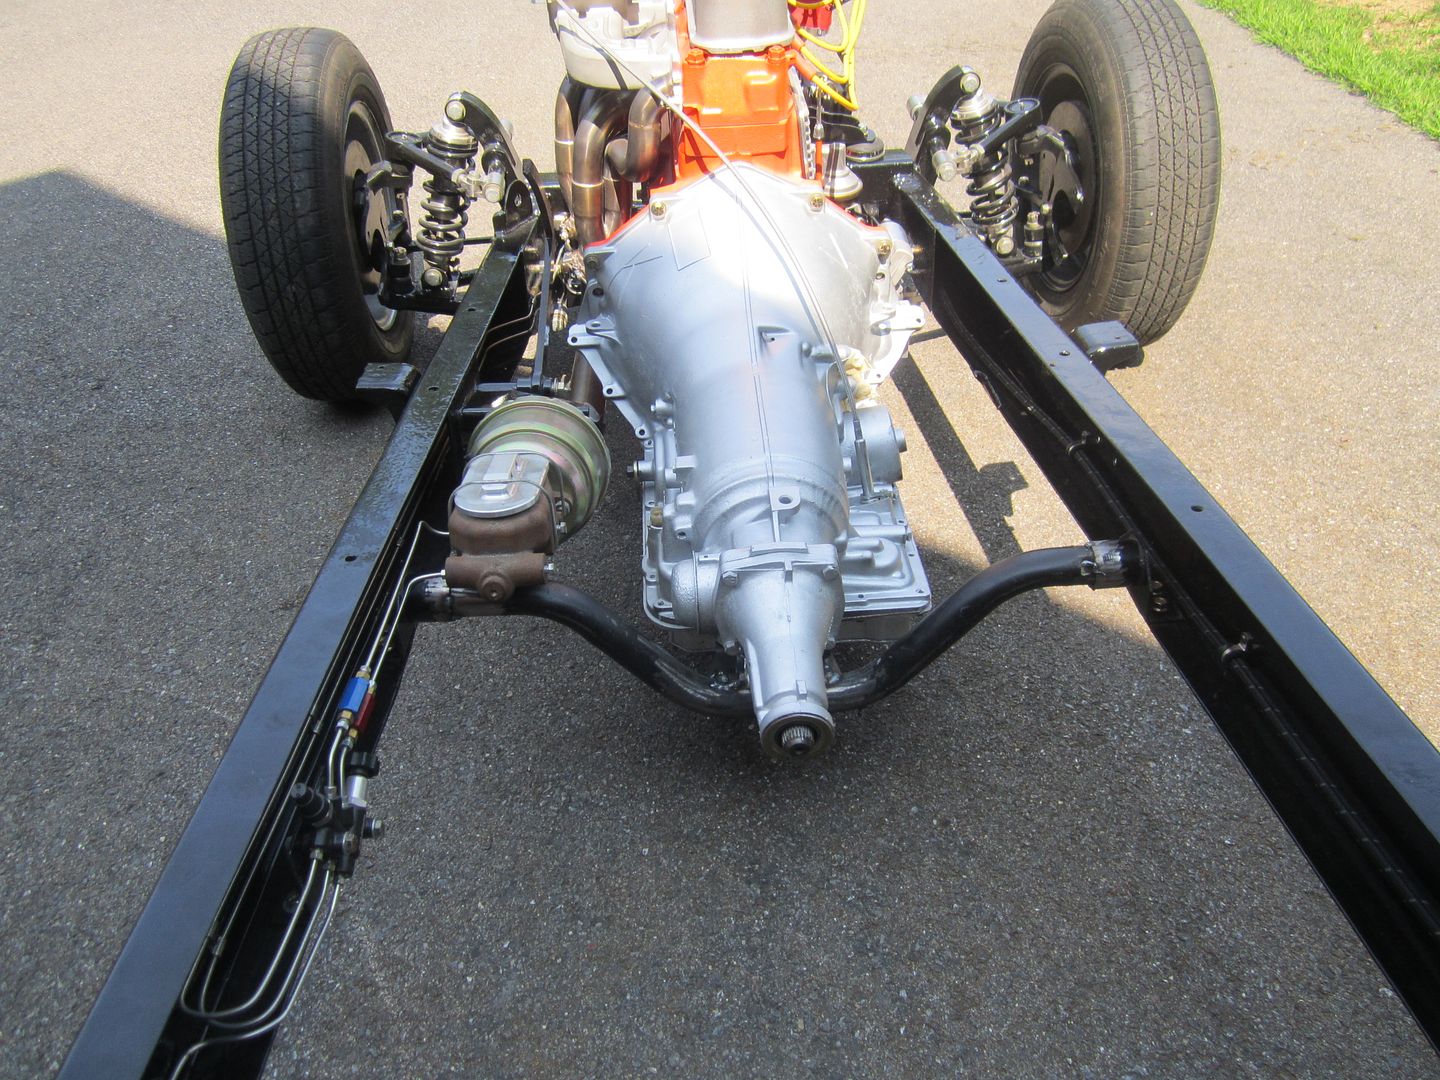 [/URL] [/URL]The other hurdle I have to overcome is the header pipe that go under the oil pan to the passenger side of the truck. When I did the mock up I used a 250 block assuming that is what I was going to use. Then I landed the 292 after I had the pipes made. Seeing as how the block is 2" taller on the 292 and the oil pan is different, it means I have a bit of a clearance issue with the pipe and oil pan. The pipe doesn't hit the pan it's just real close (about an inch of clearance) it will work it's just kind of close and I am concerned with the heat from the pipe getting the oil in the pan to hot. I guess I will just get a new pipe made. maybe I am over thinking it.  [/URL] [/URL]Now that the motor is in, I now have a bunch of work I can get done. Trans cooler and lines Shorten, or get a new drive shaft made Power steering and Alt brackets........Which may be a big issue. meanwhile putty, block sand, putty, block sand, putty, block sand..................... |
|
|

|
|
|
#235 |
|
SAVING ONE TRUCK AT A TIME
 Join Date: Feb 2010
Location: sherwood oregon
Posts: 1,141
|
Re: 46 pickemup in NJ "the Rebuild"
lookin good.
__________________
53-suburban (99% done) 40-pick up (99.9% done) 12-cc lb dually D-max (dd) 61-crew cab D-max "PAY LESS FOR WHAT YOU NEED PAY MORE FOR WHAT YOU WANT" 53 BURBAN BARN FIND:http://67-72chevytrucks.com/vboard/s...d.php?t=404091 1940 PROJECT MOON SHINE:http://67-72chevytrucks.com/vboard/s...d.php?t=551088 1961 CREW MAX: http://67-72chevytrucks.com/vboard/s....php?p=6957999 |
|
|

|
|
|
#236 |
|
Registered User
Join Date: Dec 2002
Location: Cactus Patch So. Az
Posts: 4,749
|
Re: 46 pickemup in NJ "the Rebuild"
Is there a way you can make a heat shield over part of the collector?
How about some "ugly" wrap, you will not be able to see it under the truck I love that part of the build coming together, final assembly
__________________
53 TuTone Extended Cab 350 4-Spd 3:08 (SOLD) 53 Chevy Moldy pearl green ZZ-4 4L60E 9" 3:25 55 GMC 1st Black Mll (ZZ4) ZZ6 TKO 600 5 sp 3:73 62 Solidaxle Corvette Roman Red (327 340hp 4spd 3:36) C4 & C5 suspension tube chassis LS 3 4L70E 65 Corvette Coupe 327 350hp 4spd 4:11 78 Black Silverado SWB (350/350) 5.3 & 4L60E 3:42 2000 S-Type 3.0 (wife cruiser) 2003 GMC SCSB 5.3 4L60E 3:42 |
|
|

|
|
|
#237 |
|
Registered User
Join Date: Dec 2010
Location: washington NJ
Posts: 766
|
Re: 46 pickemup in NJ "the Rebuild"
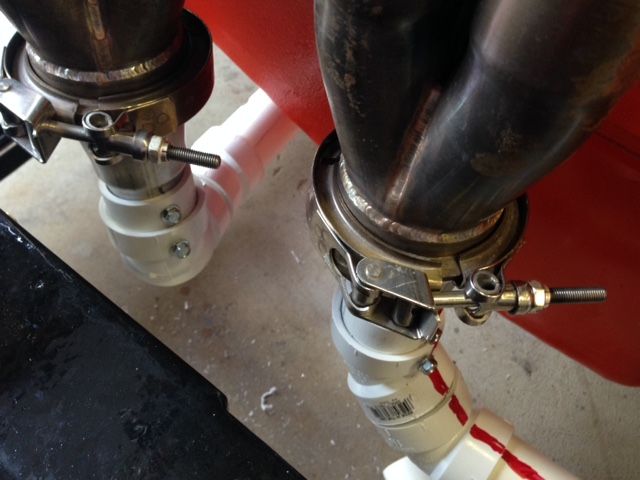
So i starte mocking up my exhaust system. Since I went through all the trouble of getting stainless headers made I figure it would be stupid not to get the exhaust done in stainless as well. Originally I planned on having them made local. However since having the headers made a year ago, Stainless Inc. is now doing exhausts as well. So it is pretty much the same procedure. Mock up what you want in PVC, send it to them, and in a few weeks you have a cherry exhaust system. Not sure what muffs I am going to run yet I am leaning towards either 2 Porters, 1 Porter 1 straight pipe, or 2 Borla Spitfires and end the pipes just before the rear end. Ugh analysis is paralysis!!!! So heres some pics of what I am wanting.
 [/URL] [/URL]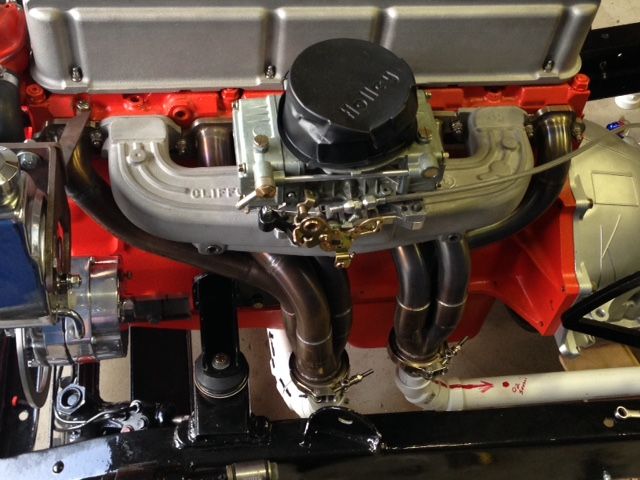 [/URL] [/URL]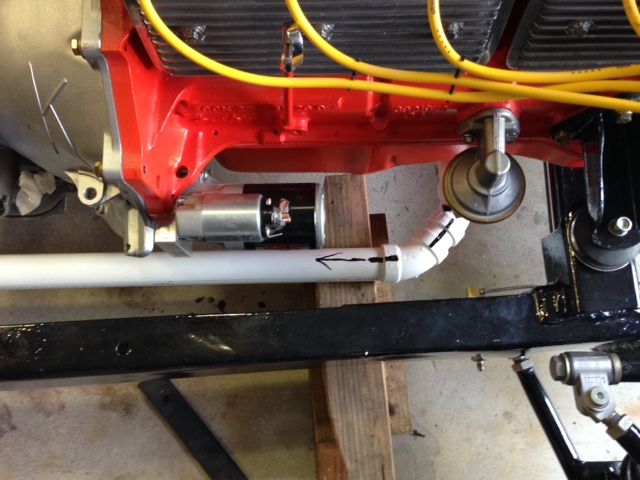 [/URL] [/URL]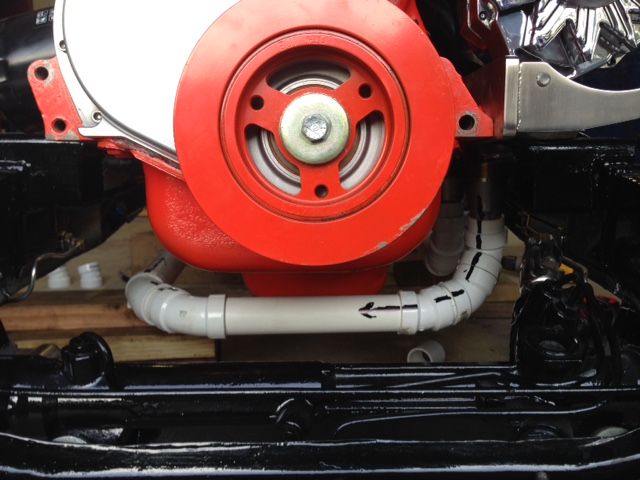 [/URL] [/URL]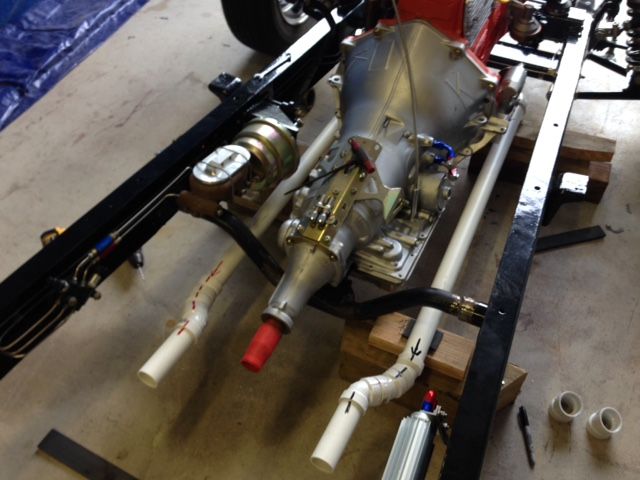 [/URL] [/URL]
|
|
|

|
|
|
#238 |
|
Registered User
Join Date: Dec 2010
Location: washington NJ
Posts: 766
|
Re: 46 pickemup in NJ "the Rebuild"
Well.....from buying this truck just to tinker with on the weekends to a full blown, frame off, rebuild. Damn, this body work crap is a lot of work!!!
 I now have everything puttied,block sanded, and 3 coats of epoxy primer. I still have a bazillion micro scratches so I guess now it's onto sanding and shooting some high build primer. Body men are worth every friggin dollar, and then a $500 tip! I now have everything puttied,block sanded, and 3 coats of epoxy primer. I still have a bazillion micro scratches so I guess now it's onto sanding and shooting some high build primer. Body men are worth every friggin dollar, and then a $500 tip!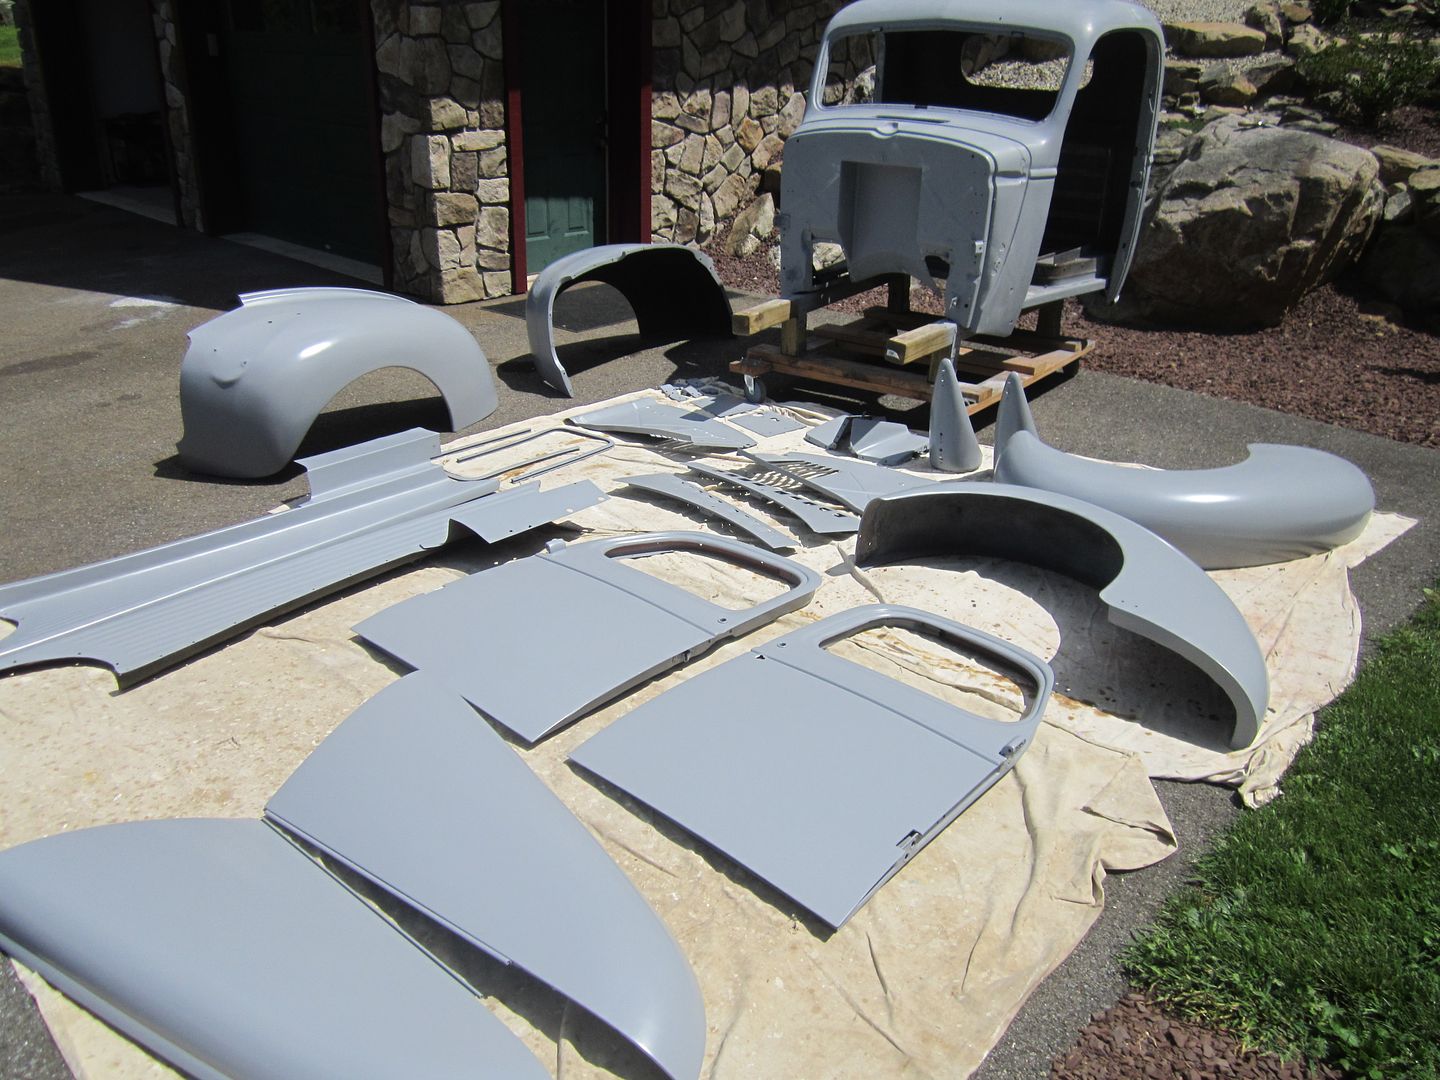 [/URL] [/URL]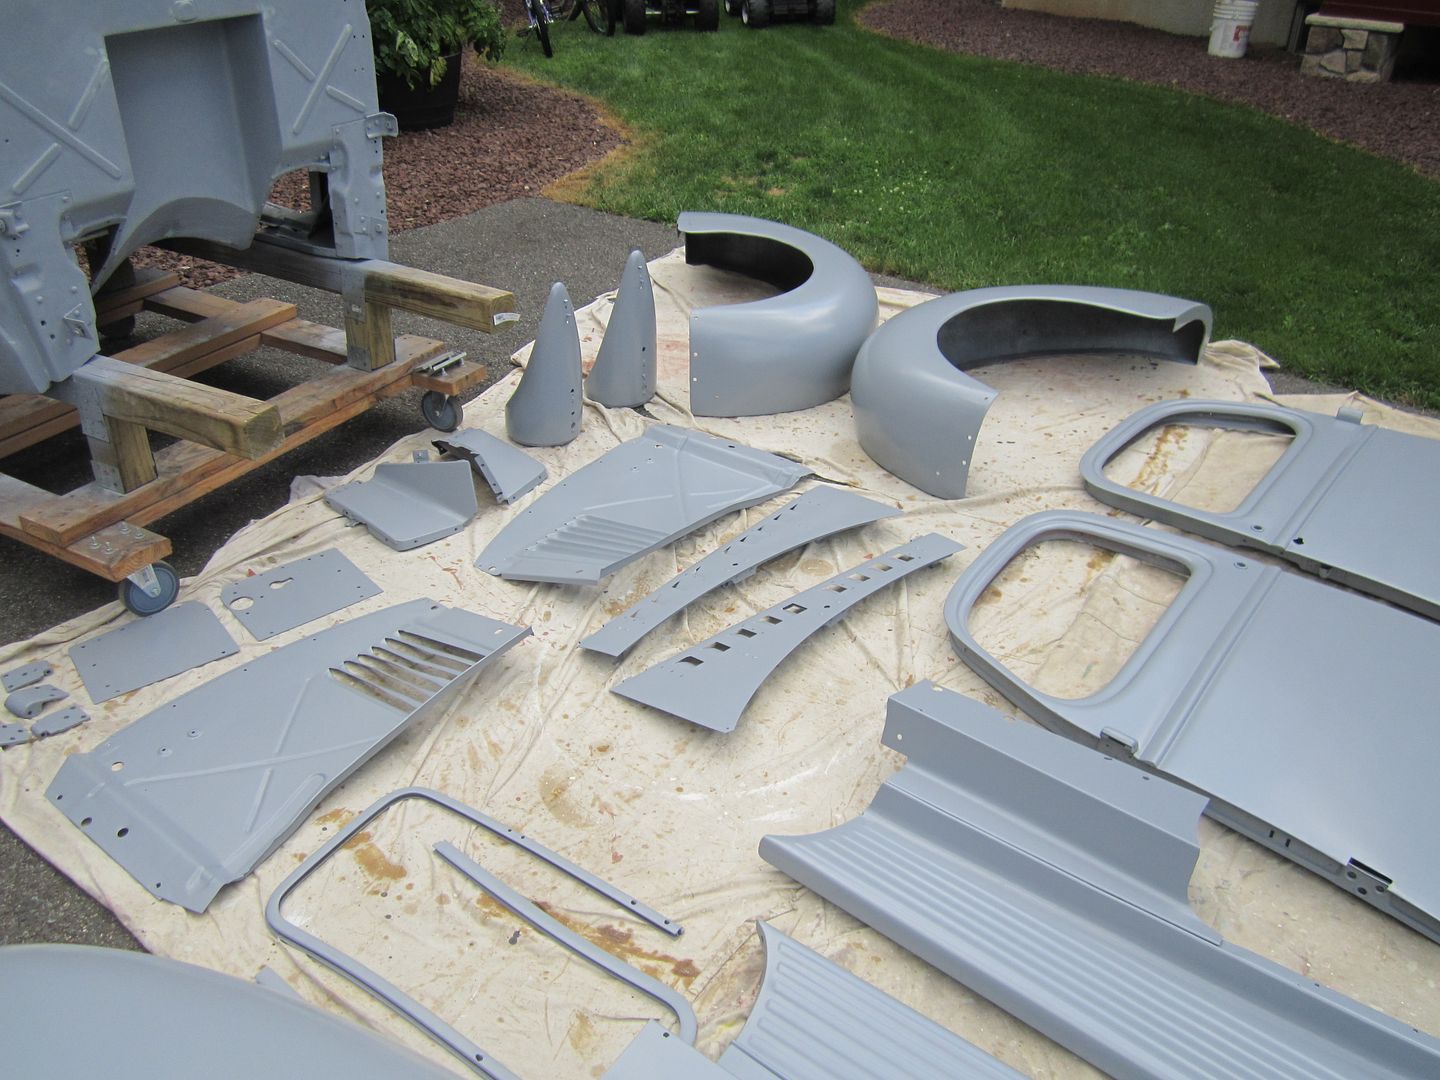 [/URL] [/URL]Here's how I have my shop set up for spraying. I have a tarp in the center of the garage to allow fresh air to be pulled in from one side and around to the other to exhaust out the other. 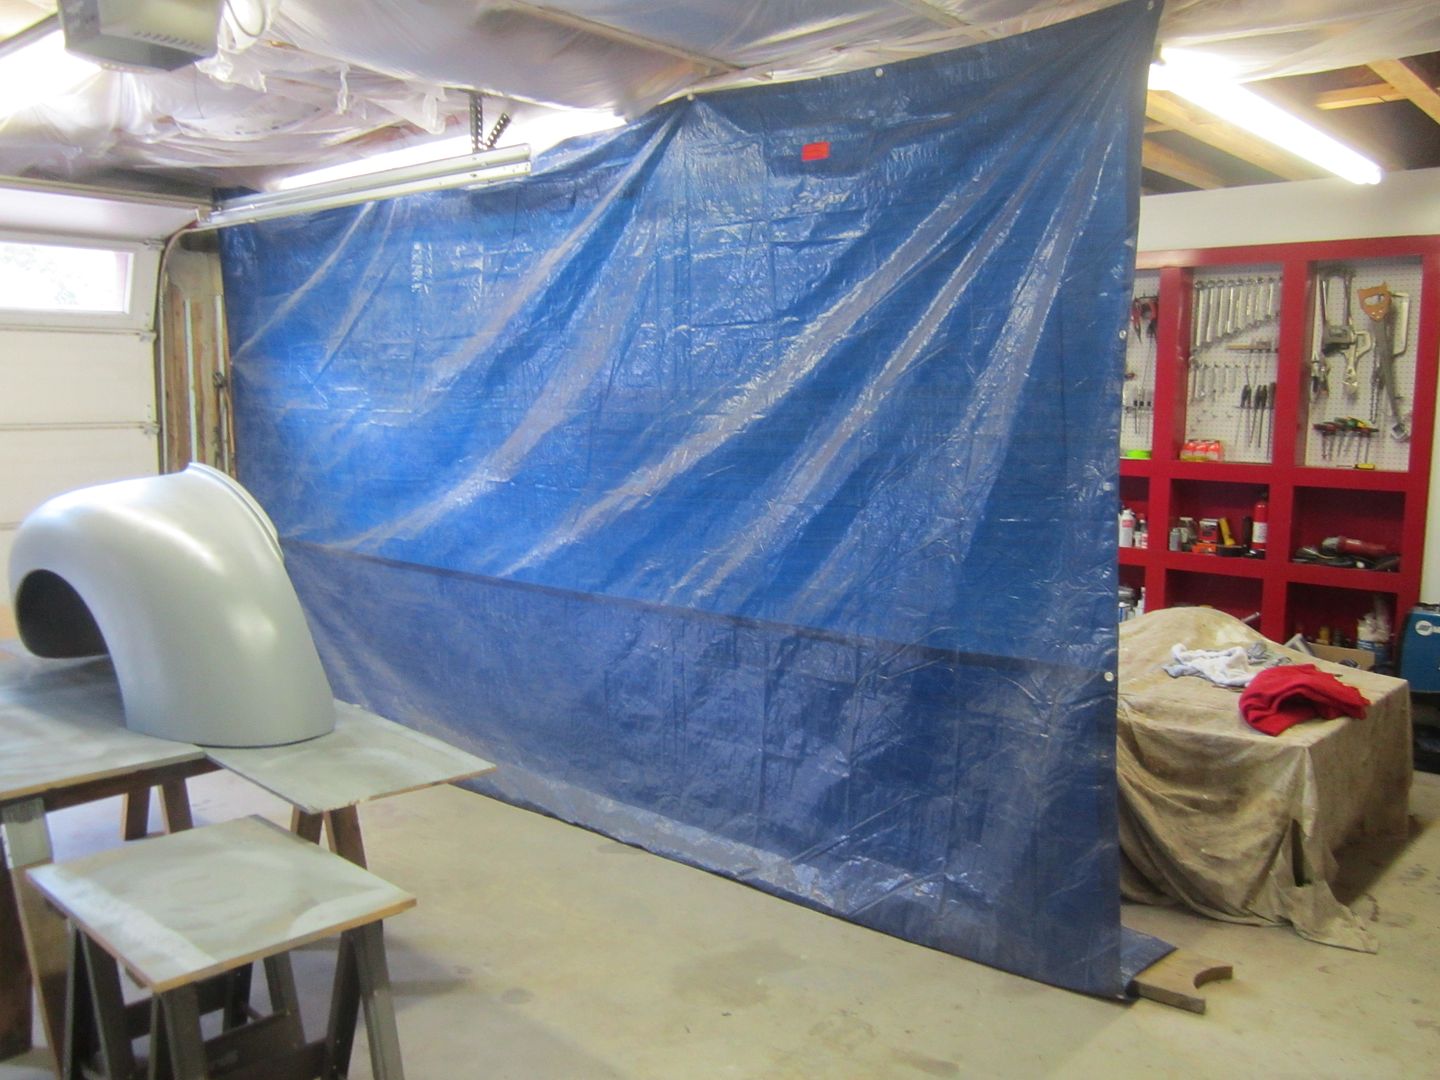 [/URL] [/URL]Fresh air sucked in through the left door and blown out through the right by a fan. 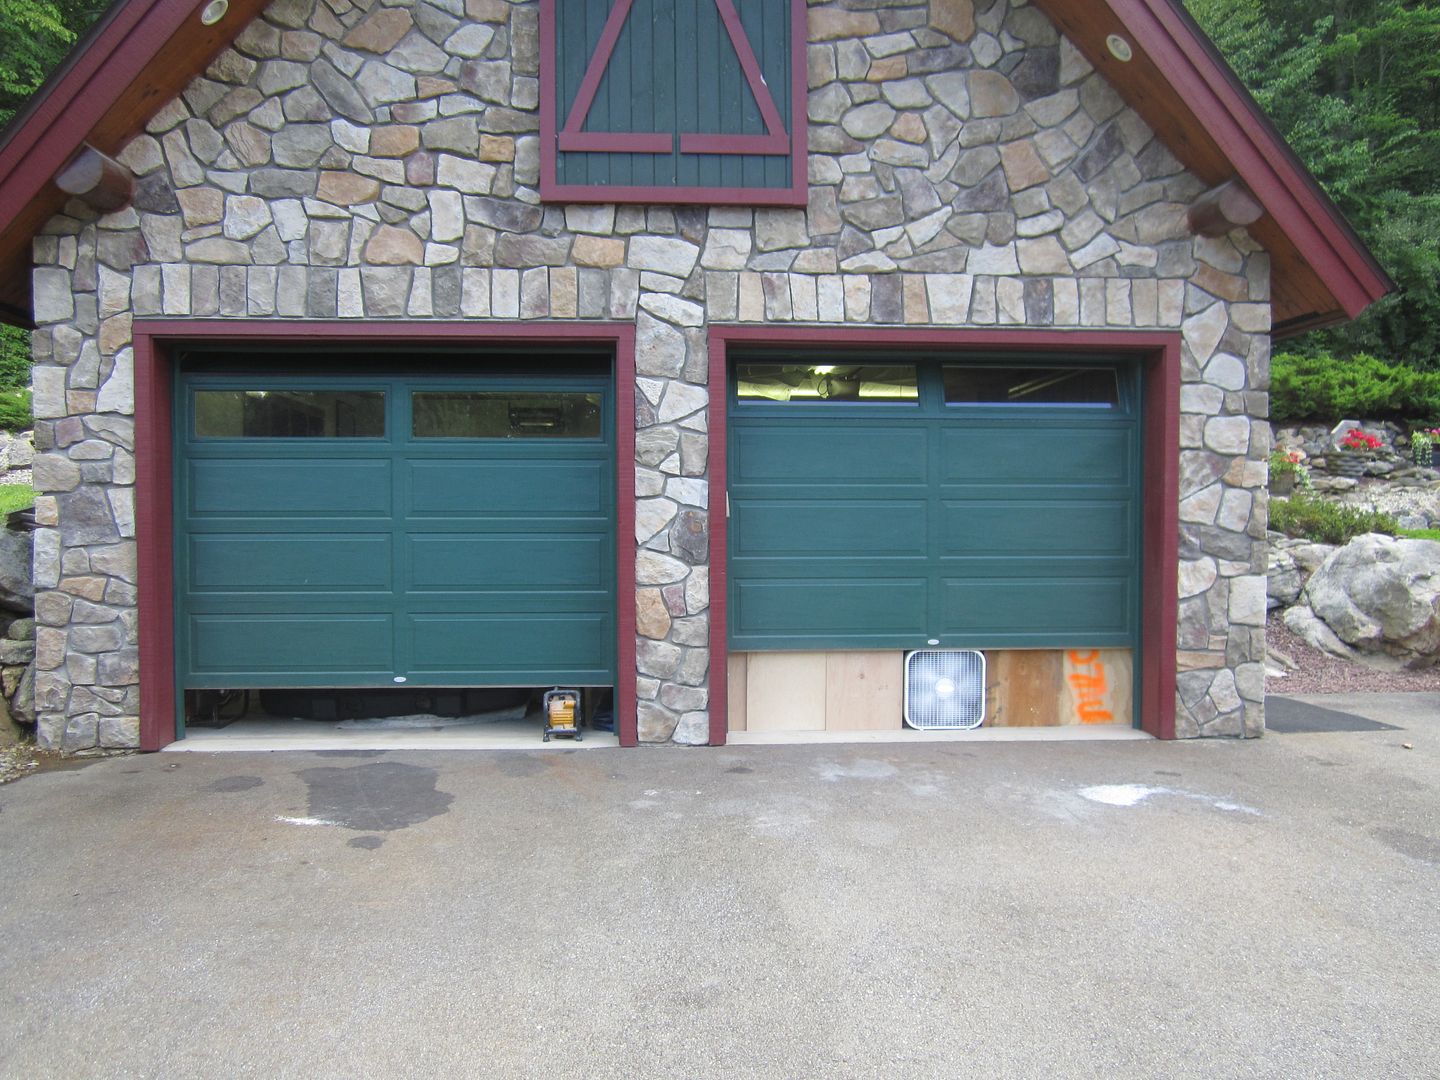 [/URL] [/URL]heres the fan drawing air out of the spray zone. I used AC filters to keep the over spray from going out and onto the entire neighborhood. 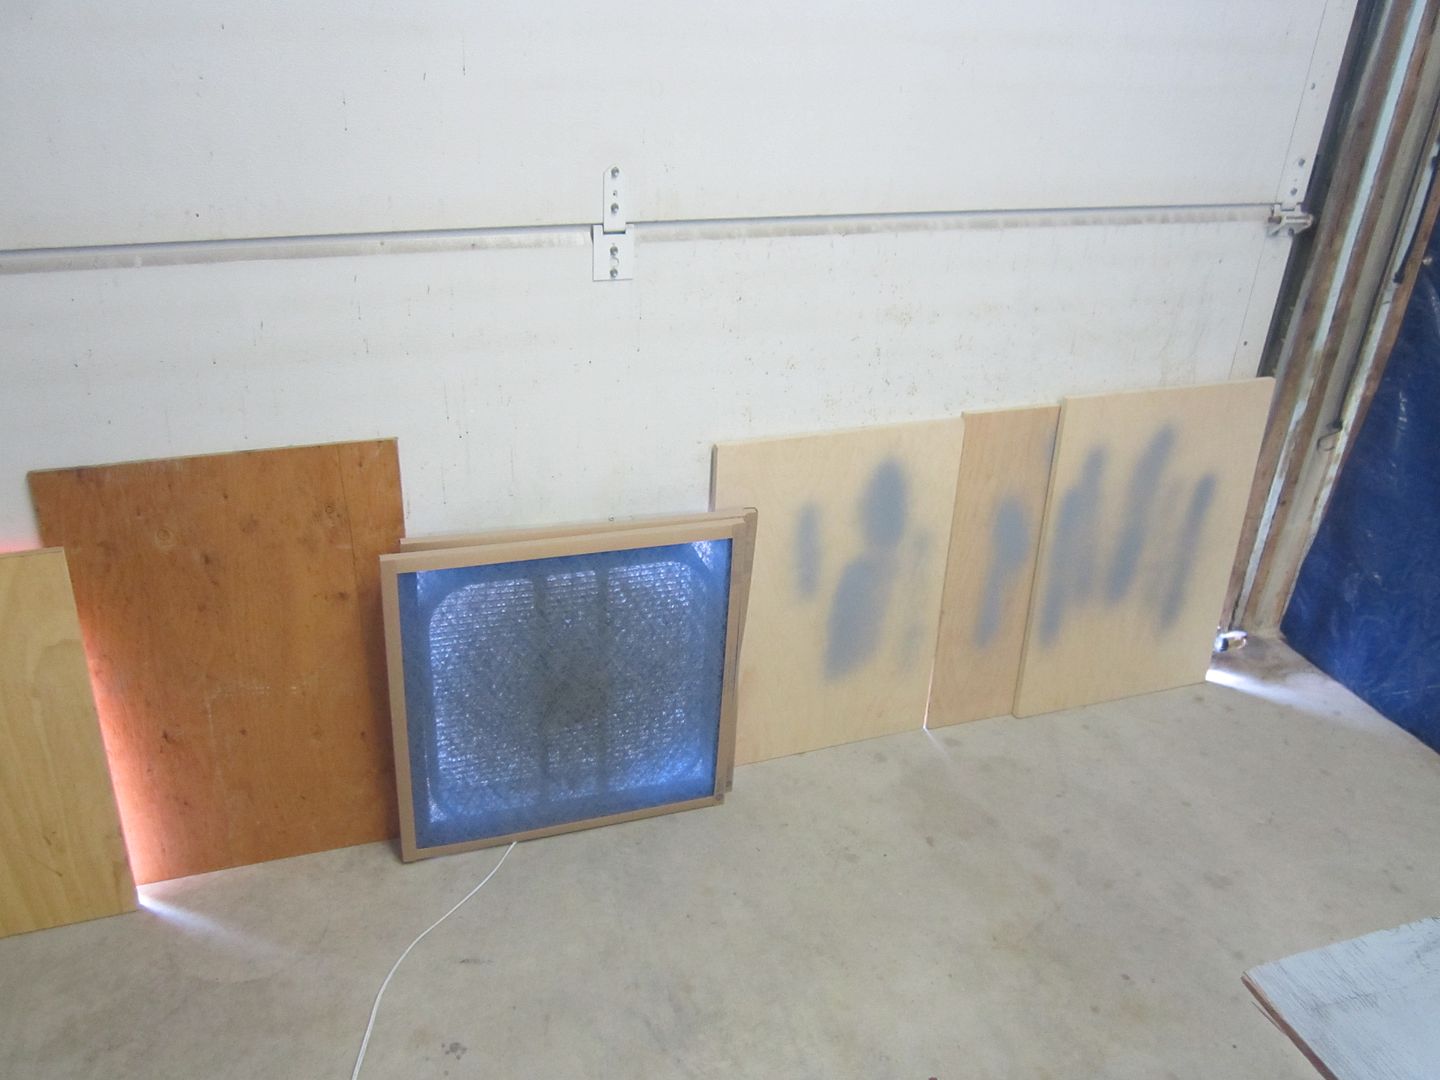 [/URL] [/URL]
|
|
|

|
|
|
#239 |
|
SAVING ONE TRUCK AT A TIME
 Join Date: Feb 2010
Location: sherwood oregon
Posts: 1,141
|
Re: 46 pickemup in NJ "the Rebuild"
Lookin good.
__________________
53-suburban (99% done) 40-pick up (99.9% done) 12-cc lb dually D-max (dd) 61-crew cab D-max "PAY LESS FOR WHAT YOU NEED PAY MORE FOR WHAT YOU WANT" 53 BURBAN BARN FIND:http://67-72chevytrucks.com/vboard/s...d.php?t=404091 1940 PROJECT MOON SHINE:http://67-72chevytrucks.com/vboard/s...d.php?t=551088 1961 CREW MAX: http://67-72chevytrucks.com/vboard/s....php?p=6957999 |
|
|

|
|
|
#240 |
|
Registered User
Join Date: Dec 2002
Location: Cactus Patch So. Az
Posts: 4,749
|
Re: 46 pickemup in NJ "the Rebuild"
I am sure 500 is not enough even when you pay a thousands for a paint job!
For those who have finished a complete body off, can you put the running boards and splash aprons on after the front and rear fenders and bed is in place?
__________________
53 TuTone Extended Cab 350 4-Spd 3:08 (SOLD) 53 Chevy Moldy pearl green ZZ-4 4L60E 9" 3:25 55 GMC 1st Black Mll (ZZ4) ZZ6 TKO 600 5 sp 3:73 62 Solidaxle Corvette Roman Red (327 340hp 4spd 3:36) C4 & C5 suspension tube chassis LS 3 4L70E 65 Corvette Coupe 327 350hp 4spd 4:11 78 Black Silverado SWB (350/350) 5.3 & 4L60E 3:42 2000 S-Type 3.0 (wife cruiser) 2003 GMC SCSB 5.3 4L60E 3:42 |
|
|

|
|
|
#241 |
|
Registered User
Join Date: Dec 2010
Location: washington NJ
Posts: 766
|
Re: 46 pickemup in NJ "the Rebuild"
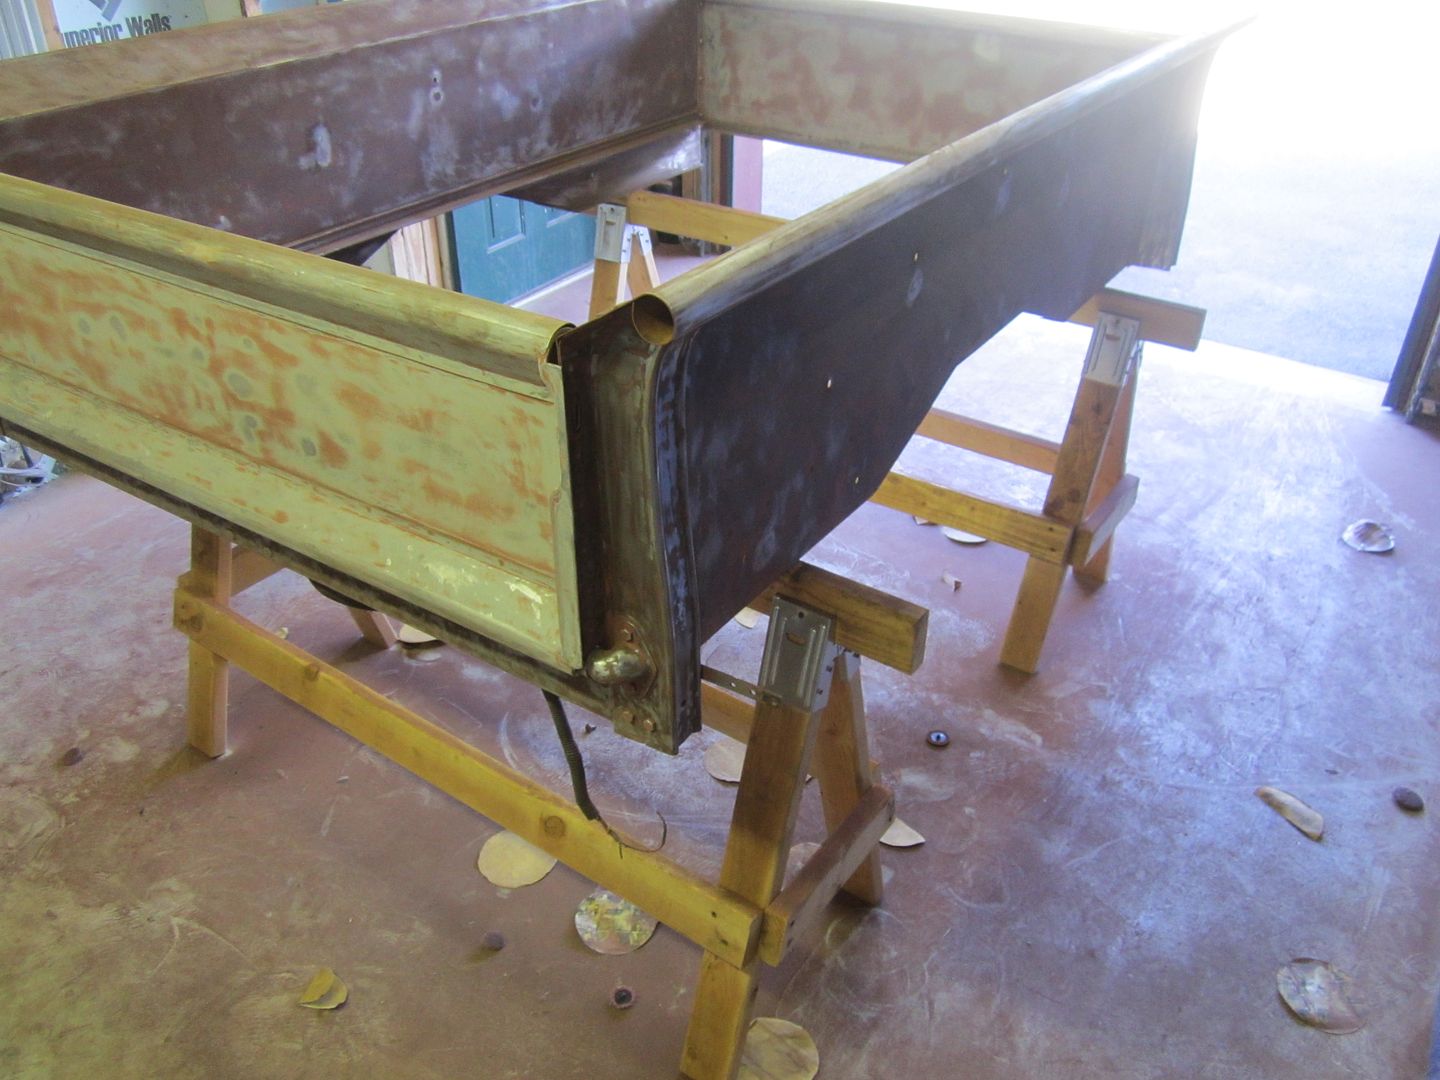
This day it sucked to be me........................
  [/URL] [/URL]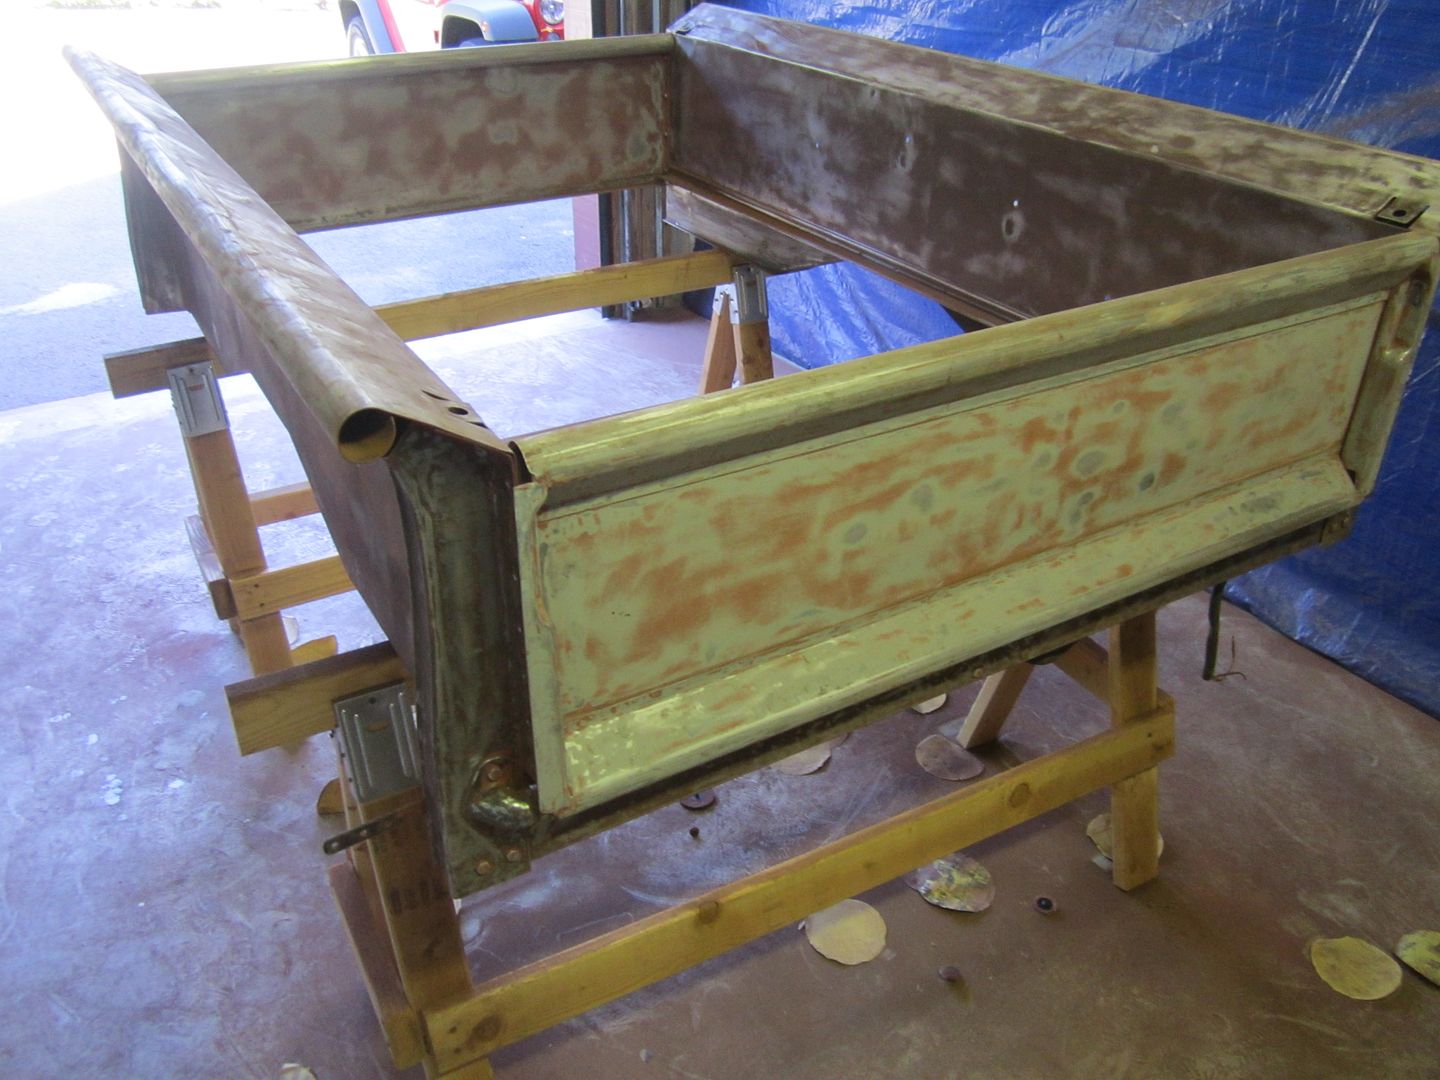 [/URL] [/URL]It also sucked today..................  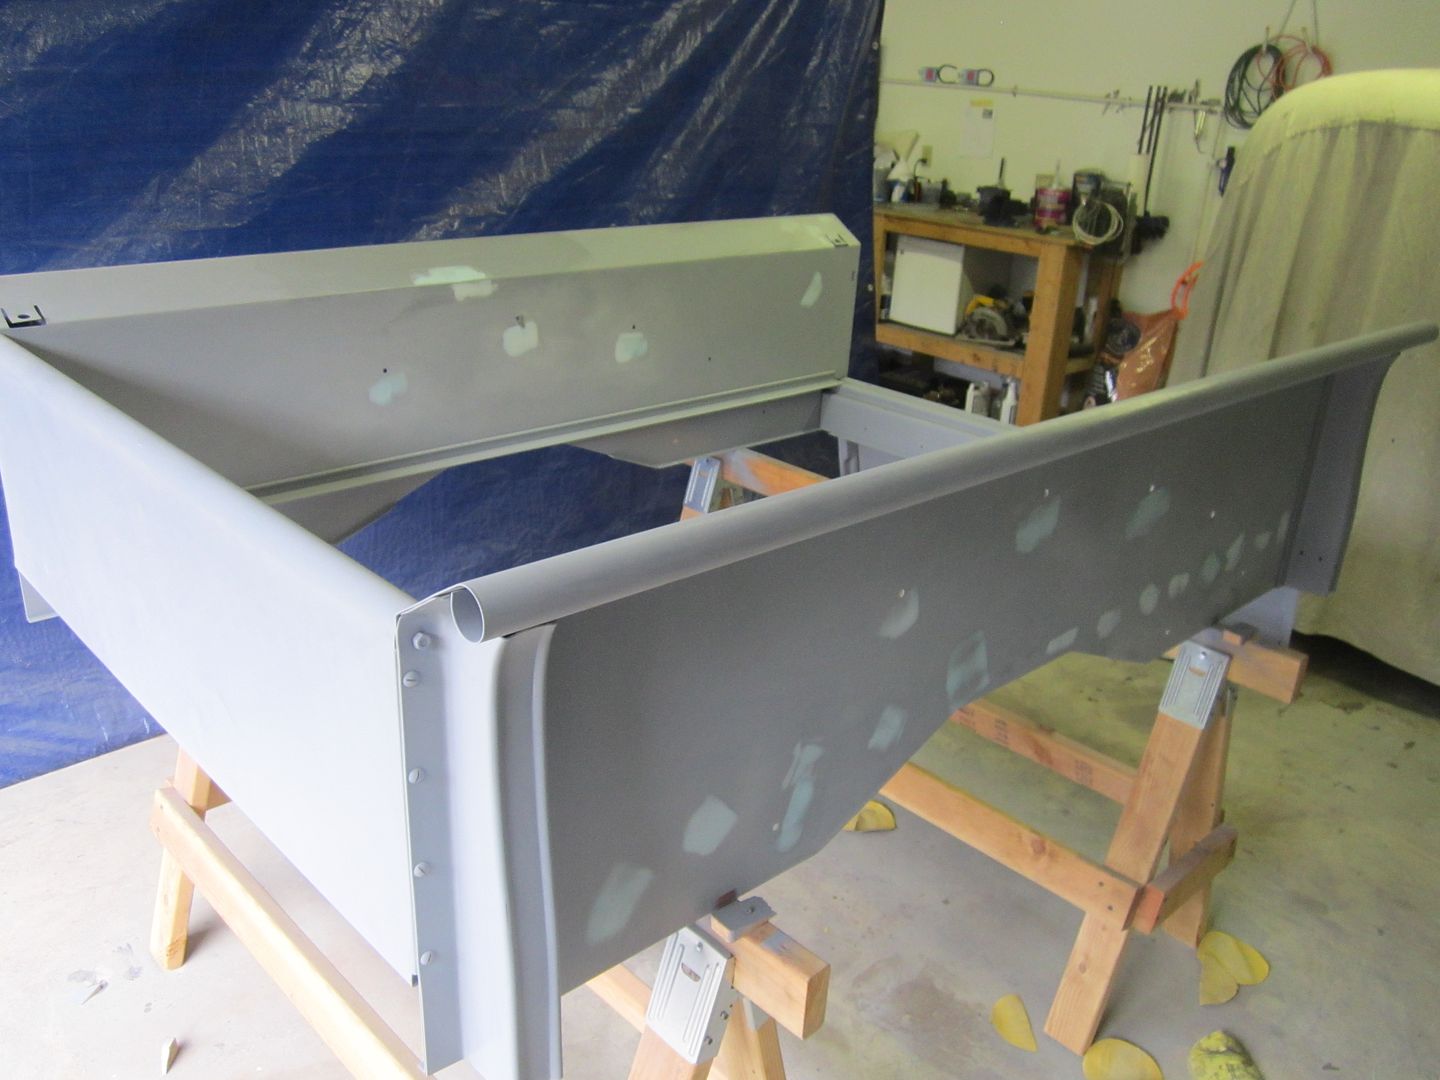 [/URL] [/URL]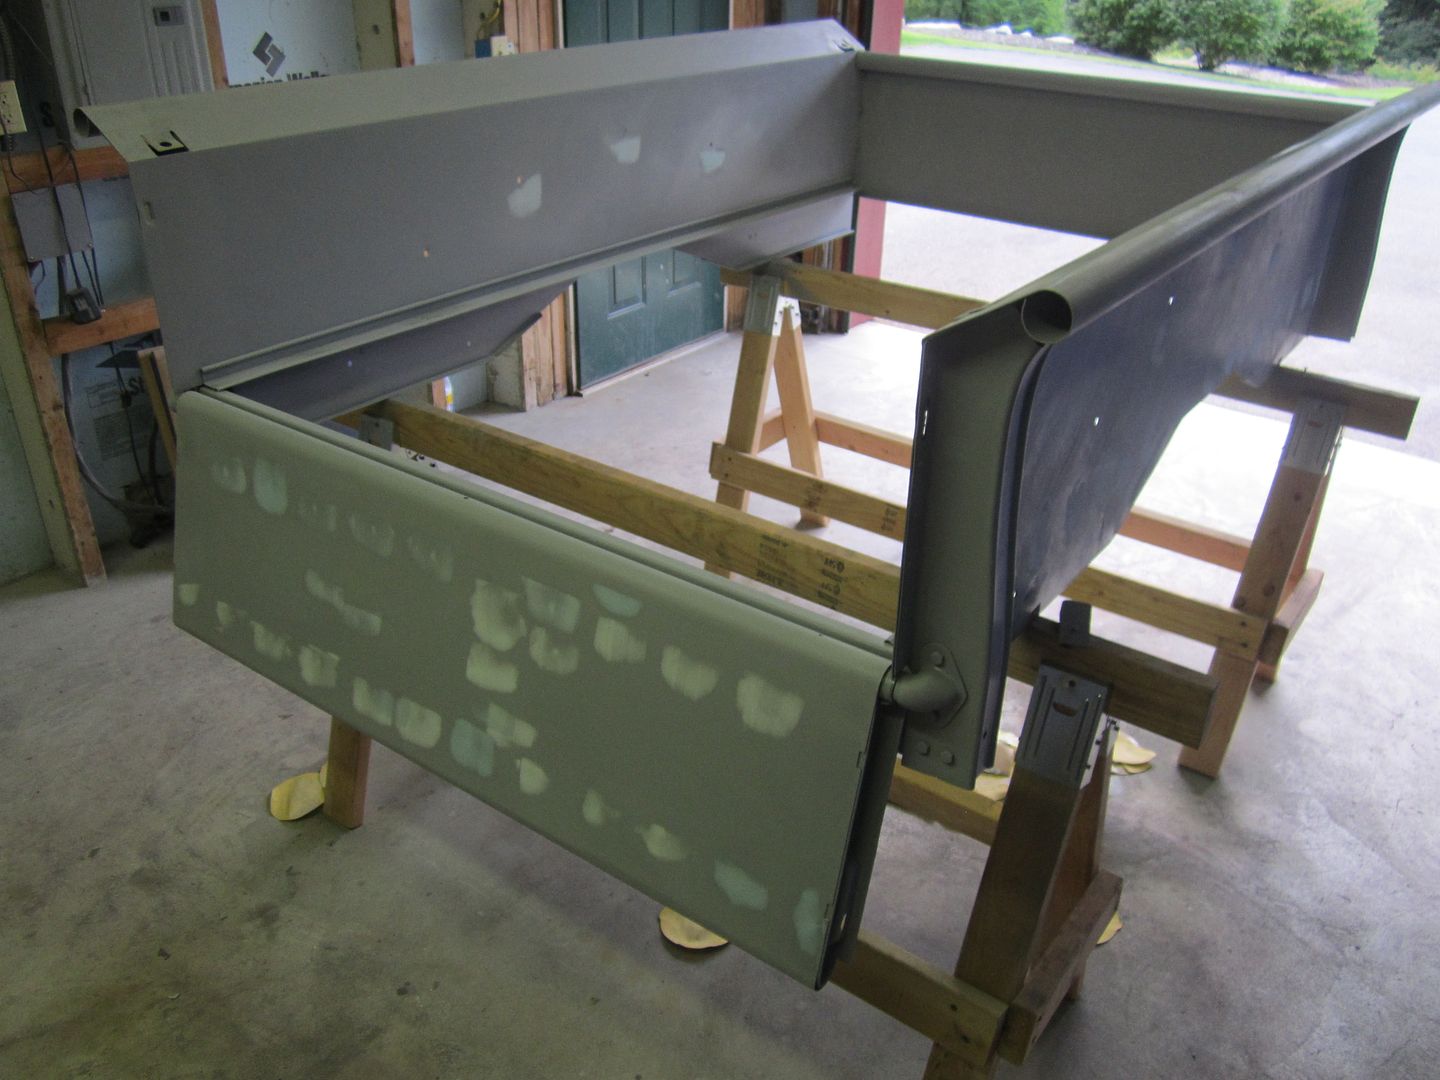 [/URL] [/URL]
|
|
|

|
|
|
#242 |
|
Registered User
 Join Date: Mar 2013
Location: Southern Oregon
Posts: 10,384
|
Re: 46 pickemup in NJ "the Rebuild"
Hey the truck is looking sweet! Great work! i do have a question....where did you mount the chains on the engine when you put it on the frame? Trying to get mine is this weekend and have a way of doing it, but I wanna see if there's another. lol
__________________
1966 Chevy C10 "Project Two Tone" http://67-72chevytrucks.com/vboard/s...d.php?t=596643 1964 GMC "Crustine" semi-build:http://67-72chevytrucks.com/vboard/s...d.php?t=665056 My youtube channel. Username "Military Chevy": https://www.youtube.com/channel/UC_h...fzpcUXyK_5-uiw |
|
|

|
|
|
#243 | |
|
Registered User
Join Date: Dec 2010
Location: washington NJ
Posts: 766
|
Re: 46 pickemup in NJ "the Rebuild"
Quote:
For the front single chain, I used the front holes in the passenger side of the head where the AC bracket would go. On the back side of the engine I used 1 loooooong chain attached to each side of the tranny. First I bolted up the tranny but used 2 extra long bolts ( i think 3"), for the 2 most outer holes on the tranny housing. I put these 2 bolts in from the engine side (essentially backwards from conventional) with the chain attached with some big fender washers. I made sure the bolts went all the way through the tranny housing to keep the threads inline. Theses 2 bolts I left about 2 inches exposed on the engine side so I could attach my chains to them. So essentially I had one long chain attached on each side of the tranny that went up to the hoist (like an upside down V). The front chain hooked at the same point on the hoist. Thus I had a tripod of sorts. This allowed me to pull straight up on the motor with no swing or tilt. Once i got the motor in I removed the 2 long bolts in the tranny, then ran the 2 proper sized bolts in from the back side like normal. Worked perfect! I did have the top of my motor all wrapped in towels as the chain might still want to rub on the valve cover. Hope all this makes sense. |
|
|
|

|
|
|
#244 |
|
Registered User
Join Date: May 2013
Location: Centerville,Ma.
Posts: 1,223
|
Re: 46 pickemup in NJ "the Rebuild"
Been doing body work for over 40 years and used to enjoy it. Now most days seem like it sucks to be me.
Bob |
|
|

|
|
|
#245 |
|
Registered User
Join Date: Dec 2010
Location: washington NJ
Posts: 766
|
Re: 46 pickemup in NJ "the Rebuild"
I hear ya Cape, I'm not even going for anything near show quality, and I am already sick of it. I am still planning on throwing on some high build though just to say I did it. At this stage in my life a scratch here or ding there will not bother me.
|
|
|

|
|
|
#246 | |
|
Registered User
 Join Date: Mar 2013
Location: Southern Oregon
Posts: 10,384
|
Re: 46 pickemup in NJ "the Rebuild"
Quote:

__________________
1966 Chevy C10 "Project Two Tone" http://67-72chevytrucks.com/vboard/s...d.php?t=596643 1964 GMC "Crustine" semi-build:http://67-72chevytrucks.com/vboard/s...d.php?t=665056 My youtube channel. Username "Military Chevy": https://www.youtube.com/channel/UC_h...fzpcUXyK_5-uiw |
|
|
|

|
|
|
#247 |
|
Registered User
Join Date: Dec 2010
Location: washington NJ
Posts: 766
|
Re: 46 pickemup in NJ "the Rebuild"
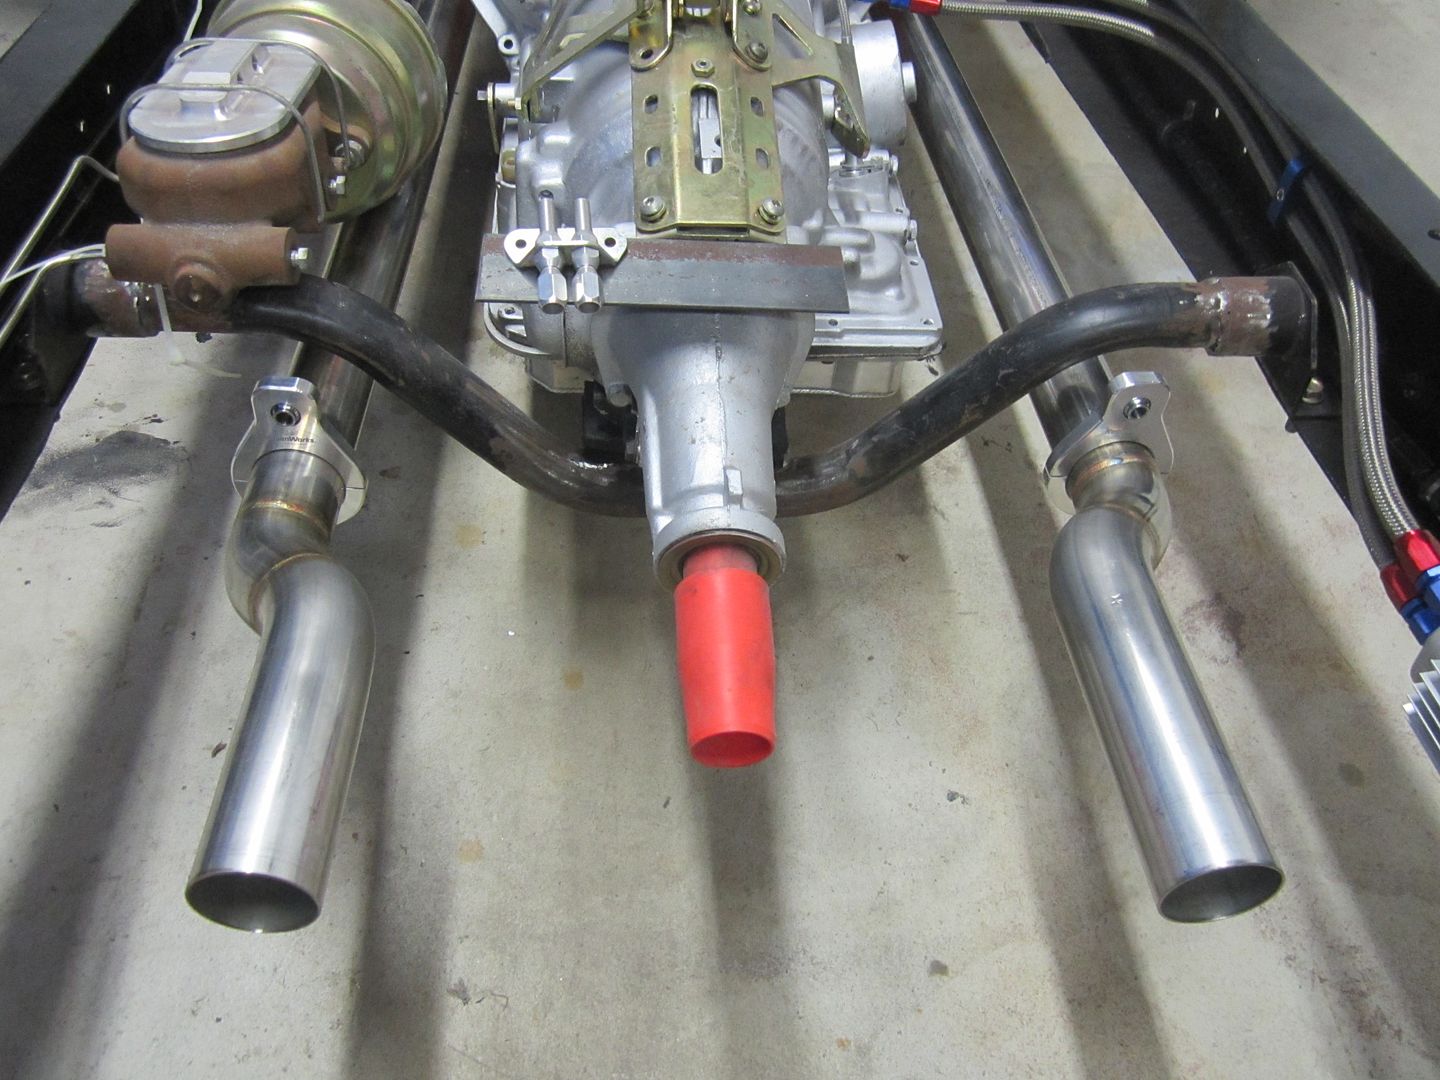
Today was pipetastic around here!!!!!!!! Got them bolted upto the headers but still have to figure out how I am going to mount them to the frame. If I remember correctly these inline 6's flex a lot.
 [/URL] [/URL]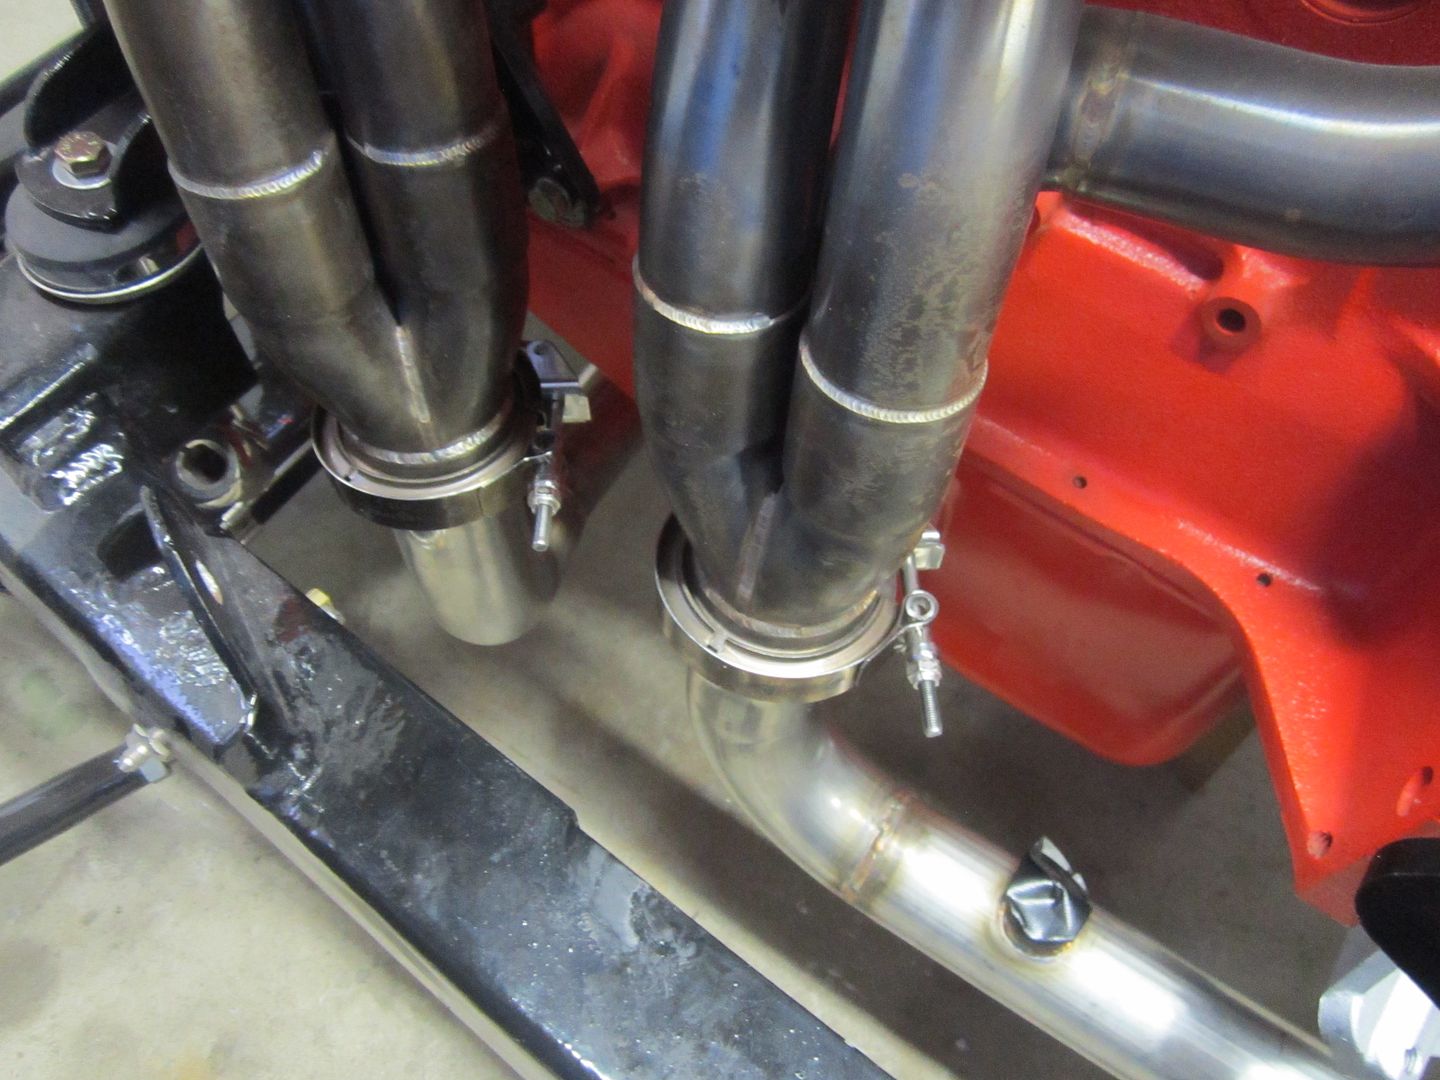 [/URL] [/URL]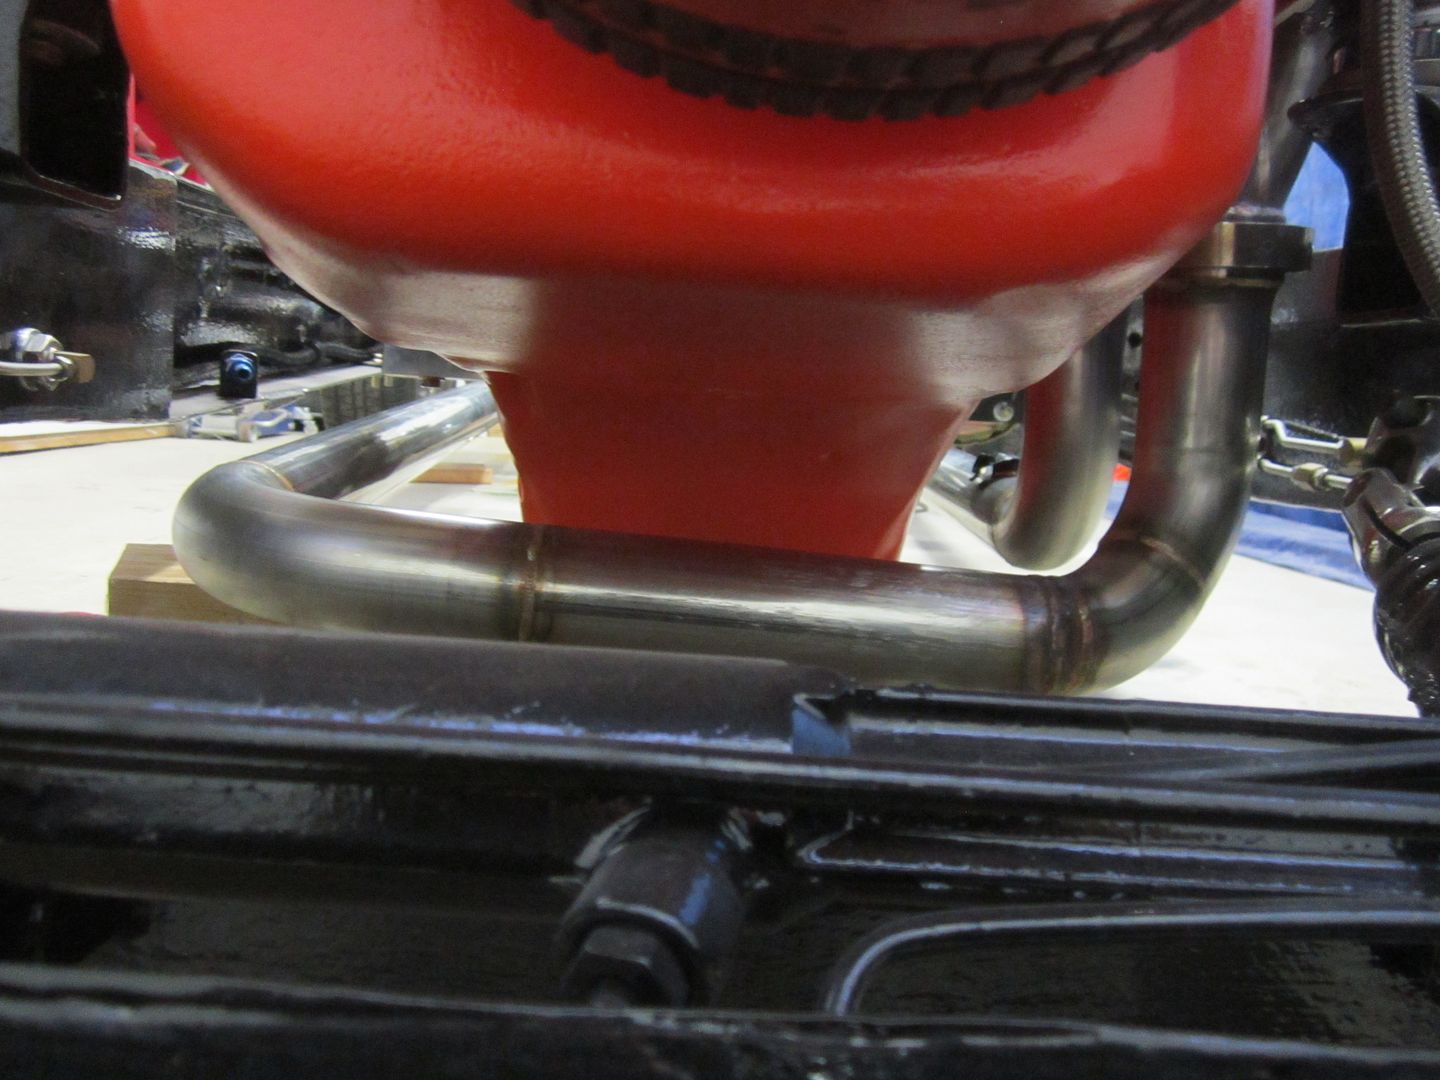 [/URL] [/URL]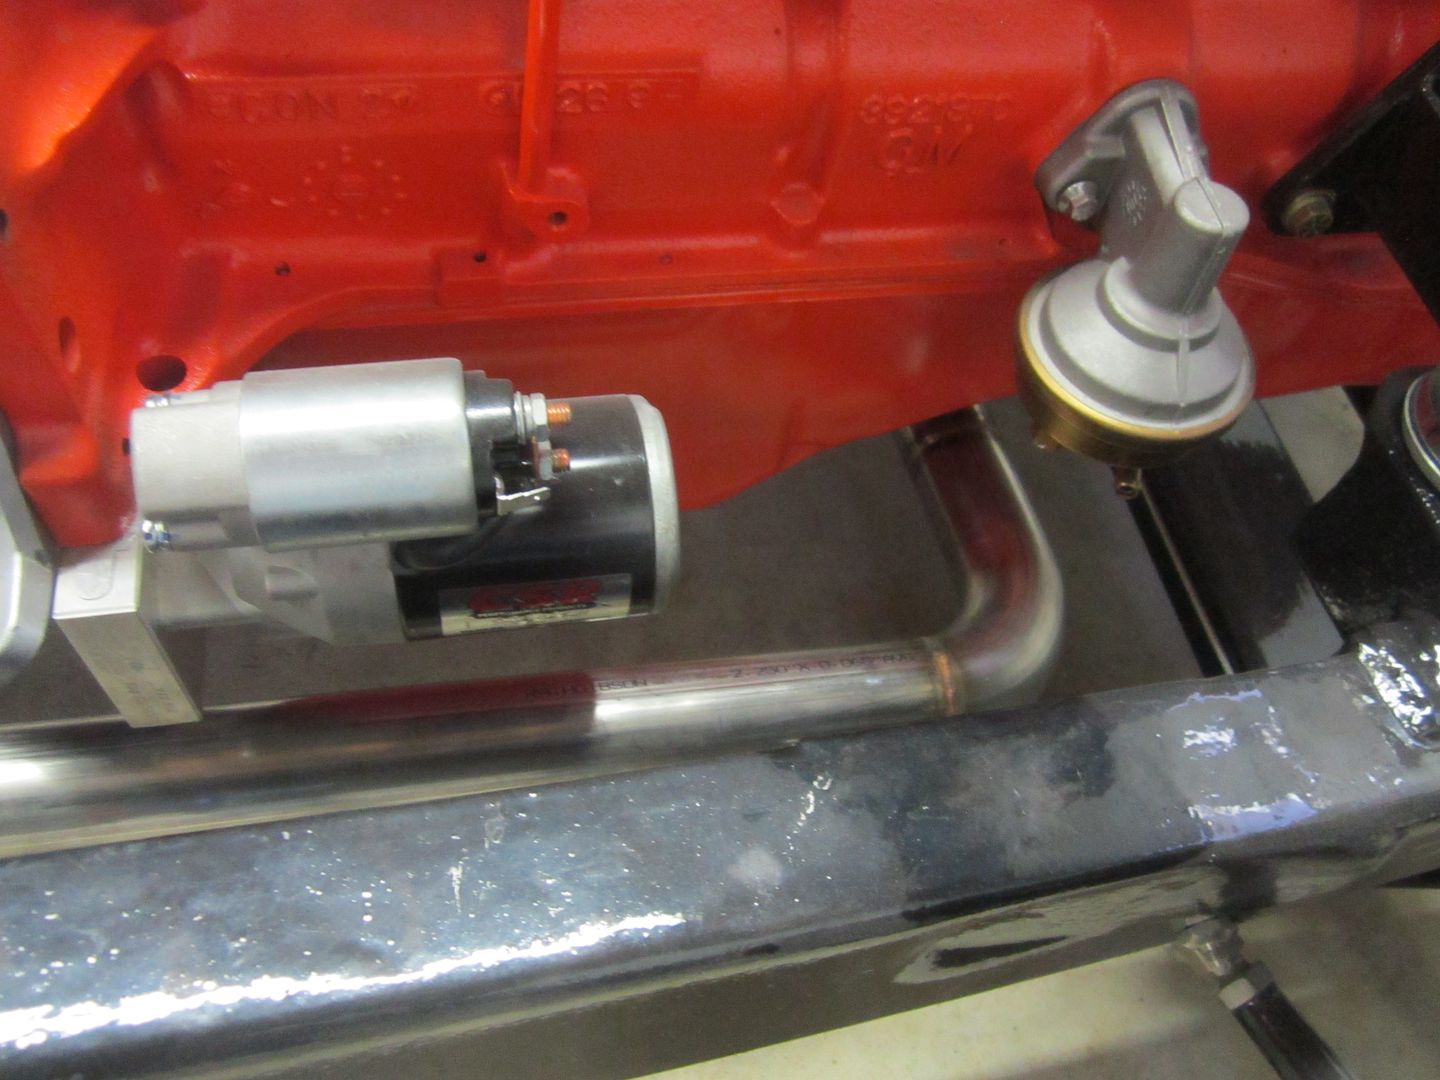 [/URL] [/URL]
|
|
|

|
|
|
#248 |
|
Registered User
Join Date: Dec 2010
Location: washington NJ
Posts: 766
|
Re: 46 pickemup in NJ "the Rebuild"
After $200 per gallon I guess theres no turning back now..............
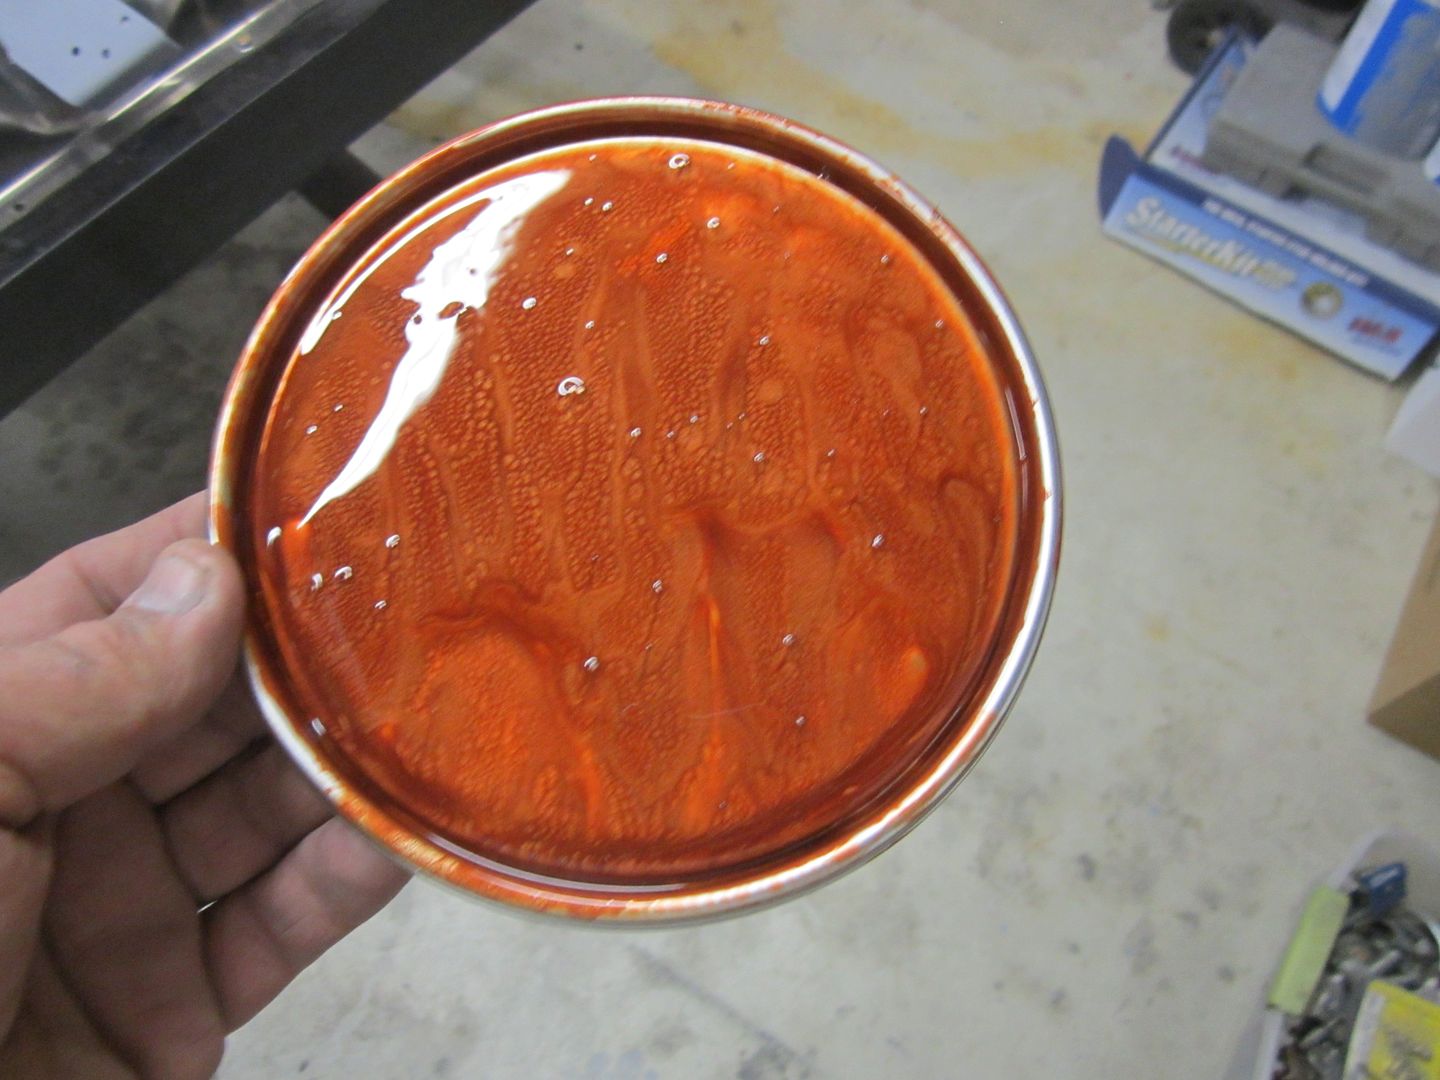 [/URL] [/URL]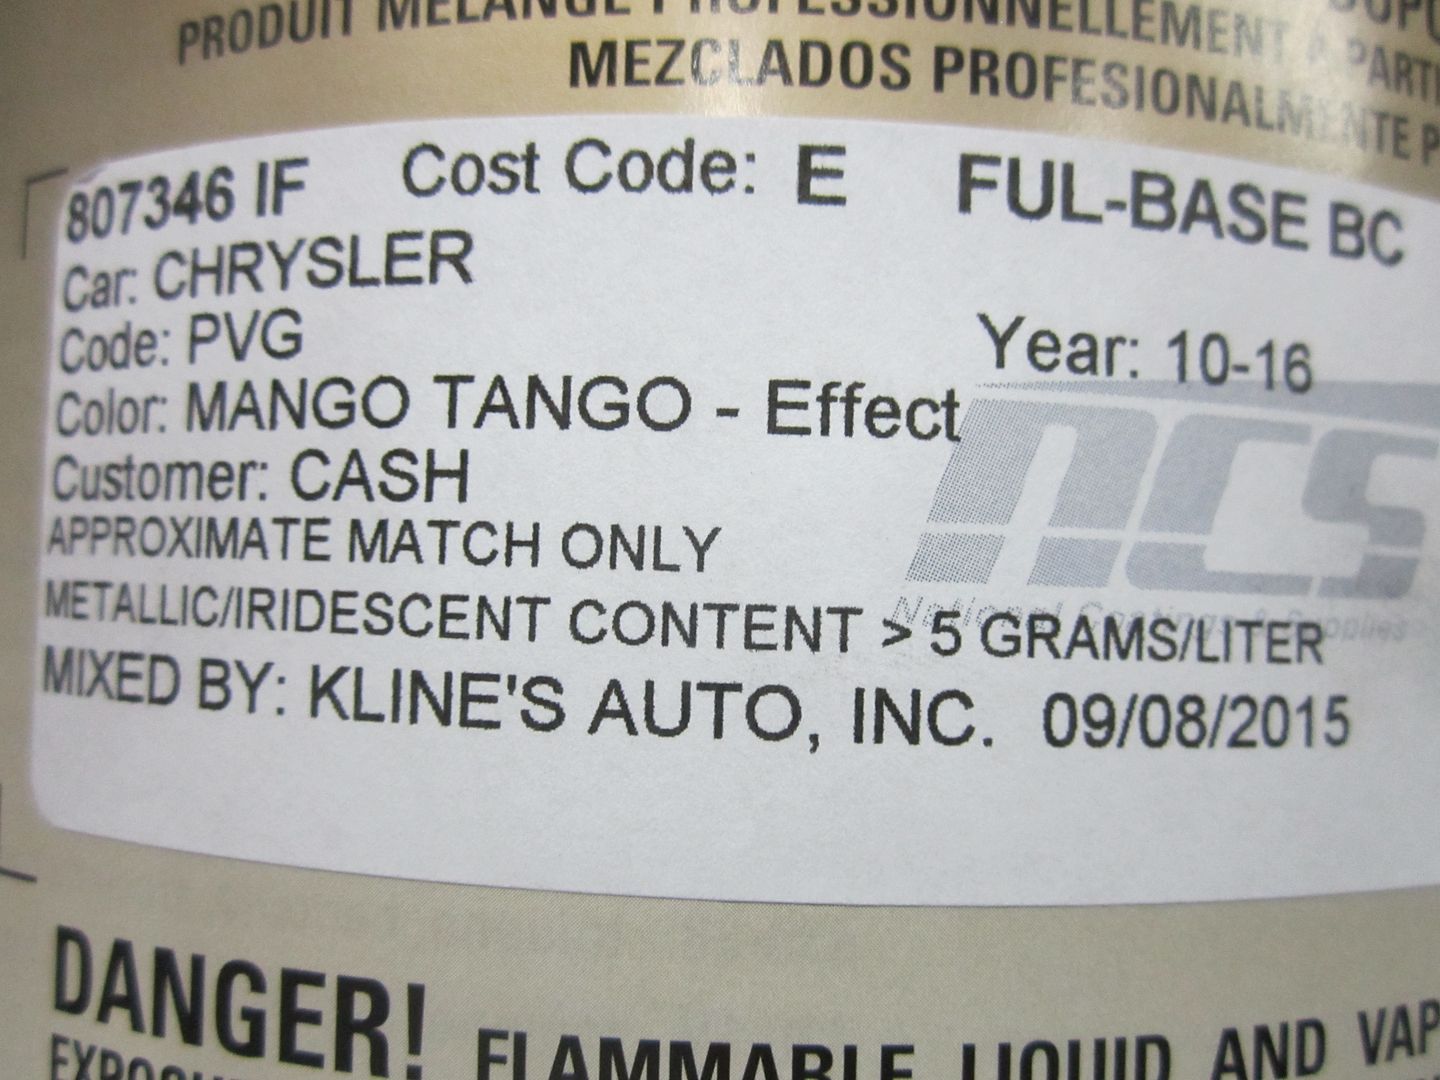 [/URL] [/URL]Customs trucks are gloss. Hot rod trucks are........ 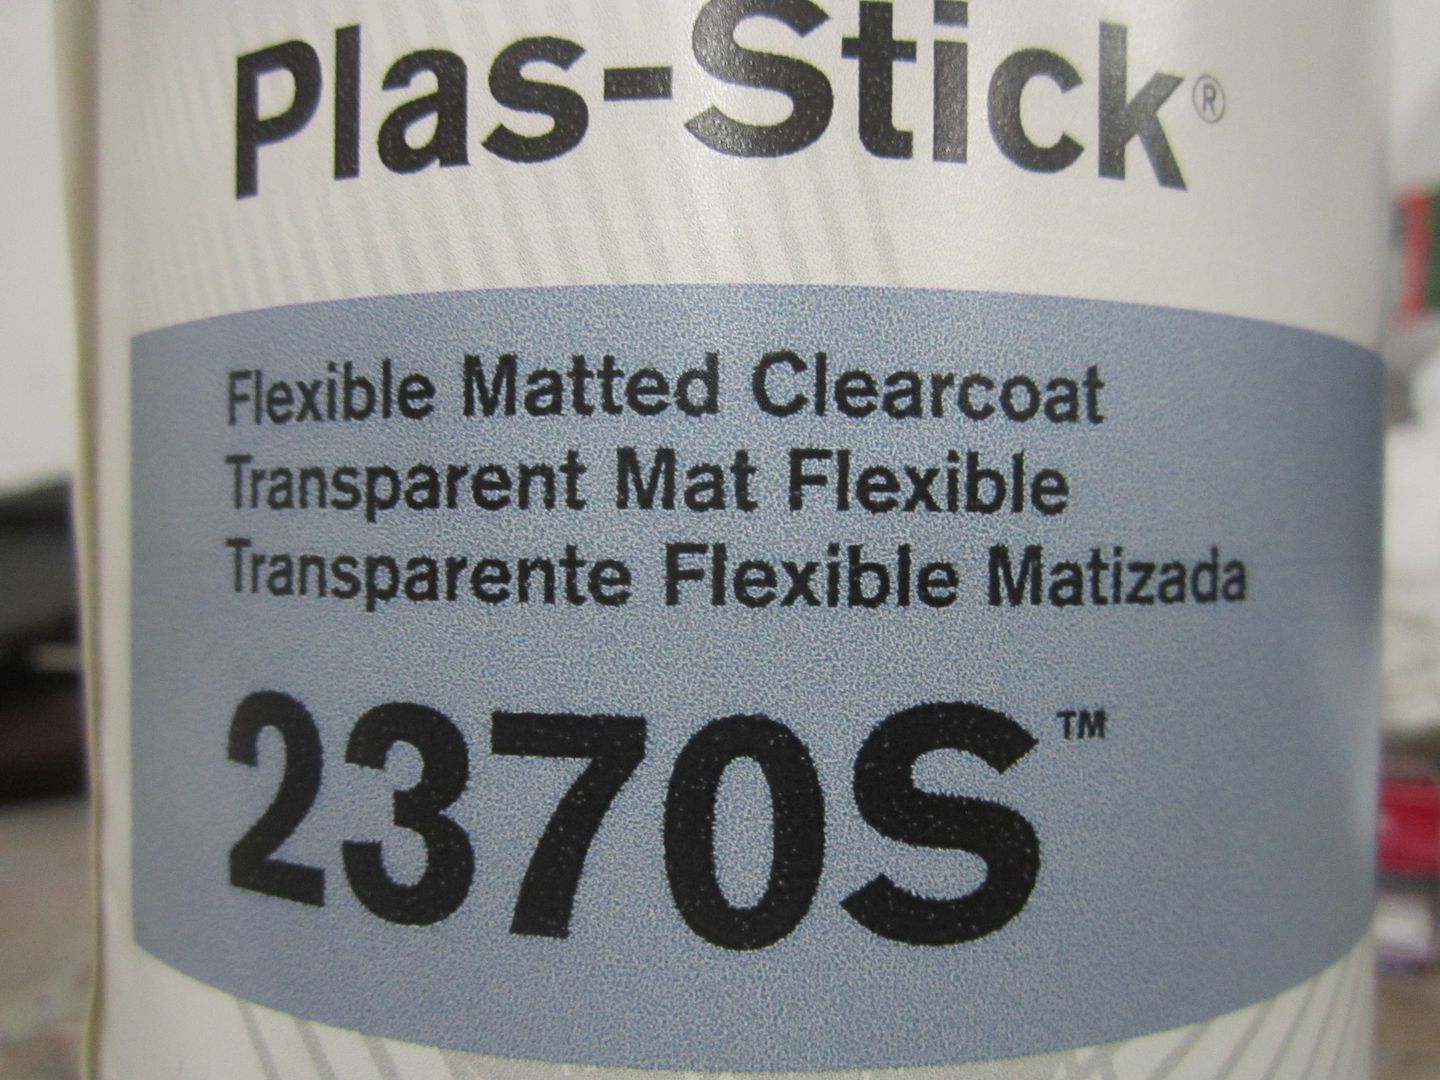 [/URL] [/URL]
|
|
|

|
|
|
#249 |
|
Registered User
 Join Date: Mar 2013
Location: Southern Oregon
Posts: 10,384
|
Re: 46 pickemup in NJ "the Rebuild"
Looks Pipetastic!
 Lovely paint to! Lovely paint to!
__________________
1966 Chevy C10 "Project Two Tone" http://67-72chevytrucks.com/vboard/s...d.php?t=596643 1964 GMC "Crustine" semi-build:http://67-72chevytrucks.com/vboard/s...d.php?t=665056 My youtube channel. Username "Military Chevy": https://www.youtube.com/channel/UC_h...fzpcUXyK_5-uiw |
|
|

|
|
|
#250 |
|
Registered User
Join Date: Dec 2010
Location: washington NJ
Posts: 766
|
Re: 46 pickemup in NJ "the Rebuild"
Mango, Tango, Tastic!........... Or, at the very least, more then acceptable. Just have doors, hood, and headlight buckets to do. It certainly is not worthy of any trophies but for someone who paints Kitchens and Bedrooms for a living, it's turning out way better then what I expected. Especially when you consider this is the first time doing something like this. Not to mention in my garage instead of a spray booth.
Of course there is some dust spots, but nothing I can't live with. The biggest problem is trying to lay the matte clear coat on all the pieces in an even consistent manor so as to achieve an even sheen. Because I have such a small space to work in I have to do a few parts each day. This causes problems because there is no way I can do the same exact tempo, speed and distance each day. Some of the pieces have a slightly different sheen because there's no way I can spray at the same distance and speed as I did the days prior. I think the best thing to do is once the truck is all together is give it a light scuff with 2000 and spray it one more time with a light coat to even things out. Ok, OK, I'll shut up and post pics. 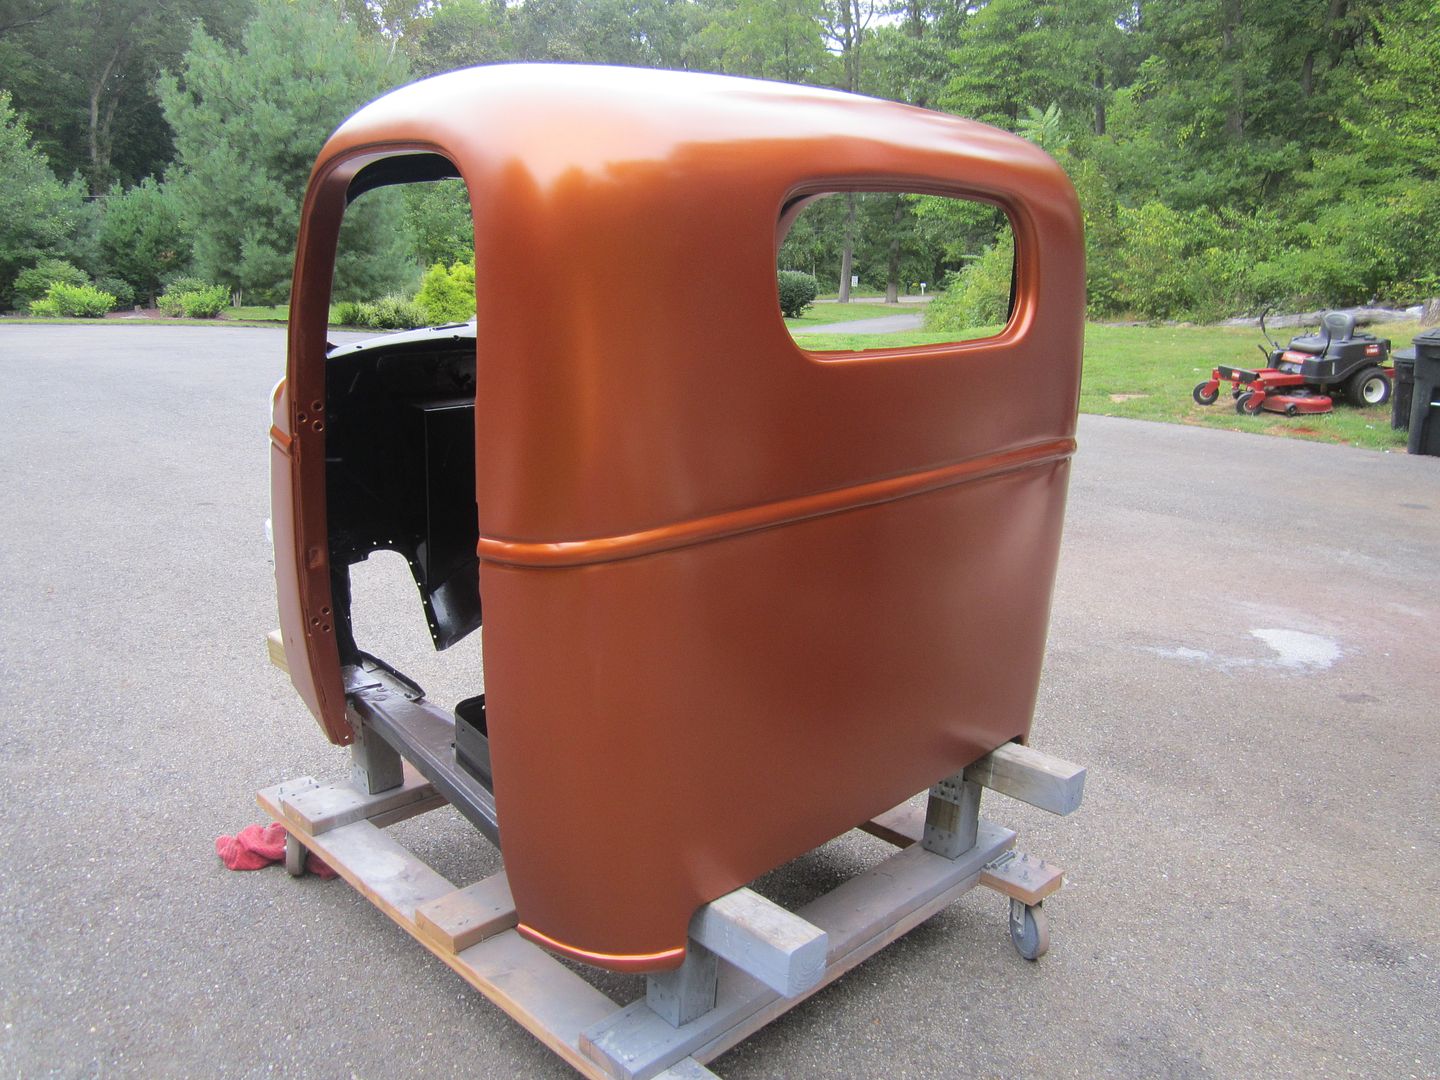 [/URL] [/URL]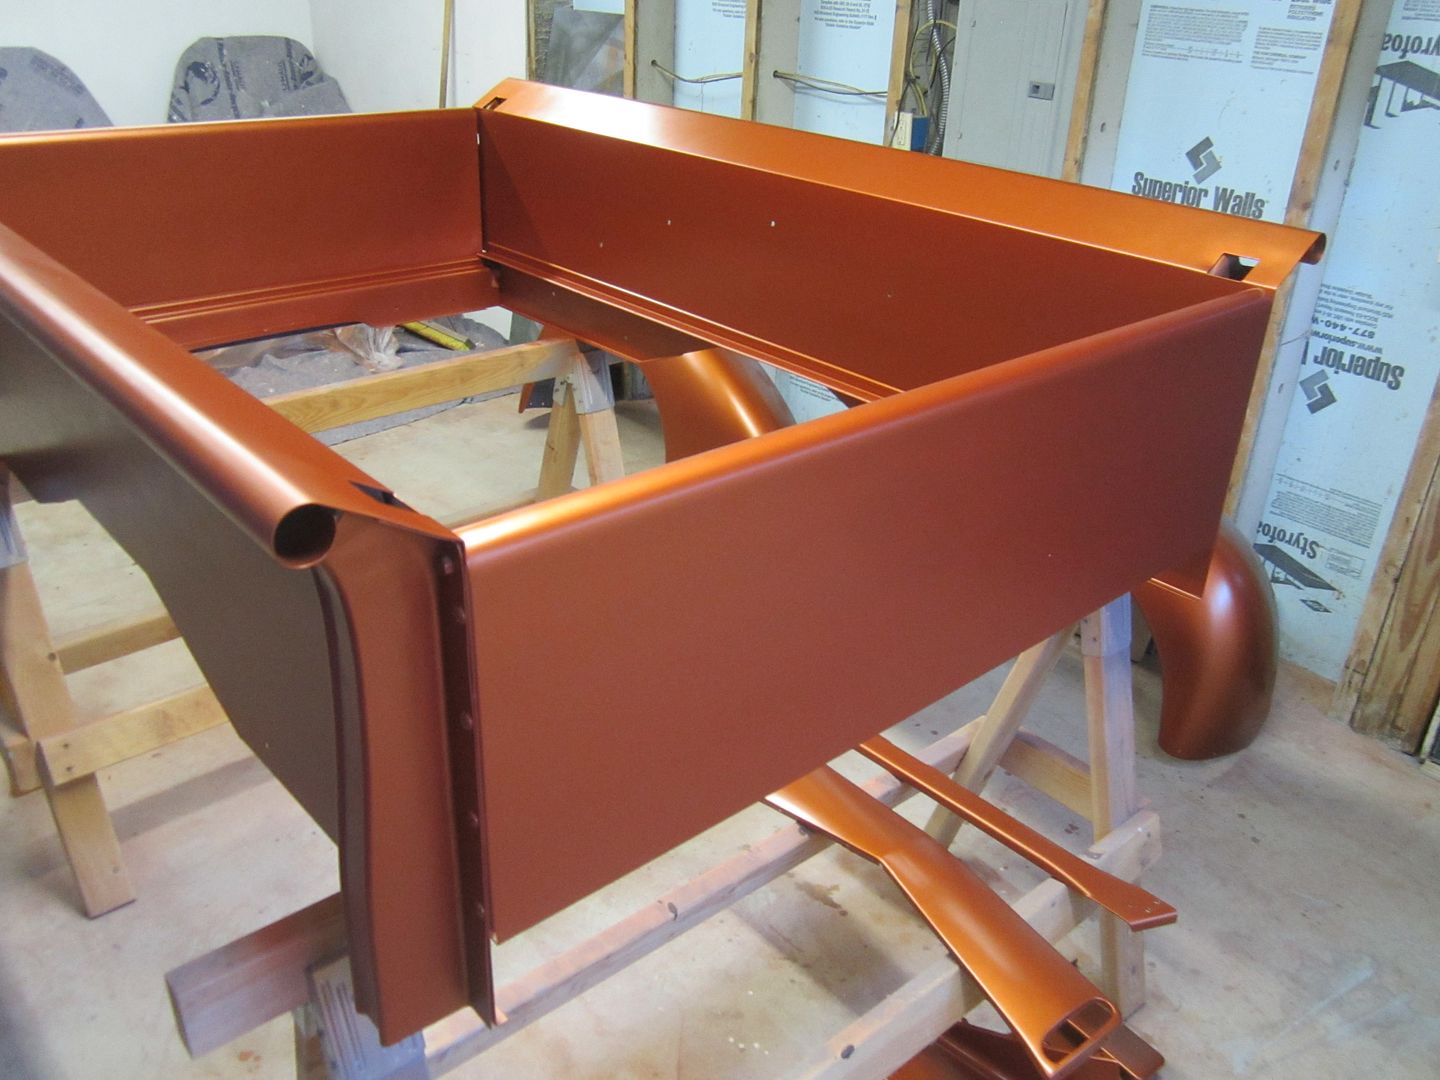 [/URL] [/URL]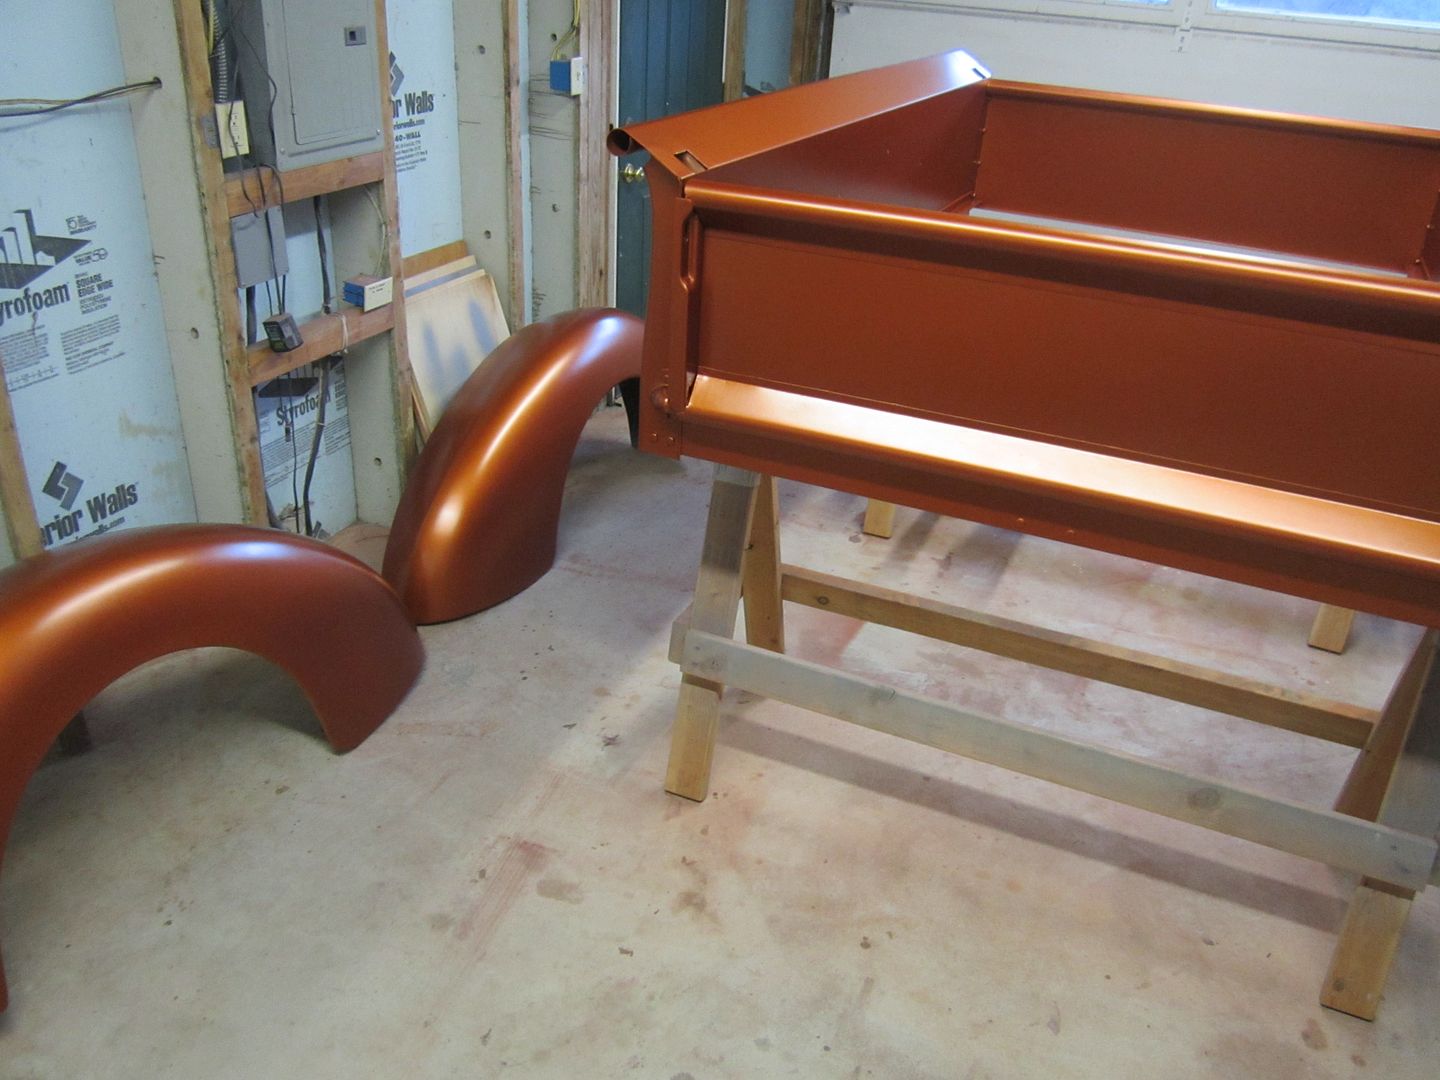 [/URL] [/URL]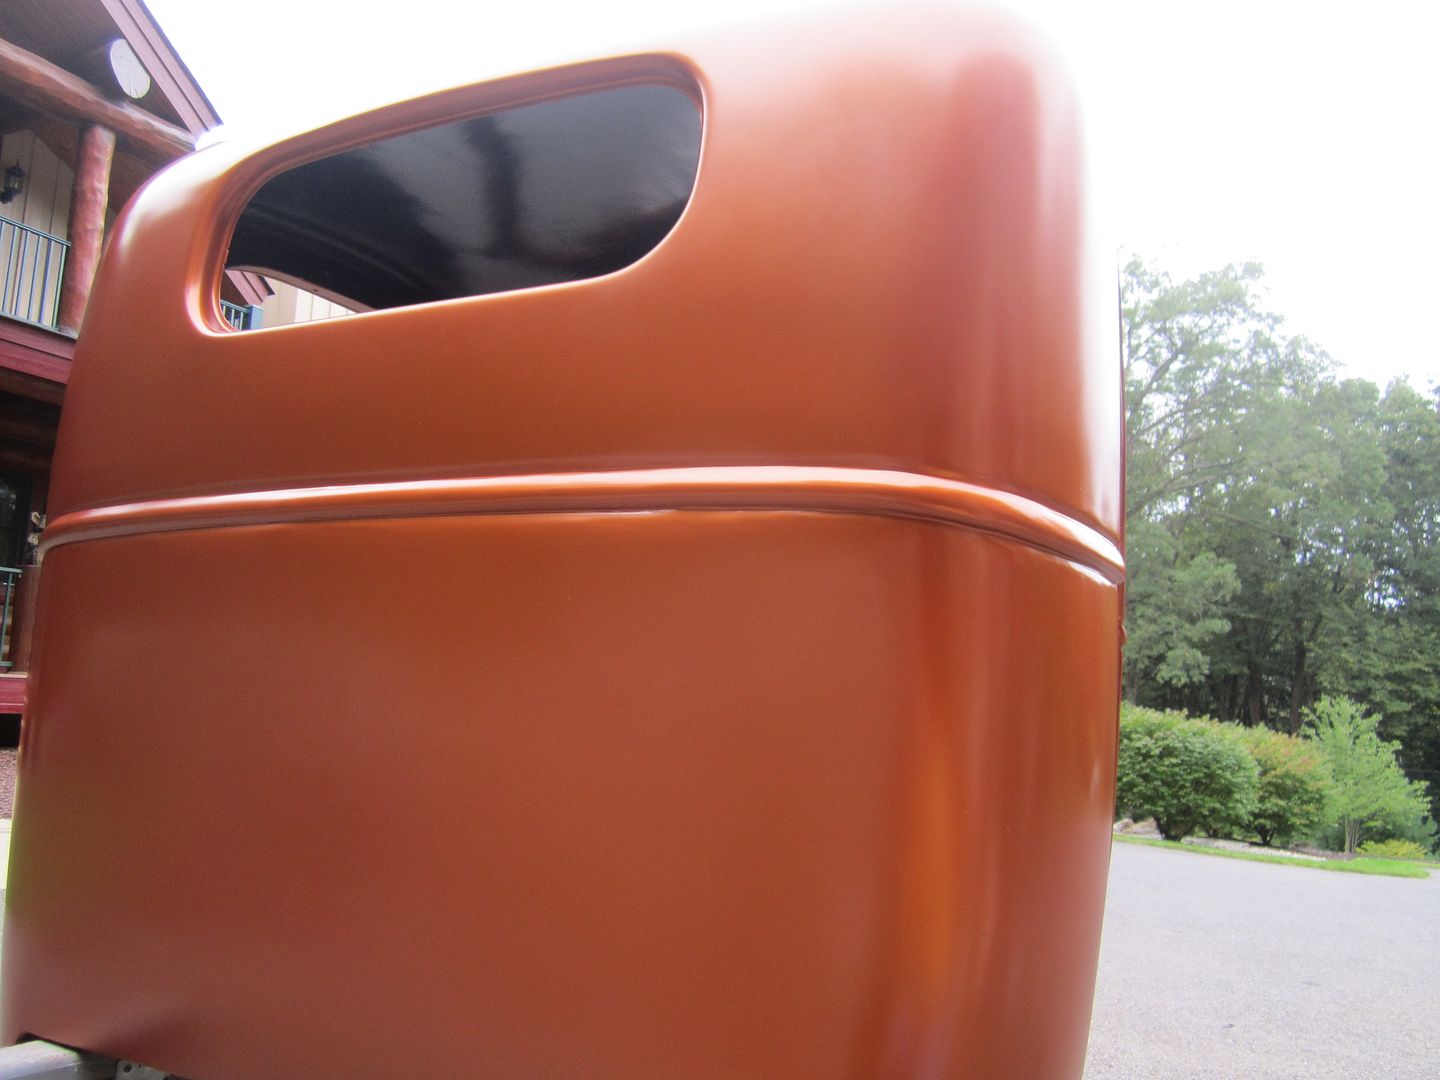 [/URL] [/URL]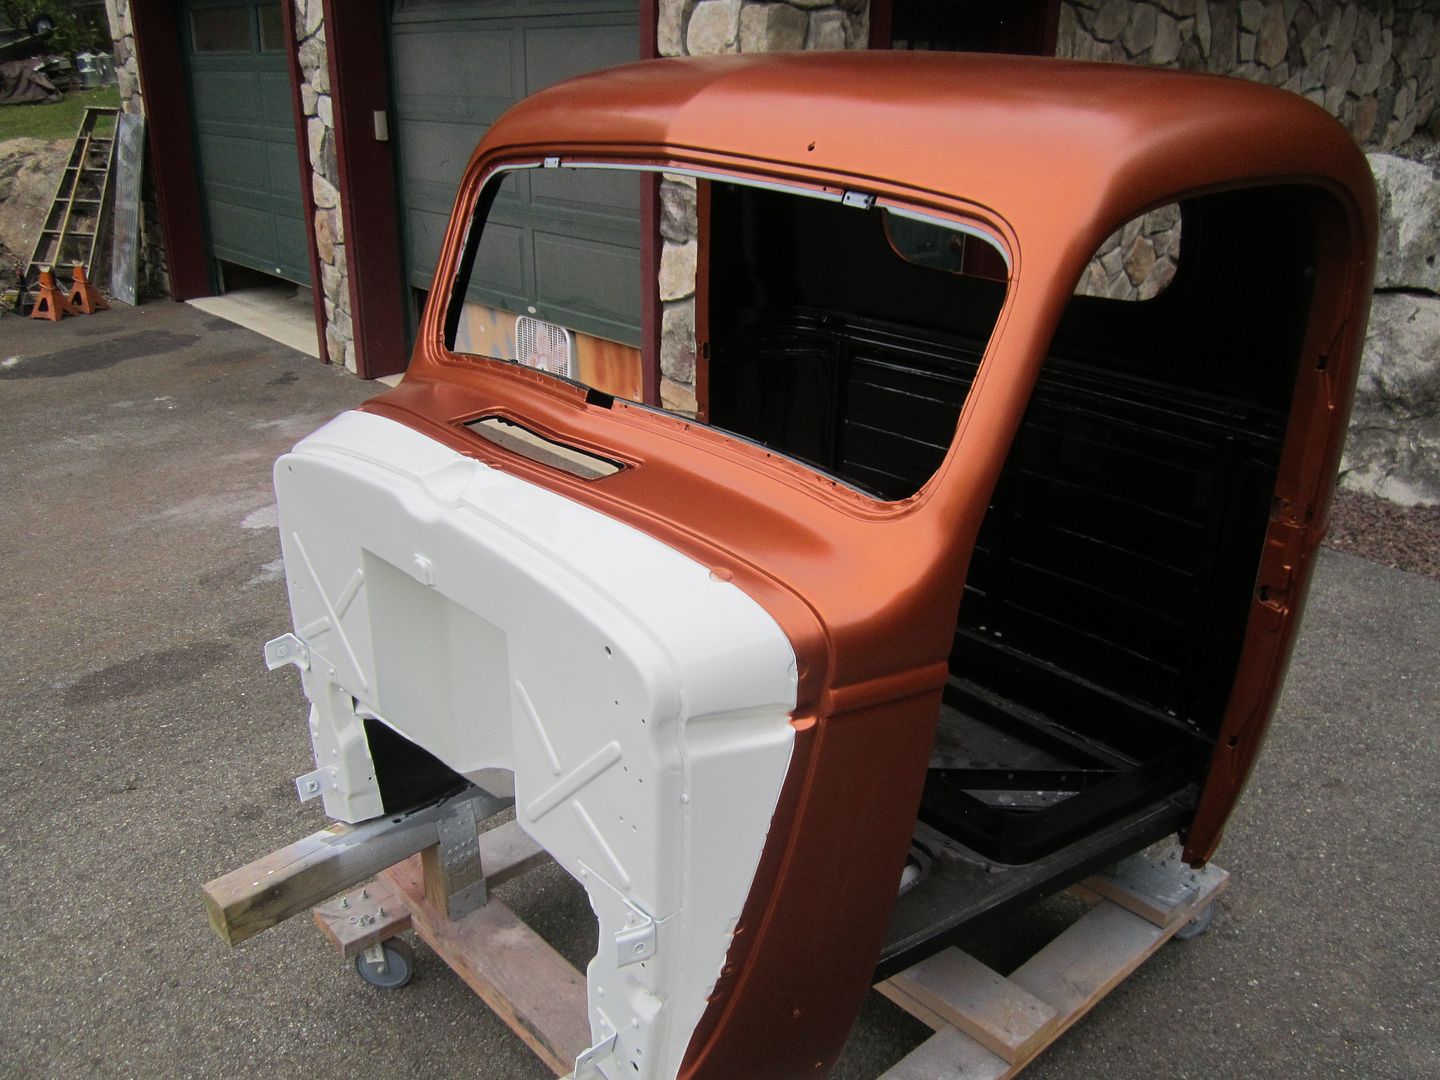 [/URL] [/URL]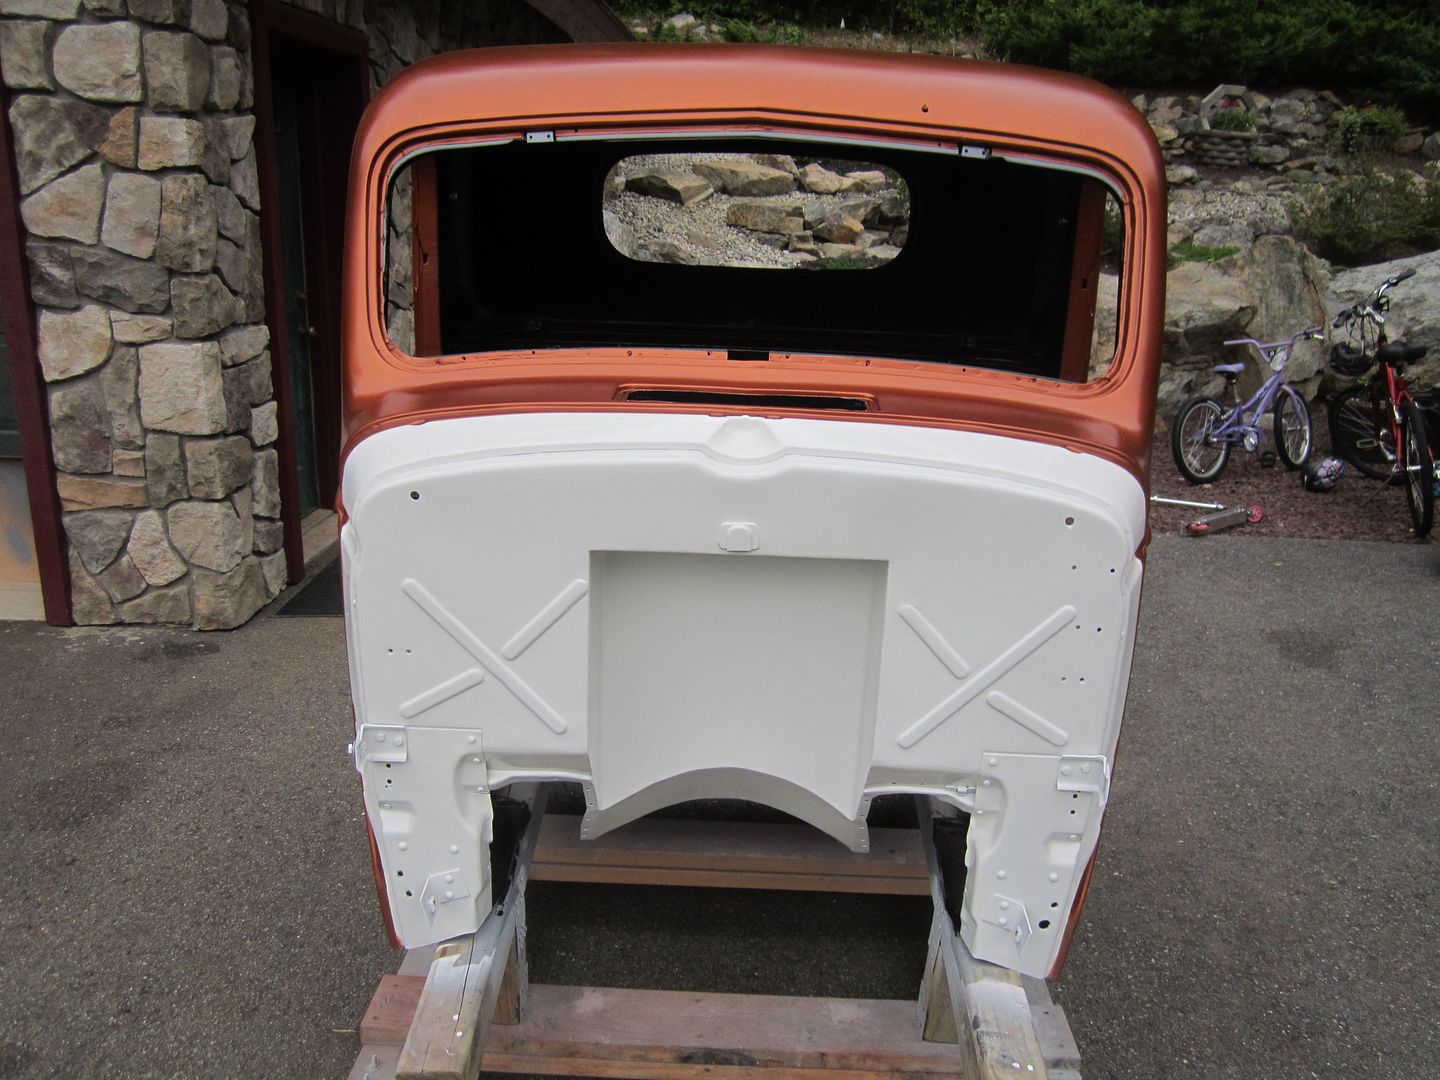 [/URL] [/URL]
|
|
|

|
 |
| Bookmarks |
|
|