
 |
|
|
#1026 |
|
Registered User
Join Date: Dec 2009
Location: Kirkland, WA
Posts: 1,302
|
Re: 1972 Chevy p/u NewType Build
This is what I had to do to line up the holes for my CPP crossmember
__________________
1968 LWB C20 / AC / Wood Bed |
|
|

|
|
|
#1027 |
|
Registered User
Join Date: Jul 2012
Location: Rosenberg, Texas
Posts: 3,506
|
Re: 1972 Chevy p/u NewType Build
Yep, did that. Got 6 of the 8 bolts in that way. The others are too far off to make that work. It's like 2/3 of the bolt hole is open, the other 3rd is covered, and it's off at an angle.
__________________
-Duane C/10 Club Texas member 1971 Chevy C10 "Brutus" SWB Fleetside 2016 6.0L (L96) 6L90E (driver/project) 1965 Pontiac GTO "Royal Goat" 400/TH400 w/AC (my baby) |
|
|

|
|
|
#1028 |
|
Registered User
Join Date: Feb 2012
Location: turlock
Posts: 2,177
|
Re: 1972 Chevy p/u NewType Build
I agree although idk why I didn't look at the bolts or holes in the new piece in the first place but that was odd. Took some drilling and no I had to cut and drill out the top rivets on the passenger side what an absolute pain in the ass it all was.. had the same issue with the top holes bein too far away so I just used a heavy tow strap ratchet and for every one or two clicks I was able to put a bolt in. Had me scared as hell with my incision area just inches from that strap and the possibility of breaking but with some brute force and a mean pry bar I got it all together. Definitely not a job to do when the cab is in place that's for sure..
__________________
 Project NewType 1972 Chevy C/10 Cheyenne Super ( Daily Driven Showtruck ) http://67-72chevytrucks.com/vboard/s...d.php?t=507903 Project NewType 1972 Chevy C/10 Cheyenne Super ( Daily Driven Showtruck ) http://67-72chevytrucks.com/vboard/s...d.php?t=507903Project Great Grandpa's Legacy 1973 Chevy C/10 Cheyenne ( Current daily driver collecting big time parts ) http://67-72chevytrucks.com/vboard/s...89#post7084289 - Dylan (209)-985-7721 |
|
|

|
|
|
#1029 |
|
Senior Member
 Join Date: Jan 2012
Location: Estevan, Saskatchewan
Posts: 1,025
|
Re: 1972 Chevy p/u NewType Build
should have just rubbed some maple syrup on it
|
|
|

|
|
|
#1030 |
|
Registered User
Join Date: Feb 2012
Location: turlock
Posts: 2,177
|
Re: 1972 Chevy p/u NewType Build
I wish it was that easy
  I'll be updating a bit tonight boys. I was a busy bee this weekend and will be for most of this week but it's all in the love of a truck am I right? 
__________________
 Project NewType 1972 Chevy C/10 Cheyenne Super ( Daily Driven Showtruck ) http://67-72chevytrucks.com/vboard/s...d.php?t=507903 Project NewType 1972 Chevy C/10 Cheyenne Super ( Daily Driven Showtruck ) http://67-72chevytrucks.com/vboard/s...d.php?t=507903Project Great Grandpa's Legacy 1973 Chevy C/10 Cheyenne ( Current daily driver collecting big time parts ) http://67-72chevytrucks.com/vboard/s...89#post7084289 - Dylan (209)-985-7721 |
|
|

|
|
|
#1031 |
|
Registered User
Join Date: Feb 2012
Location: turlock
Posts: 2,177
|
Re: 1972 Chevy p/u NewType Build
Alrighty! Back to it, Friday and Saturday morning brought forth some solid progress taking care of a much needed collector gasket swap as the ones from Doug Thorley did not last more than the year or so they were on.. bummer but onto better horizons with the old faithful I always had with my longtime style headers. Installed the shocks and know that I'll definitely need to grab some that have about two inches less on the maximum squat and at least 3" shorter overall now that I'm much lower getting rid of the blocks under the axle. Oh well they're old now anyway. Stopped by the hardware store and picked up some steel spacers and a flange bushing as well to take up the massive space having to run a smaller size bolt in the bottom of the bag through the trailing arm. If I had access to a lathe I would absolutely run the correct size and mill and thread to the size needed but alas I don't this round :/
Bags are in officially now utilizing the factory spring bolt location by upping the size to the larger mounting bolt I used in the spacer cup. With those tasks completed I could take care of running the rear bag lines down the frame and doing a quick pressure test and all passed and held through the night! Bring on Saturday morning as I cleaned up a bit and started work on the air control plate that will hang from the back rail of the bed frame. I utilized some 18" wide 22 gauge steel from the rack at OSH and built my redneck engineered "brake" to get a nice 40 degree bend in the plate so that the fittings can be accessed and aired between the bumper and tailgate space without interference from the gate dropping down on the schrader valves accidentally. I'll probably end up creating another one down the road after I get through the summer as the paint and finish edges didn't turn out great by the time I finished it and installed, oh well it's not a feature that will be staying long and is just a creature comfort at this point vs. crawling under the bumper. Accidentally crushed the seal on the pinion so had to get a new crush sleeve with seal to take care of a leak and put maybe 100 something foot lbs of torque on the new yoke to take care of that procedure. Driveline has a TON more room between the manifolds now with them being pulled up and out from the center. Gained a little room with the new yoke being a shorter overall height also. My good buddy Jeremy helped bleed the rear brakes with me and took care of the gear oil loss and helped keep me motivated. Definitely couldn't do this without all their help from pops to the few good friends I have left from school. It pays to be a good soul most days right? MORE TO COME! 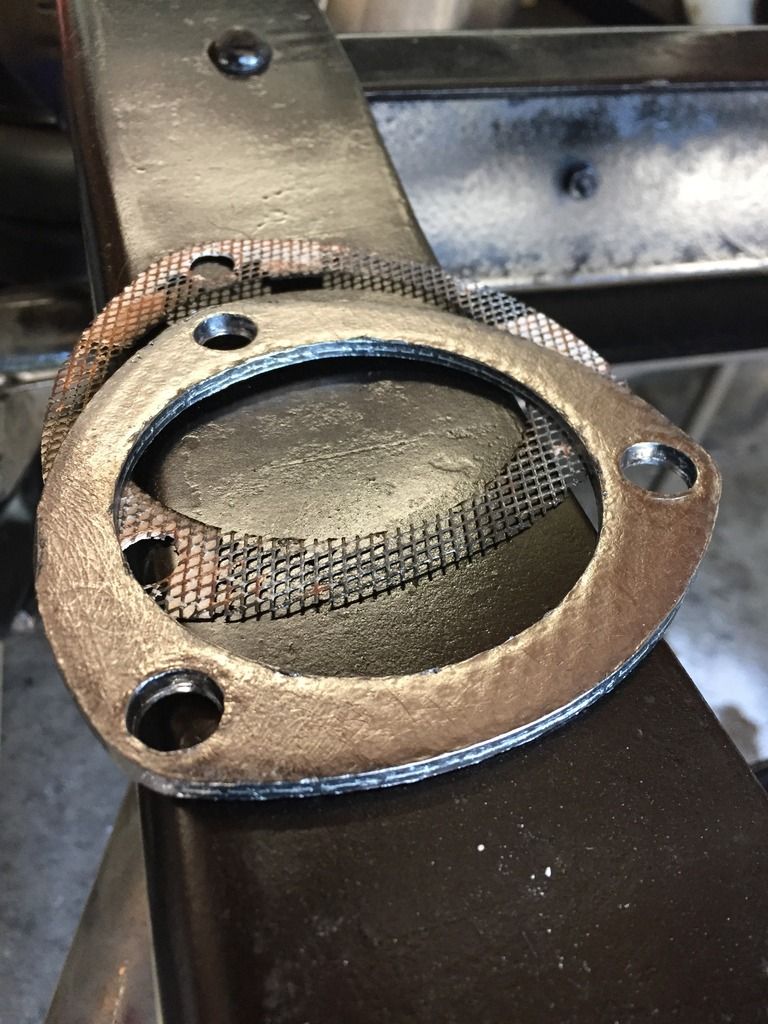 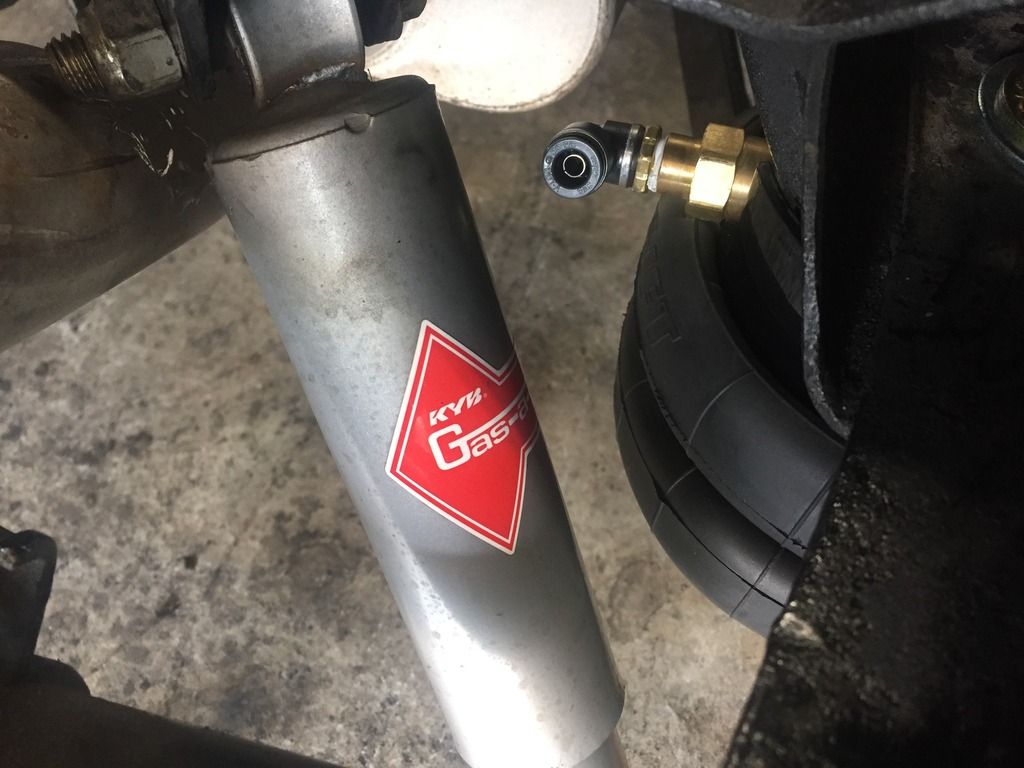 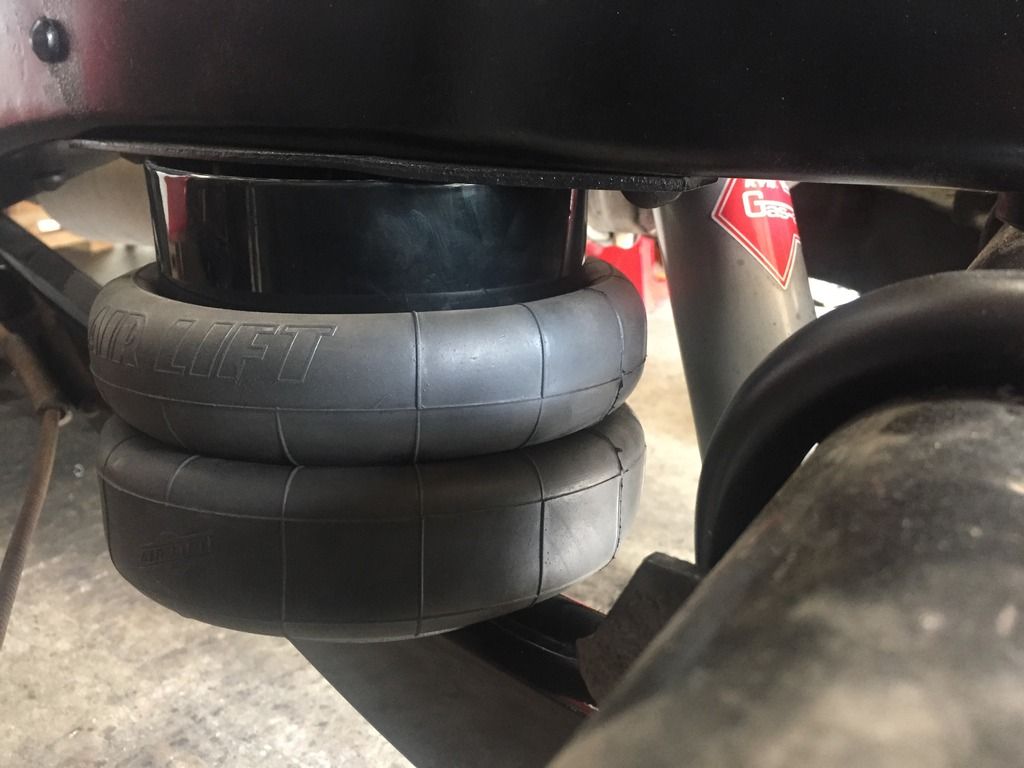 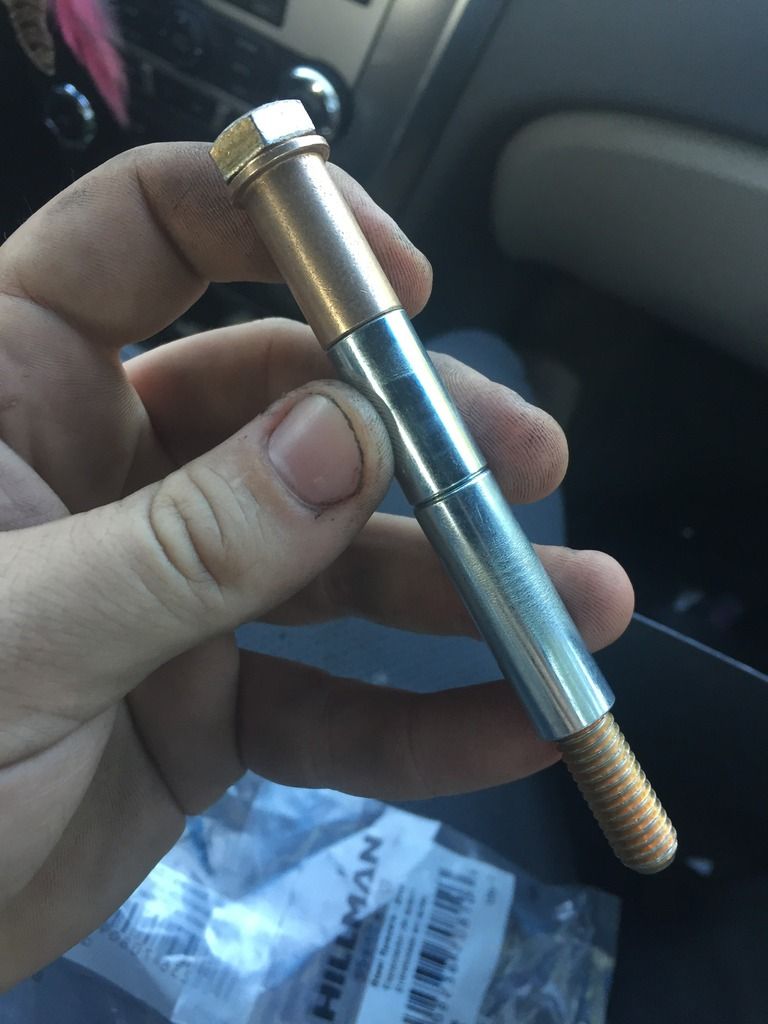 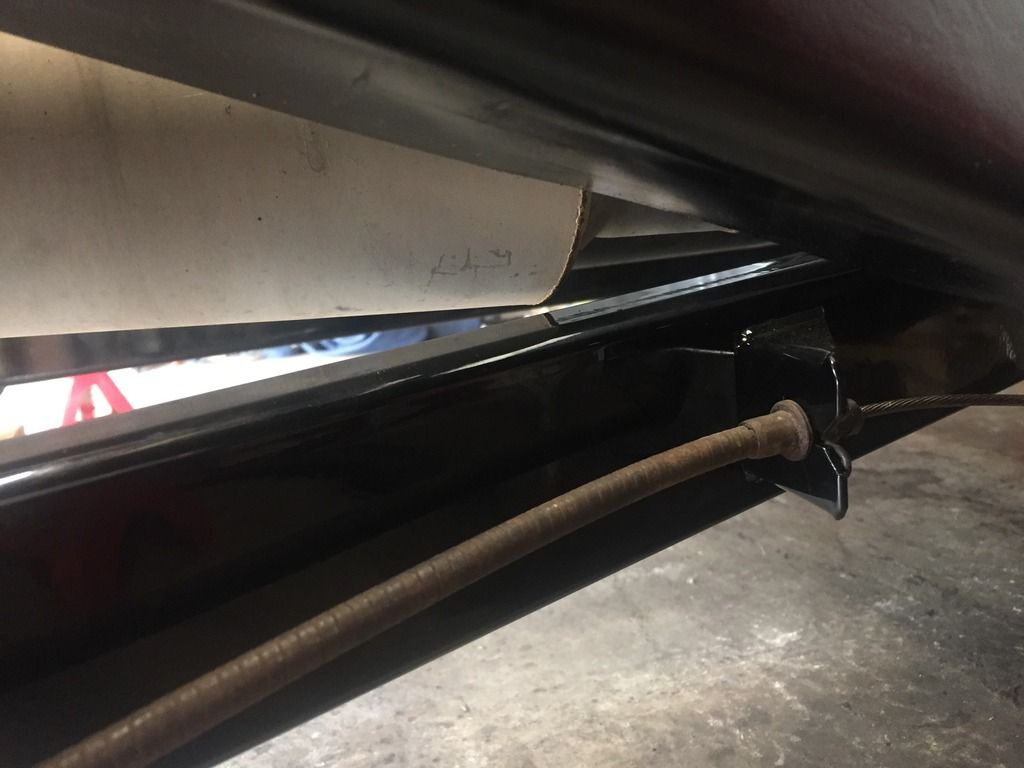 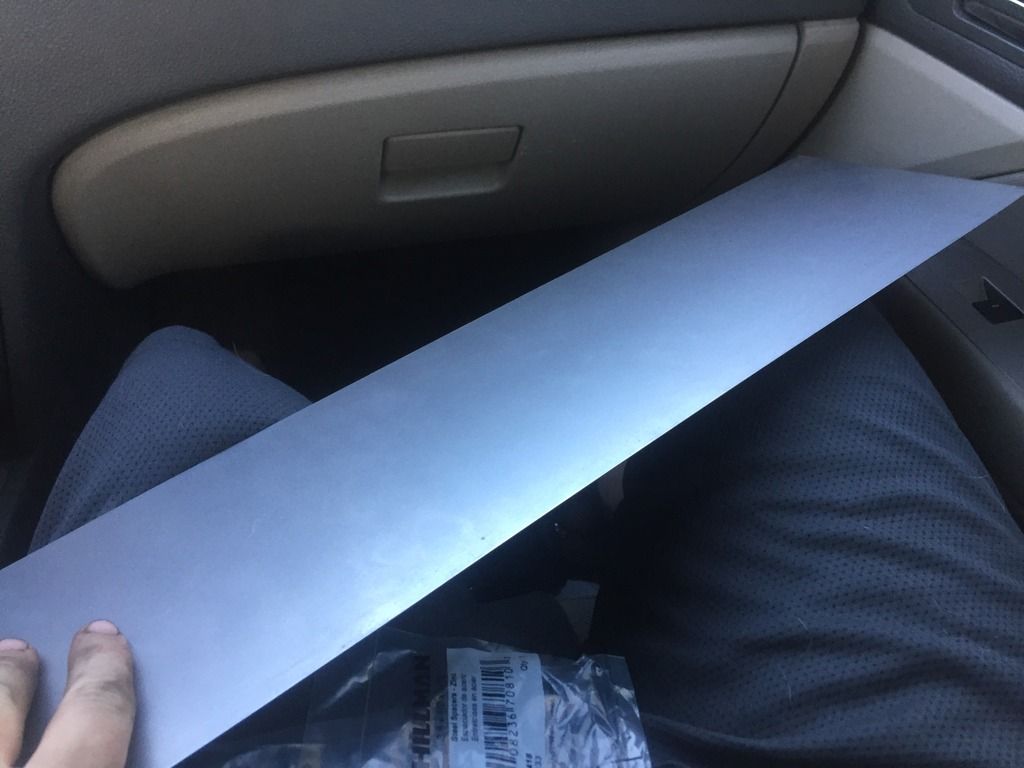 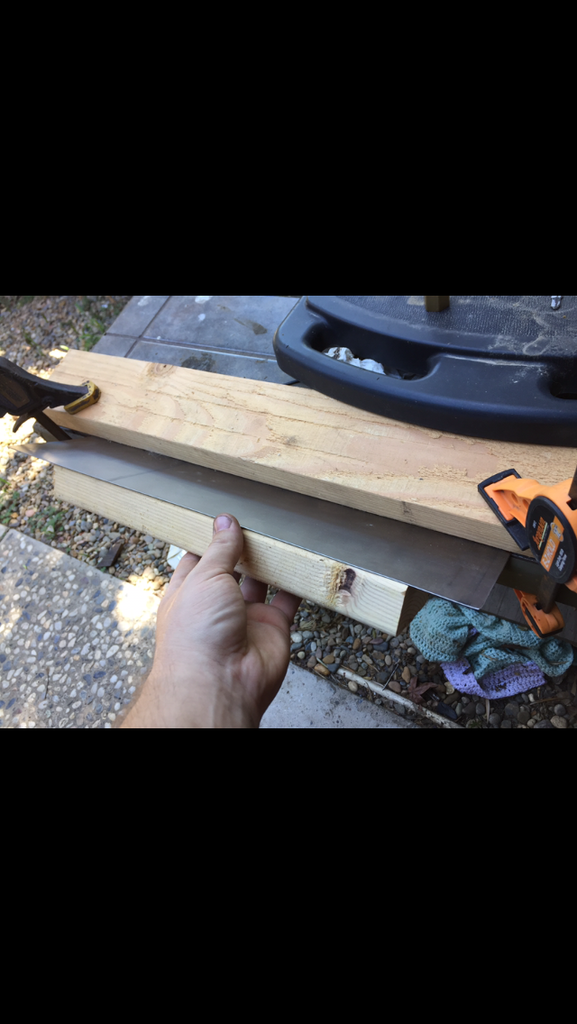 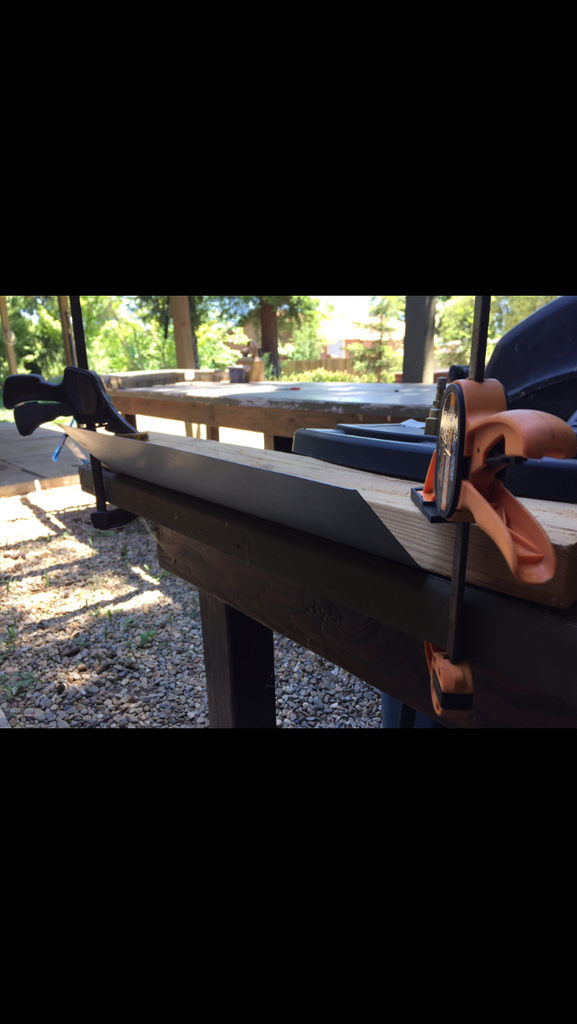 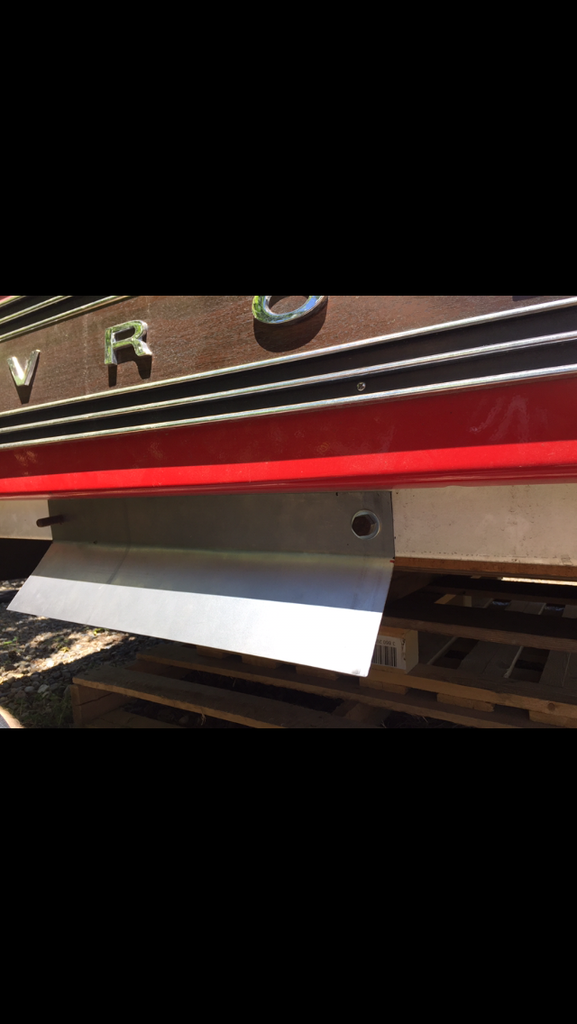 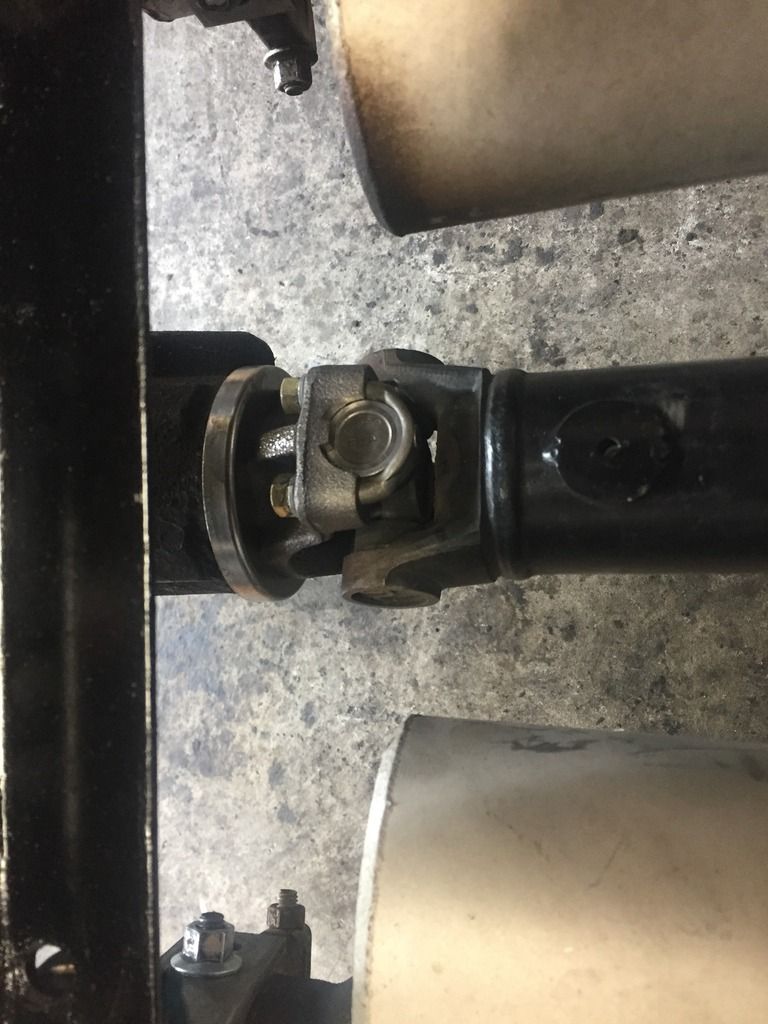 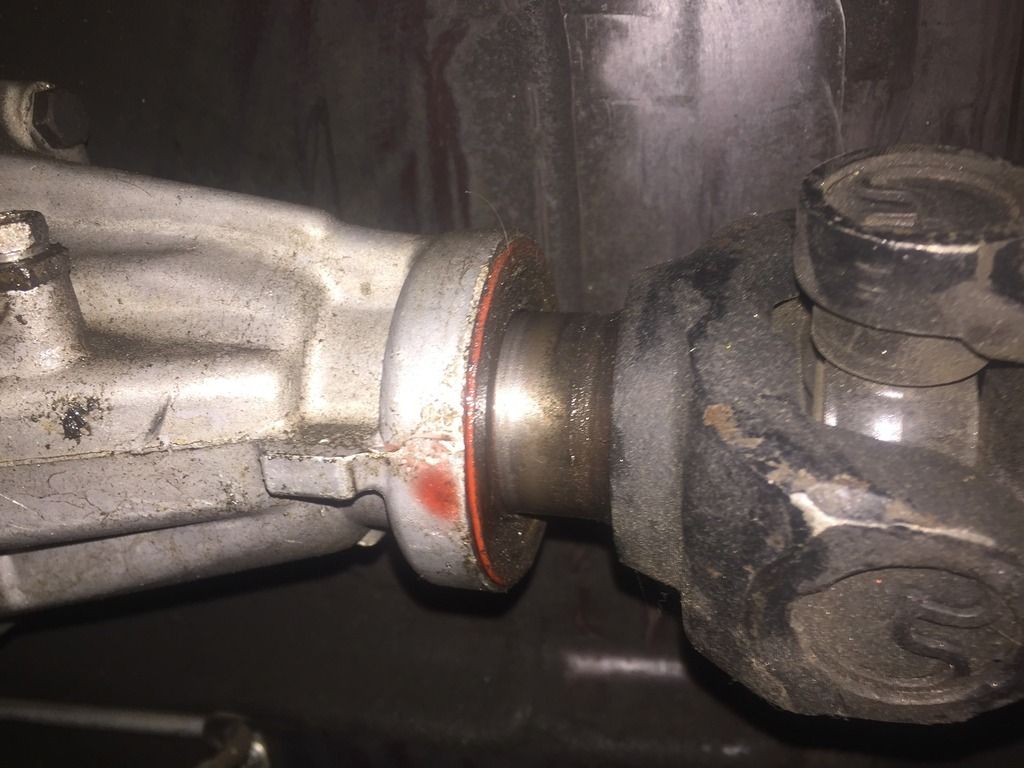
__________________
 Project NewType 1972 Chevy C/10 Cheyenne Super ( Daily Driven Showtruck ) http://67-72chevytrucks.com/vboard/s...d.php?t=507903 Project NewType 1972 Chevy C/10 Cheyenne Super ( Daily Driven Showtruck ) http://67-72chevytrucks.com/vboard/s...d.php?t=507903Project Great Grandpa's Legacy 1973 Chevy C/10 Cheyenne ( Current daily driver collecting big time parts ) http://67-72chevytrucks.com/vboard/s...89#post7084289 - Dylan (209)-985-7721 |
|
|

|
|
|
#1032 |
|
Registered User
Join Date: Jun 2014
Location: Mocksville, NC
Posts: 1,765
|
Re: 1972 Chevy p/u NewType Build
Another quality build. Very nice work. I can't believe I haven't run across this build yet.
__________________
Builds: Green Gus the 68 C10 | Bluey the 72 1500 | Lowly the 70 C10 - Instagram: @dr.hewitt - C10 Concept/Development Photos: Master Thread |
|
|

|
|
|
#1033 |
|
Registered User
Join Date: Jun 2016
Location: Visalia California
Posts: 891
|
Re: 1972 Chevy p/u NewType Build
Awesome work can't wait to see it one day.
|
|
|

|
|
|
#1034 | |
|
Registered User
Join Date: Feb 2012
Location: turlock
Posts: 2,177
|
Re: 1972 Chevy p/u NewType Build
Quote:
And absolutely Jason7121, she sticks out around town and I should be doing more out of town shows by late summer/fall
__________________
 Project NewType 1972 Chevy C/10 Cheyenne Super ( Daily Driven Showtruck ) http://67-72chevytrucks.com/vboard/s...d.php?t=507903 Project NewType 1972 Chevy C/10 Cheyenne Super ( Daily Driven Showtruck ) http://67-72chevytrucks.com/vboard/s...d.php?t=507903Project Great Grandpa's Legacy 1973 Chevy C/10 Cheyenne ( Current daily driver collecting big time parts ) http://67-72chevytrucks.com/vboard/s...89#post7084289 - Dylan (209)-985-7721 |
|
|
|

|
|
|
#1035 |
|
Registered User
Join Date: Feb 2012
Location: turlock
Posts: 2,177
|
Re: 1972 Chevy p/u NewType Build
Saturday afternoon. Brought forth the long awaited bed placement!! With the help of pops and a family friends as well as couple of my buddies we easily got the bed back where it belonged so that I could begin finalizing air line length and air fitting panel placement. I had some other errands to run that evening so that was as far as I got for the day but Sunday morning brought forth adding all the bed bolts and shimming about three washers thick on the left rear corner as the truck has a major frame twist that disappoints me to no end most days but alas all you can do is try and hide it for the time being. I was able to get the panel painted and trimmed up quite a bit as the bumper was quite a bit closer than initially expected, I took care of seal the fitting properly on each side of the panel and tightened my air line for the last time into the blocks on the back side. I'm very happy with the end result and it makes for quick accessible adjustments as needed for shows and road travel. Back on the ground she goes and a quick fluid check before the maiden voyage checks out smoothly so away we went and boy.. boy oh boy.. you can't ask for much more than an absolutely pristine problem free voyage as the one ole Foghorn Leghorn gave as everything checked out smooth and fully operable.
Ride: as if I were on air!! No squeaks nor harsh metal clashing when hitting dips in the road. Vibration at speed: absolutely Bull and void! I can't believe I was running near a full 1/8" of play on that old yoke so happy to have my 60-70 mph smoothness back and not have my teeth rattled thouroughly Happiness: through the roof. I'm so stoked the rear has gone as smoothly as it has. All there is now is to wait for the front end parts to wrap this update up next month.. I'll get into that at a later post As expected here are some beauty shots to compliment my mediocre writing skills  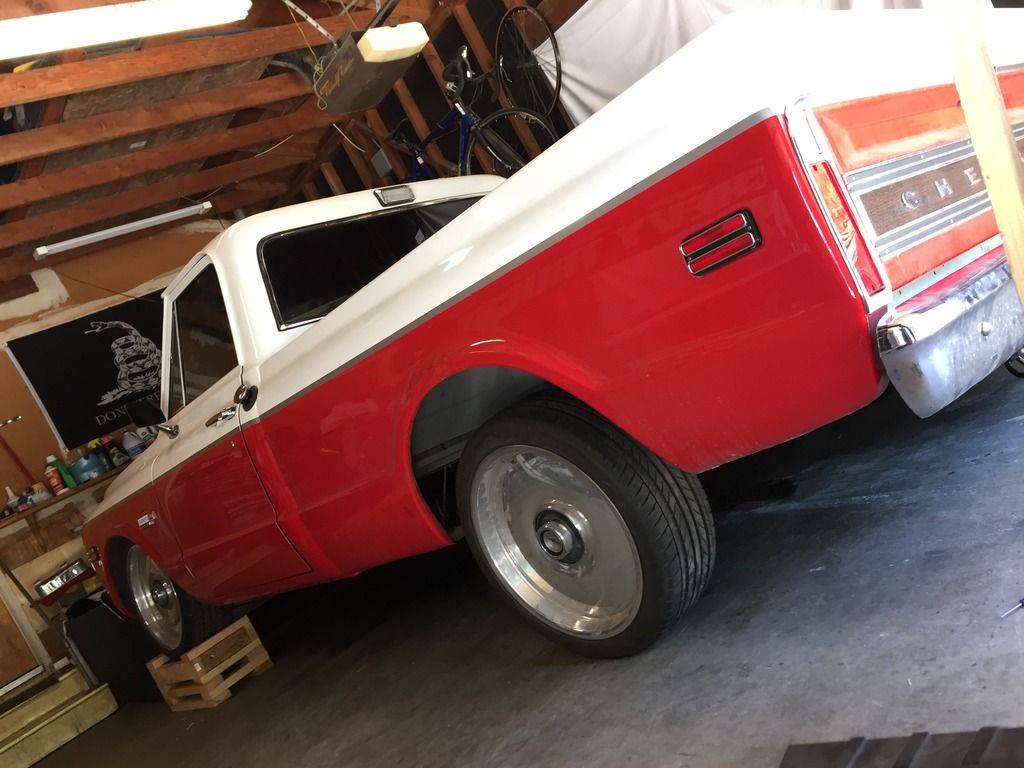 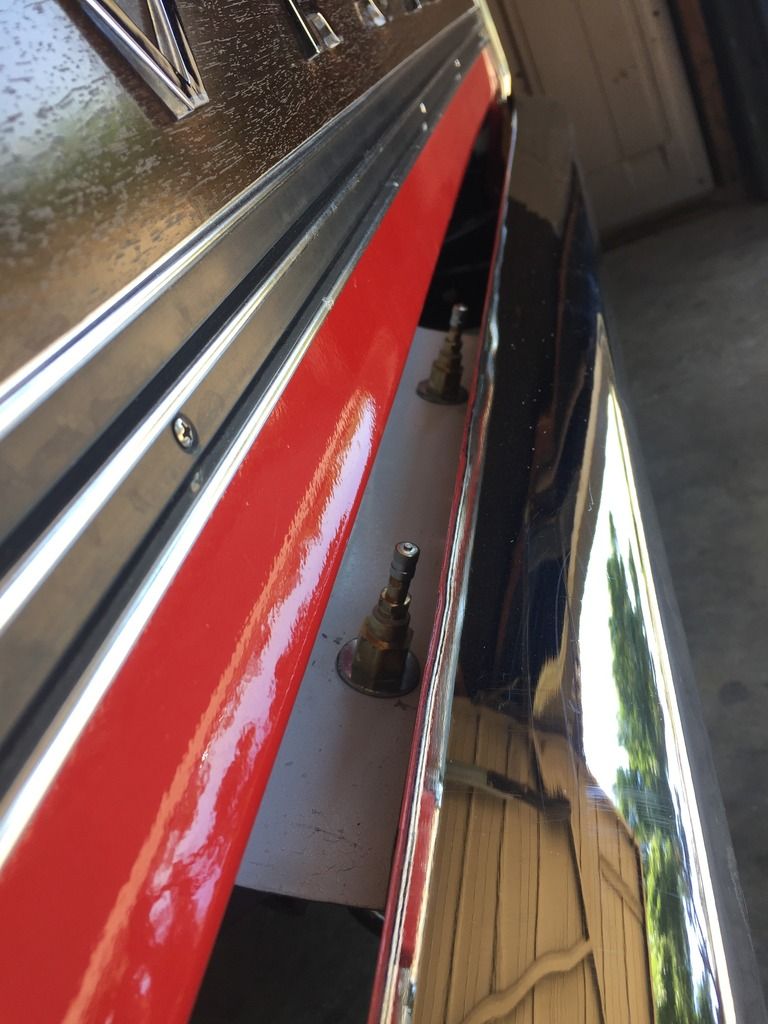 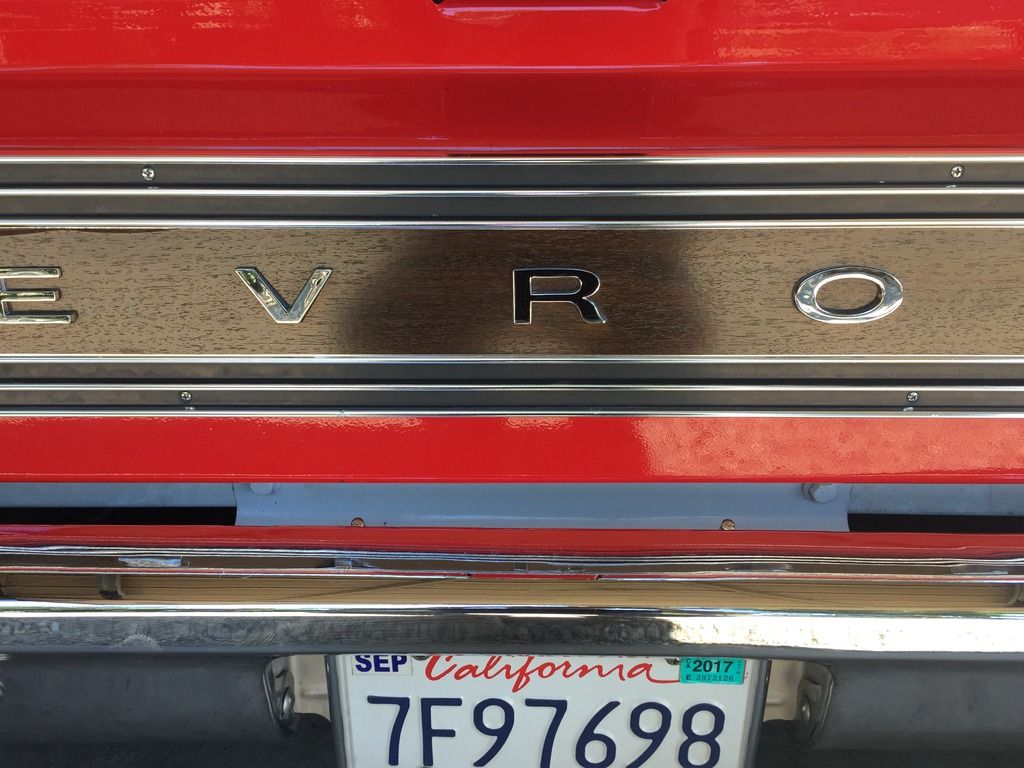 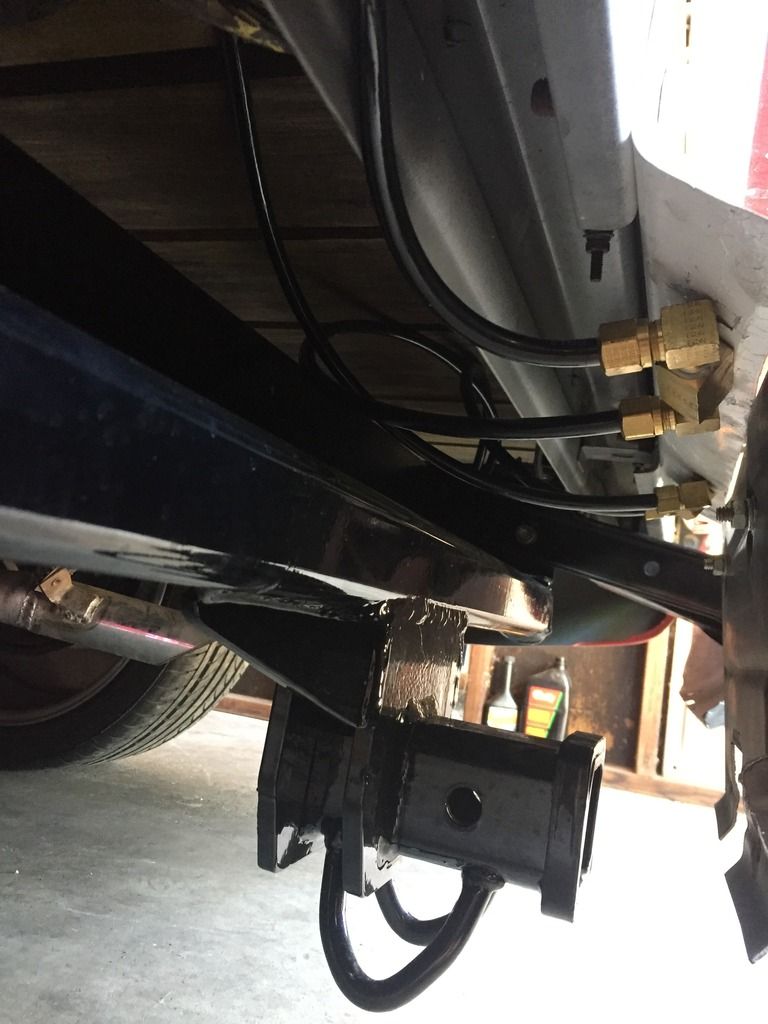 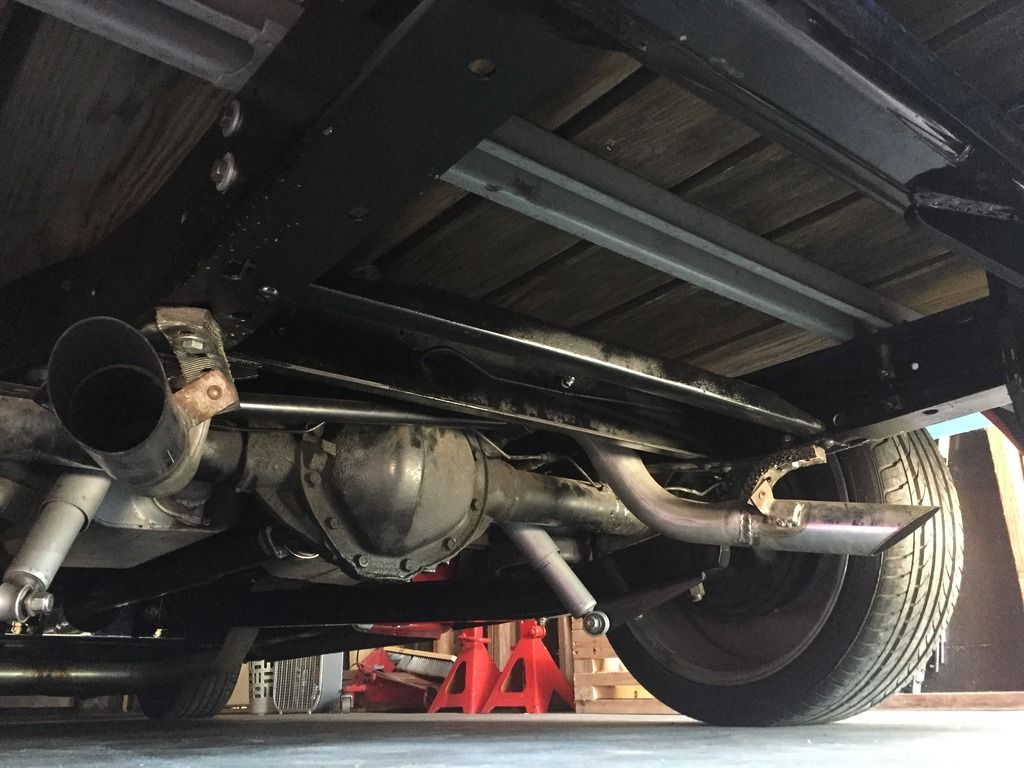 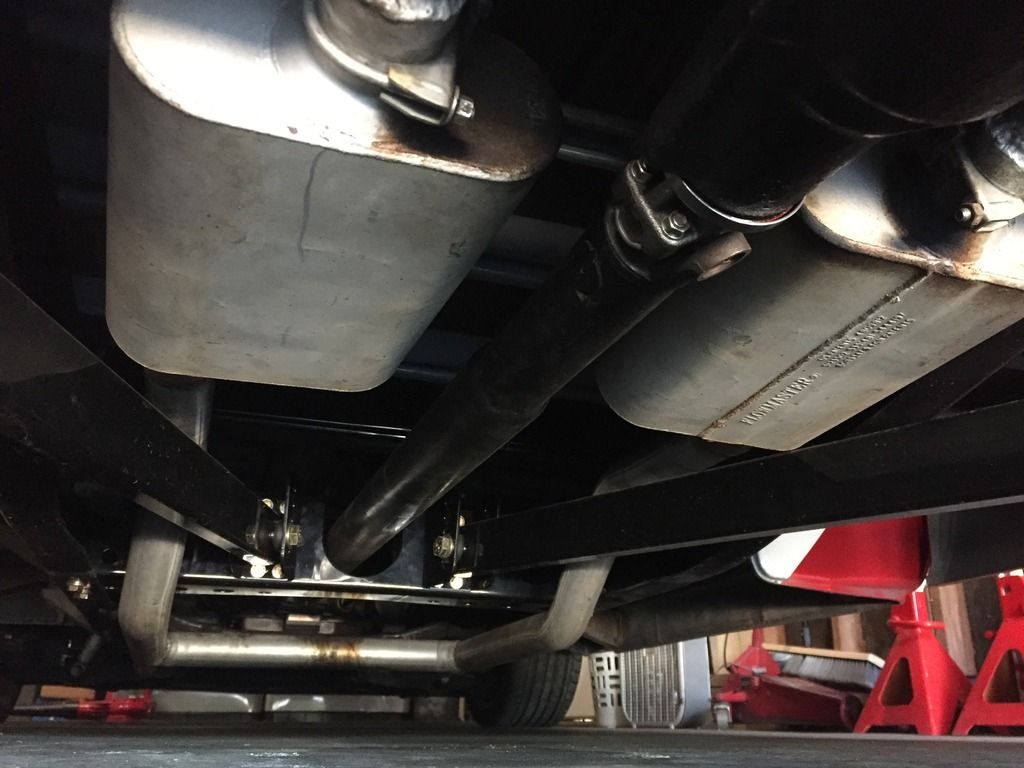 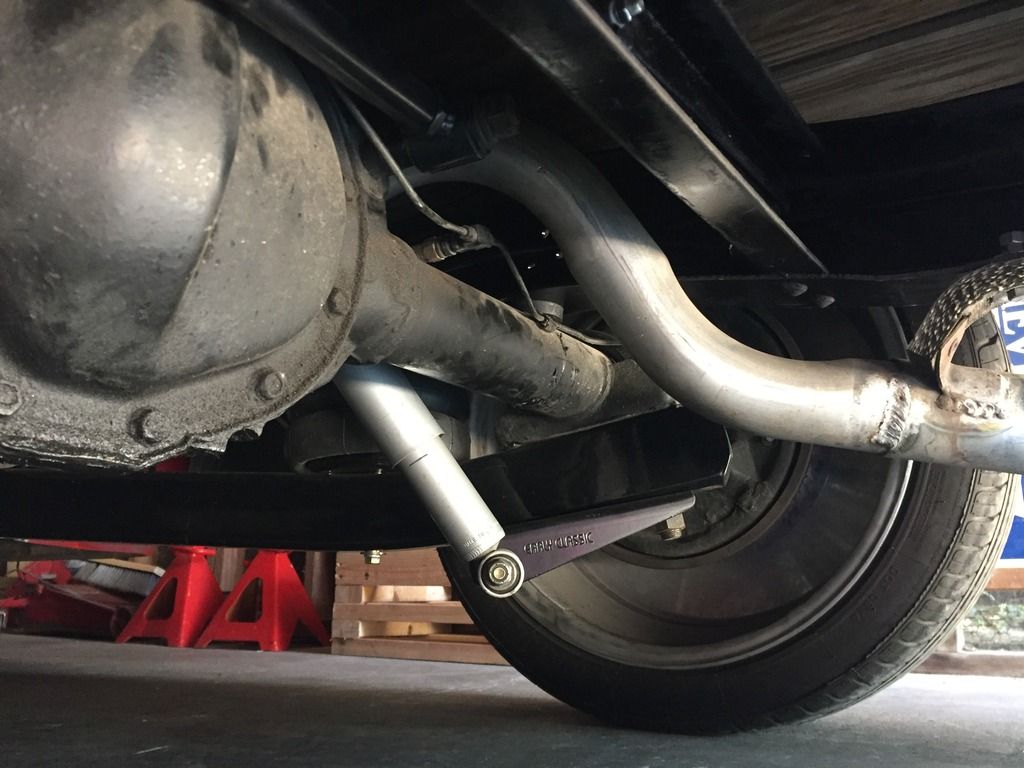 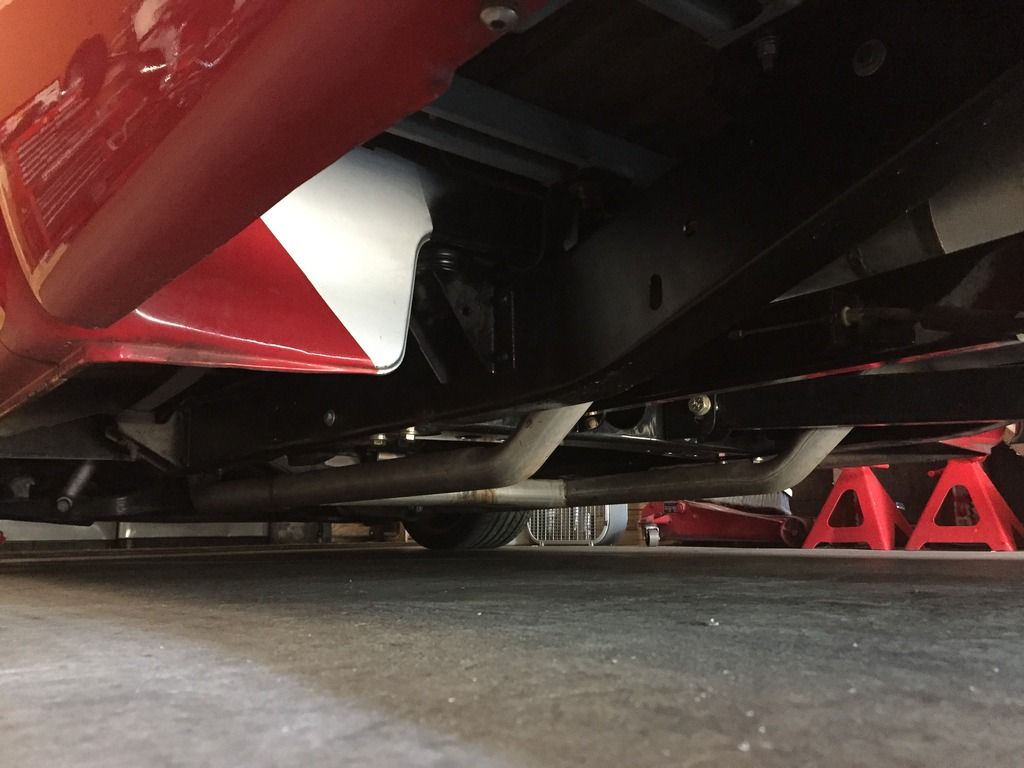 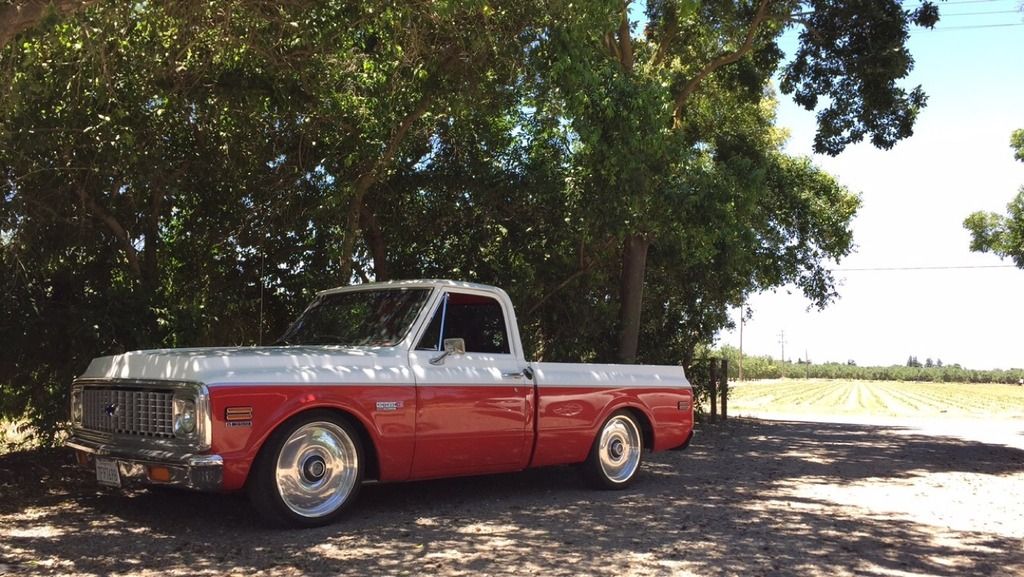 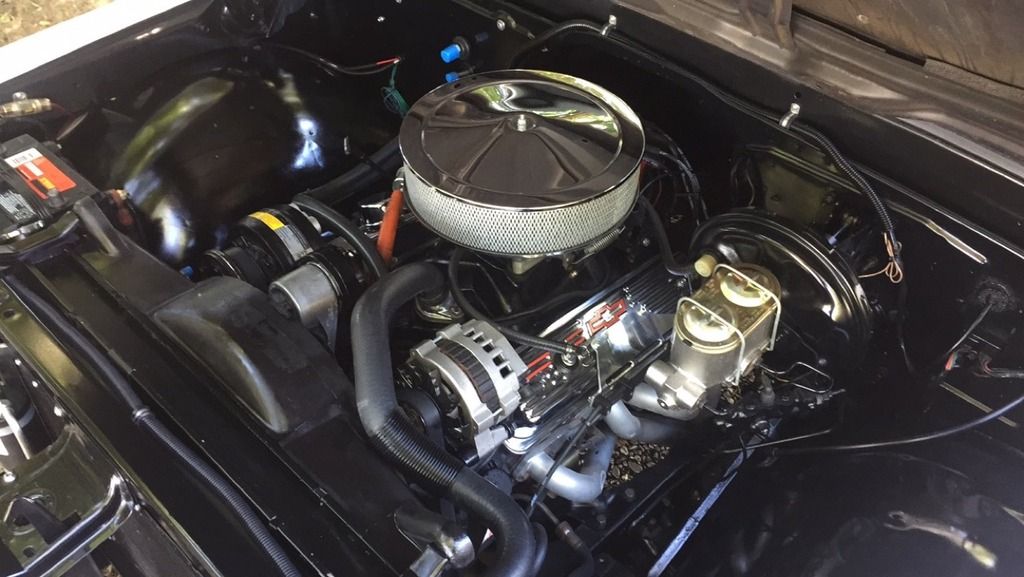 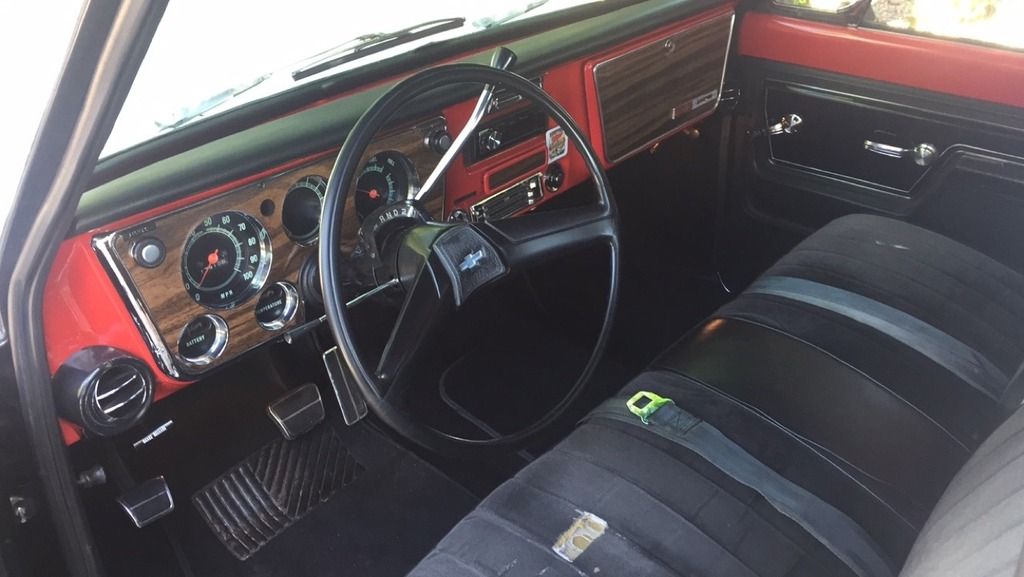
__________________
 Project NewType 1972 Chevy C/10 Cheyenne Super ( Daily Driven Showtruck ) http://67-72chevytrucks.com/vboard/s...d.php?t=507903 Project NewType 1972 Chevy C/10 Cheyenne Super ( Daily Driven Showtruck ) http://67-72chevytrucks.com/vboard/s...d.php?t=507903Project Great Grandpa's Legacy 1973 Chevy C/10 Cheyenne ( Current daily driver collecting big time parts ) http://67-72chevytrucks.com/vboard/s...89#post7084289 - Dylan (209)-985-7721 |
|
|

|
|
|
#1036 |
|
Registered User
Join Date: Jun 2016
Location: Visalia California
Posts: 891
|
Re: 1972 Chevy p/u NewType Build
Looks awesome great job!
|
|
|

|
|
|
#1037 |
|
Registered User
Join Date: Feb 2012
Location: turlock
Posts: 2,177
|
Re: 1972 Chevy p/u NewType Build
So Ever since I was little and my pops built a 70' CST for a customer of his I always enjoyed the look of the 90's air dam underneath the front of these gorgeous rounded line trucks. Some will disagree but to me they really add a quality element to these classic trucks.
For the longest time I ran one just ziptied to the bumper and anywhere a hole could reach a mounting spot and I knew it was really hokey but simply didn't have the time to think it through with all the work I was doing on pops 73' at the time. This last week was finally the time I chose to tackle the airdam mounting! I started off with a 2wd airdam with all the factory clips still intact and in fairly good condition overall, I used my wood car lift blocks to get the front up in the air to use the creeper while I worked. Utilizing the three large jack stands I have I positioned the airdam loosely taking my time to visualize where mourning could work along with the proper lining up with the body and bumper. 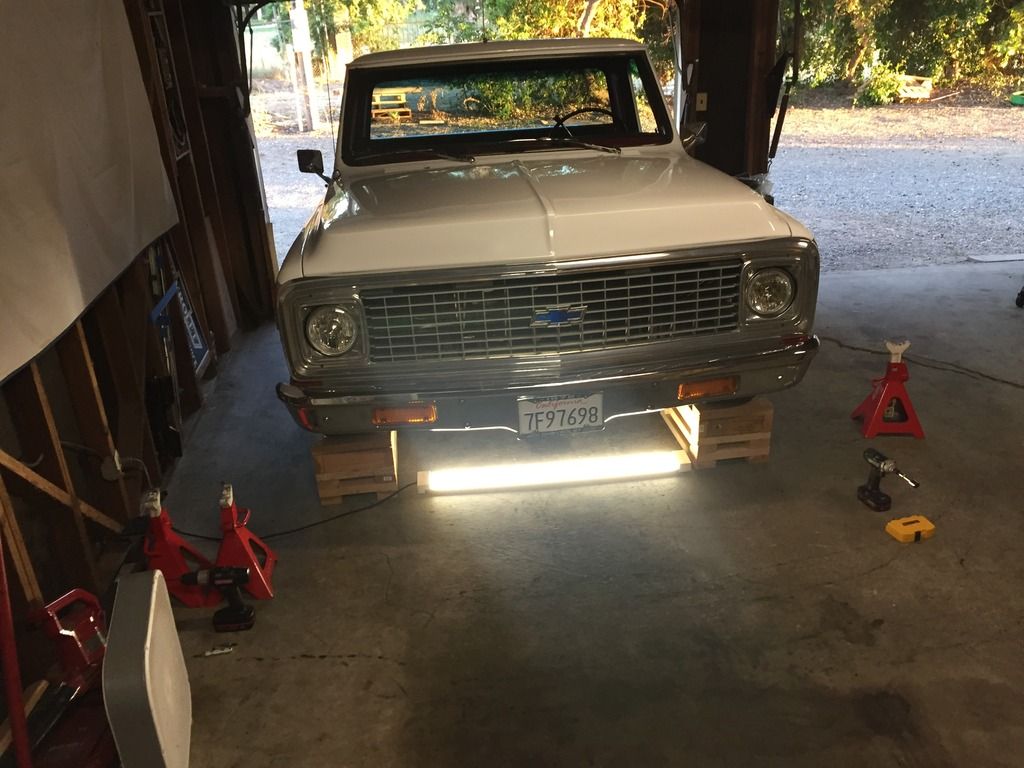 I found that the end portions would easily utilize a fresh hole in the fender cup with a proper bolting setup so that was no issue, I also saw that the outer bumper brackets could in fact be used to run a long bolt down to attach through a factory clip on the air dam, the only area I actually needed to modify were the inner portions directly under the framehorns and with a simple step drill and using tape and quick measurements the factory clips moved a couple inches total to line up with the frame horn mounting area. 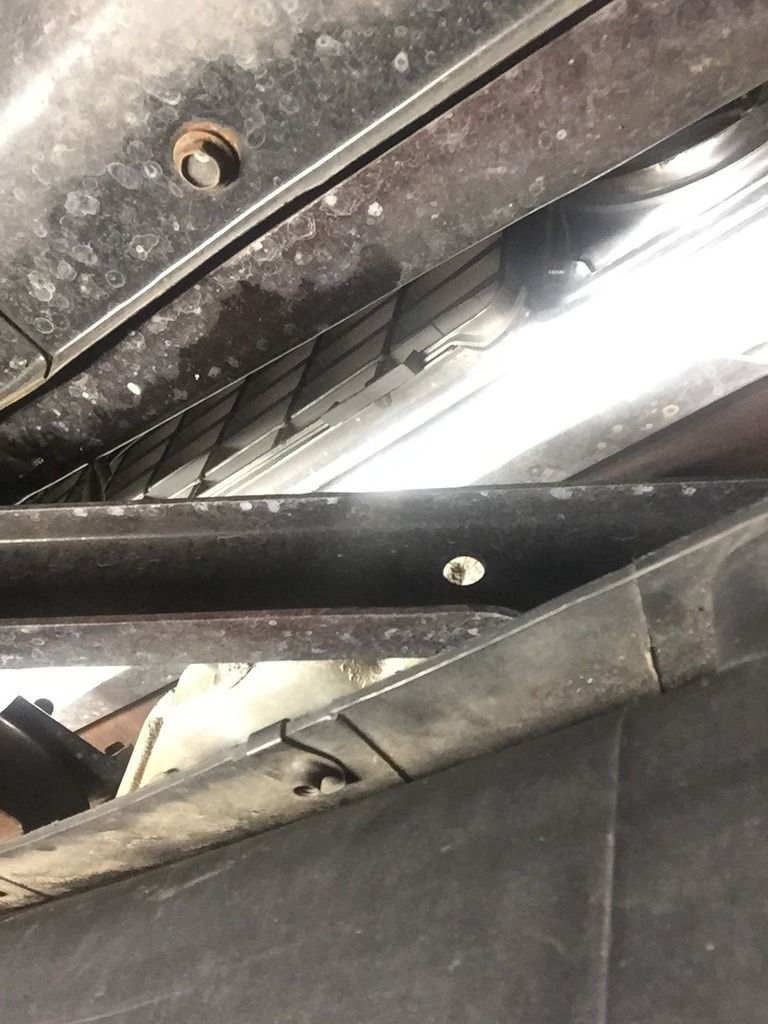 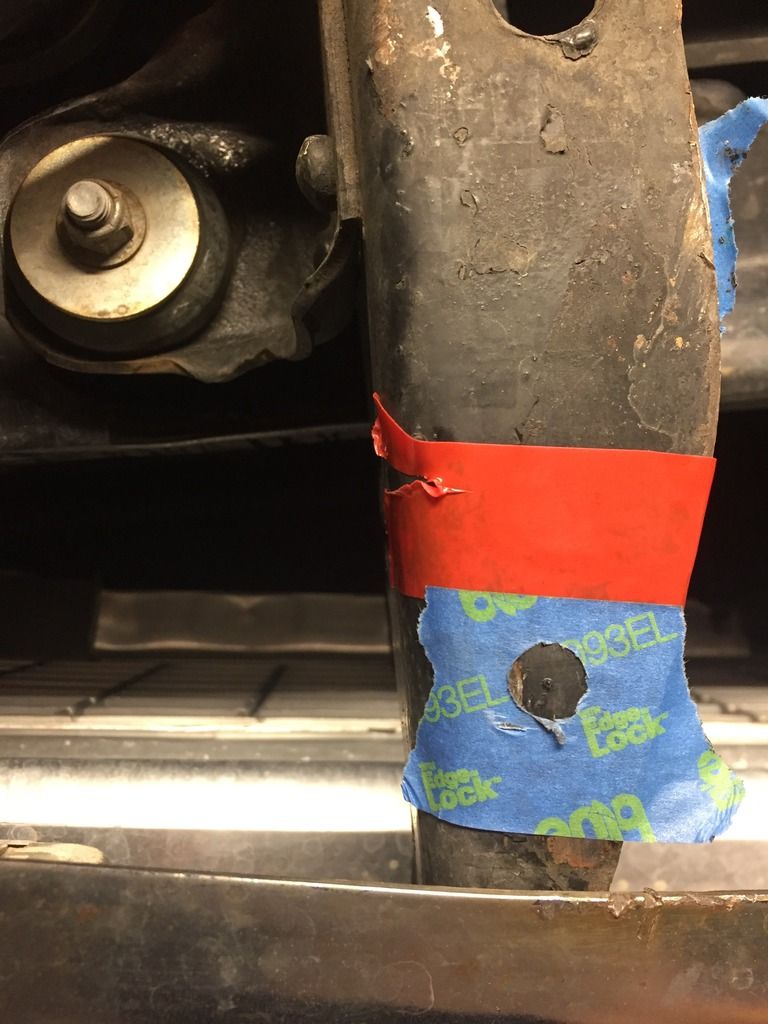 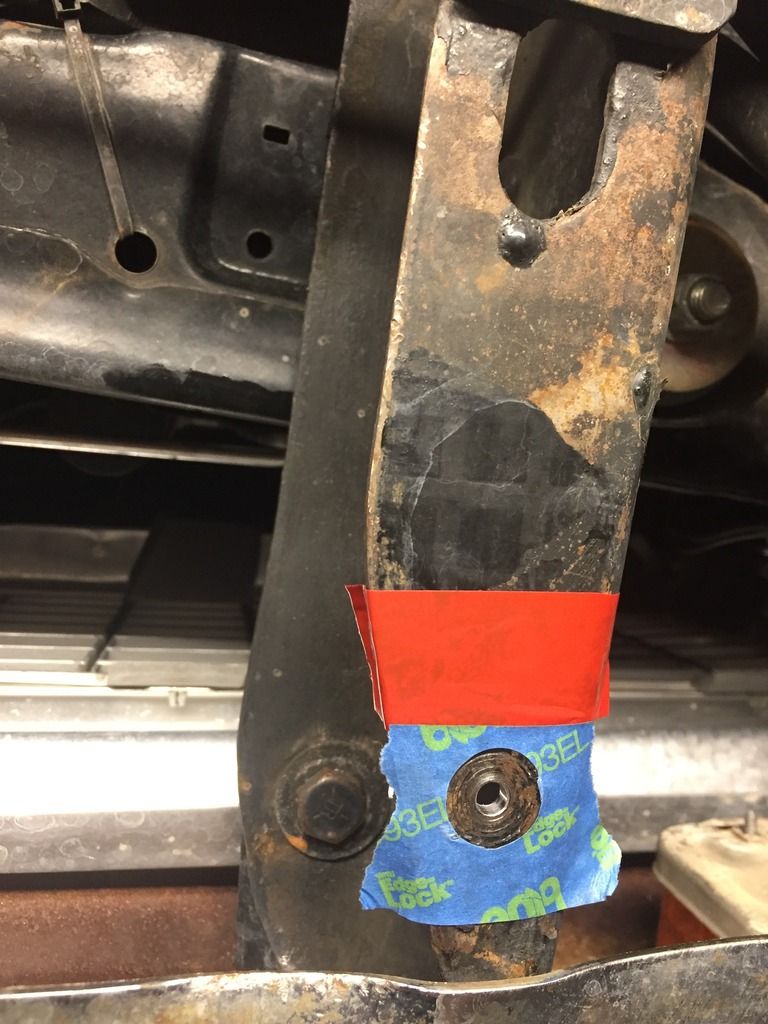 Taking an easy pace I took quick victims of all the mounting holes on the fender cups/frame horns/brackets as well as the new air dam clip holes. I used a 9/32 hole for all 6 bolt thread holes and at least a 3/8 or 7/16 hole for the clip as to not change the grip strength but I matched it directly to what was used from GM 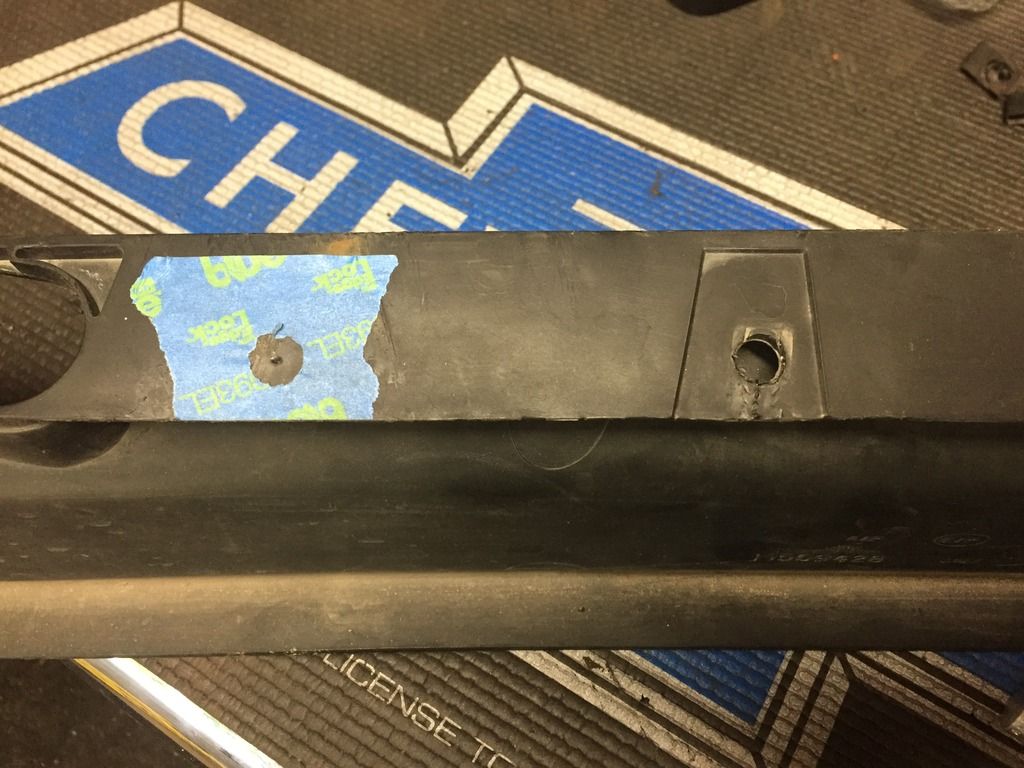 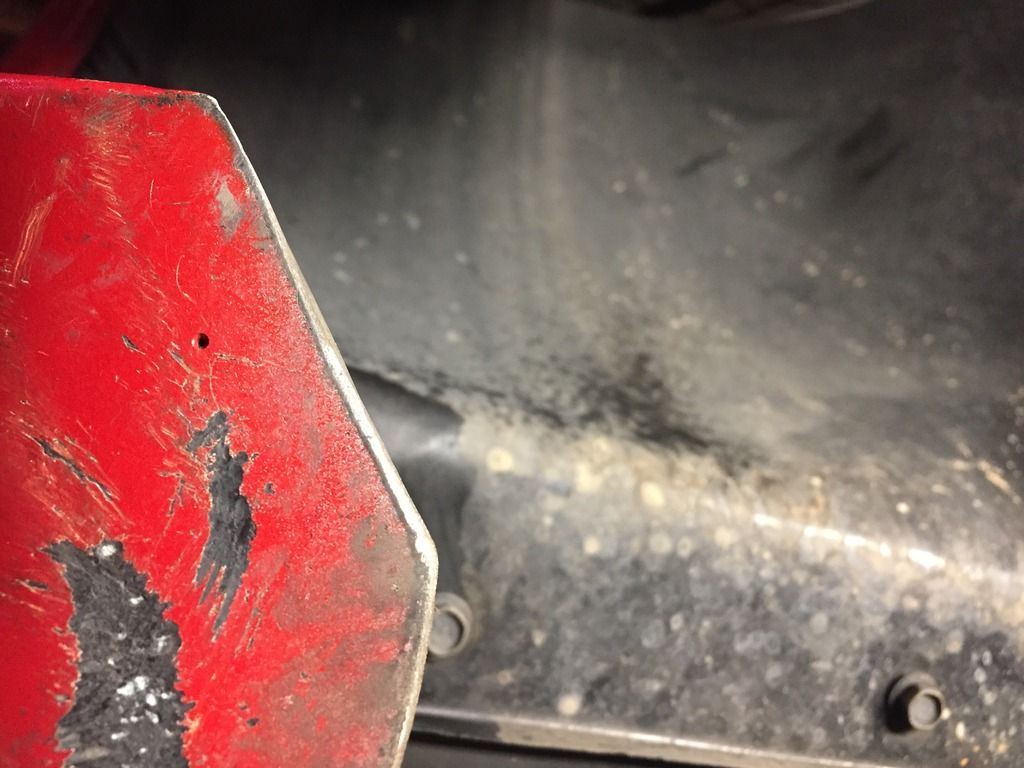 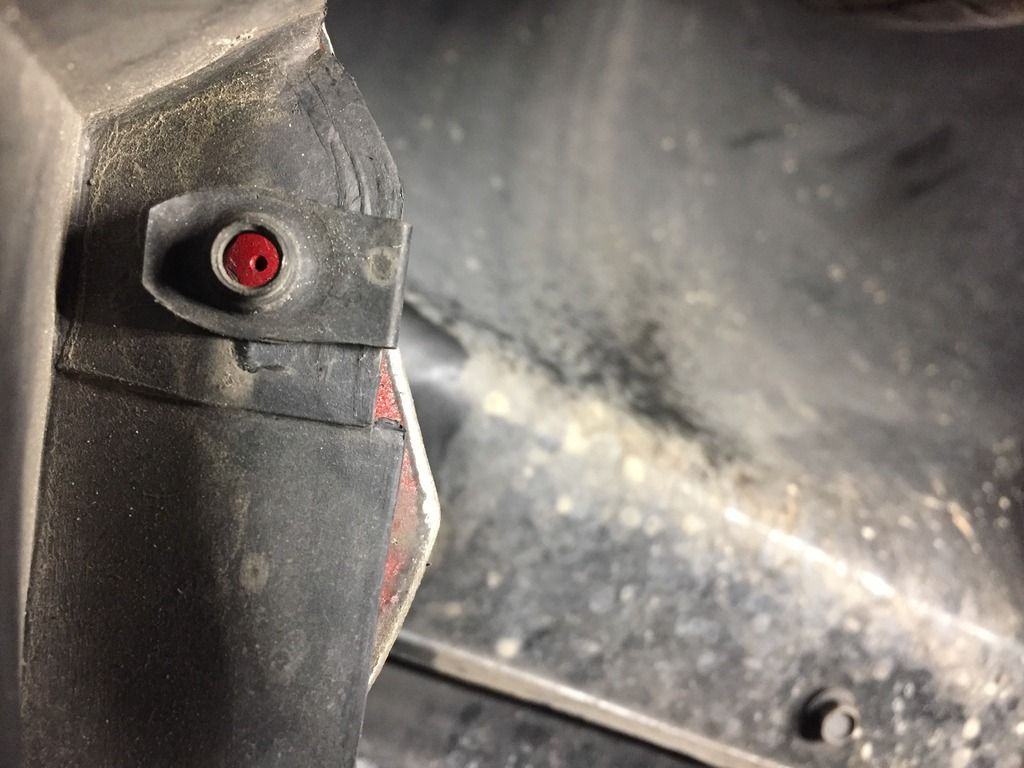 Time to go to the store. The clips used a 6mm sized bolt so I picked up four 1 1/4 length hex head bolts along with the 2 2 1/4" length bolts for the taller mounts. Grabbed the corresponding flat and lock washers and two 1/4 hole rubber fender washers to aide the paint disruption the plastic would cause during driving and the rumble of the countless junk roads here in California. I had a couple 1" tall steel spacers to take up the gap from the bumper brackets. 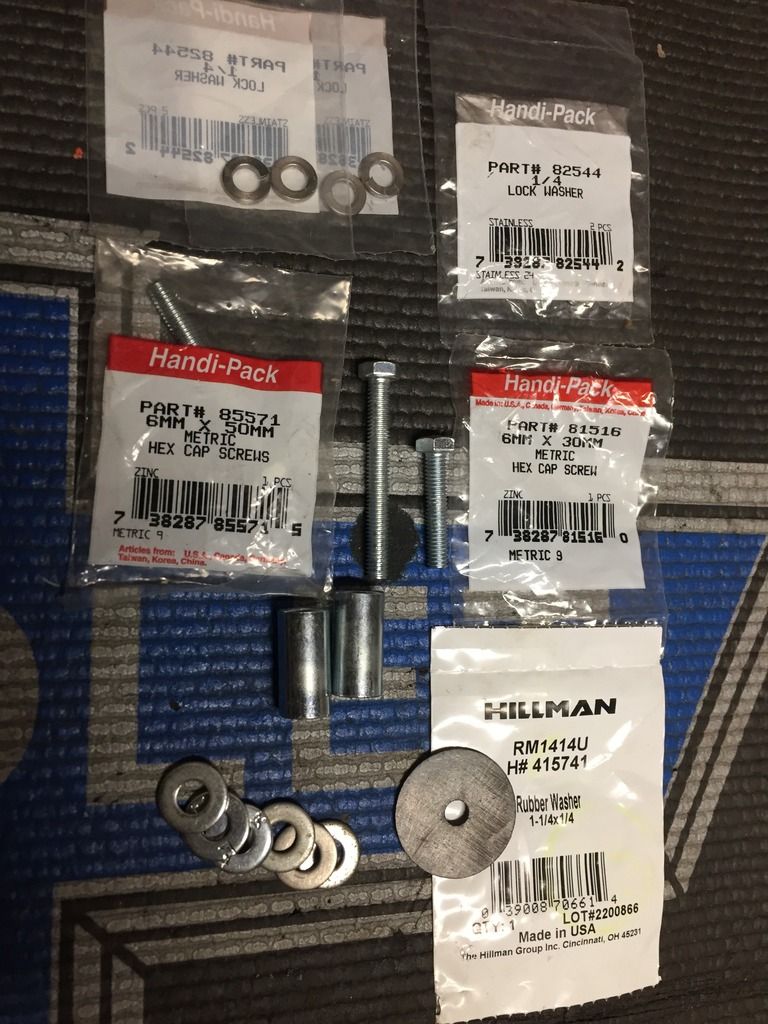 Time to bolt up!! The fender cups were definitely the trickiest part of this as I needed to use my battery powered impact driver with a long extension just to reach down into the cup but I proved that this is easily a one person job regardless. Time to tighten up and put her back on the ground! 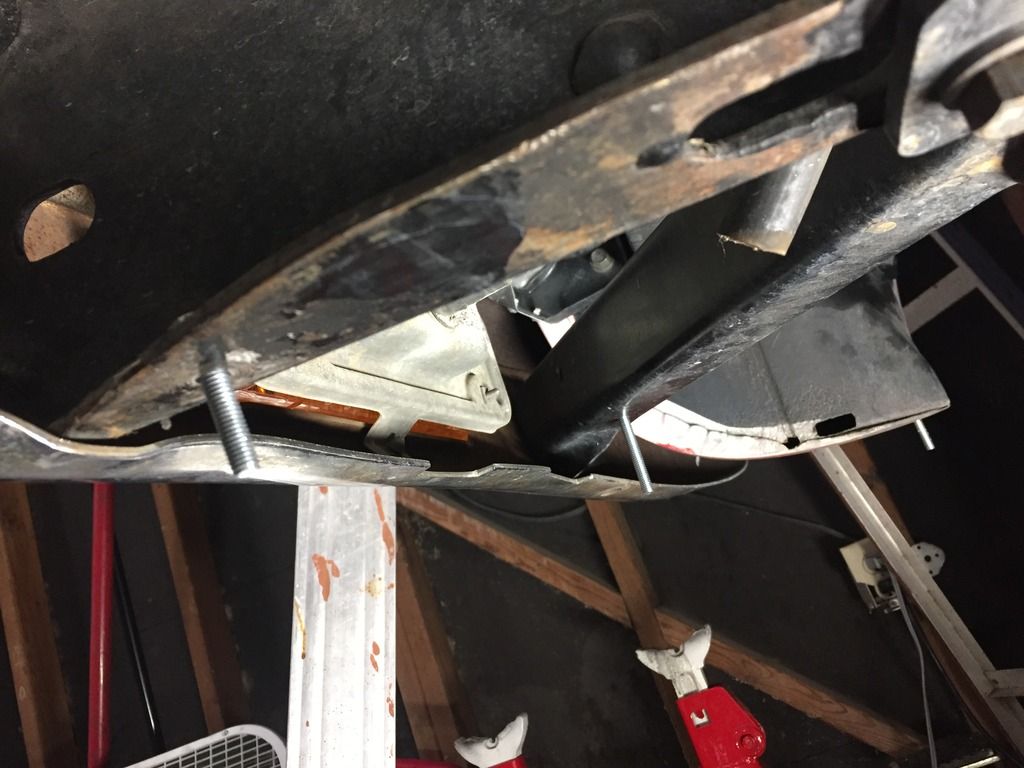 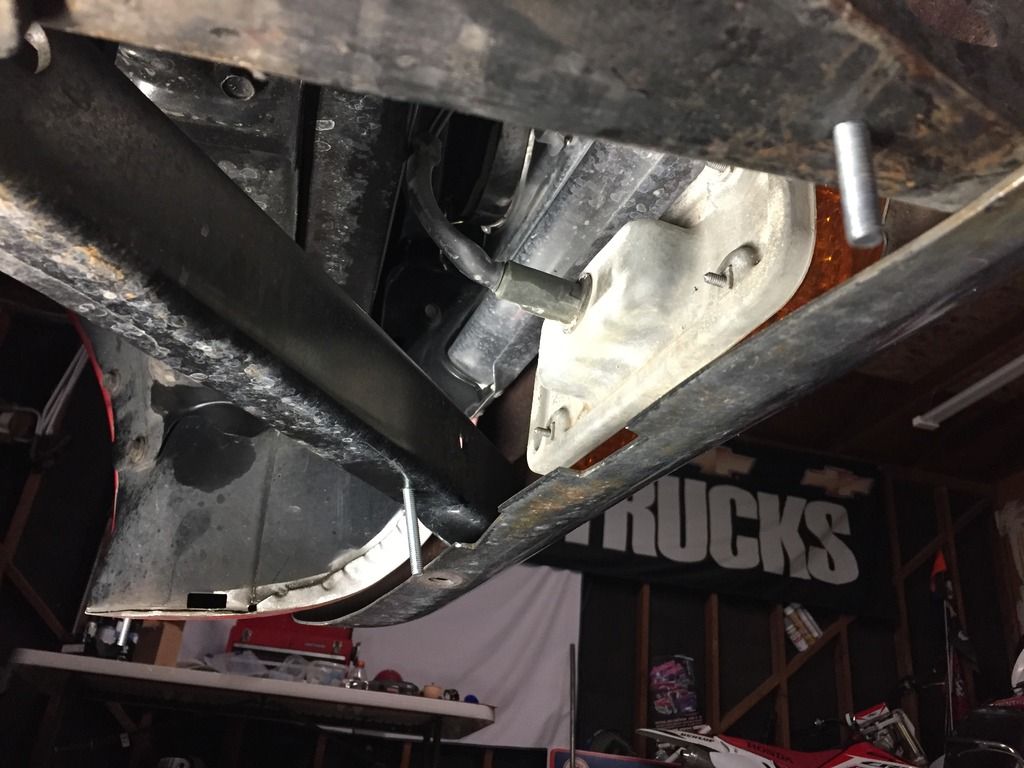 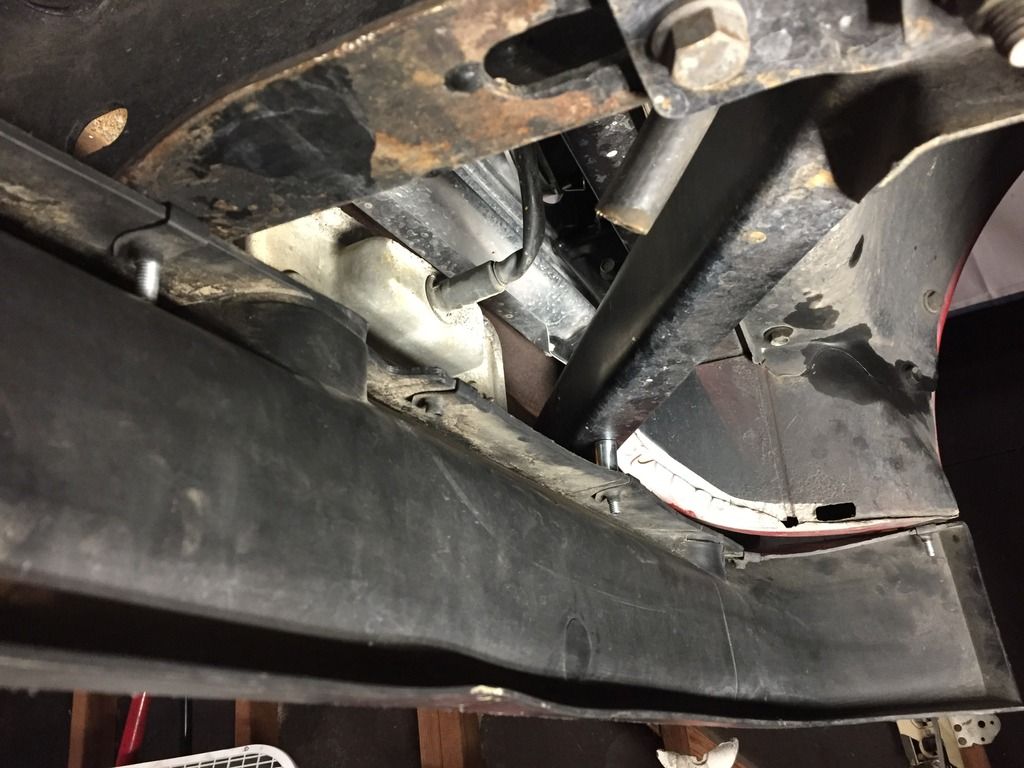 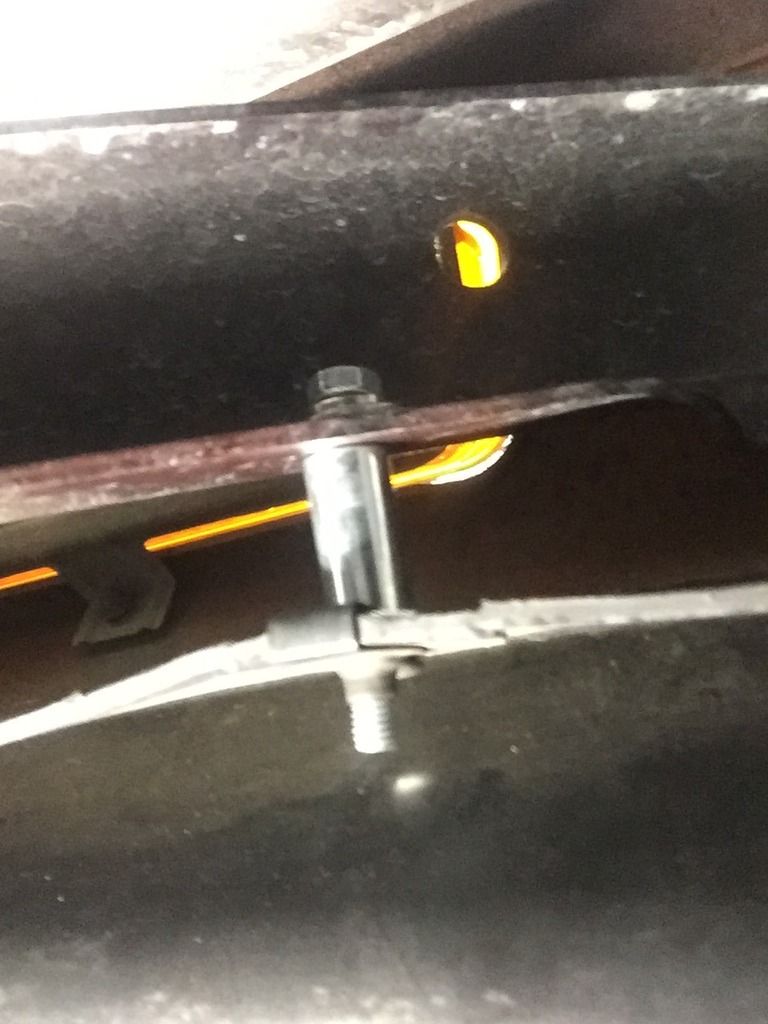 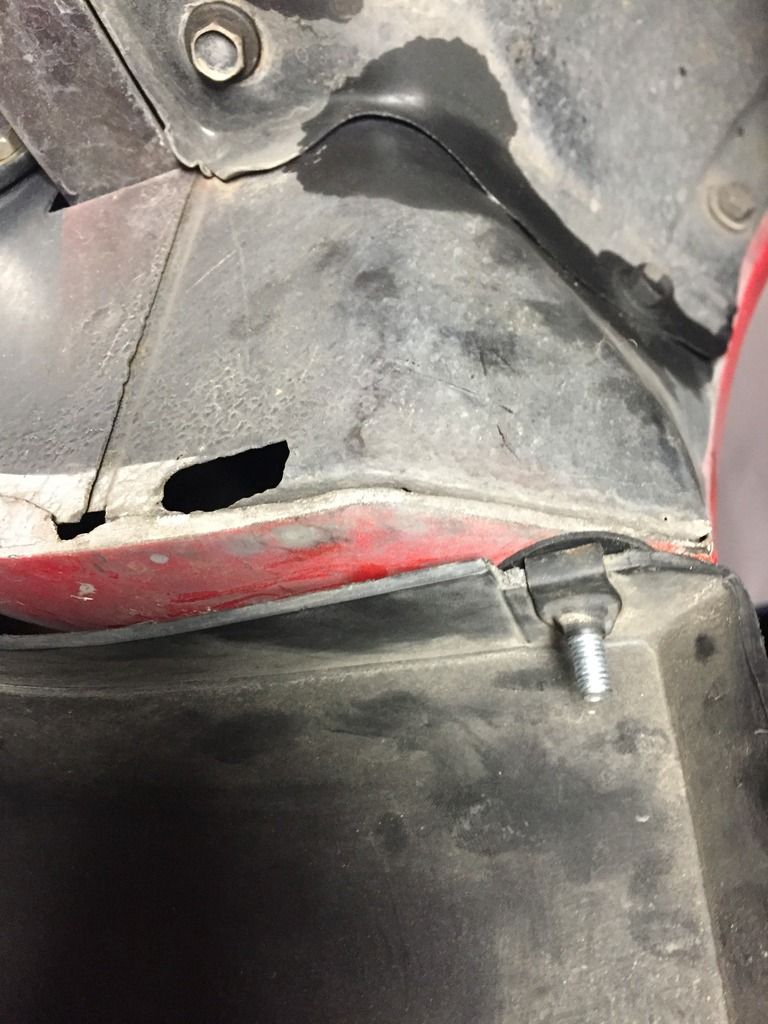 Boy with how the lines roll right from the bumper into the air dam and how the wheel opening lines up exactly on target I'm very stunned with the look of this add-on. 20+ years apart on design but they work well together IMO and hopefully to some of you out there looking for a quick 30$ visual upgrade. 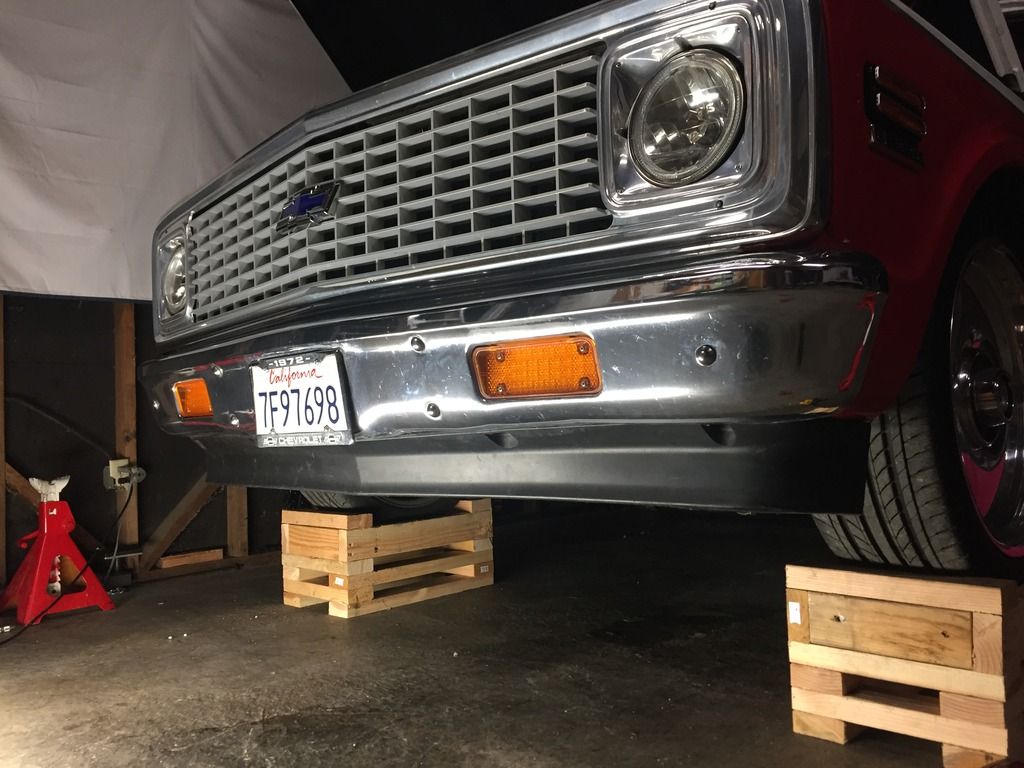 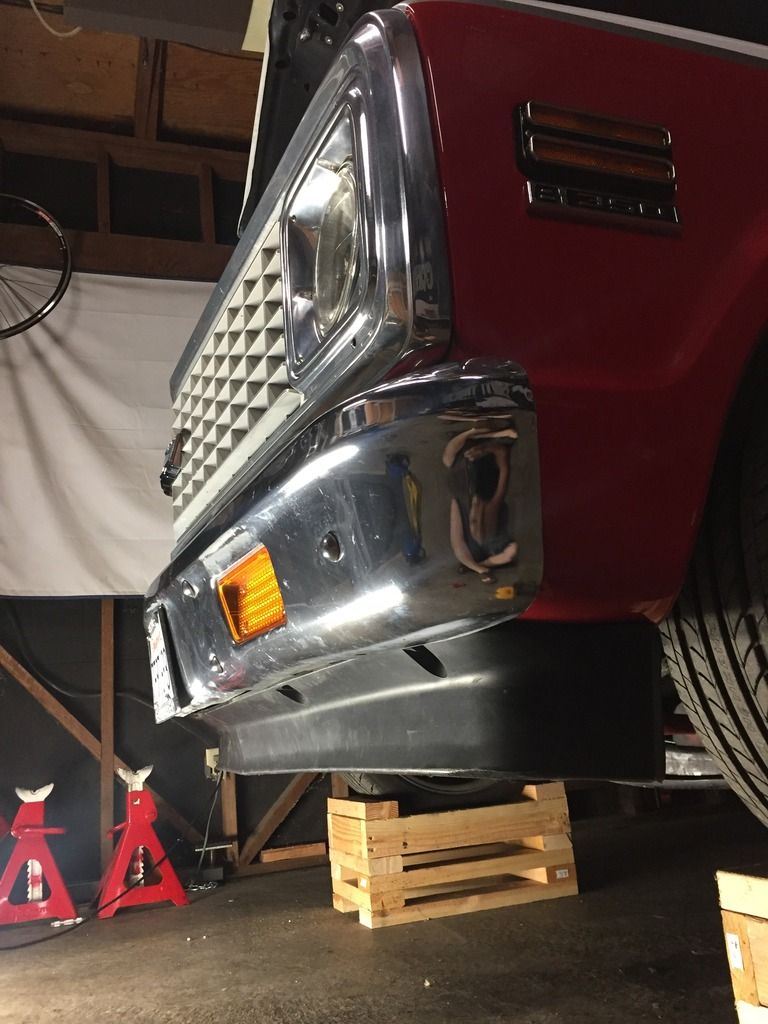 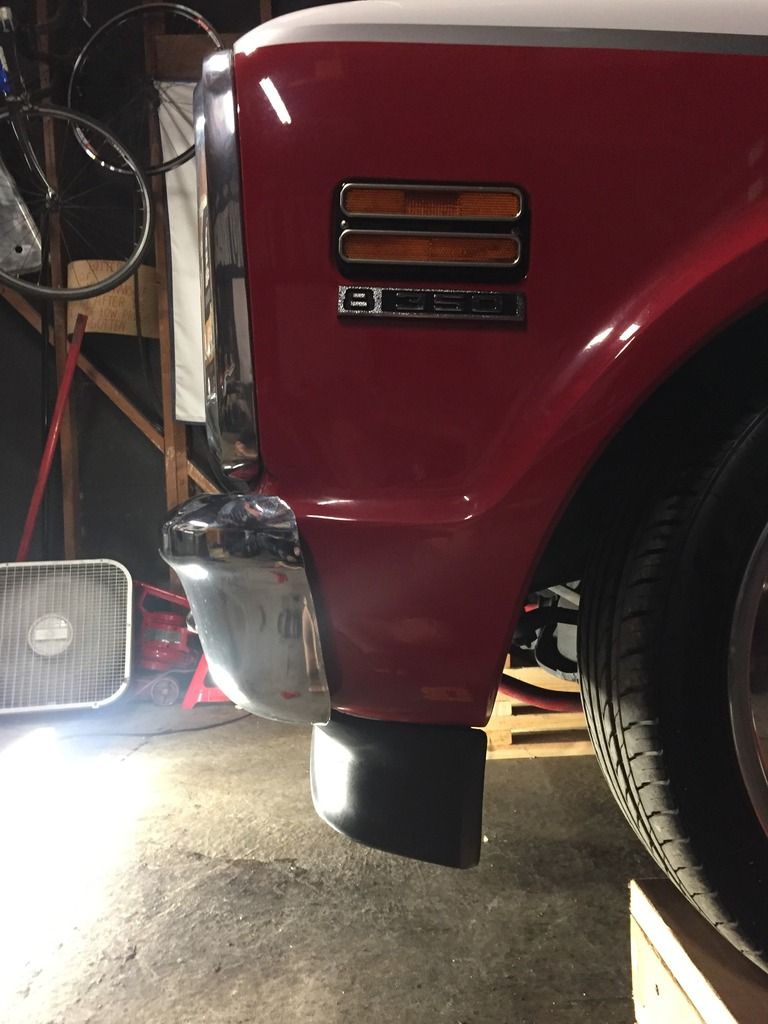 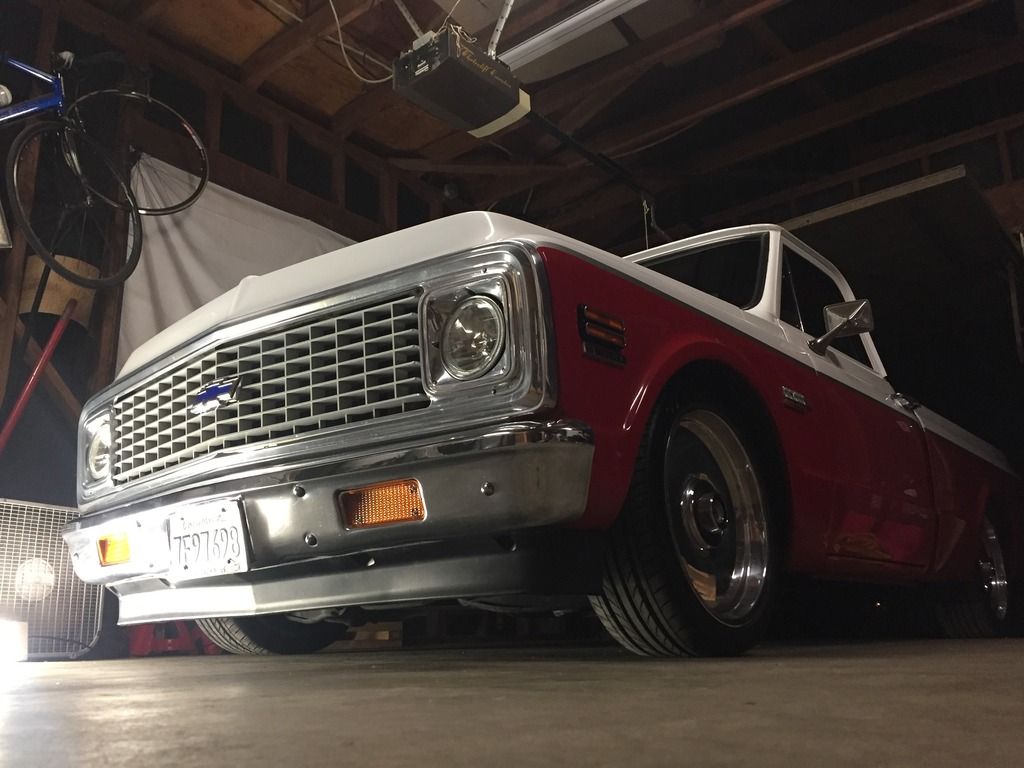 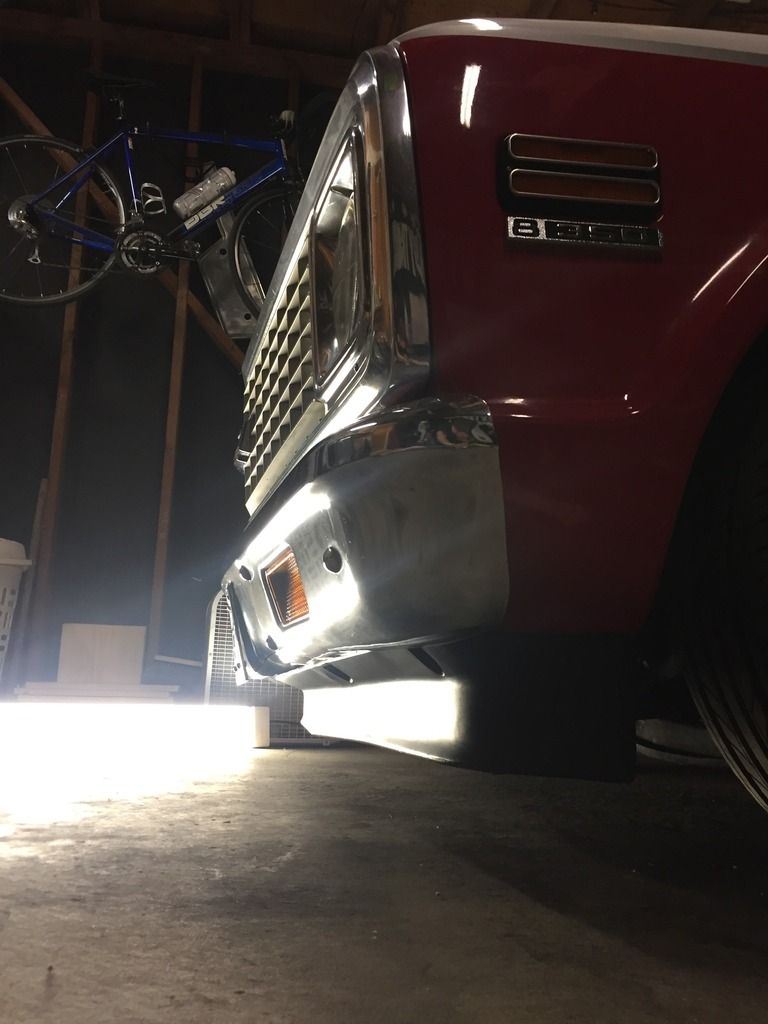 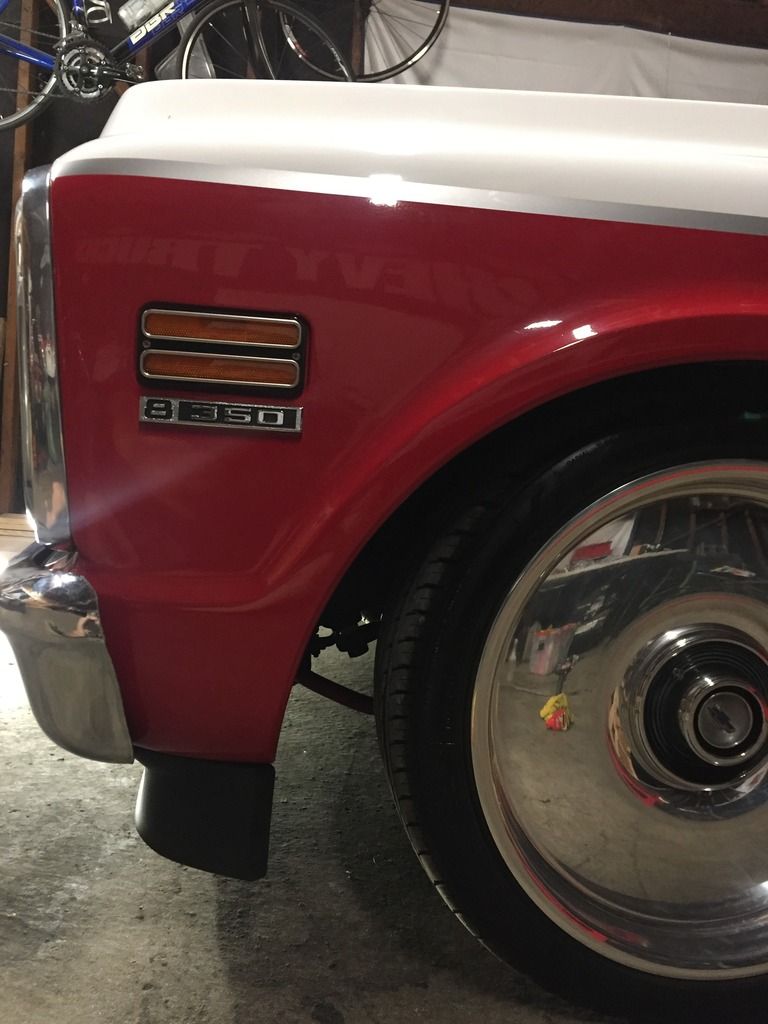 I've already driven quite a few trips on the freeway and around town and I must say it is very solid how it is mounted and definitely takes whatever may come it's way. Thank you all for checking out my write up for this and let me know your thoughts good and bad I'll enjoy them all  
__________________
 Project NewType 1972 Chevy C/10 Cheyenne Super ( Daily Driven Showtruck ) http://67-72chevytrucks.com/vboard/s...d.php?t=507903 Project NewType 1972 Chevy C/10 Cheyenne Super ( Daily Driven Showtruck ) http://67-72chevytrucks.com/vboard/s...d.php?t=507903Project Great Grandpa's Legacy 1973 Chevy C/10 Cheyenne ( Current daily driver collecting big time parts ) http://67-72chevytrucks.com/vboard/s...89#post7084289 - Dylan (209)-985-7721 |
|
|

|
|
|
#1038 |
|
Senior Member
 Join Date: Jan 2012
Location: Estevan, Saskatchewan
Posts: 1,025
|
Re: 1972 Chevy p/u NewType Build
now you need a pic of it from a distance to get a good feel for how it looks. But from what I'm seeing I like it, I might have to do it to mine but right now I have a big enough to do list lol
|
|
|

|
|
|
#1039 |
|
Registered User
Join Date: Dec 2009
Location: Kirkland, WA
Posts: 1,302
|
Re: 1972 Chevy p/u NewType Build
Looks cool! Is there a purpose to air dams besides looks though?
__________________
1968 LWB C20 / AC / Wood Bed |
|
|

|
|
|
#1040 | ||
|
Registered User
Join Date: Feb 2012
Location: turlock
Posts: 2,177
|
Re: 1972 Chevy p/u NewType Build
Quote:
Quote:
 here's the picture you requested and I should've added, the shop pug wanted to be apart of the action today here's the picture you requested and I should've added, the shop pug wanted to be apart of the action today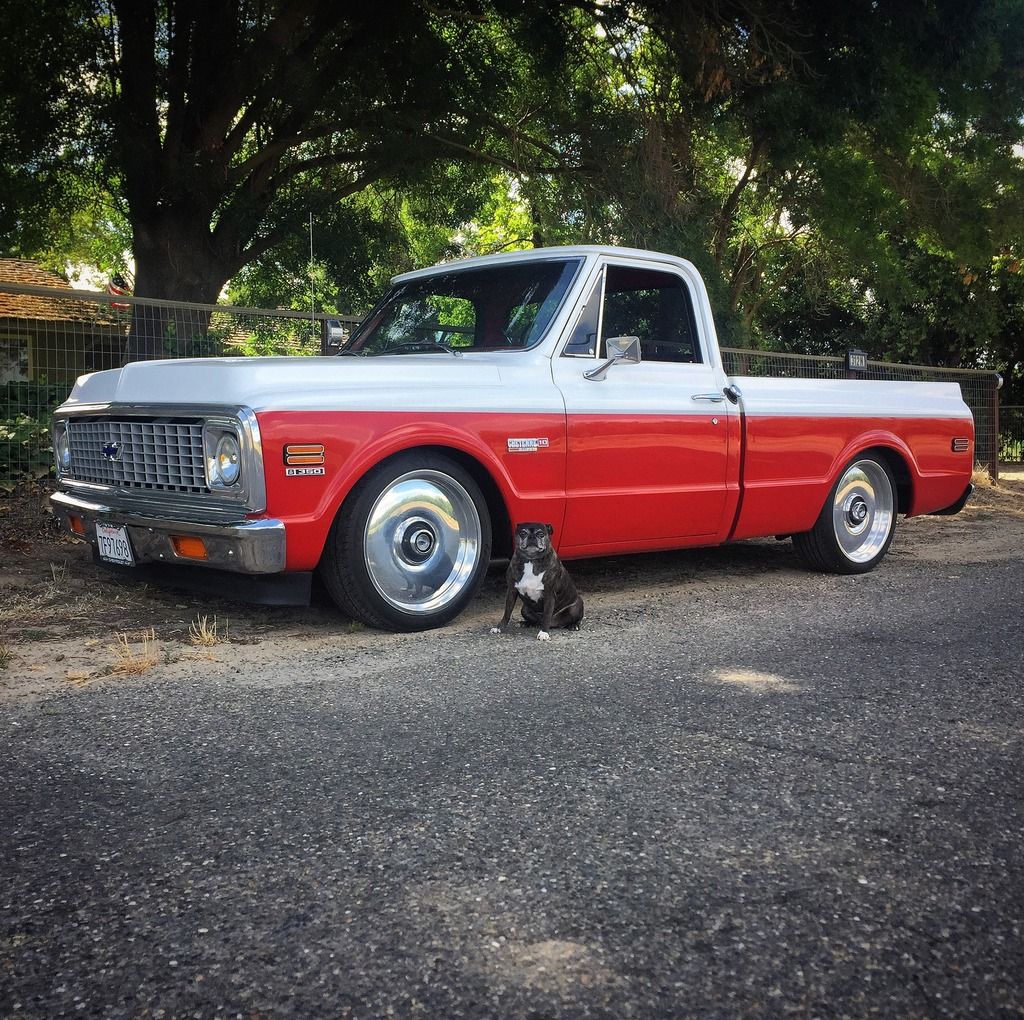
__________________
 Project NewType 1972 Chevy C/10 Cheyenne Super ( Daily Driven Showtruck ) http://67-72chevytrucks.com/vboard/s...d.php?t=507903 Project NewType 1972 Chevy C/10 Cheyenne Super ( Daily Driven Showtruck ) http://67-72chevytrucks.com/vboard/s...d.php?t=507903Project Great Grandpa's Legacy 1973 Chevy C/10 Cheyenne ( Current daily driver collecting big time parts ) http://67-72chevytrucks.com/vboard/s...89#post7084289 - Dylan (209)-985-7721 |
||
|
|

|
|
|
#1041 |
|
Registered User
Join Date: Jun 2016
Location: Visalia California
Posts: 891
|
Re: 1972 Chevy p/u NewType Build
I like the look. Had one on my first 71 in high school.
|
|
|

|
|
|
#1042 |
|
Registered User
Join Date: Feb 2012
Location: turlock
Posts: 2,177
|
Re: 1972 Chevy p/u NewType Build
Well it sure has been awhile since I was last on here hasn’t it? Haha
__________________
 Project NewType 1972 Chevy C/10 Cheyenne Super ( Daily Driven Showtruck ) http://67-72chevytrucks.com/vboard/s...d.php?t=507903 Project NewType 1972 Chevy C/10 Cheyenne Super ( Daily Driven Showtruck ) http://67-72chevytrucks.com/vboard/s...d.php?t=507903Project Great Grandpa's Legacy 1973 Chevy C/10 Cheyenne ( Current daily driver collecting big time parts ) http://67-72chevytrucks.com/vboard/s...89#post7084289 - Dylan (209)-985-7721 |
|
|

|
|
|
#1043 |
|
Proprietor of Dale's Corner
 Join Date: Nov 2012
Location: Vacaville , CA
Posts: 16,245
|
Re: 1972 Chevy p/u NewType Build
A very long time
__________________
"Some Days Chickens And Some Days Feathers" Dale XNGH ECV Sam Brannan 1004 R.I.P. 67ChevyRedneck R.I.P. Grumpy Old Man R.I.P. FleetsidePaul |
|
|

|
|
|
#1044 |
|
Registered User
Join Date: Feb 2012
Location: turlock
Posts: 2,177
|
Re: 1972 Chevy p/u NewType Build
im not getting any better at this responding and updating thing
 Anyway ill set a reminder to try and update some current pictures and status
__________________
 Project NewType 1972 Chevy C/10 Cheyenne Super ( Daily Driven Showtruck ) http://67-72chevytrucks.com/vboard/s...d.php?t=507903 Project NewType 1972 Chevy C/10 Cheyenne Super ( Daily Driven Showtruck ) http://67-72chevytrucks.com/vboard/s...d.php?t=507903Project Great Grandpa's Legacy 1973 Chevy C/10 Cheyenne ( Current daily driver collecting big time parts ) http://67-72chevytrucks.com/vboard/s...89#post7084289 - Dylan (209)-985-7721 |
|
|

|
|
|
#1045 |
|
Senior Member
 Join Date: Jan 2007
Location: Turlock, CA
Posts: 8,795
|
Re: 1972 Chevy p/u NewType Build
Hey neighbor
__________________
Please help my sister in law with her battle with cancer https://gofund.me/902f6fce Project "C10 Fever" (68 factory black 396 swb) Project "Little Sister" (70 c10 blue original paint refresh) Project "Blue Bomb" (70 c30 blue original paint refresh) SOLD Project "Vitamin C" (71 c10 orange original paint refresh) SOLD |
|
|

|
 |
| Bookmarks |
| Tags |
| 1972 chevy c10, cheyenne super, rebuild, restoration, showtruck |
|
|