
 |
Register or Log In To remove these advertisements. |
|
|
|
|||||||
 |
|
|
Thread Tools | Display Modes |
|
|
#51 |
|
Registered User
Join Date: Jan 2013
Location: Leonardtown, MD
Posts: 1,648
|
Re: 1947 Biederman Truck Fender repairs
Thanks guys!
More progress on Biederman hood, the butterfly hinge parts were removed from the old hood, and the piano hinge that attaches the hood sides was removed. Piano hinge is actually part of original hood, hemmed at the lower edge. Sanding through the hemmed edge releases the hinge.. ....and any spot welds were removed by grinding through the hood side to save the hinge.. This tool was designed and given to me by Clint Button (Carolina Sculpture Studio) at the recent metalshaping workshop I attended in Rock Hill. Worked well to mark the rear edge... https://www.youtube.com/watch?v=cnRl2RsreNA Clamping and plug welding the butterfly hinges to the hood. Hood trimmed and gapped..... https://www.youtube.com/watch?v=DNXVuMiyhPw ....and our next task will be to TIG weld the piano hinges to the trimmed lower edge of the hood, these hinges attach the hood side panels..
__________________
Robert |
|
|

|
|
|
#52 |
|
Registered User
Join Date: Jan 2013
Location: Leonardtown, MD
Posts: 1,648
|
Re: 1947 Biederman Truck Fender repairs
Progress through today, TIG welding up the hinges onto the new hoods..
Some SPI epoxy is mixed and brushed on, allowing it to seep between the welded parts and seal things up.. As the dominoes continued falling, the hood sides did not fit either. It was our initial plan to cut off the hinge from the top, wire edge from the bottom, and add a new center section, all parts cut to fit properly and welded back together. When we stripped paint off the lower wire edged part, we saw a bit too much pitting, rust, etc. that we opted to change to a full new lower section under the hinge. Nothing to wire edging 16 gauge, right? So we whipped up a set of dies to add the joggle needed for the external wiring, using 3/16 solid rod for the wiring.. Practice sample: With that complete, we tipped the lower edge to run through the joggle die.. https://www.youtube.com/watch?v=POa_yIyH3JU The wiring and inside of the joggle were both degreased, scuffed, and SPI epoxy added prior to folding the remainder.. Vise grips modified so they wouldn't slip off the wiring.. Wiring locked in place with some hammer action... Hood side is tacked to the hinge, mocked to the hood, and trimmed for gaps https://www.youtube.com/watch?v=SH2H3nR4AOc It's not done, but that's all for today, we're packing it up for the car show in Leonardtown tomorrow. .
__________________
Robert |
|
|

|
|
|
#53 |
|
Registered User
Join Date: Jan 2013
Location: Leonardtown, MD
Posts: 1,648
|
Re: 1947 Biederman Truck Fender repairs
Tonight we did the wired edge on the Biederman truck's drivers hood side, so we did a couple videos of the process. We did a practice sample to make sure our adjustment on the folded flange length gave us a good wrap with a slight gap for paint..
https://www.youtube.com/watch?v=1b6TiuiUQQQ This shows the basic process of closing the wrap, wasn't as pretty as it should have been, but hey, this is practice. https://www.youtube.com/watch?v=MNc9WJ3SmYA For the hood side, we used the tipping wheel in the Fasti swaging machine (bead roller) to add the flange. After running through the Lennox for adding the joggle, the panel was scrubbed with a warm dish soap and water mix using scotchbrite, then scuffed with 220 paper, then SPI epoxy added in the channel. After our 3/16 wire was laid in place, any remaining bare spots on the wire were also brushed with epoxy. The entire length was then closed as per the practice sample. We'll let that set a day or so and get the recycled hinge welded to the top. https://www.youtube.com/watch?v=GiNrkZ7pslg
__________________
Robert |
|
|

|
|
|
#54 |
|
Registered User
Join Date: Jan 2013
Location: Leonardtown, MD
Posts: 1,648
|
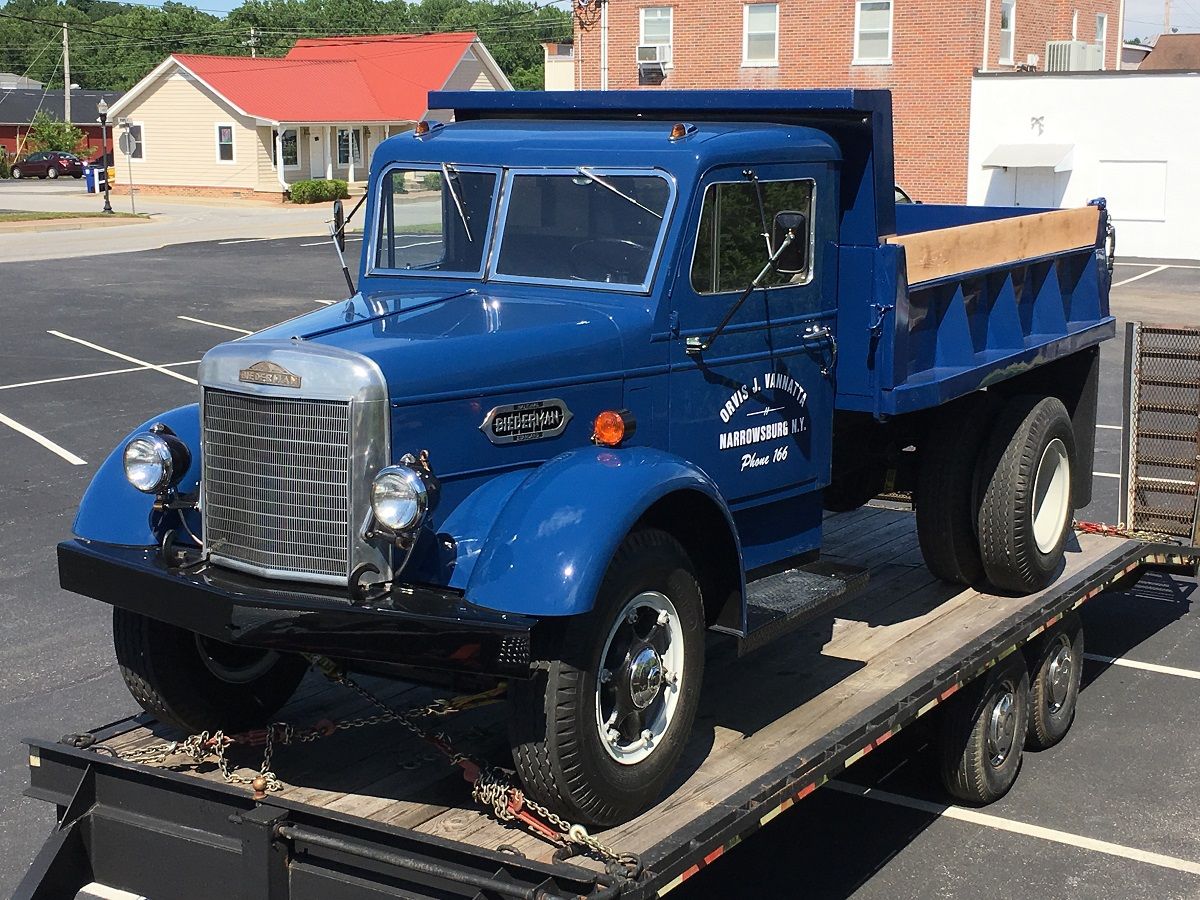
Re: 1947 Biederman Truck Fender repairs
Finishing up on the Biederman hood fabrications today.. That's what I told myself anyhow...
Getting the OEM hood hinge welded to the new hood side.. Factory version had spot welded angles on the inside to bolt side emblems to, we'll see if we can improve by eliminating a rust trap... This should do..... Vise mounted jigsaw with optional pony clamp cruise control Don't try this at home.. Beltline trim added.....Hey! it lines up with the cab! Hood sides added.. and Robert is done with the hood.. Video Version: https://www.youtube.com/watch?v=KTXzEPYzPxE .
__________________
Robert |
|
|

|
|
|
#55 |
|
Restoring it $200 at a time...
Join Date: Aug 2008
Location: NE Kansas
Posts: 889
|
Re: 1947 Biederman Truck Fender repairs
I just sit, shake my head and smile. That's just artwork.
__________________
Charter member of the 'Put the dimmer switch back on the damn floor where it belongs' Society '68 5.3L-4 speed LWB C20; grandpa bought it for the farm in '71. Now LS 5.3, rather than 327. DD '09 Pilot Weekender '65 Skylark 300-4V-4 speed Wife's '07 Lexus ES350; 117 actuator motors and I can't see the engine. Son's '04 F250 SuperCab 6.0 |
|
|

|
|
|
#56 |
|
Post Whore
  Join Date: May 2015
Location: Alabama
Posts: 14,674
|
Re: 1947 Biederman Truck Fender repairs
^^^^agreed^^^^
__________________
Mongo...aka Greg RIP Dad RIP Jesse 1981 C30 LQ9 NV4500..http://67-72chevytrucks.com/vboard/s...d.php?t=753598 Mongos AD- LS3 TR6060...http://67-72chevytrucks.com/vboard/s...34#post8522334 Columbus..the 1957 IH 4x4...http://67-72chevytrucks.com/vboard/s...63#post8082563 2023 Chevy Z71..daily driver |
|
|

|
|
|
#57 |
|
Registered User
Join Date: Jan 2013
Location: Leonardtown, MD
Posts: 1,648
|
Re: 1947 Biederman Truck Fender repairs
Thanks for the kind words fellas, the 16 gauge was definitely a challenge, good to see my portion complete.
If anyone local to Lexington KY would like to see it in person, this truck will be at the ATHS 2018 Convention in Lexington Ky, May 31 to June 2nd. I'm told it will be inside the building..
__________________
Robert |
|
|

|
|
|
#58 |
|
Registered User
Join Date: Jan 2013
Location: Leonardtown, MD
Posts: 1,648
|
Re: 1947 Biederman Truck Fender repairs
John sent me a picture today, he picked up the front fenders from his painter and got them installed. He hopes to get the hood parts tomorrow.
__________________
Robert |
|
|

|
|
|
#59 |
|
Registered User
Join Date: Jan 2013
Location: Leonardtown, MD
Posts: 1,648
|
Re: 1947 Biederman Truck Fender repairs
John got the hood installed, and truck is loaded up for the trek to Lexington KY for the ATHS Convention.
__________________
Robert |
|
|

|
|
|
#60 |
|
Post Whore
  Join Date: May 2015
Location: Alabama
Posts: 14,674
|
Re: 1947 Biederman Truck Fender repairs
looks good as...I meen better than new......
__________________
Mongo...aka Greg RIP Dad RIP Jesse 1981 C30 LQ9 NV4500..http://67-72chevytrucks.com/vboard/s...d.php?t=753598 Mongos AD- LS3 TR6060...http://67-72chevytrucks.com/vboard/s...34#post8522334 Columbus..the 1957 IH 4x4...http://67-72chevytrucks.com/vboard/s...63#post8082563 2023 Chevy Z71..daily driver |
|
|

|
|
|
#61 |
|
Registered User
Join Date: Jan 2013
Location: Leonardtown, MD
Posts: 1,648
|
Re: 1947 Biederman Truck Fender repairs
Thanks Greg!
Here's the Biederman at the show in Lexington KY last week for the 2018 ATHS Convention.
__________________
Robert Last edited by MP&C; 06-07-2018 at 07:48 AM. |
|
|

|
|
|
#62 |
|
Registered User
Join Date: Jan 2013
Location: Leonardtown, MD
Posts: 1,648
|
Re: 1947 Biederman Truck Fender repairs
An update on the Biederman truck, John came across a donor truck with an authentic 1947 Galion dump body, which matches his 47 Biederman perfectly.
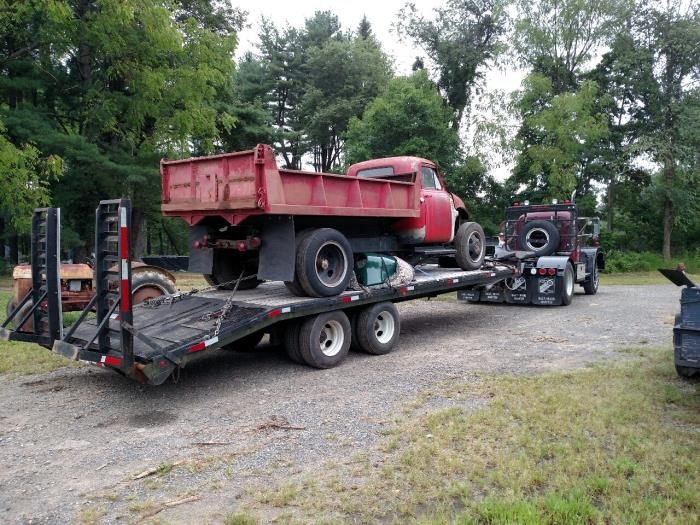 It needed some repair work on it but it was a good one to start with. He took it to a local shop and had the tailgate rebuilt, added a cab guard and replaced the floor. It will show a few authentic dents when finished but he says he prefers that to a new edition body on an old truck. 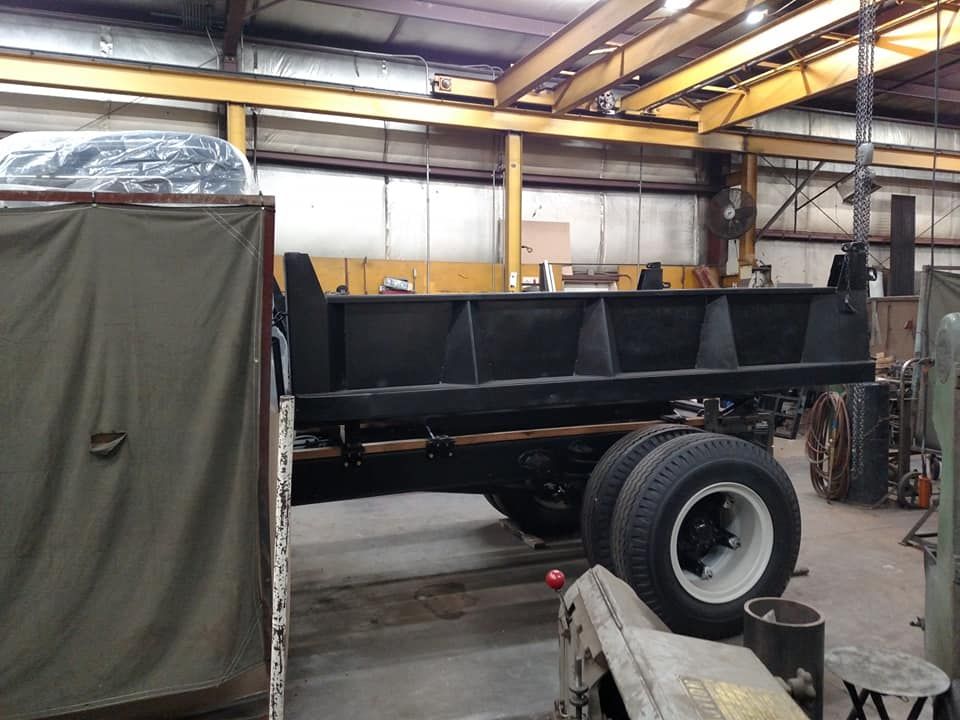 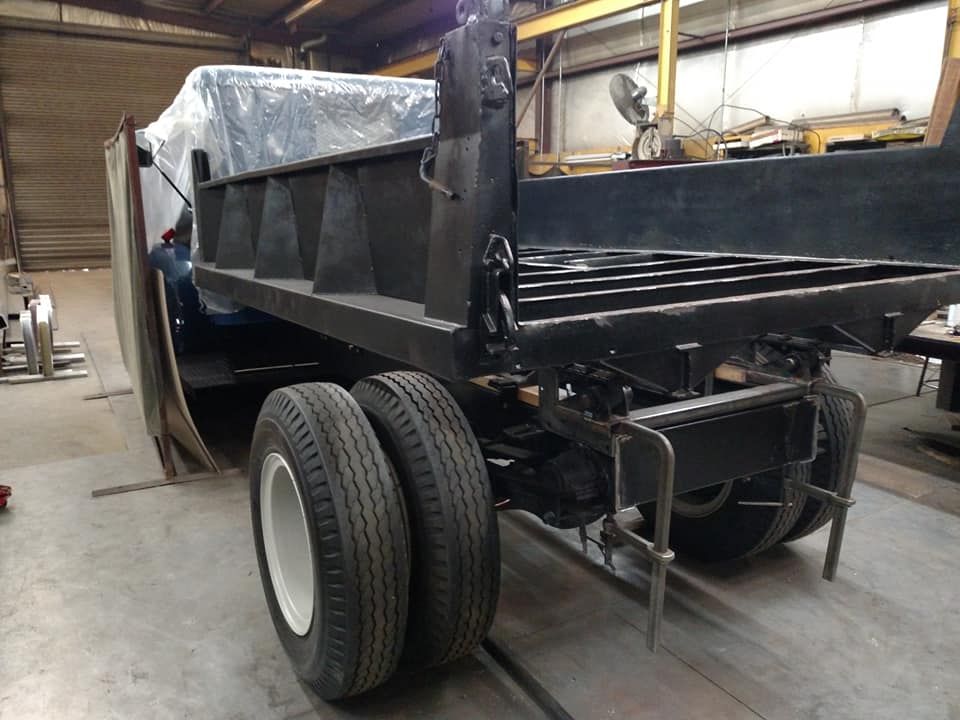 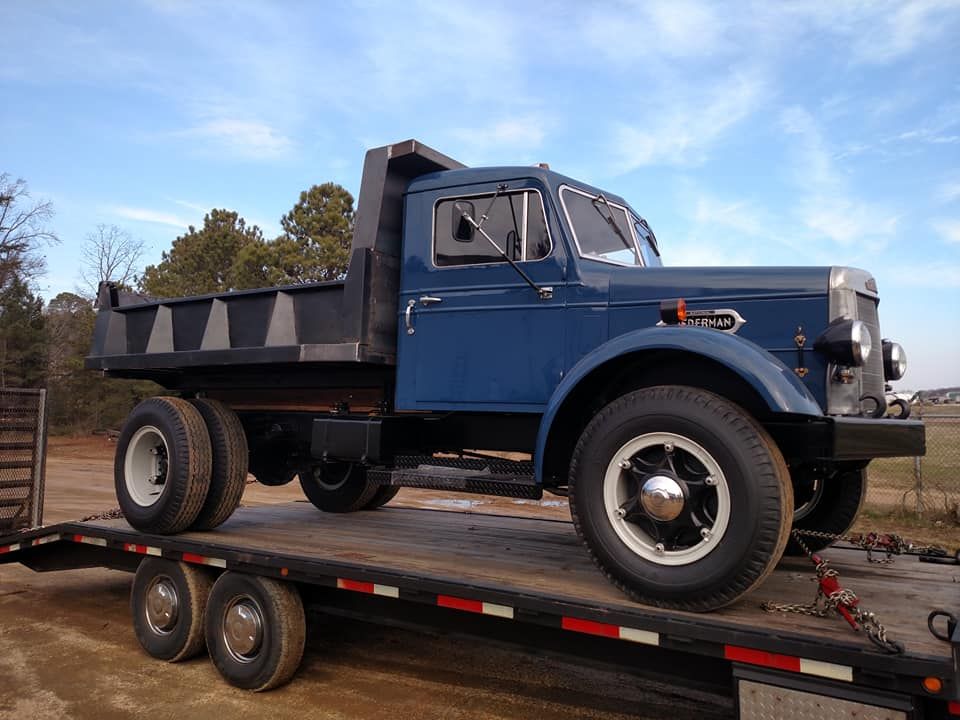 These next pictures really show why we need to add the skirt between the cab and running board. 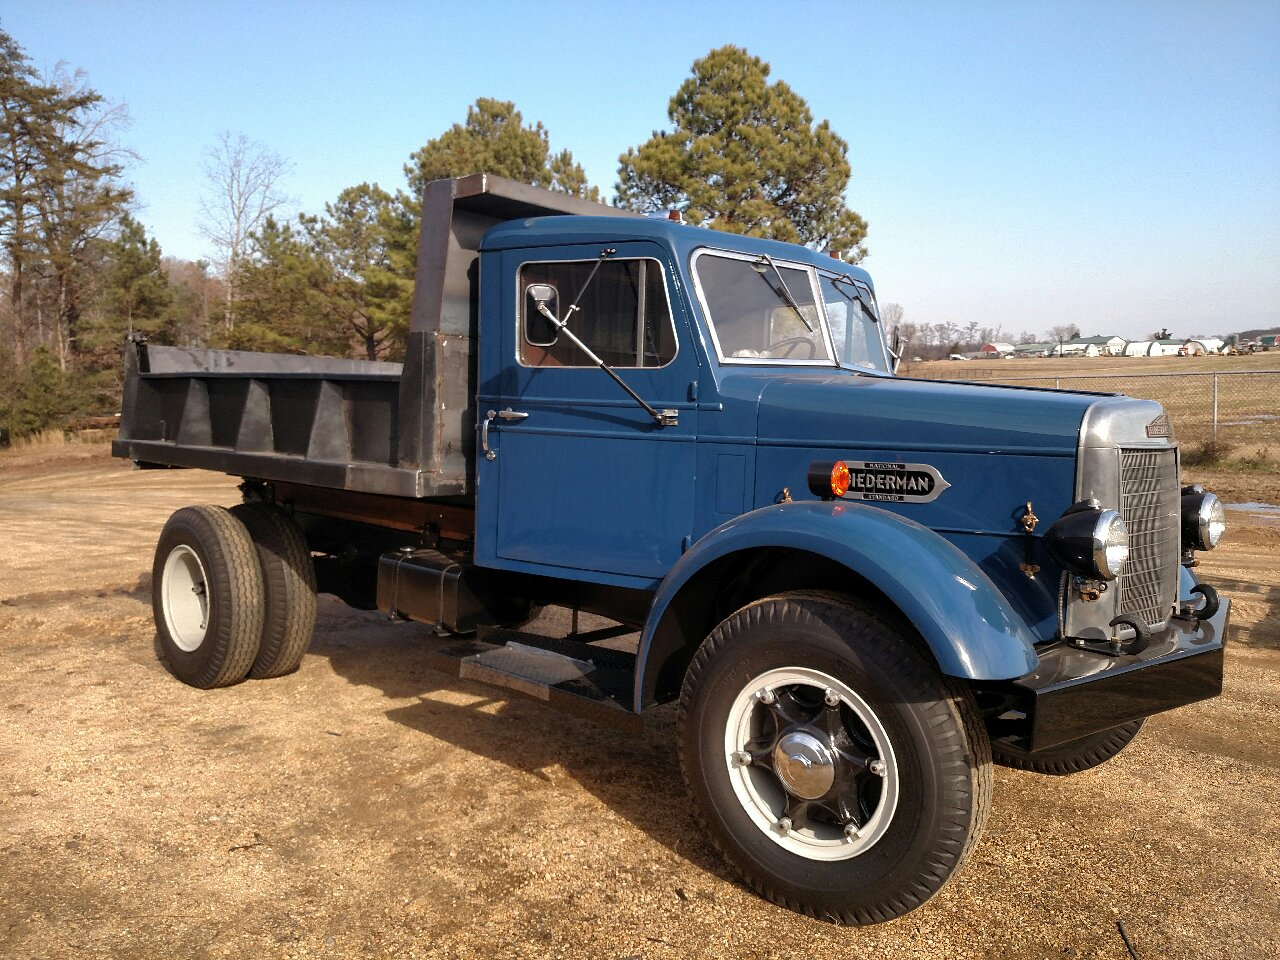 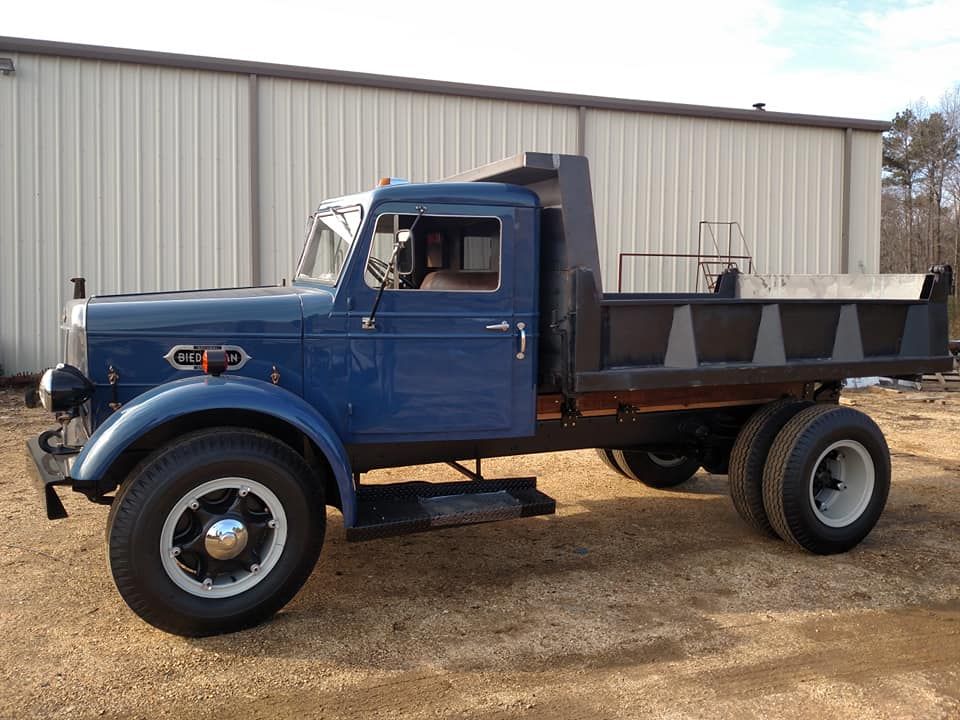 The skirt will rest on top of the running board flange, with a rubber edge trim to save some paint rubbing. Here's our sample bend that will rest on top of the flange. (it's shown upside-down...) 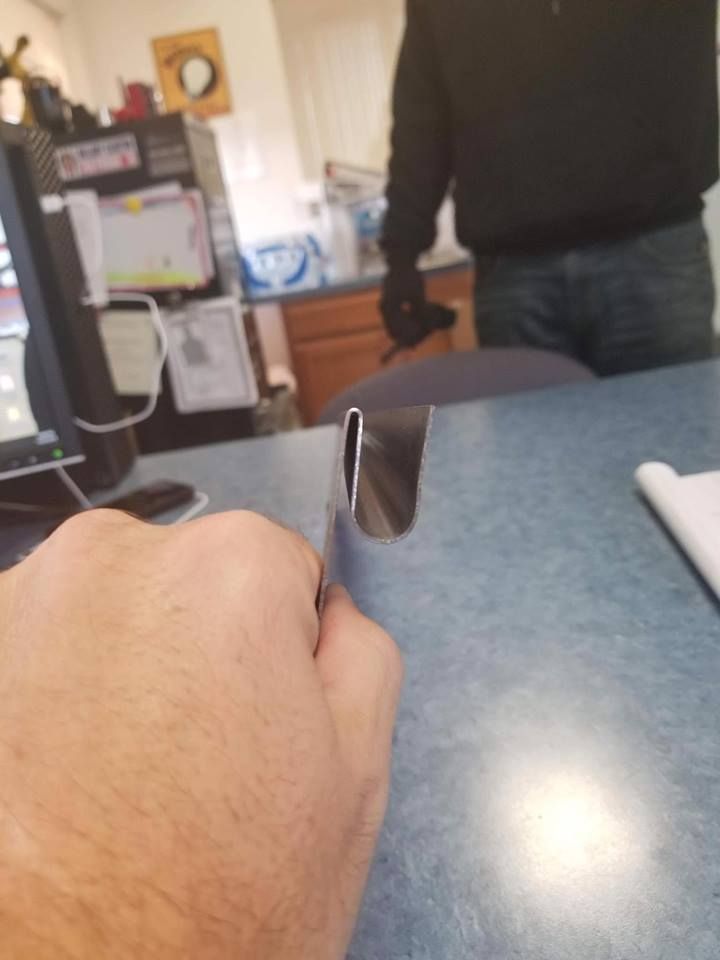 The dump body and other remaining parts will be also be painted blue, he plans to paint this spring.
__________________
Robert |
|
|

|
|
|
#63 |
|
Post Whore
  Join Date: May 2015
Location: Alabama
Posts: 14,674
|
Re: 1947 Biederman Truck Fender repairs
That's gonna be sweet....well it already is....
__________________
Mongo...aka Greg RIP Dad RIP Jesse 1981 C30 LQ9 NV4500..http://67-72chevytrucks.com/vboard/s...d.php?t=753598 Mongos AD- LS3 TR6060...http://67-72chevytrucks.com/vboard/s...34#post8522334 Columbus..the 1957 IH 4x4...http://67-72chevytrucks.com/vboard/s...63#post8082563 2023 Chevy Z71..daily driver |
|
|

|
|
|
#64 |
|
1965 Chevy C10, 2005 4.8L/4l60
 Join Date: Aug 2004
Location: DFW Texas
Posts: 8,547
|
Re: 1947 Biederman Truck Fender repairs
What a cool find! Will set the whole truck off like it should be!
__________________
Clyde65 Rebuild of Clyde http://67-72chevytrucks.com/vboard/s...84#post8338184 69 Aristocrat Lo Liner build http://67-72chevytrucks.com/vboard/s...84#post7561684    support our troops! |
|
|

|
|
|
#65 |
|
Registered User
Join Date: Jan 2013
Location: Leonardtown, MD
Posts: 1,648
|
Re: 1947 Biederman Truck Fender repairs
Been tripping over the 8’ linear slide on the Lennox for the past couple months, time to knock out these Biederman skirts so we can break the linear slide down. This will likely be the last Metalshaping done on this machine before it goes out the door and the replacement comes in.
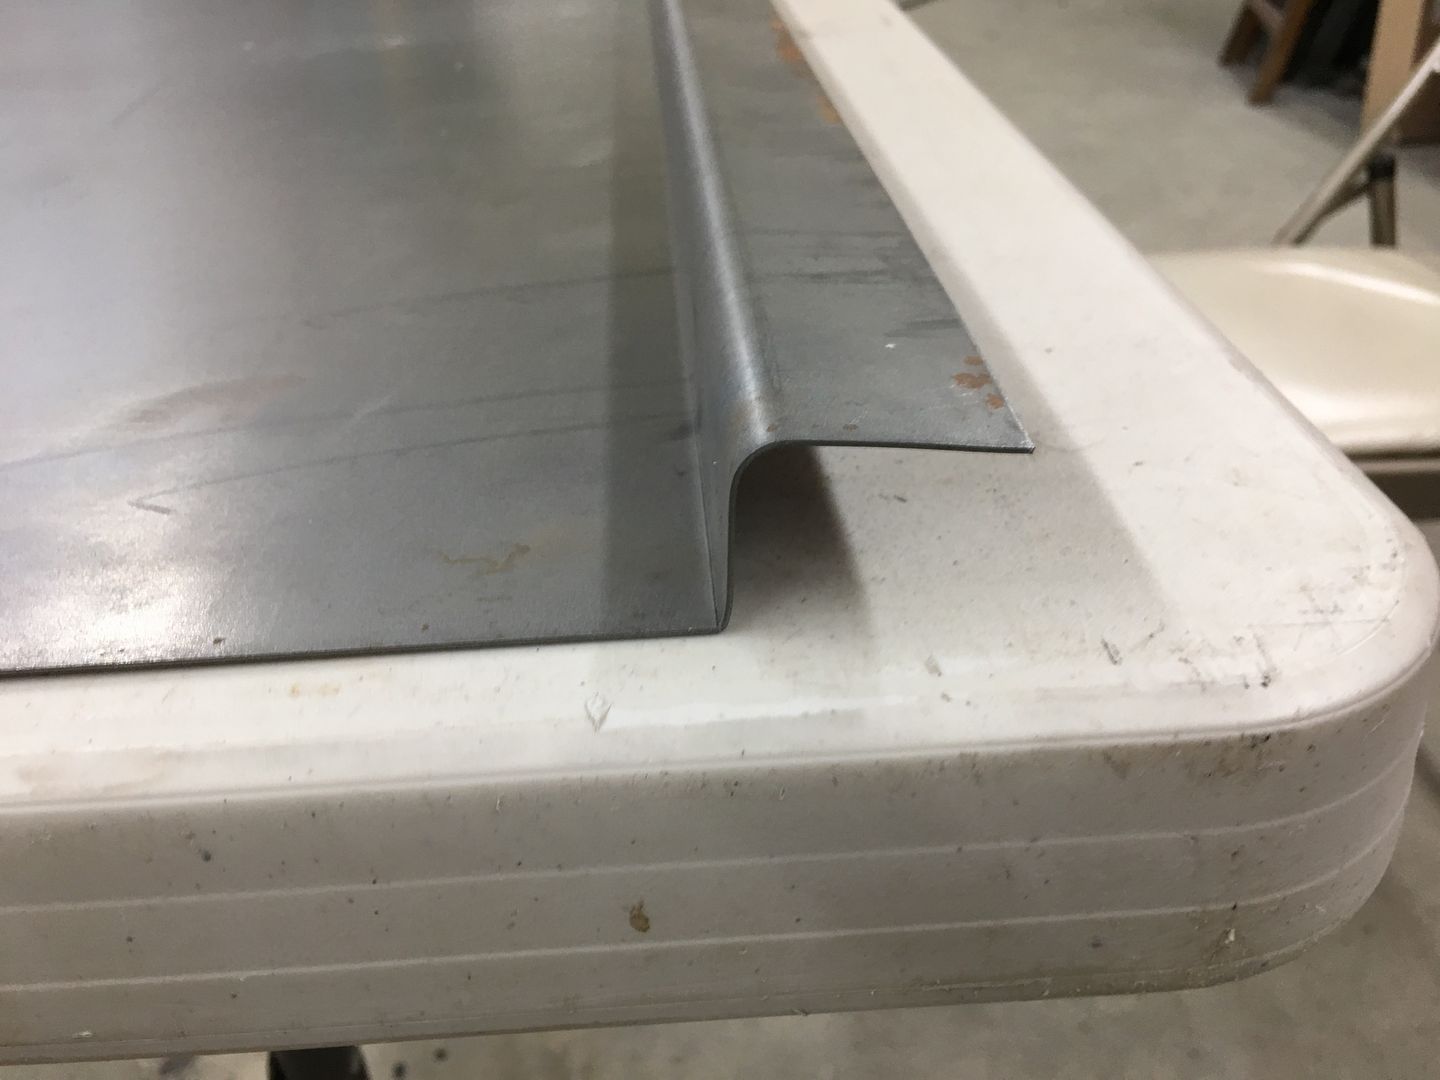 These two bends were done in the magnetic brake, the final fold for the U-shape is done in the Lennox using these dies.. 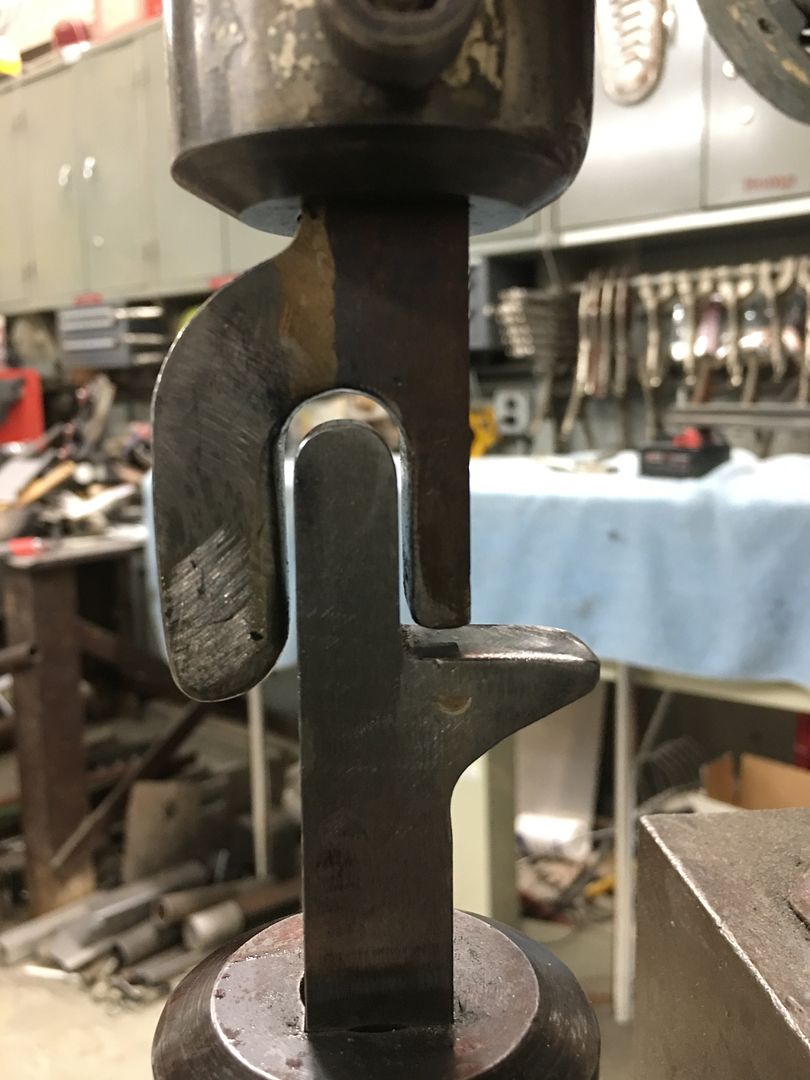 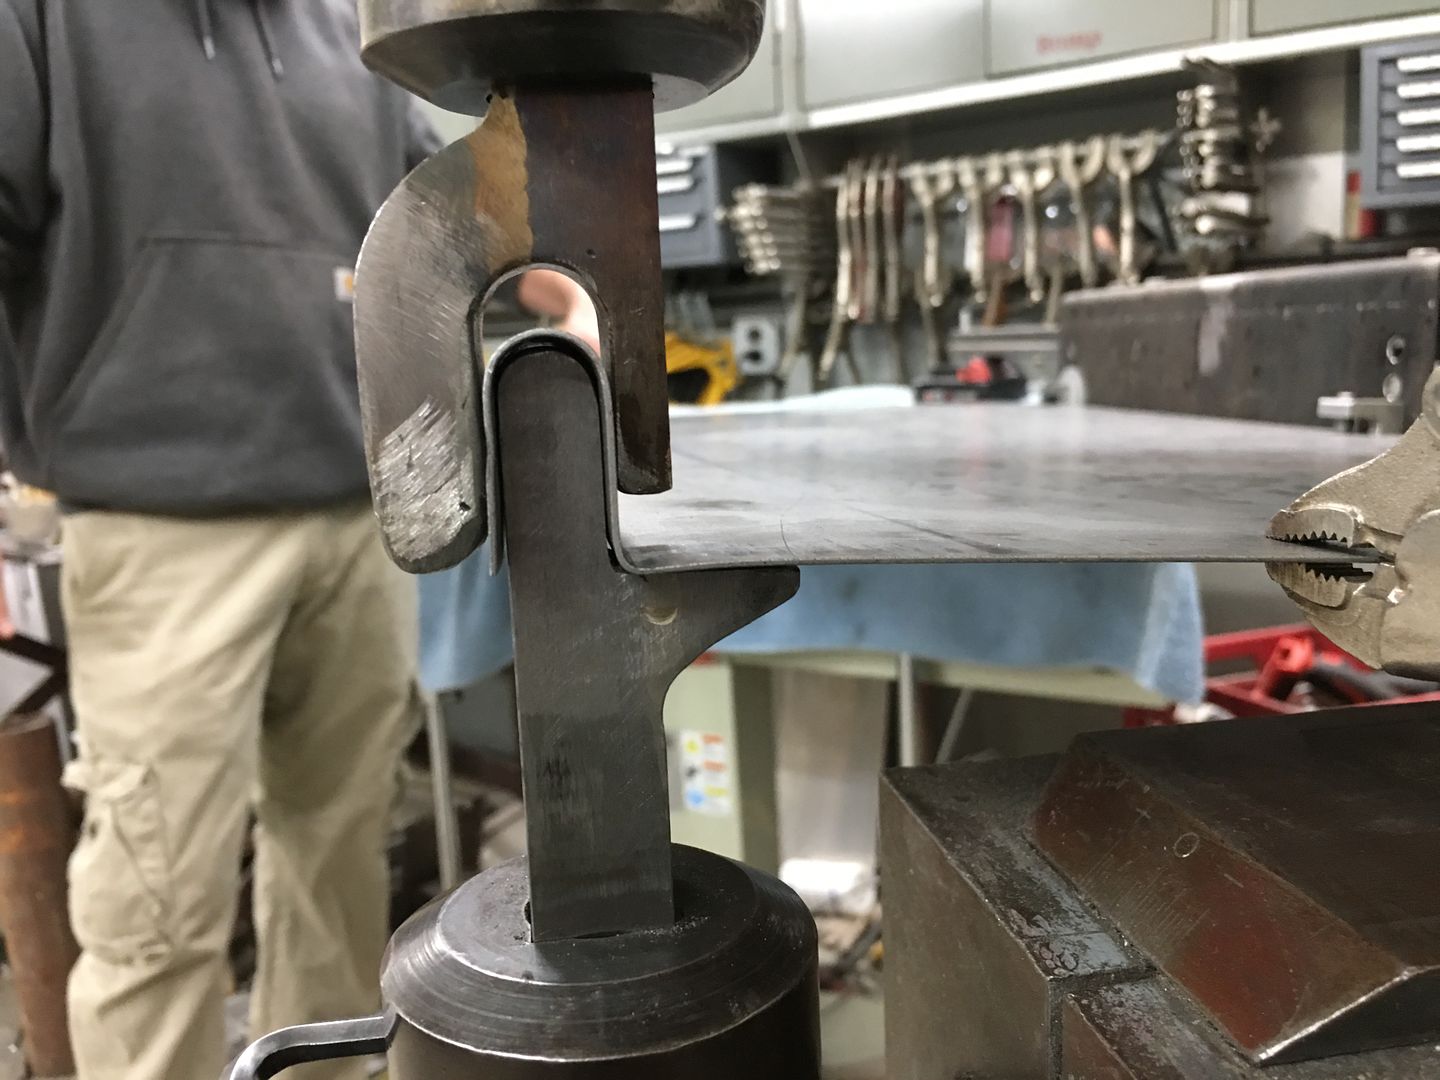 Comparison 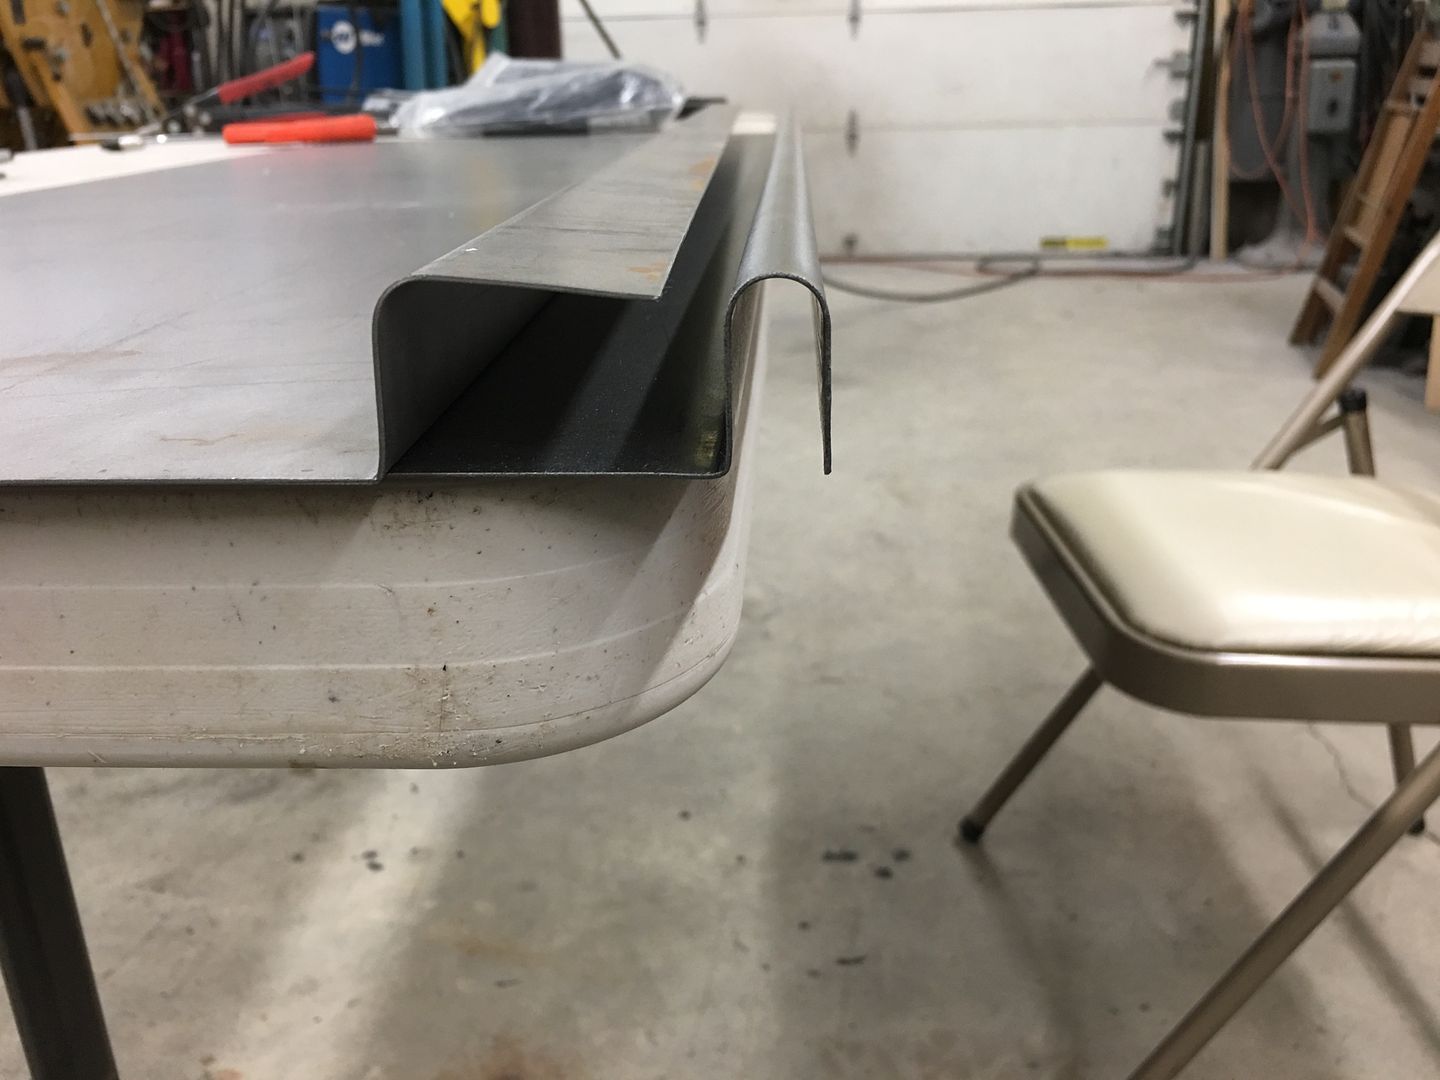 Here's the folding process... https://www.youtube.com/watch?v=pwpJ...ature=youtu.be 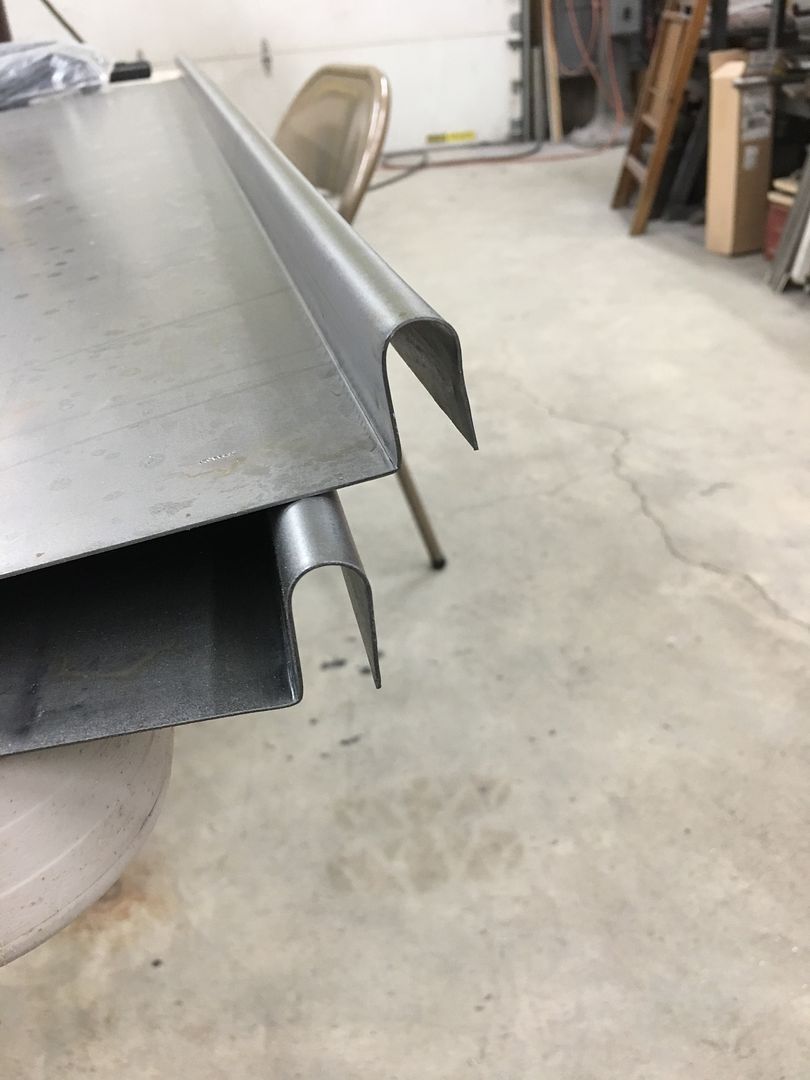 Next we took them to a local machine shop, Triton Defense, to hem the U-shape. They used a knife blade in the press brake. 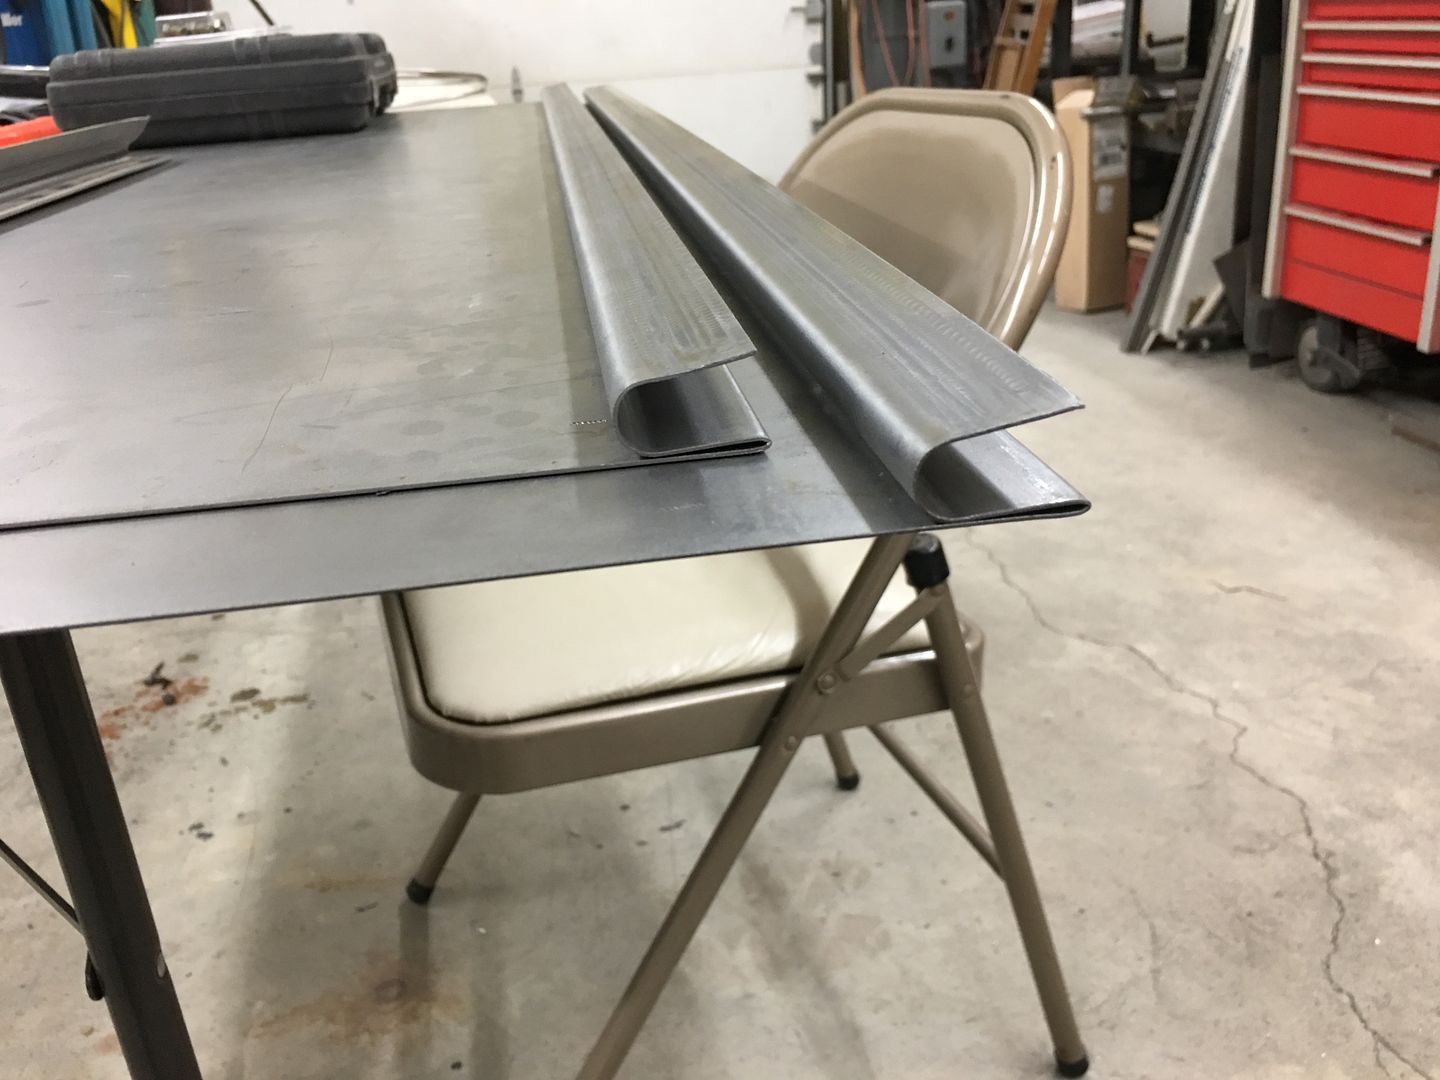 The only thing left for these is to fold the top flange for bolting to the underside of the cab, fit, and paint.
__________________
Robert |
|
|

|
|
|
#66 |
|
Post Whore
  Join Date: May 2015
Location: Alabama
Posts: 14,674
|
Re: 1947 Biederman Truck Fender repairs
amazing as usual Robert...very nice
__________________
Mongo...aka Greg RIP Dad RIP Jesse 1981 C30 LQ9 NV4500..http://67-72chevytrucks.com/vboard/s...d.php?t=753598 Mongos AD- LS3 TR6060...http://67-72chevytrucks.com/vboard/s...34#post8522334 Columbus..the 1957 IH 4x4...http://67-72chevytrucks.com/vboard/s...63#post8082563 2023 Chevy Z71..daily driver |
|
|

|
|
|
#67 |
|
Senior Member
 Join Date: Jul 2012
Location: Oblong, Illinois
Posts: 7,028
|
Re: 1947 Biederman Truck Fender repairs
Continued impressive work. Very nice!
|
|
|

|
|
|
#68 |
|
Registered User
Join Date: Jan 2013
Location: Leonardtown, MD
Posts: 1,648
|
Re: 1947 Biederman Truck Fender repairs
Thanks for the comments!
John stopped by the shop last night so we could fit up the running board skirts on the Biederman.  I know he will be glad to close off this gaping hole. 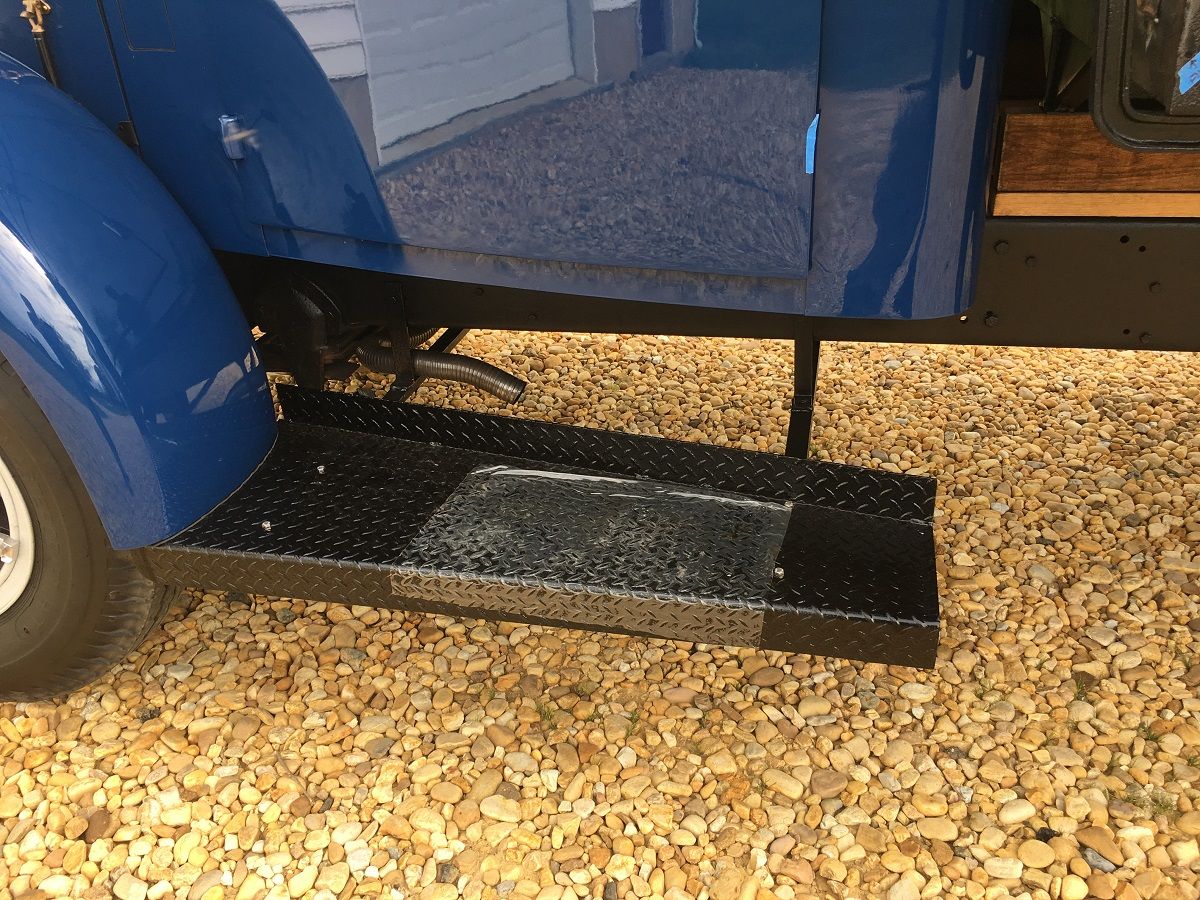 After taking some measurements we got the top flange folded over using the magnetic brake. The flange will be bolted to the underside of the cab to support the weight as we will leave about a 1/4" or so gap above the running board to allow for frame flex.    Rivet Nuts installed under the cab... 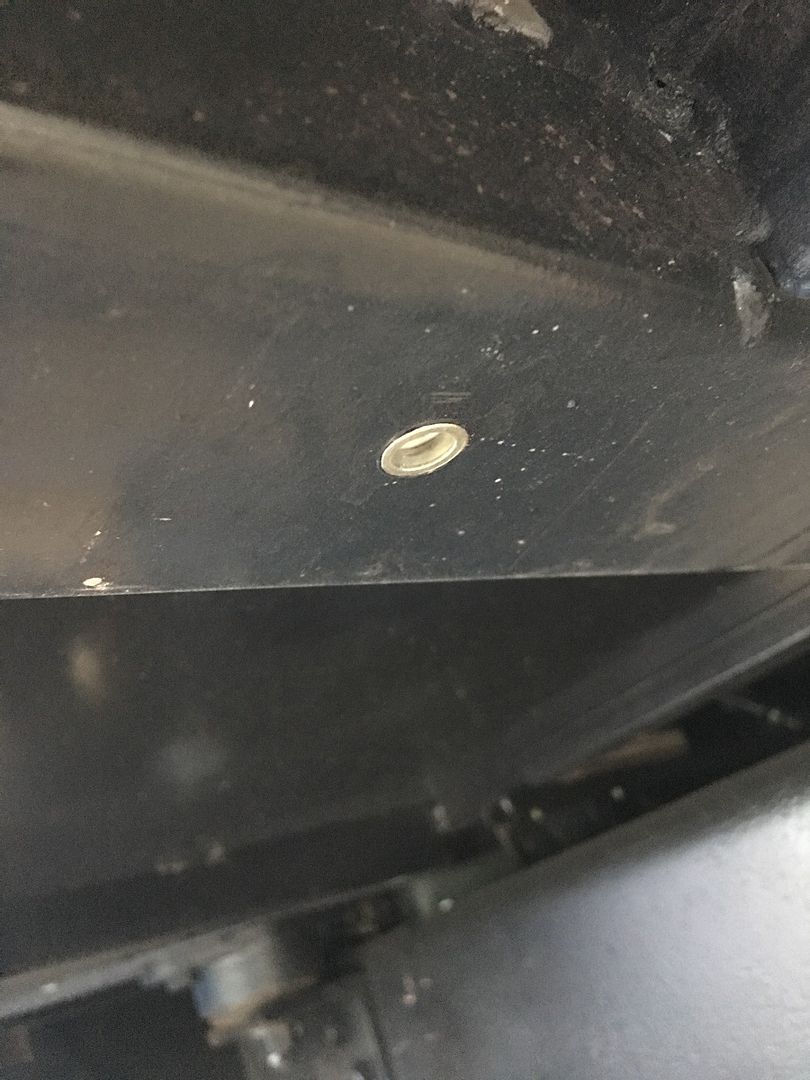  The rubber edge trim is our attempt to keep the paint from rubbing off, and these are held in place using weatherstrip adhesive. 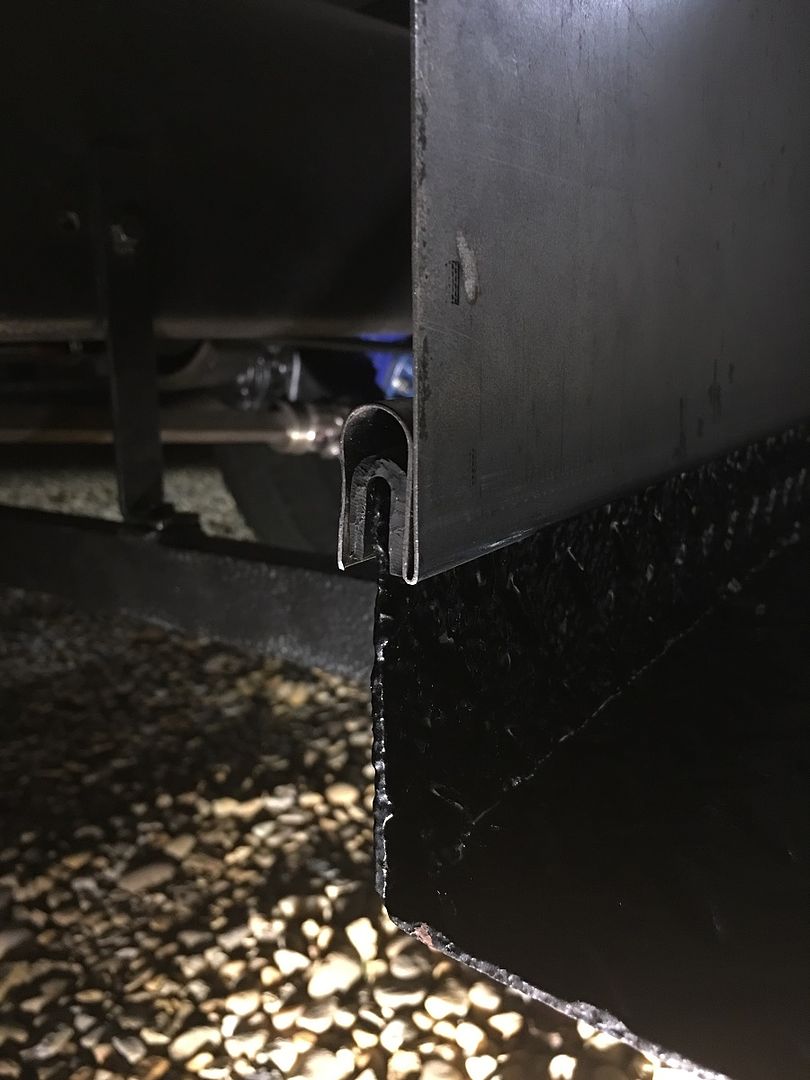 The dump bed had been painted over when John bought it, but closer inspection showed where some additional layers of paint in the hand painted lettering, "Phone 60" had staved off surface rust in it's previous life and was still visible... 
__________________
Robert |
|
|

|
|
|
#69 |
|
Registered User
Join Date: Jan 2013
Location: Leonardtown, MD
Posts: 1,648
|
Re: 1947 Biederman Truck Fender repairs
To finish off the running board skirts, some epoxy primer was brushed into the hem fold, given a couple days to cure, and then seam sealer added to keep out the moisture..
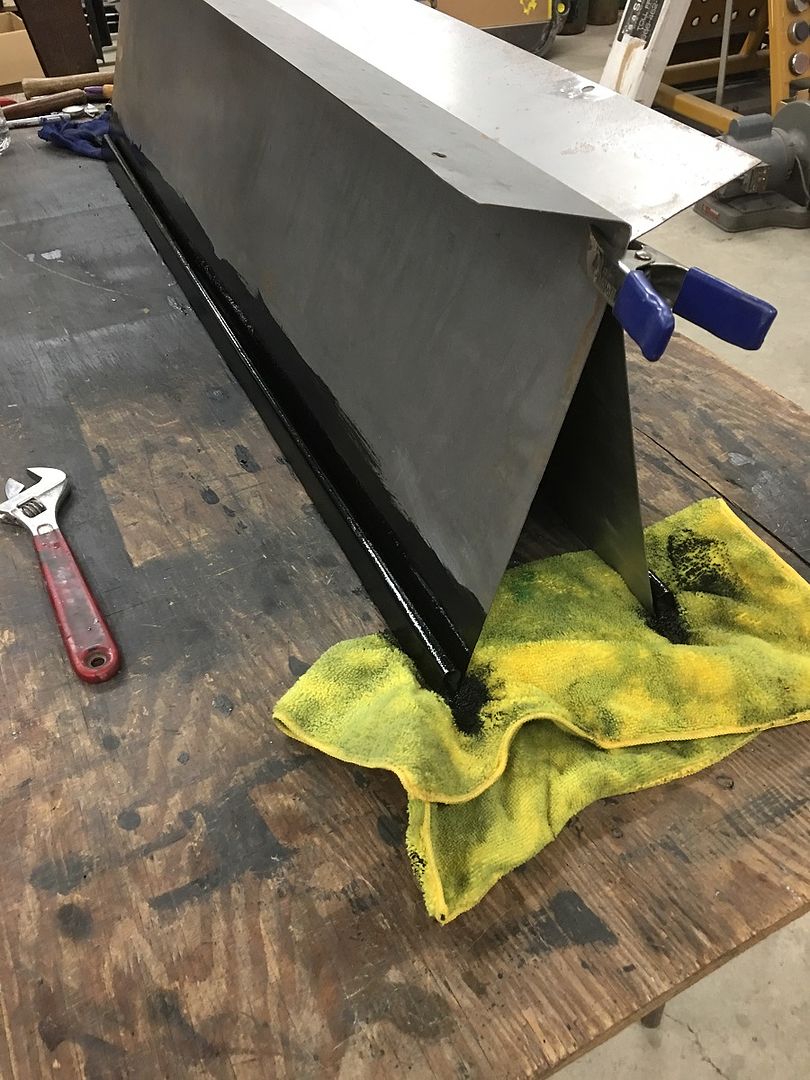 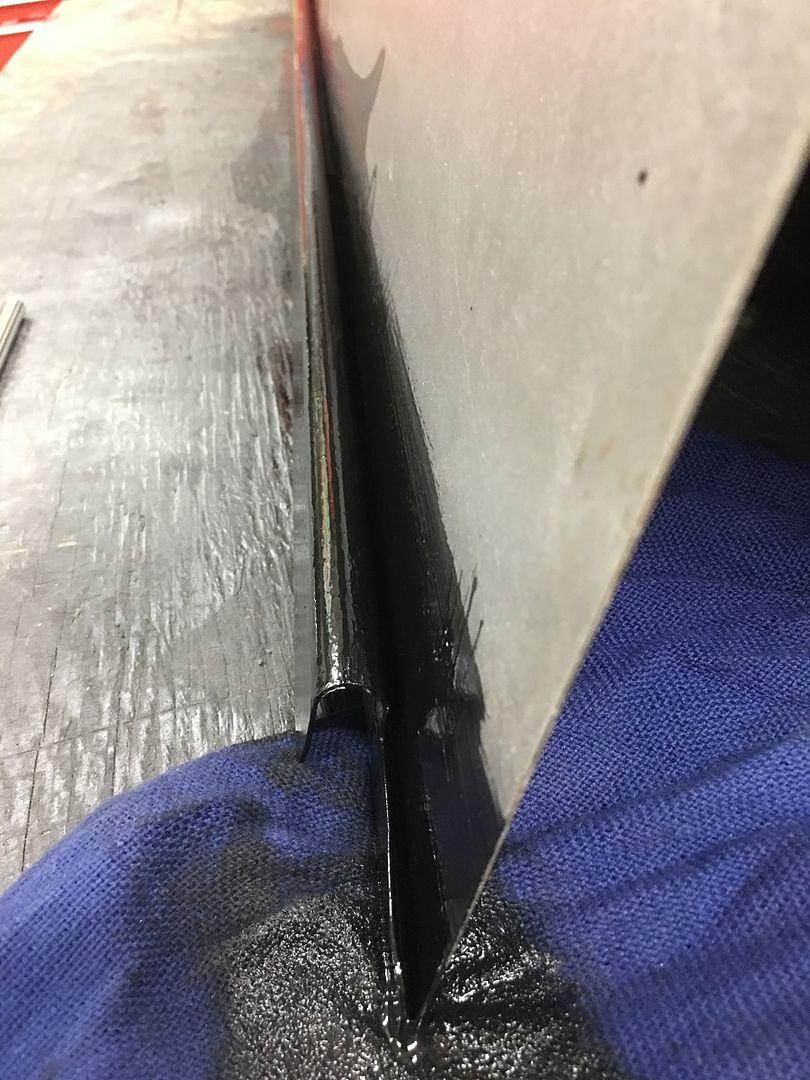 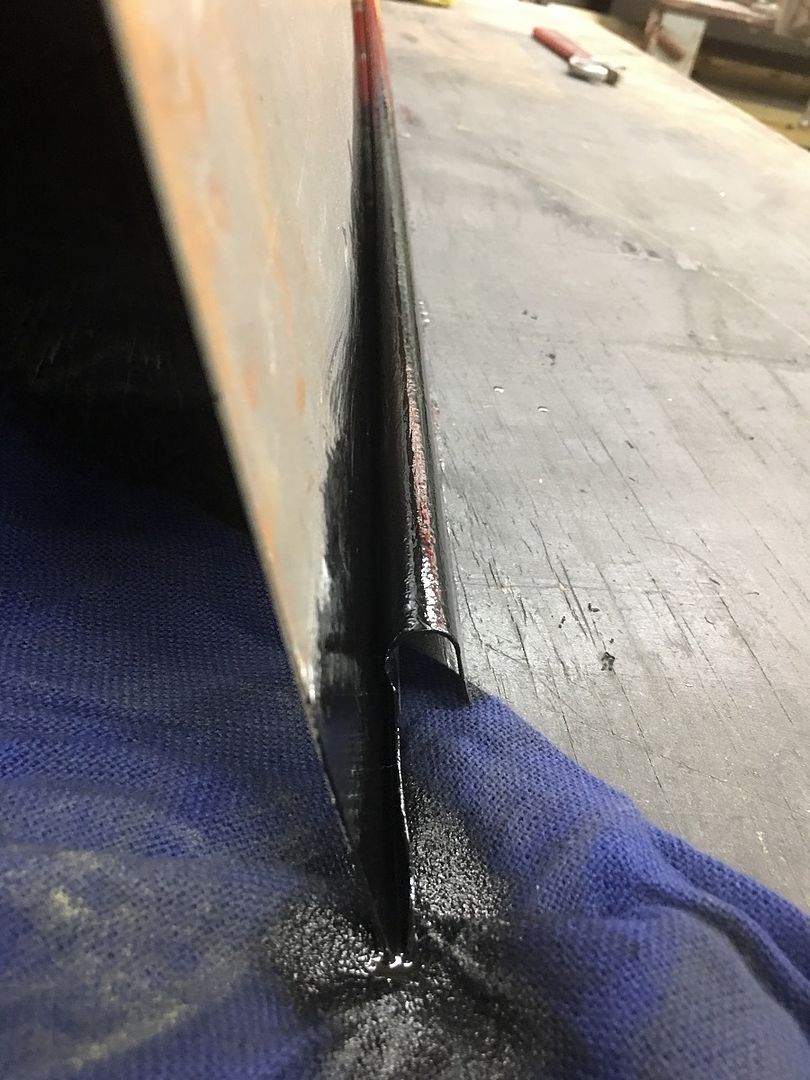 ….then another dose of epoxy over the seam sealer, and everything primed. 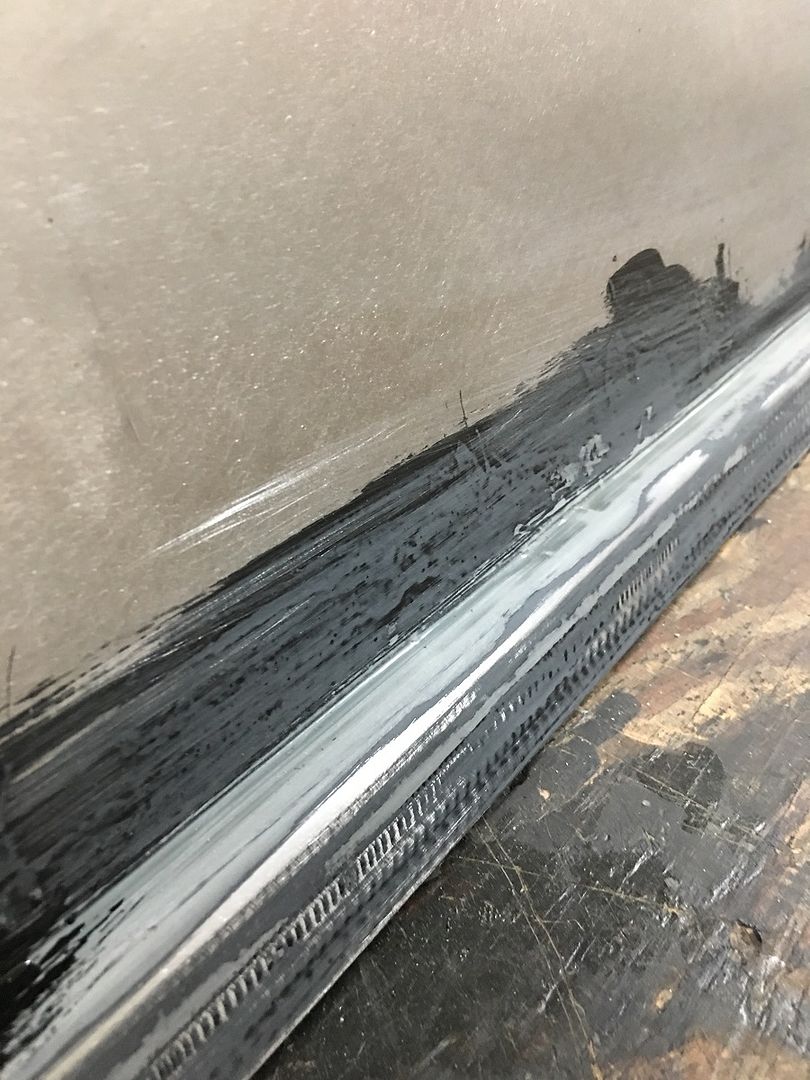 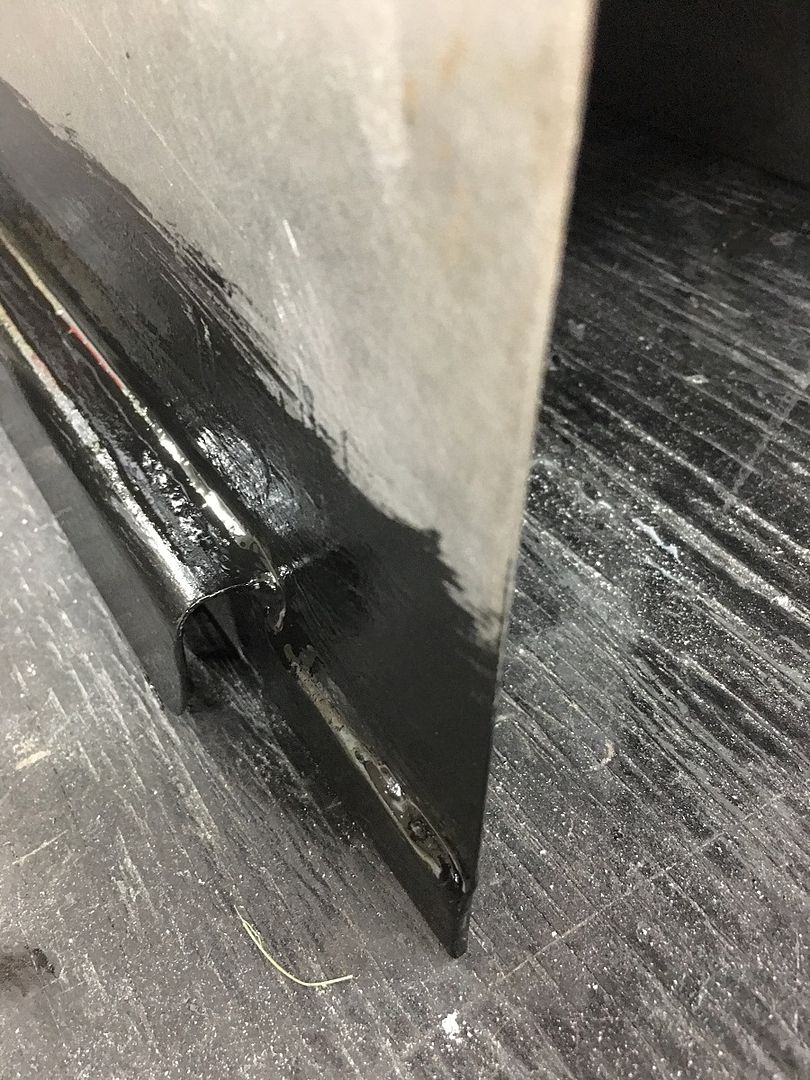 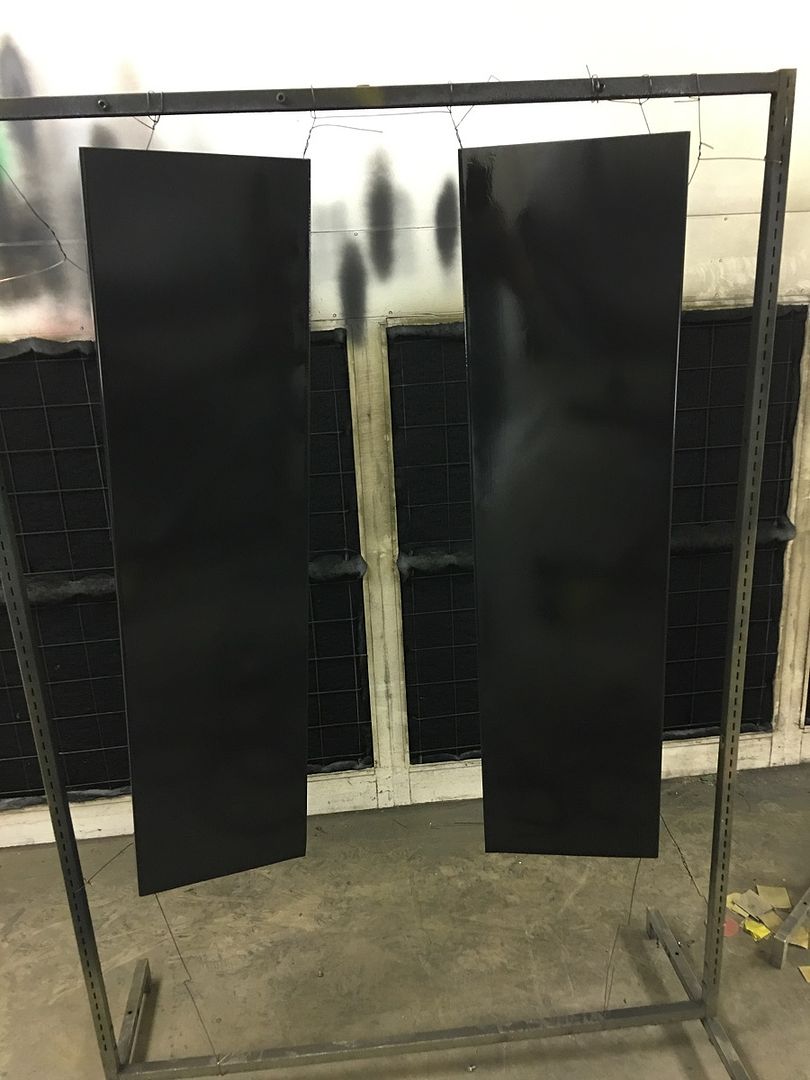 I didn't get pictures of spraying the blue, so the finals will have to do. John is tying up the loose ends, the running board skirts were installed the other night..... 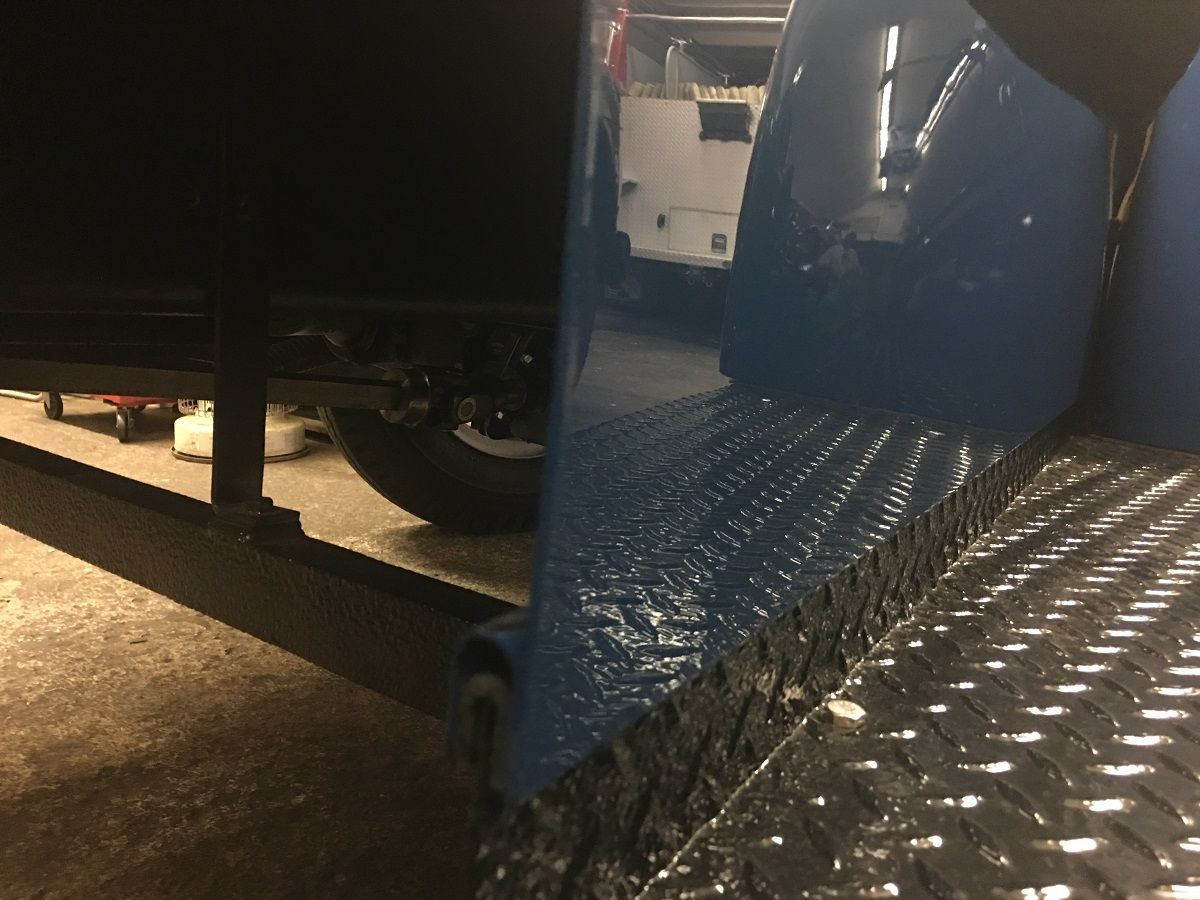 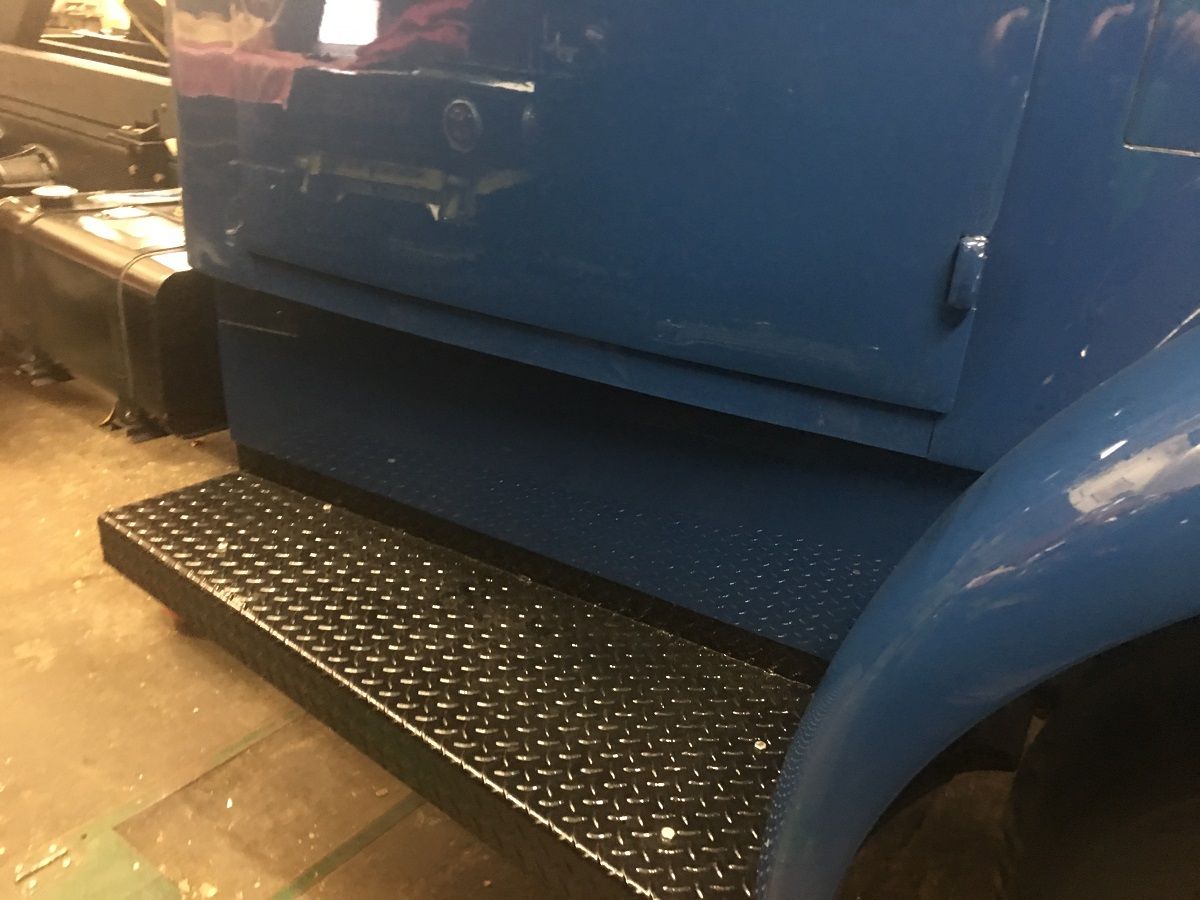 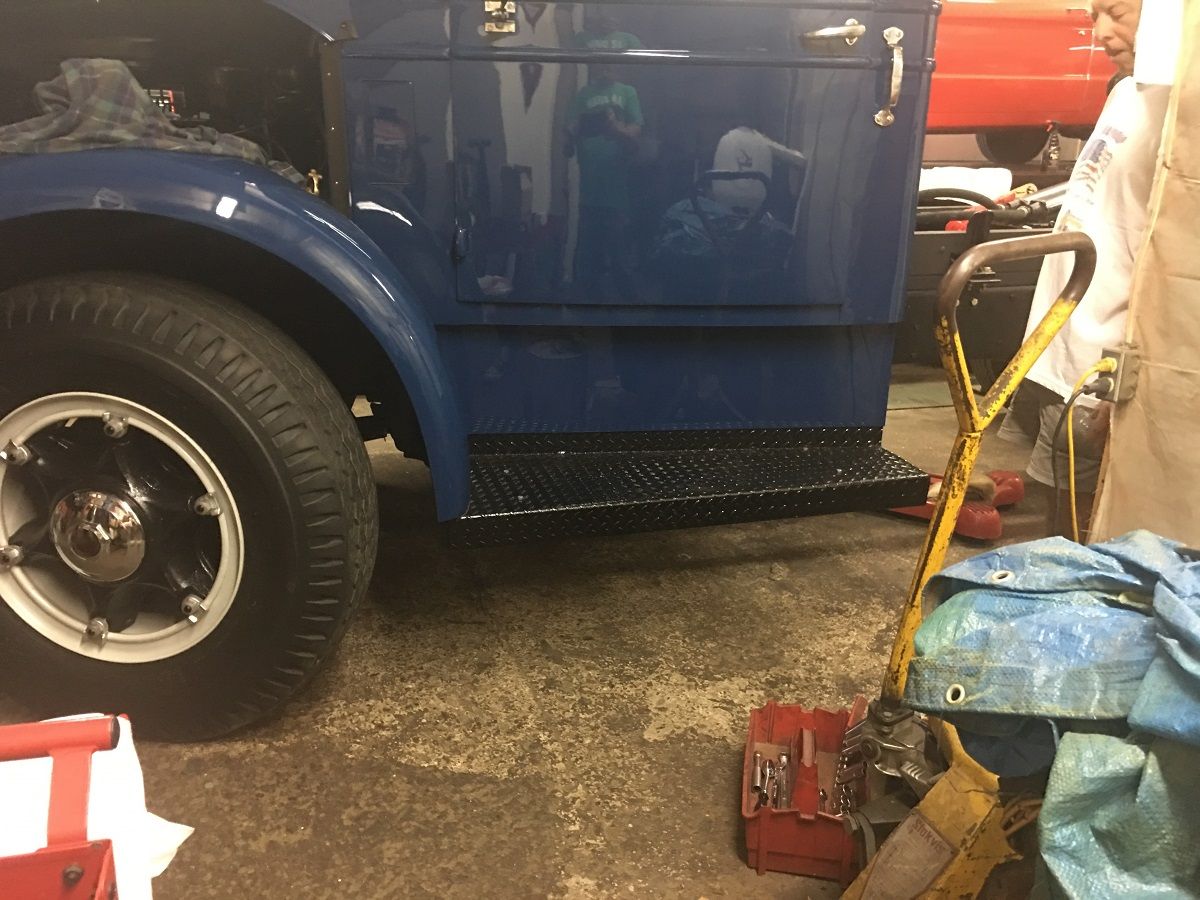 The dump body has been painted and he should get that installed today or tomorrow. 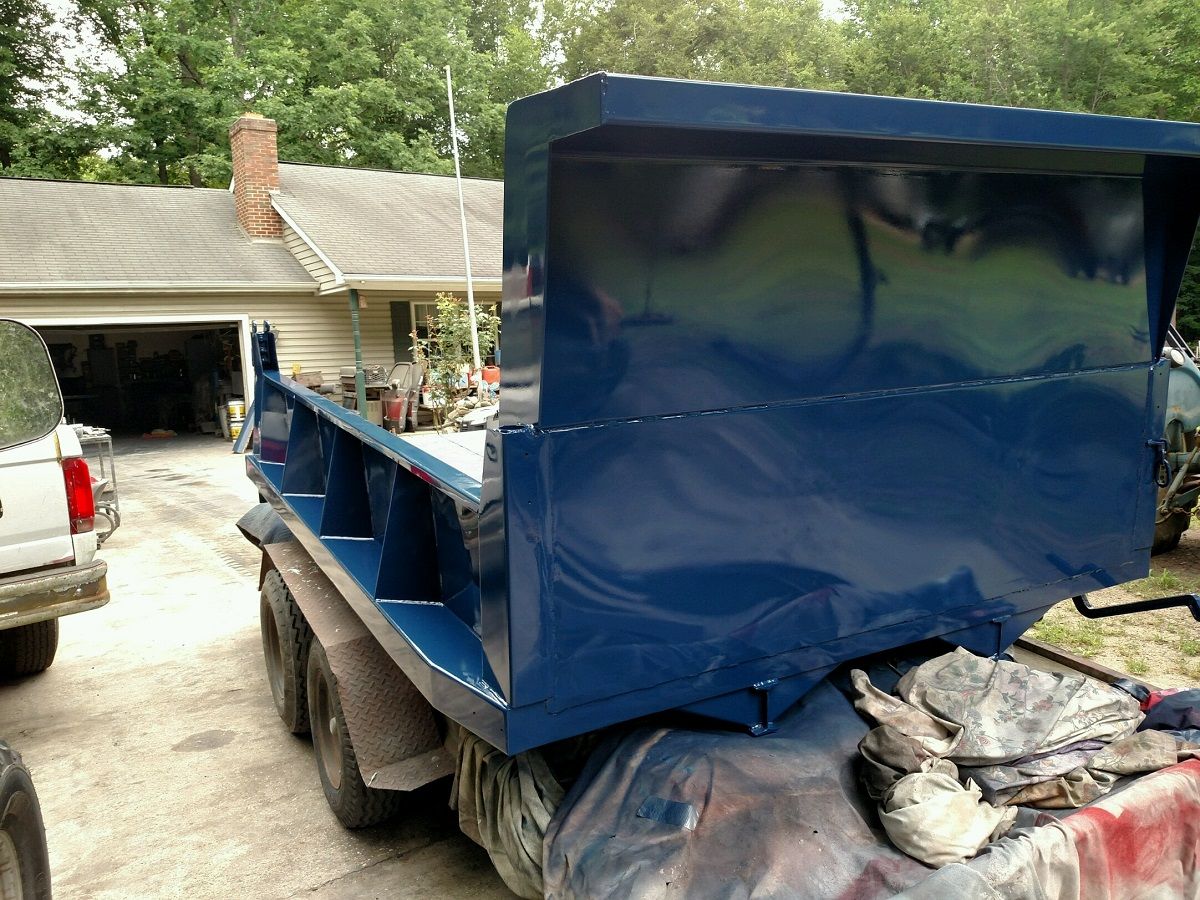 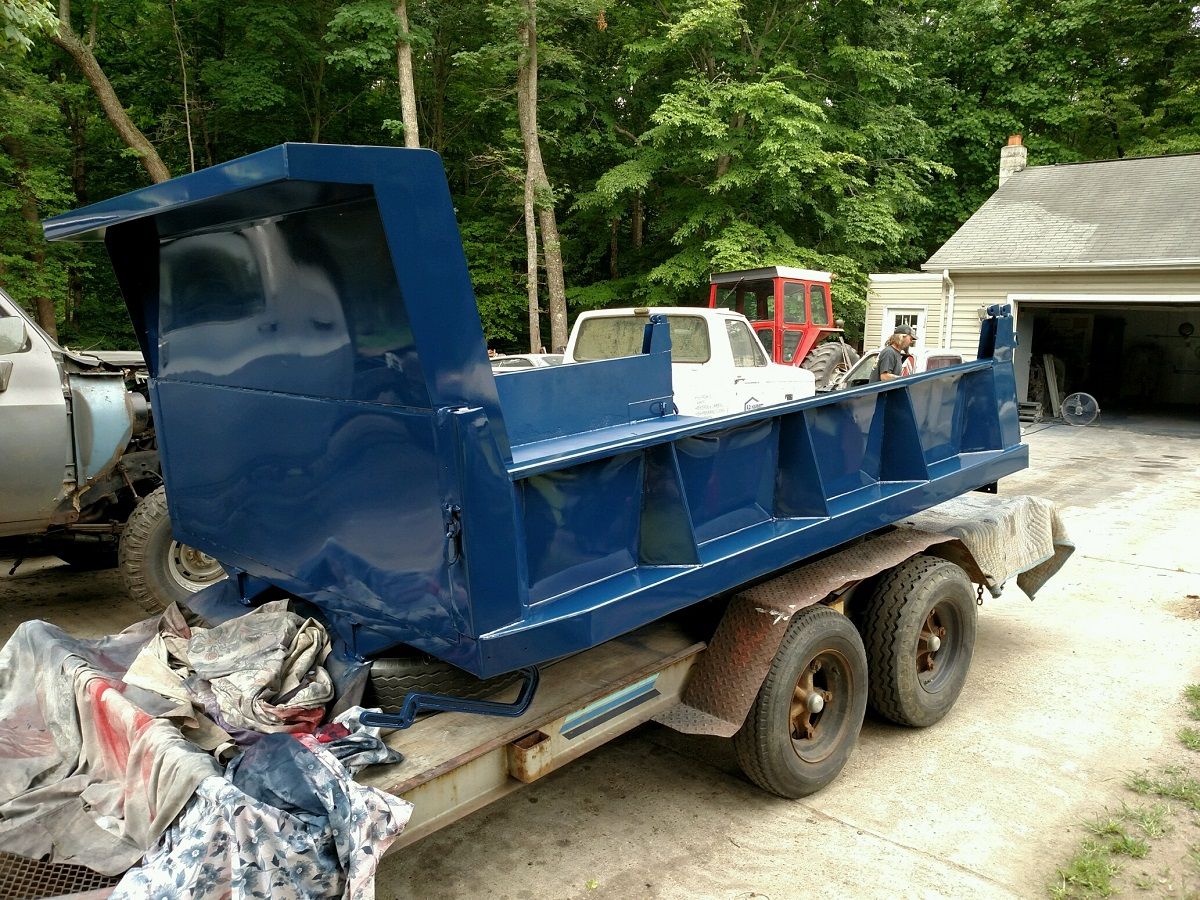 He will get it loaded up around Wednesday for the trip to Macungie PA for the truck show this coming weekend.
__________________
Robert |
|
|

|
|
|
#70 |
|
Registered User
Join Date: Jan 2013
Location: Leonardtown, MD
Posts: 1,648
|
Re: 1947 Biederman Truck Fender repairs
All finished up and John has the Biederman loaded, headed up to Macungie PA today for the truck show this weekend.
 This is the "tow" vehicle with Ian Watson, who is visiting from Melbourne Australia. 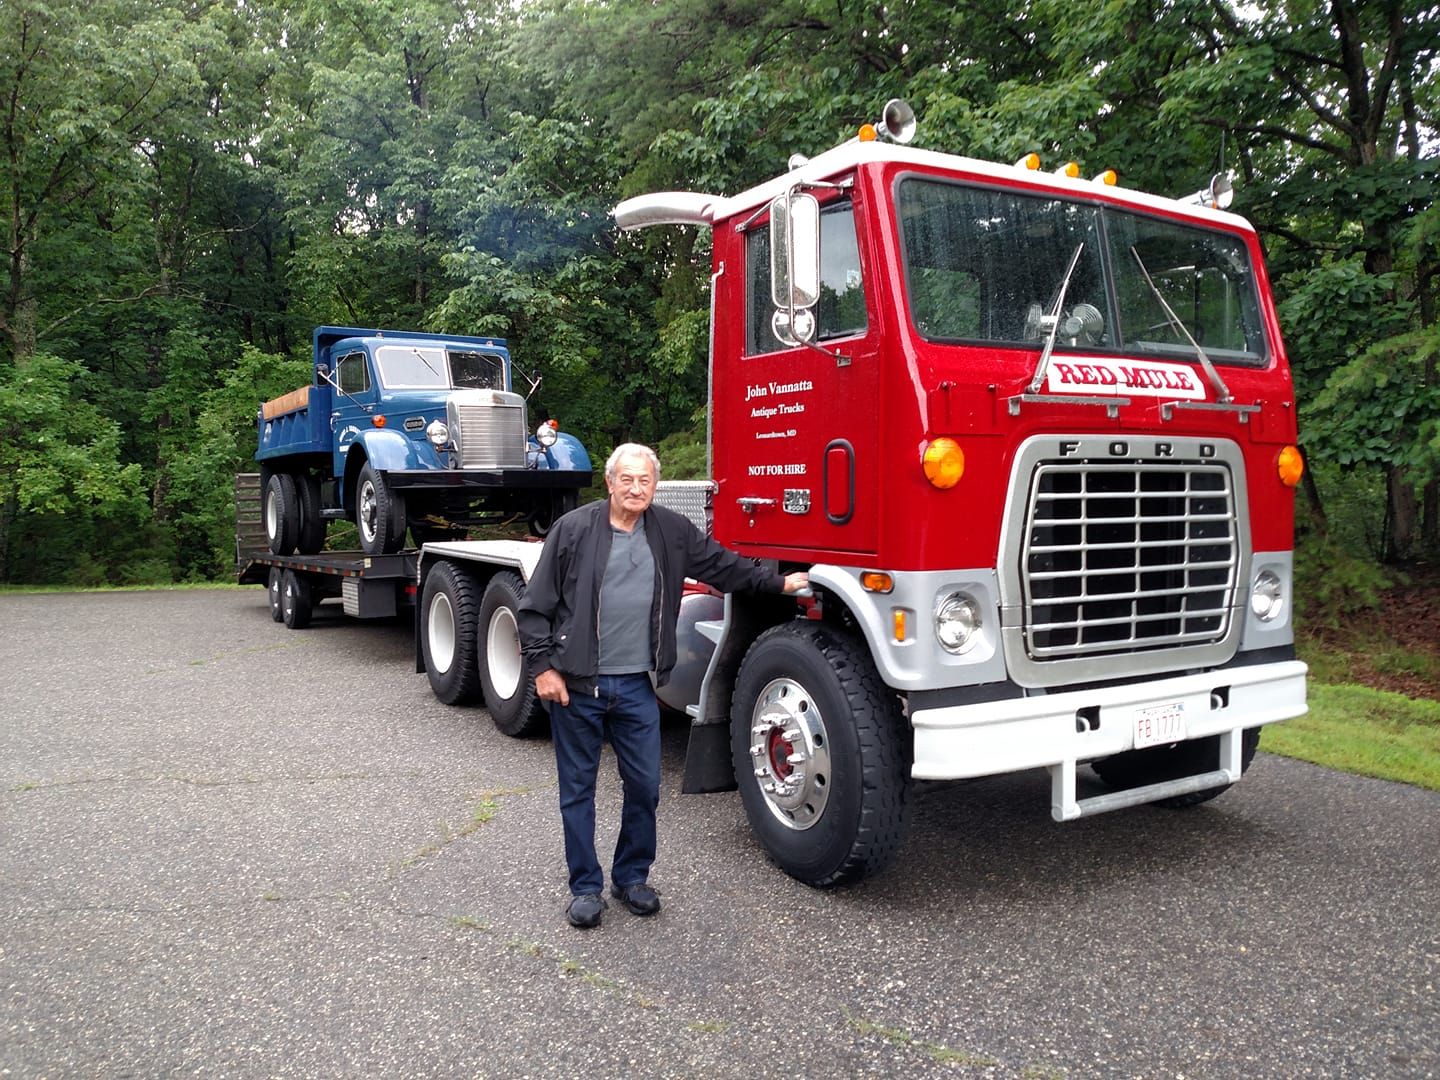 Some pics from the Macungie show, photo credit Pat66, Stovebolter 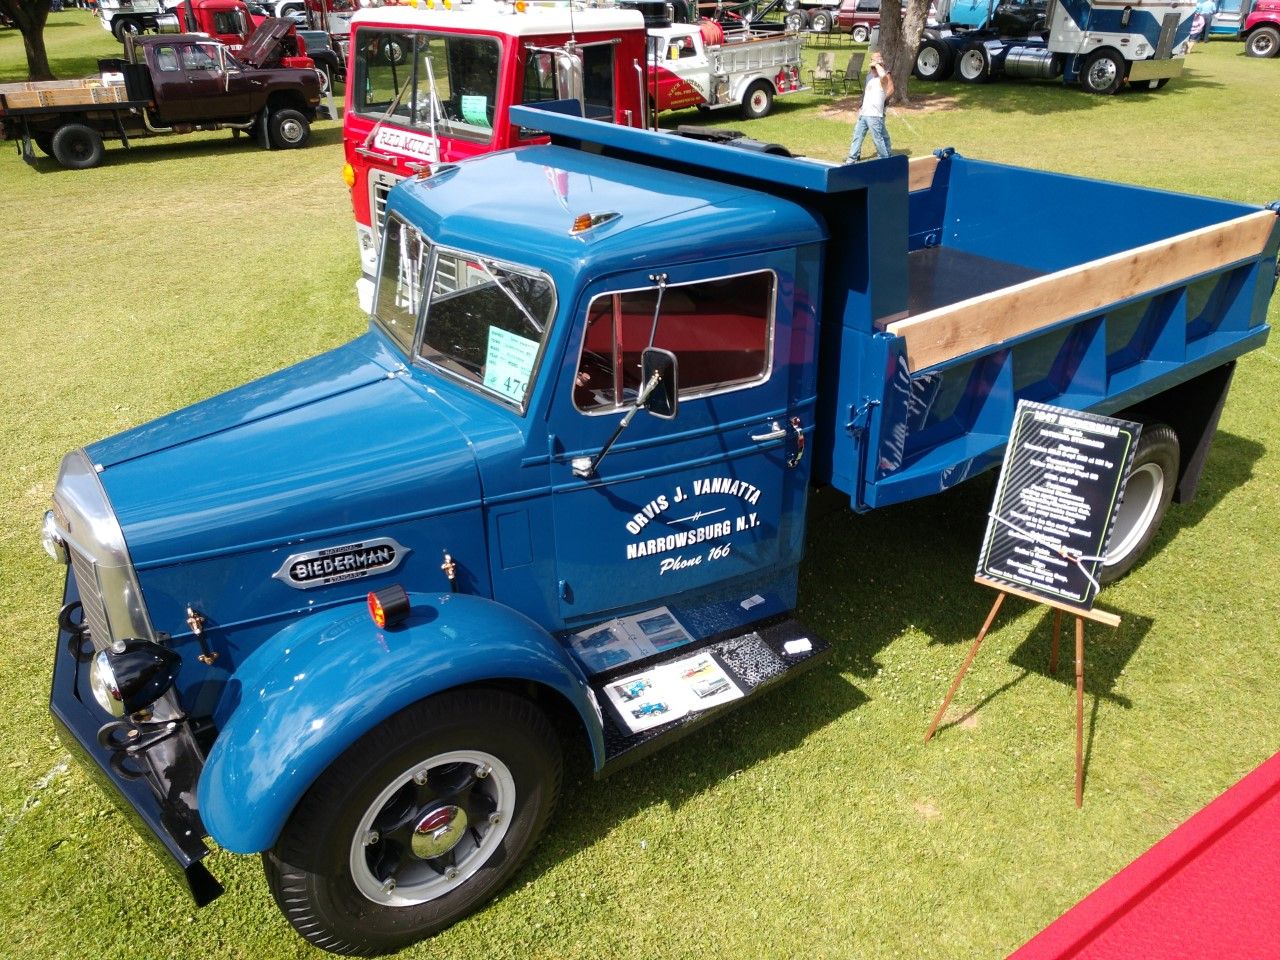 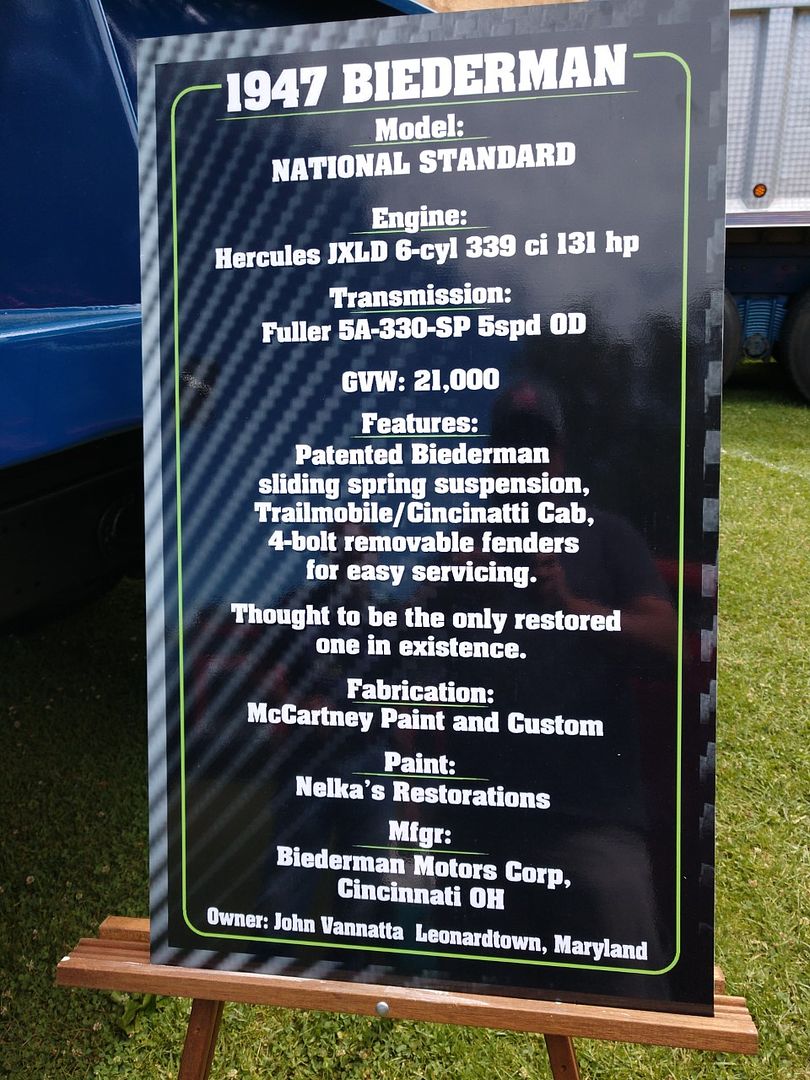
__________________
Robert Last edited by MP&C; 06-20-2019 at 11:22 AM. |
|
|

|
|
|
#71 |
|
Registered User
Join Date: Jan 2013
Location: Leonardtown, MD
Posts: 1,648
|
Re: 1947 Biederman Truck Fender repairs
The Biederman truck we did some rust repairs and metal fabrication on found its way onto the cover of the latest issue of Wheels of Time. It has a feature article on the restoration John did on the truck, as well as a follow up article on the company history. Pretty neat to read, honored to have played a small part in helping preserve an example of this rare truck for future generations.
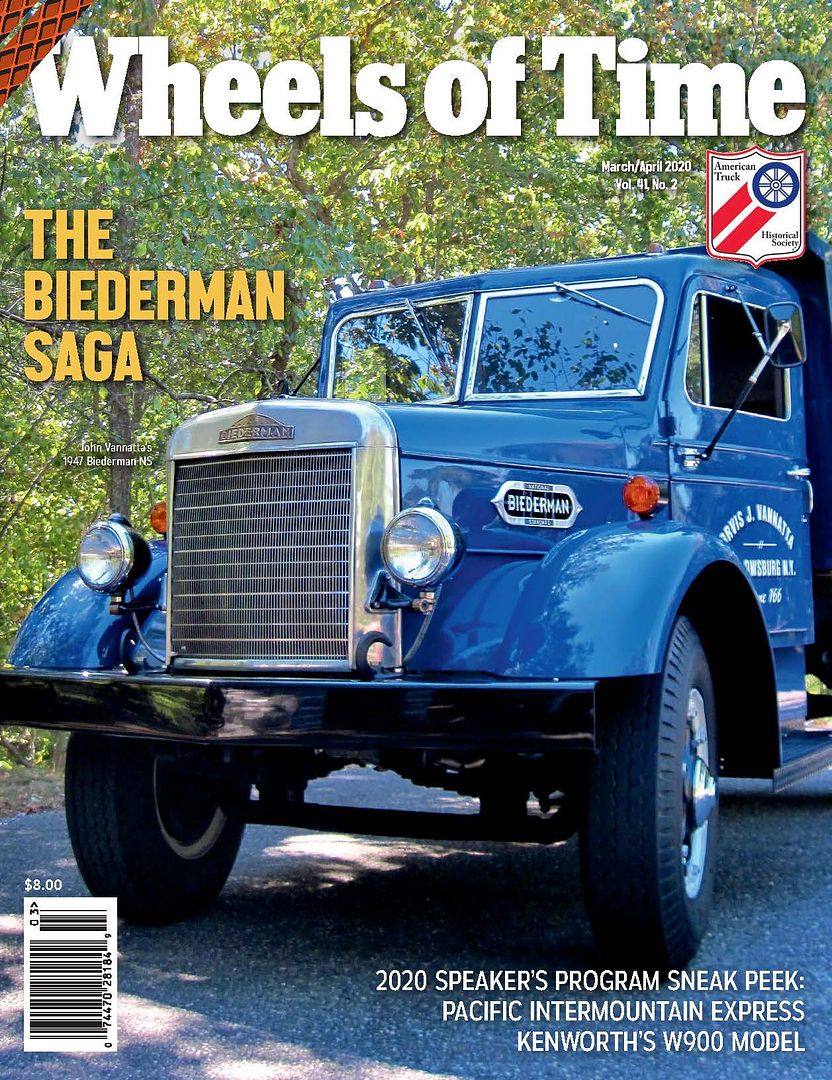 Before: 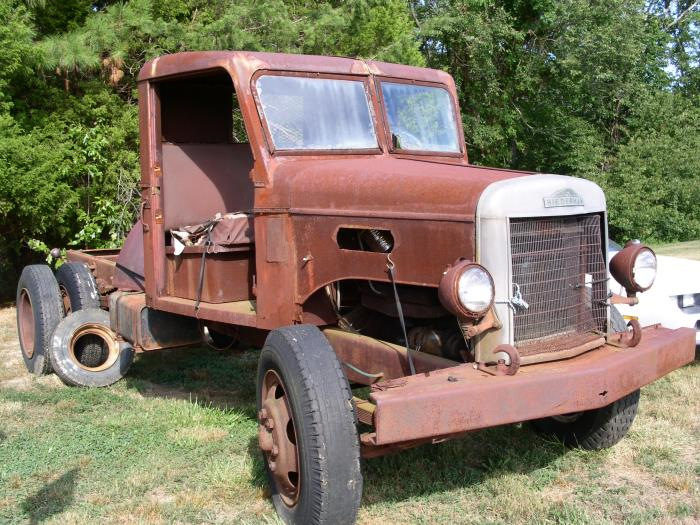 After: 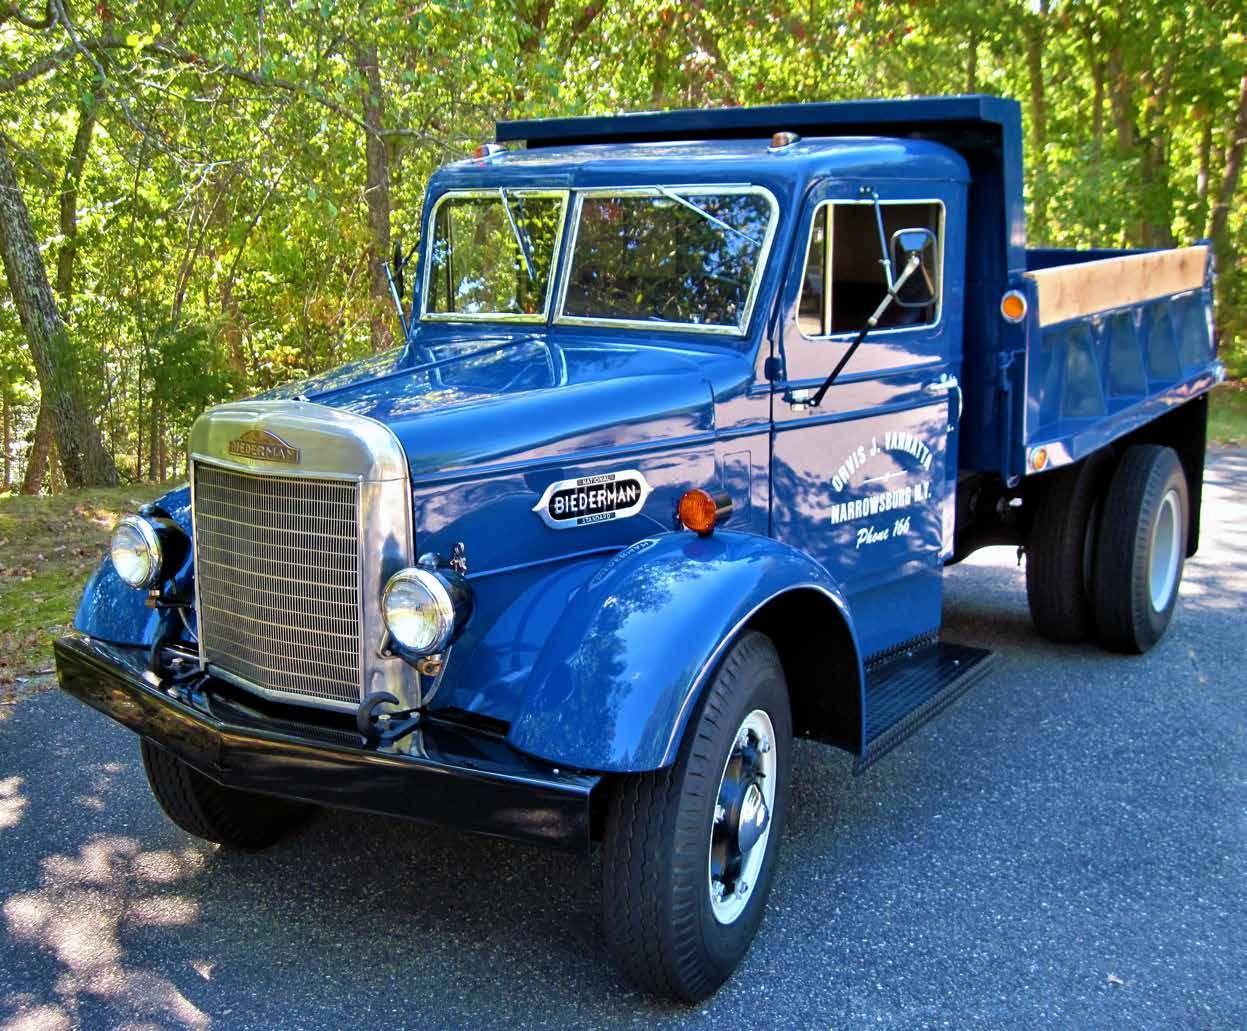 Photo credit: ATHS Wheels of Time
__________________
Robert |
|
|

|
 |
| Bookmarks |
|
|