 |
Register or Log In To remove these advertisements. |
|
|
|
|||||||
|
|
Thread Tools | Display Modes |
|
|
#1 |
|
Next project: 1970 K10
Join Date: Feb 2004
Location: Fort Collins, Colo 80524
Posts: 6,684
|
Engine mount adapter options
Please keep this thread specific to options available for engine mounting.
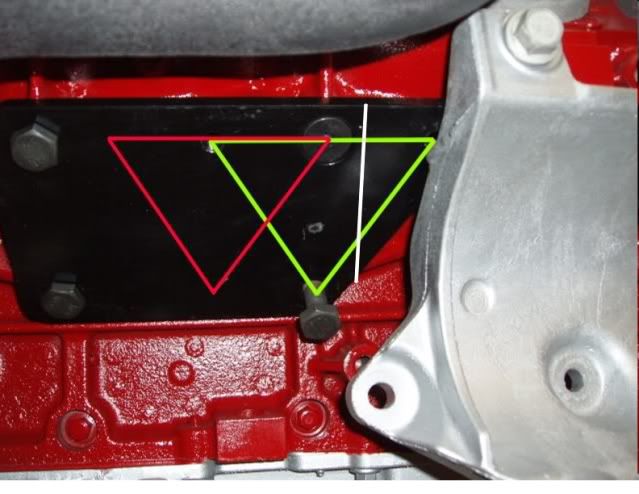
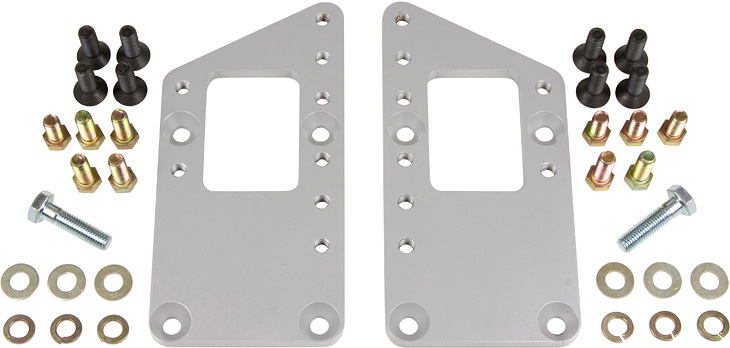
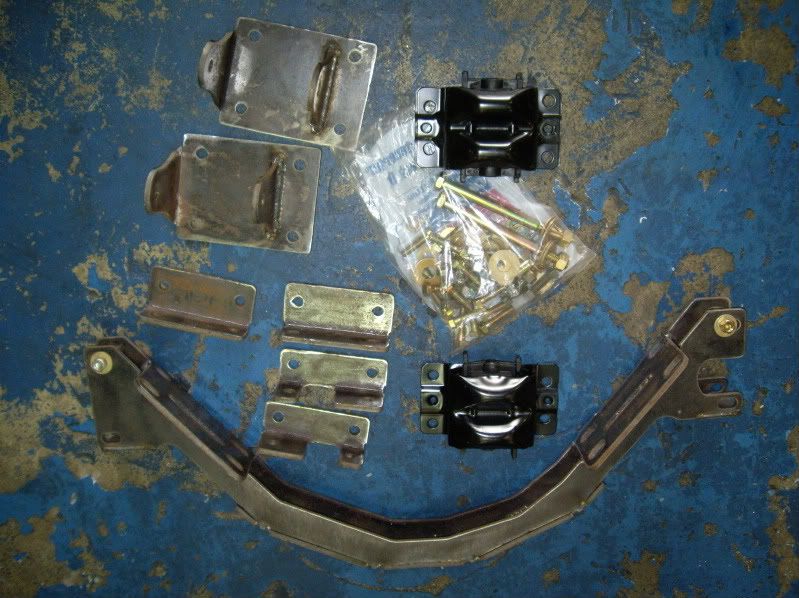
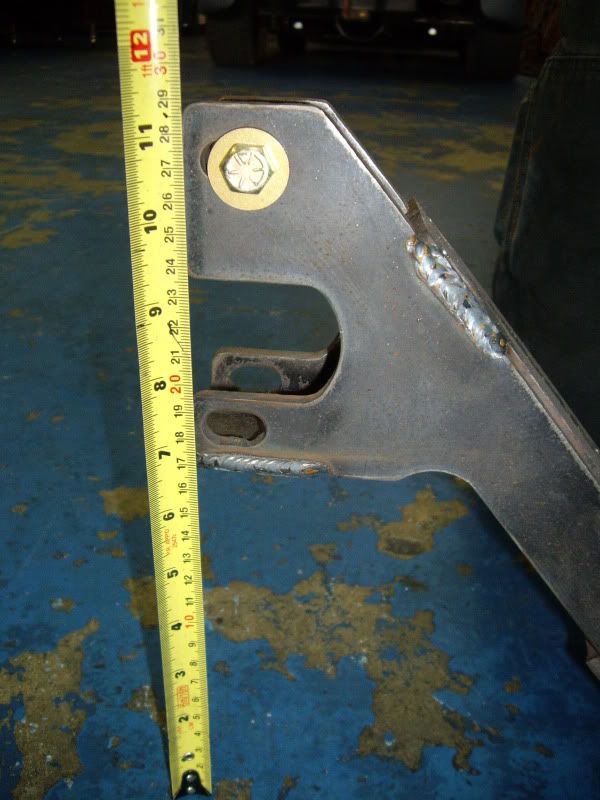
I'll start off by posting measurements and diagrams for the least expensive option: adapter plates. These plates will bolt to the LS block, and allow you to use the factory mounts that were on your SBC/BBC block, and bolt them up to the LS block. The first diagram is a comparison of the mounting boss location on both the SBC/BBC and the LS blocks. RED is the LS mounting pattern, BLUE is the SBC/BBC pattern. The measurements are taken from the machined bellhousing flange on the back of the block, where the transmission bolts to. From there, we measure forward to: 1] The rear bolt holes on the LS pattern, and 2] The center, or lower bolt hole of the SBC/BBC pattern.  Of the following three adapter plates in the drawing, numbers 2 and 3 are the most common. The plates run from around $25 for 1/4" steel, up to $160 for polished aluminum. If you have access to some scrap 5/16" x 4.25" flat bar or 5/16" plate and you have a drill and a a tap & die set, they are very simple to make. Here are the dimensions for each of the mounting configurations:  (As viewed on the drivers side of the block)  From MY experience, #2 worked best for the 73-87/91. Let me describe my original setup: 1985 GMC 1/2 ton SWB 2wd. 305/TH350C. The TH350 had a 9" tailhousing. By using the #2 plate, all I had to do to mount the transmission (a 4L60E) was slide the trans crossmember about 2" and drill a couple holes on each side. Easy stuff. These plates put everything in a position to where the shifter linkage was in the proper place, and the driveshaft installed without modification. I am using a mechanical clutch fan, and it sits centered front to rear, as well as up and down, within the fan shroud. The one issue with using the #2 plates comes when you are going to use the LS's AC compressor in it's original low location. Here is the problem I ran into:  Basically, the forward ear of the adapter plate interfered with the compressor bracket. The green triangle is where the clam shell mount from the old SBC was supposed to go. I determined that moving it to the location of the red triangle would solve the problem. Then cut the excess off at the white line. Essentially, I would be modifying the #2 type plate to be just like a #3 plate. Now everything will fit: Then I added an extension to the engine stand so that the rubber mount would have something to bolt to: Another option would be to add a bracket to the crossmember, and move the engine stand back about 2". Member menace121978 did this with his. He welded a piece to the crossmember. You might be able to do this with a piece of angle iron that is bolted to the crossmember as well: Here are a few guides to use if you plan on making your own adapter plates:    Comparing the right side plate for use with and without the LS AC compressor:  Car Shop, $45.95 http://carshop.carshopinc.com/produc...id/86959/LS1GM  Swaptech multi-position plates, $99.95 http://tpiparts.net/inc/sdetail/16936  Trans Dapt through Year One, $65.95 http://www.yearone.com/serverfiles/f...hid=613AA79244  Pacific Fabrication, 4x4 crossmembers/mounts. No other info on them other than these pics:  
__________________
Bob 1970 Chevy K10 LWB "Goldie" 350/TH350 next project!! 1981 Chevy C10 LWB 355/TH350 - My son's truck LS SWAP FORUM! Tons of LS swap info here! PLEASE CLICK HERE TO SUPPORT THE GREATEST BOARD ON THE NET! CLICK HERE FOR THE FAQ INDEX by KRUE Last edited by glock35ipsc; 07-27-2010 at 04:55 PM. |
|
|

|
| Bookmarks |
| Thread Tools | |
| Display Modes | |
|
|