 |
Register or Log In To remove these advertisements. |
|
|
|
|||||||
|
|
Thread Tools | Display Modes |
|
|
#1 |
|
Registered User
Join Date: Apr 2014
Location: Beaumont, TX
Posts: 34
|
My DIY Door Panel Restoration
So my son and I are rebuilding a 1984 GMC Stepside to be his first truck. He gets his license soon, and we are getting closer to being done. I thought I would share the process of restoring the door panels, since I was surprised at how well they turned out.
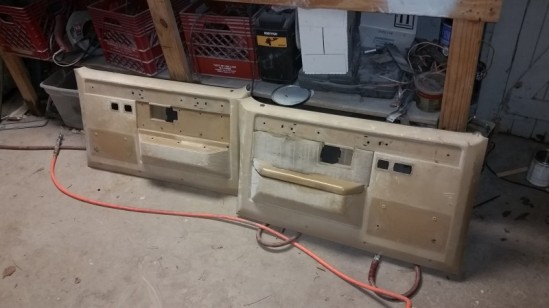
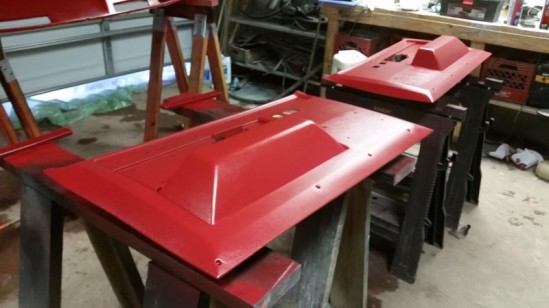
When we started tearing the truck apart, we weren't careful at all with the door panels because they were so nasty. But we stashed them in the shed and now that we are a year into the project, we are almost (way past actually) out of money. So we decided to try to restore them, as well as the nasty cracked dashboard. The door panels had the usual wear and tear, and much of it was covered in the chalky sun-destroyed plastic.     The first thing I did is take a sanding block and some 100 grit sandpaper to the panels to knock off the chalky plastic.  Then once it was fairly smooth, I used a jitterbug sander to try to smooth out the uneven plastic with 100 grit. I probably could have done this from the beginning, but I didn't want to be too aggressive at first. I also used some of the padded dash filler I had on hand for repairing the dash for any deep spots.   You can see that there was still a little unevenness in appearance, but it was mostly in appearance, and it felt very smooth. Next I sprayed the panels with two coats of plastic adhesion promoter to ensure that the paint would stick well. After the adhesion promoter came a few coats of SEM Texture Coating. This would give it a uniform texture, since I sanded off most of the texture, and would match the texture of the dash I'm redoing as well.   I gave the texture coat a light sanding with 800 grit to ensure an even texture all over. Next came the paint. Because we wanted to match the painted interior color, I had to pay a pretty penny for PPG Deltron DBC with a basecoat activator (as in 100 bucks for a pint). But I was actually glad I did because the color went on very nice.   The picture above includes the glove box, and you can see how nicely the color of the panel matches the original interior paint. By the way, I also painted the panel pockets and the door handle straps with the same paint, using plastic adhesion promoter first. And here is the finished product.  The only new parts on this door were the door handle strap covers, the fabric insert, the door handle pad, and the carpet lower panel. I was very pleased at how they turned out! If you have any questions, let me know, but I think this is a very doable project for anyone. |
|
|
| Bookmarks |
| Thread Tools | |
| Display Modes | |
|
|