 |
Register or Log In To remove these advertisements. |
|
|
|
|||||||
 |
|
|
Thread Tools | Display Modes |
|
|
#1 |
|
Registered User
 Join Date: Nov 2016
Location: Savoy, MA
Posts: 70
|
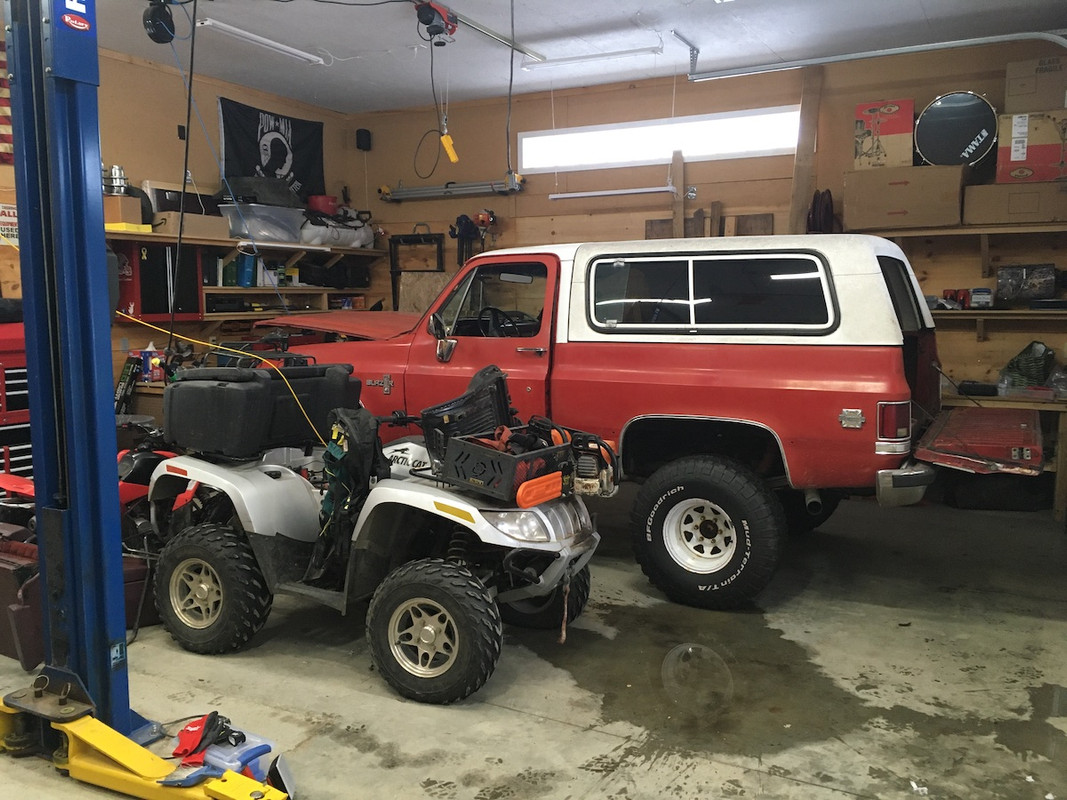
Starting the interior of my '84 K5
Been lurking and learning here for a few years now. Pretty sure this is my first truck related thread. I used to work on K5's and K10's when I was 20 something...haven't touched one for 30 years, so I am relearning everything.
Pulled this Blazer out of Oregon 2 years ago and have been driving it while figuring out where I want to go with it. Going to start with a new interior...just wanted to get some advice about the best way to go. - Going to clean and reinstall all the molding. - New plastic headliner with the built in speakers from LMC. - Reupholster the front and rear seats. - I found some really nice OEM side panels in burgundy. - New paint on the door panels - heavy duty power window harness from LMC - Some kind of a new floor...burgundy carpet, insulation, sound control? I guess my biggest question is about the best way to prep the floor after I take care of the rust? The metal is all in very nice condition. I've got some minimal rust on the driver's side sill. So, sand, brush, and primer. Wondering how you guys have then finished the floor...POR 15, bed liner, simple paint? And how about the best way to tackle the carpet adhesive on the wheel wells. Heat gun, solvent, scraper? It's not a mud truck. My wife and kids enjoy it spring through fall...fishing, camping, back road cruising...pretty tame stuff like that. Thanks in advance. Would appreciate any advice or suggestions.       
|
|
|

|
|
|
#2 |
|
I know the pieces fit
Join Date: Nov 2007
Location: MONTGOMERY, AL
Posts: 5,523
|
Re: Starting the interior of my '84 K5
That's a really good looking truck. Red with white wagon wheels is perfect to this old guy. So, I'm going with KISS. Paint got it this far, so paint over repairs and forget about it. I don't have any experience with carpet adhesive on the rear wheel wells, but a Harbor Freight heat gun with a gasket scraper should make short work of it. Looking forward to seeing the results!
|
|
|

|
|
|
#3 | |
|
Registered User
 Join Date: Nov 2016
Location: Savoy, MA
Posts: 70
|
Re: Starting the interior of my '84 K5
Quote:
|
|
|
|

|
|
|
#4 |
|
I know the pieces fit
Join Date: Nov 2007
Location: MONTGOMERY, AL
Posts: 5,523
|
Re: Starting the interior of my '84 K5
They also have plastic scrapers that might work better for removing the glue without hurting the paint.
|
|
|

|
|
|
#5 |
|
Registered User
 Join Date: Nov 2016
Location: Savoy, MA
Posts: 70
|
Re: Starting the interior of my '84 K5
|
|
|

|
|
|
#6 |
|
I know the pieces fit
Join Date: Nov 2007
Location: MONTGOMERY, AL
Posts: 5,523
|
Re: Starting the interior of my '84 K5
No, not at all. If you notice the number of views, people do check in and keep up. I think a lot of guys are like me and keep up on their phones where it's more of a PITA to reply, and only post when they're on their laptop or desktop.
|
|
|

|
|
|
#7 |
|
Registered User
 Join Date: Nov 2016
Location: Savoy, MA
Posts: 70
|
Re: Starting the interior of my '84 K5
Got it. Thanks for the advice. Going to work on the rust this weekend and just go with paint as you suggested.
|
|
|

|
|
|
#8 |
|
Registered User
 Join Date: Jun 2015
Location: Portland, OR
Posts: 274
|
Re: Starting the interior of my '84 K5
Last year I did address the floor on my '77 C10. There was of course rust to deal with. But it was only topside, the underneath was fine. So i wire wheeled it, neutralized the rust with POR-15 Metal Prep, then paint over with POR-15. Then I put down some Dynamat, and on top of that some closed cell foam.
|
|
|

|
|
|
#9 |
|
Registered User
 Join Date: Jun 2015
Location: Portland, OR
Posts: 274
|
Re: Starting the interior of my '84 K5
For removing the adhesive, you can try an adhesive remover wheel like the Whizzy Wheel.
|
|
|

|
|
|
#10 |
|
Registered User
 Join Date: Nov 2016
Location: Savoy, MA
Posts: 70
|
Re: Starting the interior of my '84 K5
|
|
|

|
|
|
#11 |
|
I know the pieces fit
Join Date: Nov 2007
Location: MONTGOMERY, AL
Posts: 5,523
|
Re: Starting the interior of my '84 K5
That's an excellent idea, much better than heat/scrape.
|
|
|

|
|
|
#12 |
|
Registered User
Join Date: Oct 2015
Location: PNW
Posts: 3,627
|
Re: Starting the interior of my '84 K5
That's a very cool Blazer. Red, white top, wagon wheels. You need to wear I Ski mirrored sunglasses when you drive it. The ones with red white and blue frames, haha. Rust-Oleum has a product actually called rusty metal primer. POR 15 will certainly more than do the job, but the rusty metal primer with a top coat of the color of your choice should also do the trick. After all, it's not out in the elements. looking at the adhesive, I would expect that you may need to employ both approaches mentioned, along with a third one. I think you'll spend a lot of time with the wizzy wheel to get that stuff off so I'd recommend starting with heating it up and getting a plastic scraper. There are also plastic razor blades that are available at paint shops. They don't last a long time, but they do have a finer edge. I think you will need to do final clean up with a solvent, Goo Gone might do it. If not, mineral spirits with plenty of ventilation and/or a respirator. You can step up to brake cleaner and then carburetor cleaner if you need to.
|
|
|

|
|
|
#13 | |
|
Registered User
 Join Date: Nov 2016
Location: Savoy, MA
Posts: 70
|
Re: Starting the interior of my '84 K5
Quote:
I love the look of the red and white K5 with wagon wheels. When I was much younger I had a similar K5 that I spent a lot of time on. I'm in the blue and white polka welder's cap. Bought these 2 K5's in West Virginia when I was in the military...used the frame, axles, and body of the red one and installed the entire drivetrain of the blue one into it. Drove it for a year and then sold it for $500 and a half empty bottle of Jack Daniels to a buddy of mine when I got out. Wonder where that thing is now?  
|
|
|
|

|
|
|
#14 |
|
Registered User
Join Date: Oct 2015
Location: PNW
Posts: 3,627
|
Re: Starting the interior of my '84 K5
Great pictures. Plus, hanging out with buddies is always fun, but even better when you accomplish something like you did. I think you gave your buddy a good deal when you passed that rig on to him. Very cool that you've been able to find a similar one. You certainly know your way around these rigs but hopefully the forum can help with details like you asked about here. Don't hesitate to post in the pickup truck area since it gets more traffic and most topics apply to all squarebodies. In fact, asking a moderator to move this to the build thread area would be good too. I know that there are others like me who would like to see more pictures of your rig and whatever you're working on.
|
|
|

|
|
|
#15 |
|
Registered User
Join Date: Oct 2015
Location: PNW
Posts: 3,627
|
Re: Starting the interior of my '84 K5
Remember these? Here are the shades you need ;)
|
|
|

|
|
|
#16 | |
|
Registered User
 Join Date: Nov 2016
Location: Savoy, MA
Posts: 70
|
Re: Starting the interior of my '84 K5
Quote:
I do remember those shades! Too funny. I wonder if LMC carries them. 
|
|
|
|

|
|
|
#17 |
|
Registered User
Join Date: Oct 2015
Location: PNW
Posts: 3,627
|
Re: Starting the interior of my '84 K5
It looks like the mods got you moved on over. Anything else about the drivetrain, option list in the glove box, is all of interest to those of us that read this section. Also, any pictures of your progress are welcome.
|
|
|

|
|
|
#18 |
|
Registered User
 Join Date: Nov 2016
Location: Savoy, MA
Posts: 70
|
Re: Starting the interior of my '84 K5
Great. Thanks. I'll be sure to document my progress with pics.
|
|
|

|
|
|
#19 |
|
Registered User
 Join Date: Nov 2016
Location: Savoy, MA
Posts: 70
|
Re: Starting the interior of my '84 K5
Thought I'd post an update on the interior of my K5. Nothing too exciting yet...but plugging away.
I did have some success getting the adhesive off of the wheel wells. The Whizzy Wheel didn't work. In the end, I just took my time and used a heat gun and a metal scraper. The plastic ones just didn't work so I used a metal scrapper. I nicked the paint here and there so just touch up everything with some primer. Took about an hour per side.   I then tore into the dash in preparation for a new stereo and speakers. The previous owner cut the wires running to the dome lights for some reason? And the wires to the under dash courtesy light were severed. So, I've got some trouble shooting to do there.     I need to replace the courtesy light switches while I'm at it. My '84 isn't suppose to have this style of switch...so not sure what's up with that. 
|
|
|

|
|
|
#20 |
|
Registered User
 Join Date: Nov 2016
Location: Savoy, MA
Posts: 70
|
Re: Starting the interior of my '84 K5
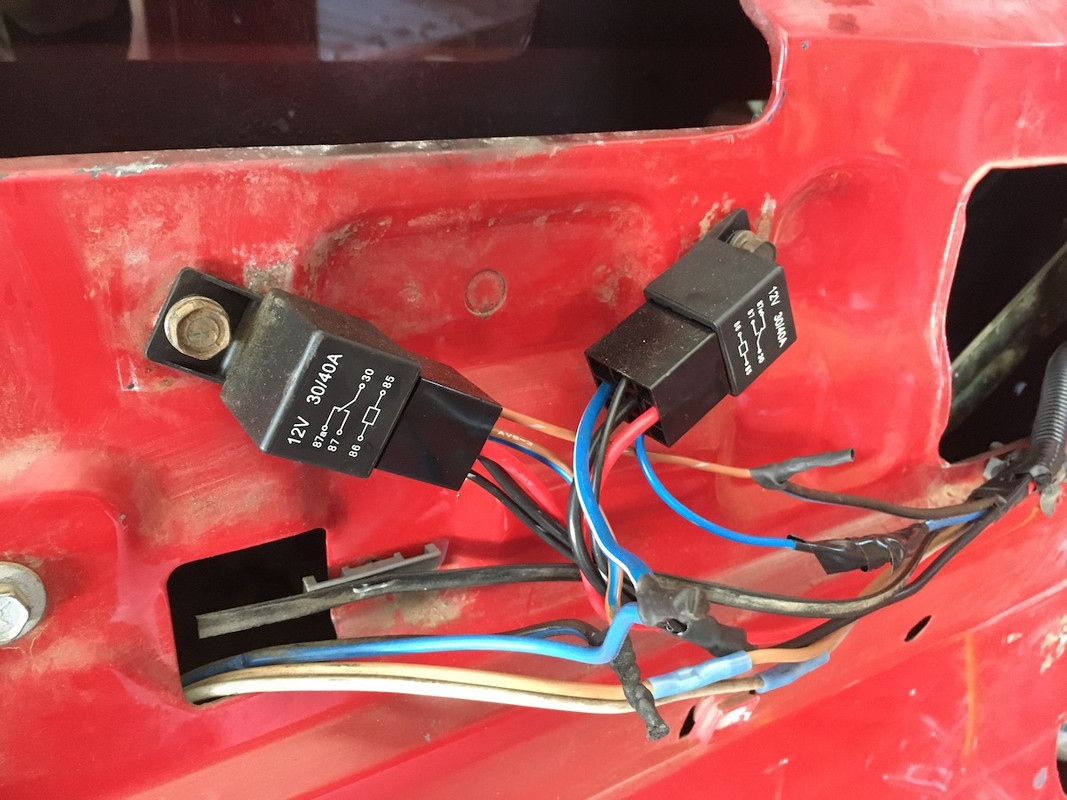
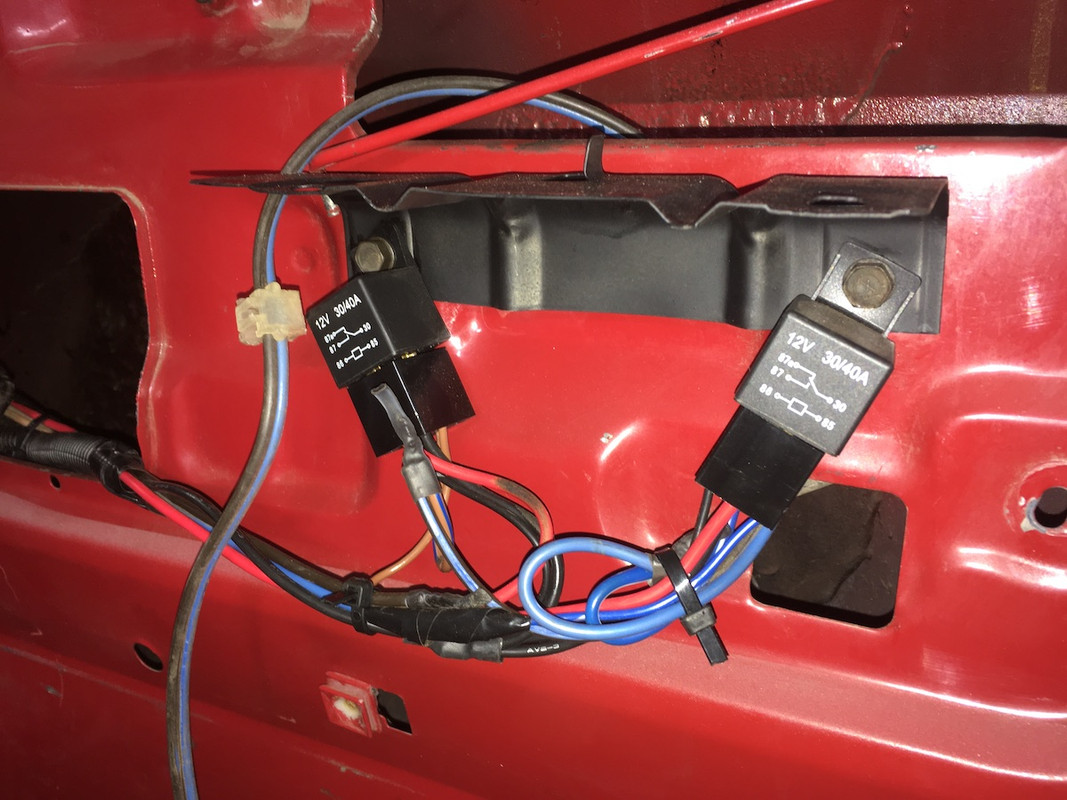
Removed the glove box to swap out the latch and found no options list. Kind of a bummer. Bought a radio patch panel off a member here on the forum. Getting that ready to weld in. And I installed a set heavy duty power windows relays from LMC. Made a huge difference.
    Found a set of factory tow hooks on Facebook for $20...got them primed and painted and installed. Wasn't sure if the hooks face in or out? I mounted them facing in.   And my new rug showed up this week. Got matching lower door panels and extra Jute padding for the rear cargo area. That's all for now. 
|
|
|

|
|
|
#21 |
|
Senior Member
 Join Date: Oct 2014
Location: Ohio
Posts: 6,979
|
Re: Starting the interior of my '84 K5
Itís coming along. Keep them pictures coming.
__________________
FB Page for my Seats Belts https://www.facebook.com/73-87-Chevy...9439407476735/ Restoring Seatbelts: http://67-72chevytrucks.com/vboard/s...d.php?t=809750 SOLD My 86 Build:http://67-72chevytrucks.com/vboard/s...d.php?t=654972 Past Restored Bench Seats:http://67-72chevytrucks.com/vboard/s...d.php?t=715398 PayPal link to pay for your items: https://www.paypal.me/TKCR |
|
|

|
|
|
#22 |
|
Registered User
Join Date: Oct 2015
Location: PNW
Posts: 3,627
|
Re: Starting the interior of my '84 K5
Nice job working your way through the details.
|
|
|

|
|
|
#23 |
|
Registered User
 Join Date: Nov 2016
Location: Savoy, MA
Posts: 70
|
Re: Starting the interior of my '84 K5
Thought I'd do an update. Been working in some wiring issues, getting interior plastic trim cleaned and painted, small details....but mostly taking care of rust issues and prepping the floor for POR 15.
First...did a refurbish on the gauge cluster...cleaned it and did a metallic silver paint job and all new LED lights. Pretty sure it made the cluster brighter at night.       Pulled the top off to get some more light in the cab and make it easier to work on the interior...even got room to park the tractor underneath.    I've never welded before, but I bought a cheap little Chinese made flux core MIG to to some sheet metal work. As I began working on the cab floor I found about a half dozen nickel-sized holes and many small little pin holes. I welded in small little patches on the bigger holes. And I used Eastwood soldering butter and lead rod to fill in the small pin holes. I then used JB weld to fill in the pin holes just to be sure. I suck at welding...but I think I am getting better and I like learning something new.      
|
|
|

|
|
|
#24 |
|
Registered User
 Join Date: Nov 2016
Location: Savoy, MA
Posts: 70
|
Re: Starting the interior of my '84 K5
Not everything is going well though. Had a bad window sash and tried for days to remove the glass from the metal sash...ended up busting the glass on my last attempt.
 Cleaned the entire floor in preparation for POR 15. Kind of a pain as it's a 3 step process. A lot of people don't like POR 15. I used it as I was meticulous in the metal prep work, and it won't be exposed to UV light or the elements at all. Two coats...happy with how it came out. The bed had no rust issues at all, so I am just going to leave it as is.      In between the rust issues and coats of primer and paint, I added some silver exterior side moulding and a set of Bully steps to the Blazer.  And I got my radio patch panel in place. I was not confident at all in my ability to weld in the panel perfectly in place. I cut it oversized and used a few rivets to hold it in place. Then I welded the rest as best I could. Worked fine and will hold my OEM AC Delco radio I have going in.  That's all for now. Next up...sound deadening Kilmat, carpets, speakers, CB, dash, interior trim, door panels, and seats. Hoping to be on the road by June 1st. Last edited by bigschuss; 05-04-2021 at 11:25 AM. |
|
|

|
|
|
#25 |
|
Registered User
Join Date: Oct 2015
Location: PNW
Posts: 3,627
|
Re: Starting the interior of my '84 K5
Good progress. CB FTW!
|
|
|

|
 |
| Bookmarks |
| Thread Tools | |
| Display Modes | |
|
|