
 |
Register or Log In To remove these advertisements. |
|
|
|
|||||||
 |
|
|
Thread Tools | Display Modes |
|
|
#101 |
|
Registered User
Join Date: May 2016
Location: Willow, Alaska
Posts: 881
|
Re: Project "You thought yours was bad!" '78 C10 Stepside
Honestly I've never found an engine paint I thought worked halfway decent if the block wasn't clean bare metal to start with. Plus, with the Vortec accessories, 99% of it gets hidden anyway.
And knowing me it'll only stay in there about a month before I get bored and decide to drop an LS into it 
|
|
|

|
|
|
#102 |
|
Registered User
Join Date: May 2016
Location: Willow, Alaska
Posts: 881
|
Re: Project "You thought yours was bad!" '78 C10 Stepside
Lookin' sexy!
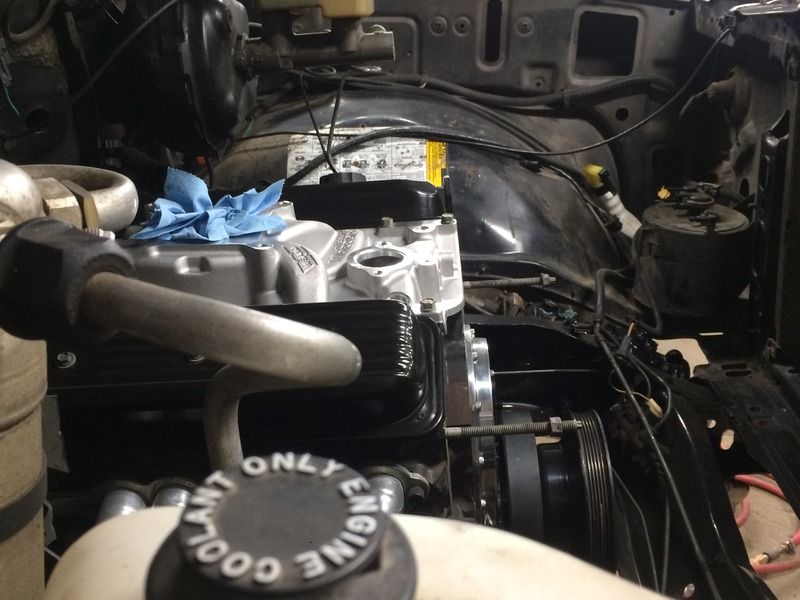 I finally decided I'm going with EFI over a carb. First score was this MSD 85551 Pro Billet distributor a local shop had sitting on the shelf for a while. I picked it up for cost! This will allow the EFI kit to control timing, as I prefer a "set it and forget it" type setup. 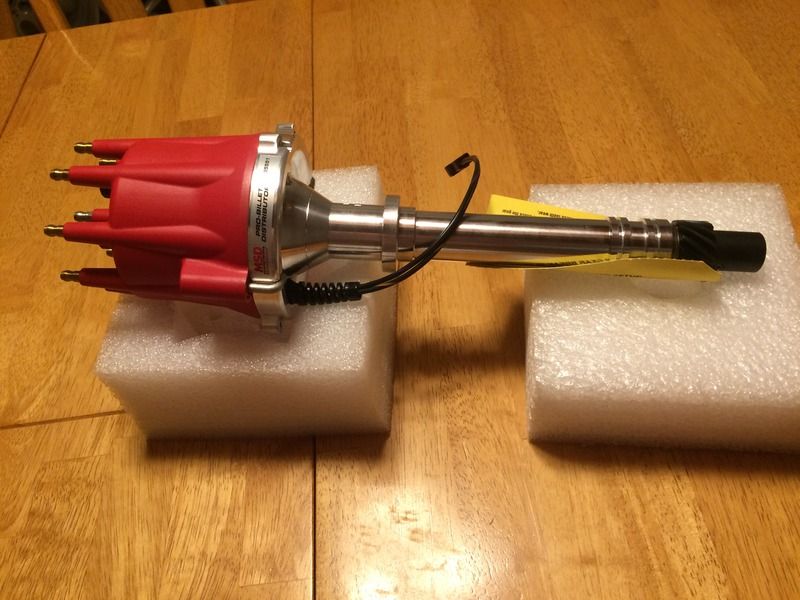 My dad also picked me up an early Christmas present!  60gal Ingersoll Rand air compressor! Its an older model but they kept it in excellent shape, as well as upgraded it to a 6HP motor. I'm stoked as my little 1gal compressor would cry when it saw air tools. 60gal Ingersoll Rand air compressor! Its an older model but they kept it in excellent shape, as well as upgraded it to a 6HP motor. I'm stoked as my little 1gal compressor would cry when it saw air tools.  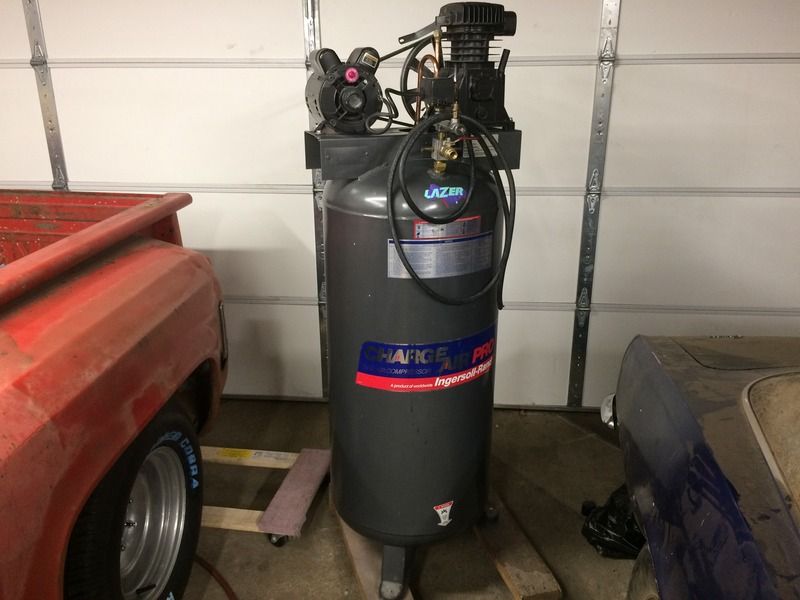 I crawled underneath and got all the torque converter bolts installed. I cleaned up the inspection plate I had laying around but when I tried to bolt it up to the transmission, it wouldn't fit! I swear that this truck had one, but I must be remembering wrong. I'll have to source a new one. 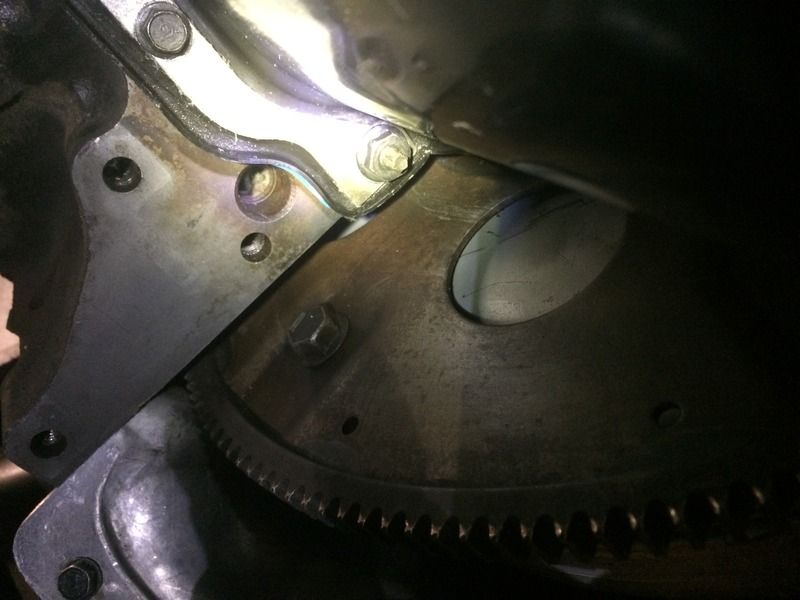 And finally, painted the transmission crossmember! 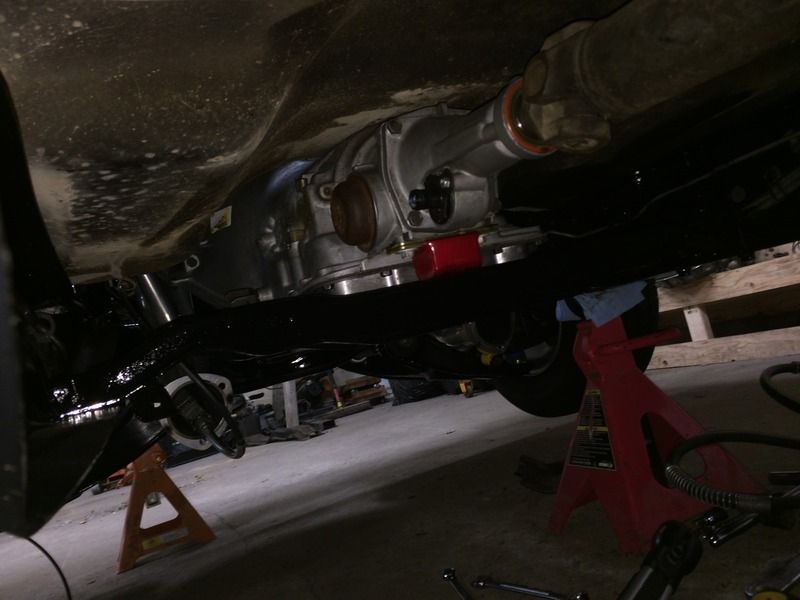
|
|
|

|
|
|
#103 |
|
Registered User
Join Date: May 2016
Location: Willow, Alaska
Posts: 881
|
Re: Project "You thought yours was bad!" '78 C10 Stepside
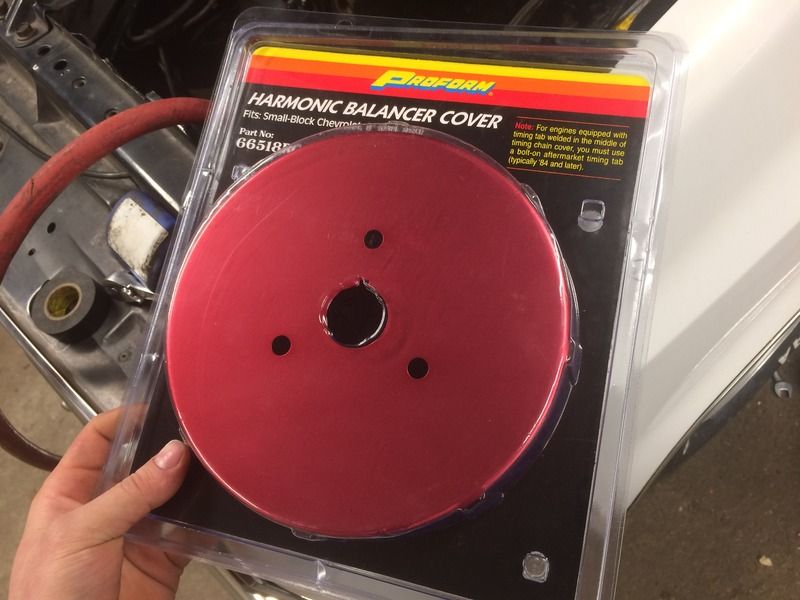
I also picked up this ingenious piece, a harmonic balancer slip cover for the SBC! This bolts directly to the hub so no matter how far the outer ring and timing mark move on the stock balancer, this will always stay in place. $20 off ebay, which is money well spent as I don't have to rely on the stock balancer staying accurate, nor deal with timing tape. This was needed because I will need to degree and phase the rotor on the distributor when the EFI kit gets installed.
 Do not ever buy one of these CVR timing pointers. It has been nothing but headaches trying to get it to work correctly. It was advertised to fit aluminum covers, but the supplied spacer makes the bolts hit the balancer, or when spacer is removed it doesn't seat against the timing cover. It especially needs more clearance away from the surface of the balancer as it sits nearly directly on it. The Proform cover fit perfectly on the stock balancer and I have no complaints there! However. due to the way the CVR pointer is positioned so closely, the cover hits it when slid onto the balancer. I set the cover up on a belt sander and knocked about 1/4" off of it as evenly as I could, which turned out working really well. Now the cover fits and clears everything perfectly! I had also verified the timing mark on the stock balancer and the marks on this cover match exactly. 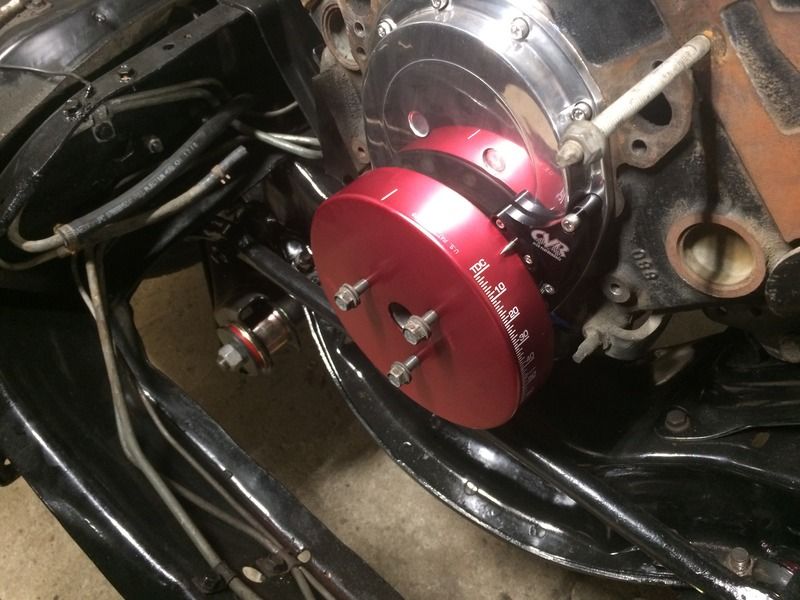 And here is how it clears now 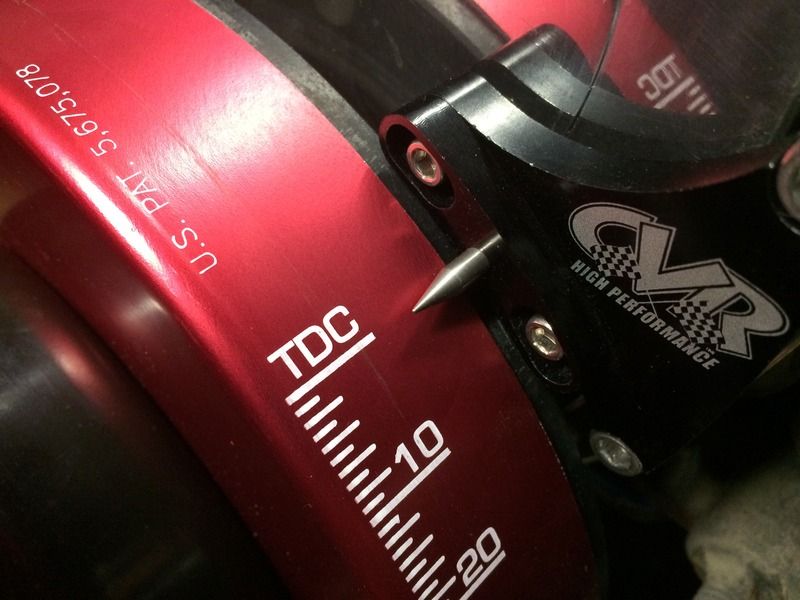
|
|
|

|
|
|
#104 |
|
Registered User
Join Date: May 2016
Location: Willow, Alaska
Posts: 881
|
Re: Project "You thought yours was bad!" '78 C10 Stepside
I swung into town and picked up a few more things.
New aluminum radiator as the old one was damaged, and only a single core anyway. 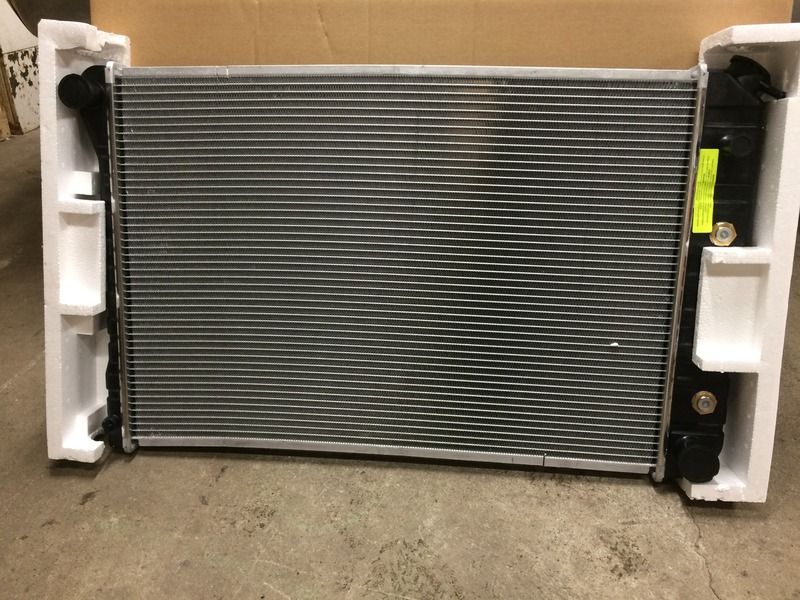 New Double Platinum plugs, oil pressure sensor, and water temp sensor. 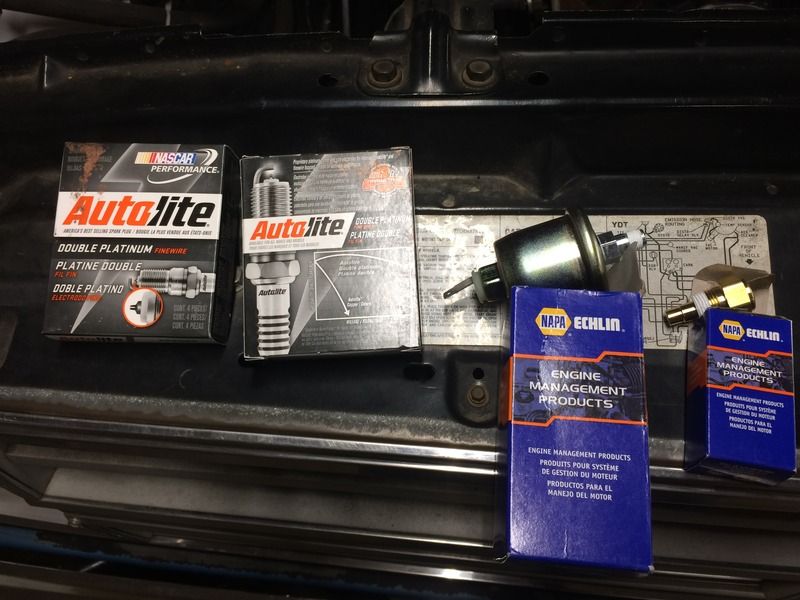 Radiator installed! 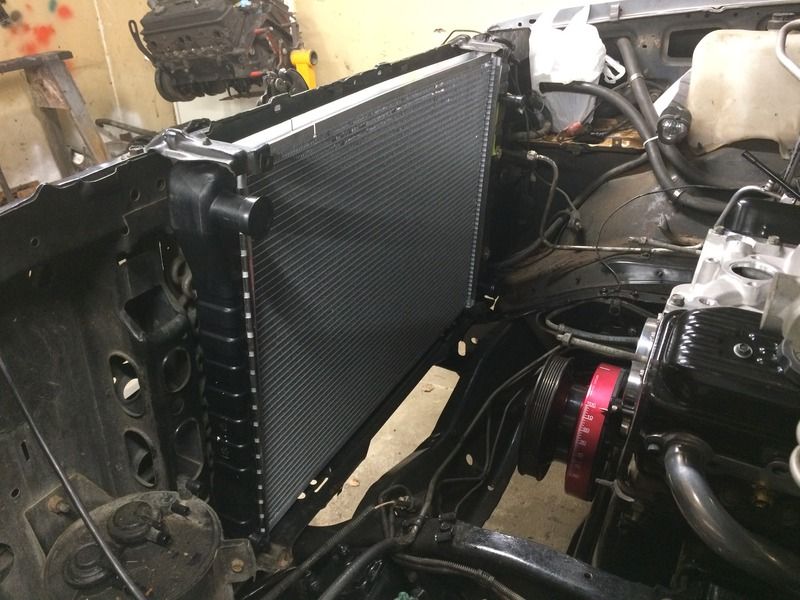 I had to trim a small flange off of the passenger side header, as these covered the bolt hole for the oil dipstick 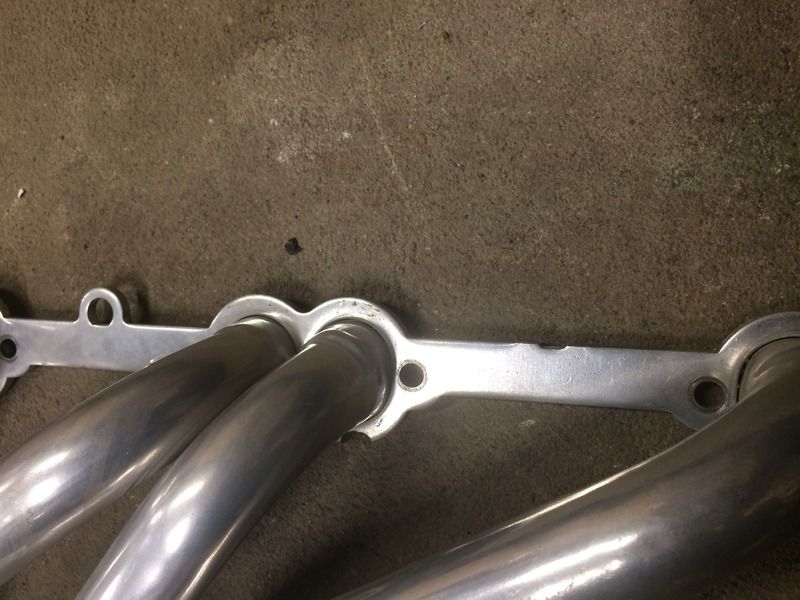 Best header gaskets ever...OEM! 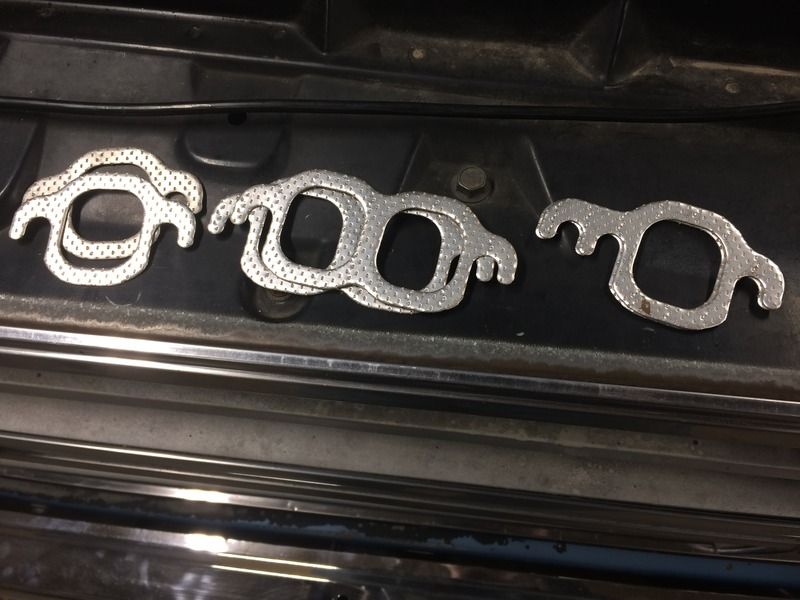 Oil dipstick, transmission dipstick, spark plugs, and temp sensor all installed. I need to find an 80's adapter for the oil pressure sensor, as the Vortec one apparantly uses a larger thread than the 86 did. 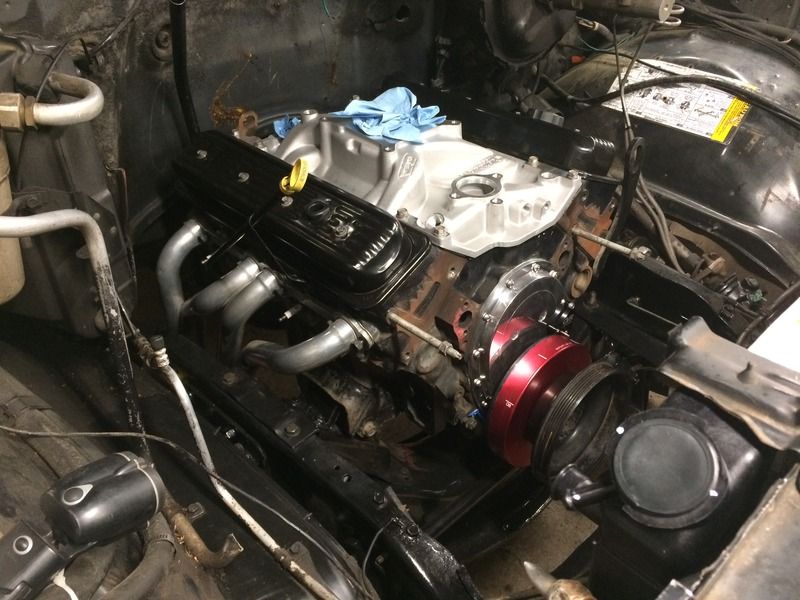
|
|
|

|
|
|
#105 | |
|
Registered User
Join Date: Nov 2012
Location: Mexico, NY
Posts: 559
|
Re: Project "You thought yours was bad!" '78 C10 Stepside
Quote:
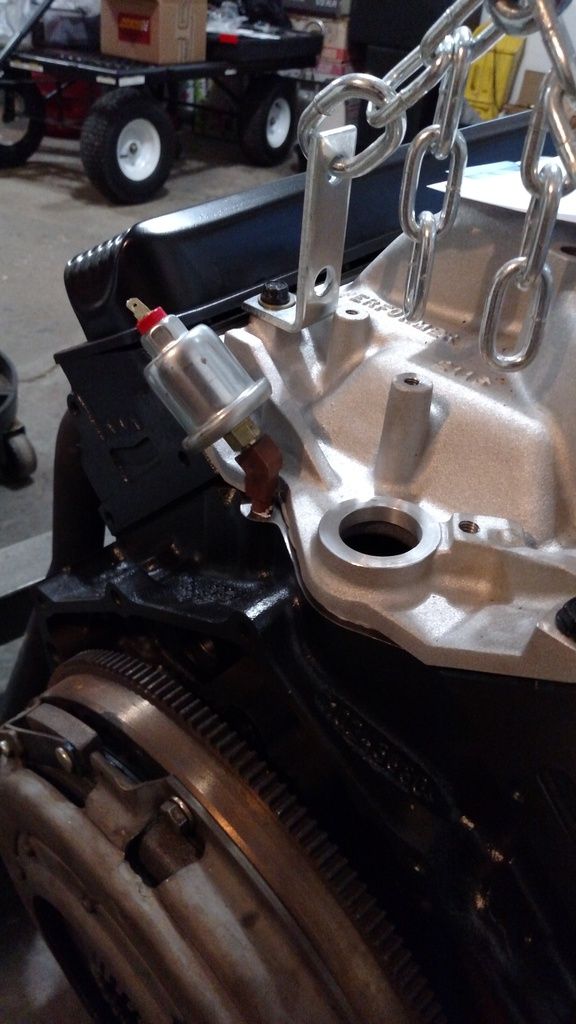 That balancer cover looks really nice on there. The outcome is nice even though it took some work. If you are going EFI, you will have to install a knock sensor then also? You need a flex plate from a 1 piece rear main seal 350. They crank snub has a different offset then the 2 piece rear main engines. I suspect that will solve your issue.
__________________
'84 K10, SM465, NP208, 3.42 Gears, 33x12.5-15 GM 4 bolt 880 roller block, 062 Vortec Heads Comp Cams XR258HR-10, MSD Street Fighter HEI Edelbrock: Performer Intake 2116, 1405 Carb Long tube headers, 2.5" duals to Flow Master Super 40's Vortec Engine Build Last edited by Marshy; 10-31-2016 at 11:27 AM. |
|
|
|

|
|
|
#106 | |
|
Registered User
Join Date: May 2016
Location: Willow, Alaska
Posts: 881
|
Re: Project "You thought yours was bad!" '78 C10 Stepside
Quote:
No knock sensor as the EFI kit is all self contained. And I'm not sure what you're referring to with the flexplate? |
|
|
|

|
|
|
#107 |
|
Registered User
Join Date: Nov 2012
Location: Mexico, NY
Posts: 559
|
Re: Project "You thought yours was bad!" '78 C10 Stepside
Sorry, I miss interpreted what you were saying about the inspection plate... Anyways, they are different between the single rear main seal engines and two piece seal engines also. It's because the single rear main seal has that aluminum housing around it. You can cut the cover from a two piece engine to fit, that's what I did.
__________________
'84 K10, SM465, NP208, 3.42 Gears, 33x12.5-15 GM 4 bolt 880 roller block, 062 Vortec Heads Comp Cams XR258HR-10, MSD Street Fighter HEI Edelbrock: Performer Intake 2116, 1405 Carb Long tube headers, 2.5" duals to Flow Master Super 40's Vortec Engine Build |
|
|

|
|
|
#108 |
|
Registered User
Join Date: May 2016
Location: Willow, Alaska
Posts: 881
|
Re: Project "You thought yours was bad!" '78 C10 Stepside
The cover I have is just from a different application altogether, it's not physically wide enough to match the bolt spacing on my transmission.
Alright, MASSIVE picture dump here. I got a lot of the small nickle and dime things done up over my weekend! Last weekend I took a break and went on a 20-mile ride up into the mountains on the RZRs. Had a blast and got probably our last warm and sunny (ish) day before the snow really falls! It was about 35-40 degrees out, but the weather was great! 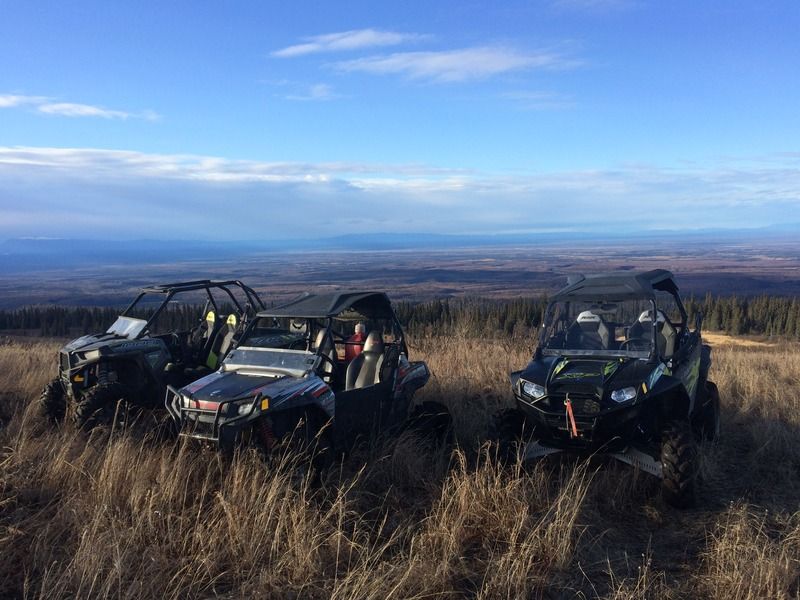 So first order of business was to get the headers tightened down. I typically only use metric tools at work, so I had to pick up this 5/16" Ball Allen drive socket to the tune of $32. These things really make life easy with awkward allen head bolts! 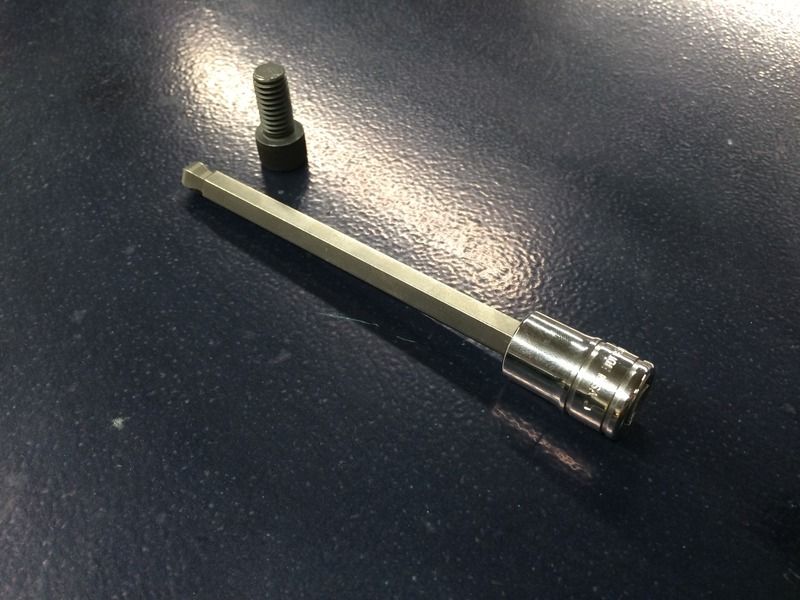 Awwww yissssss 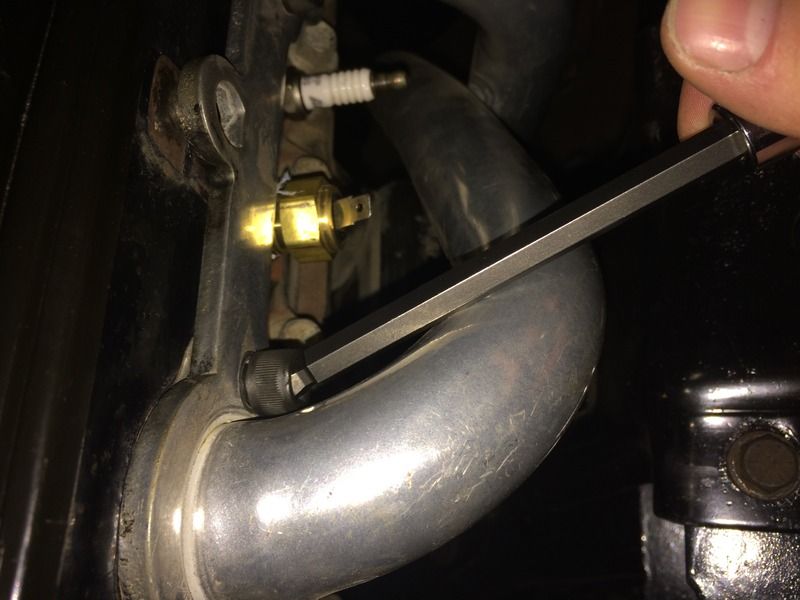 Torqued to perfection. I wish I knew what brand these headers were, I love the clearance with these ones! 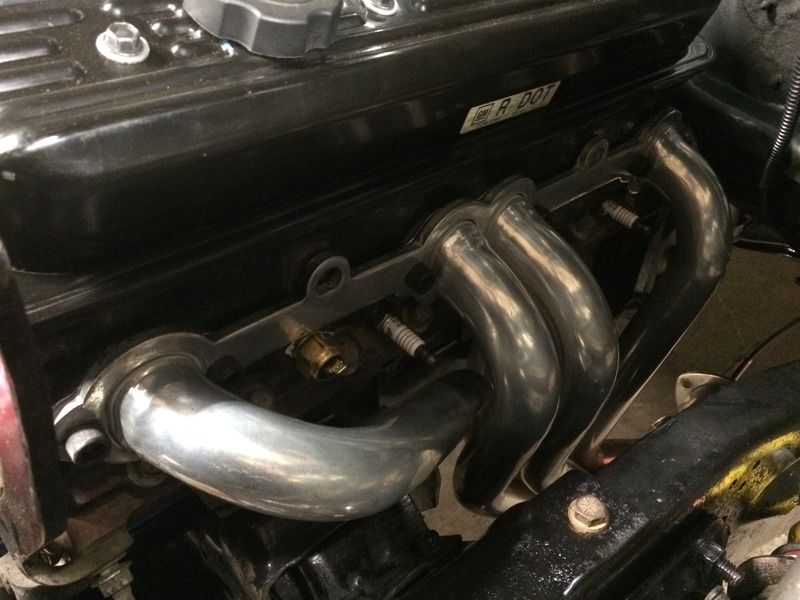 I also had this nearly new fuel pump that had come in on a customer's rig that they used to bypass the actual module itself and ended up causing all kinds of problems. They didn't want it back and I stashed it away thinking it was a low pressure pump, as the system it was installed in only called for 25PSI, but I tested it the other day and it cranks out 80PSI! This should work perfectly with the EFI system I'm planning on using. I will be changing the ends out to AN fittings. 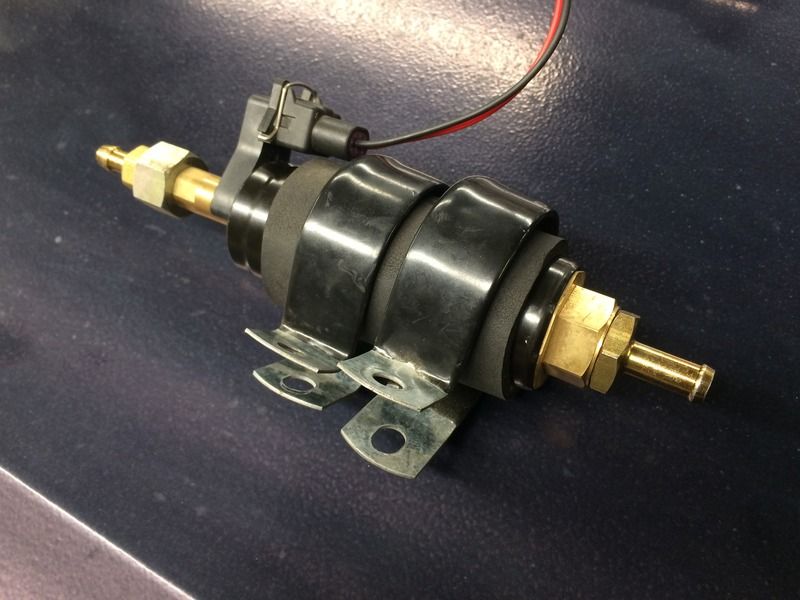 Next up, I sourced the correct oil sender adapter for the block. This was actually on my '67 Camaro when I bought it originally, I pulled it off and stuck it on the shelf in favor of a mechanical gauge at the time.  Great fit!  Next up was the accessories, starting with the waterpump. I had planned on cleaning mine up and using it, but it shows signs of leaking around the weep holes...and for the price of a brand new one, I didn't care to risk it. 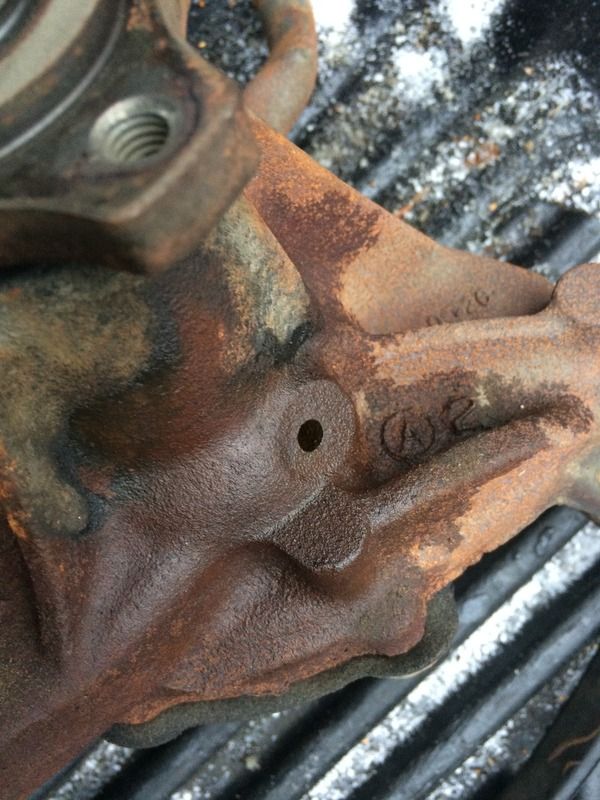 So here we are with a brand new waterpump, lower hose, and bypass fitting for the intake 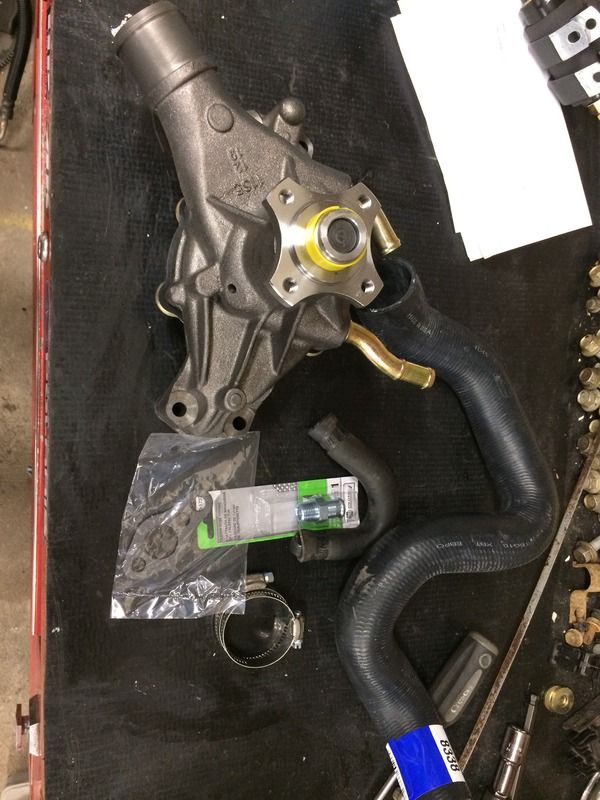 Bypass fitting installed 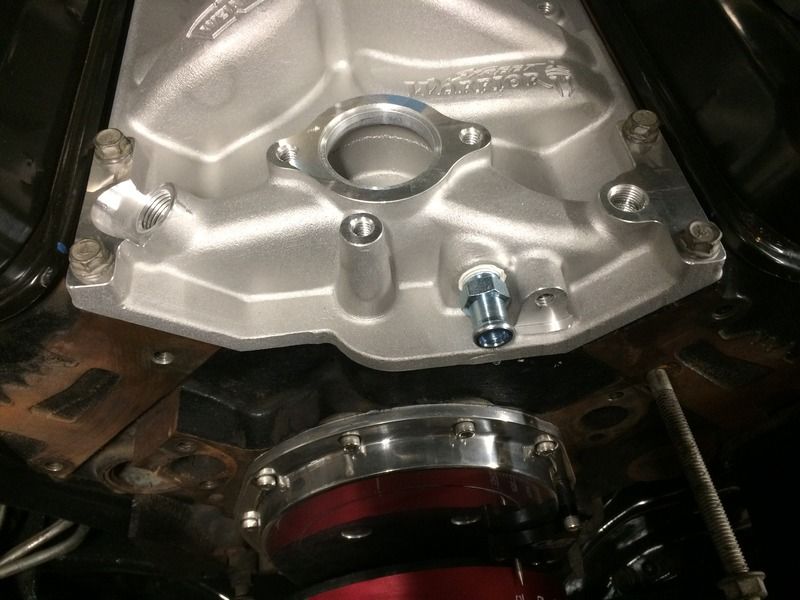 I like the cast iron look, so the waterpump was clear coated before installation 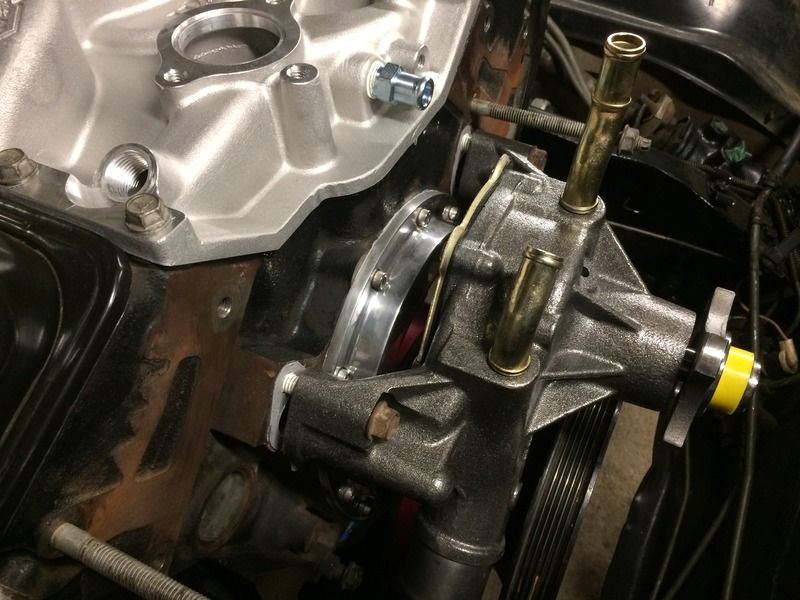 Gorgeous! 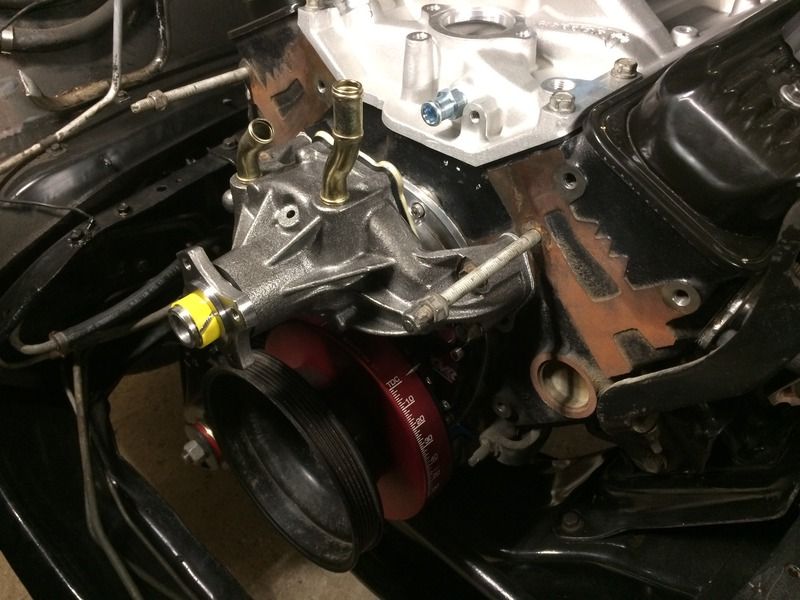 Bypass hose installed. This is the stock Vortec hose. 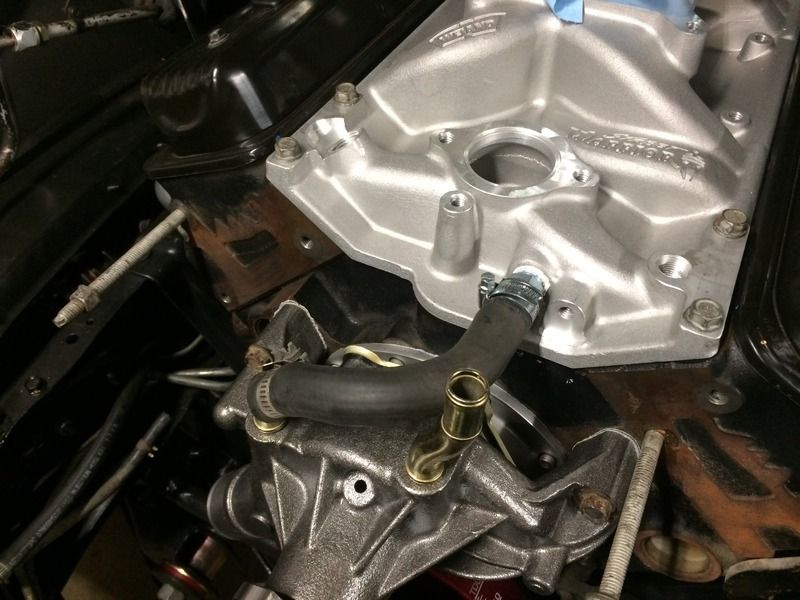 Also ran the transmission lines at the same time 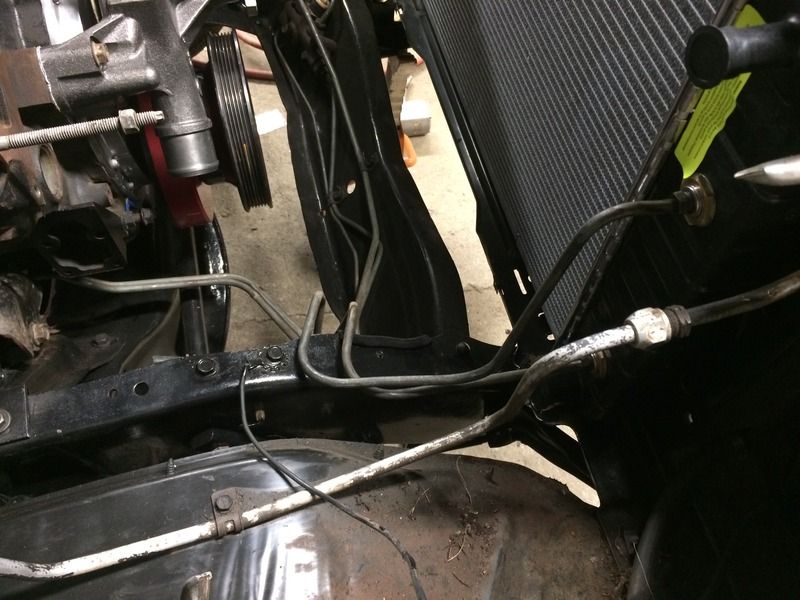 And installed the speedo drive 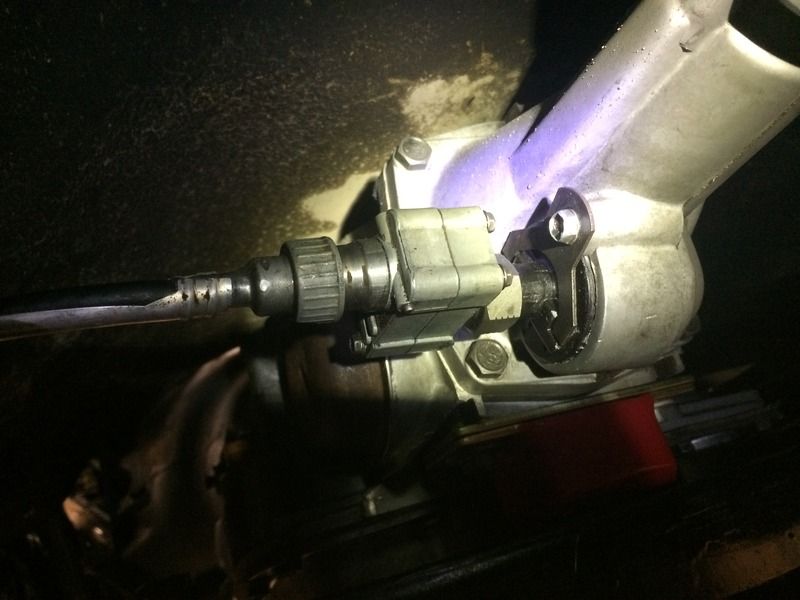 I installed the lower hose for the radiator. Little did I know this thing would be quite the headache. 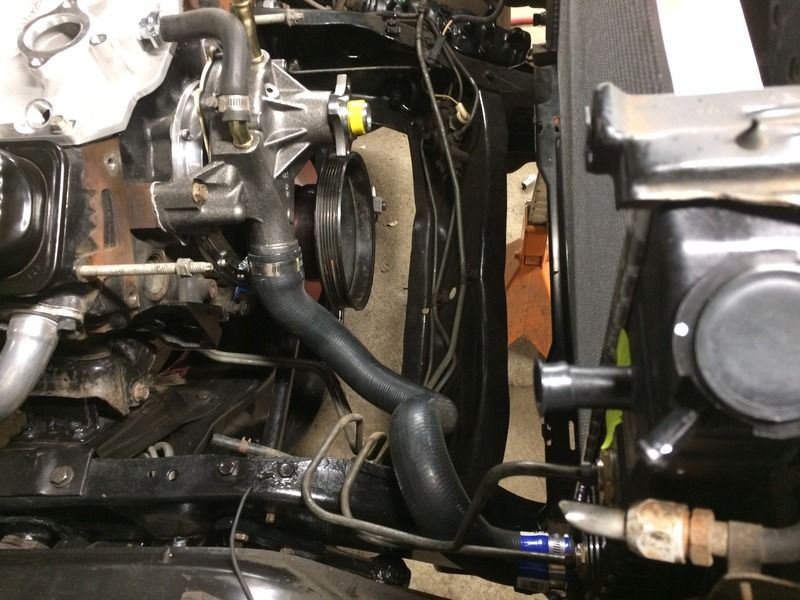
|
|
|

|
|
|
#109 |
|
Registered User
Join Date: May 2016
Location: Willow, Alaska
Posts: 881
|
Re: Project "You thought yours was bad!" '78 C10 Stepside
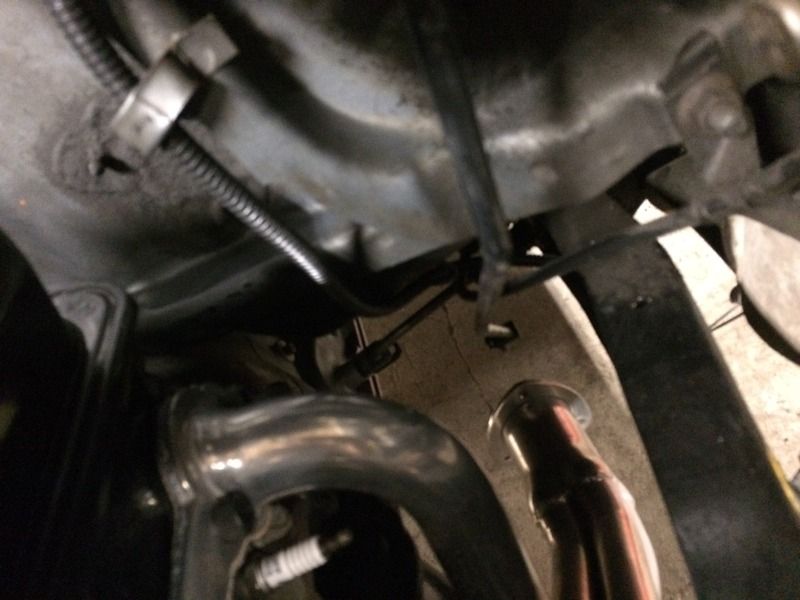
Transmission linkage was also installed while I had to slide around under there.
 Started on the accessory brackets next. I cleaned them up the best I could with steel wool and soft metal brush, but a bead blaster sure would be nice! 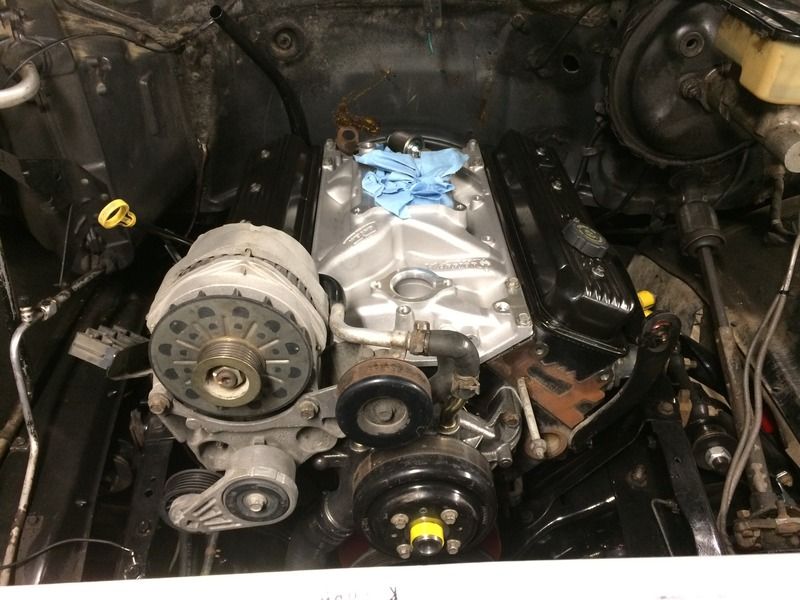 Power steering and A/C bracket mounted too  So this is where I ran into issues with the lower hose. My stock hose and the identical replacement hose Napa sold me, hit the serpentine belt! I found this one off who knows what, I believe possibly a 88-95 TBI truck. The outlet was straight and cleared the belt just fine. But then, the radiator bend wouldn't allow it to clear the fan shroud! 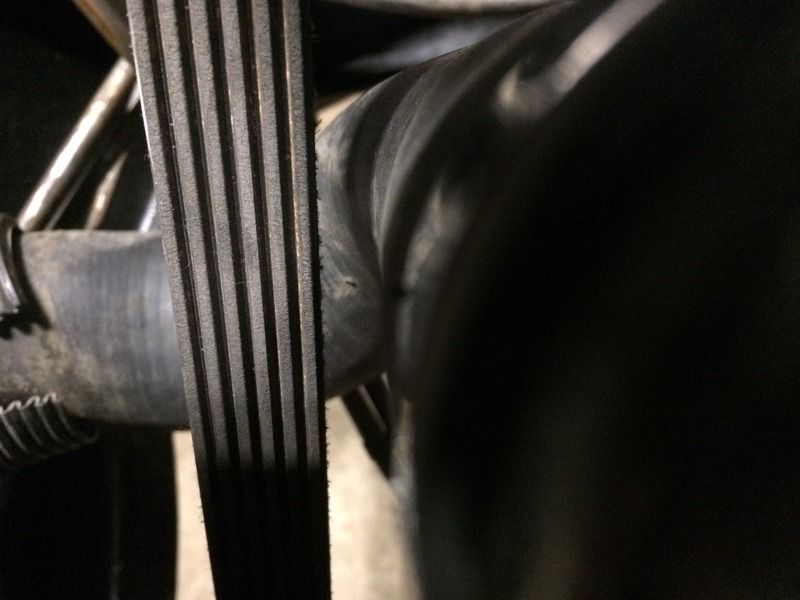 Frustrated and moving on, I finished connecting the power steering lines 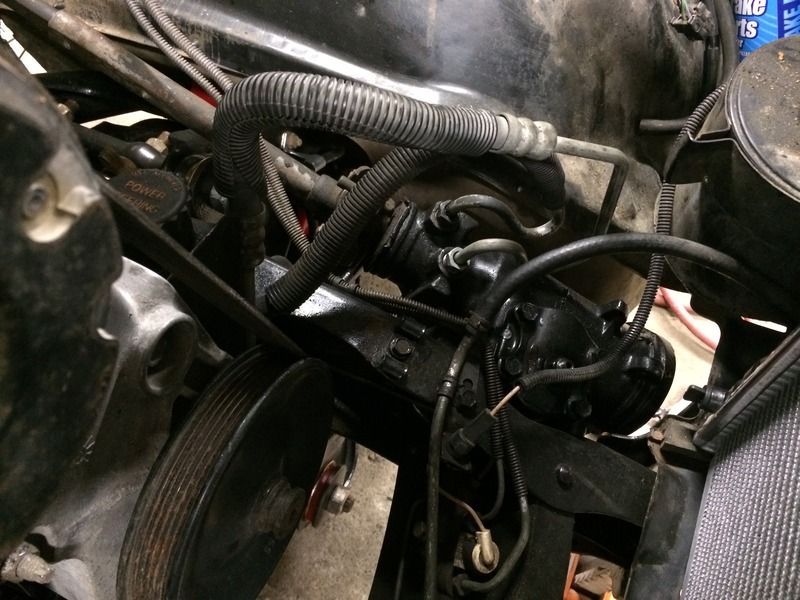 I also installed the smaller and less busy TBI style vapor canister. 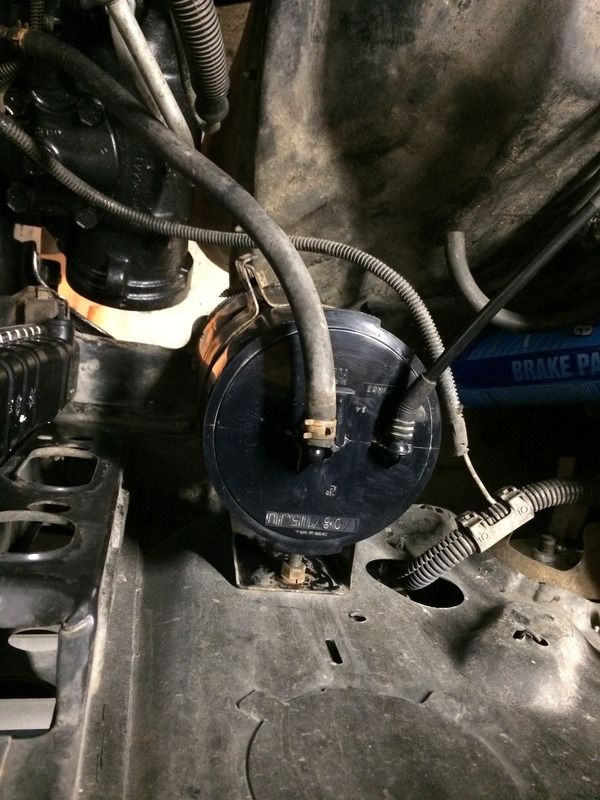 So after a trip to the junkyard, comparing fan shrouds, lower hoses, and belt drives, I finally figured out what I needed. Apparently Chevy used a different style of lower hose from 73-83, and in 84-on up, it changed. So another trip down to Napa with an 83 C10 5.7L lower hose part number in hand, yielded me the correct hose that not only has the straight outlet to clear the Vortec serpentine setup, but the correct bend off of the radiator to properly clear the fan shroud! 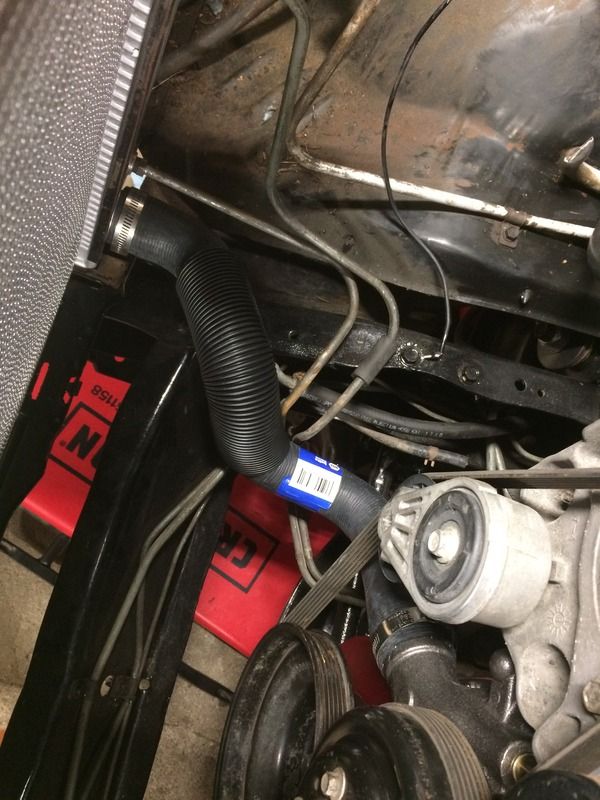 I also picked up a new radiator cap at the same time 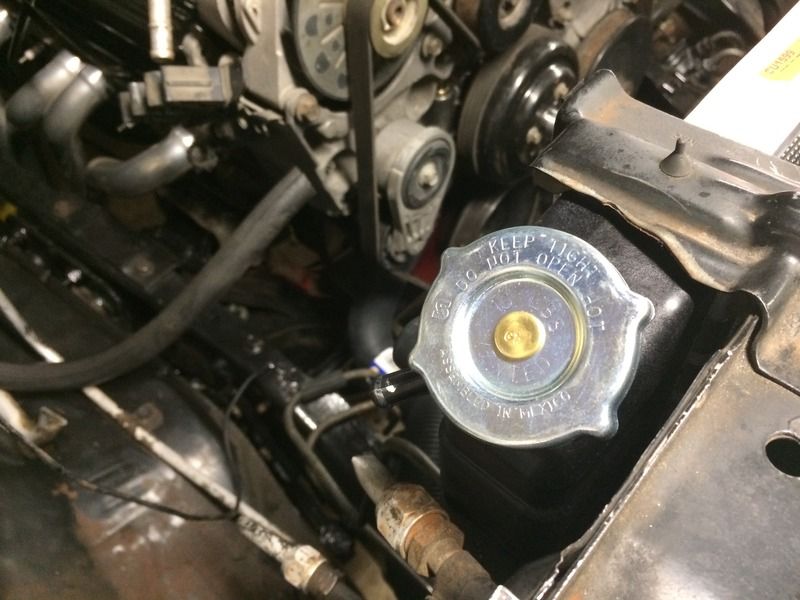 I figured it was time to replace the original heater hoses as well. I get the excess for free from work when we assemble machines with heaters, so I had two perfect pieces that fit the truck like they were meant for it! 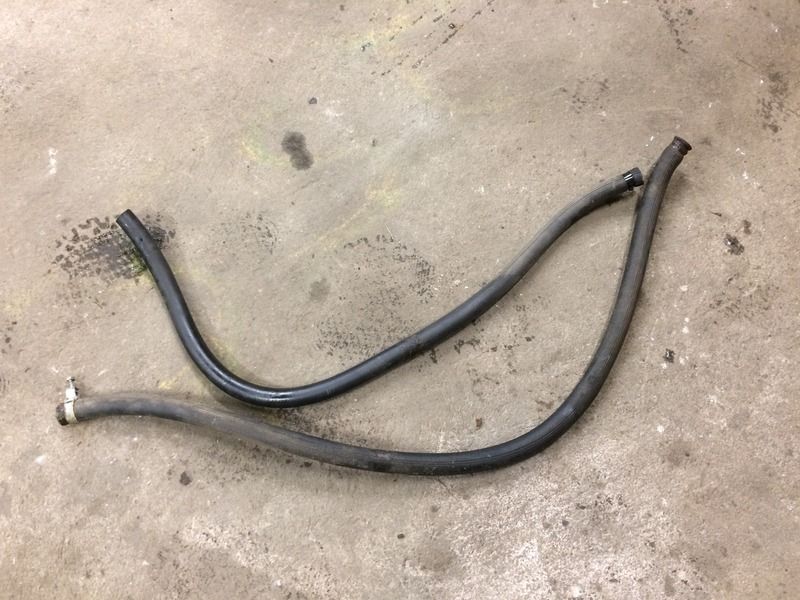 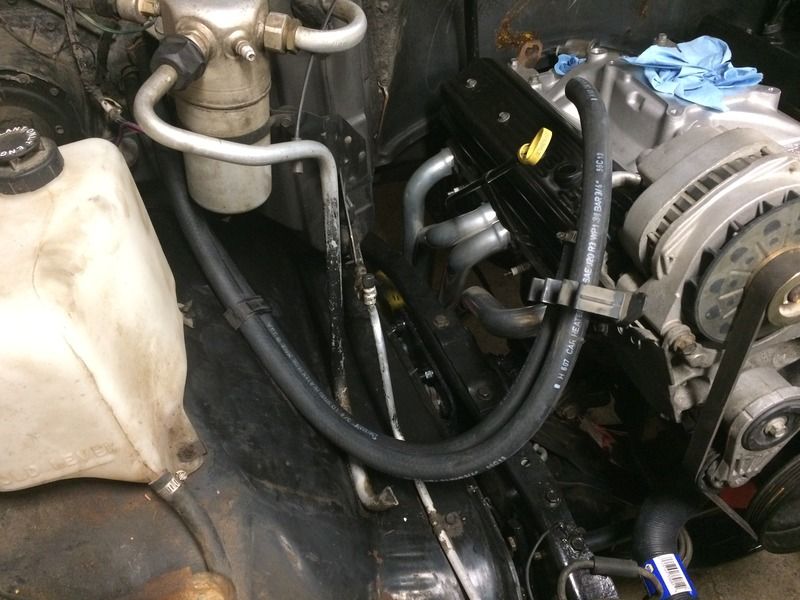 Cleaned up the fan shroud. Pledge works amazing at cleaning up dirty plastics. 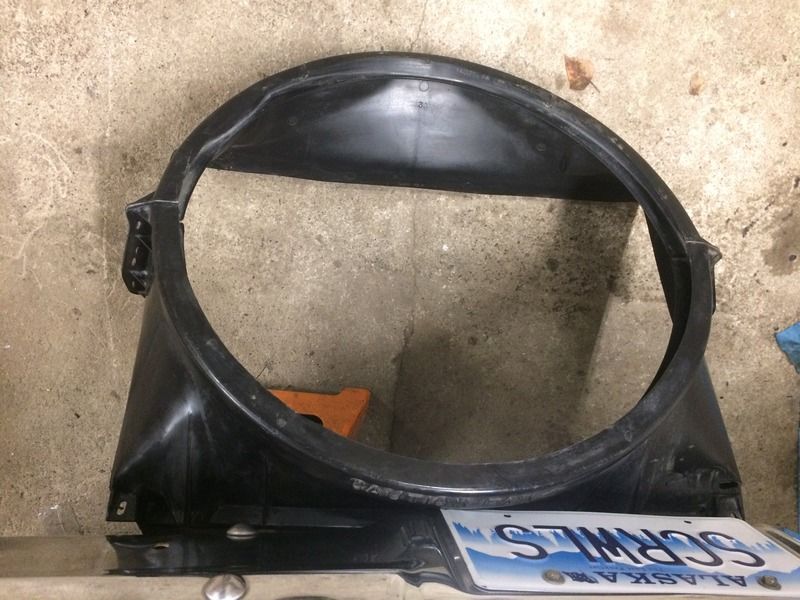 Fan shroud is mounted, along with the fan, even though it isn't visible. 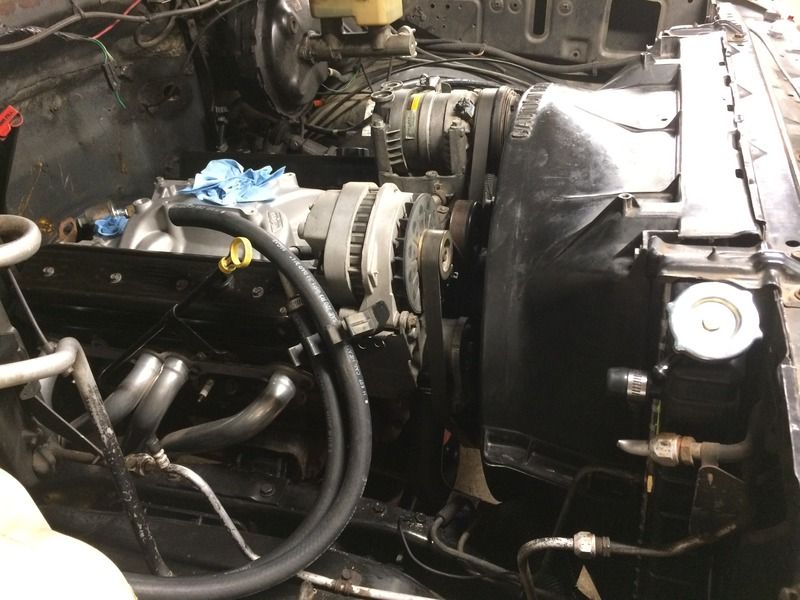  Another quick trip into town yielded an upper radiator hose, intake fitting for the heater core hose, new thermostat, and a couple more clamps. The upper hose here is for a 1990 Chevy truck with TBI and 34" radiator. 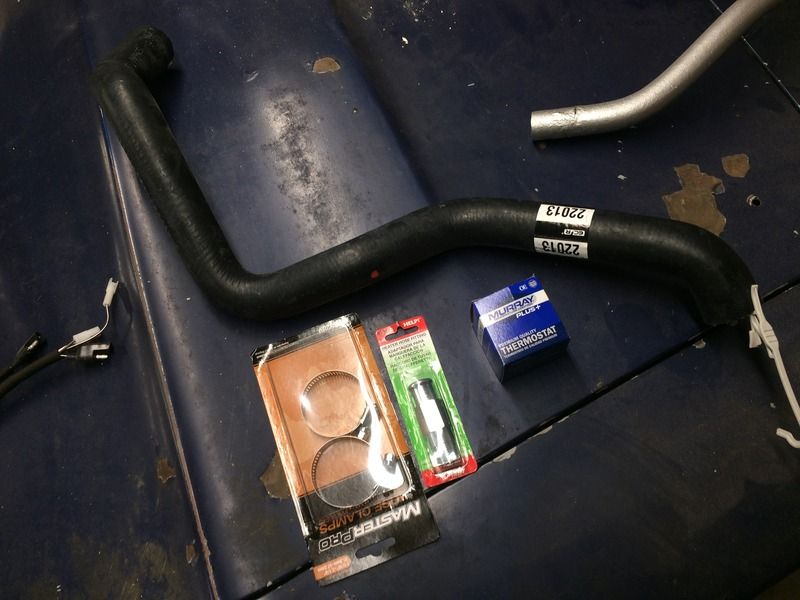 Intake fitting and both hoses installed 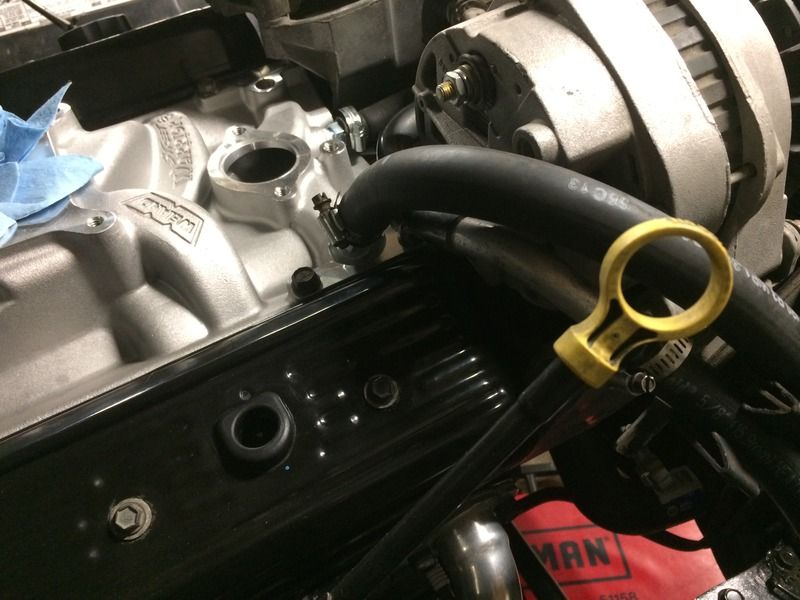  The upper hose is just mocked up for now, as I need to head out into my shed and find a thermostat housing that I want to use, but as you can see here, the fit is perfect! 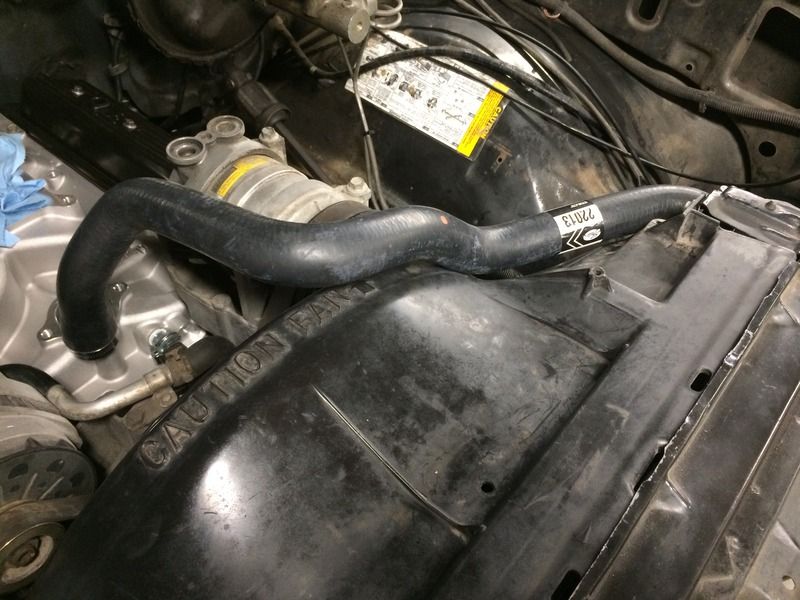 This is the angle that the hose will meet the housing. I think I may be able to find a stock one at this angle, seems like the Chevy Vans from this era used a housing that had this angle built into it. 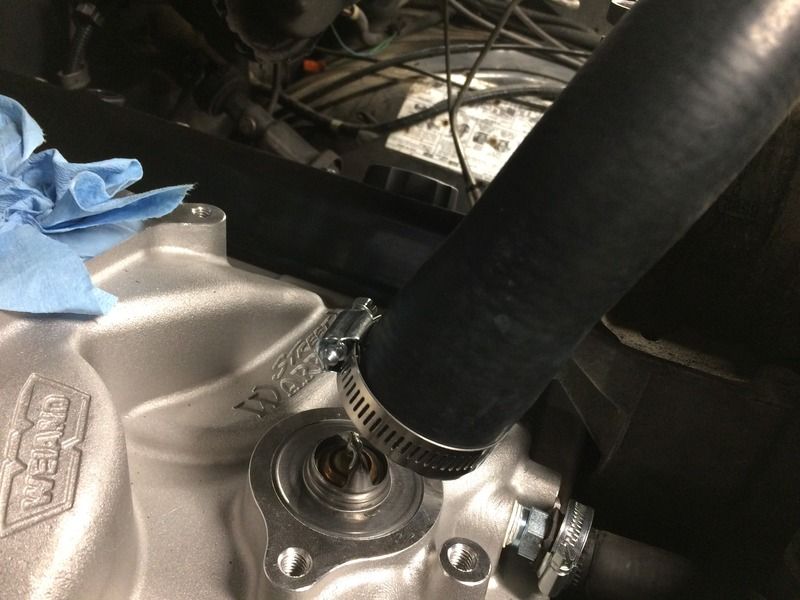 And that is it for tonight! |
|
|

|
|
|
#110 |
|
Registered User
Join Date: Dec 2007
Location: Palmer, Alaska
Posts: 13,821
|
Re: Project "You thought yours was bad!" '78 C10 Stepside
Nice work!!
What EFI kit are you planning on running?
__________________
 CHEVY ONLY CHEVY ONLY
|
|
|

|
|
|
#111 |
|
Registered User
Join Date: May 2016
Location: Willow, Alaska
Posts: 881
|
Re: Project "You thought yours was bad!" '78 C10 Stepside
Thank you!
I'm going to try out that new Holley Sniper kit that was just released within the last month or so. It lists for $999 so I don't think you could beat that for a budget build. I'm still well under my $5k mark, even if I go with that! |
|
|

|
|
|
#112 |
|
Registered User
Join Date: Jan 2013
Location: Nacogdoches, Texas
Posts: 895
|
Re: Project "You thought yours was bad!" '78 C10 Stepside
Nice job, Reminds me of my build, all frankensteined together! Following!
__________________
Current Build 89 s10 ecsb 2wd 4.3/700r4 50k OG Miles Instagram- shaggin_s10 '86 Chevrolet C10 Custom Deluxe - Gen V 454 - 4l80e - welded 12 bolt (Build thread: http://67-72chevytrucks.com/vboard/s...d.php?t=611611 ) SOLD |
|
|

|
|
|
#113 |
|
Registered User
Join Date: May 2016
Location: Willow, Alaska
Posts: 881
|
Re: Project "You thought yours was bad!" '78 C10 Stepside
|
|
|

|
|
|
#114 |
|
Registered User
Join Date: May 2016
Location: Willow, Alaska
Posts: 881
|
Re: Project "You thought yours was bad!" '78 C10 Stepside
|
|
|

|
|
|
#115 |
|
Registered User
Join Date: May 2016
Location: Willow, Alaska
Posts: 881
|
Re: Project "You thought yours was bad!" '78 C10 Stepside
Continuing with the crappy digital camera pictures until my new phone show up.
 I set the engine up at 15* BTDC also, as the Sniper instructions show, lined up the oil pump drive, and dropped the distributor in. I realized I haven't ordered a distributor clamp yet! I may also need to order a second distributor cap, too, as I will need one to cut a hole in to check my rotor phasing when everything is up and running. 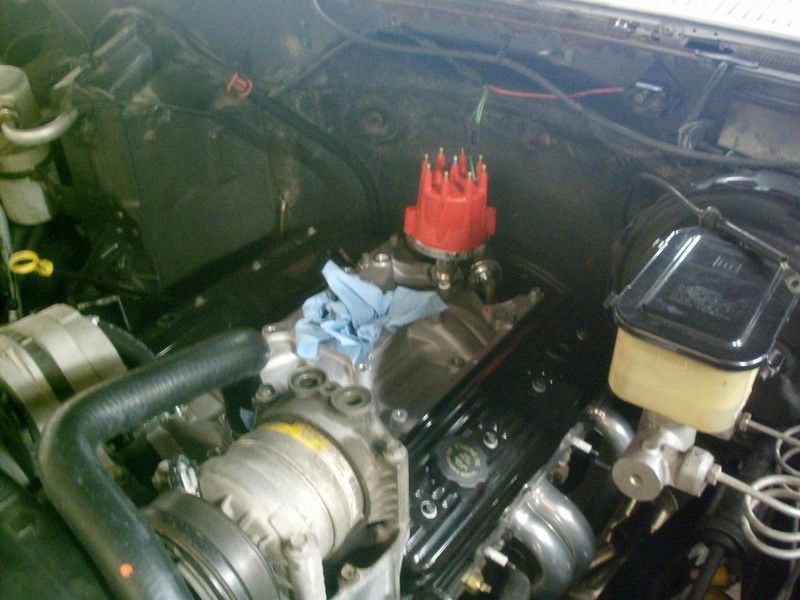 I also picked up a second thermostat housing. The upper one was sitting on my shelf and had the exact angle I wanted, but it was too small to fit the hose, so I believe this one must have been off of a V6. I did a little junkyard scrounging and came up with a V8 TBI housing, the angle is a little less, but I think it should still work fine. I will get it cleaned up and test fit later this week. 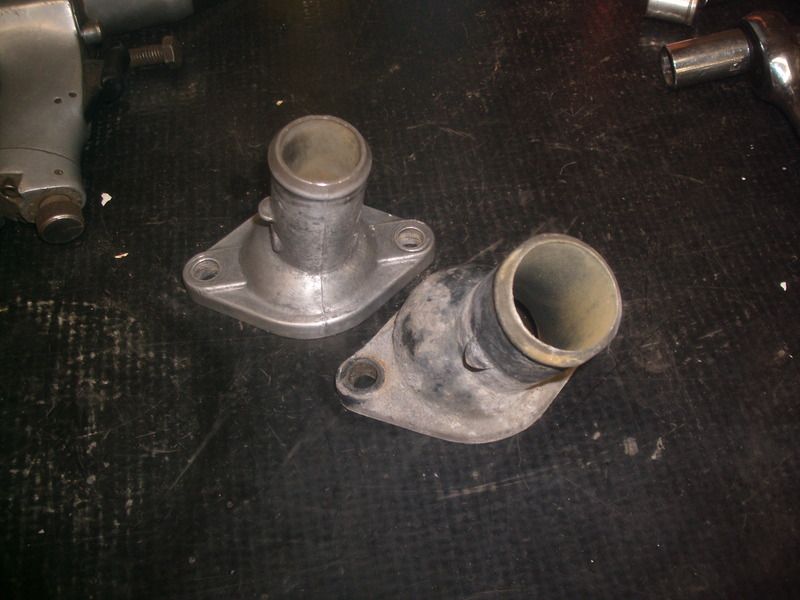
|
|
|

|
|
|
#116 |
|
Registered User
Join Date: May 2016
Location: Willow, Alaska
Posts: 881
|
Re: Project "You thought yours was bad!" '78 C10 Stepside
|
|
|

|
|
|
#117 |
|
Registered User
Join Date: May 2009
Location: Good Thunder Mn.
Posts: 955
|
Re: Project "You thought yours was bad!" '78 C10 Stepside
Truck is looking good!
|
|
|

|
|
|
#118 |
|
Registered User
Join Date: May 2016
Location: Willow, Alaska
Posts: 881
|
Re: Project "You thought yours was bad!" '78 C10 Stepside
Thank you! Glad to hear it!
 I've since sourced an OEM distributor clamp and bolt off of one of my previous TBI engines. The bolt ended up being too long with that guide tip, so I had to find another one and paint it, too. I also cleaned up and painted the thermostat housing at the same time. 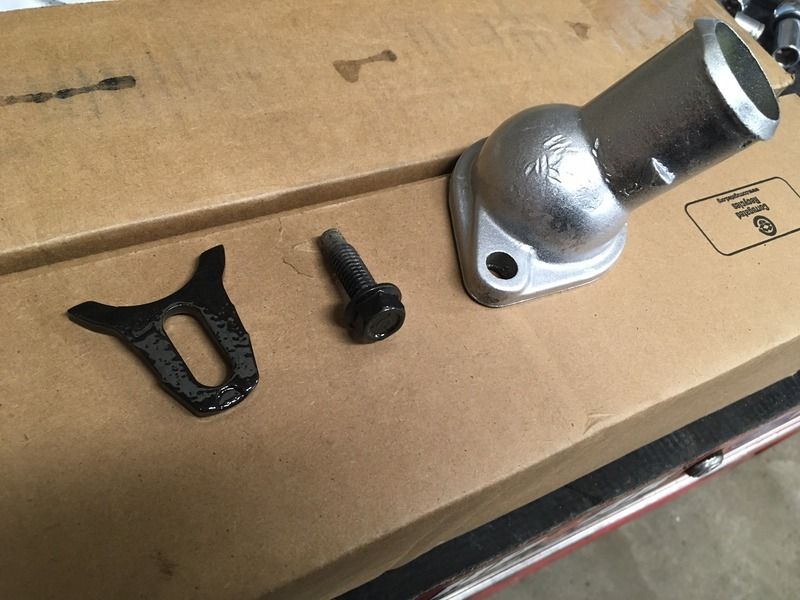 I went and dug through my 67 Camaro and found the old points cap I used to run on the car before I sold the engine and transmission out of it to prep for restoration. This shares the same dimensions as my MSD cap, so I cut this one up for my rotor phasing setup. Eventually I will need another terminal style cap, but this will do just fine for pre-setup! The hole is located at the #1 terminal. 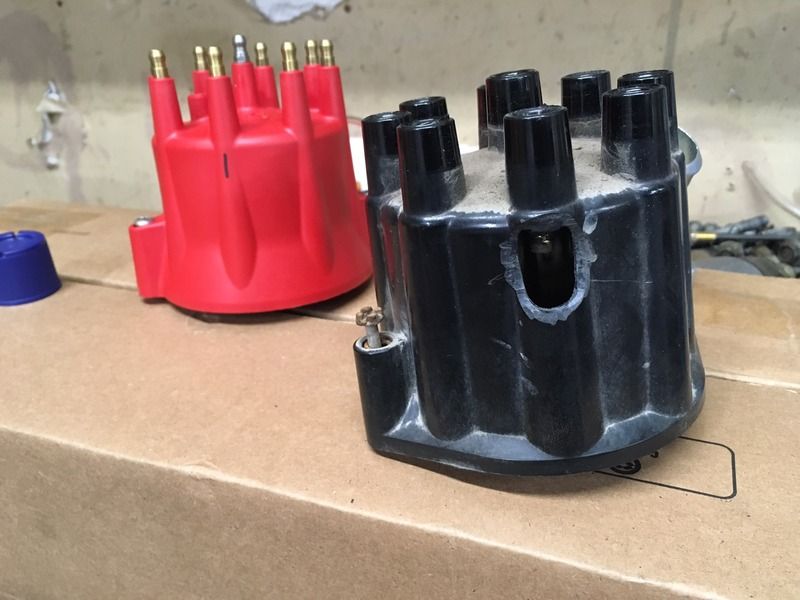 What happened to my shiny new distributor?  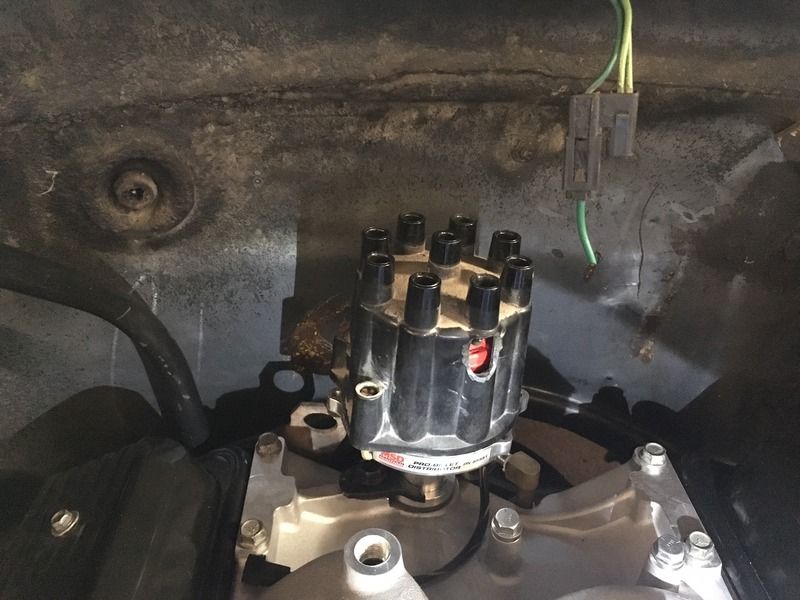 Not bad for a drop in guess! As you can see, the rotor is advanced (sitting to the left of the terminal)  I was having trouble getting it to focus in being this close, but you can see that the rotor tip is now centered inside the #1 terminal. At this point, I can snug the distributor body down, my timing is set. 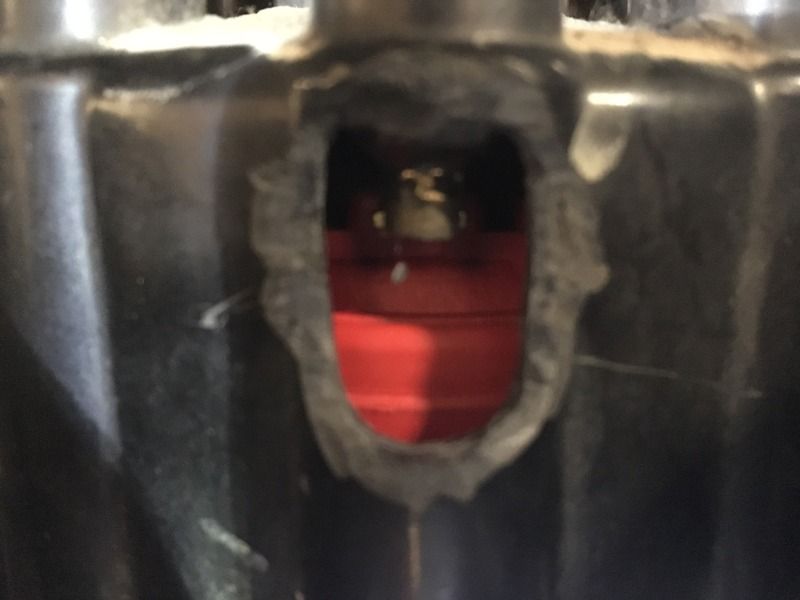 Now, to do a quick double check, I backed the crankshaft off until the reluctor wheel lined up with the hall effect sensor in the distributor. 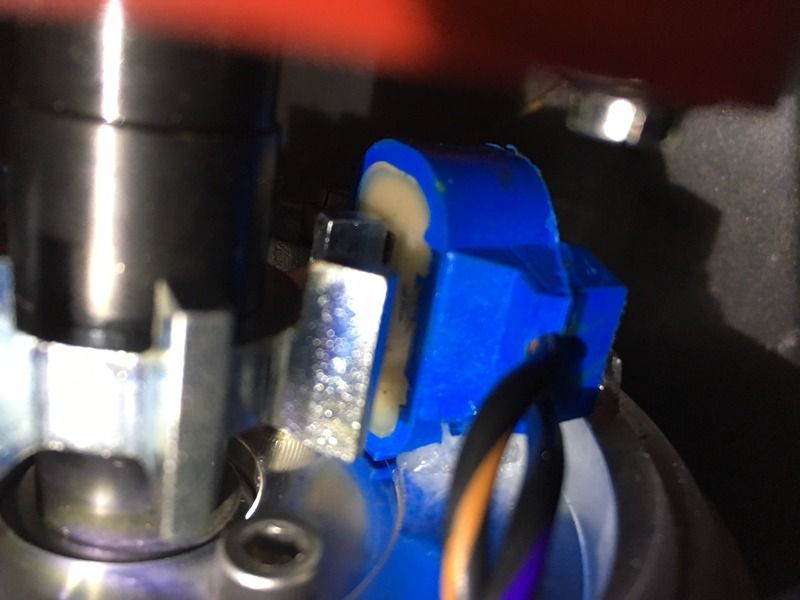 And now, lets check what it's sitting at...looks like it landed on 48*BTDC, which is pretty dang close, most specs will list 50*BTDC as the starting point. This will get fine tuned when I have the engine running and lock in the timing with the EFI, but we are dead on the money to get it up and running now! 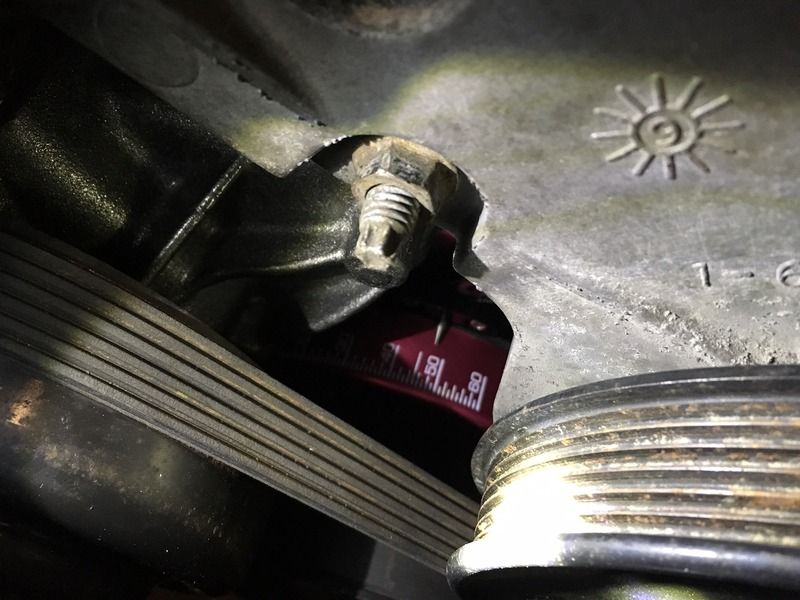
|
|
|

|
|
|
#119 |
|
Registered User
Join Date: May 2016
Location: Willow, Alaska
Posts: 881
|
Re: Project "You thought yours was bad!" '78 C10 Stepside
|
|
|

|
|
|
#120 |
|
Registered User
Join Date: May 2016
Location: Willow, Alaska
Posts: 881
|
Re: Project "You thought yours was bad!" '78 C10 Stepside
Also, here's an update to the parts list! I haven't posted this up in a while, but here's where I'm at:
C10 cost sheet Truck (Neighbor) ---------------$0 78 Hood ----------------------$40 78 Fender, driver --------------$75 3.42 Rear axle ---------------$150 Rally wheels 15x8 ------------$100 ECE Spindles 2.5" drop ------$350 Axle flip McGaughy ----------$126 Full Bushing kit E.S. ----------$188 Cooper 235/60R15 front ------$50 Rear axle brake line ------------$11 Cooper 275/60R15 rear ------$305 Parts truck 1986 longbed ---$1000 Sold 3.42 rear axle --------(-$150) Sold 78 hood --------------(-$125) Sold column/misc parts ---(-$140) Sold 78 fender -------------(-$75) Stock grille -------------------$20 Trade tach gauges for headers -$0 Sold 86 engine ------------(-$500) Vortec/Carb intake ----------$220 Powdercoat wheels ----------$200 Mount/balance tires -----------$40 Headlight bezels --------------$25 Sold 86 longbed ----------(-$100) Lower ball joints/brake lines --$100 Wheel bearings/seals/grease. $100 Front A-Arm bumpstops ------$20 Wheel spacers ----------------$44 Front brake lines --------------$25 Tail lights ---------------------$50 Front and rear shocks --------$195 Sold 86 tailgate/bumper --(-$350) Sold 86 frame --------------(-$50) 99 Suburban for parts -------$500 Sold Vortec intake ----------(-$50) Sold suburban trans ------(-$300) 255/60R15 Cooper tires -----$327 Sold dual tank kit ----------(-$100) Sold sub grill/bumper/hood (-$250) Sold sub door/mirror/heater(-$150) Transgo shift kit --------------$115 Gaskets/seals/filter ----------$143 Sold sub t-case -----------(-$100) Sold 86 tires --------------(-$500) Trans parts install -----------$540 Radiator/cap, sensors, plugs -$226 Mufflers ---------------------$128 Thermostat/rad hose ----------$27 Water pump/lower hose -------$80 Coil ---------------------------$35 Sway bar brackets ------------$26 Spark plugs wires/trade labor --$0 MSD distributor -------------$225 MSD 84211 adj rotor ----------$40 Balancer cover ----------------$20 $2925 |
|
|

|
|
|
#121 |
|
Registered User
Join Date: May 2016
Location: Willow, Alaska
Posts: 881
|
Re: Project "You thought yours was bad!" '78 C10 Stepside
It's too cold out right now to make any serious progress, so I picked up a few more bolts while I was in town and got the sway bar mounted up. I only remembered to buy enough for the frame mounts, so now I have to go back in and buy another set in order to bolt the other set of mounts to the control arms.
 Started by grinding off and punching out the cold rivets holding the old sway bar brackets on to the frame. 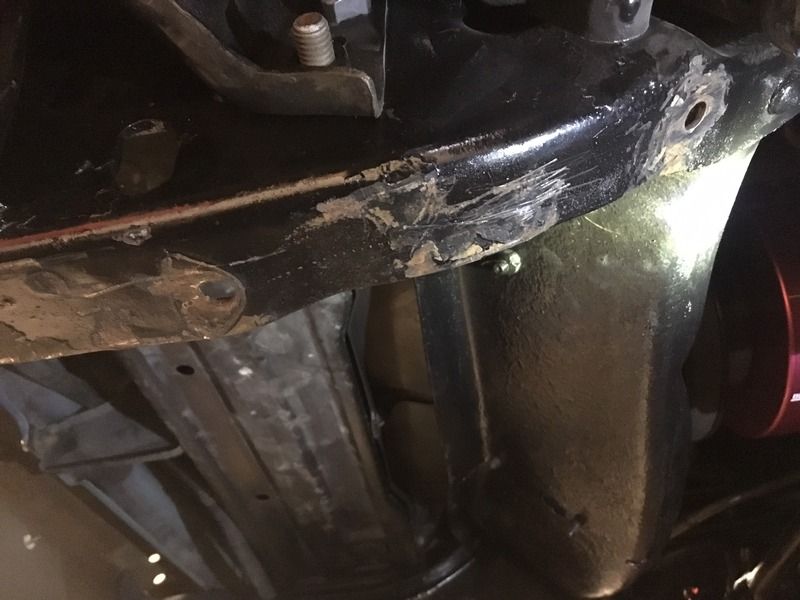 Old brackets removed. The main reason they were changed was because the drivers side was obviously damaged sometime in the past. 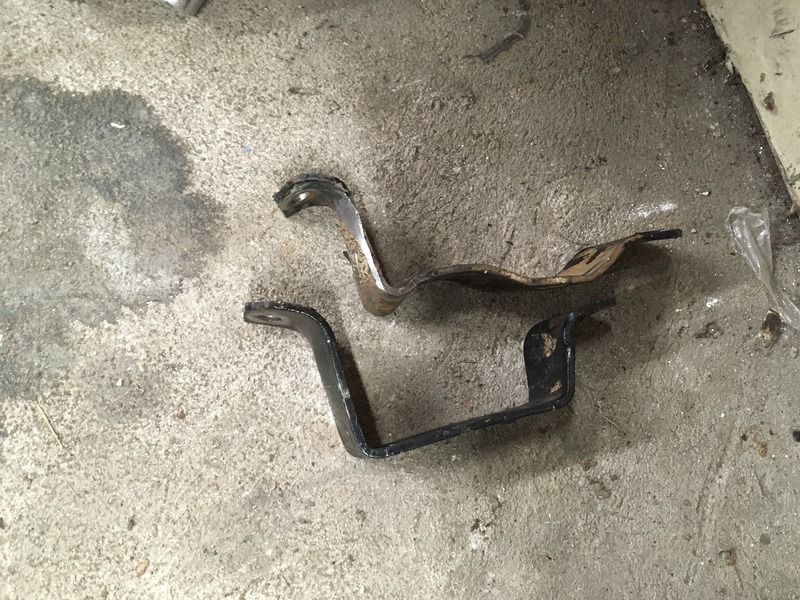 Frame area around where the brackets were removed was painted, and new brackets installed. The actual mount bolts need to be installed before the bracket goes on to the frame, it's impossible to put them in afterwards. 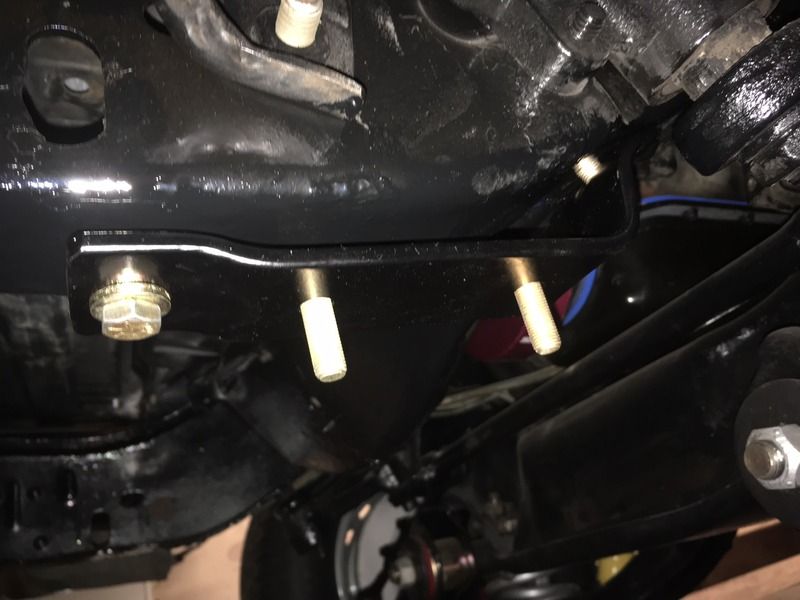 You can clearly see how close the bolts sit here 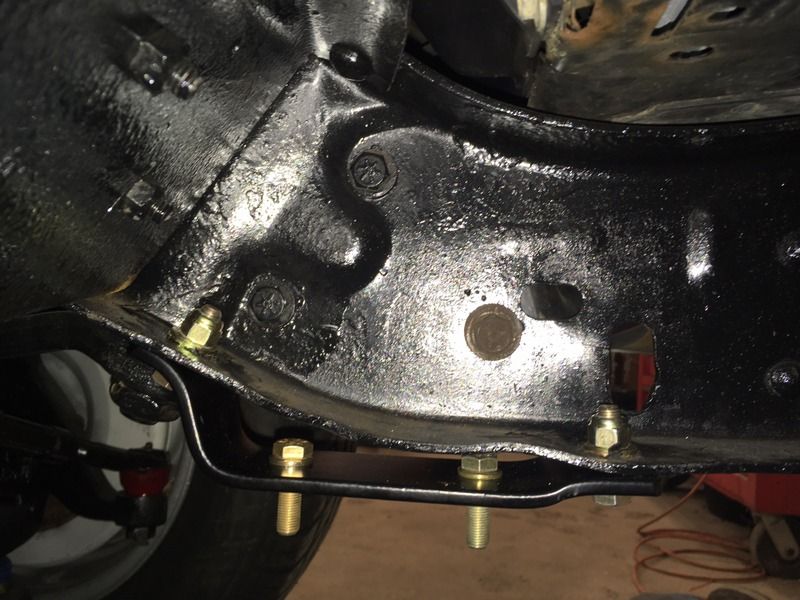 Sway bar mounts greased, installed on the bar, and mounted up to the brackets 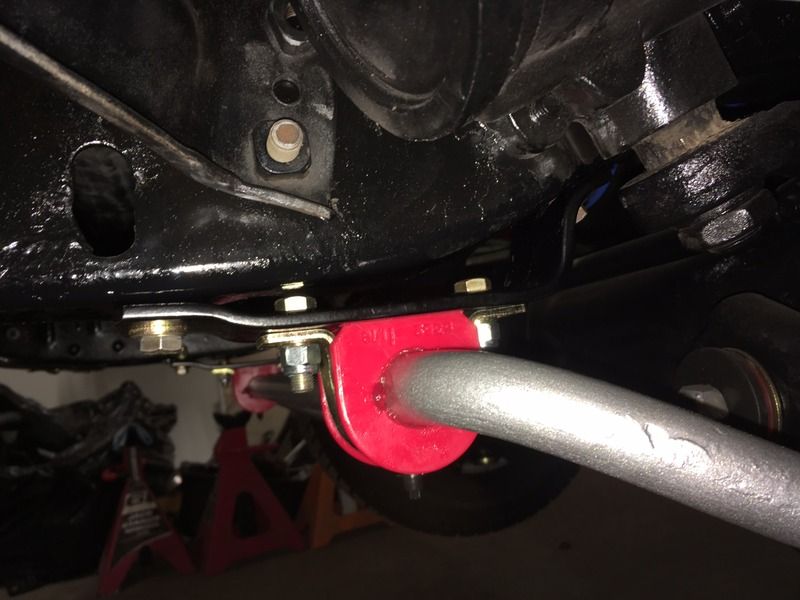 All in! I love the contrast that the silver on the sway bar and springs gives to the rest of the black parts underneath there. The red highlights them nicely! 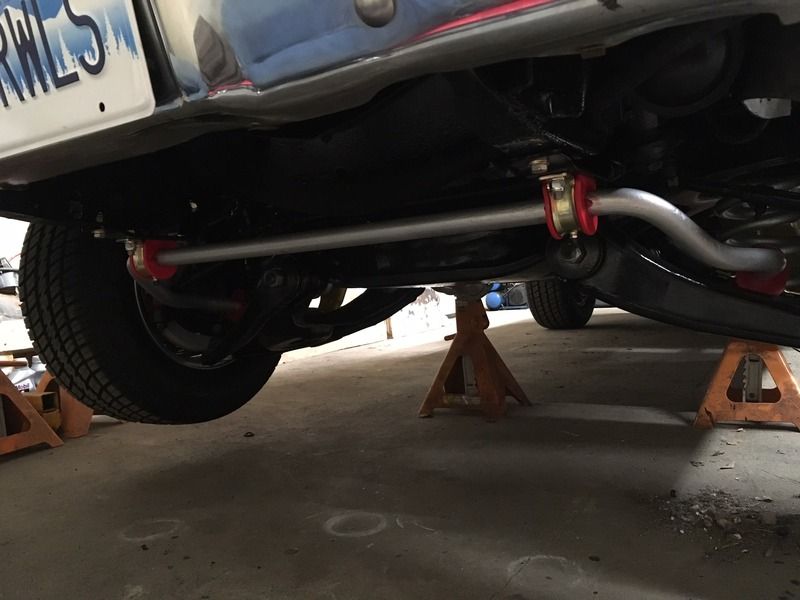
|
|
|

|
|
|
#122 |
|
Registered User
Join Date: May 2016
Location: Willow, Alaska
Posts: 881
|
Re: Project "You thought yours was bad!" '78 C10 Stepside
|
|
|

|
|
|
#123 |
|
Active Member
 Join Date: Jul 2015
Location: Anchorage, AK
Posts: 145
|
Re: Project "You thought yours was bad!" '78 C10 Stepside
Looks good without the trim rings. Where did you get them coated at? Advanced?
__________________
'75 C10 SWB 454 '75 K10 SWB "The Gilded Turd" '77 K5 Blazer Chalet #0661 Build thread:http://67-72chevytrucks.com/vboard/s...d.php?t=776072 '79 K10 Bonanza |
|
|

|
|
|
#124 |
|
Registered User
Join Date: May 2016
Location: Willow, Alaska
Posts: 881
|
Re: Project "You thought yours was bad!" '78 C10 Stepside
Yup, I live right down the road from Mark. I always have him do my stuff, he does great work!

|
|
|

|
|
|
#125 |
|
Active Member
 Join Date: Jul 2015
Location: Anchorage, AK
Posts: 145
|
Re: Project "You thought yours was bad!" '78 C10 Stepside
I've hear nothing but good things about them. Everyone says its worth the drive from Anchorage to have him coat your stuff.
__________________
'75 C10 SWB 454 '75 K10 SWB "The Gilded Turd" '77 K5 Blazer Chalet #0661 Build thread:http://67-72chevytrucks.com/vboard/s...d.php?t=776072 '79 K10 Bonanza |
|
|

|
 |
| Bookmarks |
| Thread Tools | |
| Display Modes | |
|
|