 |
Register or Log In To remove these advertisements. |
|
|
|
|||||||
 |
|
|
Thread Tools | Display Modes |
|
|
#1 |
|
Registered User
Join Date: Mar 2012
Location: Grover Beach, CA
Posts: 86
|
Vintage air in a 55' stepside
Does anyone have pictures of their installation of a vintage air unit? The instructions are a bit vague as to where to install the unit. It basically says install the unit in place of the factory heater unit. So my problem is, I haven't had the factory heater unit installed for about 20 years. I had a bodywork guy fill in few holes in the firewall so that my complicate the issue more. thanks for the help.
__________________
55' 3100 big window |
|
|

|
|
|
#2 |
|
Registered User
Join Date: Jun 2012
Location: Southern Iowa
Posts: 944
|
Re: Vintage air in a 55' stepside
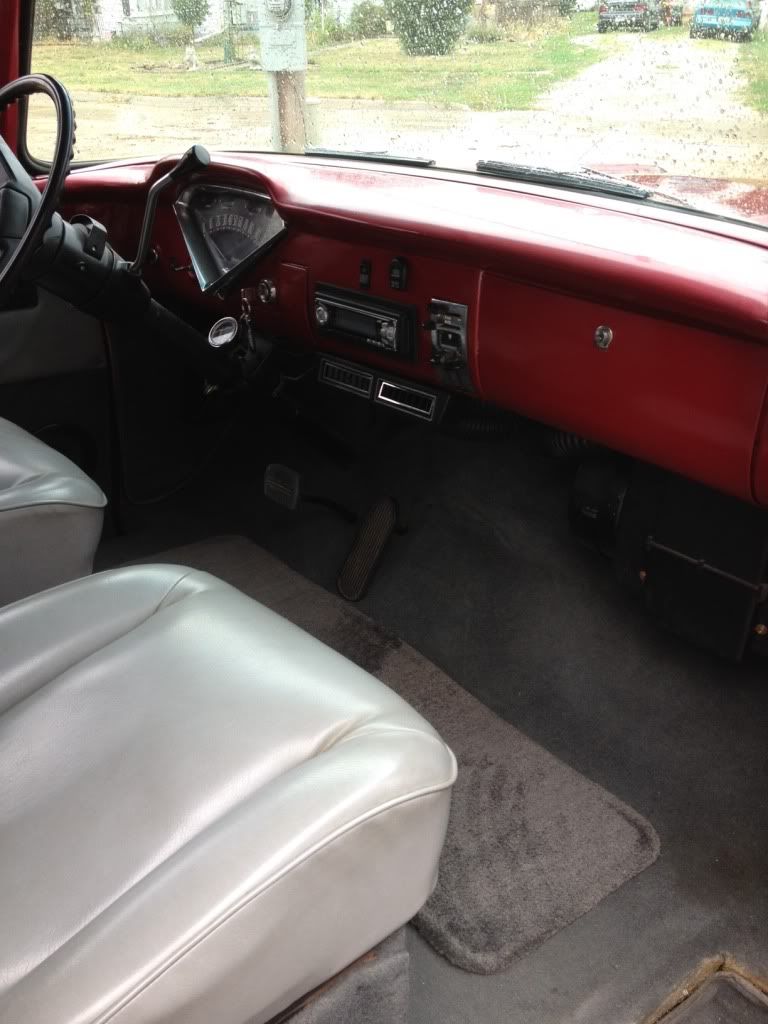
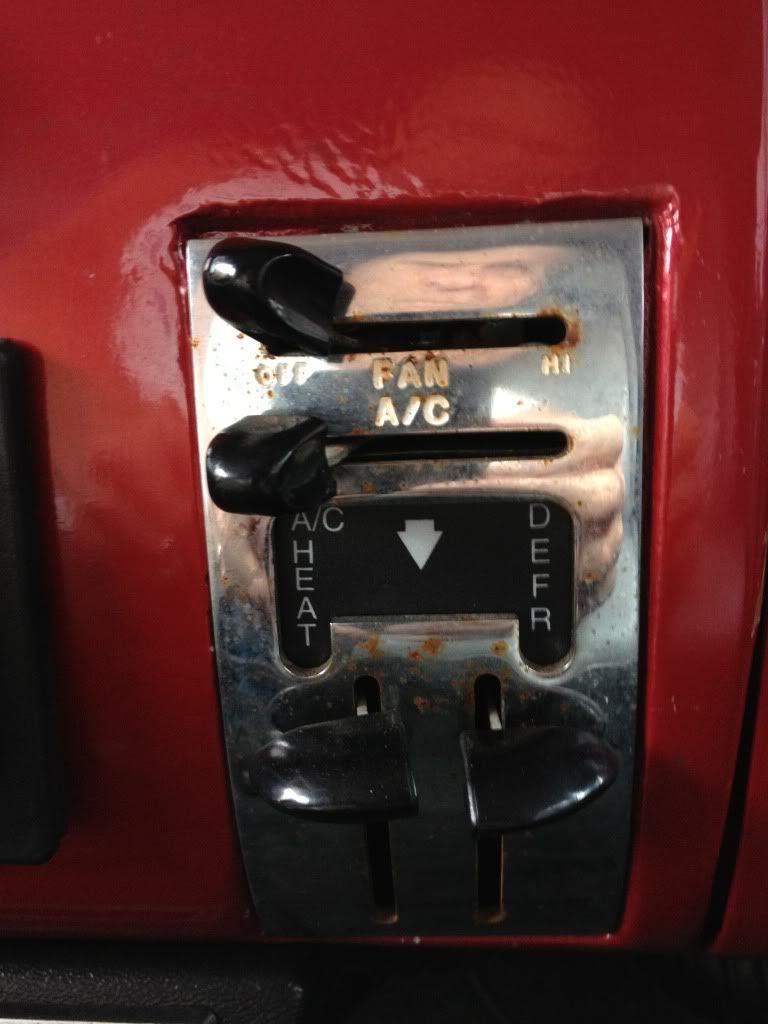
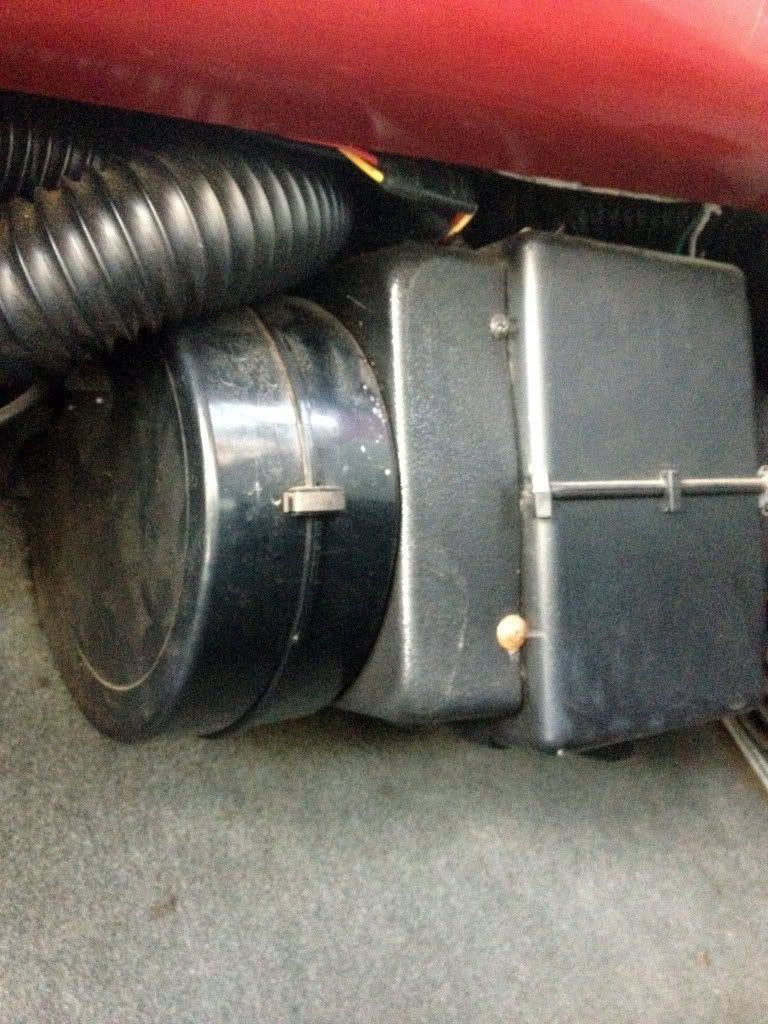
Not sure if this is what you are asking about. This is my '57 Panel I just got, so I didn't do the install. Good luck!

|
|
|

|
|
|
#3 |
|
Registered User
Join Date: Mar 2012
Location: Grover Beach, CA
Posts: 86
|
Re: Vintage air in a 55' stepside
Looks like you have the original heater box. Does your truck have A/C?
__________________
55' 3100 big window |
|
|

|
|
|
#4 |
|
Registered User
Join Date: Nov 2009
Location: Dallas, TX
Posts: 148
|
Re: Vintage air in a 55' stepside
Gono,
I used a universal Vintage Air kit, not the one made for our trucks but this is what I did... I have a box of 1/4-20 elevator bolts that I use for a lot of things like this. I've also seen them at Lowes in small packages in their nut/bolt aisle. They're great because you can weld these to the inside of the firewall and hang the unit wherever you want. So I just held the unit as high as I could comfortably get it and over to the passenger side and marked where I wanted 3 bolts, welded those in place and mounted the unit. Took less than an hour to do. Posted via Mobile Device
__________________
'59 Big Window Fleetside |
|
|

|
|
|
#5 |
|
Registered User
Join Date: Jun 2006
Location: Idaho
Posts: 8,800
|
Re: Vintage air in a 55' stepside
If you look in the VA instructions there is a template that locates the firewall opening referenced to the original battery box and heater holes. One of the holes shown is for the stud in the back of the VA box. That sets up everything else. There are two other brackets (at least on the used unit I got) one on the end towards the drivers side that mount to the firewall and one on the passenger side that screws to the kick panel. I have a smoothed fire wall and welded studs to the inside of the firewall for the end brackets. The one thru the firewall is concealed by the battery. Be warned, if you haven't done a trial fit yet there is not very much clearance between the unit and the firewall and dash bottom return. I have rigged a lift using a screw jack to support it and gradually lift it into place while connecting all the various ducts, cables and hoses.
__________________
1959 Chevy Short Fleetside w/ 74 4WD drive train (current project) OrrieG Build Thread 1964 Chevelle Malibu w/ 355-350TH (daily driver) Helpful AD and TF Manual Site Old Car Manual Project |
|
|

|
|
|
#6 |
|
Registered User
Join Date: Jun 2012
Location: Southern Iowa
Posts: 944
|
Re: Vintage air in a 55' stepside
 I didn't know the factory offered a/c in a '57 TF Panel until I bought this last month. It would be nice if it had the manual-pull floor vents. I am wondering if they were ever there with factory a/c. I wish my fan was stronger, or had a "4th speed". Ha! That is a large area to cool.  
|
|
|

|
|
|
#7 |
|
Registered User
Join Date: May 2010
Location: Lawrenceville, Ga
Posts: 2,648
|
Re: Vintage air in a 55' stepside
Highsider, I don't think that's a Vintage Aire setup you have. It looks like an Old Air unit. That's what I was going to use but the local Vintage Air dealer convinced me to go with VA because it mounts higher under the dash.
Gono, what OrrieG said. It's a tight fit between the dash and firewall. There is a hole in the firewall that lines up with a threaded nut on the rear of the VA unit that lines it up, then you level it before installing the end supports. There are several cables that connect to the control and once installed they are difficult to impossible to get to. I didn't think the clamps that came with the unit were up to the quality of the rest of the unit. It is difficult to make them clamp the cables securely. My advice when installing the cables is to put a piece of shrink tubing on the cable housing at each end and make sure to form the clamp so that it holds the cable tight enough to keep it from slipping when you operate the controls. The shrink tubing adds thickness to the cable and also allows the clamp to dig in slightly. I had to go back and do this so that's why I'm mentioning it. It's a clean installation when done and you can keep the fresh air vents operable if you want to. |
|
|

|
|
|
#8 |
|
Registered User
Join Date: Mar 2012
Location: Grover Beach, CA
Posts: 86
|
Re: Vintage air in a 55' stepside
Thanks for the responses. So here's what I'm planning to do:
1) Locate the threaded bolt in the back of the unit first to get an idea of where the unit will hang. 2) Weld in the required elevator bolts to secure the unit. 3) Test fit the working cables from the control panel. As a side note, did any of you guys use a bulkhead fitting on the firewall? And if you did, where did you mount it? lower on the firewall not directly behind the A/C unit? I did notice that there isn't much room between the firewall and the back of the unit and was wondering how much slack you gave yourself when attaching the A/C hoses? It seems like it could be very challenging to mount it in a location that is fuctional yet stills hides the connection point.
__________________
55' 3100 big window |
|
|

|
|
|
#9 |
|
Registered User
Join Date: Jun 2006
Location: Idaho
Posts: 8,800
|
Re: Vintage air in a 55' stepside
I got mine used with rubber ac lines, not the bent hardlines that come with the kit. Looking at other manf. there is one that runs the lines thru the old fresh air opening, thru holes in the kick panel next to the fire wall, then under the inner fender to the water and ac at the engine. Here is what I did for water, ac will run just to the left of it and below it on the inner fender panel. That install is happening next weekend so no photos.
__________________
1959 Chevy Short Fleetside w/ 74 4WD drive train (current project) OrrieG Build Thread 1964 Chevelle Malibu w/ 355-350TH (daily driver) Helpful AD and TF Manual Site Old Car Manual Project |
|
|

|
|
|
#10 |
|
Registered User
 Join Date: Jul 2010
Location: Mesa, AZ
Posts: 513
|
Re: Vintage air in a 55' stepside
I am very happy with my VA install. I did not use the 'pods' on the left and right air outlets and elected to cut a hole in my dash for the outlets, looks more 'stock' in my opinion. I do believe that if it was an option in the day, it is where Chevy would have put it. The heater blower evap unit is a very tight fit, and it will be a rpita to get the radio out, and you will not have any glove compartment space.
__________________
JB from AZ 1969 Chevy Sub K10 1957 Chevy 3200 1962 VW Beetle 1957 Willys CJ5 
|
|
|

|
|
|
#11 |
|
Senior Member
 Join Date: Jul 2012
Location: huntington beach
Posts: 845
|
Re: Vintage air in a 55' stepside
Nicely done, magic!
|
|
|

|
|
|
#12 |
|
Registered User
Join Date: Dec 2011
Location: Humble,TX
Posts: 287
|
Re: Vintage air in a 55' stepside
I too have a VA unit for my 58, I've been held back by the wiper motor but that's all been fixed. I also wondered about which hole is used to mount the unit. My truck has the original 2 heater holes plus 2 other holes near by that I'm thinking about using. How important is it to stick with the template? BTW, thanks for shedding some light on this. The instructions that come with the VA are not so clear in some areas, I have parts that are not shown in the instructions that I'm sure I'll need help with.
Posted via Mobile Device |
|
|

|
|
|
#13 |
|
Registered User
 Join Date: Jul 2010
Location: Mesa, AZ
Posts: 513
|
Re: Vintage air in a 55' stepside
I utilized the template and only needed to drill two xtra holes. The other two were in the correct place, i just needed to enlarge them a tad. I find if you deviate too much from the directions u have the potential of creating the classic 'customization onion.' layers and layers of headaches that make you want to cry.
Posted via Mobile Device
__________________
JB from AZ 1969 Chevy Sub K10 1957 Chevy 3200 1962 VW Beetle 1957 Willys CJ5 
|
|
|

|
|
|
#14 |
|
Registered User
Join Date: Jun 2012
Location: Southern Iowa
Posts: 944
|
Re: Vintage air in a 55' stepside
Couple of notes relating to mine is I have a full, stock glove compartment and even though the unit hangs low, in a panel truck the aftermarket (Porsche) seats slid back for plenty of passenger leg room.
Like I said above, I wish I had a faster fan when on highest speed, to help the a/c. Thanks to all that contributed notes and photos! |
|
|

|
|
|
#15 |
|
Registered User
Join Date: Jul 2011
Location: shingle springs, calif
Posts: 771
|
Re: Vintage air in a 55' stepside
This a vintage air kit i installed in a '55.. hope they help you
|
|
|

|
|
|
#16 |
|
Registered User
Join Date: Jul 2011
Location: shingle springs, calif
Posts: 771
|
Re: Vintage air in a 55' stepside
Here a few more to show how they hide it...
|
|
|

|
|
|
#17 |
|
Registered User
Join Date: Dec 2011
Location: Humble,TX
Posts: 287
|
Re: Vintage air in a 55' stepside
That's beautiful! Nice pics
Posted via Mobile Device |
|
|

|
|
|
#18 |
|
Registered User
Join Date: Apr 2012
Location: Fayetteville, AR
Posts: 105
|
Re: Vintage air in a 55' stepside
beautiful stuff.
Park, did you make the piece below the metal dash that holds the vents? |
|
|

|
|
|
#19 |
|
Registered User
Join Date: Mar 2012
Location: Grover Beach, CA
Posts: 86
|
Re: Vintage air in a 55' stepside
Great install. Did you crimp your own connections for the A/C lines? You've given me really good ideas for a clean install. Thanks. Since I'm on the topic of clean installs, how and where did you mount your battery? I'm thinking of taking the stock battery tray and mounting it on the frame rail. Not sure what group size battery to use. Any suggestions?
1955 3100 stepside 350/700R4
__________________
55' 3100 big window |
|
|

|
|
|
#20 |
|
Registered User
Join Date: Jul 2011
Location: shingle springs, calif
Posts: 771
|
Re: Vintage air in a 55' stepside
|
|
|

|
|
|
#21 | |
|
Registered User
Join Date: Jul 2011
Location: shingle springs, calif
Posts: 771
|
Re: Vintage air in a 55' stepside
Quote:
Hope this helps... |
|
|
|

|
|
|
#22 |
|
Registered User
Join Date: Nov 2009
Location: Dallas, TX
Posts: 148
|
Re: Vintage air in a 55' stepside
I used the same battery box as Parkwood. To hide my a/c lines, I ran the lines through the fresh air vent and into the cowl. On the cowl, I just used rubber grommets I bought from a local a/c supplier. The VA bulkhead I used is actually on the inner fender and will have short hoses to the compressor and such. I mounted the drier in front of the grille. I wish I had more pics but this is all I could find:

__________________
'59 Big Window Fleetside |
|
|

|
|
|
#23 |
|
Registered User
Join Date: Mar 2012
Location: Grover Beach, CA
Posts: 86
|
Re: Vintage air in a 55' stepside
Thanks for the pics. So I wondering if I mount the lines on the inner fenders if I will have clearance issues since I'm running air bags. I'm also still in the process if figuring out what size wheel and tire I'm going to run. I may have got the cart before the horse on this one.
So, since you used the fresh air box on the passenger side, could you post a picture of the lines running into there? I cut out the air boxes to make room to mount speakers. Thanks.
__________________
55' 3100 big window |
|
|

|
|
|
#24 |
|
Registered User
Join Date: Jun 2006
Location: Idaho
Posts: 8,800
|
Re: Vintage air in a 55' stepside
Classic Air is the company that runs theirs in the fenders too. You can download the install manual. Bulkhead fitting in the inner panel is a good idea, I may need to do that because the original hose looks too short.
__________________
1959 Chevy Short Fleetside w/ 74 4WD drive train (current project) OrrieG Build Thread 1964 Chevelle Malibu w/ 355-350TH (daily driver) Helpful AD and TF Manual Site Old Car Manual Project |
|
|

|
|
|
#25 |
|
Registered User
Join Date: Nov 2009
Location: Dallas, TX
Posts: 148
|
Re: Vintage air in a 55' stepside
Yeah, that's it. Classic Air is close to my house so I went over there and had the lines you see crimped and bought the grommets there. Again, I welded the handy elevator bolts to the outside of the inner fender and bought some zip ties from McMaster that have mounting holes in them so I could run the 1/4" bolt through the zip tie. You have to buy 100 of them though and will only use a few!
Gono, I've never used air bags before so I don't know about the clearance on those but you can see what it looks like with a Mustang II suspension in the pic. I mounted the lines as high as I could. I honestly don't see how it could interfere unless you might be running the truck just super, super, super low with really tall tires. As far as running the lines through the air box, I had to enlarge the air hole next to the dash a bit and then just used 90* fittings to snake outside the cowl. Prepare to scratch your wrists and forearms up a bit! For speakers, I'm using kick panels that have speakers molded into them.
__________________
'59 Big Window Fleetside |
|
|

|
 |
| Bookmarks |
| Thread Tools | |
| Display Modes | |
|
|