
 |
Register or Log In To remove these advertisements. |
|
|
|
|||||||
 |
|
|
Thread Tools | Display Modes |
|
|
#1 |
|
Registered User
Join Date: Nov 2014
Location: Oakland, CA
Posts: 114
|
Kell's Two Cents - 1946 build
Edit: I refuse to let Photobucket win and am beginning the process of updating the photos associated with this thread. I'll do my best to get the correct ones on, but in any case please enjoy
What's up world Well I've been hanging out lurking on this site for about a year now and figured I would finally put my two cents up and add a build thread. There is some real skill on this site! This is my first build and am learning a lot as I go, so I come on this site for info and ideas for the build. Chizzler's build is obviously incredible, paint man is far more meticulous than the bulk of us, and there are awesome builds on the 47-55 side. My thread will show that a regular guy with a welder and a grinder can still get a build done! Anyways, let's get into it! I was already working on a '46 and I wasn't liking the direction it was going in. It wasn't very complete, somebody had black primered over what was left of the patina, and I was losing enthusiasm over my truck choice. That's when I came across these photos on Craigslist.  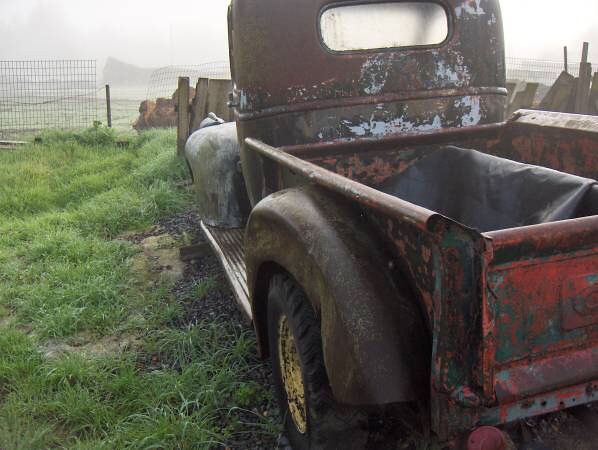   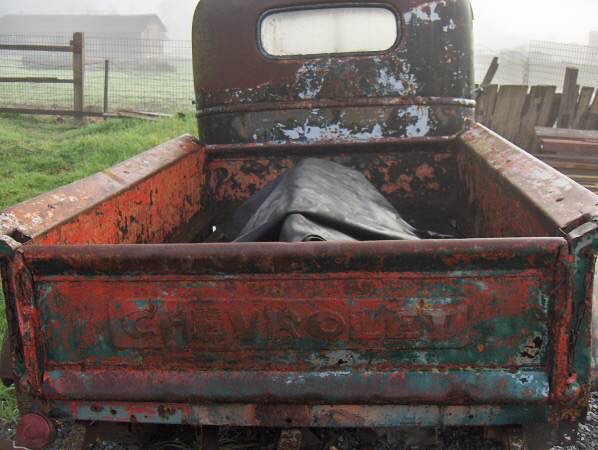 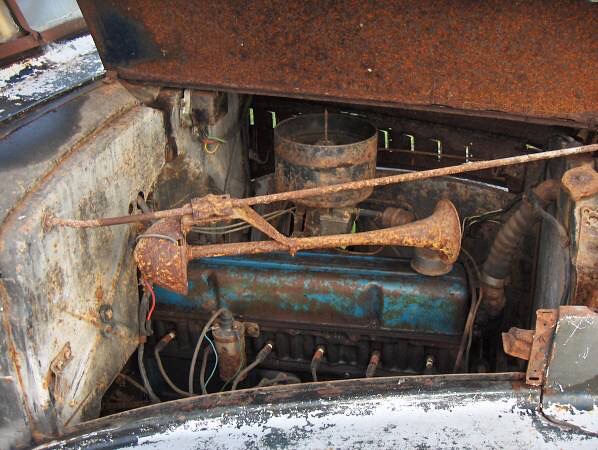 Northern California farm find, guy said it had been sitting up there 15-20 years. Totally complete and untouched with an incredible patina to go with it. I drove up the same day and gave him the deposit and returned a week later with the trailer. I was juiced! Last edited by gokellurself; 07-21-2017 at 02:03 AM. |
|
|

|
|
|
#2 |
|
Registered User
Join Date: Nov 2014
Location: Oakland, CA
Posts: 114
|
Re: Kell's Two Cents - 1946 build
My original plan was a low and slow, low budget build with a nice patina. This being my first build I didn't want to do anything too crazy, just wanted to get it up and running and ready for the street. Of course, with lack of experience and lack of the hot rod "vision" it's actually really tough to stick to a low budget build plan, and how quickly does the build plan evolve!
As I said, I was already working on a '46 so I had a couple parts gathered already. The first truck came with an original drop I-beam, so I knew I wanted to use that. A local hot rod builder highly suggested I go the S10 frame route, but I really wanted to build an OLD truck. I didn't want an S10 with an old face. I stripped the truck and got right down to the frame. Very first thing I did was fix the broken frame horn it came with. 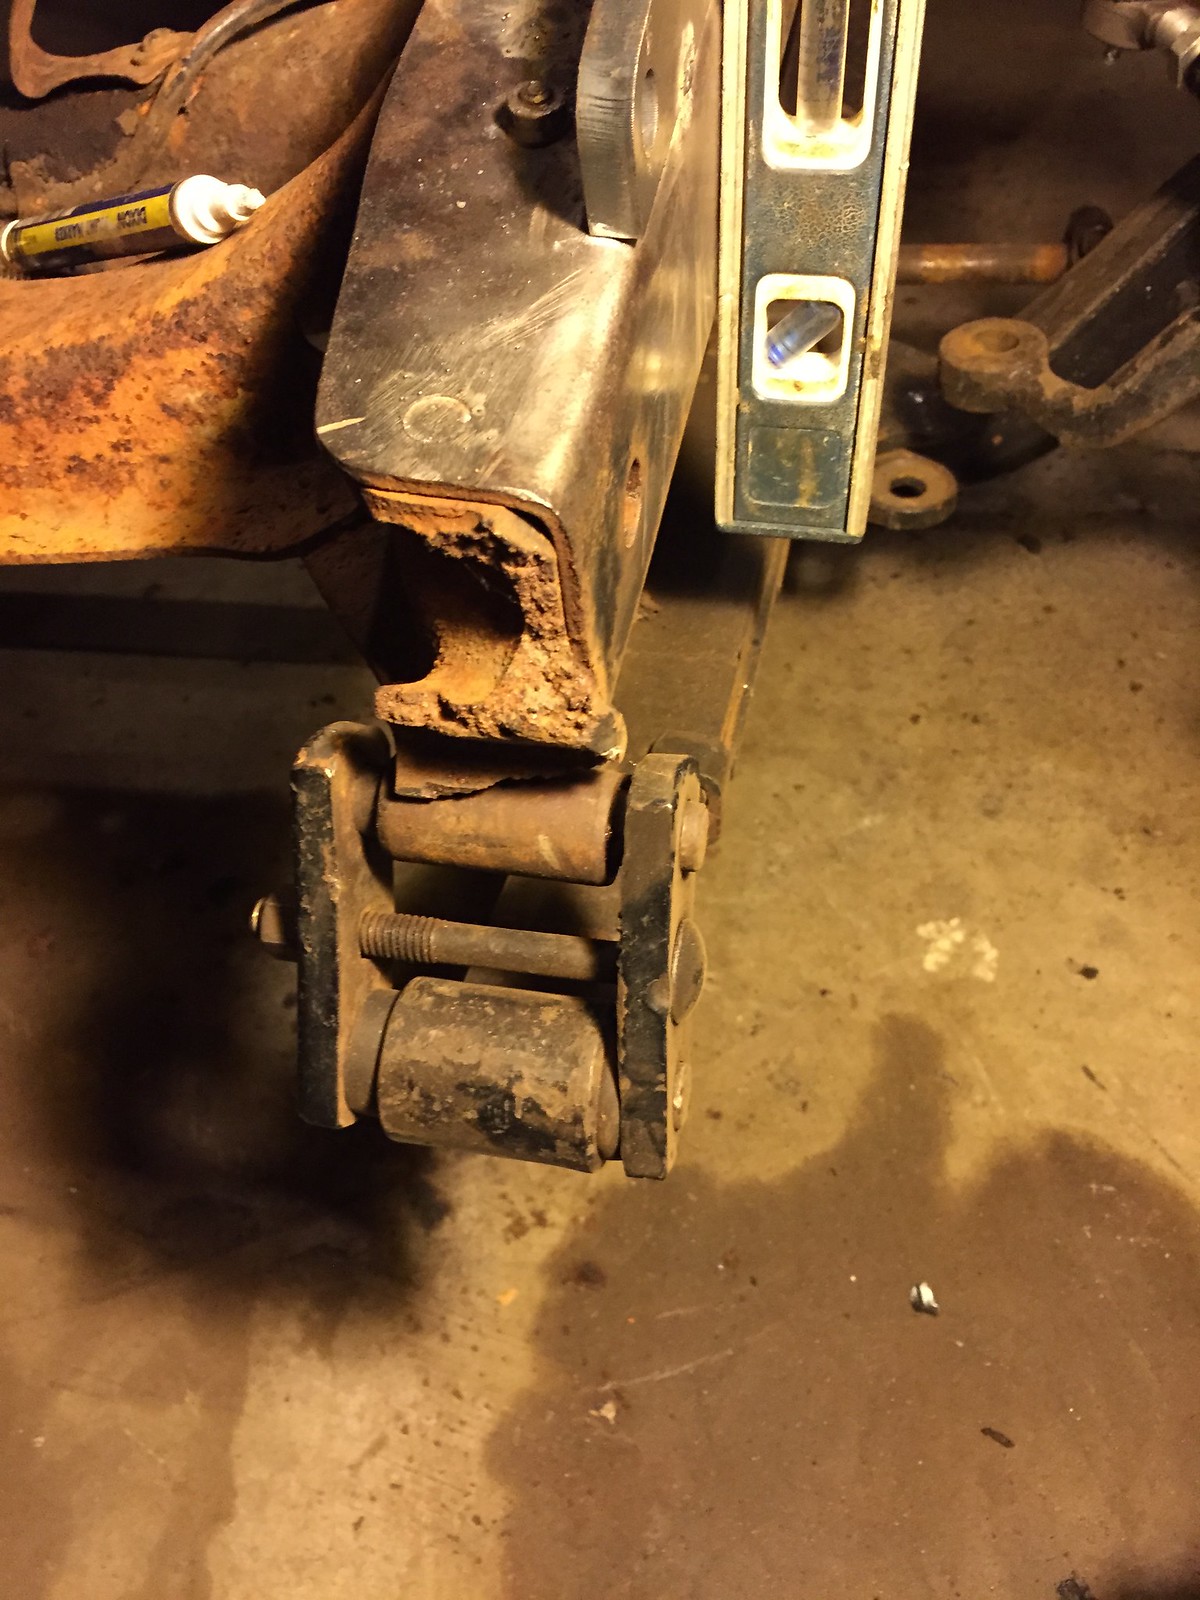 And at the same time started doing the CPP power steering kit that ends up bolting through the frame horn. 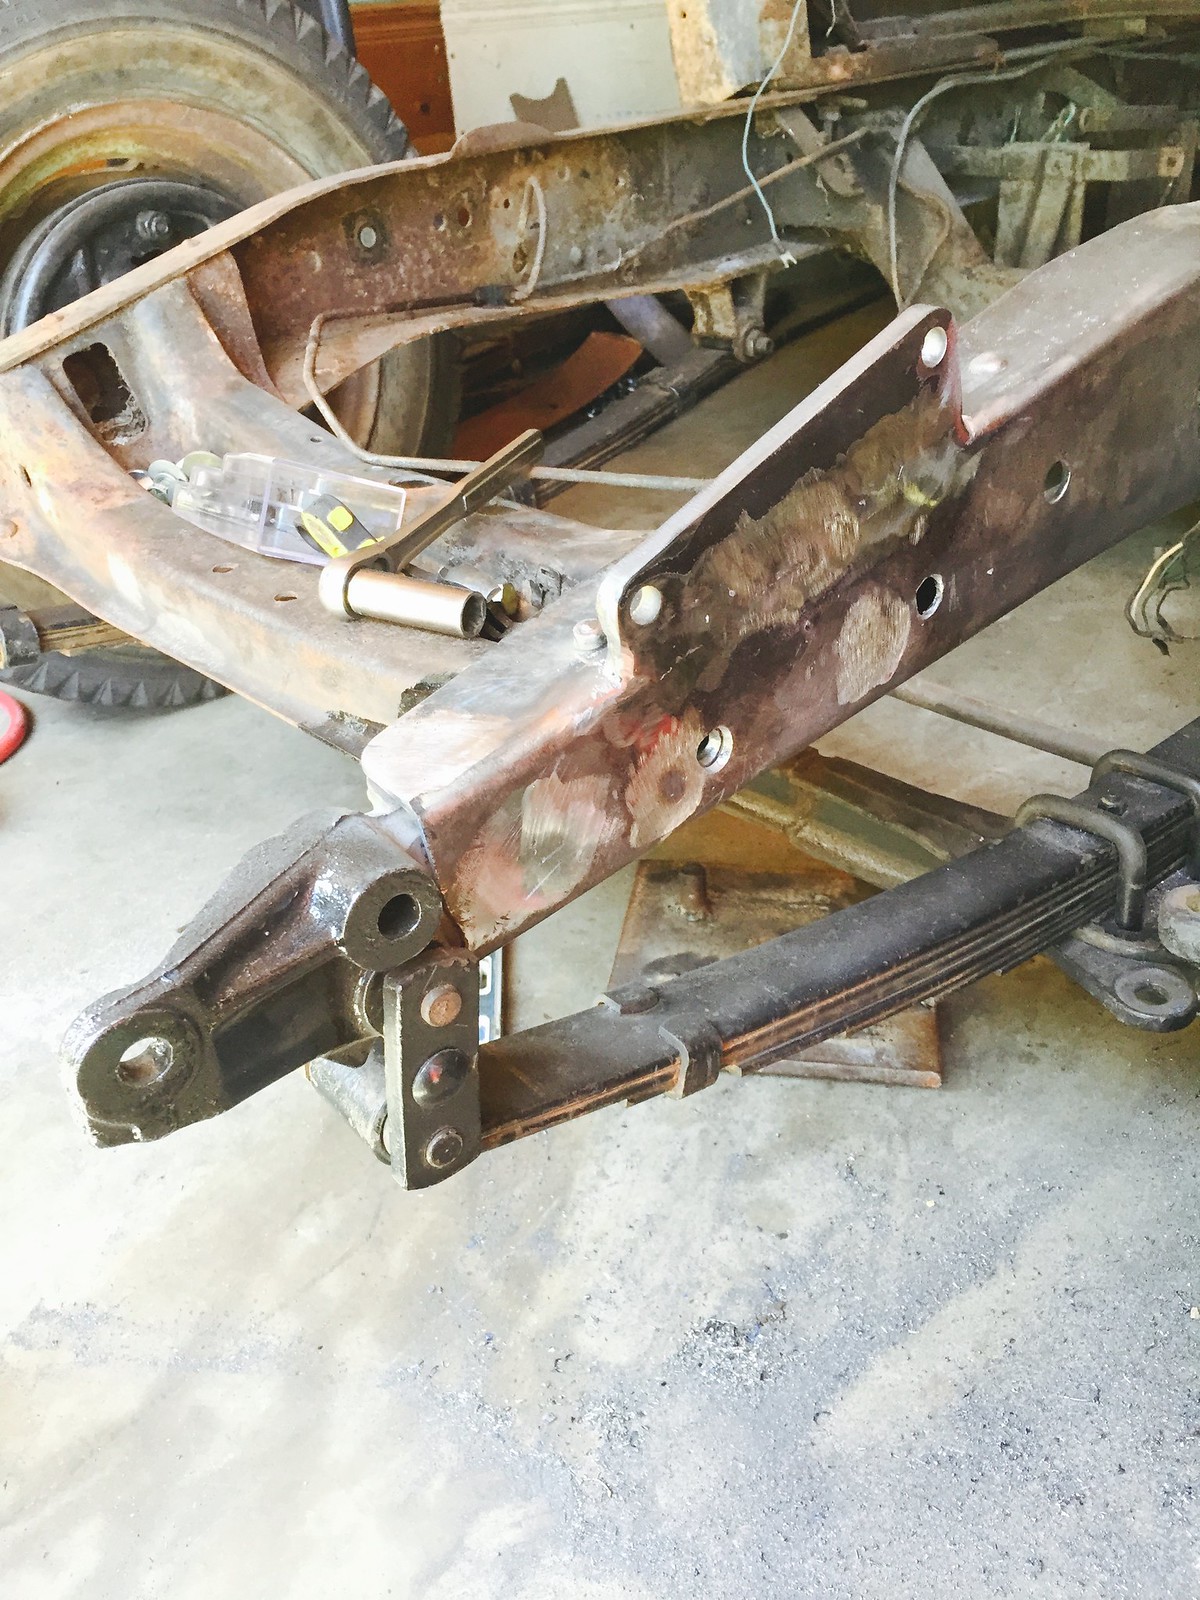 One note on the power steering kit is that it's built for 47+ trucks, and I think for 46- trucks it could use a higher mounting bracket. I got it as high as I could to try to have the steering link level and went with it. Here's the truck down to bare frame 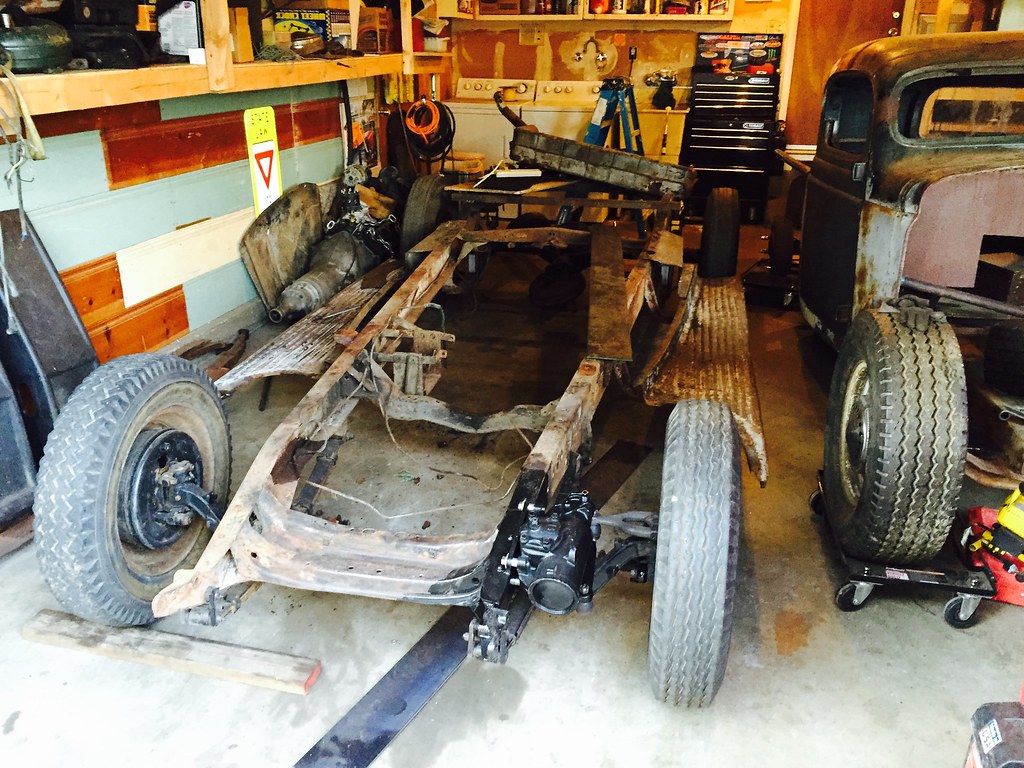 
Last edited by gokellurself; 08-20-2017 at 02:08 PM. |
|
|

|
|
|
#3 |
|
Registered User
Join Date: Nov 2014
Location: Oakland, CA
Posts: 114
|
Re: Kell's Two Cents - 1946 build
You read a lot about how weak these old frames are. With the original inline 6 obviously needing work, I figured I might as well put the money into a V8. That being said, I knew I needed to beef this frame up. I couldn't believe how expensive the boxing plate kits were! I took some measurements and got some plate from my local steel shop. The whole mid section of the truck was something like 5 1/2 inches and I got the plate something like 6 feet long. Cost me $100 but took no modification to get the whole mid section boxed up.
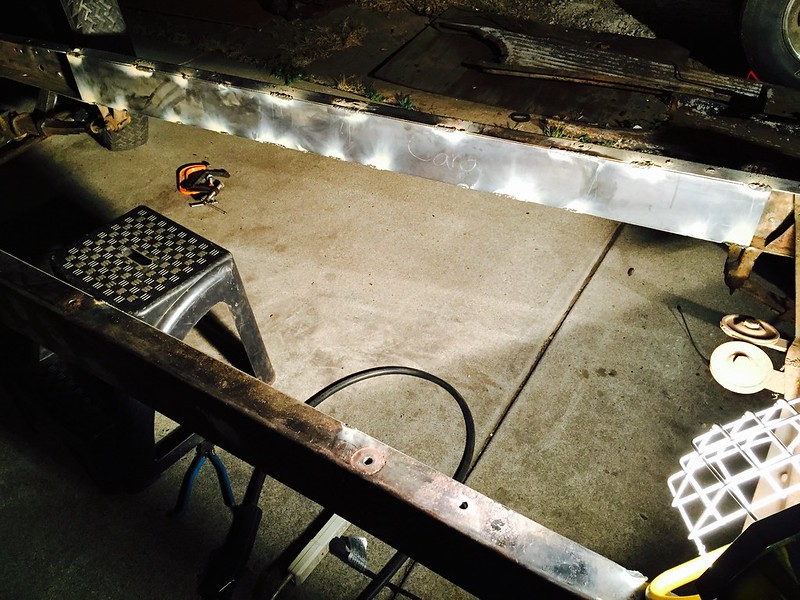 I had closed up all unnecessary holes and welded nuts to the inside where I was needing running board/body mounts. 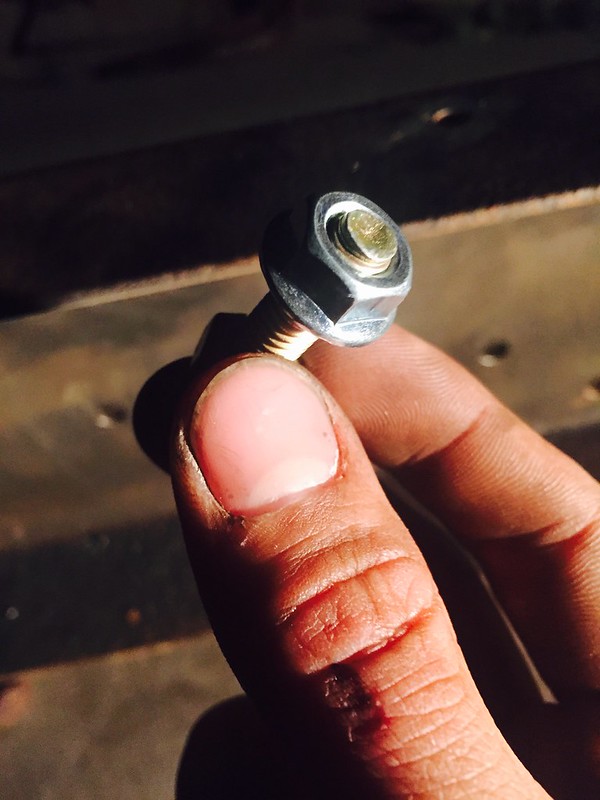 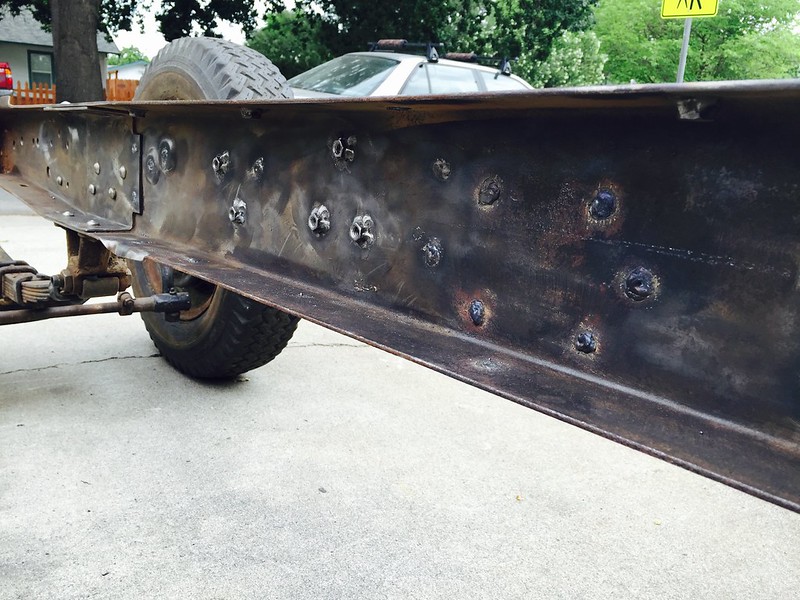 Welded the full length and ground it all smooth 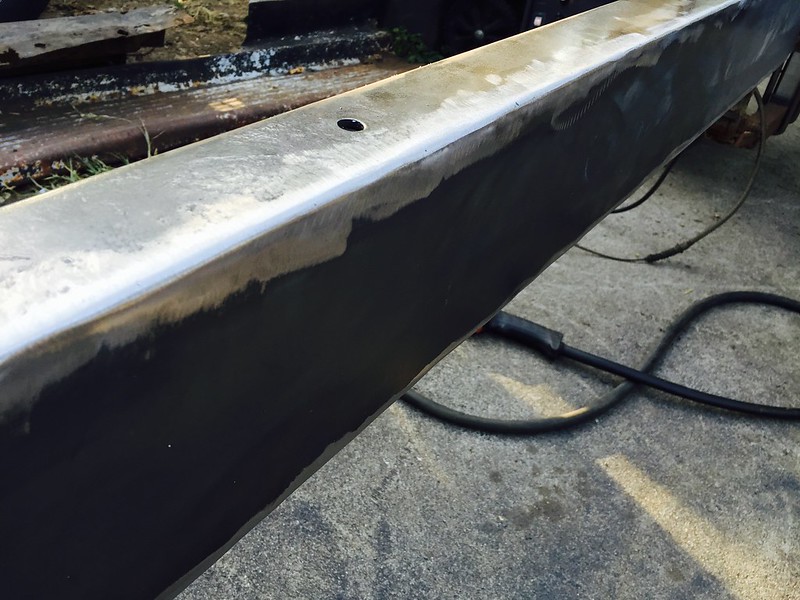 I ordered the 47-55 rear C-notch kit that came with boxing plates and was affordable 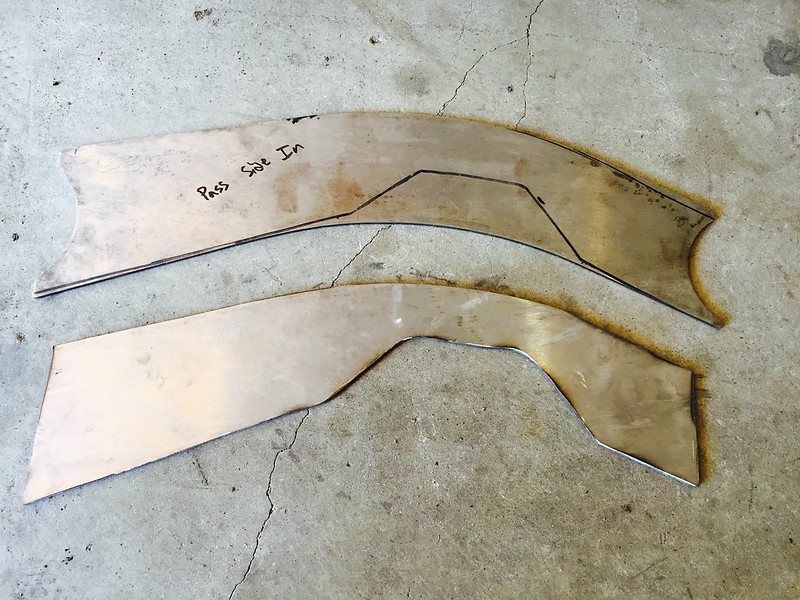 Made a template to fill in the missing section from the frame's mid section to the plate that came with the notch 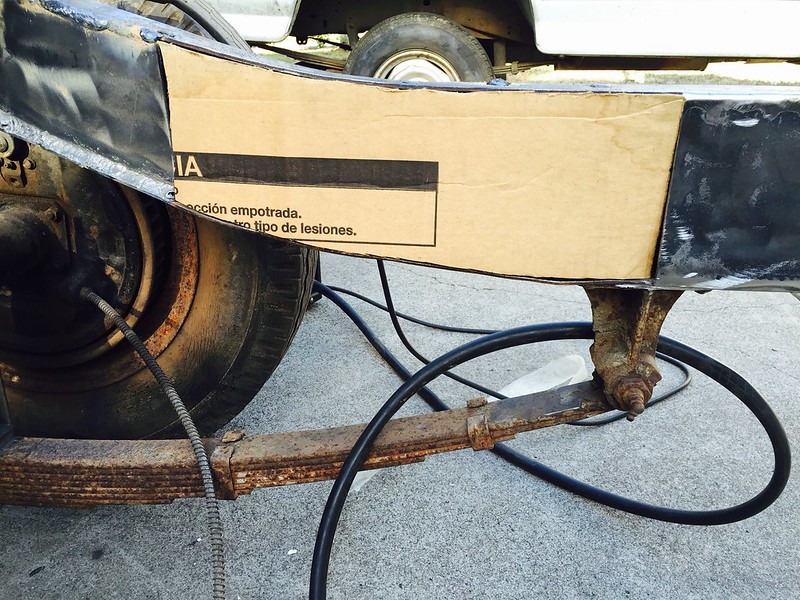 Filled it all in 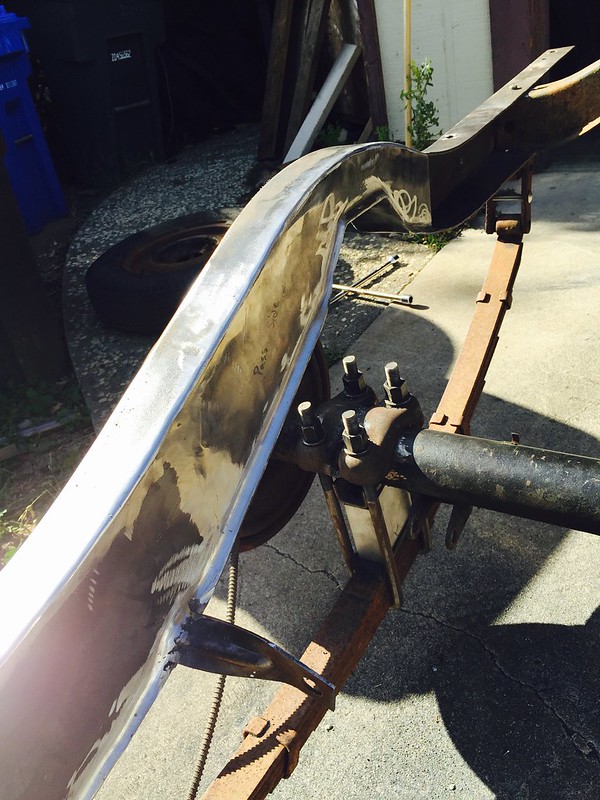 That being said I thought this notch kit was kind of hokey and I probably could have done without it. But either way, boxing was done Last edited by gokellurself; 07-21-2017 at 02:51 AM. |
|
|

|
|
|
#4 |
|
Registered User
Join Date: Nov 2014
Location: Oakland, CA
Posts: 114
|
Re: Kell's Two Cents - 1946 build
Now this is the point in time when the whole "low budget build" idea gets thrown out the window. I wanted to do new crossmembers, and lacking experience and hot rod building "vision" I came across the Progressive Automotive X-members. These things look bad ass and I really liked that it incorporates the transmission mount, brake pedal and booster. It came and I was very impressed with how simple they made it. The two sides come built and you just weld the connecting pieces together
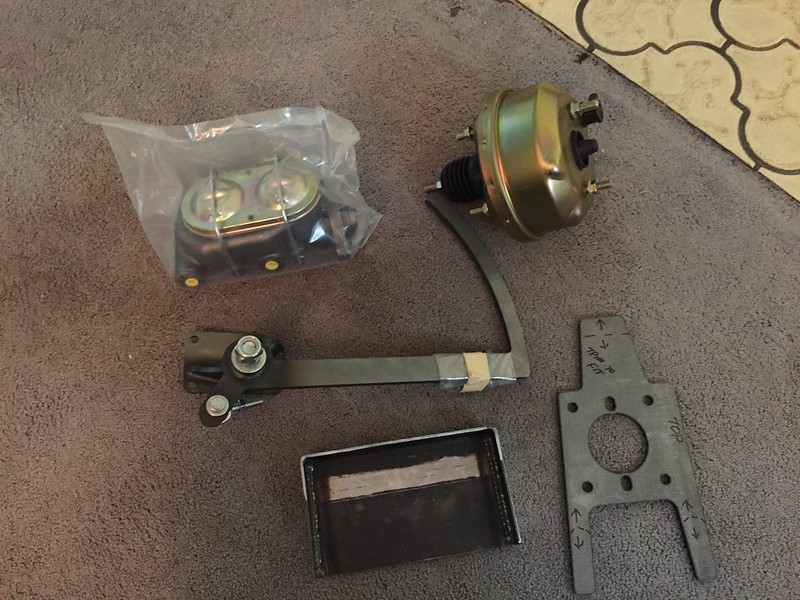 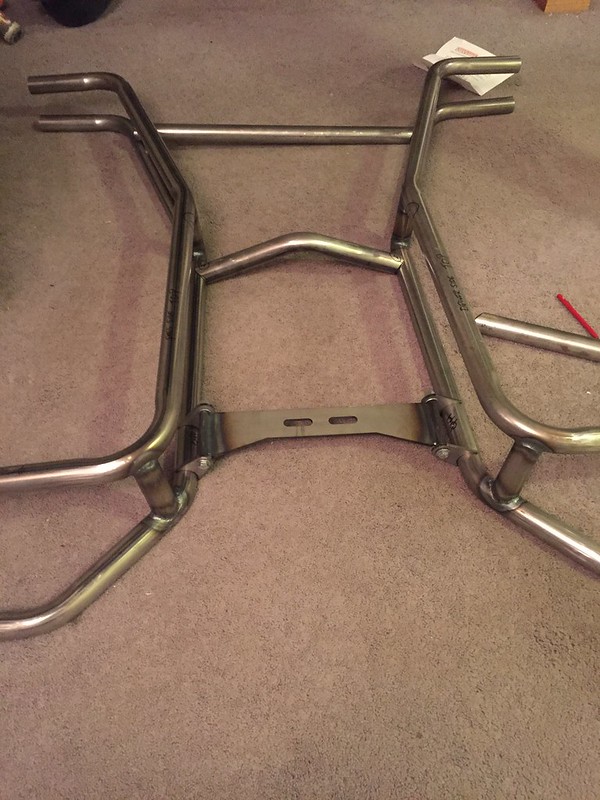 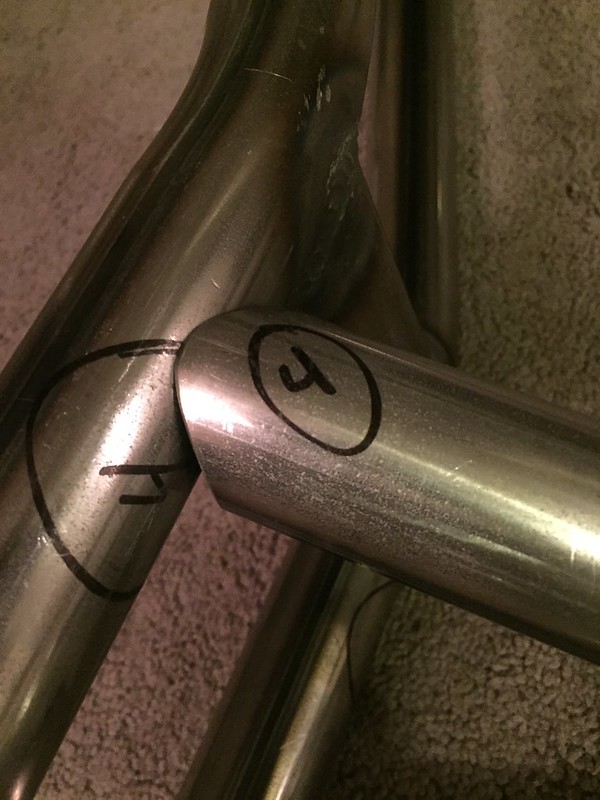 It should be noted that they actually build these for the 41-46 trucks, so you are not adapting 47+ parts to your 46 as is typical with most all parts available. I followed the detailed instructions, did the measurements, and cut only the bottom part first so I could verify my cuts on the top part 2nd. 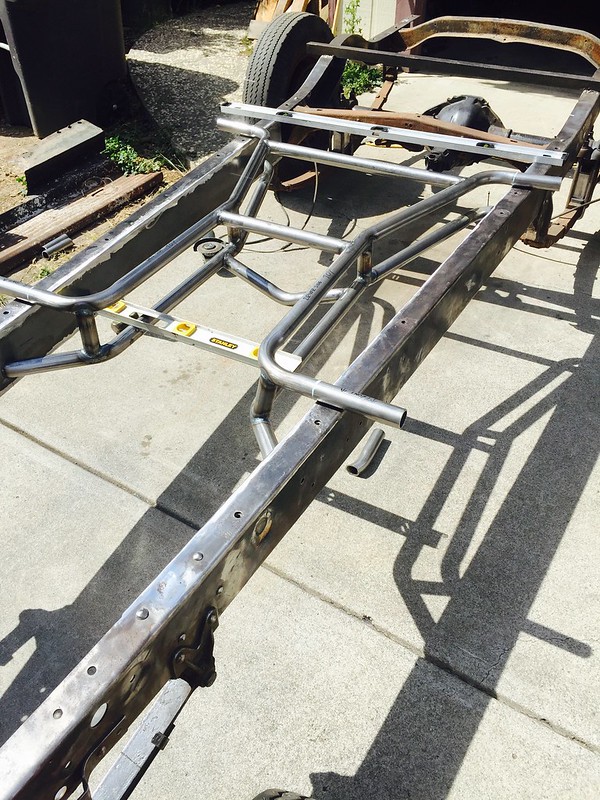 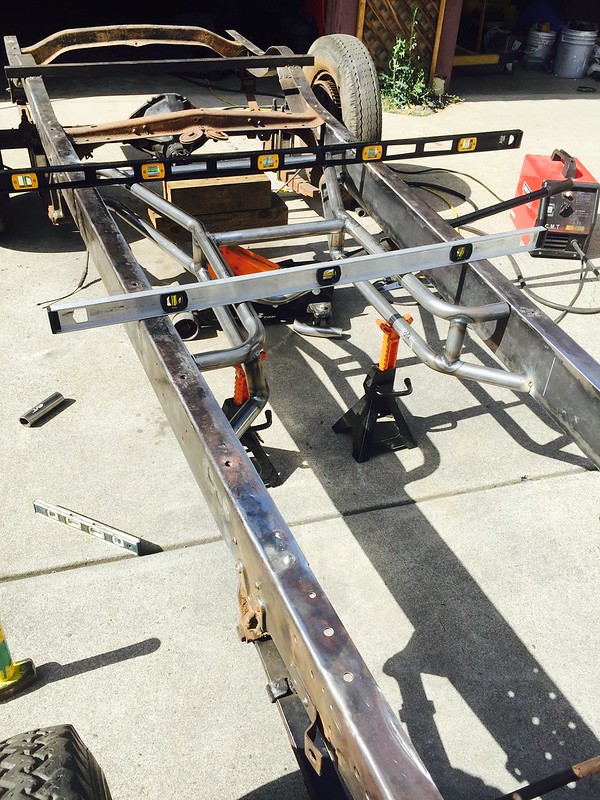 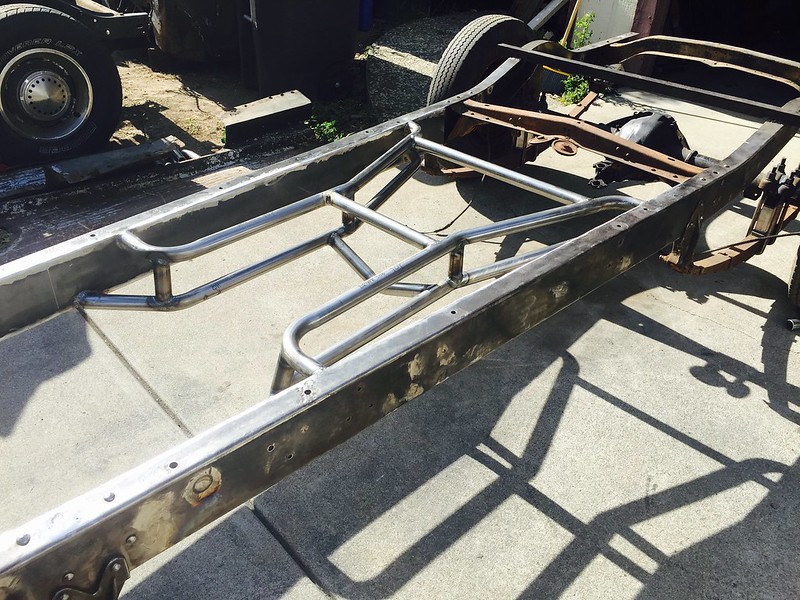 Nothing to it. Changed out the crossmember that held the e-brake lines with tube steel  [/url] [/url]
Last edited by gokellurself; 07-21-2017 at 02:57 AM. |
|
|

|
|
|
#5 |
|
Registered User
Join Date: Nov 2014
Location: Oakland, CA
Posts: 114
|
Re: Kell's Two Cents - 1946 build
I put the cab back on to mock up the engine/trans mounts and this is the view from the back side.
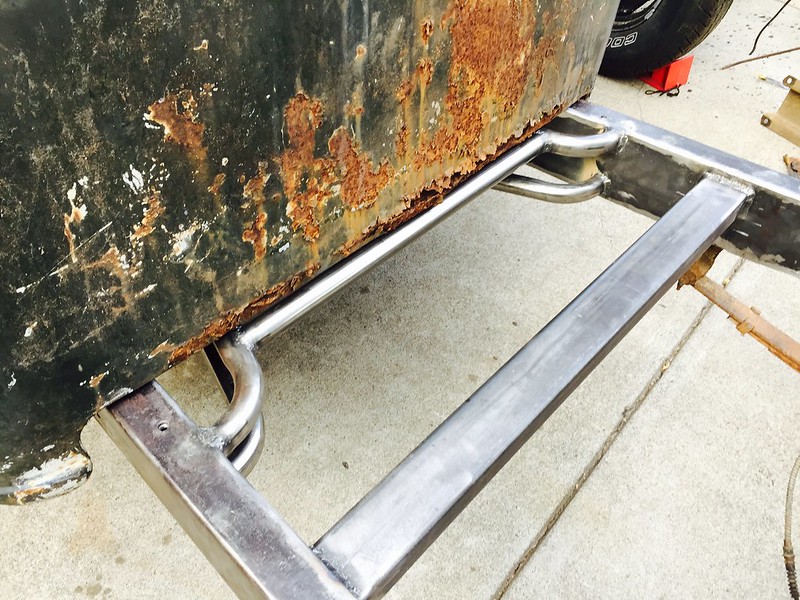 Got the V8 where I wanted it, the trans crossmember and brake booster and pedal. POR 15 the whole thing and top coats of high temp BBQ paint  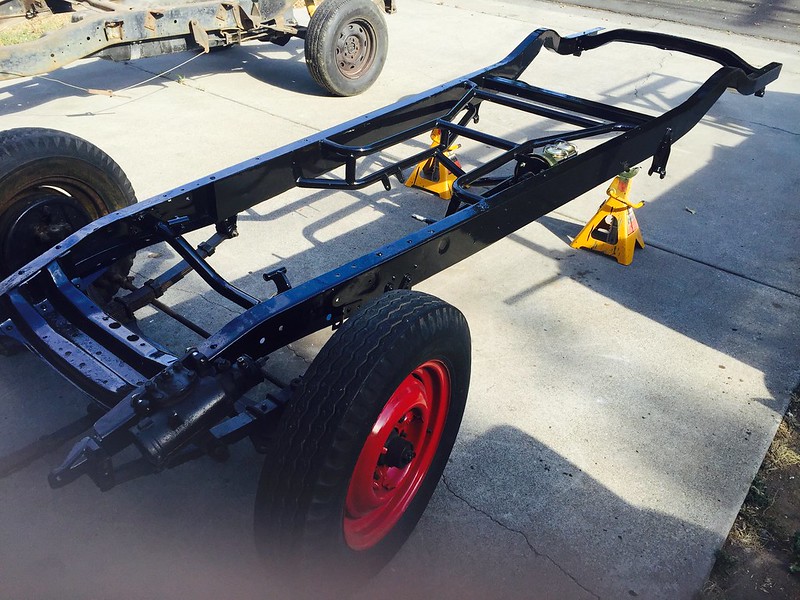 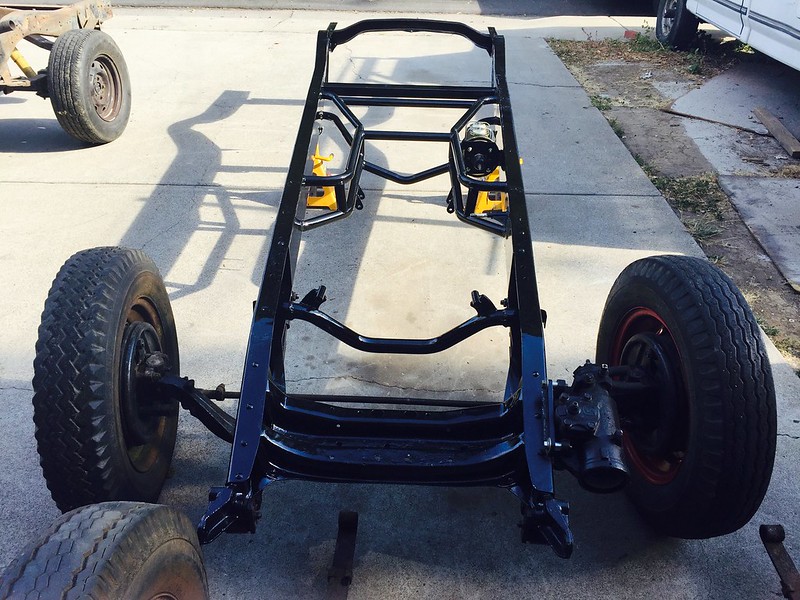
Last edited by gokellurself; 07-21-2017 at 03:01 AM. |
|
|

|
|
|
#6 |
|
Registered User
Join Date: Nov 2014
Location: Oakland, CA
Posts: 114
|
Re: Kell's Two Cents - 1946 build
I'm the original owner of my 07' GMC and had wanted for years to lower it
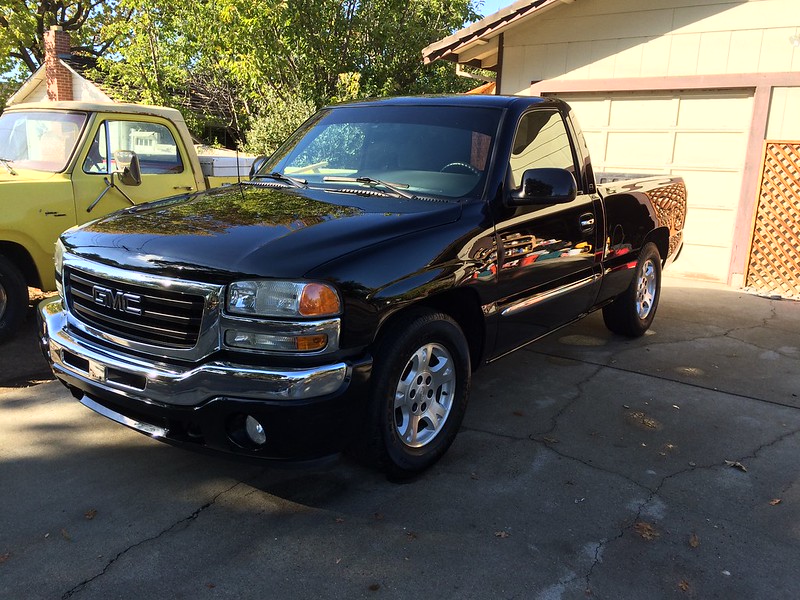 So I finally decided, before I get back to the '46, let's just get this thing how I wanted it. It ends up with a 4-7 drop, spring/spindles in the front, flip kit and shackle in the rear and I am extremely happy with how it turned out 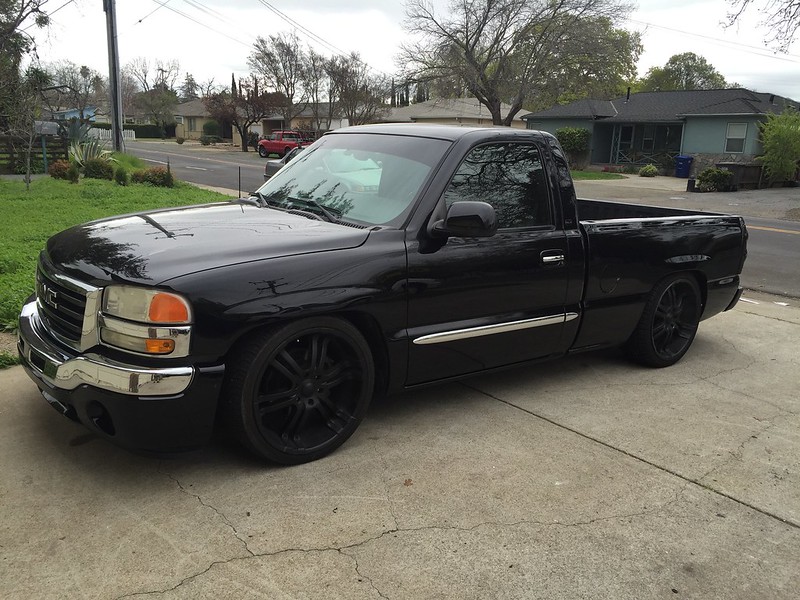  [/url]Untitled by [/url]Untitled by Now back to the 46.. Last edited by gokellurself; 07-21-2017 at 03:12 AM. |
|
|

|
|
|
#7 |
|
Registered User
Join Date: Nov 2014
Location: Oakland, CA
Posts: 114
|
Re: Kell's Two Cents - 1946 build
Next up were front brakes. Ordered the CPP 47+ disc brake kit and upgraded roller bearings. You have to separate the hubs from the original drums
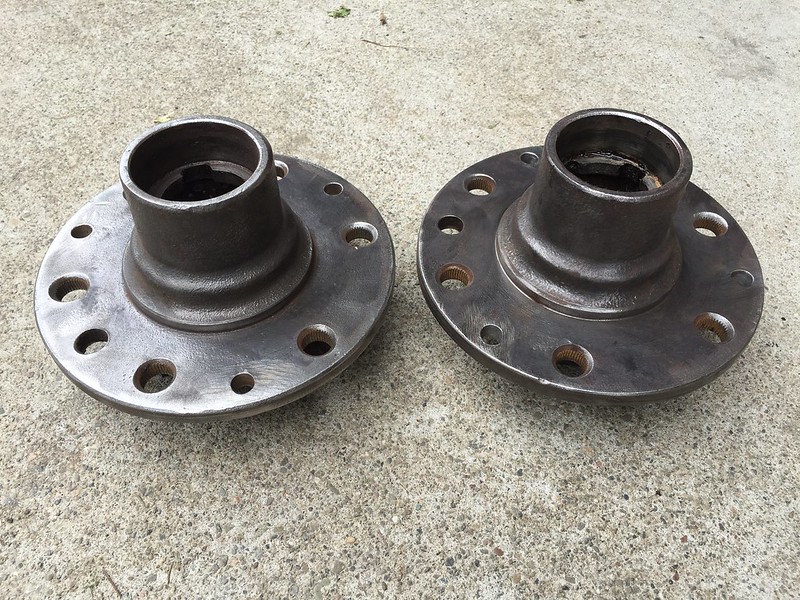 Pressing in the studs and the bearing races. Getting it all installed 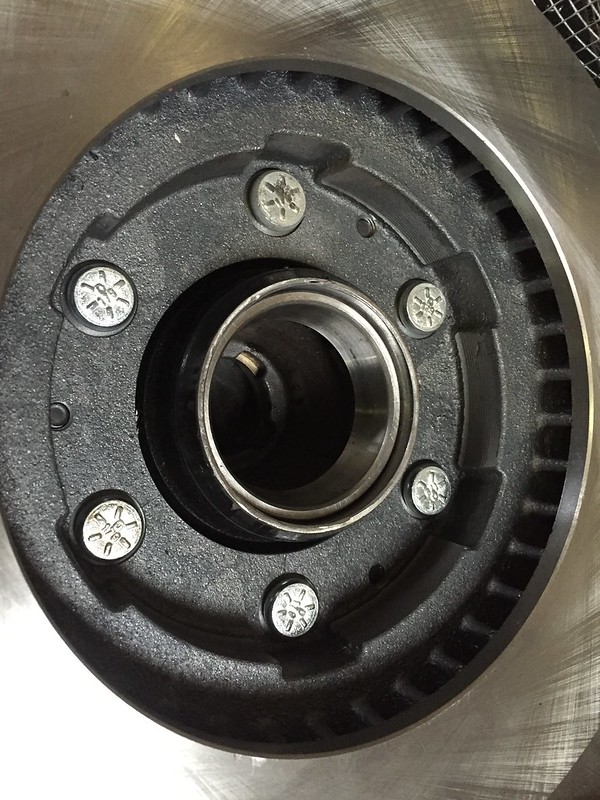 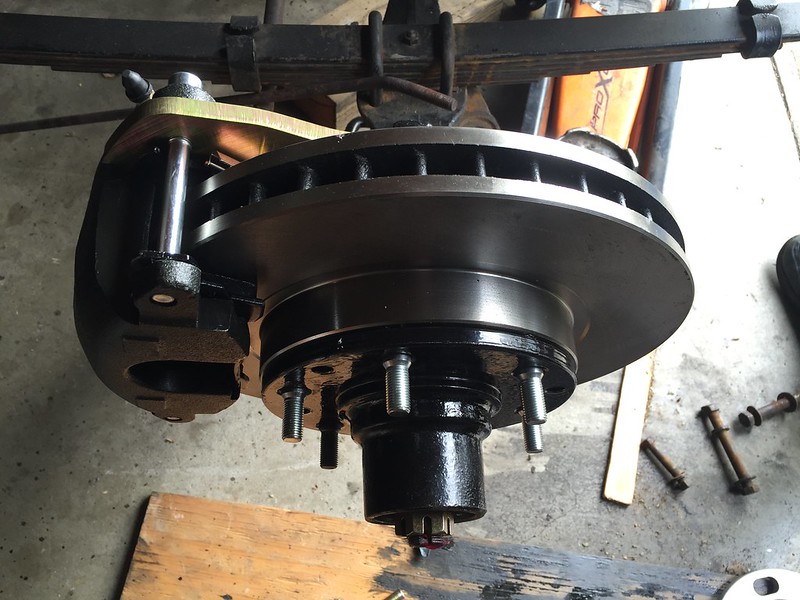 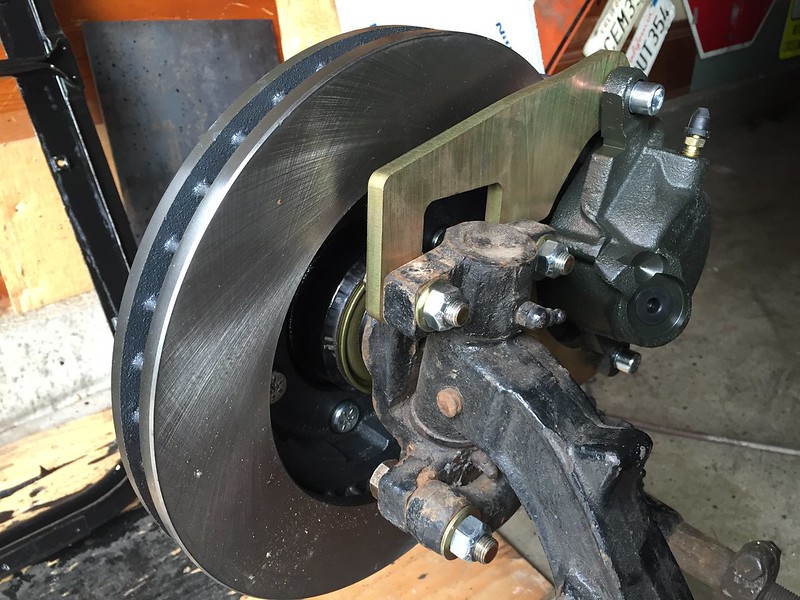 CPP warns that you will not be able to fit original wheels without adding a spacer to the kit. They supply a small spacer that I replaced with a 1/2" spacer and the wheels fit right on. 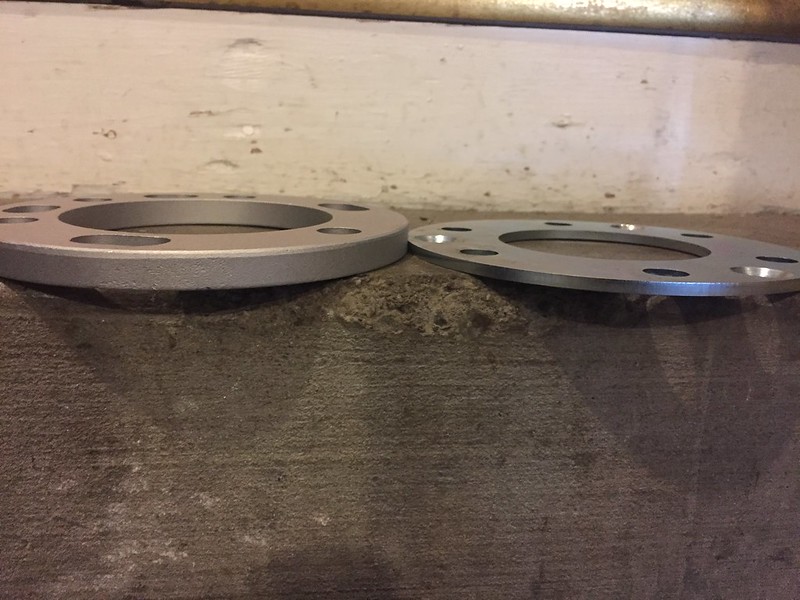 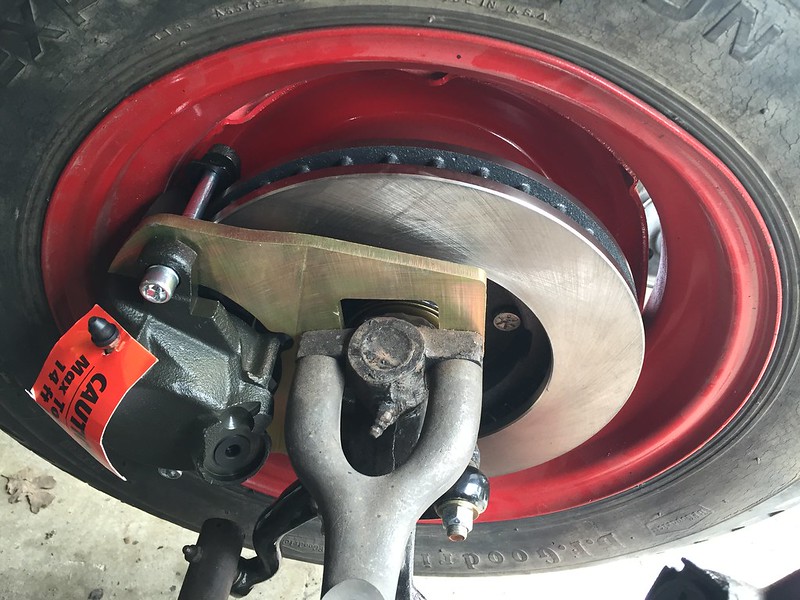 I must say, once I started getting everything apart and began to get my head wrapped around what the hell I was actually doing, the disc swap is actually pretty easy. Pretty nice little kit Last edited by gokellurself; 07-21-2017 at 03:20 AM. |
|
|

|
|
|
#8 |
|
Registered User
Join Date: Oct 2014
Location: Hanover PA
Posts: 59
|
Re: Kell's Two Cents - 1946 build
Welcome to the forum. Its good to see another pre 47 build. Looks like your off to a good start.
__________________
46 Chevy Pickup (project) 60 Chevy Biscayne 93 Caprice wagon(Impala SS style) 99 Corvette convertible 2014 Silverado 2500HD 92 Chevy 1500 (Shop/plow truck) 02 Silverwing 05 H-D Springer Classic 2011 Civic (Wifes car) 03 Highlander (beater) 96 Honda Elite 80 |
|
|

|
|
|
#9 |
|
Registered User
Join Date: Nov 2014
Location: Oakland, CA
Posts: 114
|
Re: Kell's Two Cents - 1946 build
Thanks for the welcome, with such an active site I wanted to come on and add to the pre-47 section as we are few in numbers lol
|
|
|

|
|
|
#10 |
|
Registered User
Join Date: Nov 2014
Location: Oakland, CA
Posts: 114
|
Re: Kell's Two Cents - 1946 build
So today I have some rookie woes to share with everybody and how I went about trying to fix it. I'm amidst a self administered crash course in small block Chevy's, as the only thing with a carb I've ever worked on was my CR250... so this has been a little interesting
A buddy had come upon a 350 tbi with a 700R4 and let me have it on the super cheap. Only problem was he had already gotten into it and tore it all apart. Part of our deal was he could keep the fuel injection system. As I had mentioned before, I want to build an OLD truck, and for me that means carb and as little wiring as possible. At the time I had the heads out getting cleaned up is and was setting the motor mounts. So with just the block, serpentine and distributor I go about setting the engine with a mere 1/2" behind the distributor. Essentially as a result of research, I had gotten to the conclusion that if I clear the distributor I'm pretty much good to go. 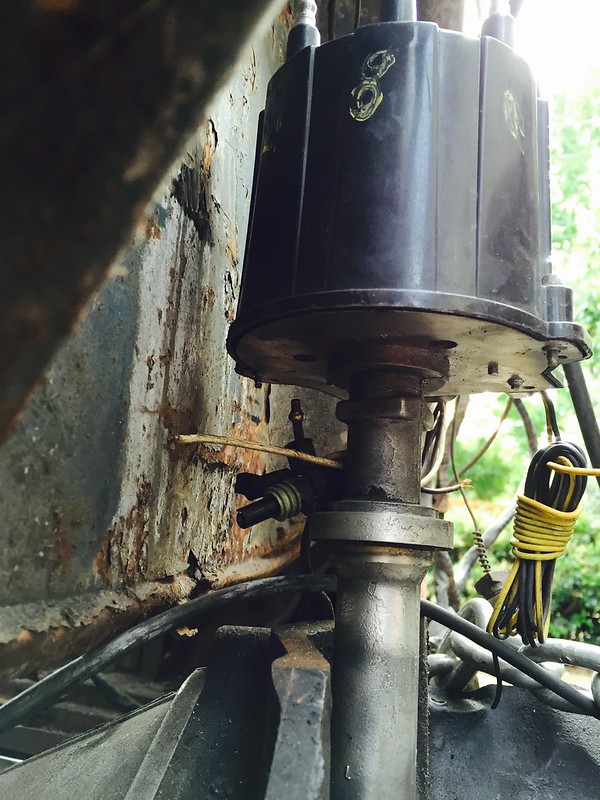 So all is well and I'm happy. I used the website small-block-chevy.com/assemblyspec.html for specs and watched videos each step of the way. It wasn't all the way until I go to install the valve covers that it dawns on me that I had an issue. The heads on SBC's are actually "offset", with the passenger side sitting about 3/4" farther back than the driver's side. I took a photo in which you can somewhat tell  In this photo you can see with clarity the difference 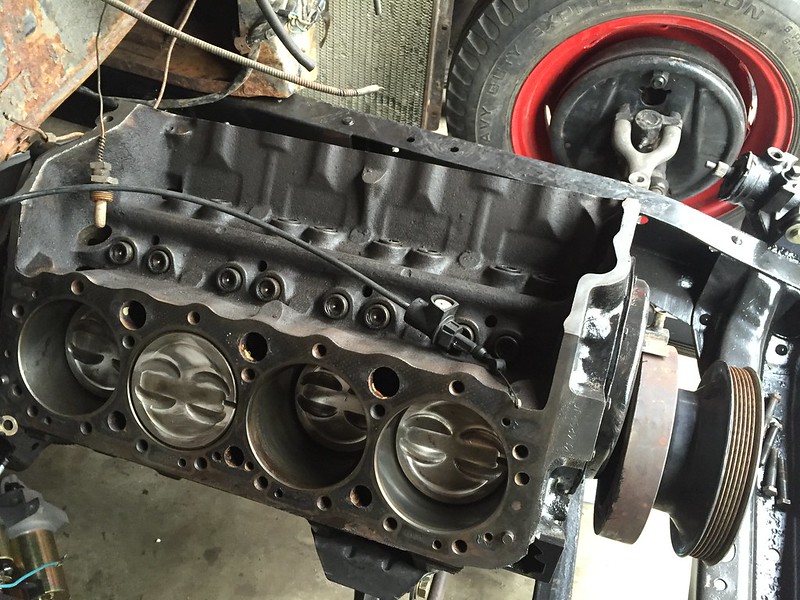 And sure enough, this little bit makes it impossible to slide the valve cover on the passenger side. Driver side was just fine, passenger side a no go. Last edited by gokellurself; 07-21-2017 at 03:32 AM. |
|
|

|
|
|
#11 |
|
Registered User
Join Date: Nov 2014
Location: Oakland, CA
Posts: 114
|
Re: Kell's Two Cents - 1946 build
A little distraught I begin going through the different scenarios... I could fully cut out my V8 crossmember, redo it... I could hack a big patch into the firewall and make way...
in an act of desperation I wanted to try something else before going such distances. I ordered another set of transmission mounting tabs from Progressive automotive and cut off my old ones. On the V8 crossmember there was a little room near the back of the tube that I could chop off 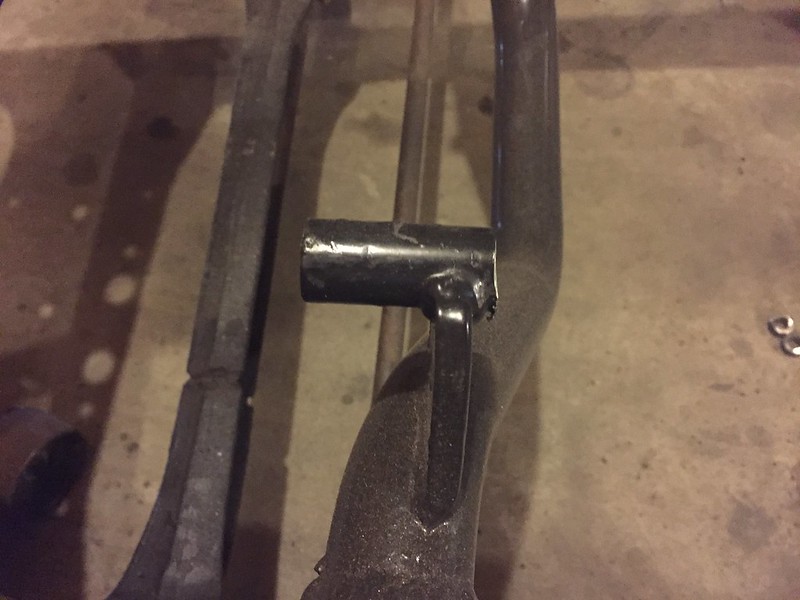 The idea is to cut off what I can in the back and weld new tube to the front, hence moving the engine toward the front of the truck in an equal amount. I was able to get about 5/8" off the rear. I went to the steel supply and found a similar tube and tacked it to the front 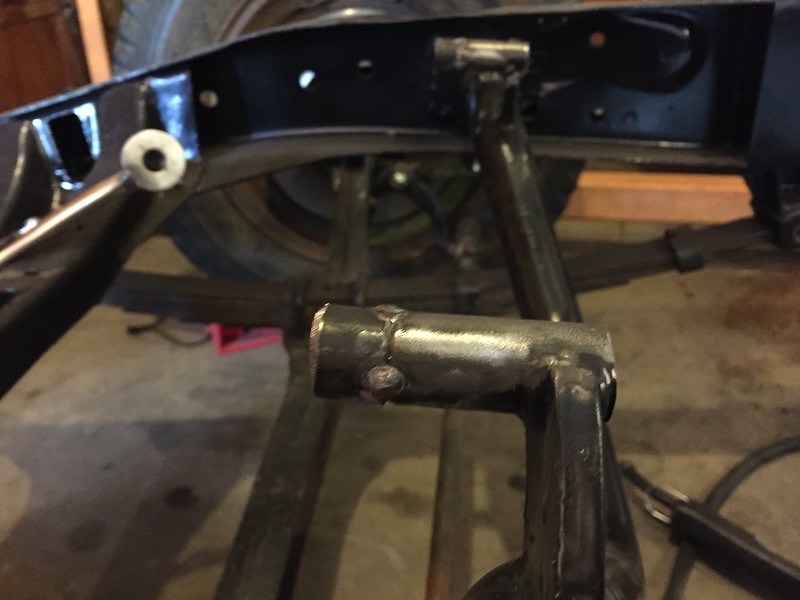 With a port-a-band or something with a clean cut, one could simply take what was cut off the rear and move it to the front. I'm only working with a grinder however which I felt cut out too large of a portion. I welded all the way around and ground it smooth 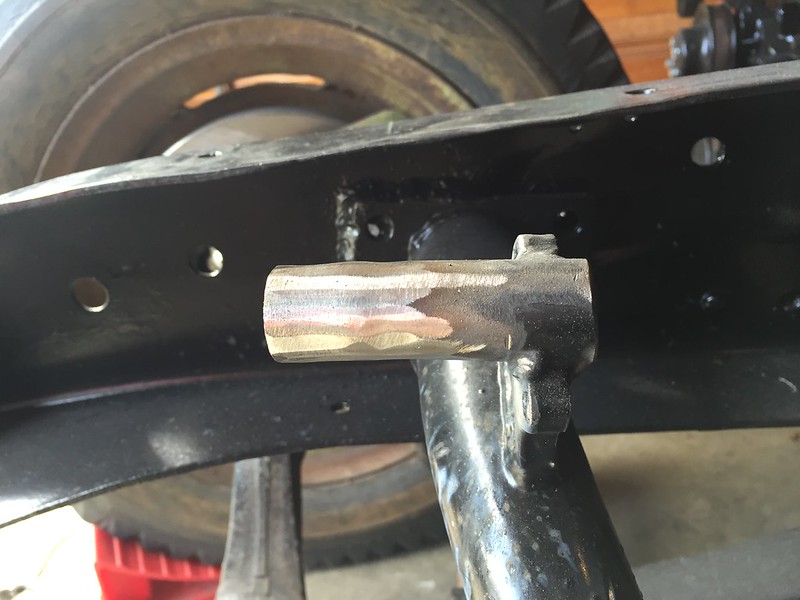 I set the engine back in and got the new position for the transmission mount tabs, welded them in and recoated everything. 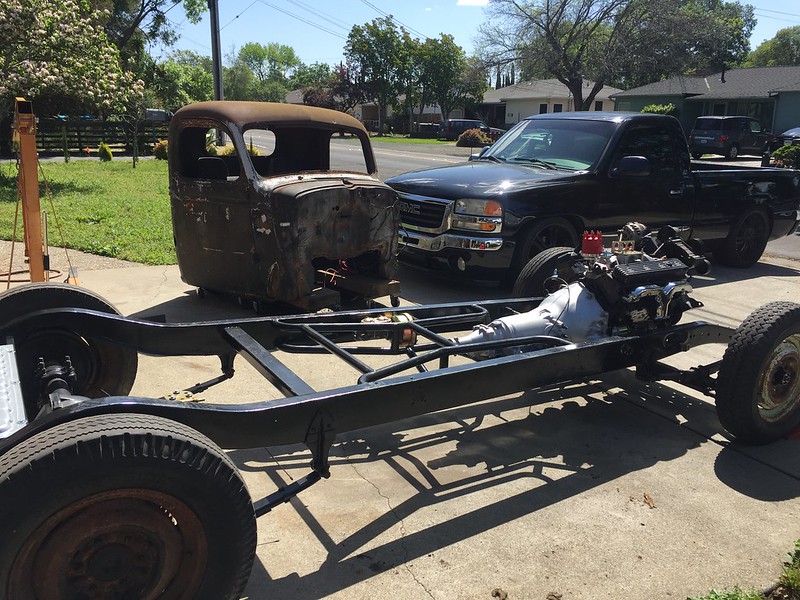 The engine and everything went back in fine, so the fix seems to be working. I have yet to set the cab back on, so we'll have to wait and see if I have the clearance I need for the firewall. At this point if I still have to make room and cut clearance into the firewall I figure it will be a lot less then would have been previously required. The one draw back I can see is underneath, as this moves the oil pan 5/8" closer to the V8 crossmember and could inhibit pan removal. I'll have to report back on that. Anyways, I know this was a rather drawn out post but the SBC crash course continues until its up and running! Thanks for looking Last edited by gokellurself; 07-21-2017 at 03:37 AM. |
|
|

|
|
|
#12 |
|
Registered User
Join Date: Dec 2010
Location: washington NJ
Posts: 769
|
Re: Kell's Two Cents - 1946 build
Hey, careful who you call meticulous. LOL! Welcome aboard Kell!
|
|
|

|
|
|
#13 |
|
and a few others
Join Date: Jun 2007
Location: Blue Ridge Mountains of VA
Posts: 5,638
|
Re: Kell's Two Cents - 1946 build
Very true. Very few here. I wanted to thank you for the abundance of pictures. So many builds are just "words-and-no-pics."
__________________
Bill  US Army Vet -193rd Infantry US Army Vet -193rd InfantryBlueRidgeMuscleCars.com “The greatness of a nation and its moral progress can be judged by the way its animals are treated” Gandhi |
|
|

|
|
|
#14 | |
|
Registered User
Join Date: Nov 2014
Location: Oakland, CA
Posts: 114
|
Re: Kell's Two Cents - 1946 build
Quote:
Yessir thank you, photos go a long way |
|
|
|

|
|
|
#15 |
|
Registered User
Join Date: Nov 2014
Location: Oakland, CA
Posts: 114
|
Re: Kell's Two Cents - 1946 build
What's up world, got a little update for the weekend
The truck came with the original gas tank and it was in really good shape on the outside, so I had planned on using it. But of course inside is where it counts, and that was a whole other story  Found a local radiator guy who could have cleaned it up but it wasn't saving me much money over just ordering a new one out of BowTie Bits. For about half the cost I could go the Mustang gas tank route, and with the idea that I would gain the whole storage compartment underneath the seat I decided this was the way to go. I still had the rear crossmember on the truck, so that was going to have to be removed. I used 2x3 tube stock to have a decently beefy crossmember for the rear part of the leaf springs. I wanted to mount the tank about an inch about the frame rails so I cut the crossmember to length and added slits on all sides that allowed it to be on either side of the frame. I ground out the old crossmember rivets and got it out after beginning to weld in the new crossmember.  Finished welding out each seam. I used 1" stock for the rest of it. It's true that the Mustang tank fill neck is not centered, so one has to take this into account. Beyond that, I decided to offset it further to aim for the center of one of the planks in the bed, as dead center in the bed sends you up through the center bed strip. Came out something like this 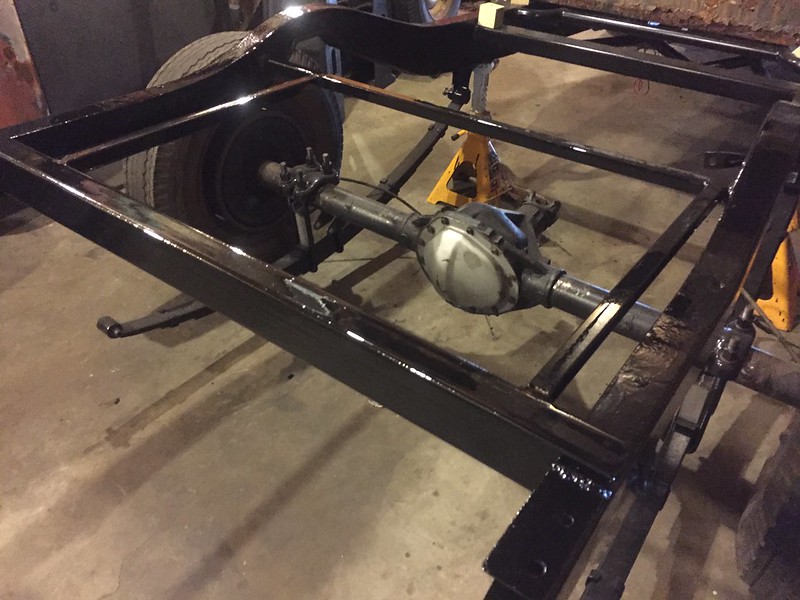  Even capped the open end on the 2x3 so it's fully sealed up 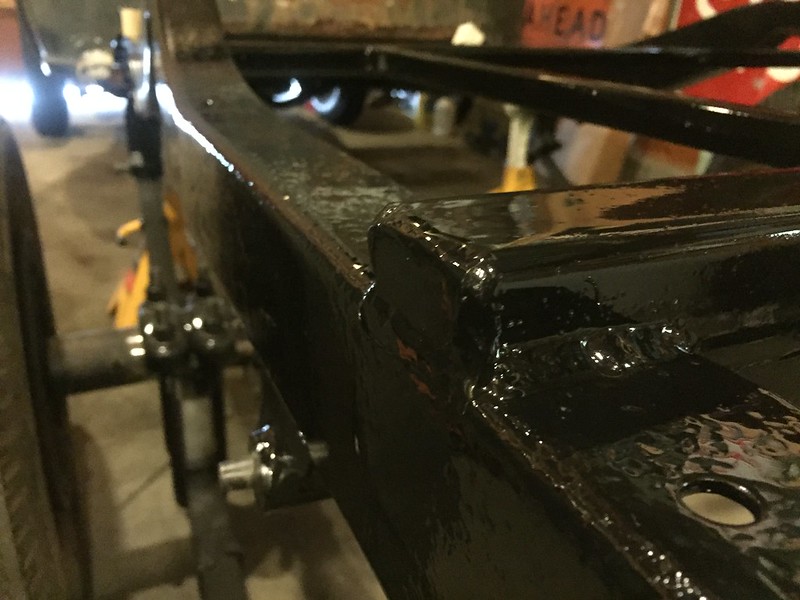 Fender washers and self tappers 
Last edited by gokellurself; 07-30-2017 at 11:20 PM. |
|
|

|
|
|
#16 |
|
Registered User
Join Date: Nov 2014
Location: Oakland, CA
Posts: 114
|
Re: Kell's Two Cents - 1946 build
I'm using a TBI 350 that's going to be carbureted, and turns out one of the draw backs of doing this is that there is no spot on the block for the mechanical fuel pump. Also, being carbureted apparently most electric fuel pumps have too high of a psi and you need a regulator. After some research I found a Carter fuel pump that puts out only 4-8 PSI, and word on the street is thats about where I want to be using a carb. This sound right? It's the Carter P4070
Biggest complaint in the reviews of this fuel pump is how loud it is. I ordered it with the extra bushings that go in between it and the frame rail that's supposed to help this, but I'm not too worried 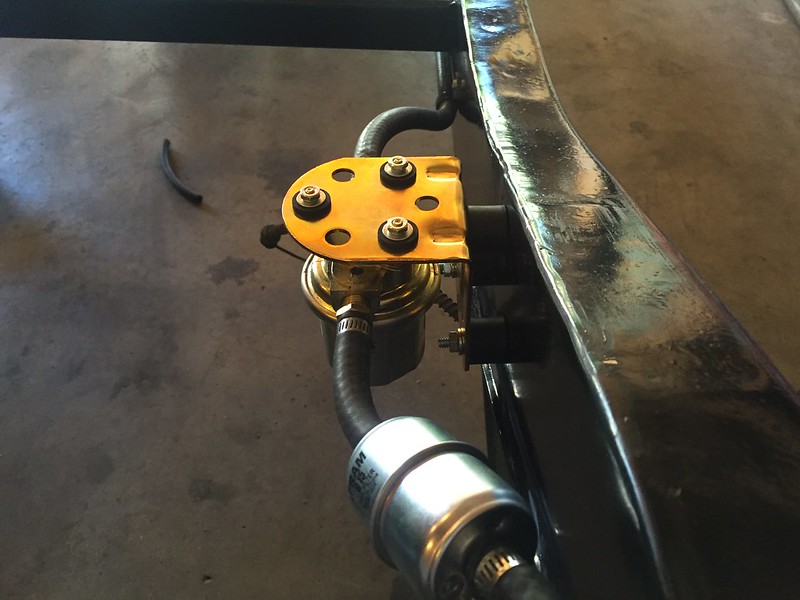 Up and over the axle... Directions say not to mount pump above 24" of the gas tank so I figured I'd be ok going up slightly. 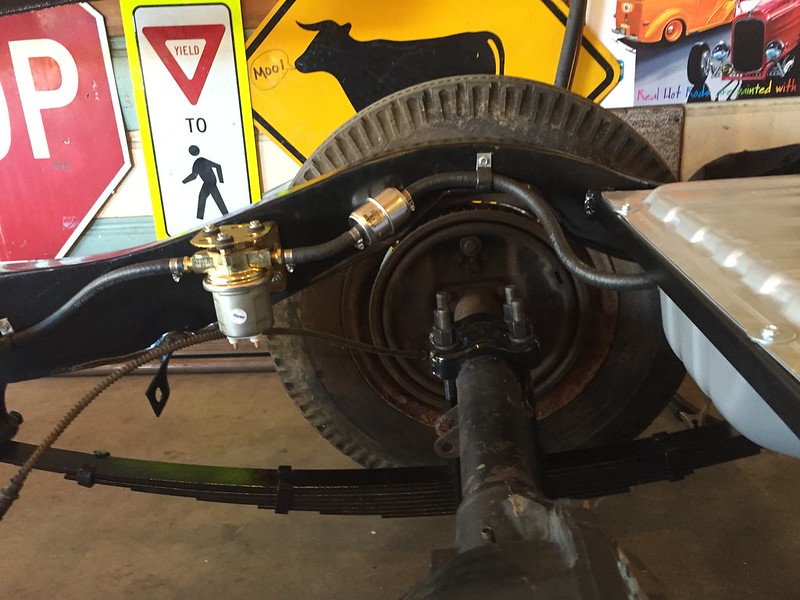 Along the frame rail 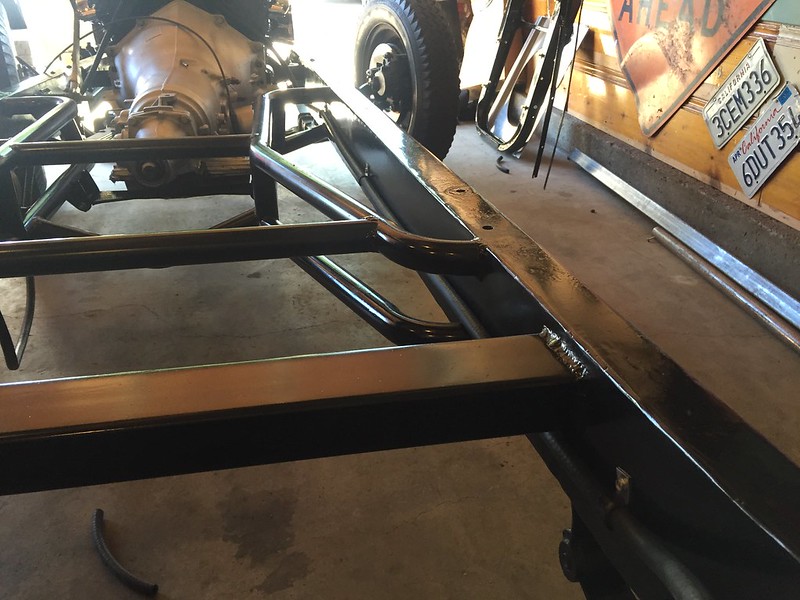 Up and in (short one hose clamp) 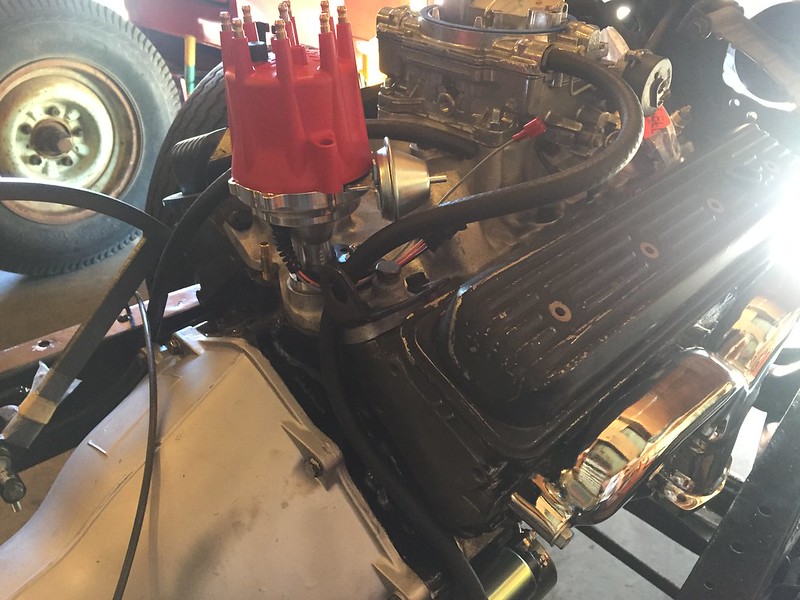 Let me know if you see something I'm messing up on. First timer over here lol Read the instructions carefully, measure twice and go on ahead cutting your fuel sending unit wayyyy down and install 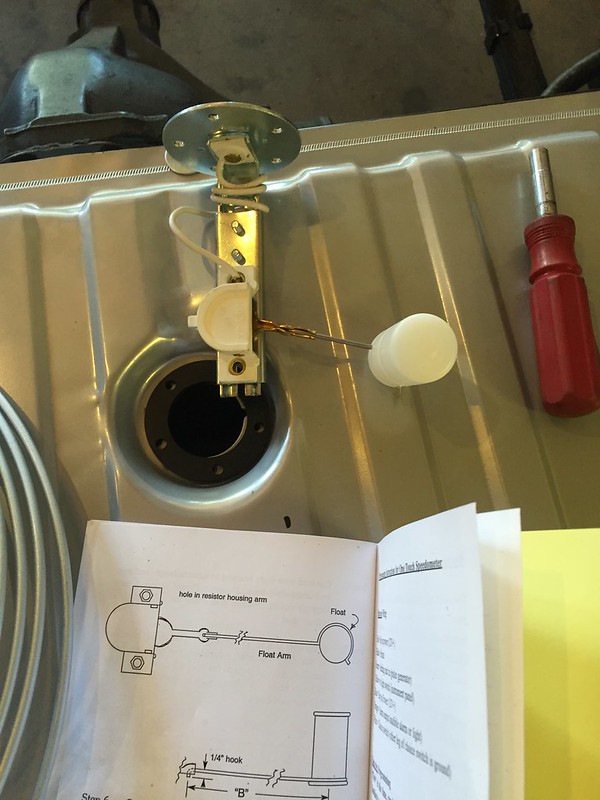 That's about it guys, looking to bend up some brake lines pretty soon here. Thanks for checking it out Last edited by gokellurself; 07-30-2017 at 11:28 PM. |
|
|

|
|
|
#17 |
|
Registered User
Join Date: Nov 2014
Location: Oakland, CA
Posts: 114
|
Re: Kell's Two Cents - 1946 build
What's up world, been hanging out in the garage a little bit. Had my thoughts on bending brake lines for some time now and finally got everything together to do it. Those who have entered this phase will know what I'm talking about... This is the point in time when you look at a critically acclaimed $250 double flaring tool with excellent reviews and a $30 double flaring tool that nobody seems to be able to get to work properly, and you just KNOW that the $250 one is the way to go...
But $250 is a lot of money! So the $30 will have to do!  Brake line necessities 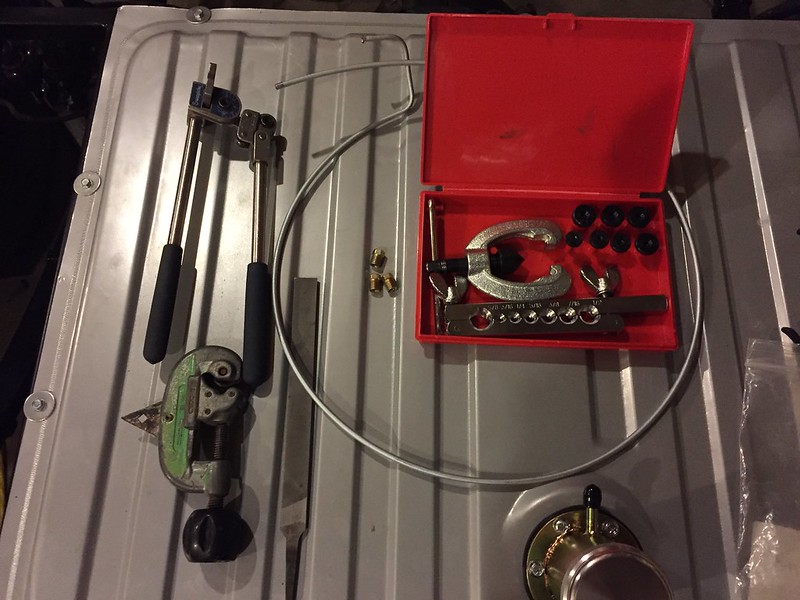 After several double flare how-to videos and several practice tries I could get them somewhat consistent. Can't bleed the brakes yet so no idea if these are actually gonna work, but here we go 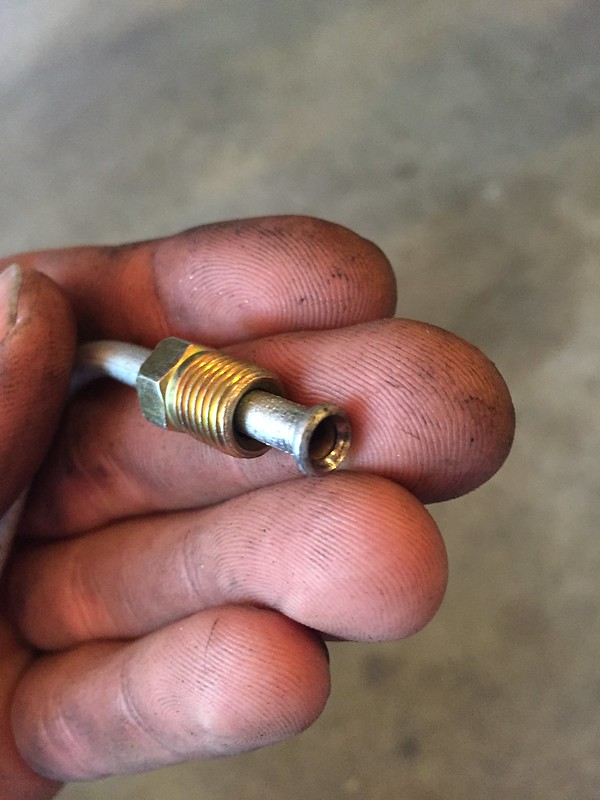 I chose not to run my fronts through the proportioning valve, but it seems that most people do?? I didn't see the reasoning, so I just plugged the ports on the valve. Somebody let me know if there's reasoning for me not to do so 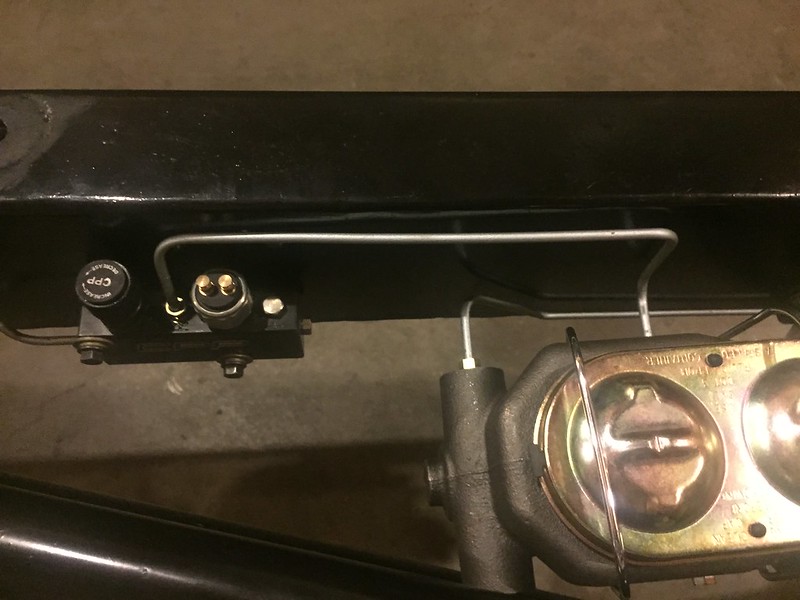 Where the fronts split 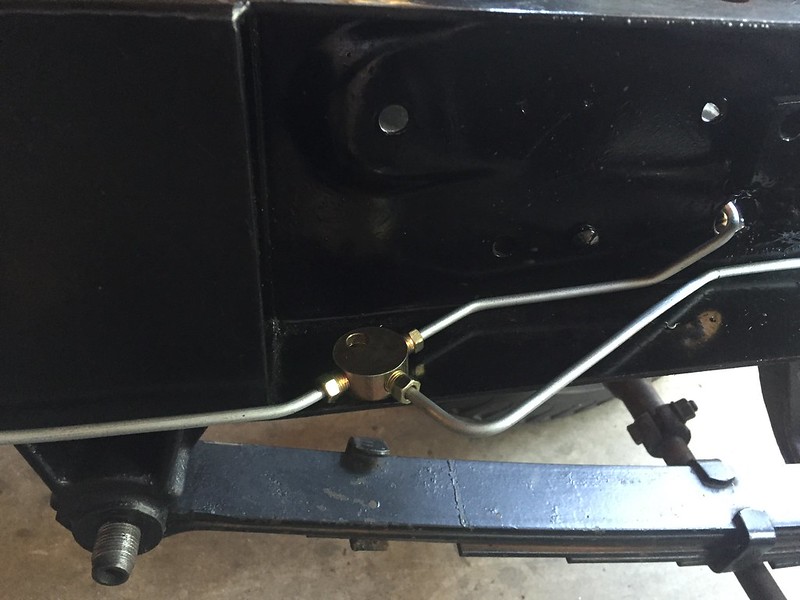 Me trying to break the record for engine removal and installs in a single build  I thought the rear looked decent 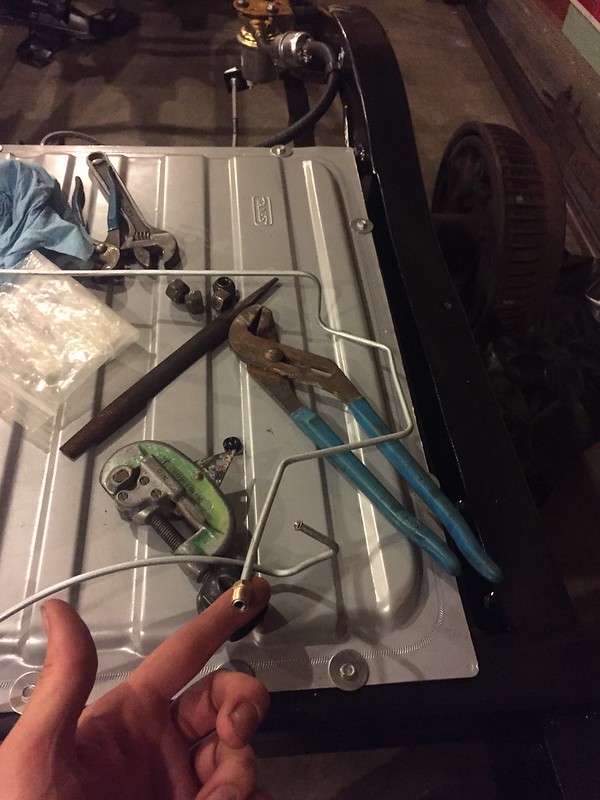 I kept my the original tab for the brake like. Ordered a 24" brake line from summit. Probably could have gone 22" but oh well 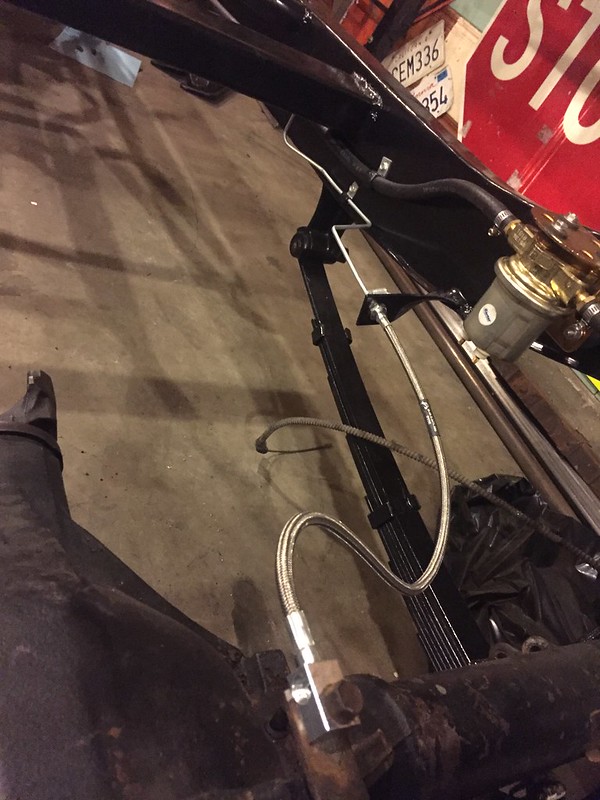 I was planning on just reusing the brake lines that came with the rear end but they were seized into the flex brake line that I was having to replace, so I went for it. Is that spiral bound wire for vibration deadening or something? Slide it off the old ones and onto the new Remote reservoir cap to top it all off  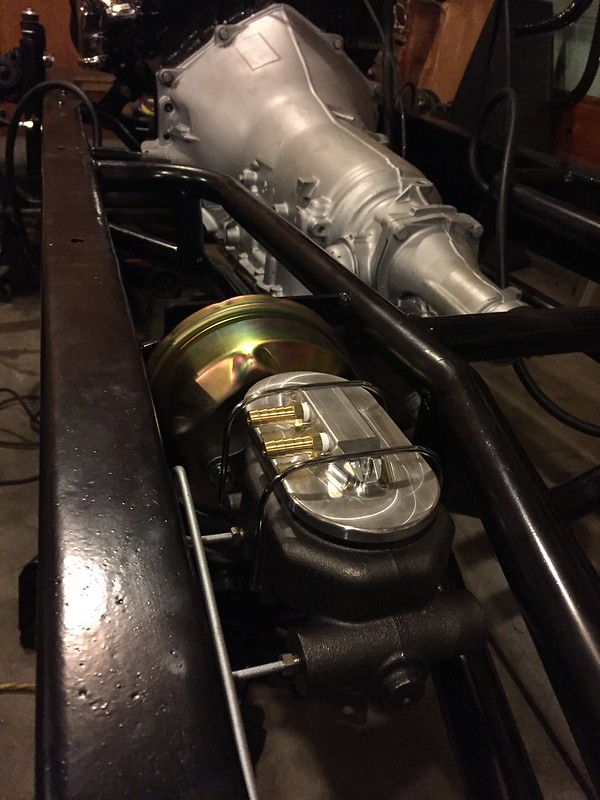 And there's the brake lines. Thanks for looking guys, catch you later Last edited by gokellurself; 07-30-2017 at 11:40 PM. |
|
|

|
|
|
#18 |
|
Registered User
Join Date: Dec 2010
Location: washington NJ
Posts: 769
|
Re: Kell's Two Cents - 1946 build
I was going to go with the remote fill on my truck but I have heard you will have nothing but trouble with the gasket leaking around the lid unless you have the top of the master cylinder machined perfectly flat. for now I went with a trap door to fill the cylinder.
|
|
|

|
|
|
#19 |
|
Registered User
Join Date: Nov 2014
Location: Oakland, CA
Posts: 114
|
Re: Kell's Two Cents - 1946 build
aw man, shame to hear. I hope I don't have a problem, but I guess I'll have to be the guinea pig
|
|
|

|
|
|
#20 |
|
Registered User
Join Date: Oct 2014
Location: Location:
Posts: 8,451
|
Re: Kell's Two Cents - 1946 build
.
. That '46 has some serious patina. Progress looks good. Also digging your 'after' stance on the '07. . . |
|
|

|
|
|
#21 |
|
Registered User
Join Date: Nov 2014
Location: Oakland, CA
Posts: 114
|
Re: Kell's Two Cents - 1946 build
Thanks man, yeah I found a thread somewhere online of guys posting pics and all the specs for the drops they did. No conversation was allowed, just pics and specs, so it was really cool. It took a lot of the guess work out since I could find the trucks sitting exactly how I wanted and emulate their drops. Only difference was most everybody bolted in c-notches and seemed to have clearance issues. I welded in a deep C and don't even run bump stops in the back, I never hit.
|
|
|

|
|
|
#22 |
|
Registered User
Join Date: Nov 2014
Location: Oakland, CA
Posts: 114
|
Re: Kell's Two Cents - 1946 build
Alright, so I'm back with some minor updates. I feel like I'm doing more running around and less actual building of the truck.. But I have began to tackle the cab a little bit.
Months ago I tried to begin disassembly on it. I ordered clutch head bits, and literally got nowhere with it. Not a single screw would come off the interior, the clutch heads just seemed to melt away. So my cab for the most part remained untouched while I had been focusing on the frame and everything else. Finally I could ignore it no longer and had to get serious on it. I went down and bought a bunch of 1/4-20 bolts and started welding them to all the interior screws. Finally they came off relatively easily, and I could grind and reuse the bolts a 2nd time. In many cases I found it easier to hold the bolt to one side of the screw head to give myself a larger welding area on the other side, as holding it dead center of the screw head doesn't give you much room on any side of it. 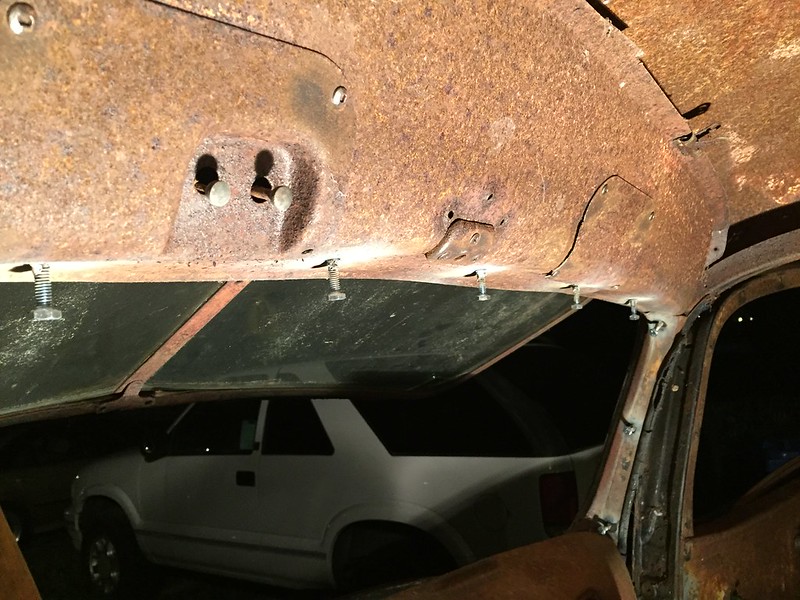 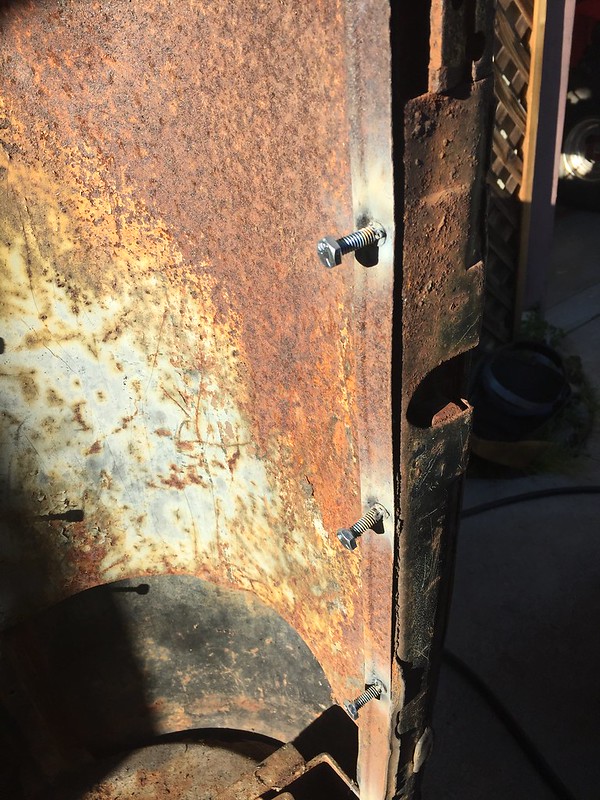 So that's how it went getting the cab pieces all taken off. I pulled the windshield and the dash, and I began stripping the interior of all the rust. Let me just say this is painstaking work, absolutely not my favorite part of this build lol If it weren't for preserving the patina, one should seriously just cash out and have their cab sandblasted. Anyways, couple photos 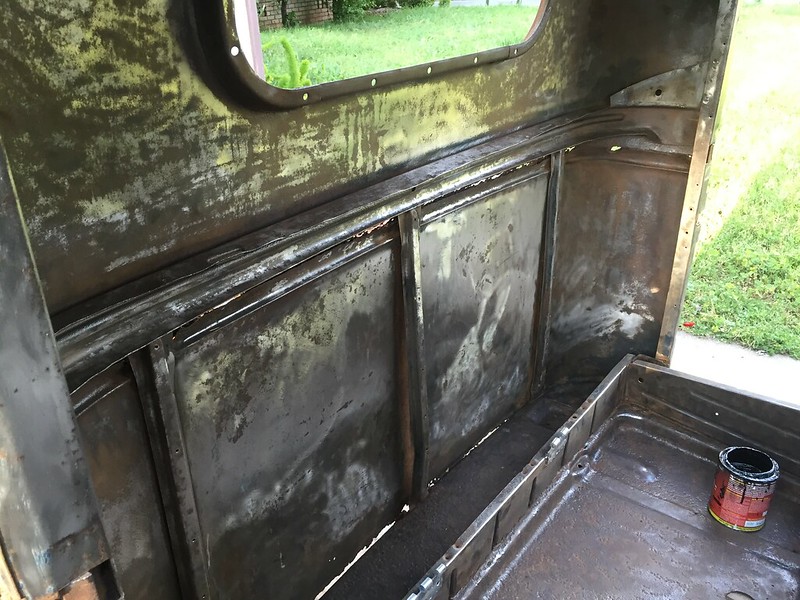 All this is just one part of one day  POR-15 all around 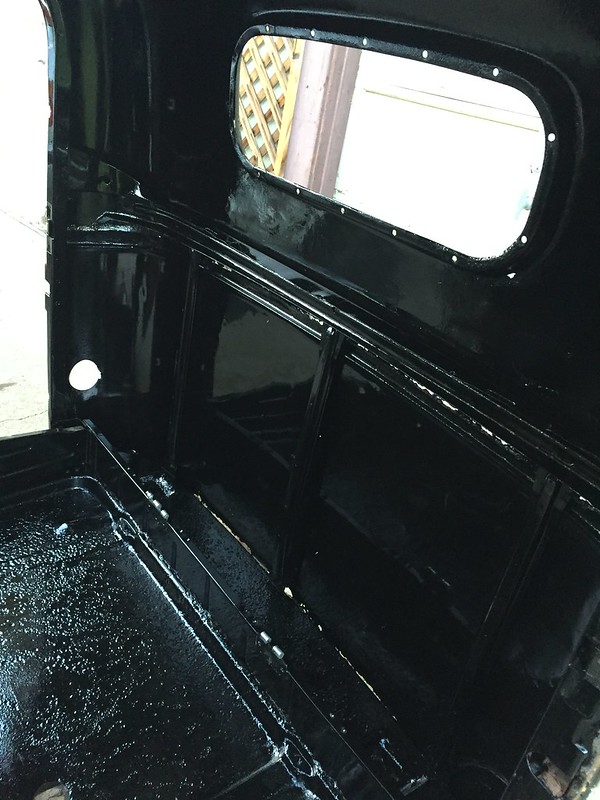 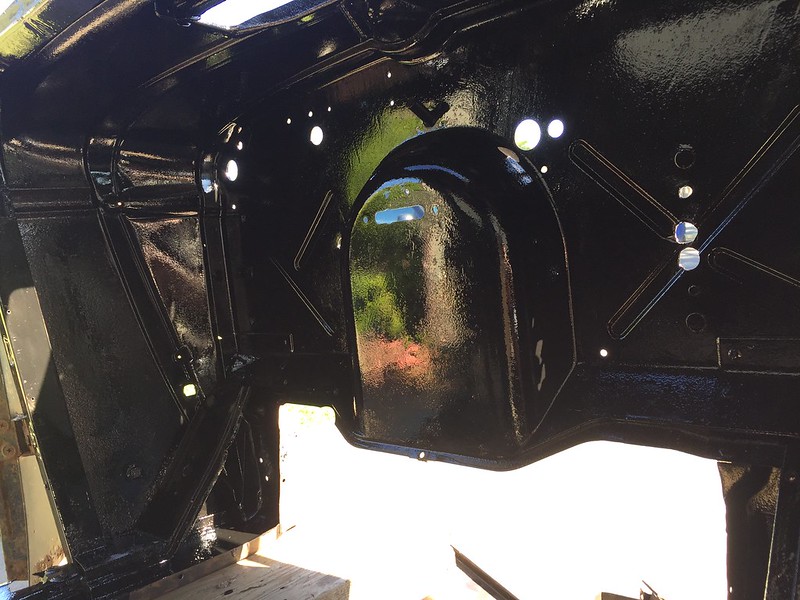 Next I flipped it up and got the bottom 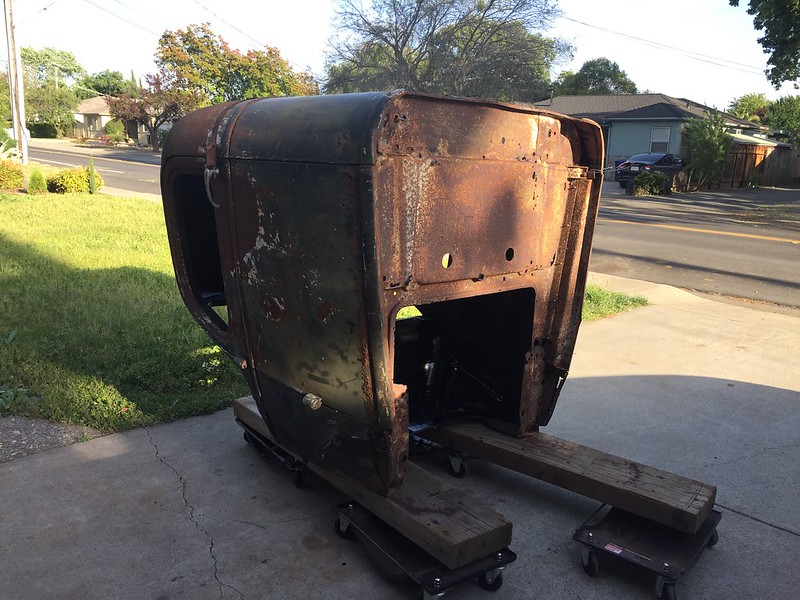 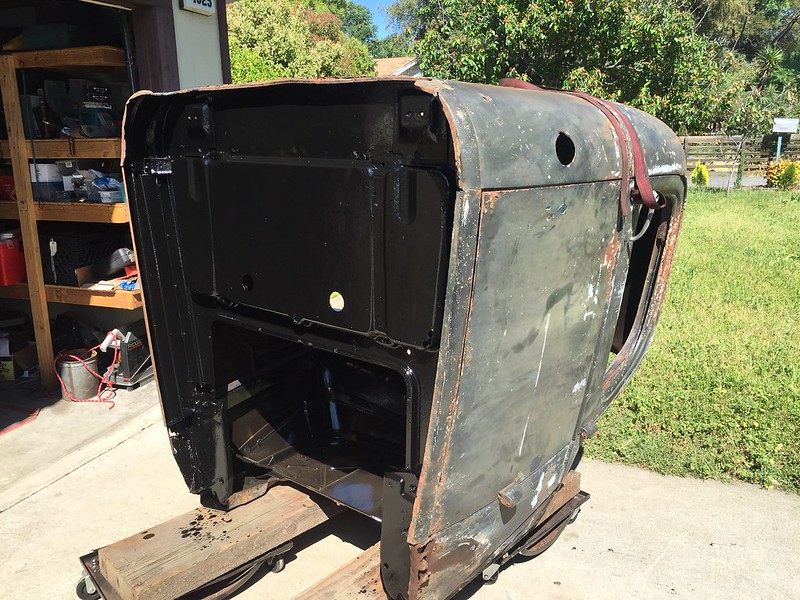 I really like the original moss on the roof 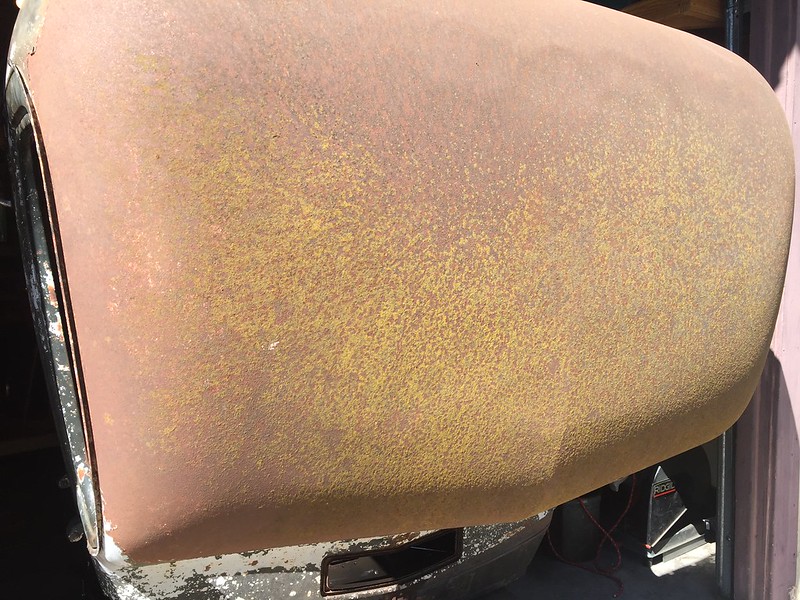 The cab is obviously in pretty bad shape. Pitting in the floor, rust through at the belt line, bottom back of the cab, cab corners, etc. I would really like the redo the floor, bottom back, and cab corners as all these area get covered up and would not show. I'll have to revisit it though, it's just not in the cards this summer Thanks guys, I'll catch ya later Last edited by gokellurself; 08-20-2017 at 02:11 PM. |
|
|

|
|
|
#23 |
|
Registered User
 Join Date: Sep 2015
Location: Sioux Falls, South Dakota
Posts: 702
|
Re: Kell's Two Cents - 1946 build
Nice work so far Frames looking killer it will be a sweet truck for sure just like your 07'
I'm sticking around to the end of this one! 
__________________
"Orange Crush" |
|
|

|
|
|
#24 | |
|
Registered User
Join Date: Nov 2014
Location: Oakland, CA
Posts: 114
|
Re: Kell's Two Cents - 1946 build
Quote:
 another young guy such as myself another young guy such as myself
|
|
|
|

|
|
|
#25 | |
|
Registered User
 Join Date: Sep 2015
Location: Sioux Falls, South Dakota
Posts: 702
|
Re: Kell's Two Cents - 1946 build
Quote:
 Us younger guys need to stick together  Any updates you must have done something over the weekend 
__________________
"Orange Crush" |
|
|
|

|
 |
| Bookmarks |
| Thread Tools | |
| Display Modes | |
|
|