 |
Register or Log In To remove these advertisements. |
|
|
|
|||||||
|
|
Thread Tools | Display Modes |
|
|
#1 |
|
Senior Enthusiast
Join Date: Feb 2007
Location: Spokane Valley, WA
Posts: 8,356
|
Simple Headlight Upgrades
Here are a couple of reasonably simple upgrades for the headlight system in our trucks. There are many threads on the internet explaining relay installation; it seemed time we had a thread of our own. First is the installation of relays, next is a jumper that keeps the low beams on normal brightness during the high beam cycle, providing more effective lighting.
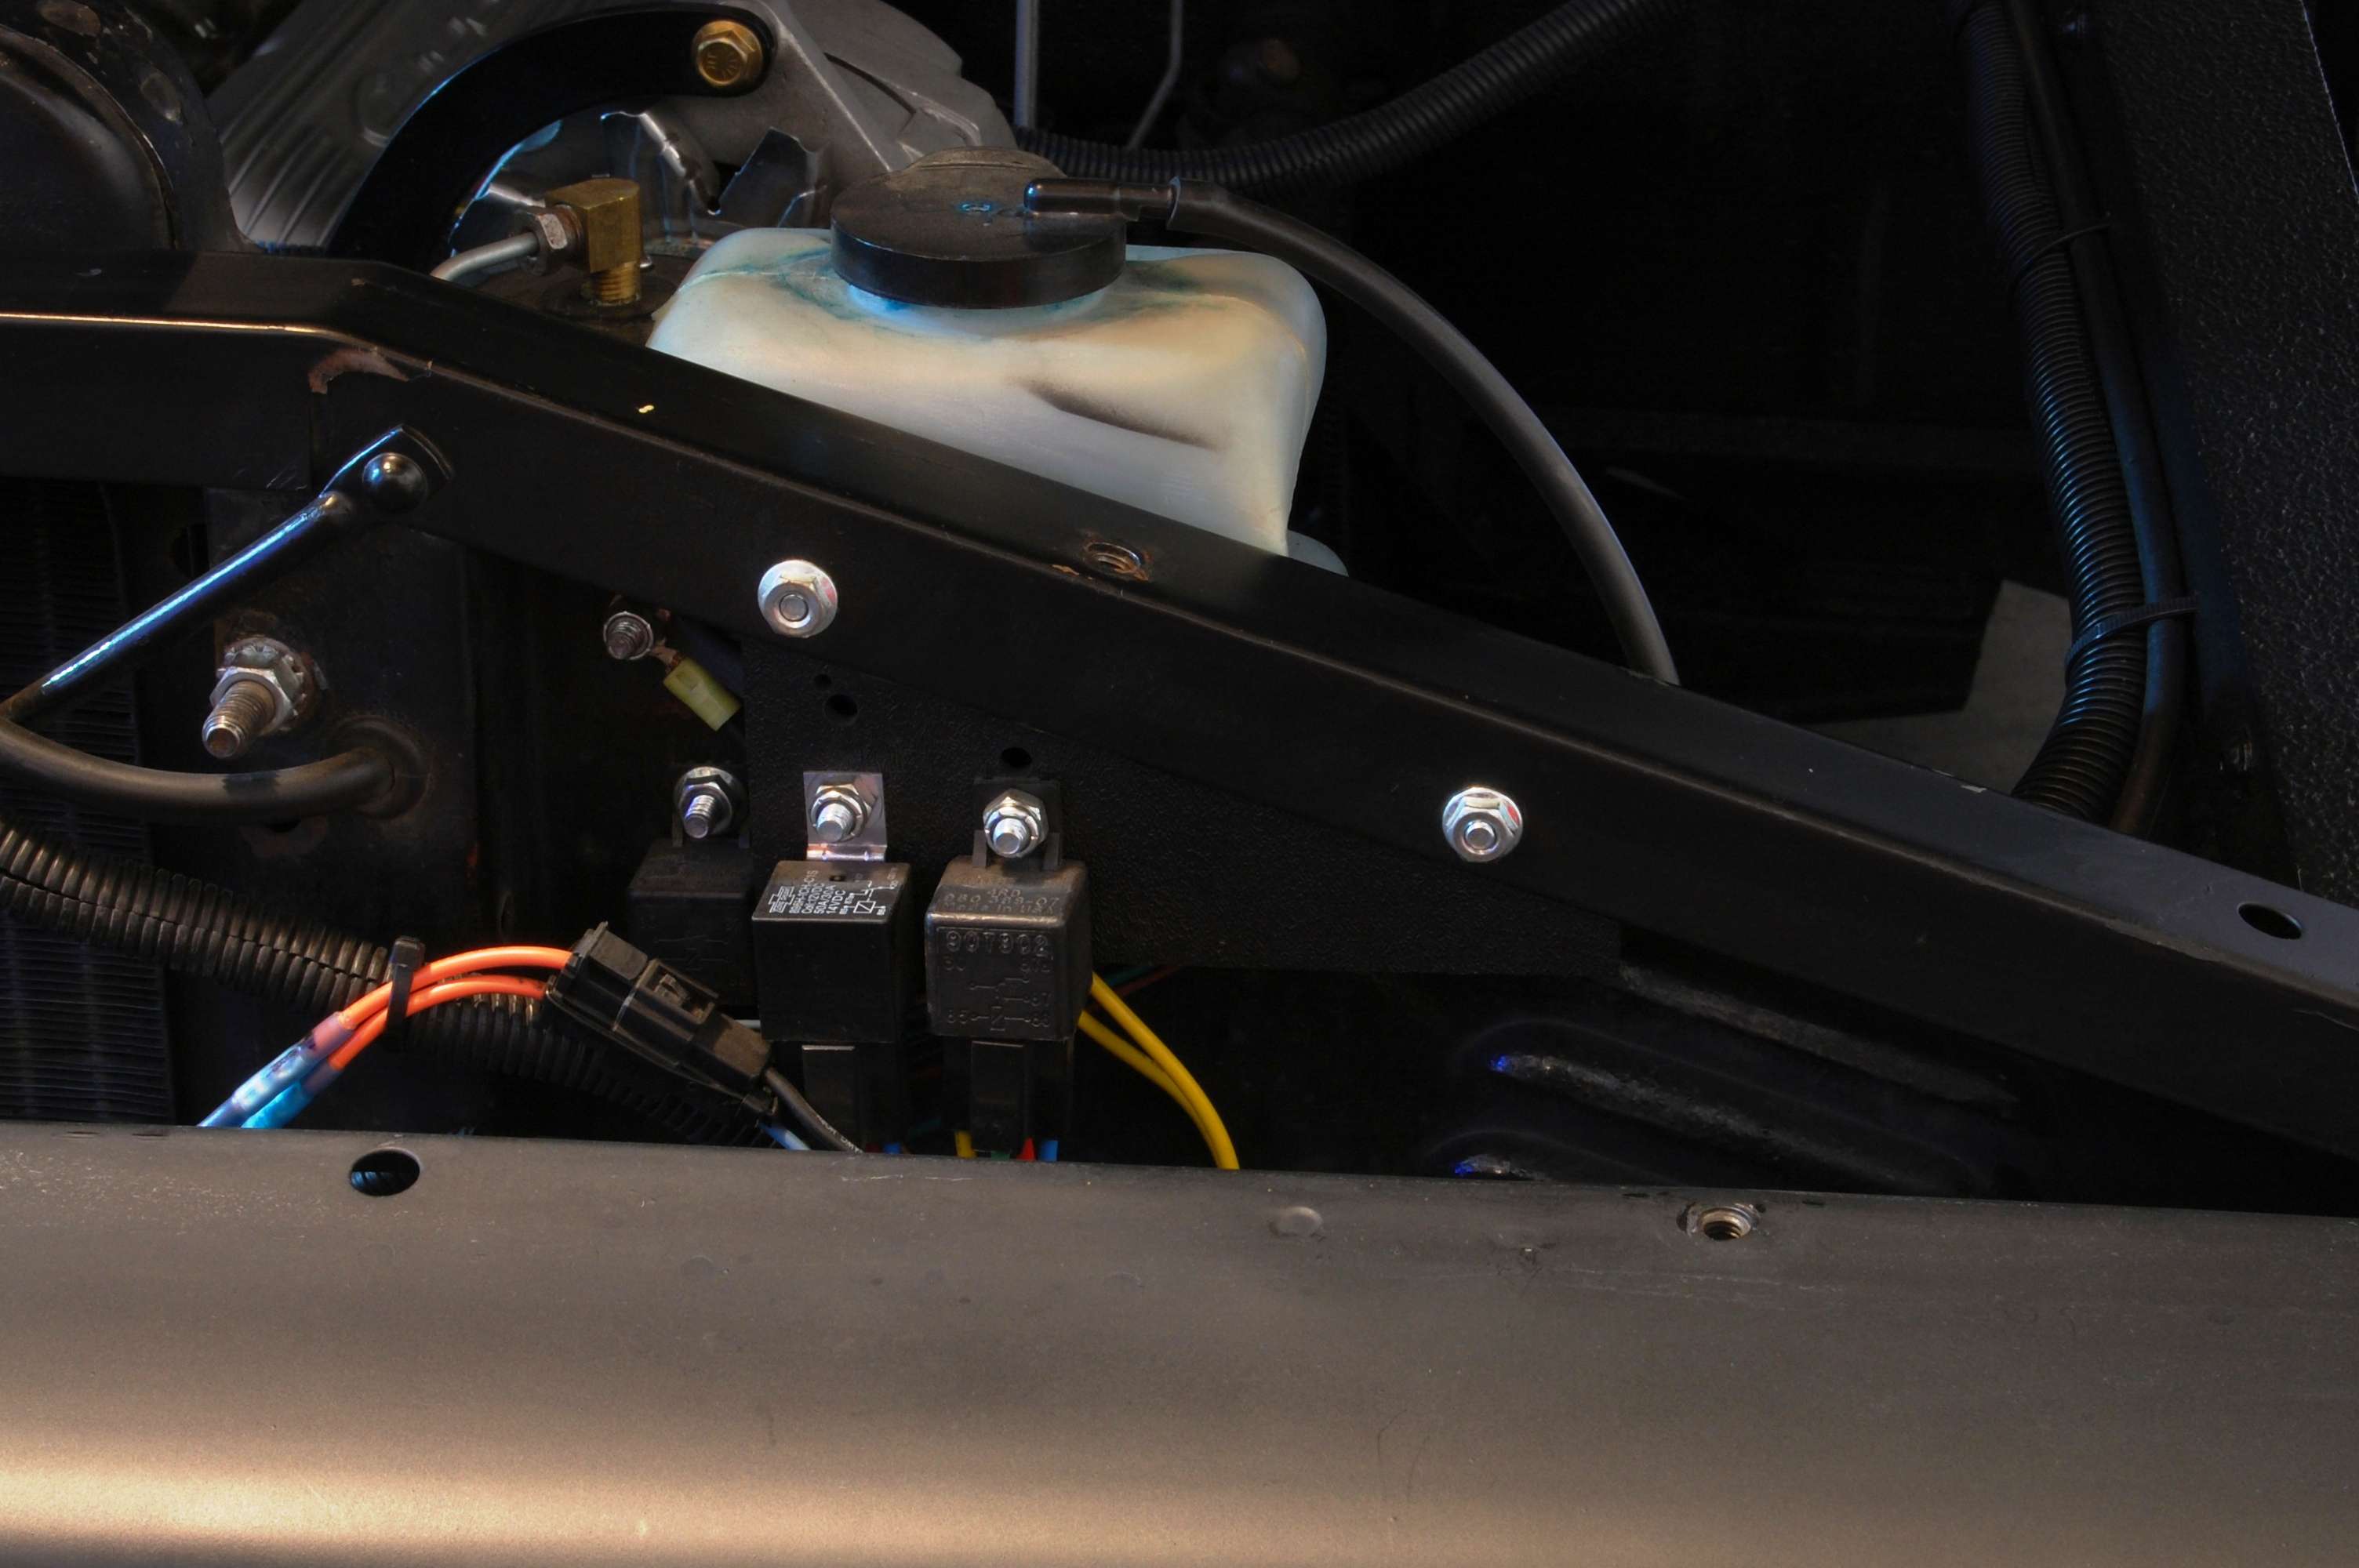
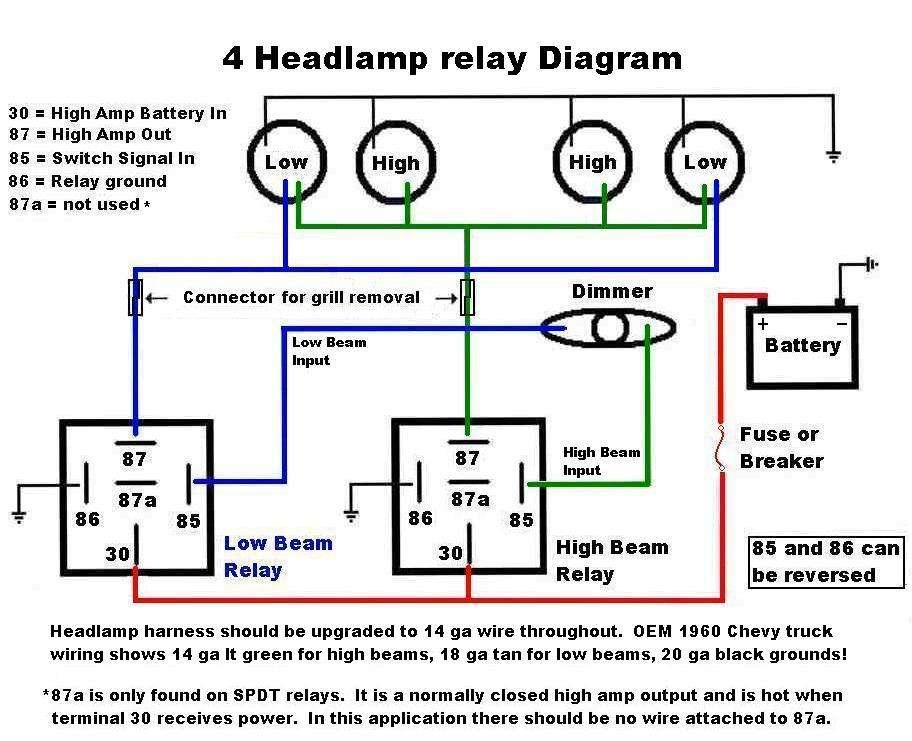
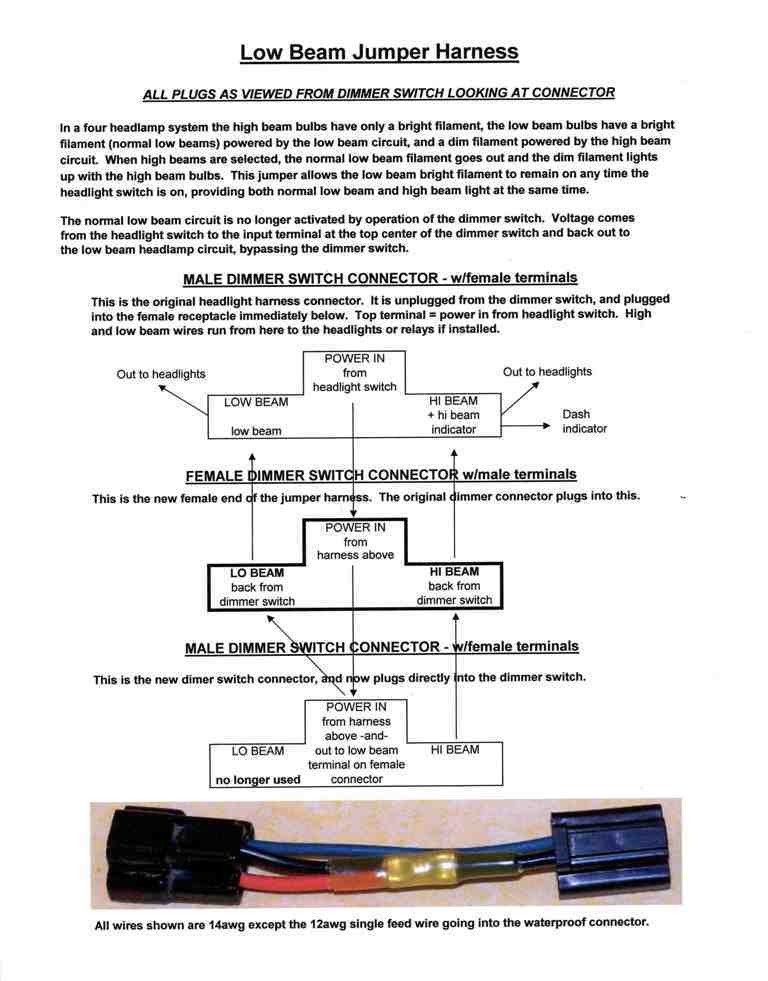
In the OEM headlight circuit power runs from the battery to the headlight switch, to the dimmer switch, and out to the lamps. The high beam wires are 14 gauge, low beam 18 gauge and the grounds are 20 gauge. Due to the distance traveled and small 18 and 20 gauge wires in the circuit there is a substantial amount of voltage drop. The result is up to 30% reduction in potential light output. The switches also handle whatever amperage the bulbs draw (generally up to +/- 20 amps), which increases if halogen (or larger) bulbs are installed. Over time this can lead to switch failure, or melted wires Ė especially with higher amperage bulbs. With the relay system, the high amperage draw is handled by the relay, direct from full battery voltage right to the lamps. The switches are simply used to activate the relays. It is imperative a fuse or circuit breaker (30 amp recommended) be installed in the main feed wire to the relays. From what Iíve read the amperage flowing through the switches is reduced to something less than one amp. I included a two wire connector after the relays, to allow removal of the grille with the headlight harness intact, similar to the OEM setup. The relays are mounted under the driver side air deflector, so the installation doesn't have to show even on a restored truck. Here they are exposed and covered:   The small relay to the left is for the fog lamps. The other two are for the low and high beam circuits. The headlight relays are mounted on an ABS panel for proper positioning and easy access. The increase in light output is substantial and remains constant, no longer dimming and increasing with engine rpm. I recommend rewiring the stock headlight harness with 14 gauge wire, since I donít trust 18 and 20 gauge wires for something as important as headlights. I'm also a fanatic on grounds, and never depend on sheetmetal. All grounds are carried by wire to a common ground, which connects to the engine block. Following is a wiring diagram for a 4 headlight system. For a 2 headlight system, simply delete the two high beam headlamps from the schematic as both high and low beam filaments are contained in the same lamp.  The second improvement is a jumper harness that redirects the source of low beam power from the dimmer switch to the headlight switch. Under high beam conditions, the normal low beam filament goes out, and a dim filament in the bulb illuminates along with the high beam lamps. The jumper keeps the normal low beam filament illuminated anytime the headlight switch is on, regardless of the dimmer switch setting. You can buy this jumper from Ron Francis Wiring for about $15.00: http://www.ronfrancis.com/prodinfo.asp?number=BJ%2D2 Or - if you have the spare parts available in your electrical stash, a free version can be assembled using the following diagram: 
Last edited by markeb01; 03-05-2012 at 03:45 PM. |
|
|

|
| Bookmarks |
|
|