
 |
|
|
#451 |
|
Registered User
Join Date: Aug 2011
Location: Bury St Edmunds, UK
Posts: 215
|
Re: faux-tina paint jobs
Wow, nice job! Please share your technique..!?
__________________
Barney, in the UK 1962 Chevy C20 1974 Ford Econoline 1987 Peugeot 205 GTi 1991 Peugeot 205 GTi |
|
|

|
|
|
#452 |
|
Registered User
Join Date: Jan 2019
Location: Dallas, PA
Posts: 13
|
Re: faux-tina paint jobs
BEWARE !! BEFORE anyone tries this technique, you are one your own !!!! This has worked well for me, but your results may not turn out to your liking !!!
I will not assume any liability for your results. ONLY use this process if you present paint work is not satisfactory to you, as there is no going back. Lightly scuff up the panel with 600 grit sandpaper, dry sand the entire panel (no water) with heavier pressure on areas that would normally rust first, do not wipe down, only gently blow off the excess with an air gun from about 4 feet away, this will clean off most of the dust, leaving some dust to get integrated into the upcoming paint to give somewhat of a texture like a light rust. Then lightly mist the entire panel with lacquer thinner from a spray bottle, let it dry on the panel Time spent so far on a complete bedside will 15 minutes tops ! Next stand about 2 1/2 to 3 feet away, and lightly mist on a very , very faint coat, like a guide coat, of flat black paint, remember only a very light coat, so it will dry almost on contact. This should only take 3 minutes or less. Now you are almost done with the panel and you have less 20 minutes and than 75 cents invested. Now the MAGIC Rustolium spray paint (Aged Metallic rust) in a spray can # 285072. They make a few similar shades, but the Metallic Rust color looks best. Before you spray the rustolium, do not shake the can, turn upside down, and press the button about 10 tp 15 seconds, to release some of the propellent, and thinner from the can. I know what you are thinking, "won't that make the paint partially clog up the nozzle" well you would be right, but that is exactly what you want, to simulate natural rust. Also the spray nozzle on this Metallic Rust can, is not like the standard nozzle, it is really bad. you can never get a nice splatter free uneven coat if you try. Actually the more it splatters from the can, the worse it gets, what is exactly what you want, so simulate a natural rust. DO NOT SHAKE THE CAN at any time, spray the liquid rust onto the panel at various distances, to produce heavier coats on areas that would naturally rust the heaviest. Go light at first, as you can go over an area again to apply more paint. When the sputtering is worst, that is perfect to apply the paint. This stage should cover the entire bedside in only 5 minutes, and use 1/4 to 1/2 of the can. Let the panel dry, and the next day scuff lightly with a 3m pad, to flatten off some of the sheen. MIST VERY LIGHTLY WITH LACQUER THINNER, let dry, and you are done. Total time 25 minutes, with the total cost about $3.00 for half a can of paint. Most of the sheen will flatten out in a few weeks in the sun. You can do your entire truck for less than $50. My liking is to spray the entire panel with a medium coat of rust paint, from about 2 feet away, so that most of the original color still shows underneath. Next I go in closer about 1 foot away, to re-spray areas where natural rust would be heaviest. Good luck When I do my blue truck, I'll post a video. |
|
|

|
|
|
#453 |
|
Registered User
Join Date: Jan 2009
Location: Burbank, CA
Posts: 3,626
|
Re: faux-tina paint jobs
do you have a photo of your friends ford?
|
|
|

|
|
|
#454 | |
|
Registered User
Join Date: Mar 2014
Location: Tacoma Wa
Posts: 146
|
Re: faux-tina paint jobs
Quote:
Subscribing. Steve
__________________
1953 3100 261cu in, sm420, 3.55 torque tube, omaha orange 1964 GMC 1000 series,custom, 305E, sm420 |
|
|
|

|
|
|
#455 |
|
Registered User
Join Date: Dec 2015
Location: tarboro nc.
Posts: 400
|
Re: faux-tina paint jobs
the glove box looks great , I tried to find this color local , but I ended up getting it on ebay. I plan on using it on my 65 c10 rat ,and my chopped top 50 f car
the 65 is spray canned satin green with zero prep . it was black with horrible paint and bodywork when I got it. i put the rusty hood on it. |
|
|

|
|
|
#456 | |
|
Registered User
Join Date: Jan 2019
Location: Dallas, PA
Posts: 13
|
Re: faux-tina paint jobs
Quote:
As I said in a previous post I Plan to faux patina my crappy paint job, until I can buy new sheet metal to properly have my truck painted in a year or two. I plan to permanently change the color of my truck from the current blue to Rally Red. Previously I played around with the blue color, so I decided to actually use the rally red color, and see how it turns out. Wow I am happy. First I had a bunch of joist hangers left over from a backyard shed I built last summer, so I thought I would use them for my latest experiment. I sprayed two coats of the red, and let it dry for about 2 hours, and then sprayed the "rust in a can" over the red, and let it dry overnight. The next day I sanded it lightly with 1000 wet dry, and this is how it came out. The pics with 2 hangers, show the original shiny red paint on top, and the finished result underneath. Any comments would be welcome. |
|
|
|

|
|
|
#457 |
|
Registered User
Join Date: Dec 2010
Location: konawa ok/oakdale Ca.
Posts: 1,652
|
Re: faux-tina paint jobs
FB_IMG_1580324927589.jpg
|
|
|

|
|
|
#458 |
|
Registered User
Join Date: Aug 2015
Location: Texas
Posts: 328
|
Re: faux-tina paint jobs
A lot of good faux-tina paint jobs on this thread. Are any of you applying any kind of clear coat afterwards?
|
|
|

|
|
|
#459 |
|
Active Member
 Join Date: Aug 2012
Location: Central Illinois
Posts: 103
|
Re: faux-tina paint jobs
Here is one that a friend owns. He is doing a mild drop and several other mods this spring. Going to 5 X 4 3/4 bolt pattern so he can run any of many GM wheels. I think it is going to be a slick driver.
|
|
|

|
|
|
#460 |
|
Registered User
Join Date: May 2011
Location: Anderson SC
Posts: 3,903
|
Re: faux-tina paint jobs
I bought a '69 that had mostly original paint but needed a fender, hood, and cowl. The new fender already had black primer, and the hood was painted black first then green to match the original primer color. I soaked a rough terry cloth towel in lacquer thinner to rub the paint off the high spots before the paint set up all the way.
 
__________________
Project Goldilocks '66 C10 Short Fleet BBW Build '65 C10 Highly Detailed Stock Restoration Thread '78 Camaro Targa Roof Build '55 International Metal/Body/Paint Work '66 F100 Full Rotisserie Restoration '40 Packard 120 Convertible Coupe Restoration How To Restore and Detail an Original Gauge Cluster How To Detail Sand Body Panels, Edges, Corners, Etc |
|
|

|
|
|
#461 | |
|
Registered User
 Join Date: Jul 2015
Location: Phoenix, AZ
Posts: 1,335
|
Re: faux-tina paint jobs
Quote:
|
|
|
|

|
|
|
#462 |
|
Registered User
 Join Date: Jul 2015
Location: South Orange County CA
Posts: 1,265
|
Re: faux-tina paint jobs
Lots of good info in here. Mine has a pretty good start, I think, just need to figure out a way to "touch-up" ther areas that need attention.
Wondering if a fresh coat on the just the grill would enhance the look. |
|
|

|
|
|
#463 | |
|
Registered User
 Join Date: Mar 2007
Location: Scotts, Michigan
Posts: 3,774
|
Re: faux-tina paint jobs
Quote:
__________________
…………...........__________ .................. ((__|__||___\____ ..;.;;.:;:;.,;..;((_(O))____ (_(O)) 1948 Chevy Truck - Finished SOLD!! 1953 Chevy Suburban "Family Truckster" Completed: Spring of 2021 http://67-72chevytrucks.com/vboard/s...d.php?t=605484 1994 4x4 Blazer - "Field Find" https://67-72chevytrucks.com/vboard/...ferrerid=30857 Last edited by youngrodder; 05-13-2020 at 09:11 AM. |
|
|
|

|
|
|
#464 |
|
Registered User
 Join Date: Mar 2007
Location: Scotts, Michigan
Posts: 3,774
|
Re: faux-tina paint jobs
Here's a few afters of my Suburban using the prescribed technique
Marc
__________________
…………...........__________ .................. ((__|__||___\____ ..;.;;.:;:;.,;..;((_(O))____ (_(O)) 1948 Chevy Truck - Finished SOLD!! 1953 Chevy Suburban "Family Truckster" Completed: Spring of 2021 http://67-72chevytrucks.com/vboard/s...d.php?t=605484 1994 4x4 Blazer - "Field Find" https://67-72chevytrucks.com/vboard/...ferrerid=30857 |
|
|

|
|
|
#465 |
|
Registered User
 Join Date: Mar 2007
Location: Scotts, Michigan
Posts: 3,774
|
Re: faux-tina paint jobs
More pics
__________________
…………...........__________ .................. ((__|__||___\____ ..;.;;.:;:;.,;..;((_(O))____ (_(O)) 1948 Chevy Truck - Finished SOLD!! 1953 Chevy Suburban "Family Truckster" Completed: Spring of 2021 http://67-72chevytrucks.com/vboard/s...d.php?t=605484 1994 4x4 Blazer - "Field Find" https://67-72chevytrucks.com/vboard/...ferrerid=30857 |
|
|

|
|
|
#466 |
|
But Found Her 25yrs Later!
Join Date: Oct 2010
Location: Oregon City, Oregon
Posts: 10,530
|
Re: faux-tina paint jobs
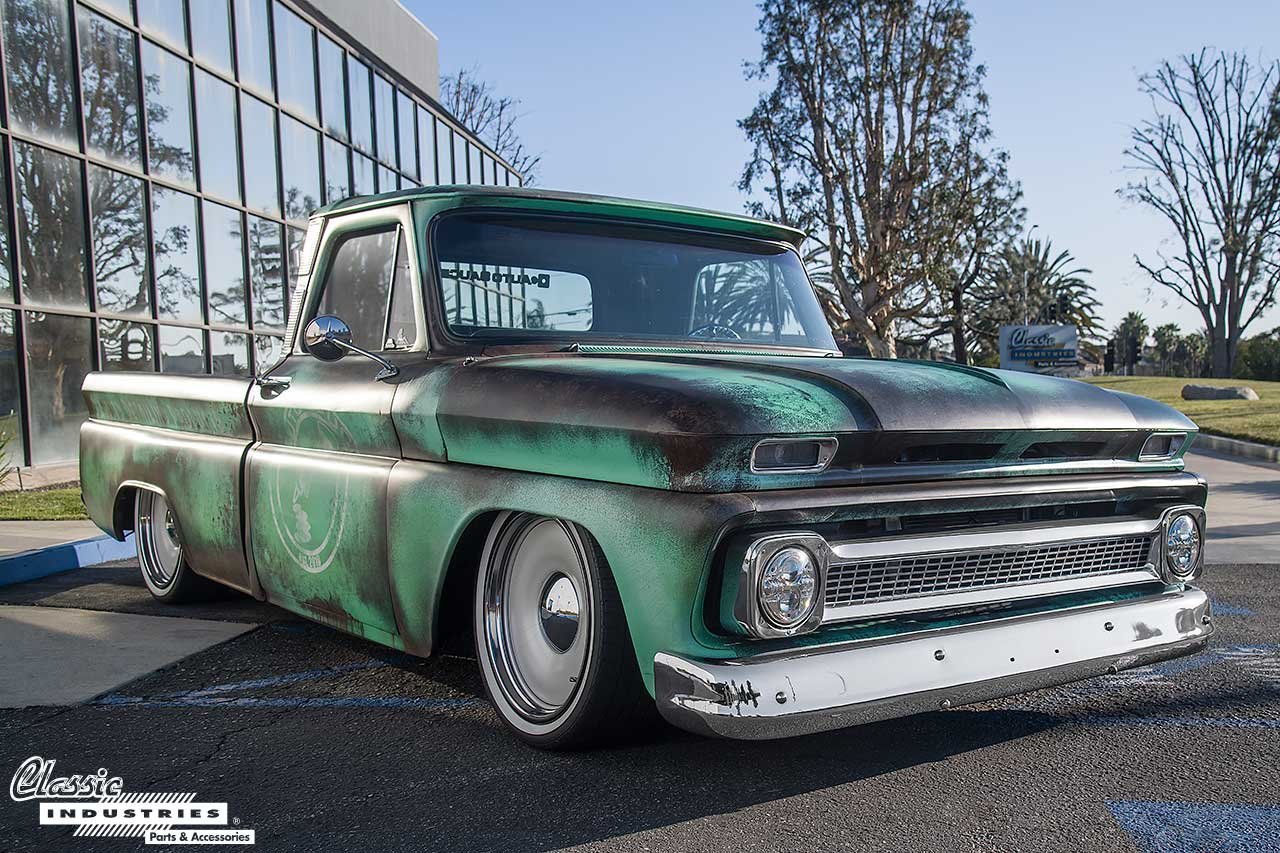
__________________
I lost my 65 - Found it 25 years later: http://67-72chevytrucks.com/vboard/s...d.php?t=426650 66 C20 Service Truck: http://67-72chevytrucks.com/vboard/s...d.php?t=428035 |
|
|

|
|
|
#467 |
|
But Found Her 25yrs Later!
Join Date: Oct 2010
Location: Oregon City, Oregon
Posts: 10,530
|
Re: faux-tina paint jobs
I went and picked up some diesel to get some burn piles going. An older guy pulled in with a shiny older jeep. He said if I gave my truck a nice paint job, it would be a really sweet ride. I said, but then I'd have to worry about it. He smiled and said good point.
__________________
I lost my 65 - Found it 25 years later: http://67-72chevytrucks.com/vboard/s...d.php?t=426650 66 C20 Service Truck: http://67-72chevytrucks.com/vboard/s...d.php?t=428035 |
|
|

|
|
|
#468 |
|
But Found Her 25yrs Later!
Join Date: Oct 2010
Location: Oregon City, Oregon
Posts: 10,530
|
Re: faux-tina paint jobs
Found this in another thread.
I like both with and without clear. .
__________________
I lost my 65 - Found it 25 years later: http://67-72chevytrucks.com/vboard/s...d.php?t=426650 66 C20 Service Truck: http://67-72chevytrucks.com/vboard/s...d.php?t=428035 |
|
|

|
|
|
#469 |
|
Senior Member
 Join Date: Oct 2010
Location: Largo, FL
Posts: 532
|
Re: faux-tina paint jobs
I just finished this one a few weeks ago.
Stripped, bodyworked, 2K primed and patina'd it basecoat/clearcoat 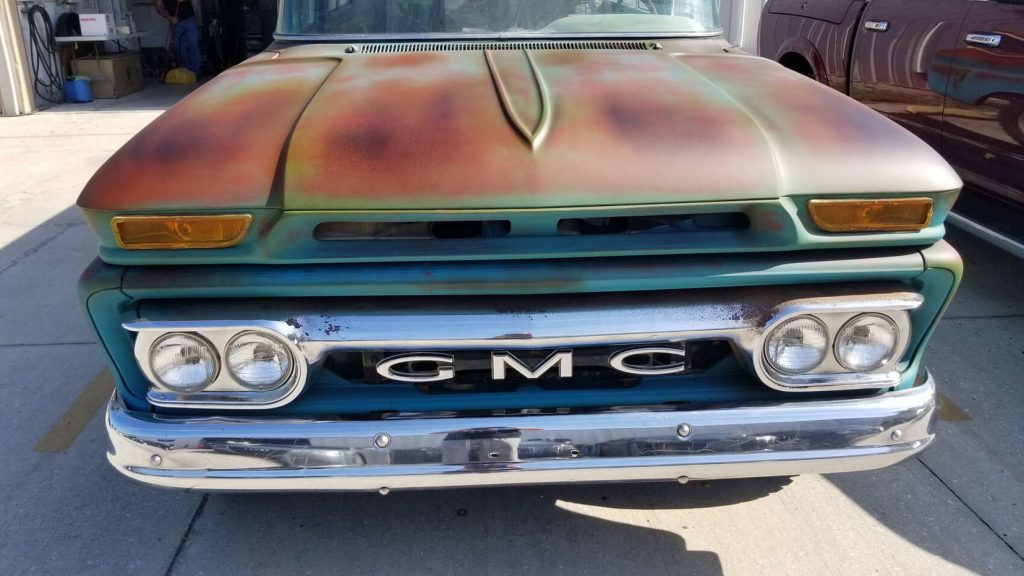 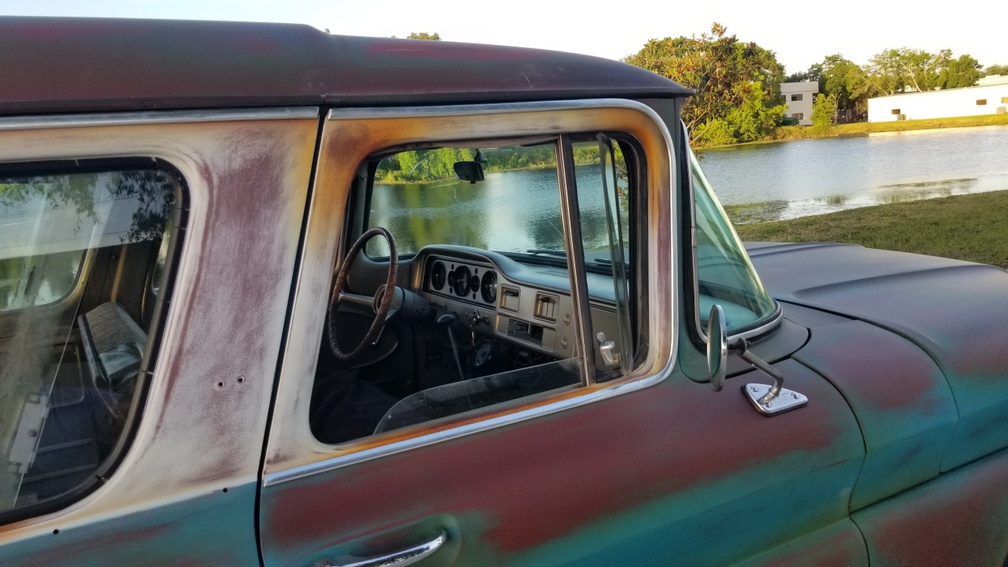 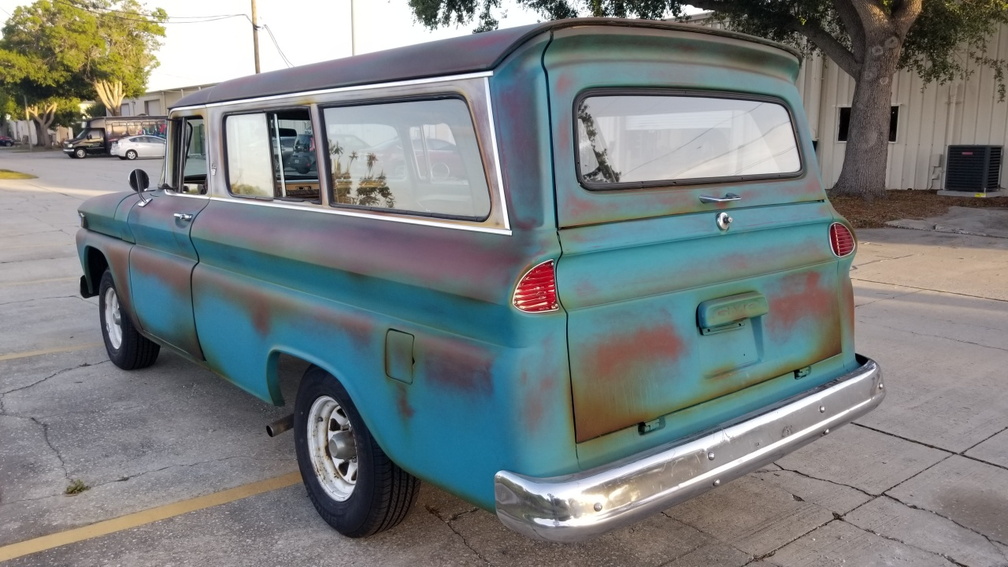 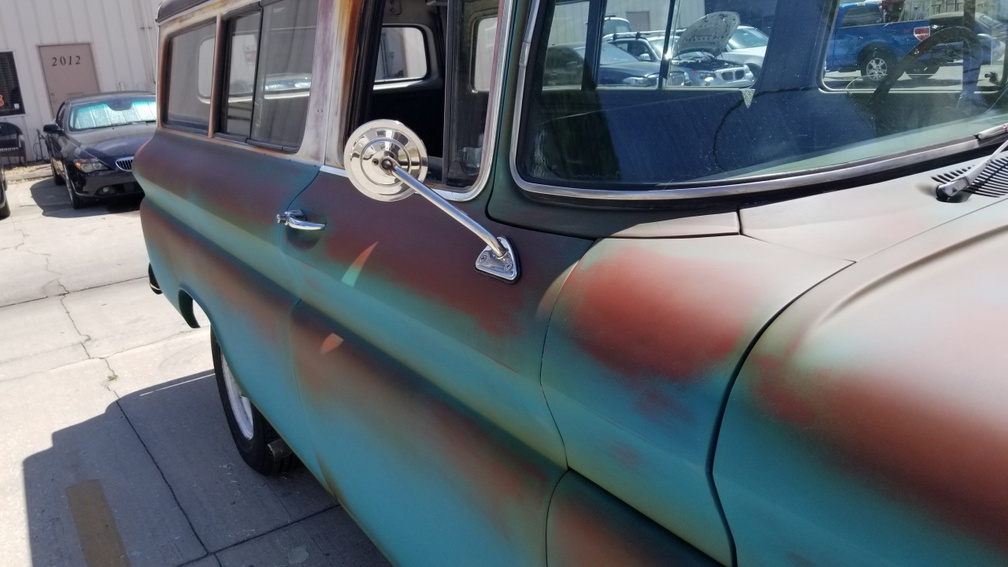 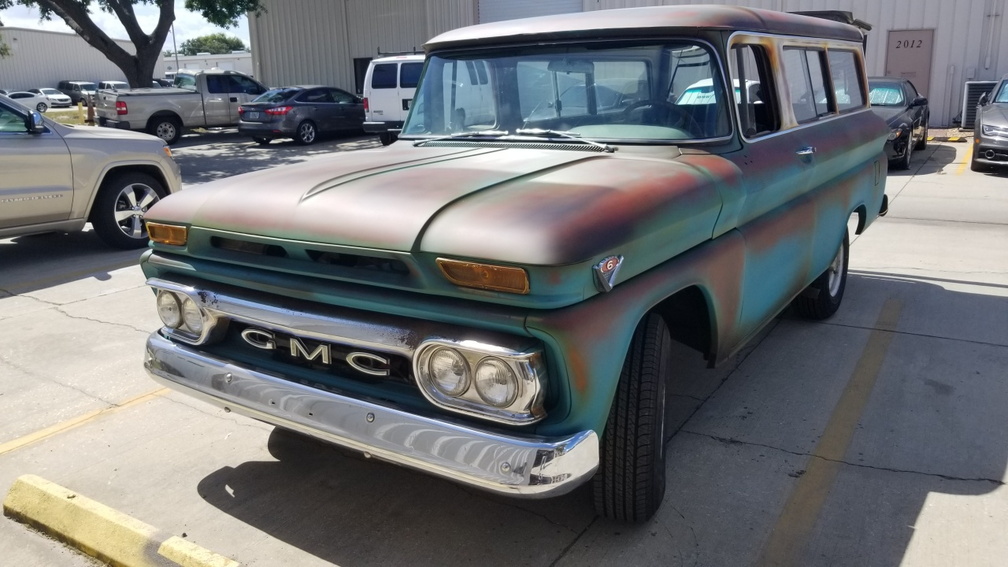 More pics https://www.attitudecustompainting.c...l_suburban_c10 video of the paint job process https://youtu.be/RRo0P_K0jyM
__________________
TAZ BUILDS 1966 GMC Suburban 1963 GMC Suburban Patina frame-on FOR Sale 1966 C10 Short Bed (2010-11) Monthly Updates 2015 C10 Pics with my '72 Montego GT 429/521 build 1963 Pro Street C10 back halved. Frame off I did back in 1990 Pics / Video |
|
|

|
|
|
#470 |
|
Registered User
Join Date: Apr 2001
Location: DALLAS,TX
Posts: 22,094
|
Re: faux-tina paint jobs
^^ Awesome! ^^
__________________
67SWB-B.B.RetroRod 64SWB-Recycle 89CCDually-Driver/Tow Truck 99CCSWB Driver All Fleetsides @rattlecankustoms in IG Building a small, high rpm engine with the perfect bore, stroke and rod ratio is very impressive. It's like a highly skilled Morrocan sword fighter with a Damascus Steel Scimitar..... Cubic inches is like Indiana Jones with a cheap pistol. |
|
|

|
|
|
#471 |
|
Registered User
Join Date: Feb 2013
Location: central California
Posts: 2,783
|
Re: faux-tina paint jobs
Wow, Taz...nice job. One of the most natural looking ones I've seen. I bet that took way more time that just doing a straight forward paintjob.
|
|
|

|
|
|
#472 |
|
Registered User
 Join Date: Jul 2015
Location: South Orange County CA
Posts: 1,265
|
Re: faux-tina paint jobs
Should I just start sanding to get rid of the cracked look of the paint? That’s probably the quickest, right?
__________________
1963 C20, small window, long bed 292, 4-speed |
|
|

|
|
|
#473 | |
|
Registered User
 Join Date: Jul 2015
Location: South Orange County CA
Posts: 1,265
|
Re: faux-tina paint jobs
Quote:
__________________
1963 C20, small window, long bed 292, 4-speed |
|
|
|

|
|
|
#474 |
|
Senior Member
 Join Date: Nov 2013
Location: Portland, OR
Posts: 562
|
Re: faux-tina paint jobs
I wouldn't touch it. That looks cool.
|
|
|

|
|
|
#475 | |
|
But Found Her 25yrs Later!
Join Date: Oct 2010
Location: Oregon City, Oregon
Posts: 10,530
|
Re: faux-tina paint jobs
Quote:
__________________
I lost my 65 - Found it 25 years later: http://67-72chevytrucks.com/vboard/s...d.php?t=426650 66 C20 Service Truck: http://67-72chevytrucks.com/vboard/s...d.php?t=428035 |
|
|
|

|
 |
| Bookmarks |
|
|