
 |
|
|
#726 |
|
Registered User
Join Date: Dec 2012
Location: Rochester, KENT
Posts: 10,577
|
Re: Grizz's Redneck Express 1966 Chevy Short Fleetside BILLYBOB
Thanks guys. 00.45 here, should be sleeping. BUT.....
Door checks, as my doors are creased. http://persh.org/Pickup/DoorChecks.htm And http://67-72chevytrucks.com/vboard/s...+Cherokee+door Very useful info and guidance.
__________________
MY BUILD LINK: http://67-72chevytrucks.com/vboard/s...585901]Redneck Express - 1966 C10 Short Fleetside MY USA ROADTRIPS http://forum.retro-rides.org/thread/...2018-humdinger IF YOU CAN'T FIX IT WITH A HAMMER, YOU'VE GOT AN ELECTRICAL PROBLEM MATE. |
|
|

|
|
|
#727 |
|
Registered User
Join Date: Apr 2012
Location: Searcy, AR
Posts: 4,203
|
Re: Grizz's Redneck Express 1966 Chevy Short Fleetside BILLYBOB
2015… CHEERS MATE!!!
 
__________________
DON Proverbs 27:17  US Air Force Retarded errr Retired My '65 Stepper Build:http://67-72chevytrucks.com/vboard/s...d.php?t=533920 My '60 Rusty Patina Build:http://67-72chevytrucks.com/vboard/s...66#post7402266 My '72 http://67-72chevytrucks.com/vboard/s...59#post7204359 SOLD |
|
|

|
|
|
#728 |
|
Registered User
Join Date: Dec 2012
Location: Rochester, KENT
Posts: 10,577
|
Re: Grizz's Redneck Express 1966 Chevy Short Fleetside BILLYBOB
BONDO/BOG/FILLER/PLOD is the friend of every good body worker ehhh??
Took the door parts off today, including the door panels..... first surprise was not being able to unscrew one of the screws on the drivers side, followed by another 5 on the passenger side. Lubricated them, not progress, then went and had a coffee with Martin when he pitched, after which he tried various bodyshop techniques, followed by me and Mr Drill, so I have a repair job ahead before I can get the panels back on. The lower door kick panels were covered with some thick gauge plastic, covering the 6x9 holes which I had planned on welding up, but then realized they have a swage/ridge which I am not sure I want to repair, unless I make up some panels and weld them in..... more welding. Inside the door was surprise number one, indicating that a lot more pain awaits me...... Can you tell what it is yet? 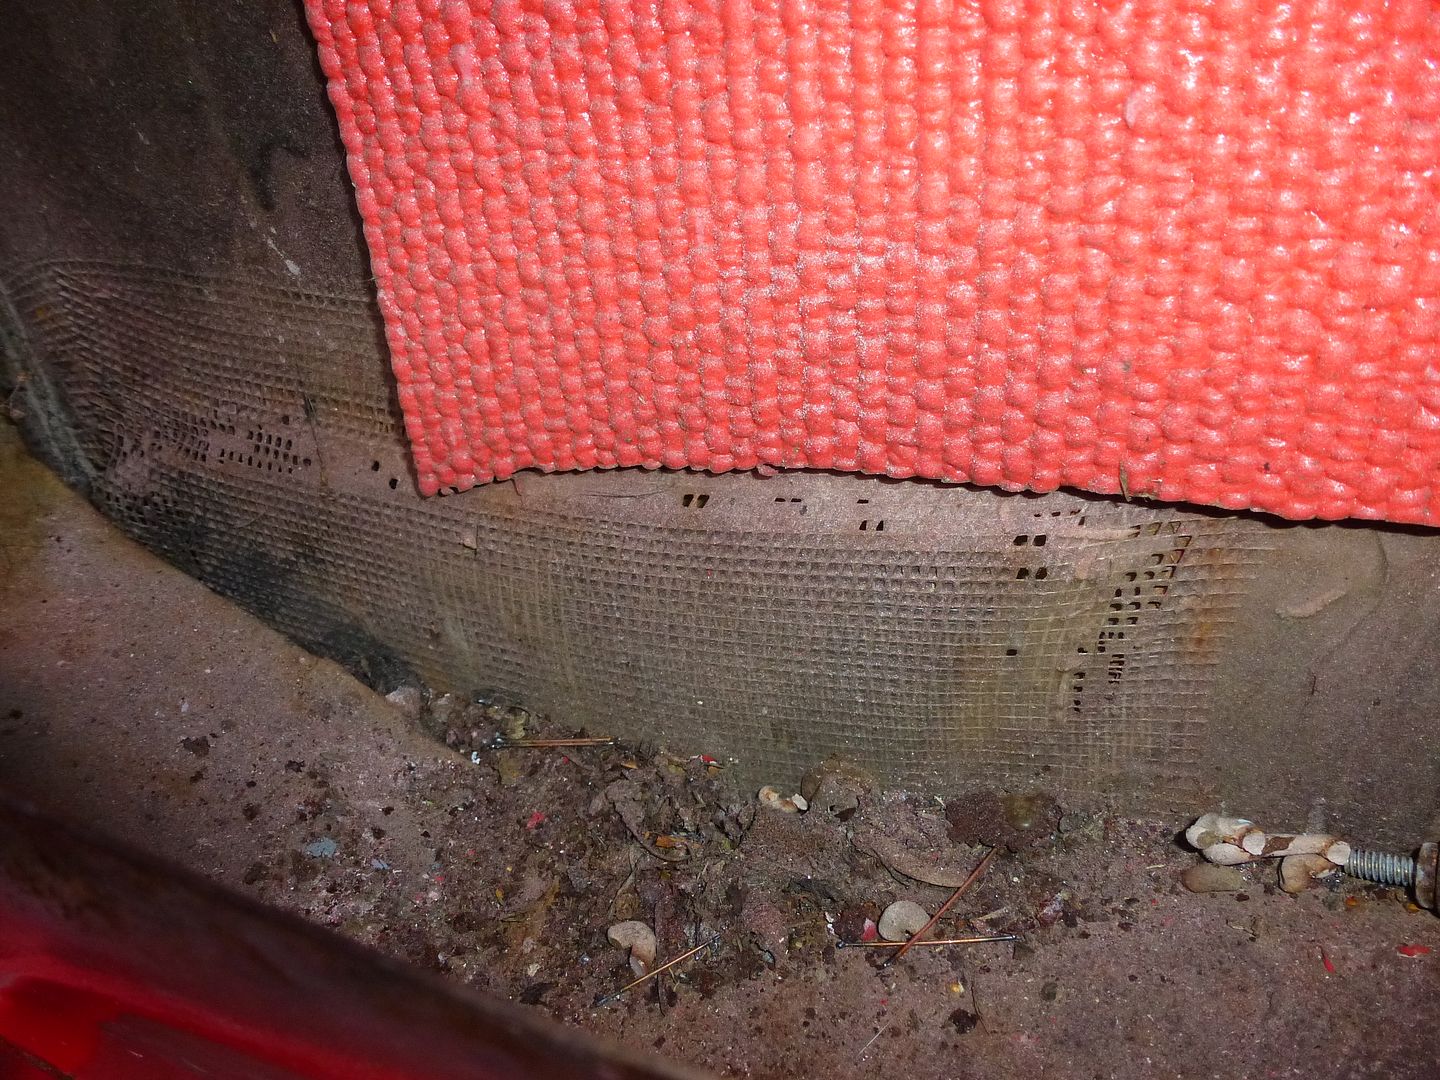 Ohhh, and the red you see in the pic, is high density foam flooring, or a camping mat that some clever idiot glued a bunch of inside the doorskin as sound deadening..... So then between Martin and I we continued to laugh, curse and be amazed at all the cockups as we unbolted bits, with bolts missing from the tailgate, some cross threaded bolts etc.... Rear lights out, tailgate gone and bumper removed. I STILL WOULD LOVE TO FIND THE SAME BUMPER AGAIN. 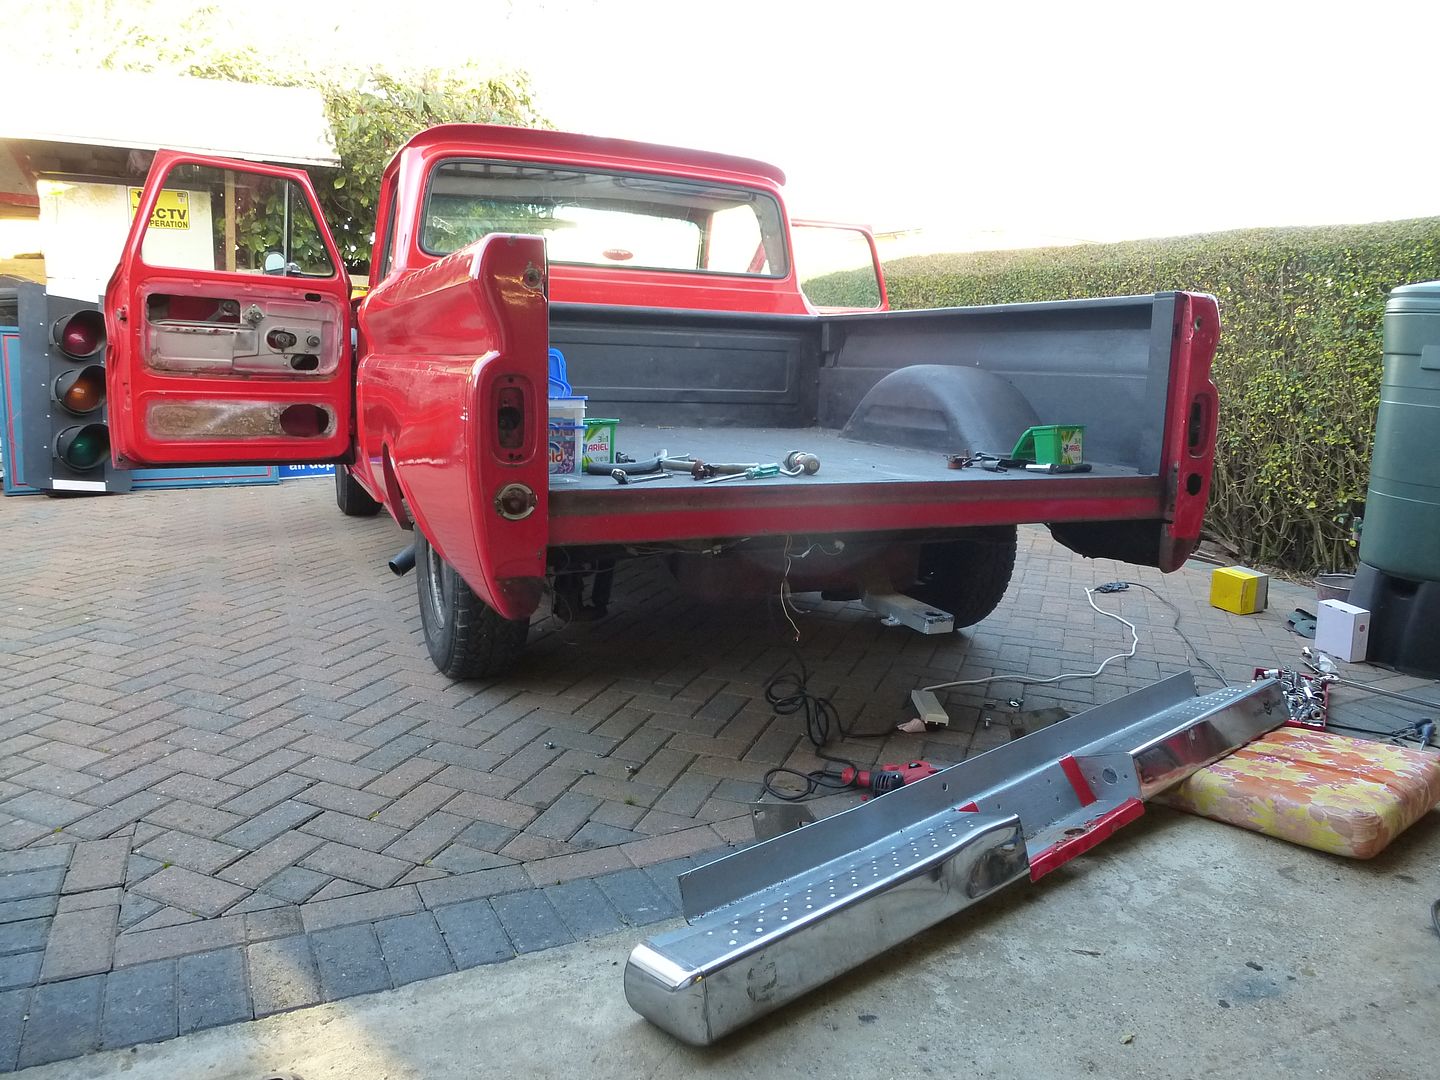 Then more coffee and left over Christmas mince pies Nicola had put out for us before returning to start the front end. This was the moment I have feared the last 18 months, but at least I was in control. The biggest lump of Plod on my truck that I know of, clearly there will be more surprises forthcoming. From the drivers fender. 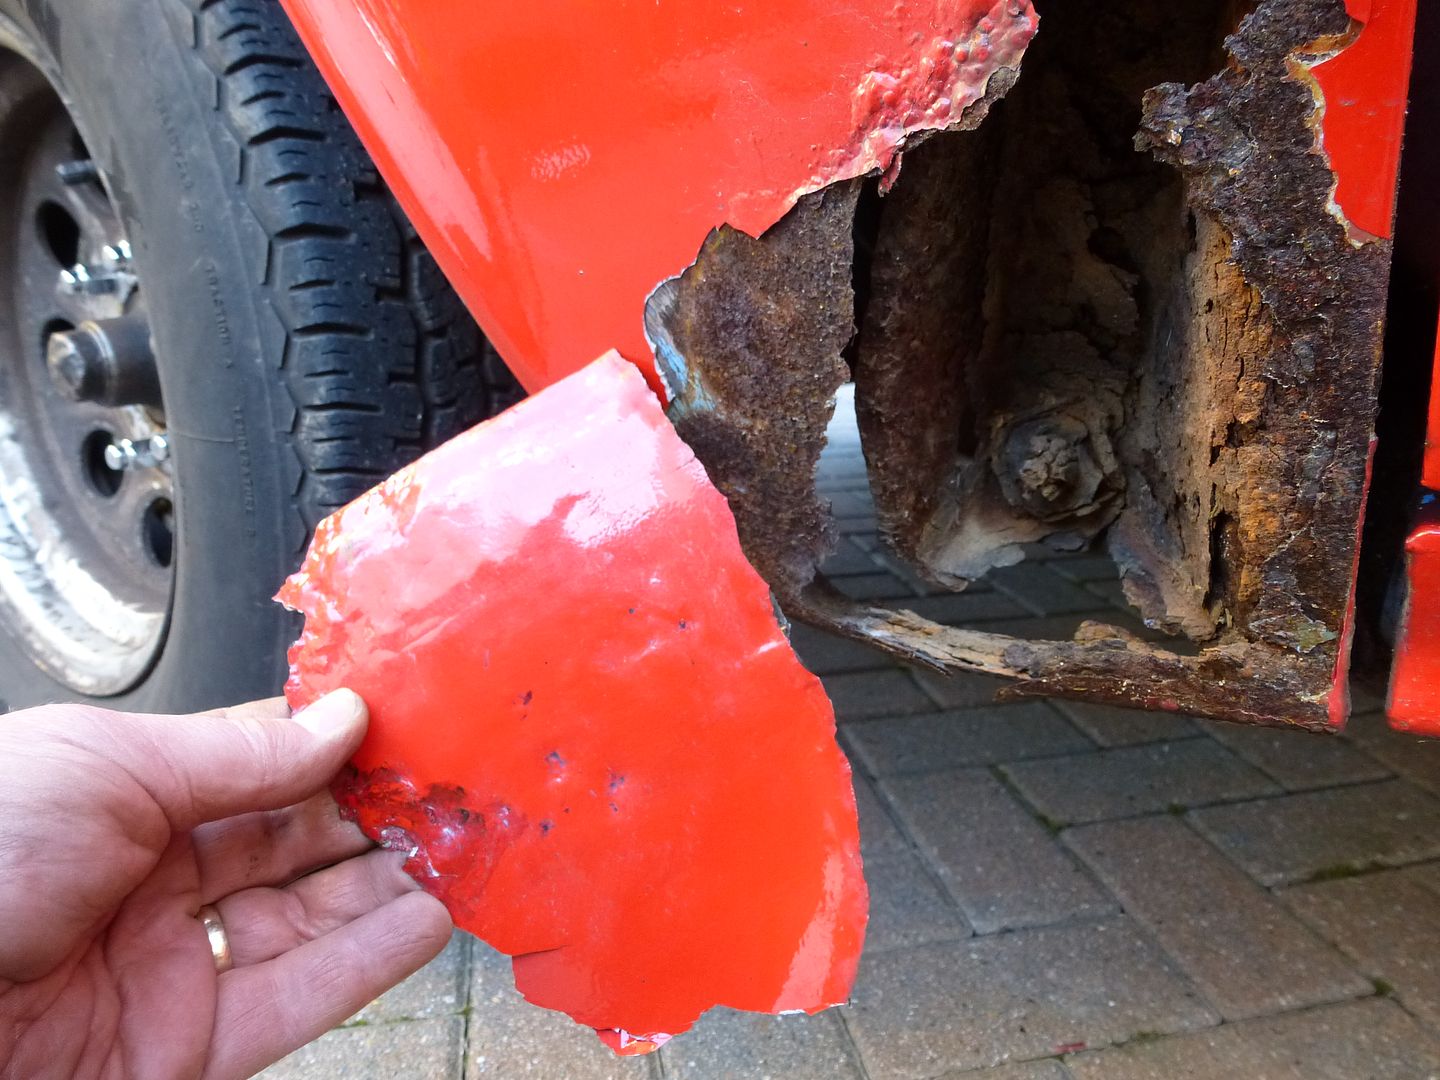 After we had undone a zillion nuts and bolts Martin made me remove the first fender, just to torture me. 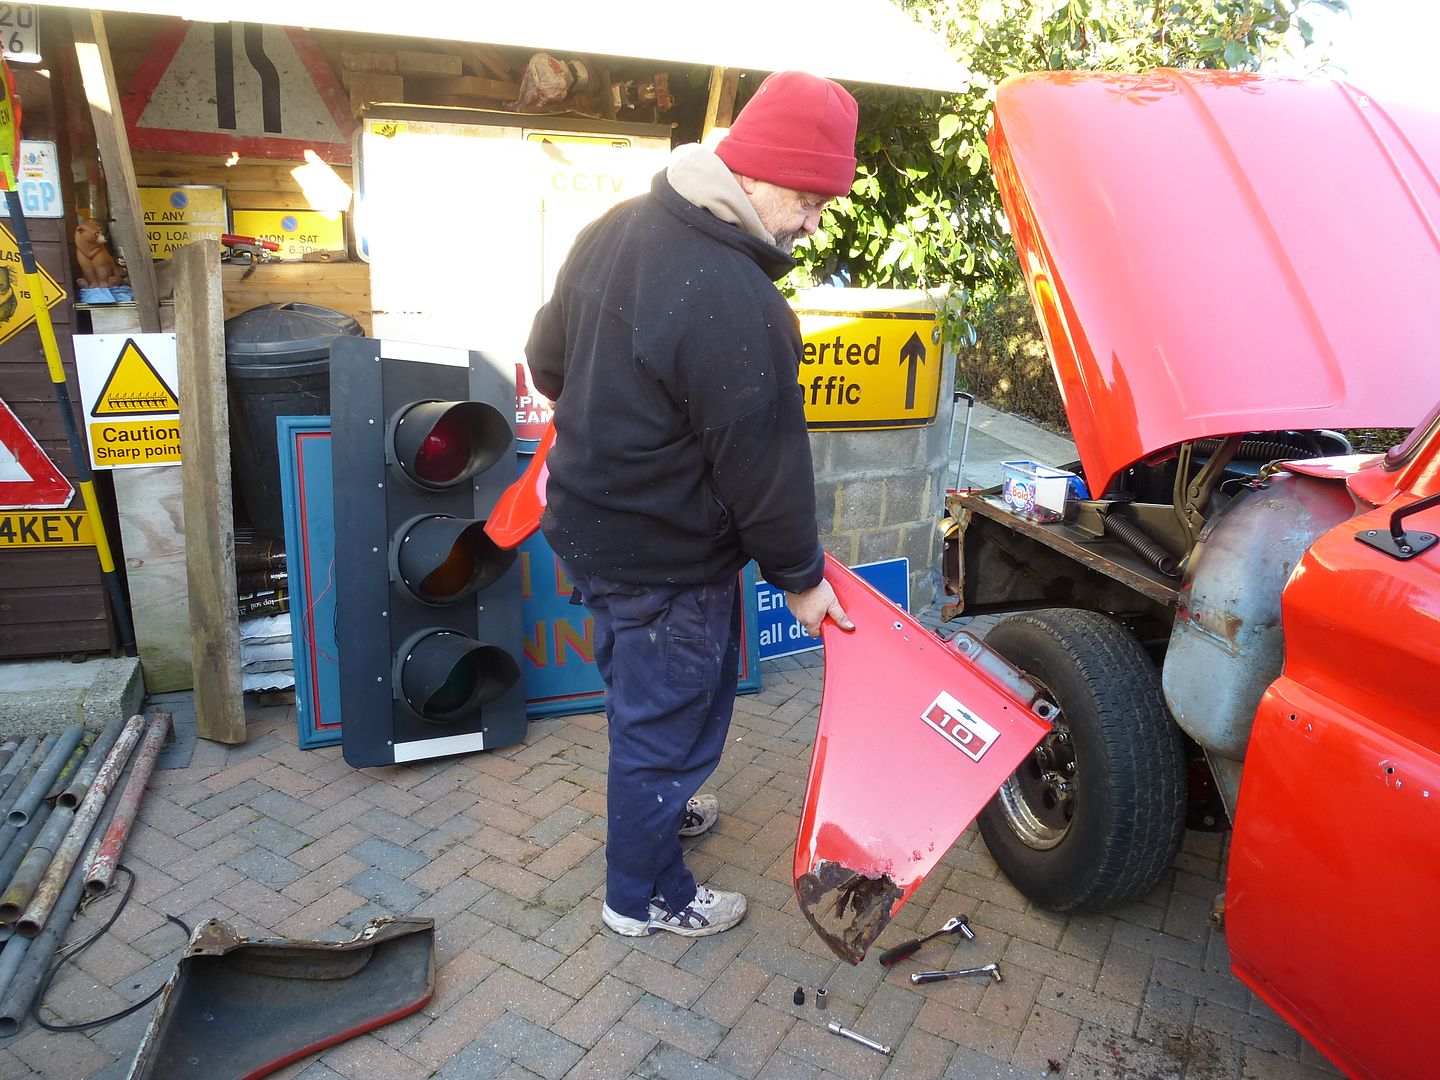 While I was at the second fender, Martin was grunting, groaning and sounding like a walrus mating on a rocky beach..... "Where's your bloody rattle gun?" he grunted from below my feet, under the fender. The bottom fender bolt was not letting up, a bit like some of the others we had already encountered. Fetched the rattle gun and got on with what I was doing, heard ZZZZZRRT..!! Had Martin's head pop up, kinda like a ground hog.... Burger me !!! This thing works well. Note the offending items deterioration. 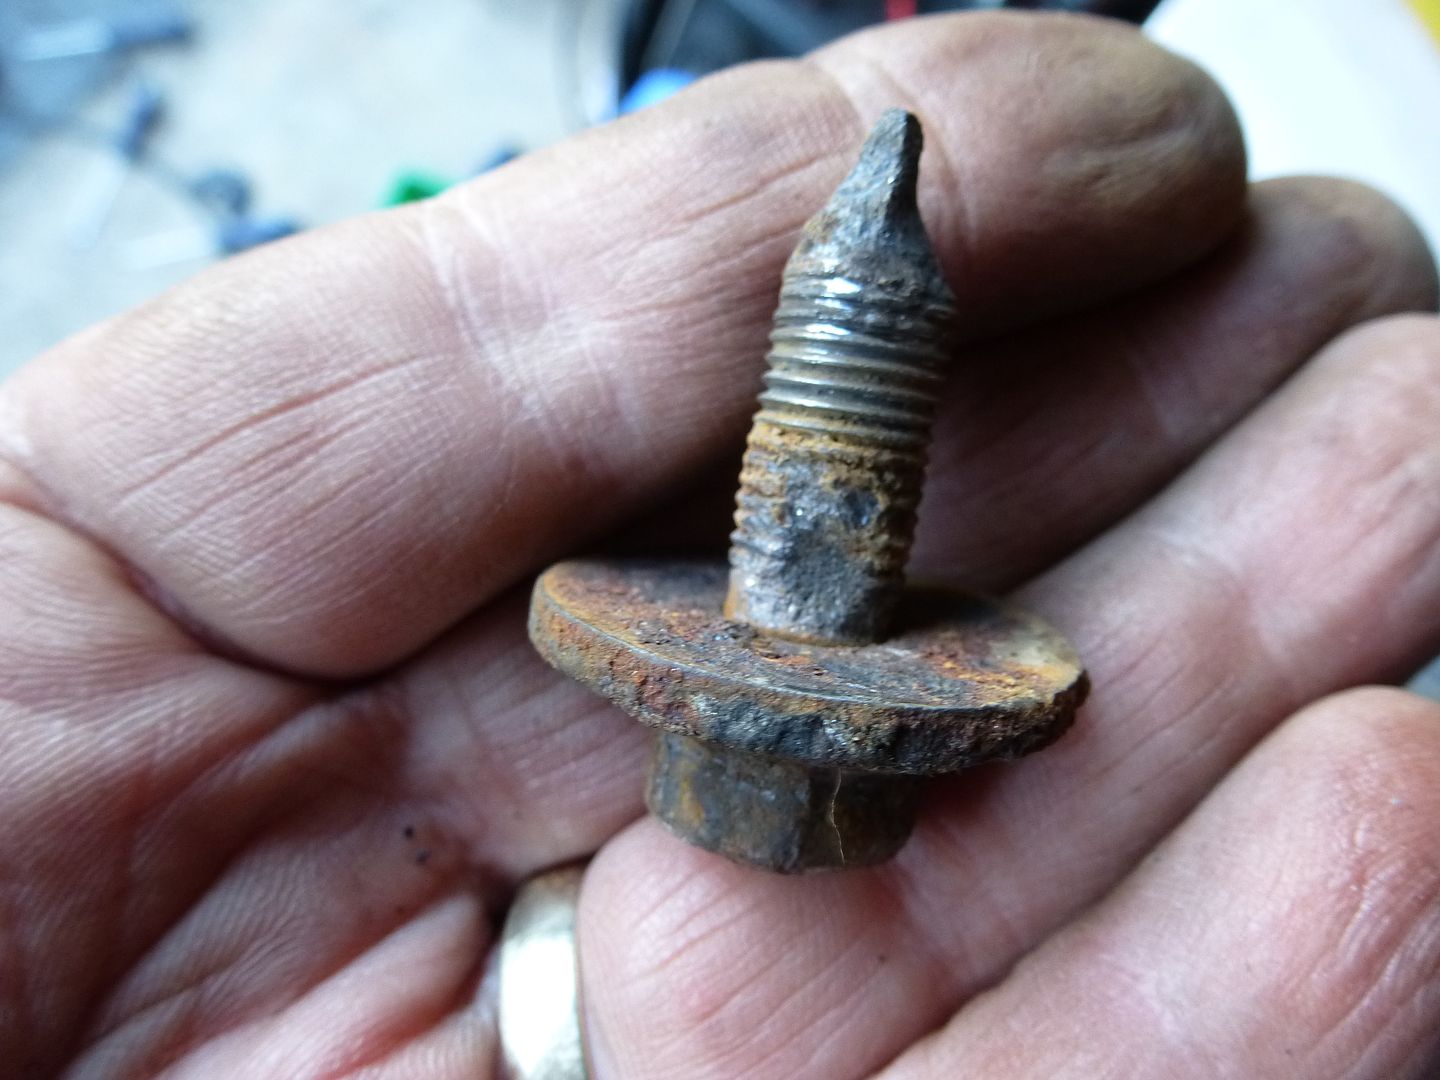 This point saw us get some sandwiches, tea and a catch up on various other tasks, like ordering bits off Ebay and Amazon. 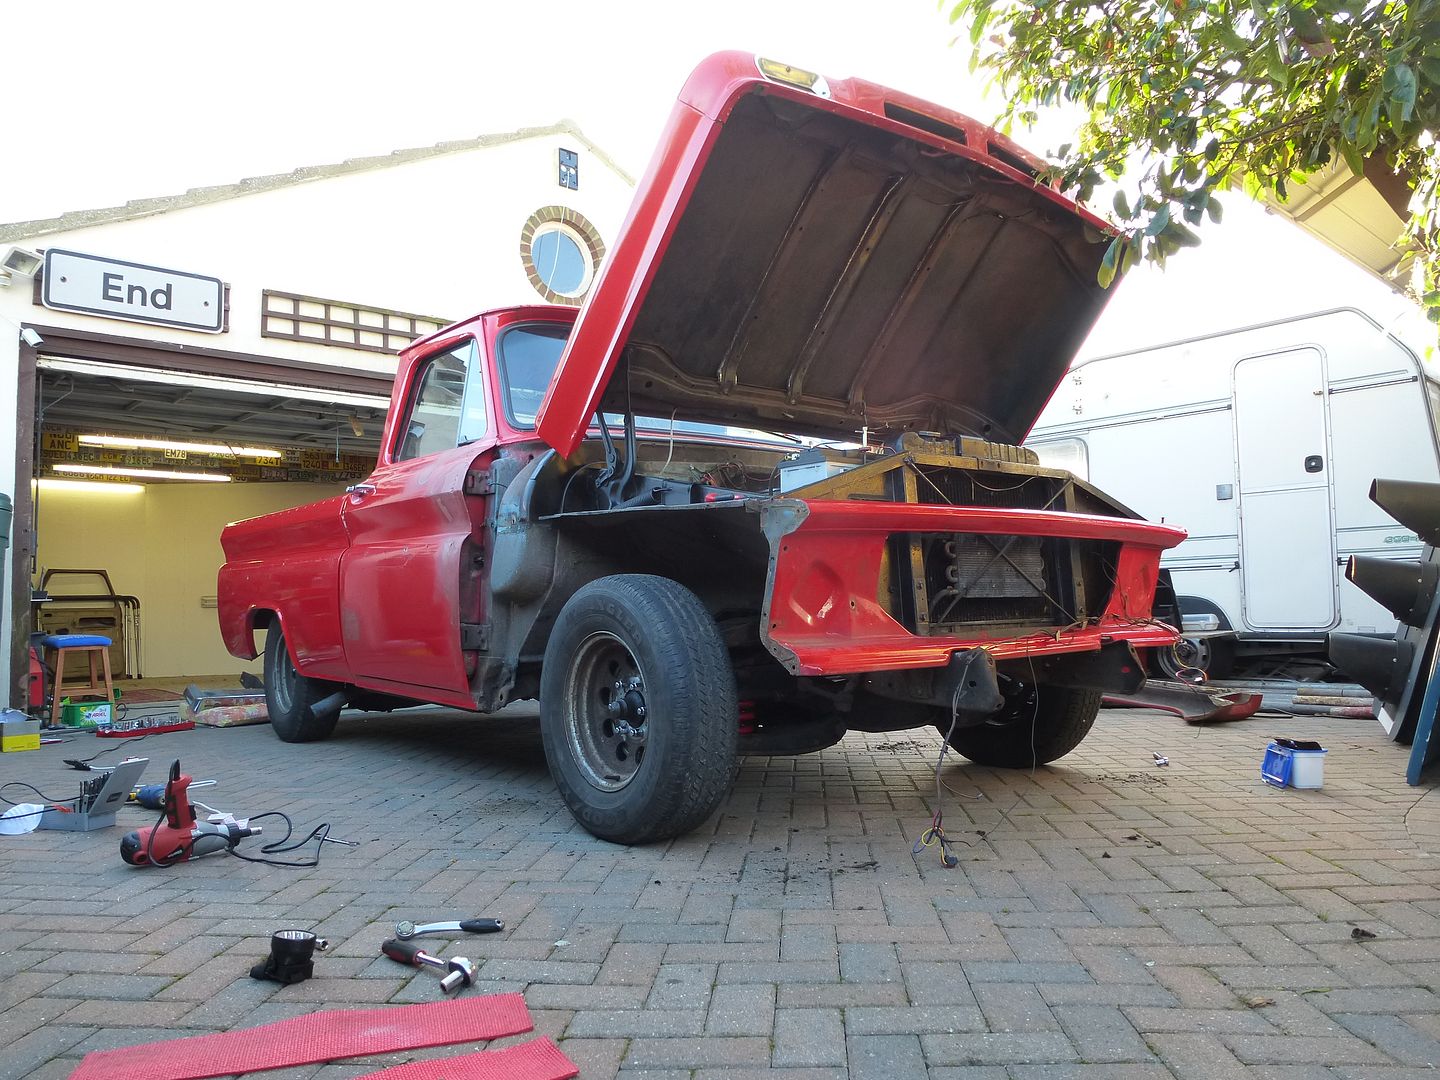 Martin is upgrading the rear of his truck with park/indicator lights so made up a template using pencil, masking tape, which is then transferred to cardboard so he can mark out the rear of his truck before cutting the steel to fit the new lights. 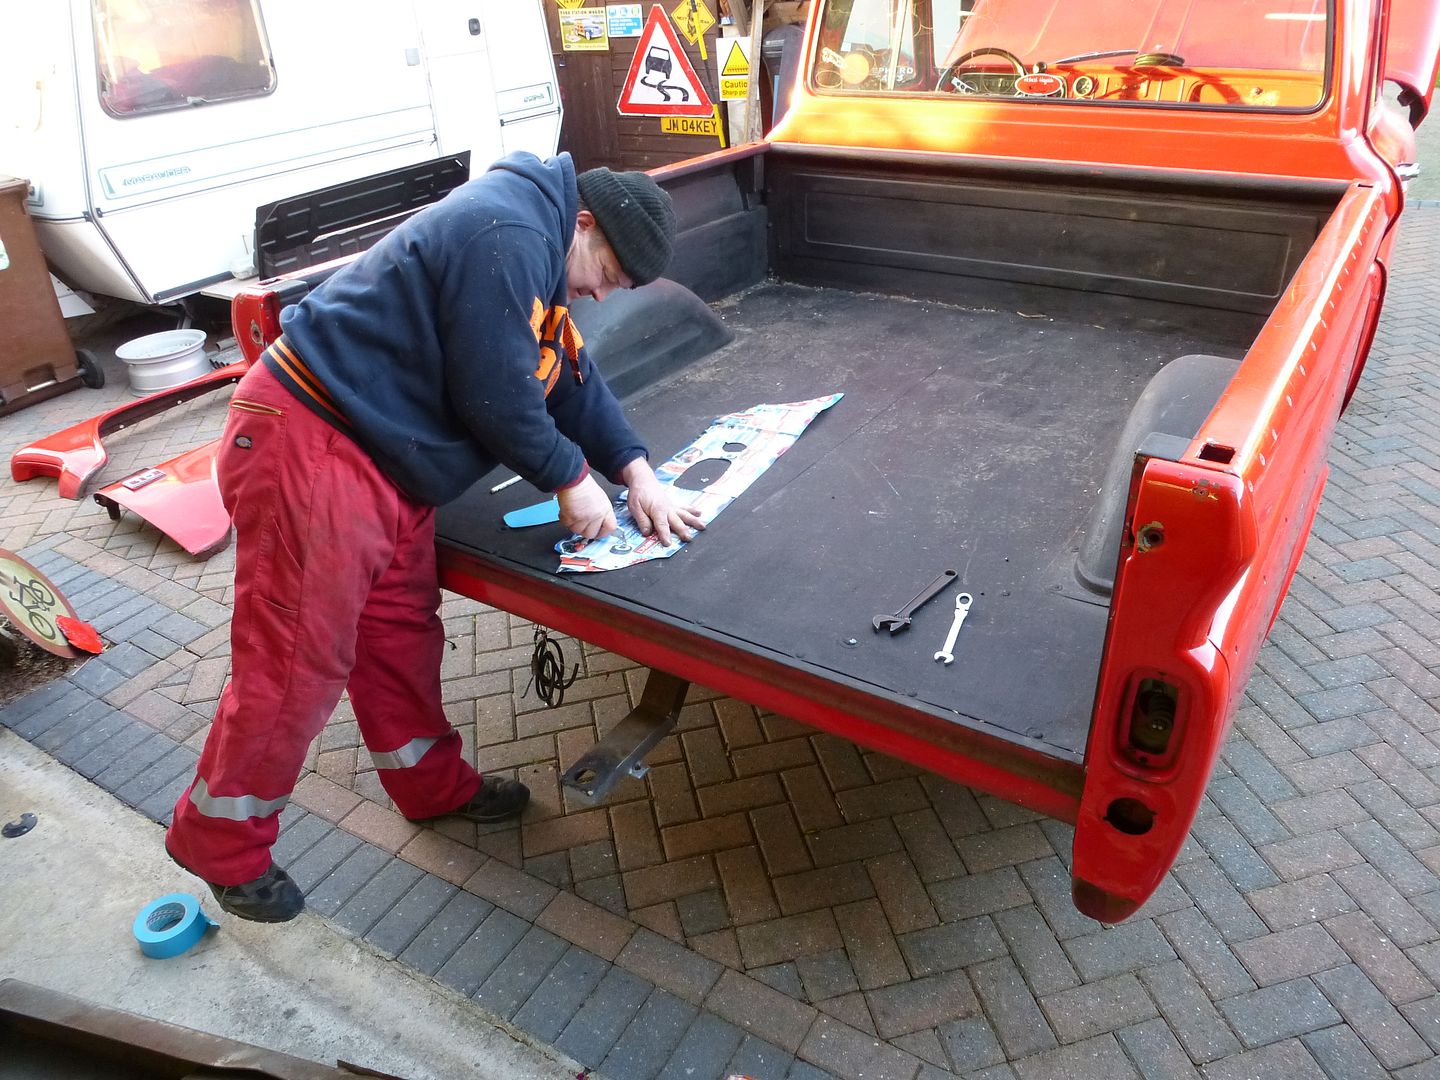 SURPRISE !!! 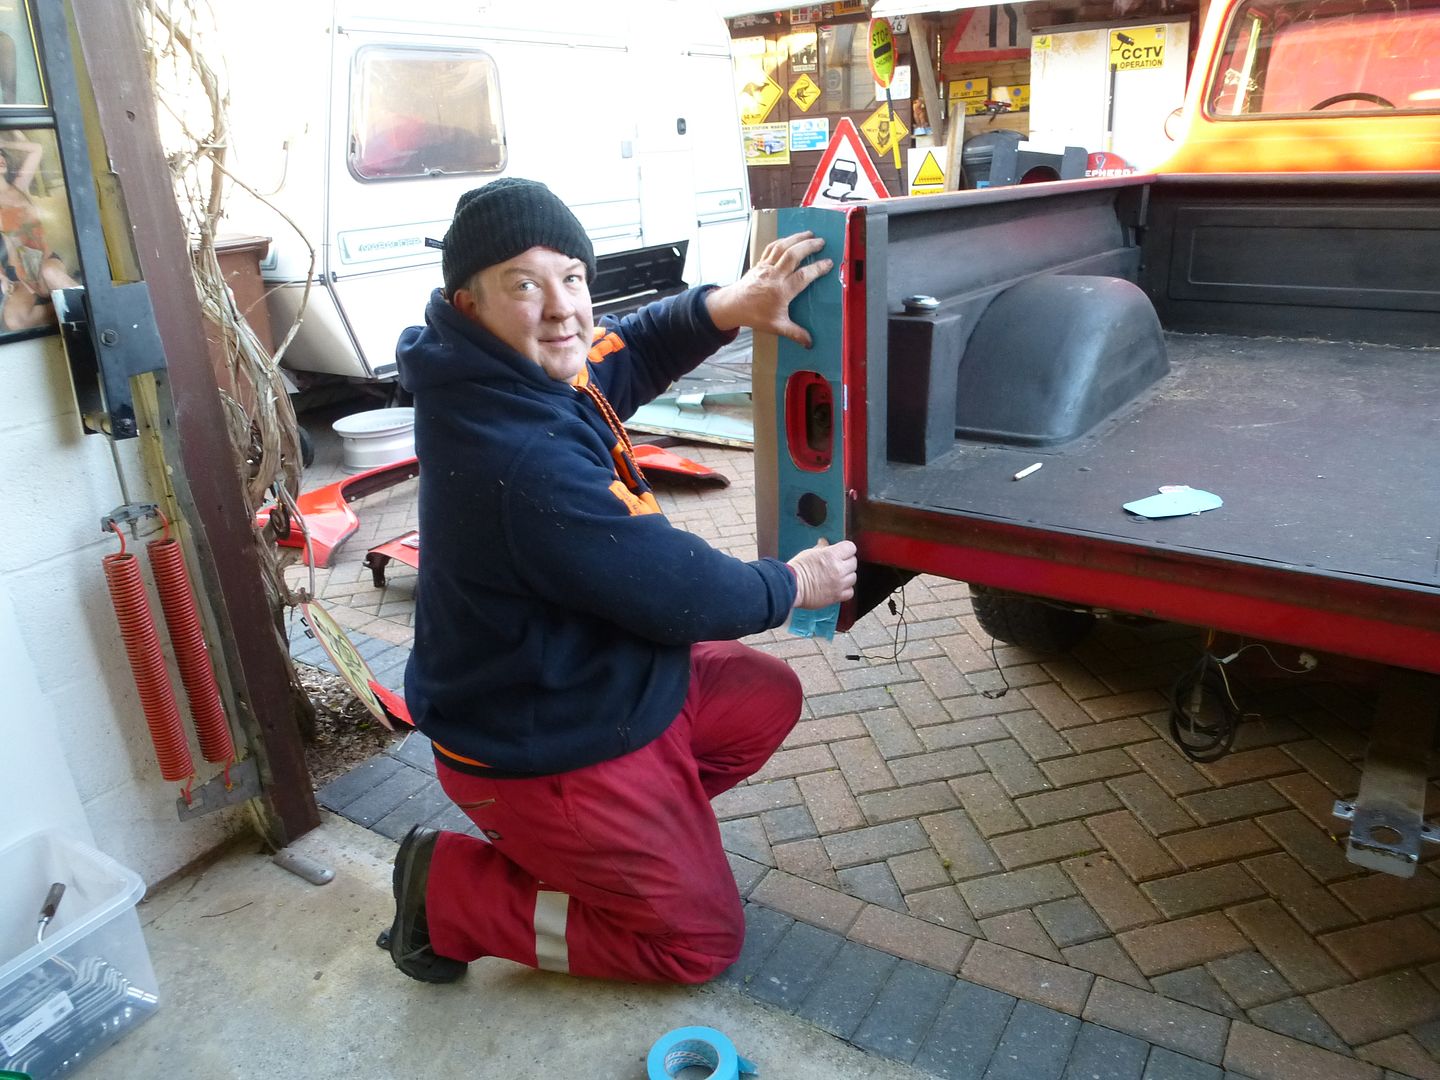 As you know the truck is being fitted with a 67-72 rear bumper as I have not been able to find out where the bumper fitted originated from. Any suggestions and help still appreciated if you know or recognize where it is from. I would still fit one. It was chromed all the way around. At this point I will be throwing a 9" angle grinder at it, and removing the fitting brackets, to use to make fitting brackets for the new bumper. 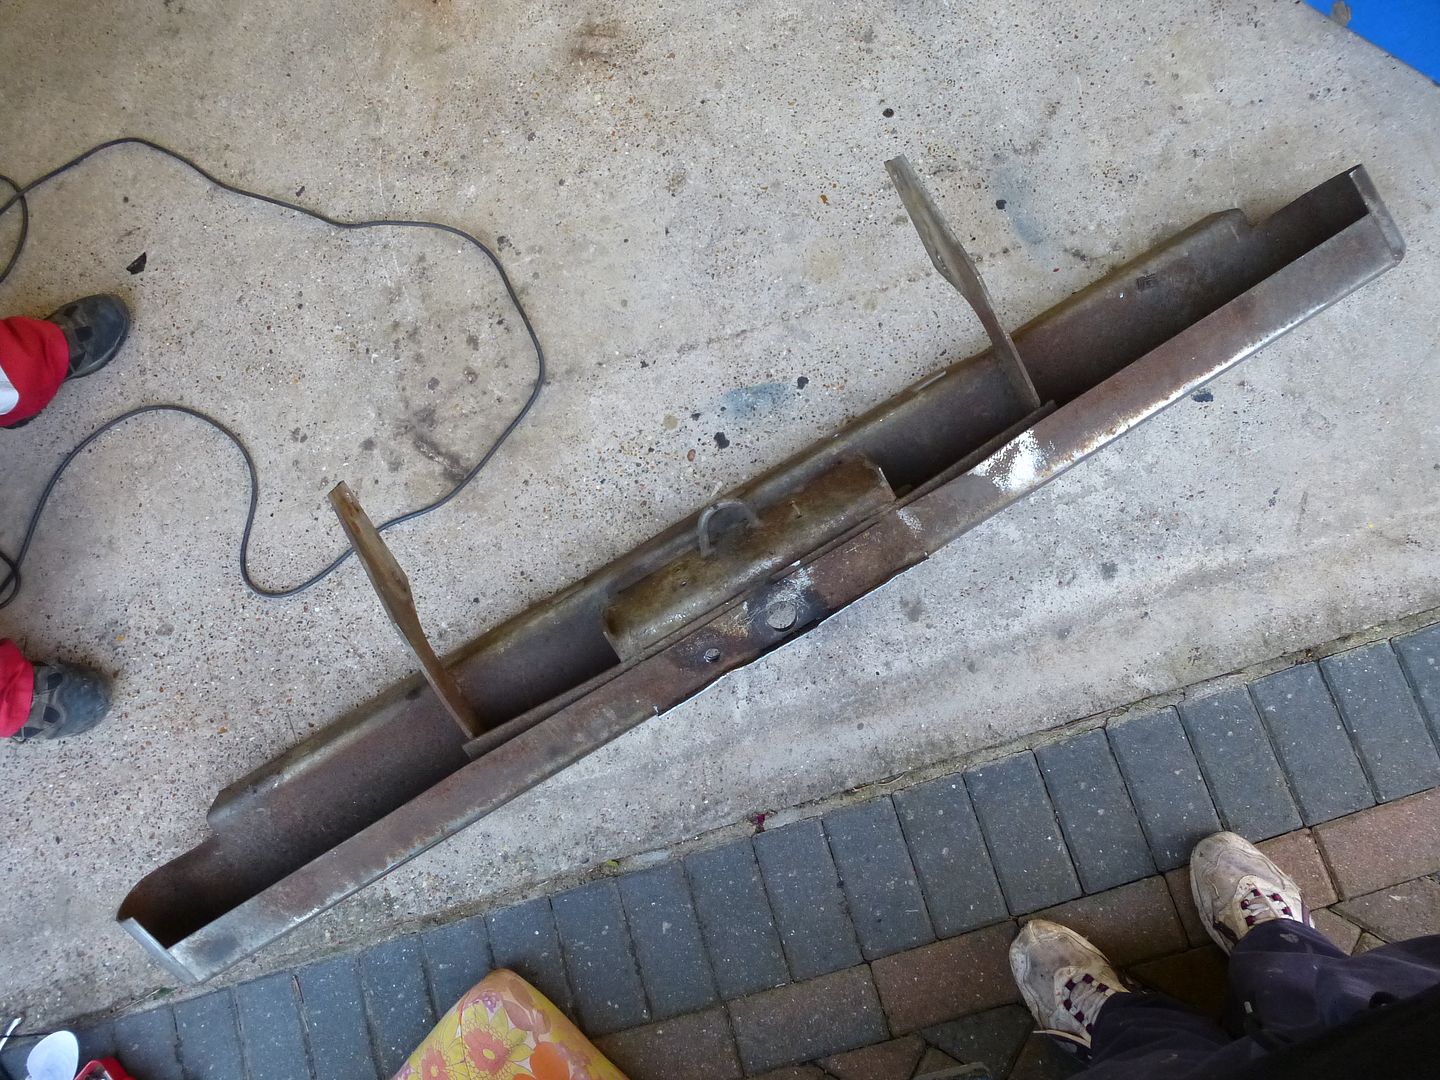 Different angle. 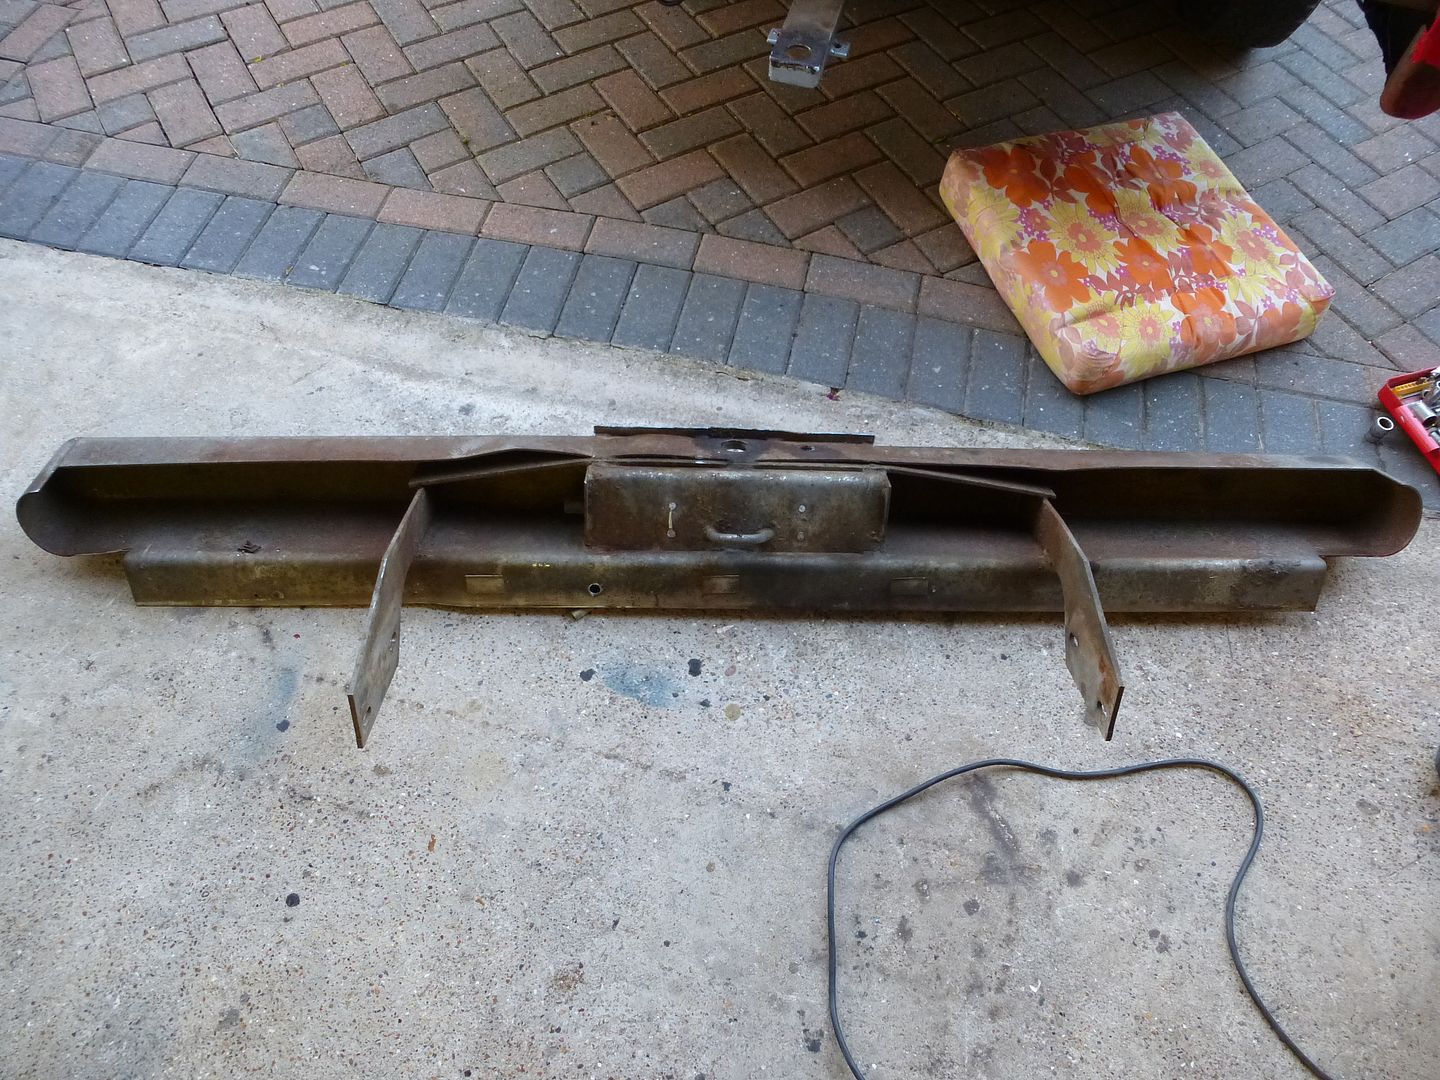 We also removed the load body bolts, and I undid the fuel filler and overflow pipe Jubilee clips in preparation to remove the whole thing one my trolley comes back from under Martins engine and gearbox. We called it a day quite early as we both had more stuff to do that had nothing to do with trucks. End of a great day. Now the work starts. 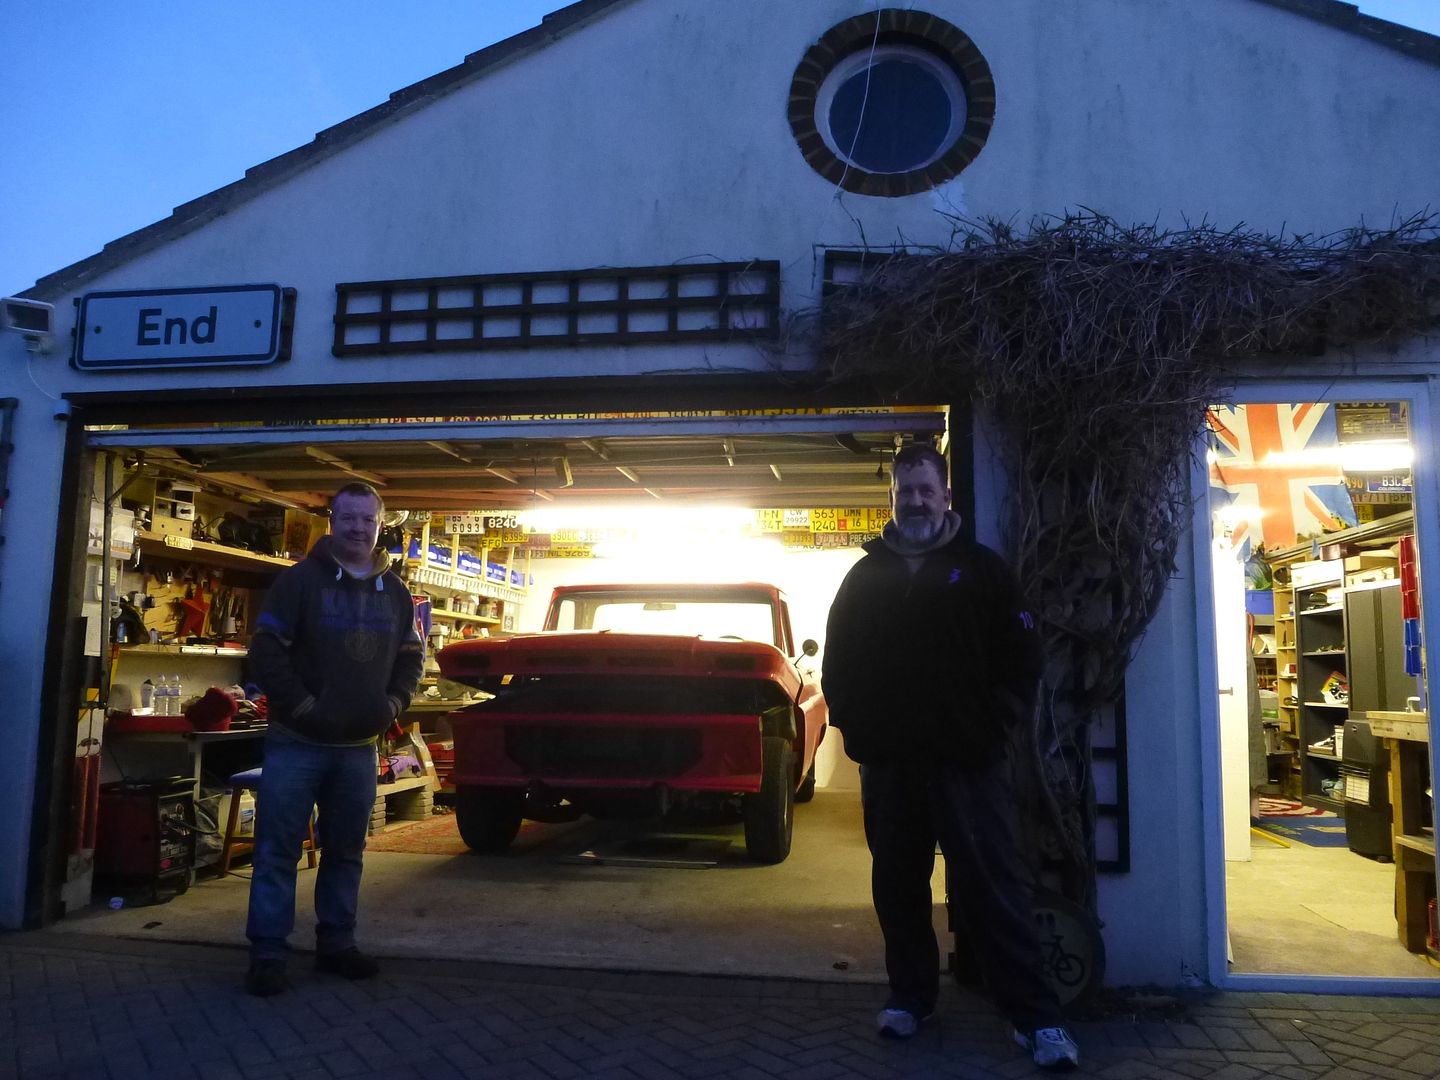 Thanks for checking in, as always, help and advice appreciated.
__________________
MY BUILD LINK: http://67-72chevytrucks.com/vboard/s...585901]Redneck Express - 1966 C10 Short Fleetside MY USA ROADTRIPS http://forum.retro-rides.org/thread/...2018-humdinger IF YOU CAN'T FIX IT WITH A HAMMER, YOU'VE GOT AN ELECTRICAL PROBLEM MATE. |
|
|

|
|
|
#729 |
|
Registered User
Join Date: Oct 2009
Location: canton ga
Posts: 12,724
|
Re: Grizz's Redneck Express 1966 Chevy Short Fleetside BILLYBOB
Its a shame you are way over across the pond as I have a nice rust free fender for one of those trucks ,the last part of one of those years I have left but it does make a nice wall hanging .
|
|
|

|
|
|
#730 |
|
Registered User
Join Date: Apr 2012
Location: Searcy, AR
Posts: 4,203
|
Re: Grizz's Redneck Express 1966 Chevy Short Fleetside BILLYBOB
Solid days work...
 Will be on those bumper bolts for you mate... 
__________________
DON Proverbs 27:17  US Air Force Retarded errr Retired My '65 Stepper Build:http://67-72chevytrucks.com/vboard/s...d.php?t=533920 My '60 Rusty Patina Build:http://67-72chevytrucks.com/vboard/s...66#post7402266 My '72 http://67-72chevytrucks.com/vboard/s...59#post7204359 SOLD |
|
|

|
|
|
#731 | |
|
Registered User
Join Date: Dec 2012
Location: Rochester, KENT
Posts: 10,577
|
Re: Grizz's Redneck Express 1966 Chevy Short Fleetside BILLYBOB
Quote:
You will be surprised, because we have so very little resources here for our truck and due to the cost of getting stuff imported, we normally just have to swallow the bitter pill of inflated costs. The cost of importing a Short Fleet to the UK from lets say Houston Texas will be around £2200.00 or $3375.00 on top of the purchase price. Thanks Don. I will be needing the two rubbers that fit in behind the fenders and a full set of the door panel screws to replace mine. Most were mangled when I got the truck. Will chat again.
__________________
MY BUILD LINK: http://67-72chevytrucks.com/vboard/s...585901]Redneck Express - 1966 C10 Short Fleetside MY USA ROADTRIPS http://forum.retro-rides.org/thread/...2018-humdinger IF YOU CAN'T FIX IT WITH A HAMMER, YOU'VE GOT AN ELECTRICAL PROBLEM MATE. |
|
|
|

|
|
|
#732 |
|
Registered User
Join Date: Dec 2012
Location: Rochester, KENT
Posts: 10,577
|
Re: Grizz's Redneck Express 1966 Chevy Short Fleetside BILLYBOB
Another one of those days where I was busy most of the day, but did very little.
Started off with collecting Hannah, Nicola's daughter, guess my step daughter at the station, then over to Maidstone to buy a 1997 Ford Fiesta 1250cc Zetec from friend Woodsie for her, at the price of a cheap bicycle, 42k miles and an elderly owner makes it a perfect cheap car to run for her job as radiographer with a lot of on call work. Then home on my own, had a coffee, then down to the garage to play for a bit, and take a few pics. Firstly, some weird but predictable rust on the inner wings. Usually they rust through to the supporting plate below, taking that away as well, but mine are both great, with only the top metal rotten. I need some advice on how others have approached this repair. I have about one and a half inner wings, inherited from Martin as he got a good pair in Florida last year. So I suspect I will need to cut some pieces out of the donors and make them fit (hopefully) Is it going to be possible to harvest sections for the tips that narrow down, from hogher up the fenders? 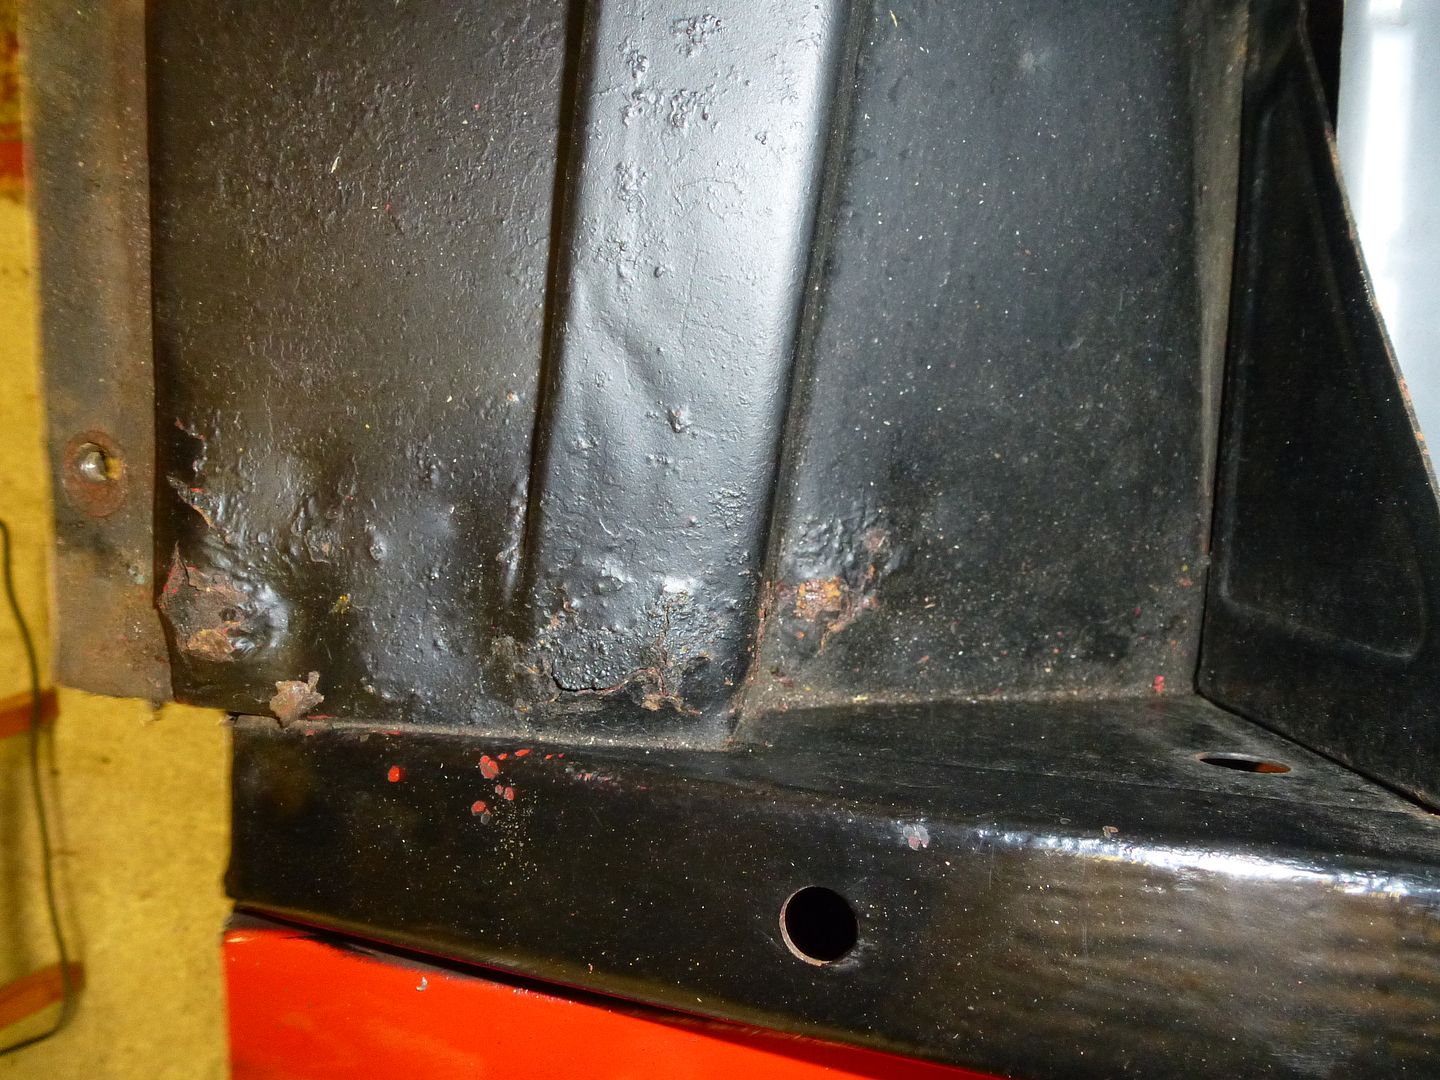 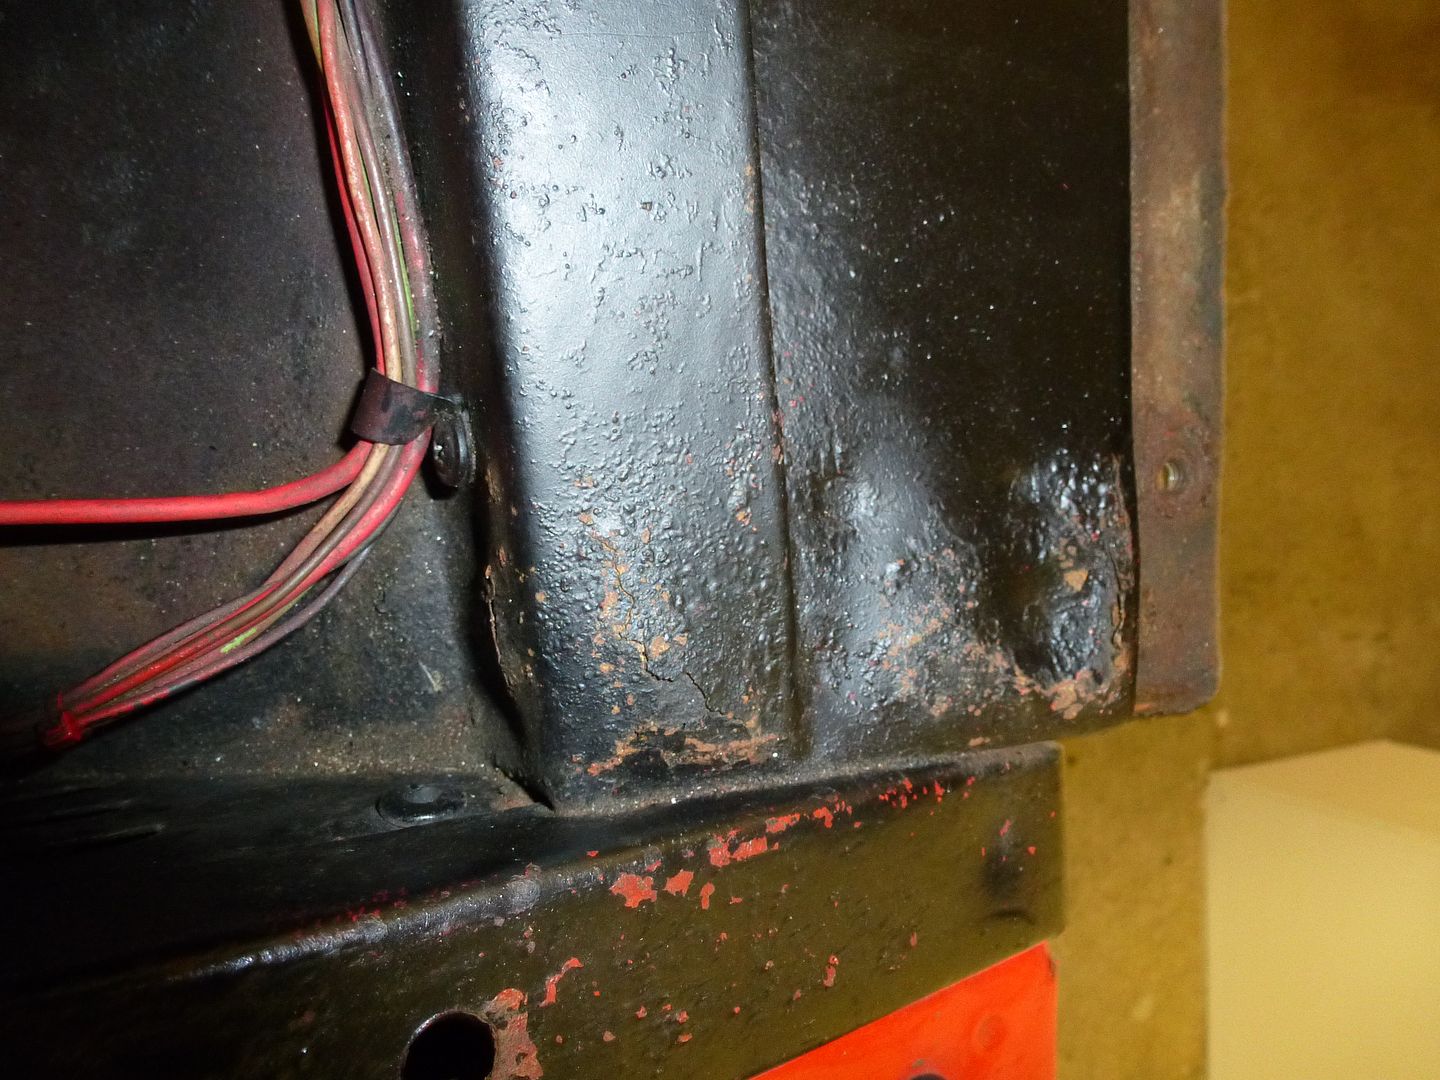 These are my donor pieces from which I need to harvest replacement pieces for the rusty sections. 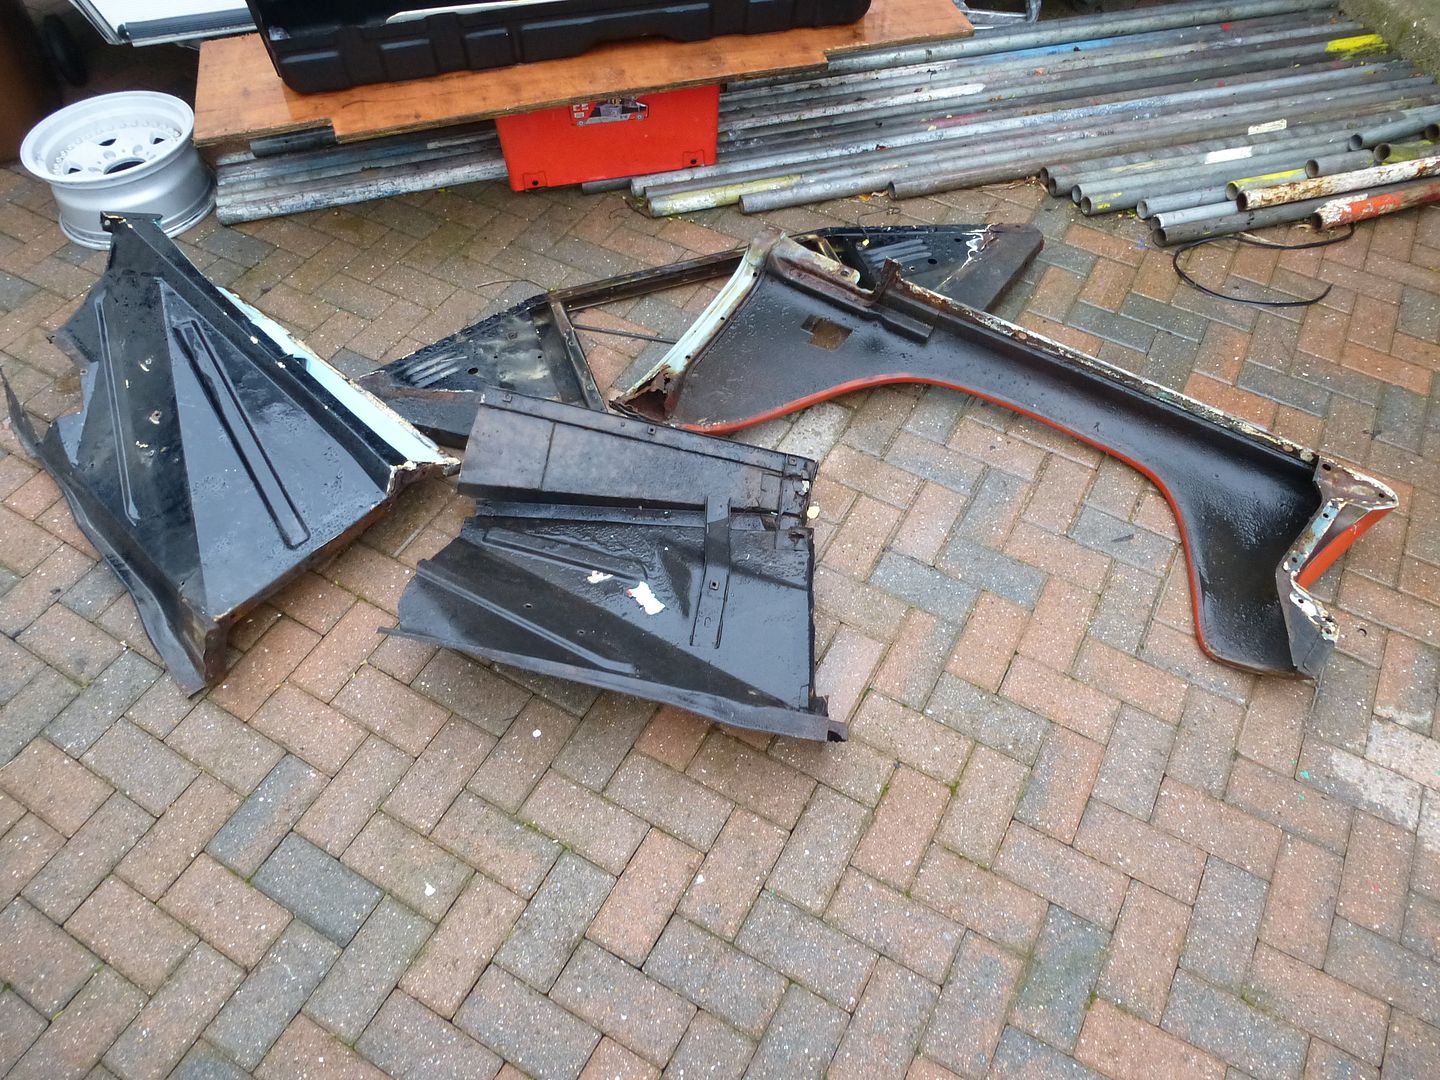 BACK TO OUR SCHEDULED TRANSMISSION. There are three sets of these holes down the bed sides, I would assume they point toward some part of its history as a real working truck in California ( I so wish I could find out more about it early history) I wonder if there was a metal carrying rack, like a plumber could have used back in the day. The repair technique leaves much to be desired, why stick some mesh over the holes and then fill from the outside ??? I will be grinding all this rubbish back and welding the holes up before resealing the inside in underseal and repainting the outside, as the underseal works well for a working truck. 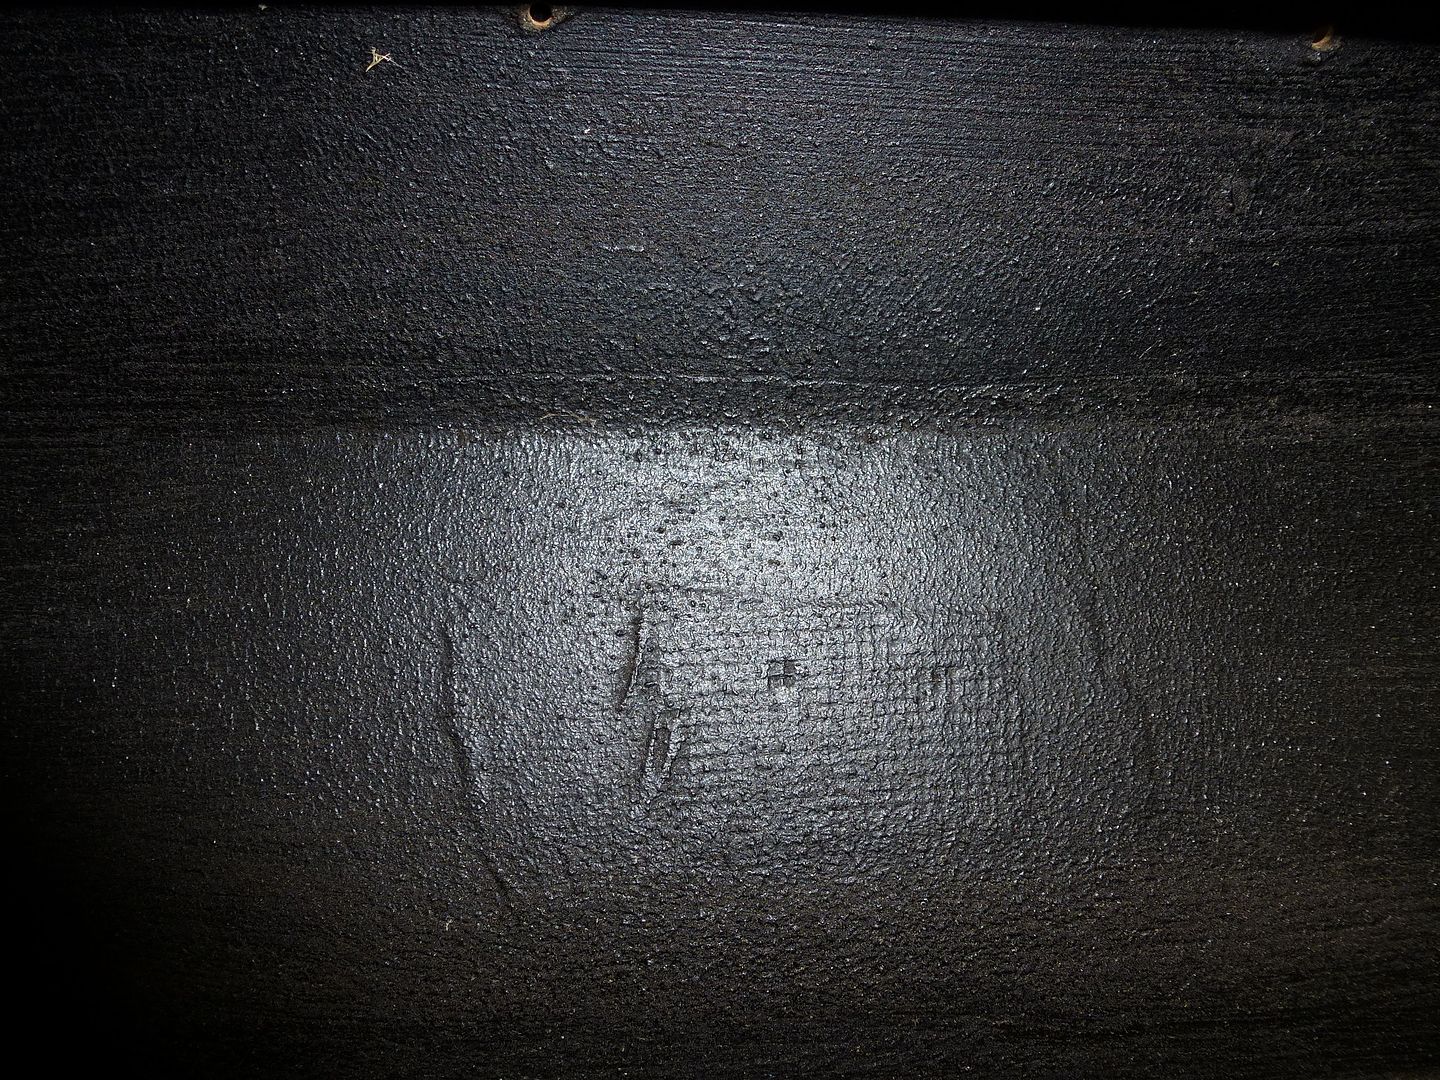 The next small job was to use my almost new Rattle Gun to undo the second fender bolt that was completely rusted away and seized to the flat nut that ha kept it all together. This Impact wrench is a huge help and for the money, despite using it three times so far, and absolute must have for this sort of job. The bolt was never going to release, so the torque tore it off after about three tries, using a huge spanner to hold the spinning rust lump. 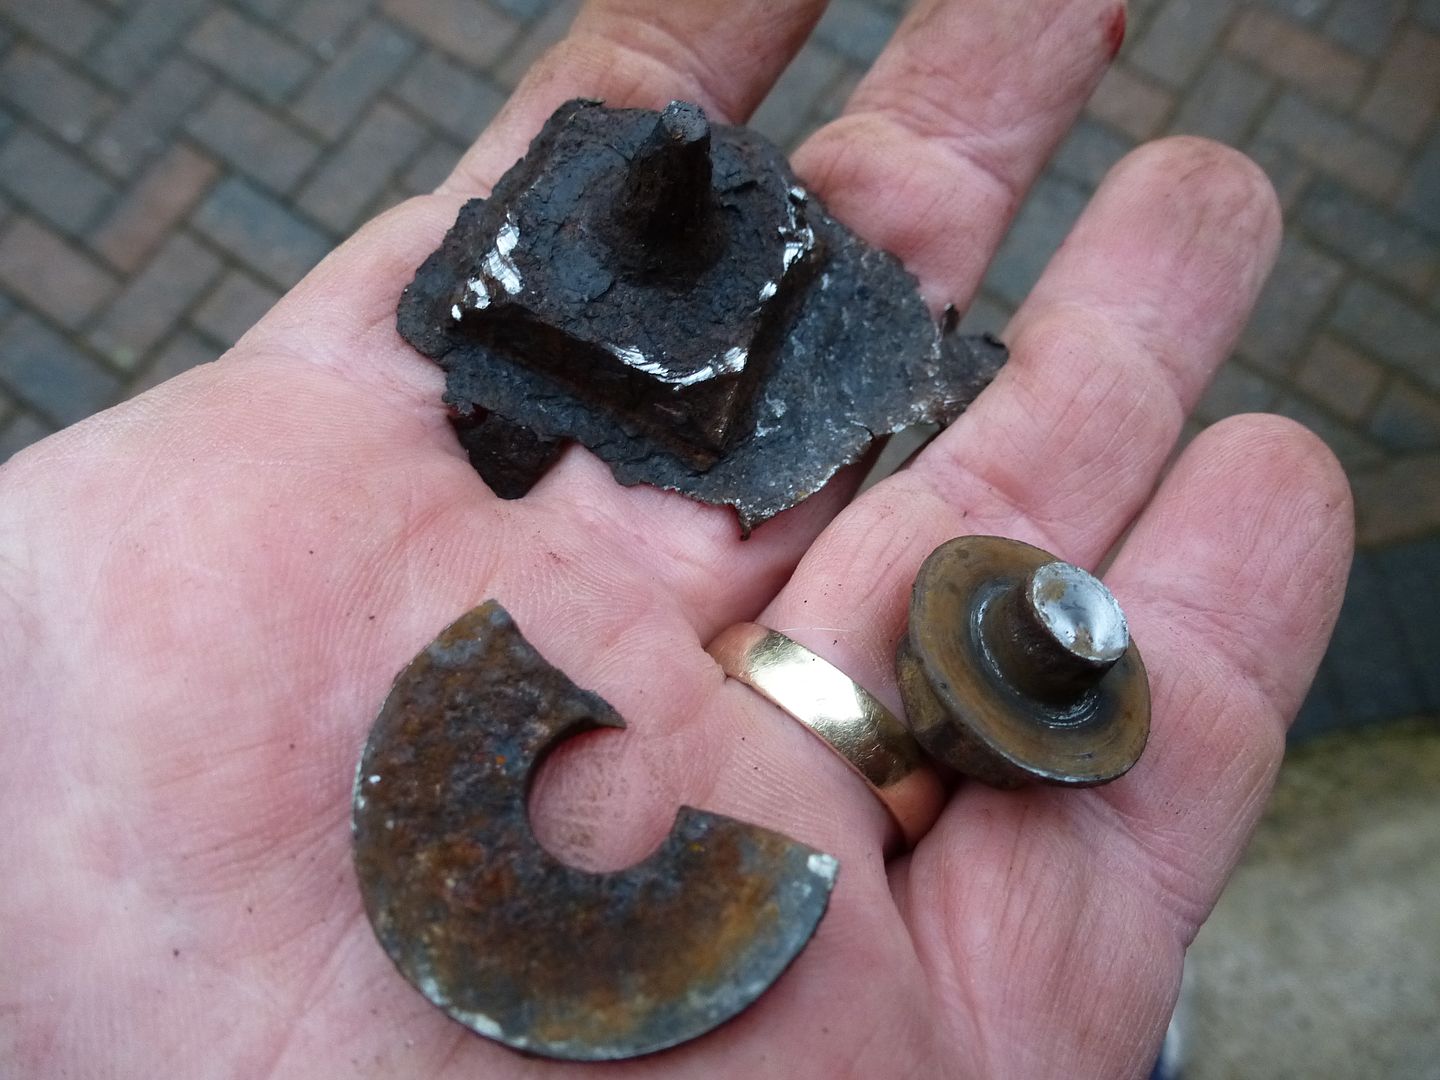 My next little time waster was to remove the mounting plates from my dearly departed rear bumper. Two angle grinders made it easy going. 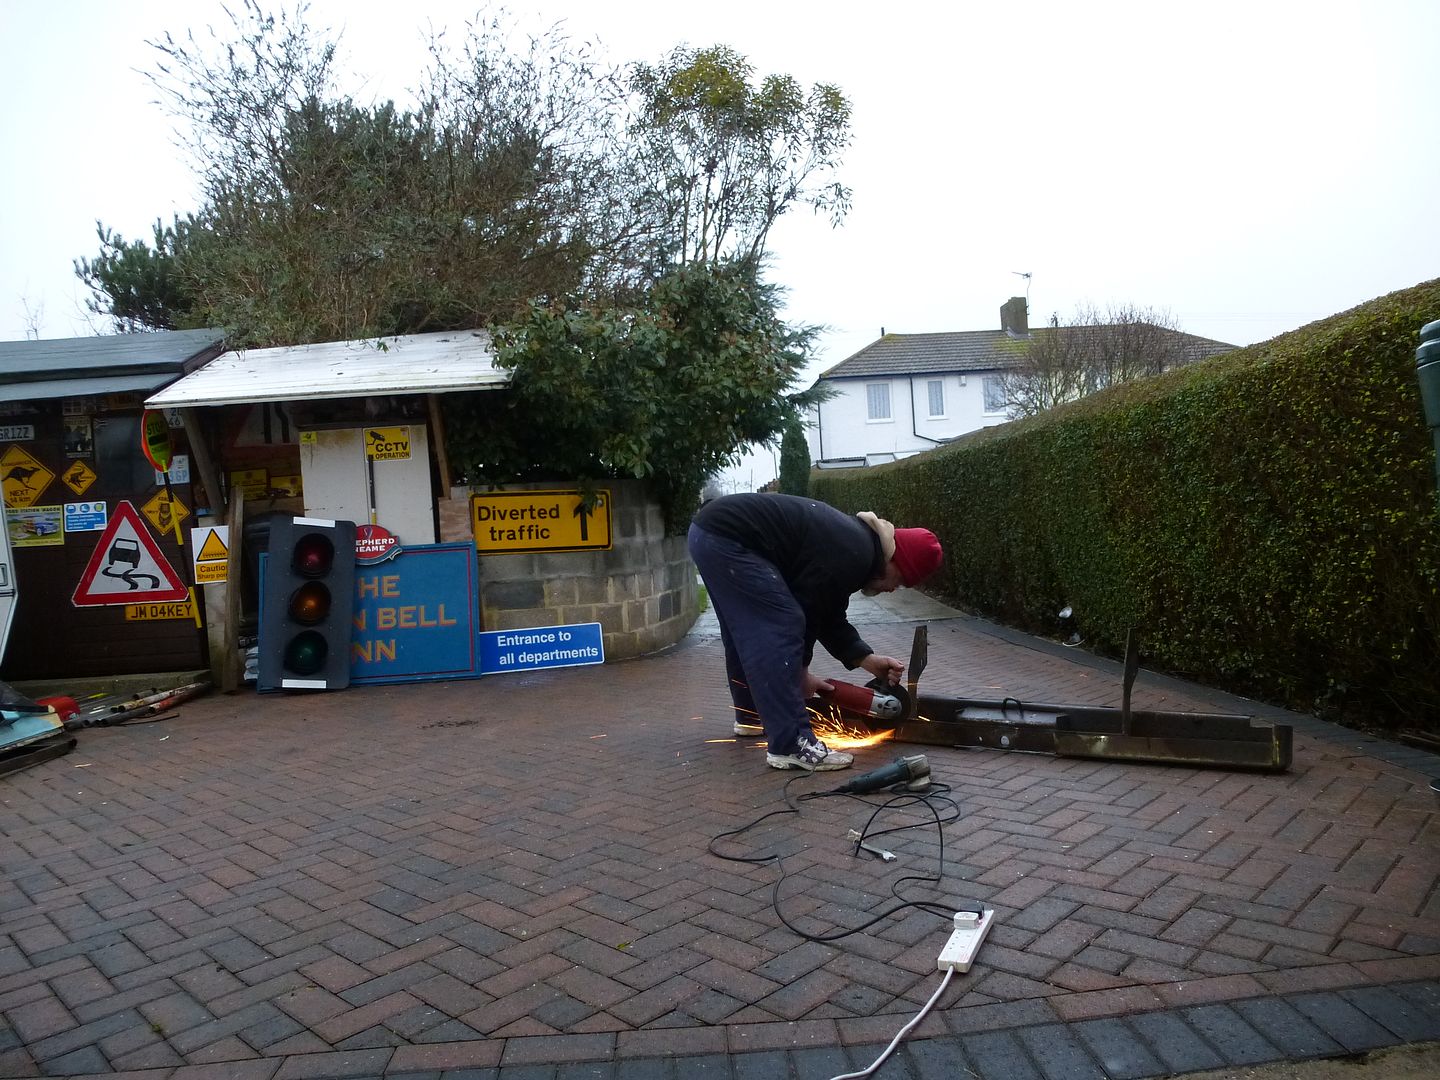 Unfortunately, the 9" grinder just did not cut it, but I then attacked from the other side which meant cutting around the welds. 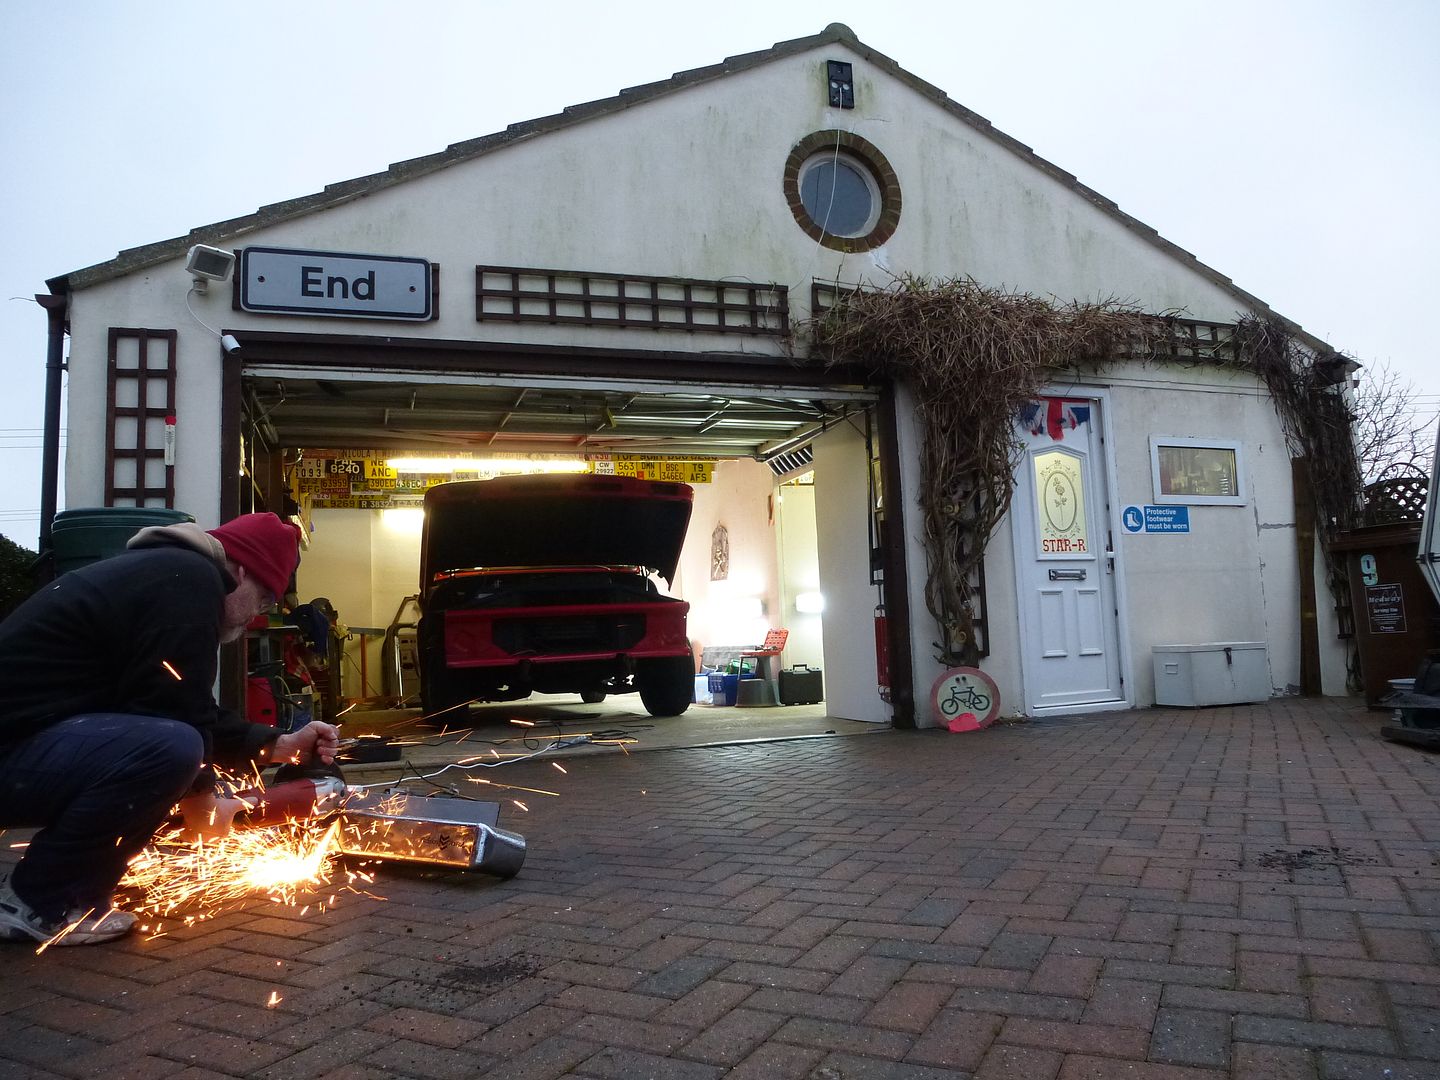 The plan is to use them and some more 1/4 inch angle iron or wide flat bar to make the mounting irons for the new bumper to fit to, and then to also create a new towbar mount with a removable tow ball. A few minutes with a flap wheel and most of the chrome on it came back with years worth of crud flying off. 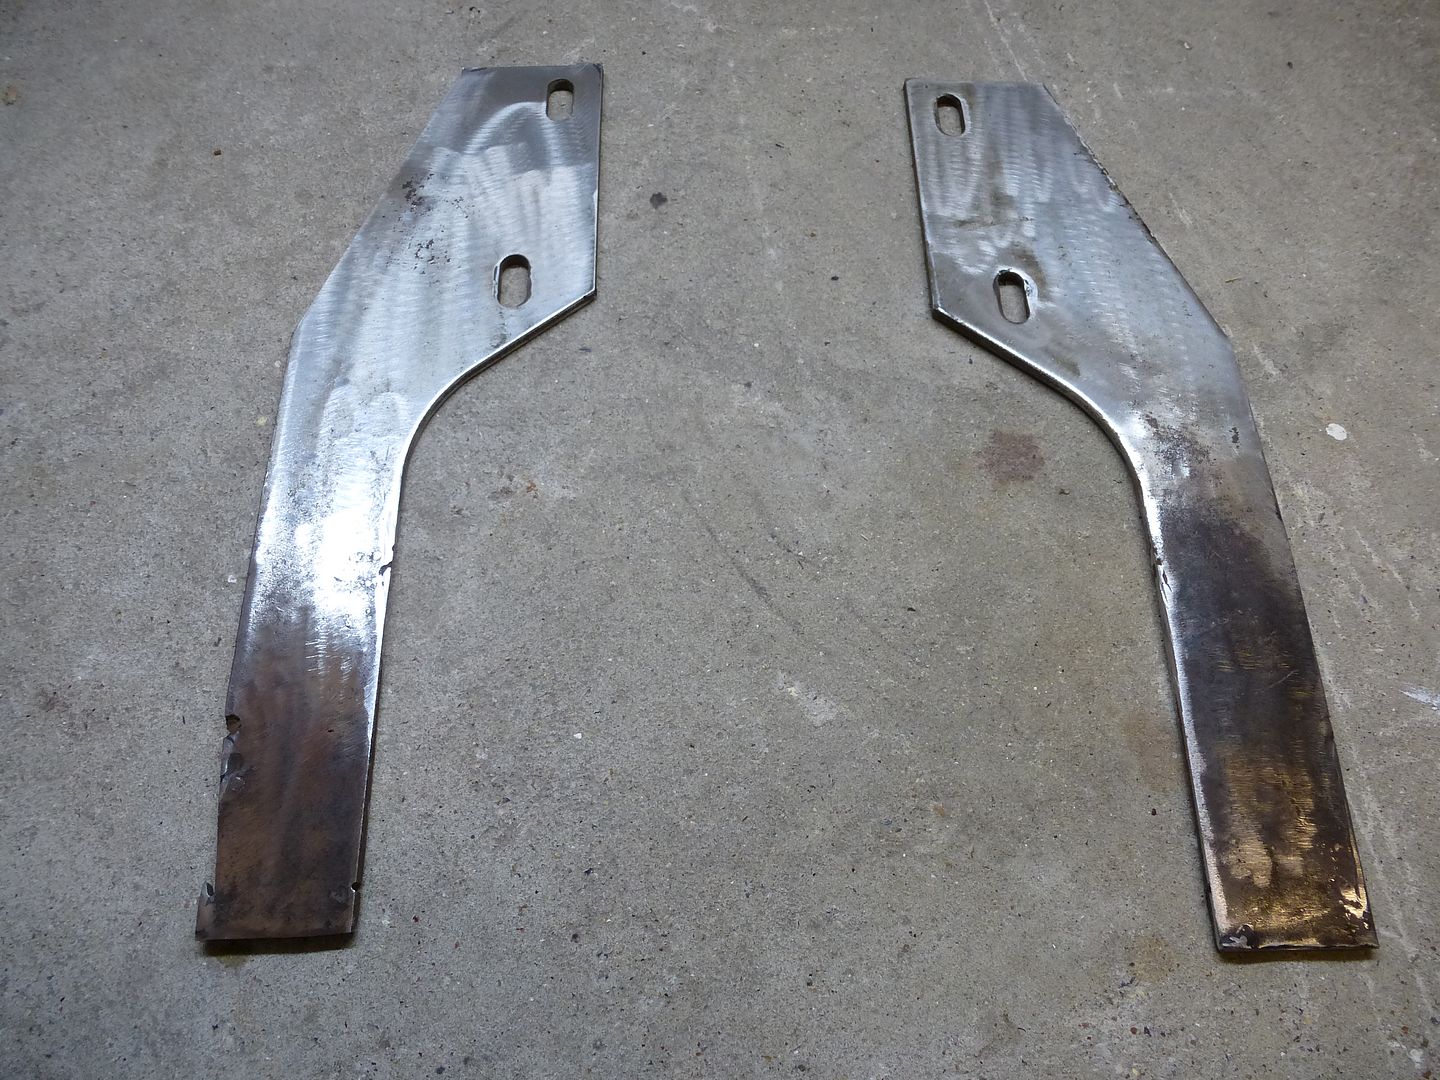 Right, time for dinner.
__________________
MY BUILD LINK: http://67-72chevytrucks.com/vboard/s...585901]Redneck Express - 1966 C10 Short Fleetside MY USA ROADTRIPS http://forum.retro-rides.org/thread/...2018-humdinger IF YOU CAN'T FIX IT WITH A HAMMER, YOU'VE GOT AN ELECTRICAL PROBLEM MATE. |
|
|

|
|
|
#733 |
|
Registered User
Join Date: Sep 2012
Location: Leander, TX
Posts: 969
|
Re: Grizz's Redneck Express 1966 Chevy Short Fleetside BILLYBOB
Rian
Those can inner fenders can be repaired easily just strip them down. Cutout the rotten clean in out spray with rust inhibitor and weld new pieces in. I did both of mine have pics I can send you
__________________
64' Build Thread http://67-72chevytrucks.com/vboard/s...d.php?t=586955 |
|
|

|
|
|
#734 | |
|
Registered User
Join Date: Dec 2012
Location: Rochester, KENT
Posts: 10,577
|
Re: Grizz's Redneck Express 1966 Chevy Short Fleetside BILLYBOB
Quote:
Did you post it in your build thread?
__________________
MY BUILD LINK: http://67-72chevytrucks.com/vboard/s...585901]Redneck Express - 1966 C10 Short Fleetside MY USA ROADTRIPS http://forum.retro-rides.org/thread/...2018-humdinger IF YOU CAN'T FIX IT WITH A HAMMER, YOU'VE GOT AN ELECTRICAL PROBLEM MATE. |
|
|
|

|
|
|
#735 |
|
Registered User
Join Date: Apr 2012
Location: Searcy, AR
Posts: 4,203
|
Re: Grizz's Redneck Express 1966 Chevy Short Fleetside BILLYBOB
Did mine too...
 with pieces donated by DaBearsda1  
__________________
DON Proverbs 27:17  US Air Force Retarded errr Retired My '65 Stepper Build:http://67-72chevytrucks.com/vboard/s...d.php?t=533920 My '60 Rusty Patina Build:http://67-72chevytrucks.com/vboard/s...66#post7402266 My '72 http://67-72chevytrucks.com/vboard/s...59#post7204359 SOLD |
|
|

|
|
|
#736 |
|
Senior Member
 Join Date: Oct 2009
Location: Fayetteville, Arkansas
Posts: 1,923
|
Re: Grizz's Redneck Express 1966 Chevy Short Fleetside BILLYBOB
yep, me too. a replacement piece is available to weld in there but whos got time to wait on the slow boat. cut what you need out of the donor and weld it up.
that fender is another story... hope you got a replacement brace cause that one is toast. you got a bunch done today... even with the distractions. maybe i need some of your coffee.  today for me was slow at best... lousy weather. today for me was slow at best... lousy weather.
|
|
|

|
|
|
#737 |
|
Registered User
Join Date: Sep 2012
Location: Leander, TX
Posts: 969
|
Re: Grizz's Redneck Express 1966 Chevy Short Fleetside BILLYBOB
Rian,
Here are some pics of my repair. If I was great with metal work I could have pulled this off with no bodywork. But I'm not. Rot cutout. Rust inhibitor sprayed on metal beneath. The underside of mine was still solid. And this rusted right where the brace underneath traps all the dirt and crap. I am going to seal this up with seam sealer when I get ready to paint it. 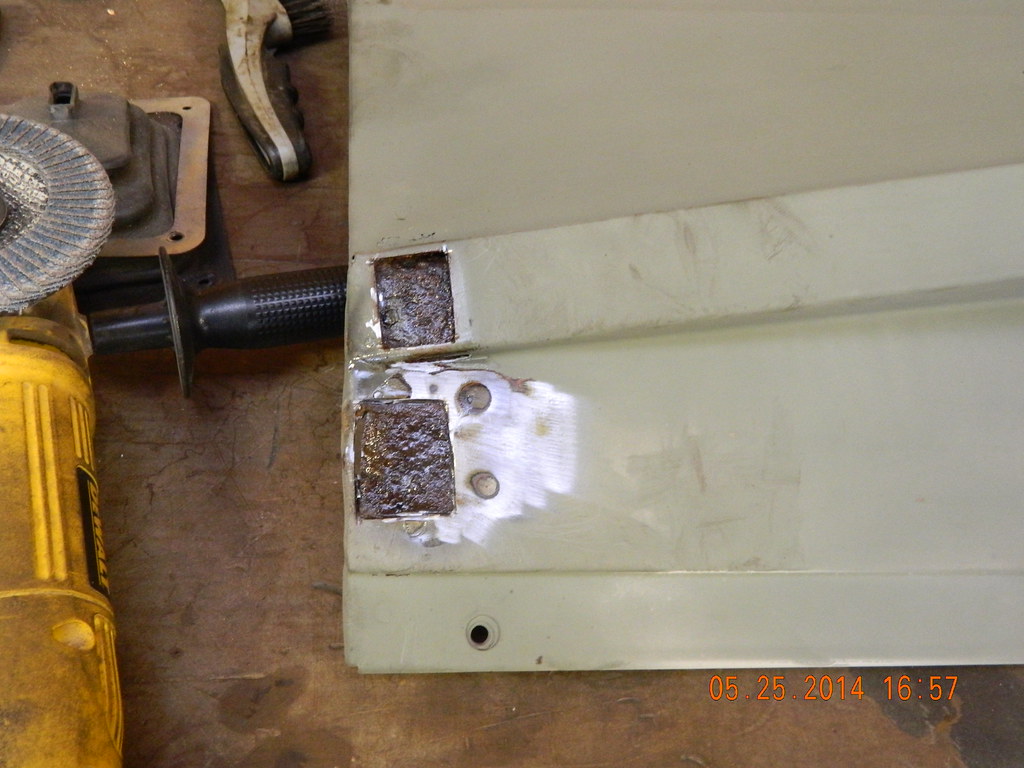 DSCN8193 by bjohnson388, on Flickr DSCN8193 by bjohnson388, on Flickr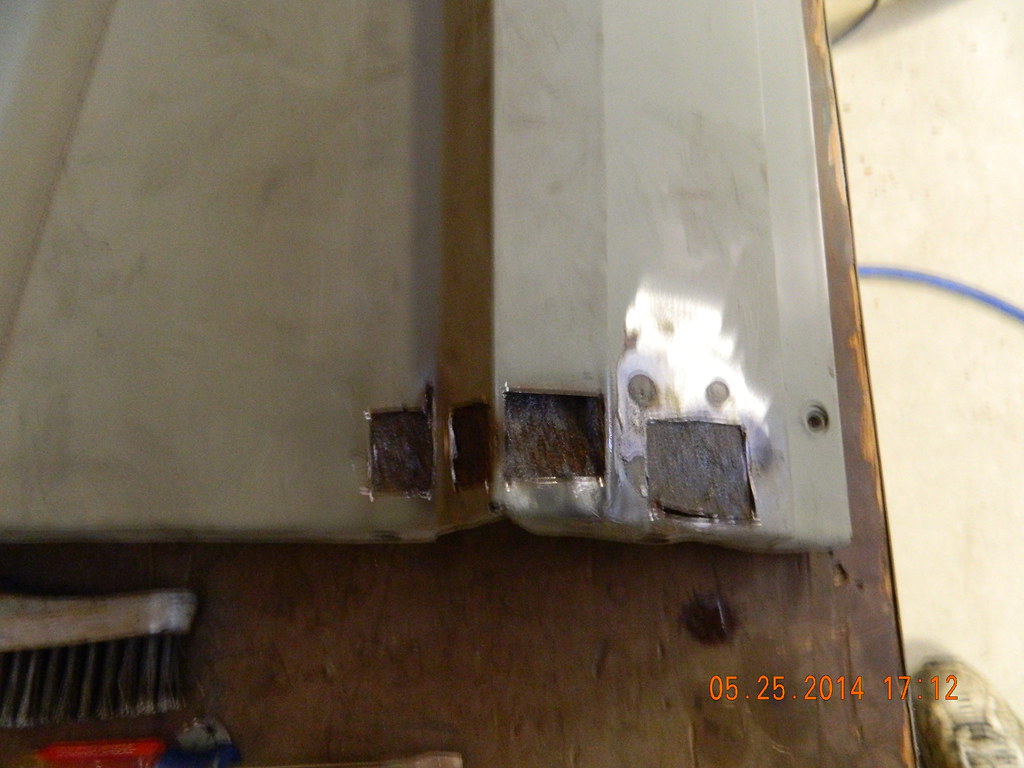 DSCN8194 by bjohnson388, on Flickr DSCN8194 by bjohnson388, on FlickrNew pieces welded in  DSCN8197 by bjohnson388, on Flickr DSCN8197 by bjohnson388, on FlickrCleaned up. Not the best.  DSCN8201 by bjohnson388, on Flickr DSCN8201 by bjohnson388, on FlickrA little bodywork to fix that mess. I used some bondo I had on hand. I may end up grinding it all of and using some of the new Evercoat. I got. Hope these pictures help you. 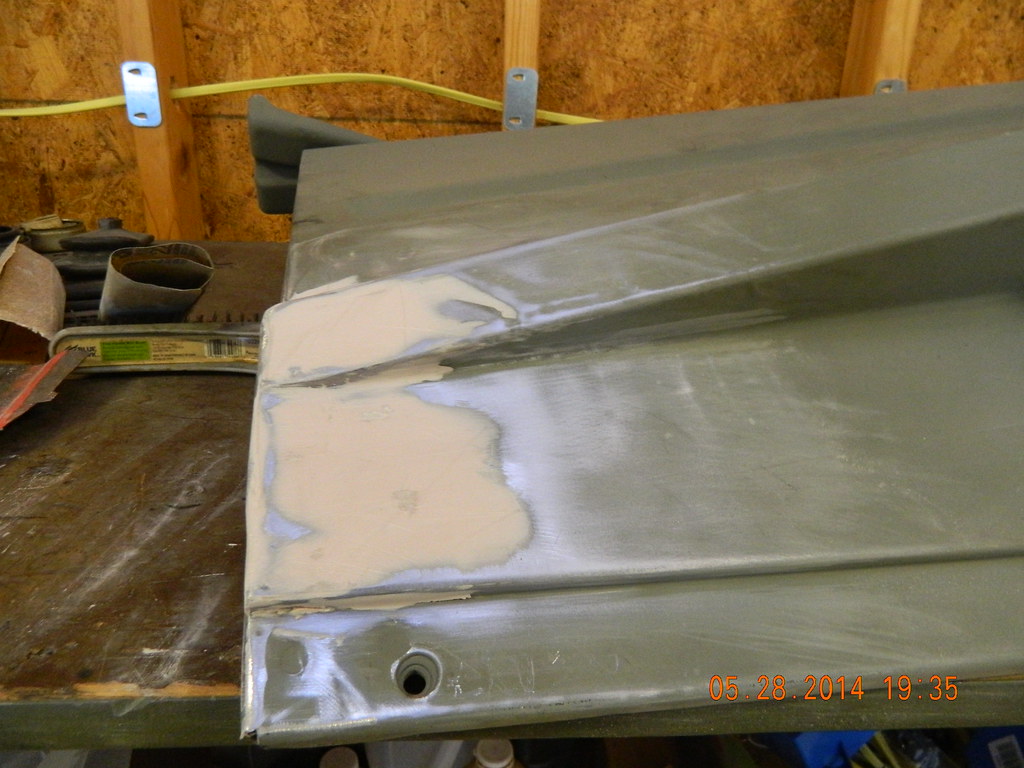 DSCN8209 by bjohnson388, on Flickr DSCN8209 by bjohnson388, on Flickr
__________________
64' Build Thread http://67-72chevytrucks.com/vboard/s...d.php?t=586955 |
|
|

|
|
|
#738 | ||
|
Registered User
Join Date: Dec 2012
Location: Rochester, KENT
Posts: 10,577
|
Re: Grizz's Redneck Express 1966 Chevy Short Fleetside BILLYBOB
No donors here, except for Martin who is replacing a lot of his truck.
So I will use bits to recreate the rusted out sections. Quote:
Looking forward to "getting it right" I think as long as I let the truck dictate the pace, it should stay fun. Today was another such a day. Quote:
Looks like I am going to go the same route as you. The bottom brackets are good.
__________________
MY BUILD LINK: http://67-72chevytrucks.com/vboard/s...585901]Redneck Express - 1966 C10 Short Fleetside MY USA ROADTRIPS http://forum.retro-rides.org/thread/...2018-humdinger IF YOU CAN'T FIX IT WITH A HAMMER, YOU'VE GOT AN ELECTRICAL PROBLEM MATE. |
||
|
|

|
|
|
#739 |
|
Registered User
Join Date: Dec 2012
Location: Rochester, KENT
Posts: 10,577
|
Re: Grizz's Redneck Express 1966 Chevy Short Fleetside BILLYBOB
Was awake at stupid-o-clock this morning, texted Martin to see what he was up to today, as he was a bit, (Very) under the weather yesterday when we had planned to retrieve the trolley I had bought in June from the scrap yard so that I can get it under the loadbed.
It was under Martin's engine and gearbox, right at the rear of his garage..... 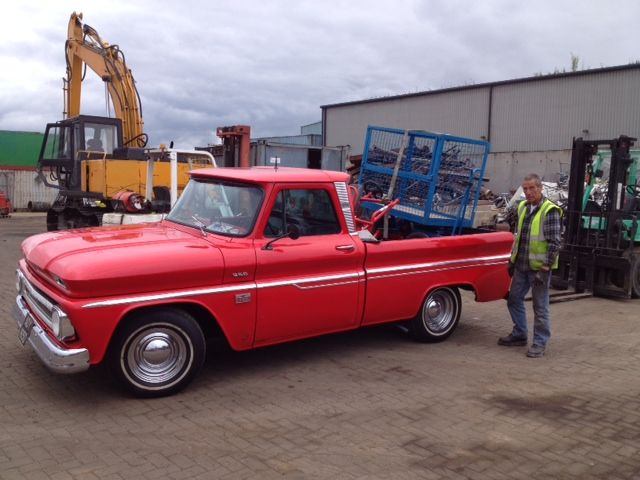 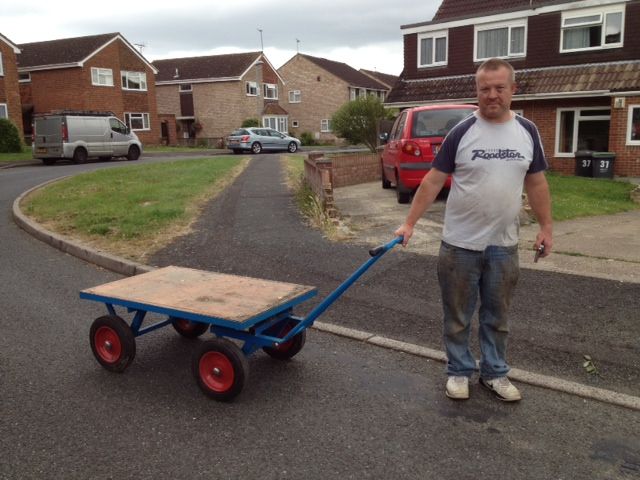 I was home and cleaned up by 11.30 after which Nicola and I went to town. So today, no progress, but I am ready to remove the load bed. Back to work tomorrow after two weeks, less progress than I had planned, but a lot more than it would have been had I been drinking Pinã Colada's on a sunny beach somewhere.
__________________
MY BUILD LINK: http://67-72chevytrucks.com/vboard/s...585901]Redneck Express - 1966 C10 Short Fleetside MY USA ROADTRIPS http://forum.retro-rides.org/thread/...2018-humdinger IF YOU CAN'T FIX IT WITH A HAMMER, YOU'VE GOT AN ELECTRICAL PROBLEM MATE. |
|
|

|
|
|
#740 |
|
Senior Enthusiast
Join Date: Feb 2007
Location: Spokane Valley, WA
Posts: 8,356
|
Re: Grizz's Redneck Express 1966 Chevy Short Fleetside BILLYBOB
Man that door looks ugly inside, it may look like the front fender when stripped of the filler. The screen inside looks like a 1960's repair when the truck would have been new, but was probably done much later. Some Bondo brand products even provided a small piece of plastic screen. It looked just like metal window bug screen, and was intended to bridge small holes and give the filler something to stick to.
Many kids in high school kids (including me) used it to eliminate mounting holes when “dechroming” the hood and trunk emblems. Here’s my 54 Chevy in 1966 after removing the emblems: 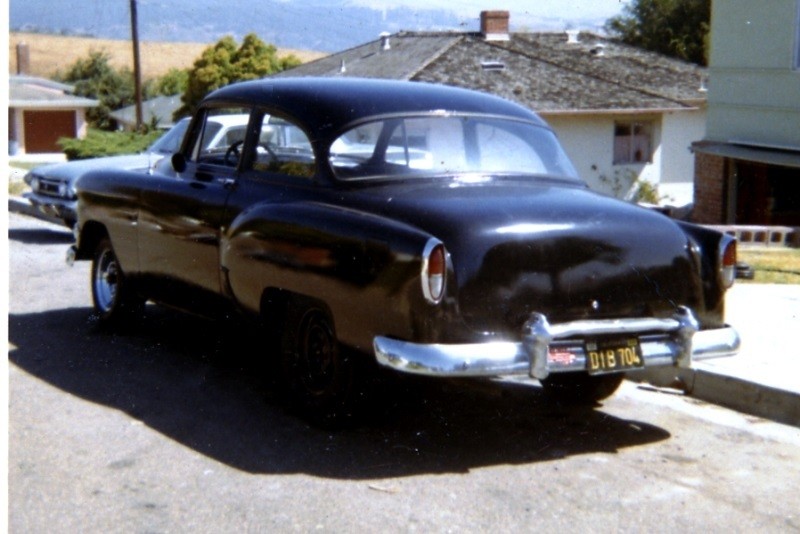 And here it is two years later in the hands of the new owner, still wearing the Bondo patched hood and trunk: 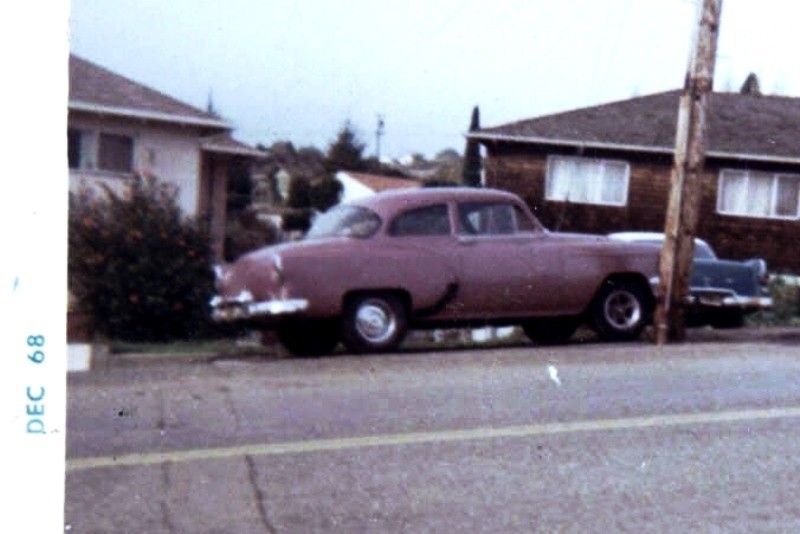 It held up well if applied to clean metal. The downside was any clown thinking it would be funny, could push the filler/patch into the trunk by applying stiff thumb pressure over the repair! I’ve just never seen so much of it used to cover a large defect. It’s really a benefit you know how to weld and do correct repairs. As for the small 2 hole patch in the door, that might have been a lower attaching bracket for a different set of “West Coast” mirrors at some point in history (depending on where the holes were on the door). Sure nice to see you moving along at a nice pace. I’ll do some research on that “original” rear bumper. I’m thinking it might be an aftermarket accessory bumper for a much newer truck. I’ve seen them around many times, just never paid much attention to what they were on. Also my care package arrived yesterday. Thanks so much! I got to keep the magazine and decal, but Ruthann immediately claimed the wall hanging, already having a spot for it! The magazine is fantastic. It’s much like what was commonly available here in the States back in the 1970’s. Not much gets published here anymore that isn’t a high dollar investment at one of the publication friendly shops. Keep up the good work!
__________________
My Build Thread: http://67-72chevytrucks.com/vboard/s...d.php?t=444502 |
|
|

|
|
|
#741 | |
|
Registered User
Join Date: Dec 2012
Location: Rochester, KENT
Posts: 10,577
|
Re: Grizz's Redneck Express 1966 Chevy Short Fleetside BILLYBOB
Quote:
Thanks a lot, I am still fascinated by the rear bumper my truck came with. Glad you liked the magazine, and that Ruthann got in there fast. It is often a problem for me, what to add in for the girls, as we generally do not know the other halves. Thanks for the PM as well.
__________________
MY BUILD LINK: http://67-72chevytrucks.com/vboard/s...585901]Redneck Express - 1966 C10 Short Fleetside MY USA ROADTRIPS http://forum.retro-rides.org/thread/...2018-humdinger IF YOU CAN'T FIX IT WITH A HAMMER, YOU'VE GOT AN ELECTRICAL PROBLEM MATE. |
|
|
|

|
|
|
#742 |
|
Registered User
Join Date: Dec 2012
Location: Rochester, KENT
Posts: 10,577
|
Re: Grizz's Redneck Express 1966 Chevy Short Fleetside BILLYBOB
Came home from work tonight and decided it was a good time to strip out some of the interior.
Interesting. 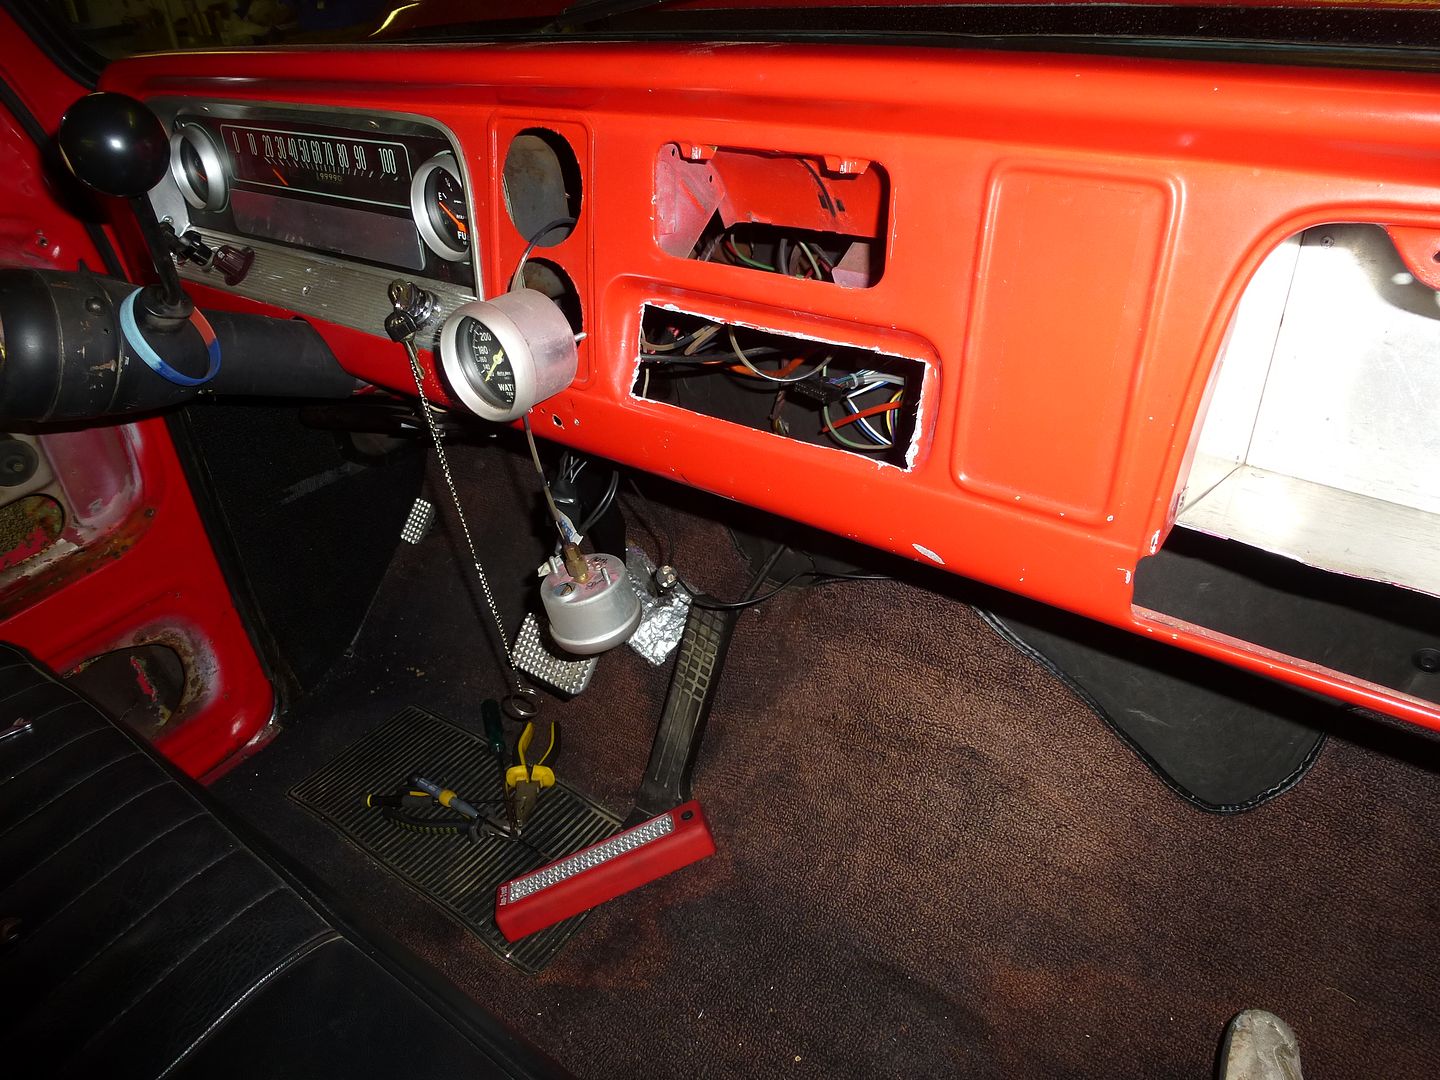 Some of the replacement panels Martin had sourced for me last year. looking at the hole where the radio had been fitted, presumably chewed in by an angry badger. I am still in two minds as to whether I should weld it up, and fit the modern radio out of sight, I had also thought of fitting an 8 Track player at one point. 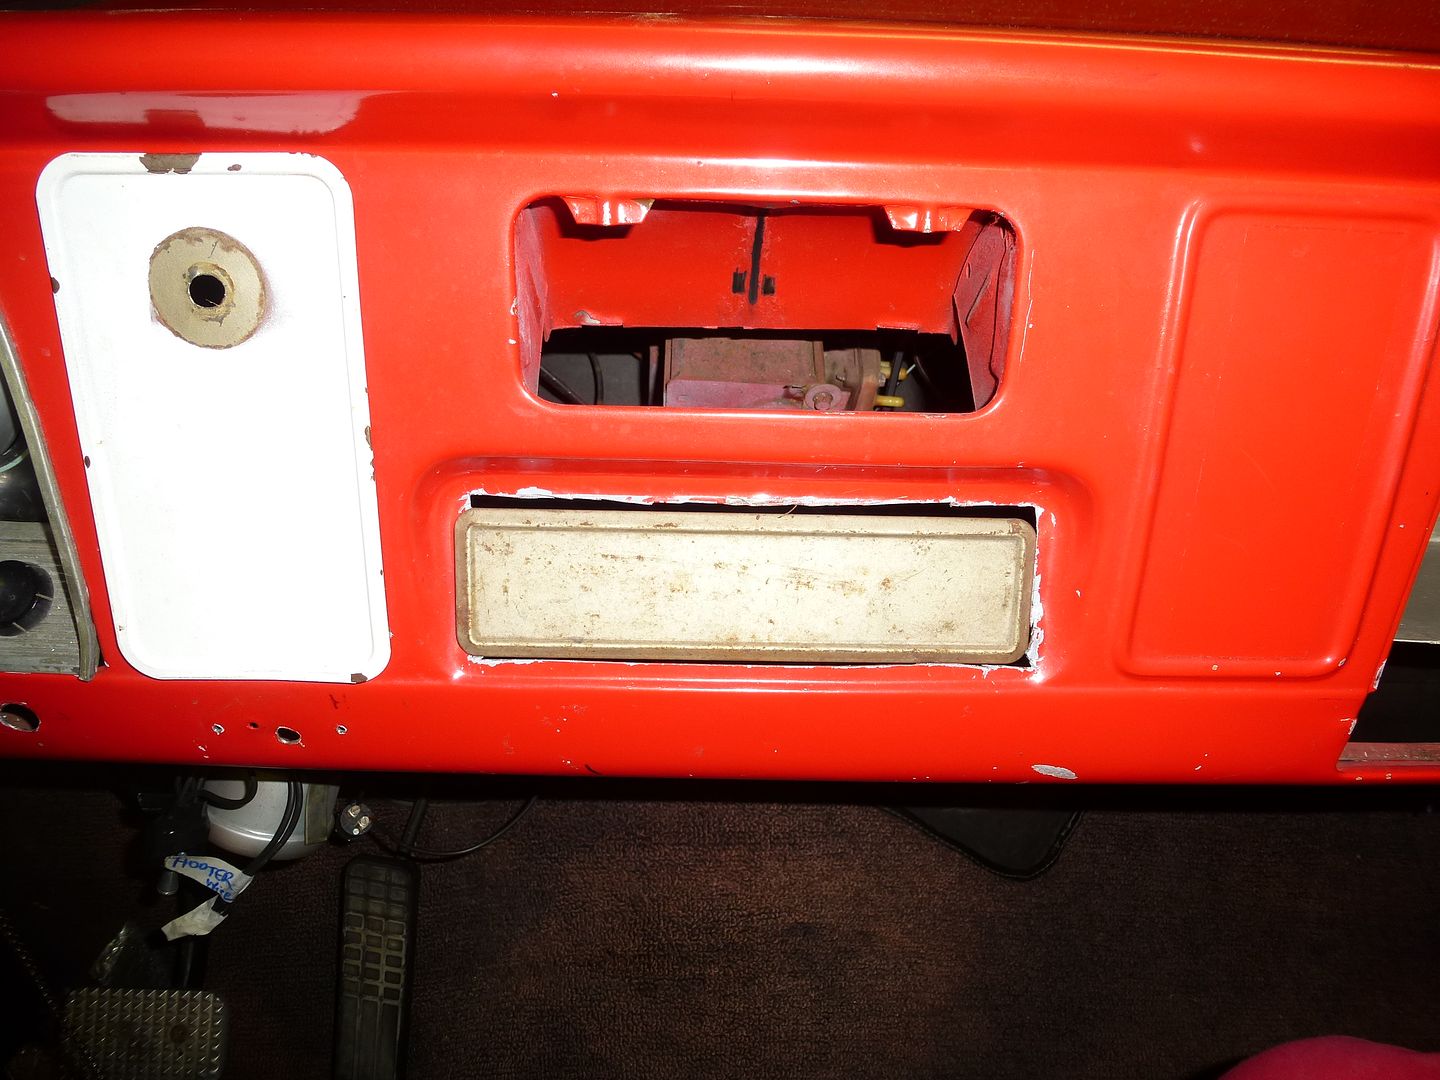 Removed the speakers that were fitted behind my head in the cab sides. Starting to understand why animals in the wild eat their young...... 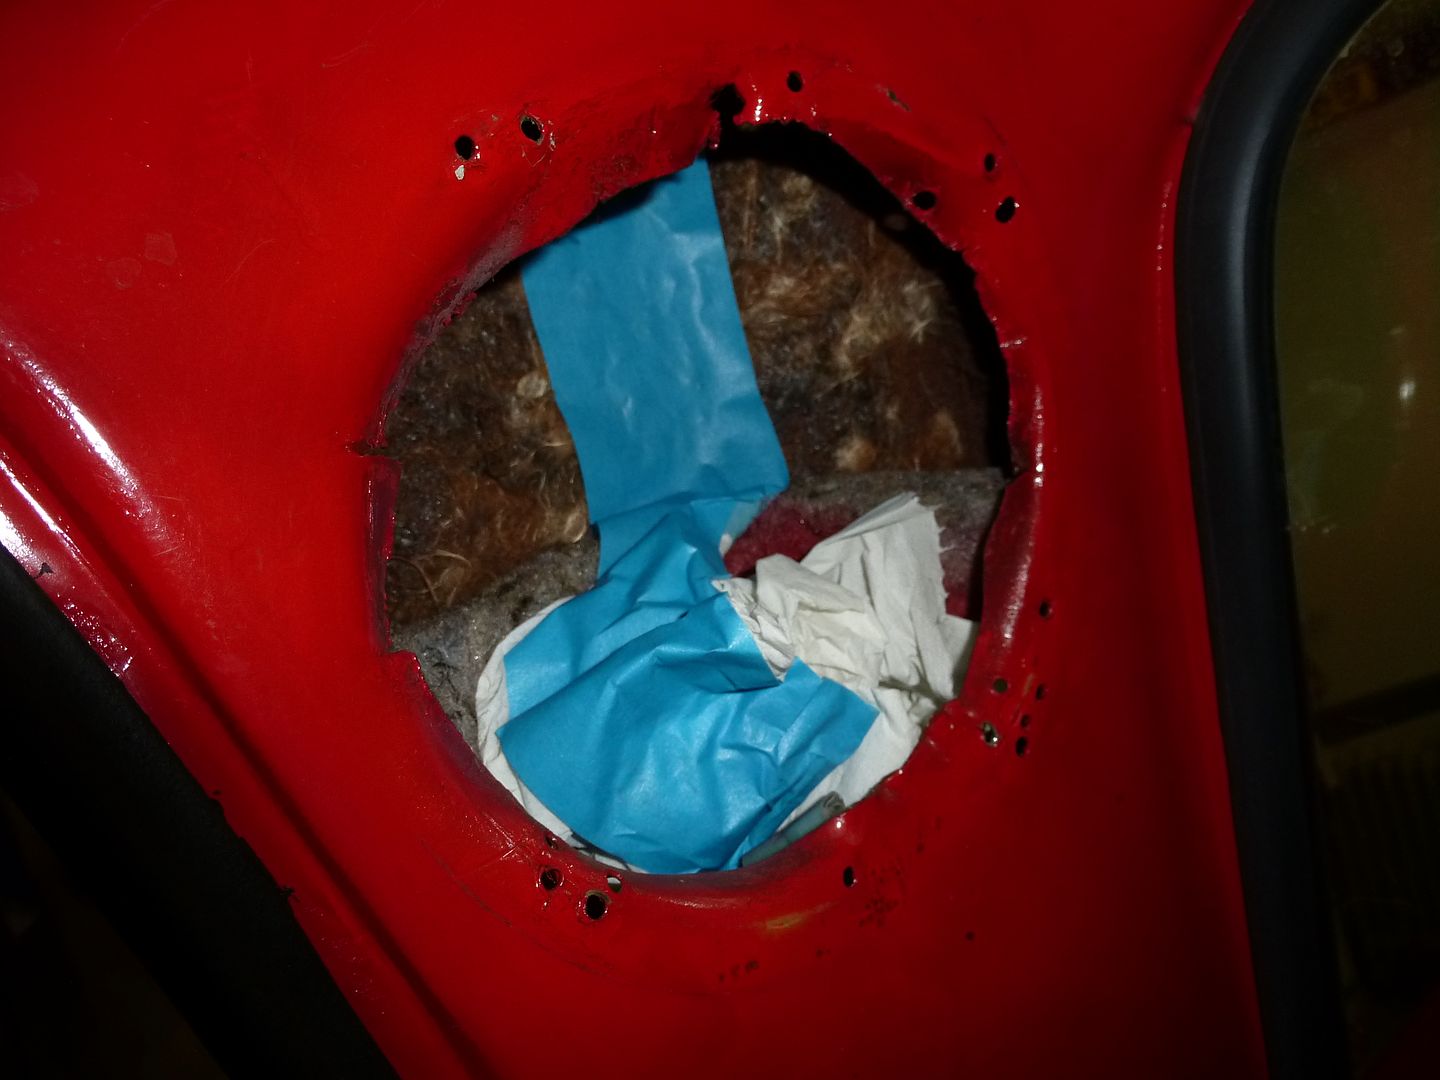 While I was at it I removed what has to be one of my favourite features on the truck, the roof lining. 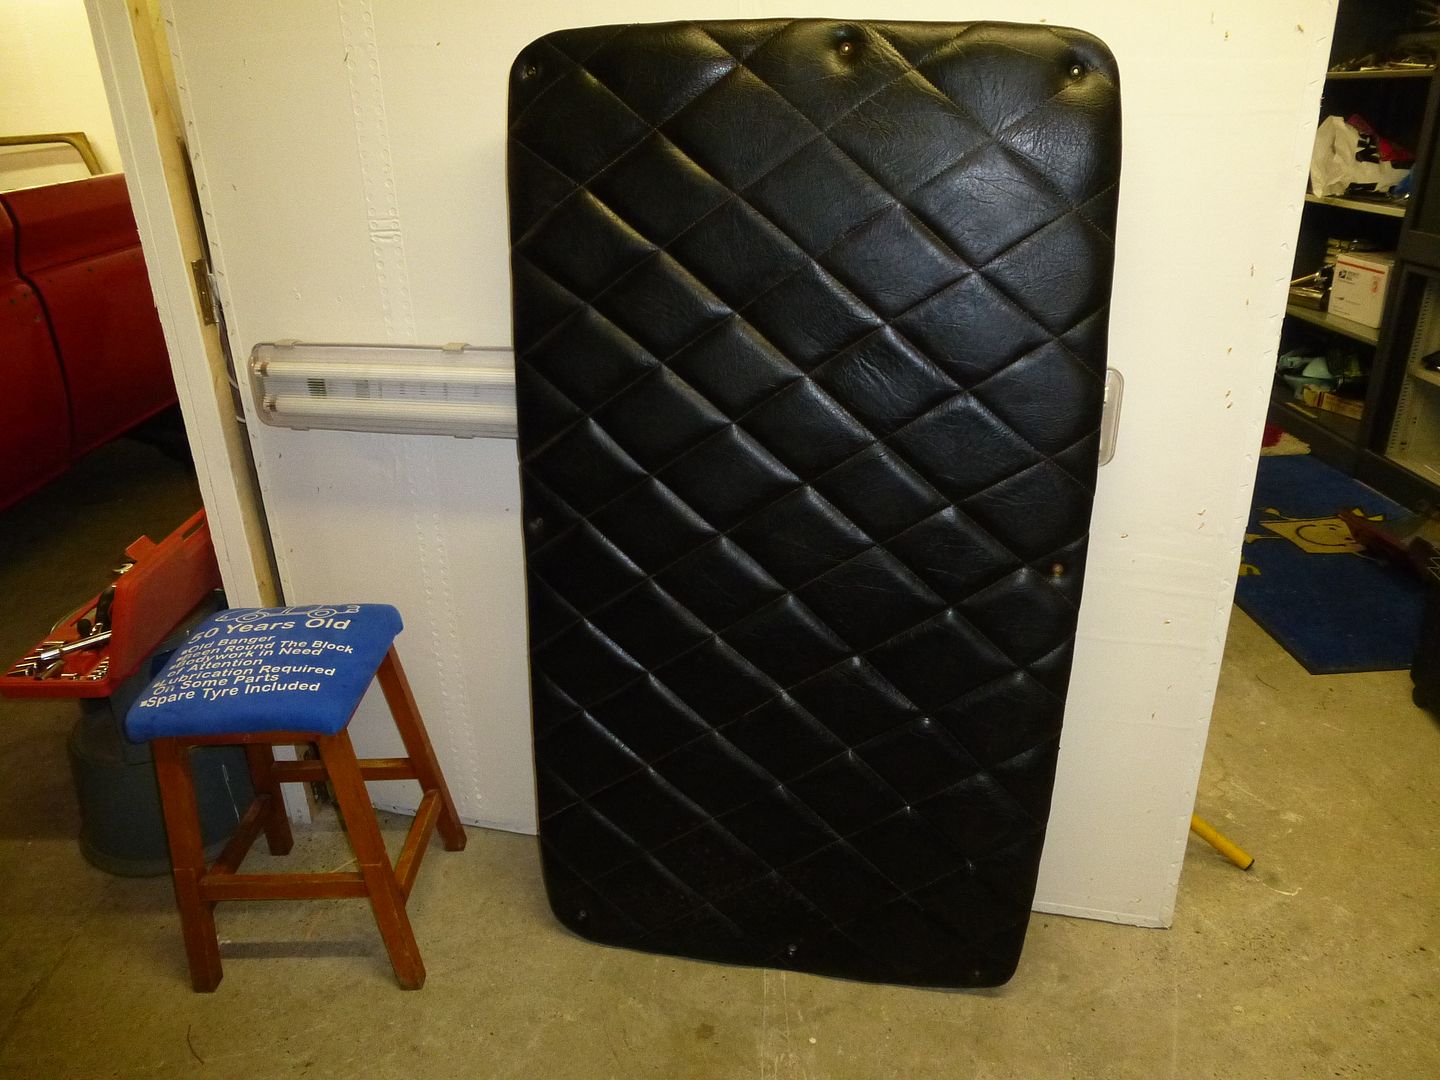 Original roof, weird colour under the red ?? 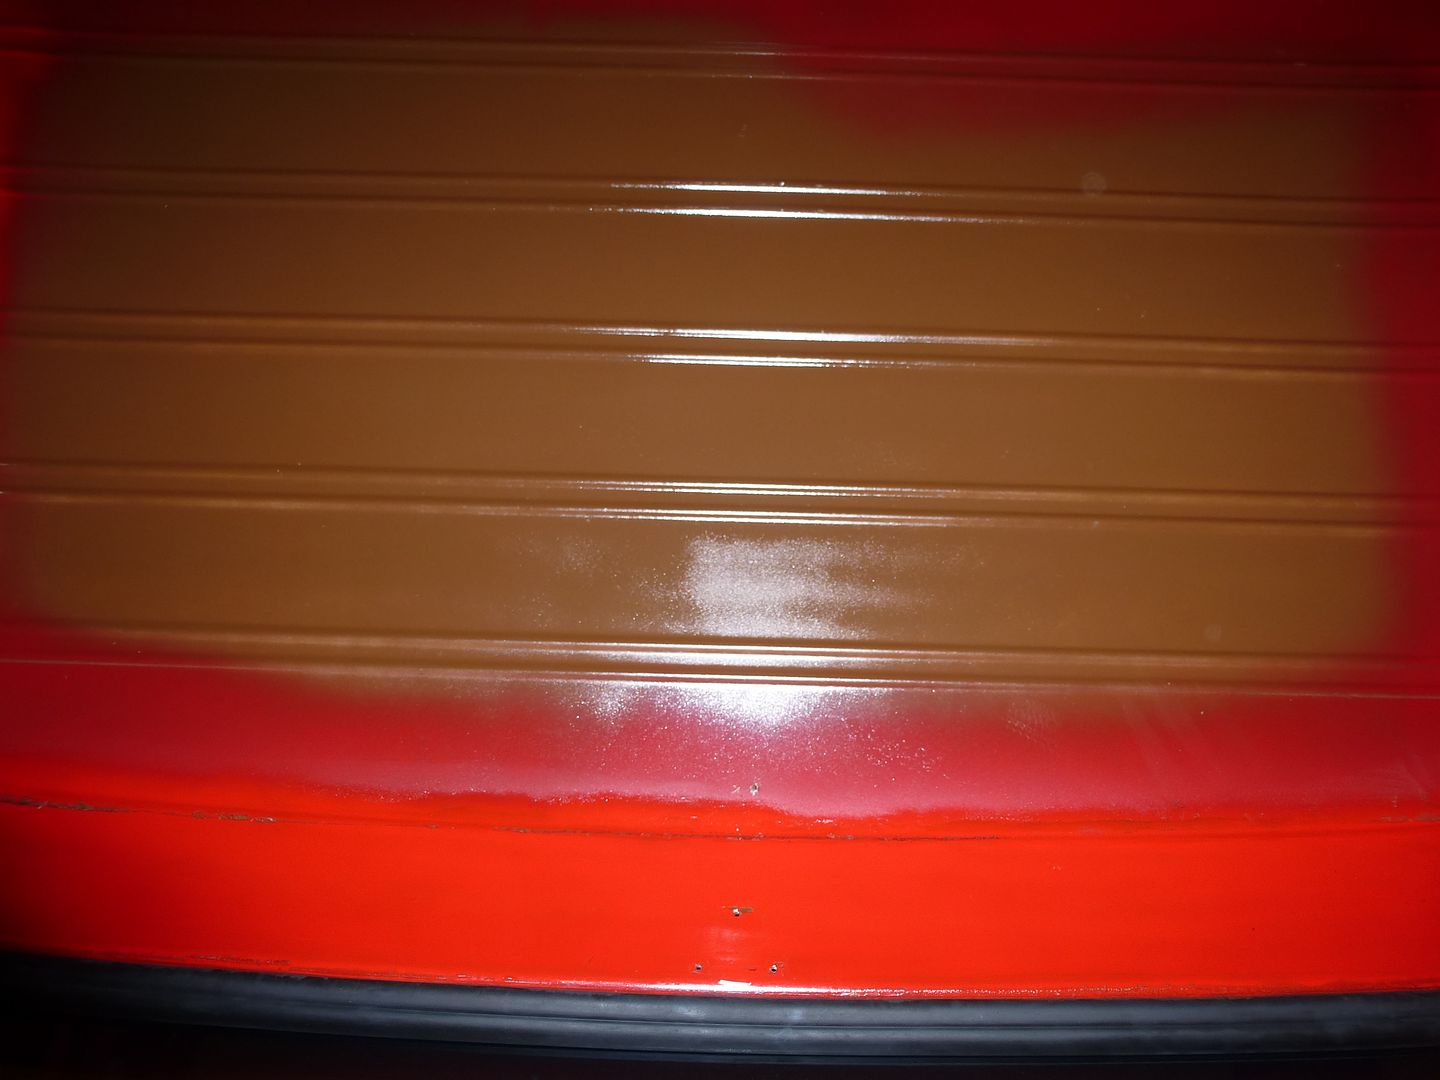 The plan is to paint the dash Satin Black, and also to repaint the interior of the cab, preparing some of it for the white roof I am going to do. Tonight Mickey next door came around to drop off the SAS20 that I had ordered off Amazon at a lot cheaper than anywhere else if you buy volume. I had bought a couple of cans for £1.00 each at a bootfair last year and it has proven to work really well on the nuts and bolts so far. So now I am ready for the next bunch of challenges, though the drivers side mirror cannot be released, despite me trying to motivate it with some serious tools. 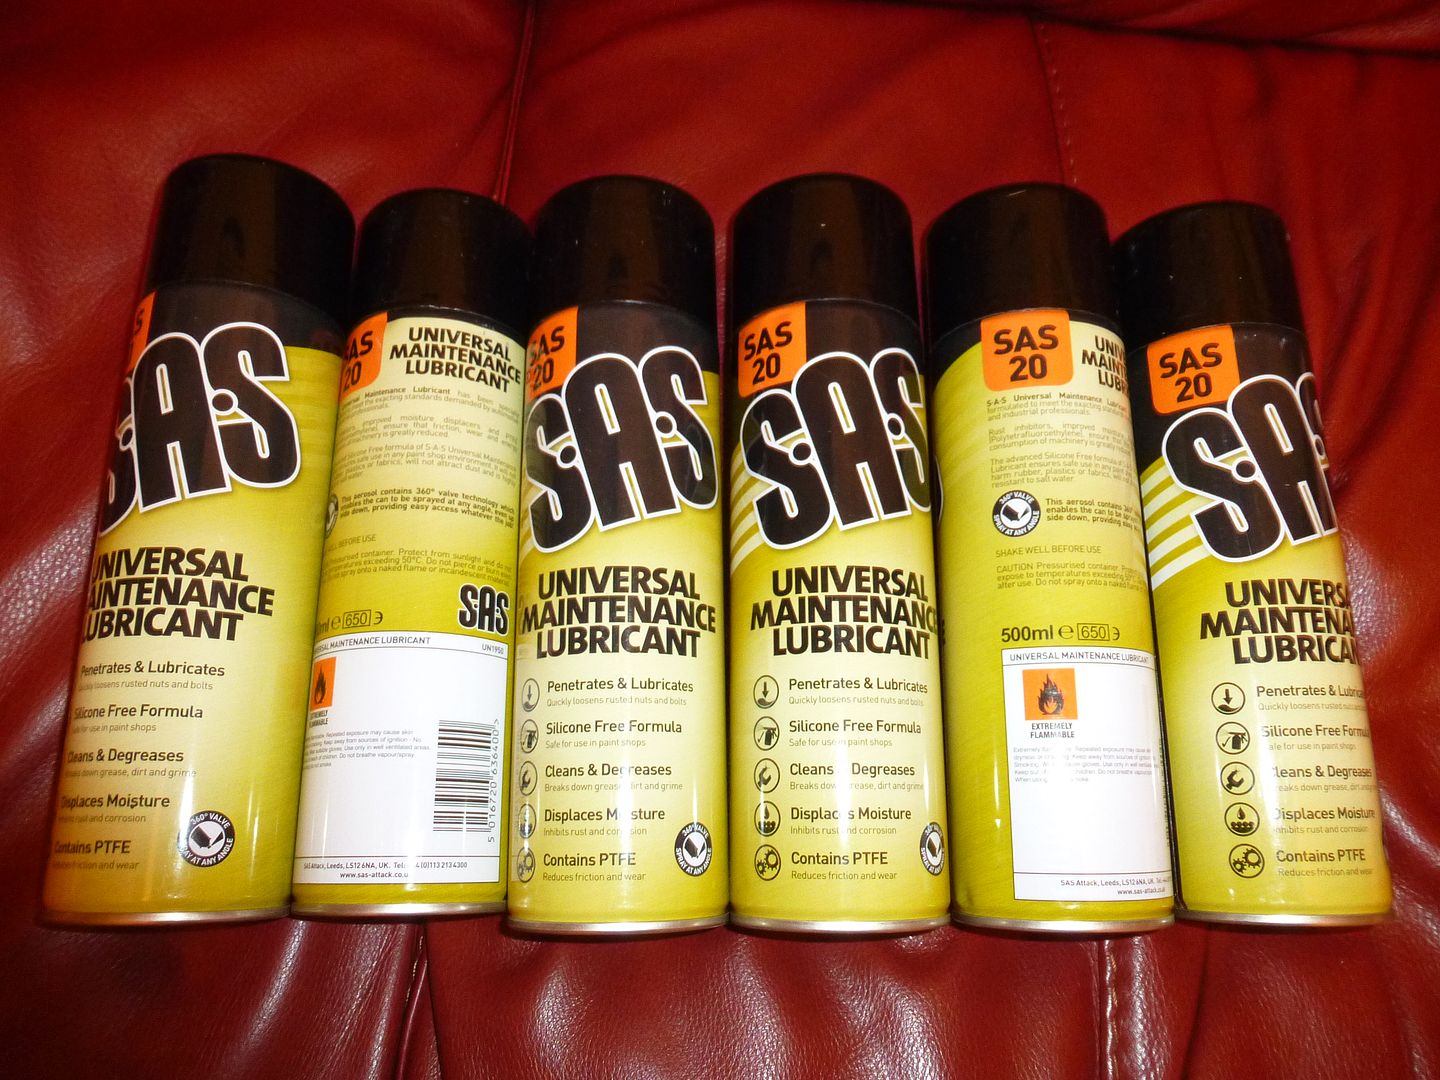 Tomorrow evening the speedo will be dismantled from behind, I ran out of "truck time" tonight at 7.30 which is the time I close shop, so that the truck does not become and issue to Nicola and I.
__________________
MY BUILD LINK: http://67-72chevytrucks.com/vboard/s...585901]Redneck Express - 1966 C10 Short Fleetside MY USA ROADTRIPS http://forum.retro-rides.org/thread/...2018-humdinger IF YOU CAN'T FIX IT WITH A HAMMER, YOU'VE GOT AN ELECTRICAL PROBLEM MATE. |
|
|

|
|
|
#743 |
|
Registered User
Join Date: Sep 2013
Location: Kent England
Posts: 1,025
|
Re: Grizz's Redneck Express 1966 Chevy Short Fleetside BILLYBOB
I will be over tomorrow to help you get your broken front screen and rear window out and of course I will remove the instrument cluster ready for the complete re wire
__________________
FINALLY PUTTING IT BACK TOGETHER AT LONG LAST MY BUILD THREAD: http://67-72chevytrucks.com/vboard/s...d.php?t=611614 Last edited by mjh1965; 01-06-2015 at 05:17 PM. |
|
|

|
|
|
#744 | |
|
Senior Member
 Join Date: May 2007
Location: Doodah Kansas
Posts: 7,774
|
Re: Grizz's Redneck Express 1966 Chevy Short Fleetside BILLYBOB
Quote:
try heat. get a bottle of MAPP gas and a torch head and heat the screws up a lot. then whack em as they cool. and the best rust penetrator is a mix of acetone and auto tranny fluid. keep shaking in between applications with a trigger spray bottle. I got this tip on here.
__________________
the mass of men live lives of quiet desperation if there is a problem, I can have it. new project WAYNE http://67-72chevytrucks.com/vboard/s...d.php?t=844393 |
|
|
|

|
|
|
#745 | |
|
Registered User
Join Date: Dec 2012
Location: Rochester, KENT
Posts: 10,577
|
Re: Grizz's Redneck Express 1966 Chevy Short Fleetside BILLYBOB
Quote:
Still have some ATF and will get the Acetone from mrs Grizz as I gave her most of a litre recently.
__________________
MY BUILD LINK: http://67-72chevytrucks.com/vboard/s...585901]Redneck Express - 1966 C10 Short Fleetside MY USA ROADTRIPS http://forum.retro-rides.org/thread/...2018-humdinger IF YOU CAN'T FIX IT WITH A HAMMER, YOU'VE GOT AN ELECTRICAL PROBLEM MATE. |
|
|
|

|
|
|
#746 |
|
Registered User
Join Date: Dec 2012
Location: Rochester, KENT
Posts: 10,577
|
Re: Grizz's Redneck Express 1966 Chevy Short Fleetside BILLYBOB
Ashtray front looking like this...... How do you do that? Step on it?
Another bit of fun for the future. 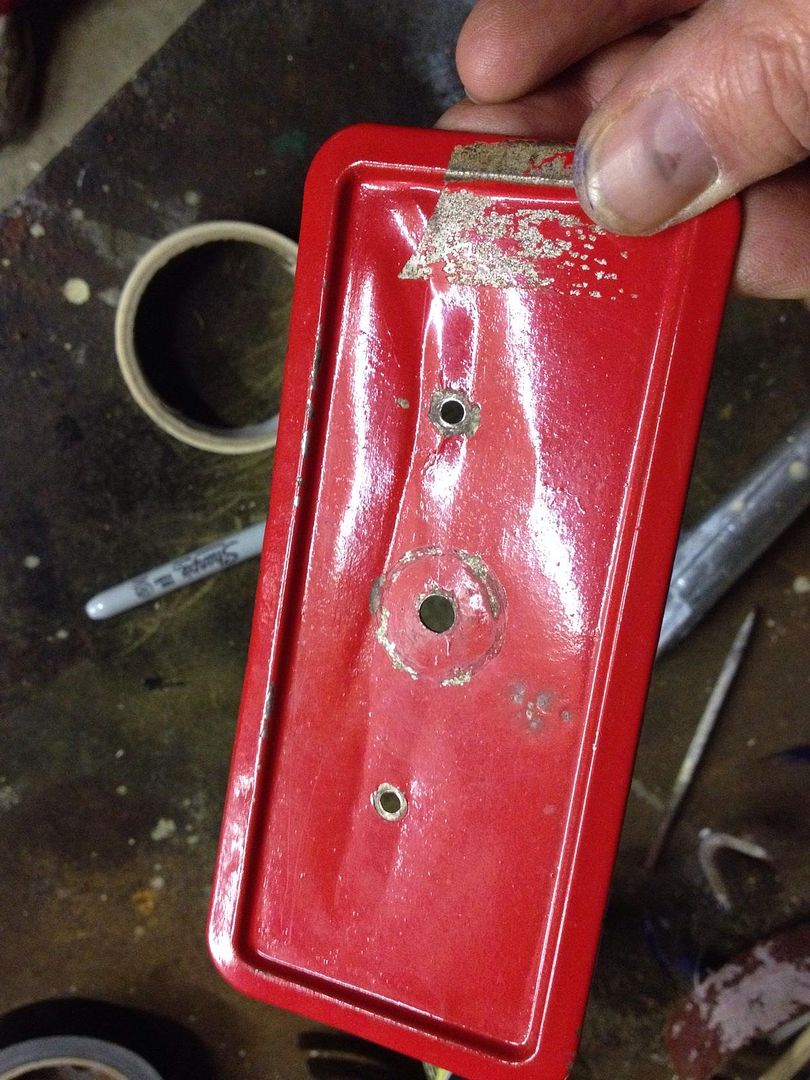
__________________
MY BUILD LINK: http://67-72chevytrucks.com/vboard/s...585901]Redneck Express - 1966 C10 Short Fleetside MY USA ROADTRIPS http://forum.retro-rides.org/thread/...2018-humdinger IF YOU CAN'T FIX IT WITH A HAMMER, YOU'VE GOT AN ELECTRICAL PROBLEM MATE. |
|
|

|
|
|
#747 |
|
Registered User
Join Date: Dec 2012
Location: Rochester, KENT
Posts: 10,577
|
Re: Grizz's Redneck Express 1966 Chevy Short Fleetside BILLYBOB
Put out a request last week on Freecycle for any old Imperial spanners or sockets as one can often see them thrown out at the council tip.
The day after the post I got a PM on Retro Rides from Luke (Smurf) to offer me a set of Imperial spanners he has had for years but never used, he saw my request on Freecycle and responded. I popped around this morning on the way to work to collect them, and offered to pay for them, however he refused payment. I was more interested in his new toy........ Mitsubishi Delica 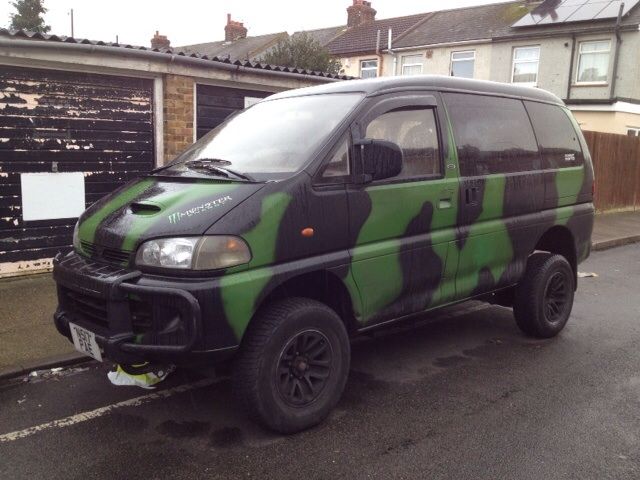 After using Martin's articulated ratchet Imperial spanners he picked up in a pawnshop in Florida, I needed a set as well, Pronto !! Found a set on Ebay for £29.00 delivered, and they were delivered to Nicola's work today, so double joy on the spanner front. 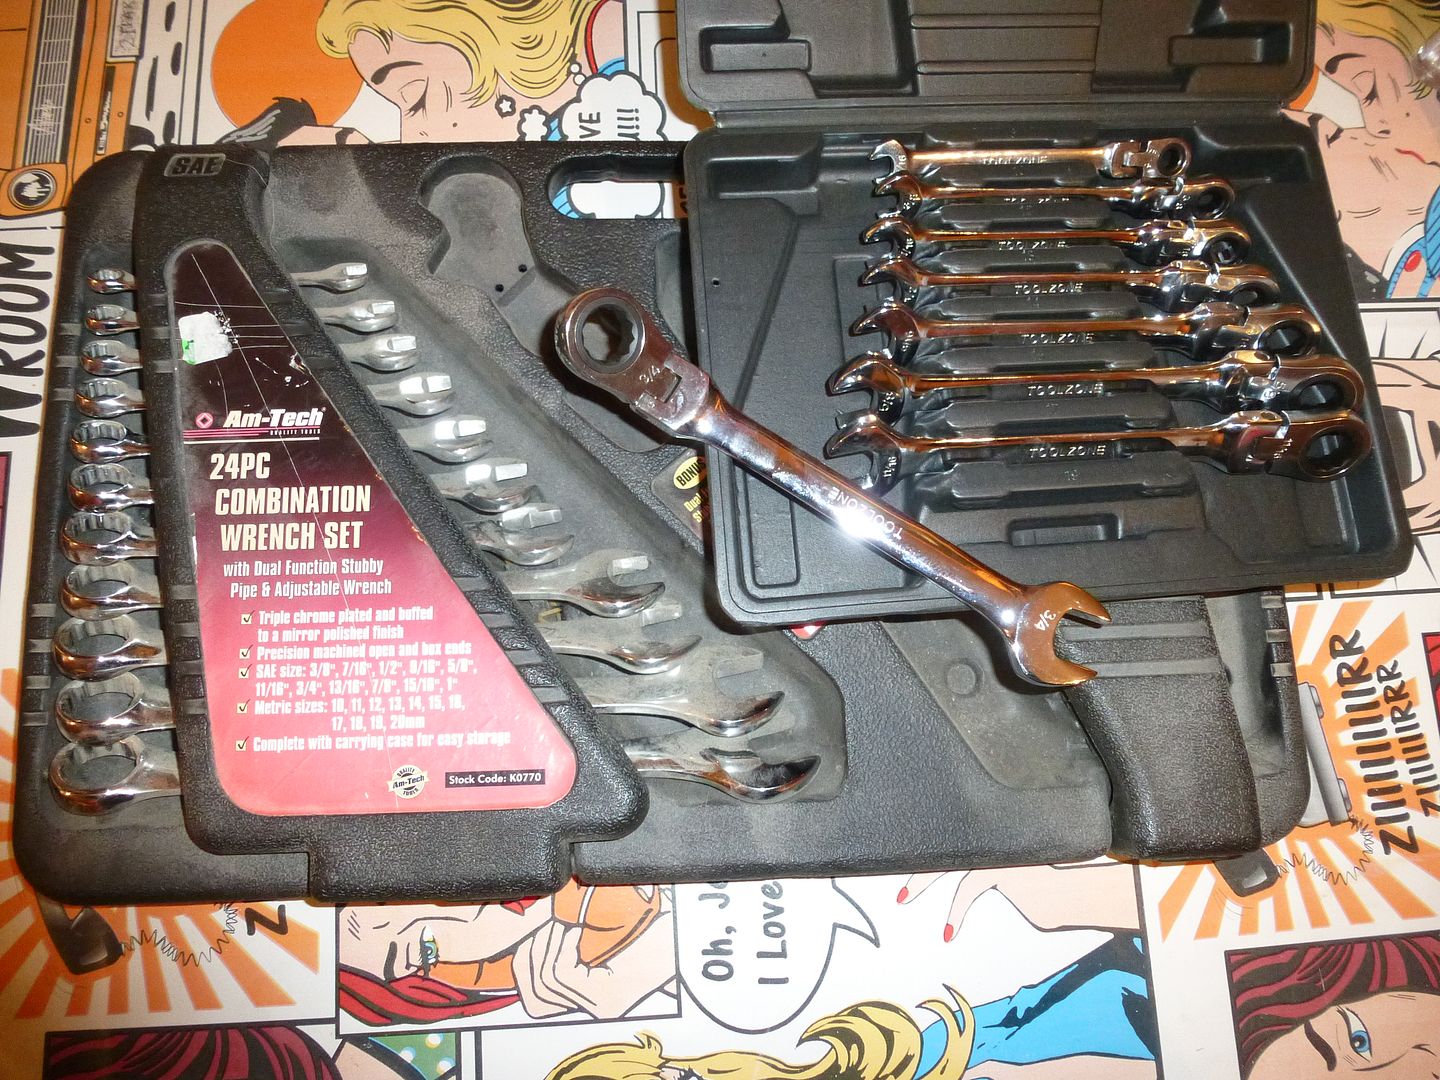 Tonight after work the first thing I did was to put two oil heaters in the trucks cab at maximum heat, to heat it up, and soften the rubber around the broken front, but perfectly intact rear windows, as they were both coming out tonight so that I can carry on with the body work, and changing the dash colour. 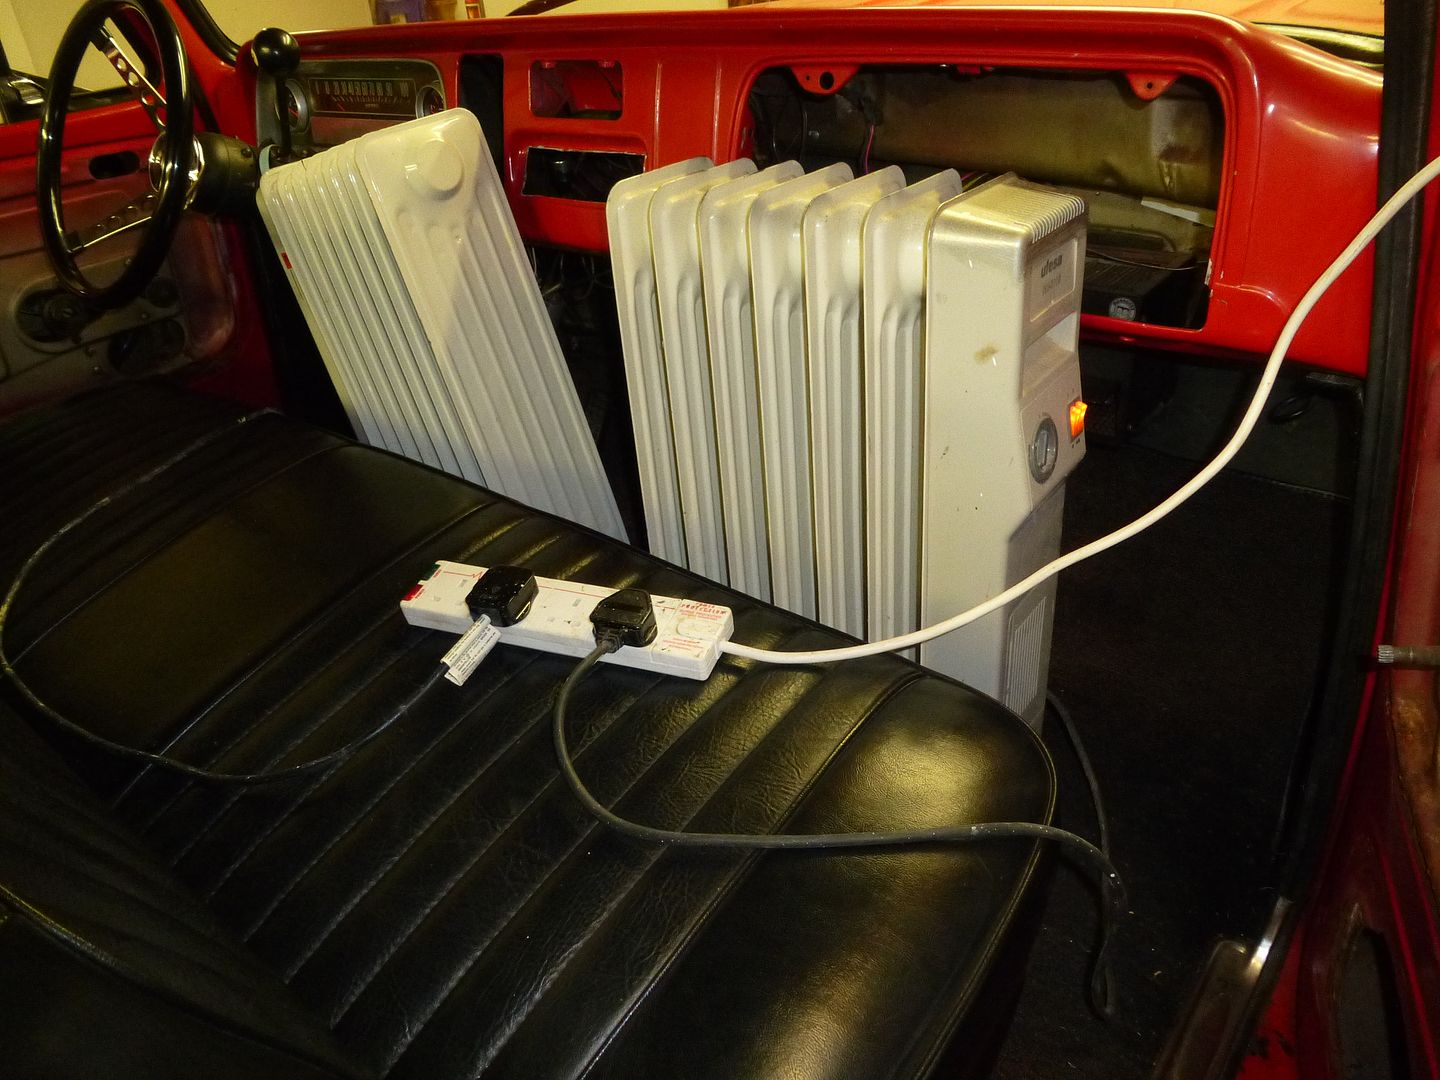 So after about three hours the cab was toasty, both inside and out. Having worked in a body shop for many years, Martin knew his way around and was quick to pull the rear screen out. 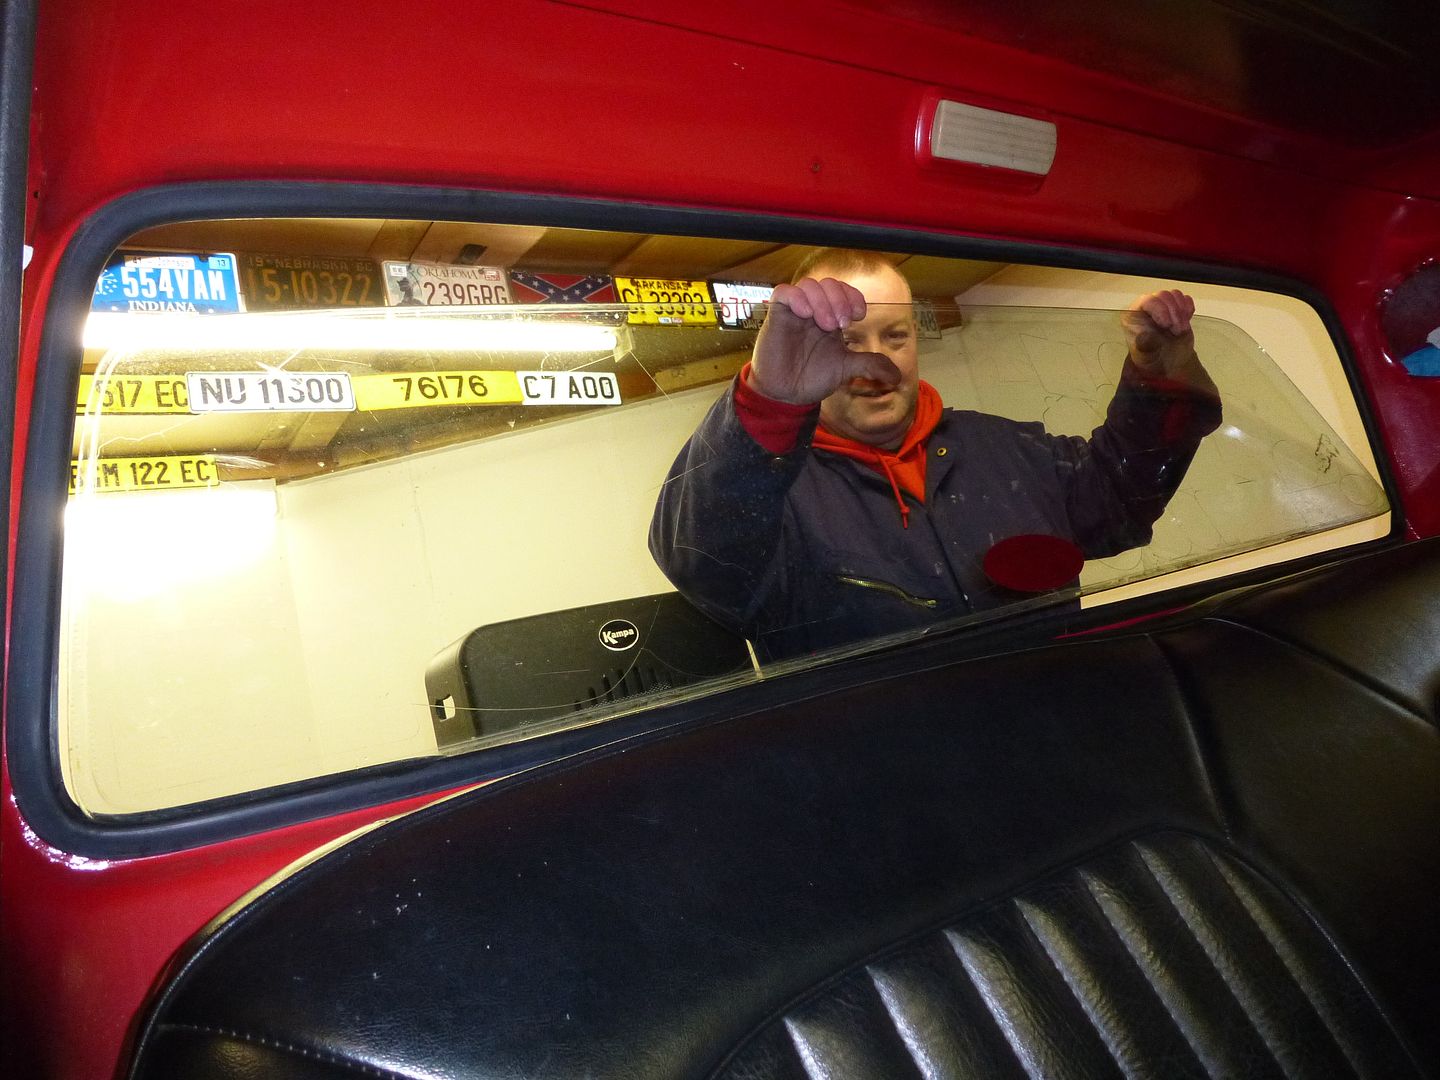 Unfortunately I did not get a photograph of his laying curled up on his back like a stranded dung beetle when the front screen came hurtling toward me. It looked great from where I stood to catch it on the bonnet and the cushion I had put there....... He pushed it out in one long hard push with his huge safety boots planted firmly in each corner, breaking it a bit more than it already was..... thankfully the damage was already done at the end of last years last ride out. He was laughing like a mad man as he said he had always wanted to "kick a windscreen out" The whole of the top steel ridge is rusted, but recoverable, and there was quite a bit of silicone where leaks were obviously treated before, I have never had a problem when it rained or when I washed the truck, so I suppose the sealing treatments worked. 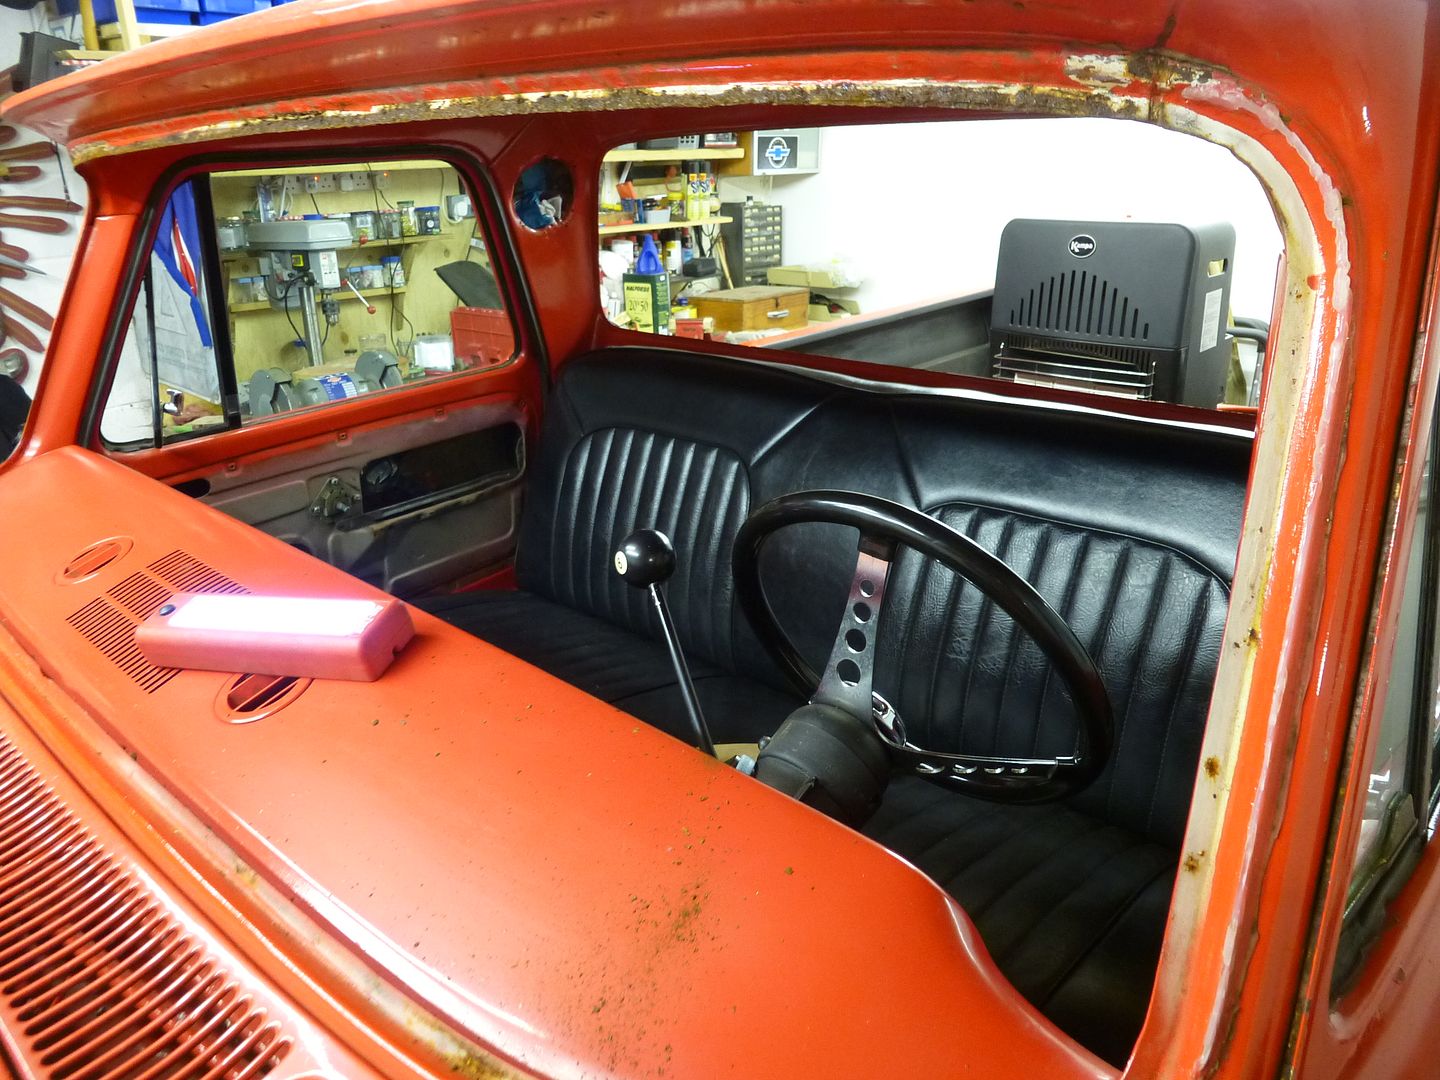 Last thing was to remove the instrument cluster from the dash. This turned into a major ball ache as the ignition switch unit, including the barrel could not be removed, so it meant getting in from behind with a 1/4 inch spanner (yes, I do have one) and a 1/4 inch socket to undo the large cluster bezel from the actual instruments rear. Can anyone please explain to me why I could not get the part that holds the key undone, the bezel does not fit over it, and these two little holes did not react to the panel pins I pushed in there, though the one hole felt like there was a spring in it. In the end removing the instrument cluster's large bezel released it so that we could get it out in two parts, with much of the front glass falling out, as I knew it would because it was damaged when I got the truck. 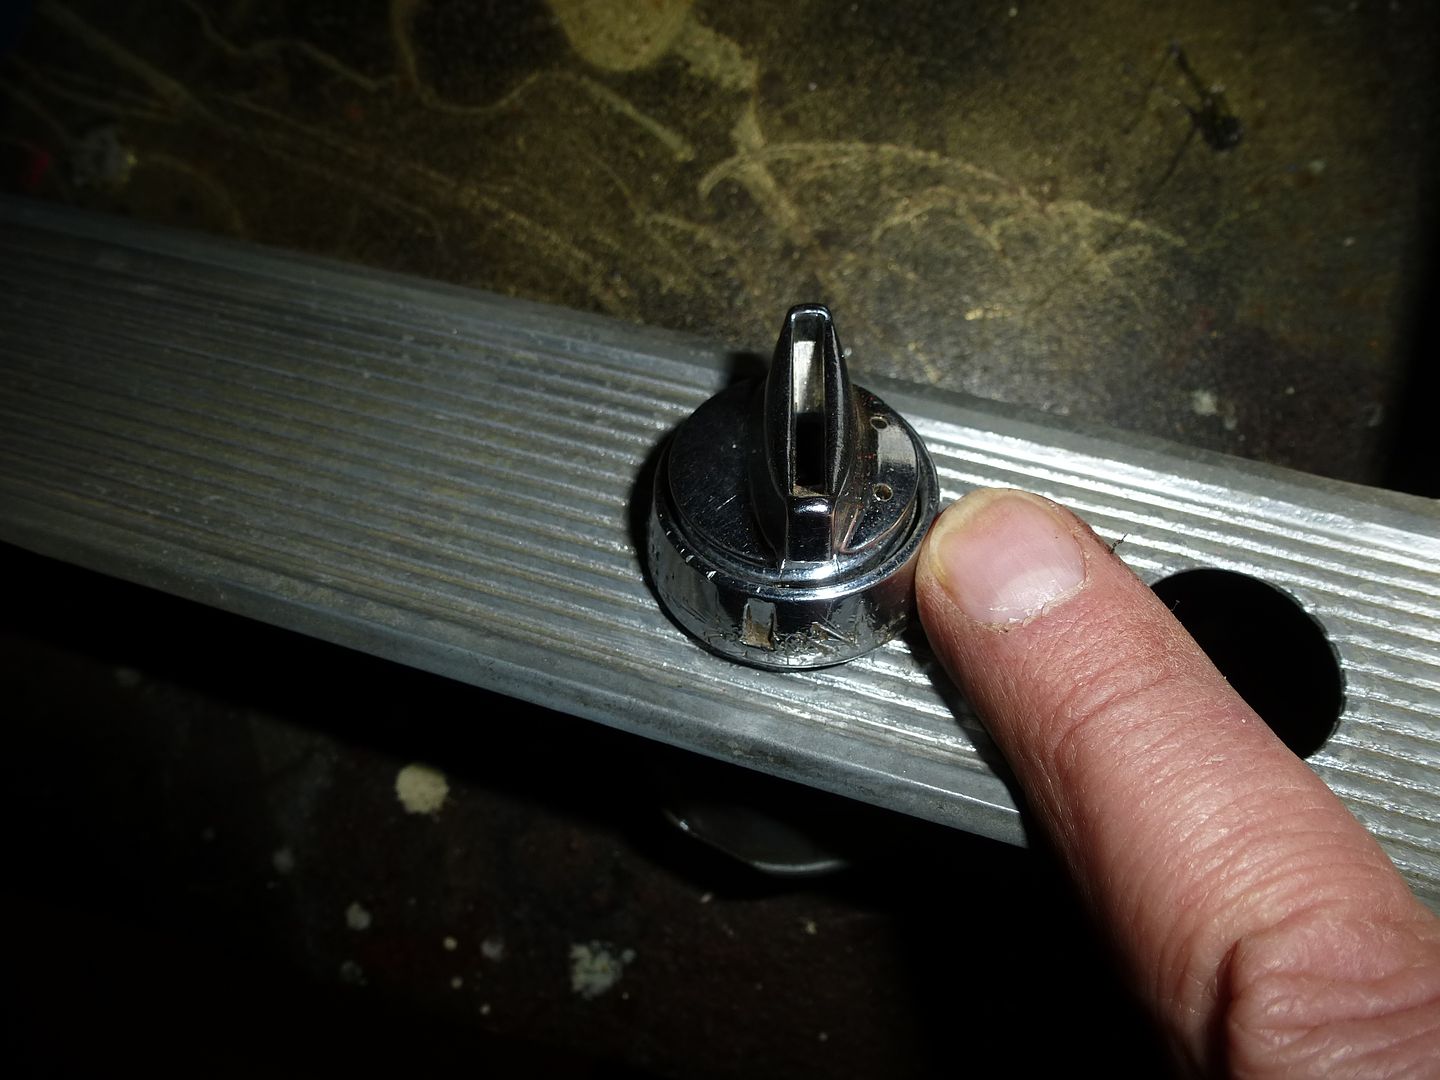 All bits removed, next up for removal will be the seat and old carpet, which is in remarkably good nick, despite having some colour changes. 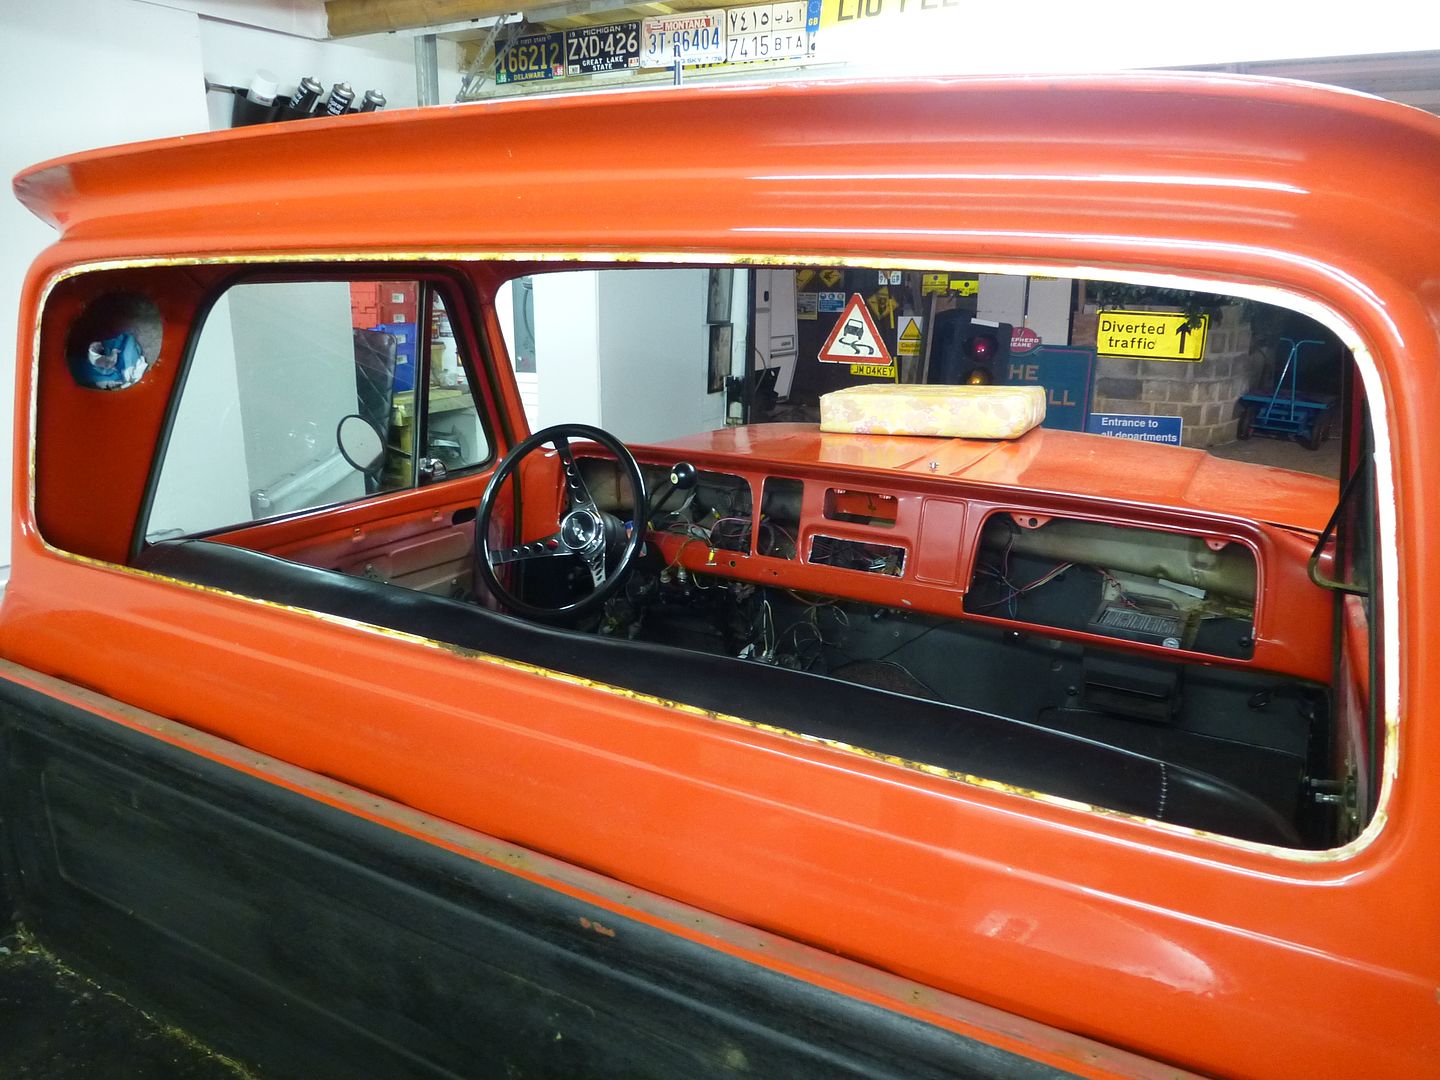 Last thing I guess is again proof of the great vibe in this hobby and community of ours. WhippinSaw in Illinois offered to sell me a replacement section for my dash where the radio fits, so I agreed to buy it from him, and will be welding it in when it gets here after cutting the Badgers Revenge out. Catfood was not included in the deal. 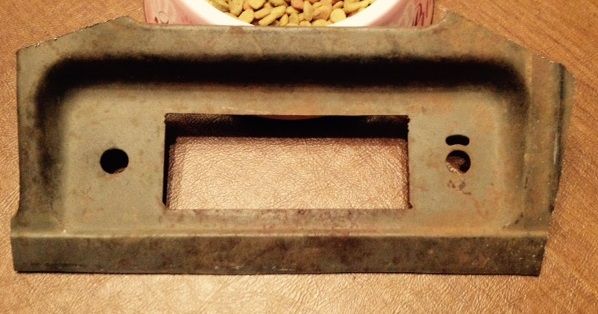 Thanks again for checking in.
__________________
MY BUILD LINK: http://67-72chevytrucks.com/vboard/s...585901]Redneck Express - 1966 C10 Short Fleetside MY USA ROADTRIPS http://forum.retro-rides.org/thread/...2018-humdinger IF YOU CAN'T FIX IT WITH A HAMMER, YOU'VE GOT AN ELECTRICAL PROBLEM MATE. |
|
|

|
|
|
#748 |
|
Registered User
Join Date: Sep 2013
Location: Kent England
Posts: 1,025
|
Re: Grizz's Redneck Express 1966 Chevy Short Fleetside BILLYBOB
It's a lot quicker taking out the front screen when it's already broken,and you are not worried about cracking it on removal. No problem with helping that's what mates are for
__________________
FINALLY PUTTING IT BACK TOGETHER AT LONG LAST MY BUILD THREAD: http://67-72chevytrucks.com/vboard/s...d.php?t=611614 |
|
|

|
|
|
#749 |
|
Registered User
Join Date: Apr 2012
Location: Searcy, AR
Posts: 4,203
|
Re: Grizz's Redneck Express 1966 Chevy Short Fleetside BILLYBOB
Would've liked to see a video of Martin and the windscreen...
 Great score on the spanners...  …and also scoring the radio plate... 
__________________
DON Proverbs 27:17  US Air Force Retarded errr Retired My '65 Stepper Build:http://67-72chevytrucks.com/vboard/s...d.php?t=533920 My '60 Rusty Patina Build:http://67-72chevytrucks.com/vboard/s...66#post7402266 My '72 http://67-72chevytrucks.com/vboard/s...59#post7204359 SOLD |
|
|

|
|
|
#750 |
|
Registered User
Join Date: Oct 2009
Location: canton ga
Posts: 12,724
|
Re: Grizz's Redneck Express 1966 Chevy Short Fleetside BILLYBOB
I love that Mitsubishi Delica ,never seen anything like it . Nice tools you scored too .
|
|
|

|
 |
| Bookmarks |
|
|