
 |
|
|
#1076 |
|
Senior Member
 Join Date: Feb 2014
Location: new smyrna beach fl / 29 palms cal
Posts: 1,727
|
Re: 55 Wagon Progress
Looks good she has your talent and attention to detail
__________________
Hand made A/C vent manifolds for 64-66 trucks adapts any aftermarket A/C to OEM vent |
|
|

|
|
|
#1077 |
|
Registered User
Join Date: Jan 2013
Location: Leonardtown, MD
Posts: 1,648
|
Re: 55 Wagon Progress
Thanks! She's actually more artsy than I am, does paintings in her free time.
Progress pics from last night... Yep, we've been block sanding.. 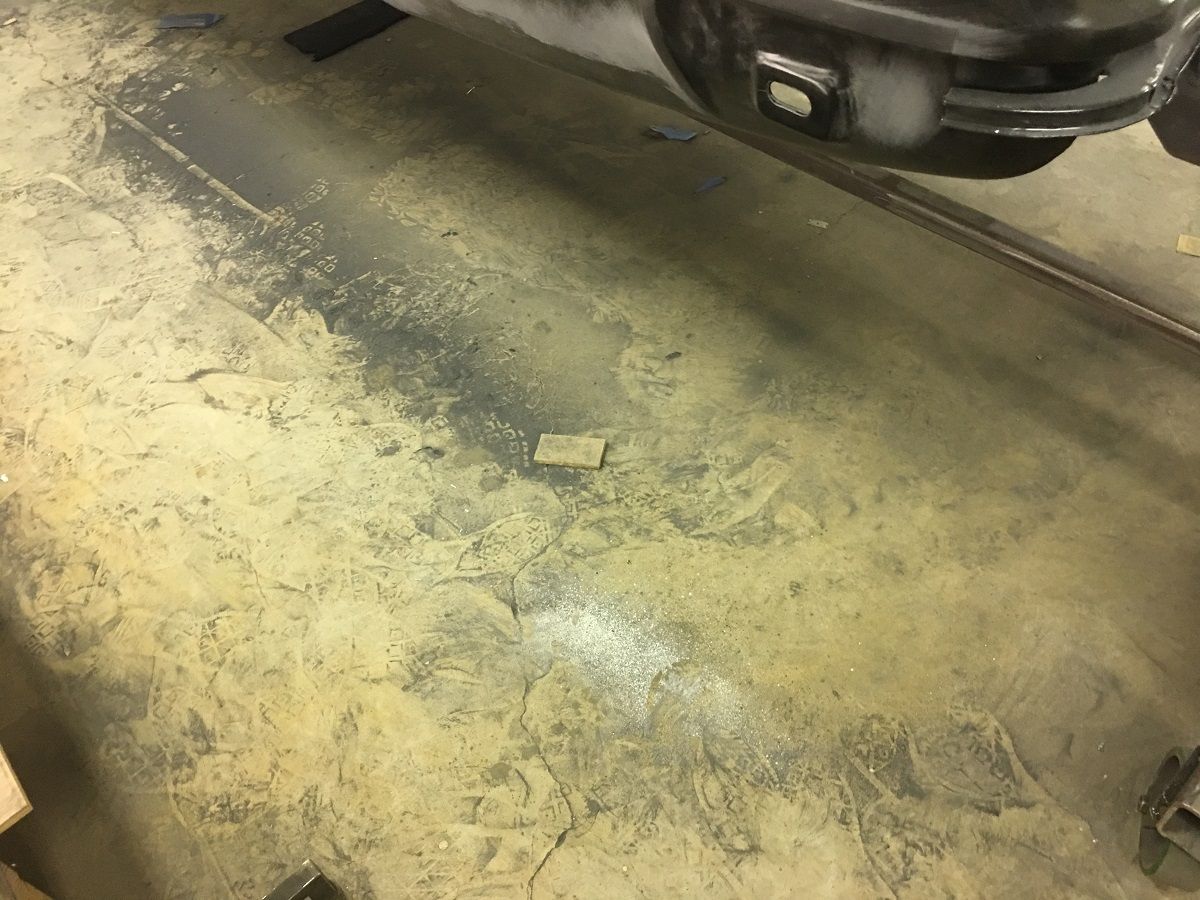 Using Evercoat 416 to address the few low spots.. 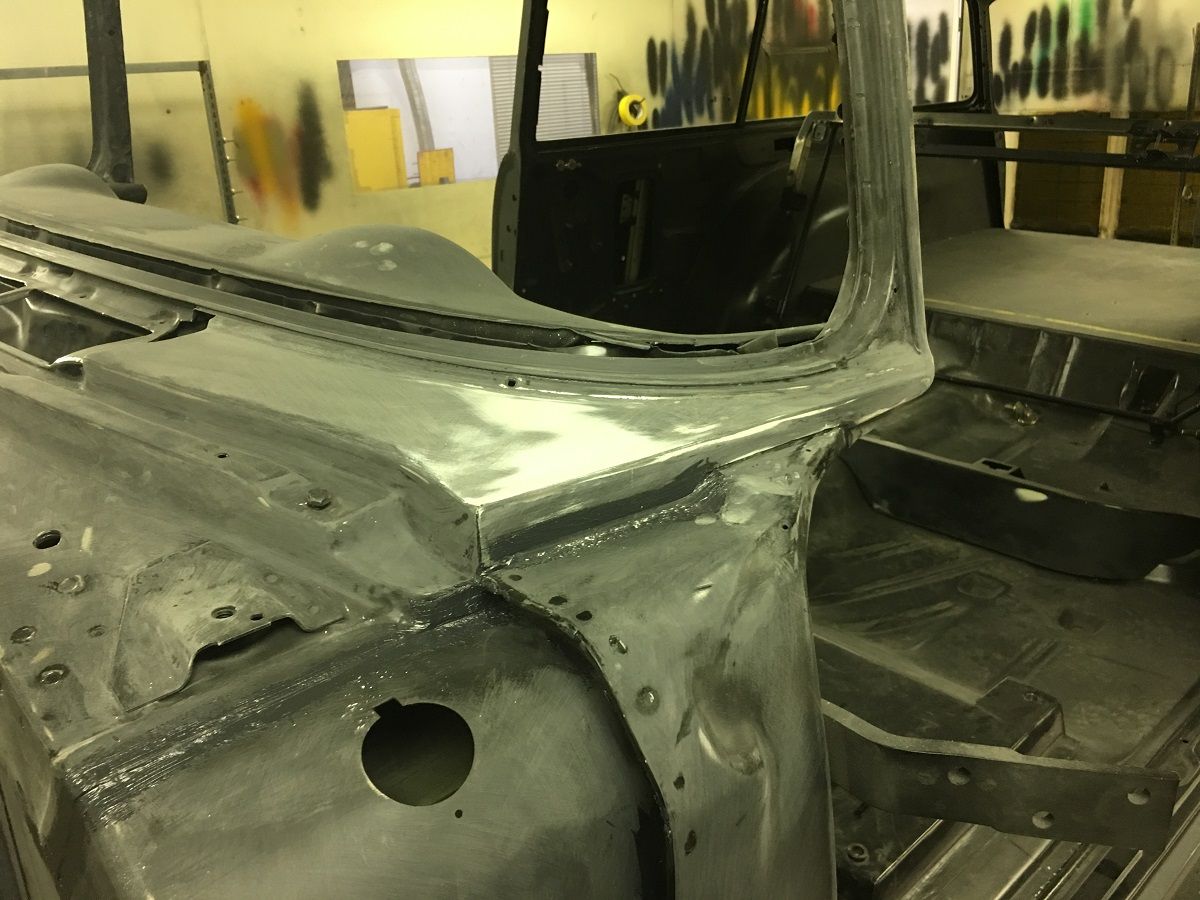 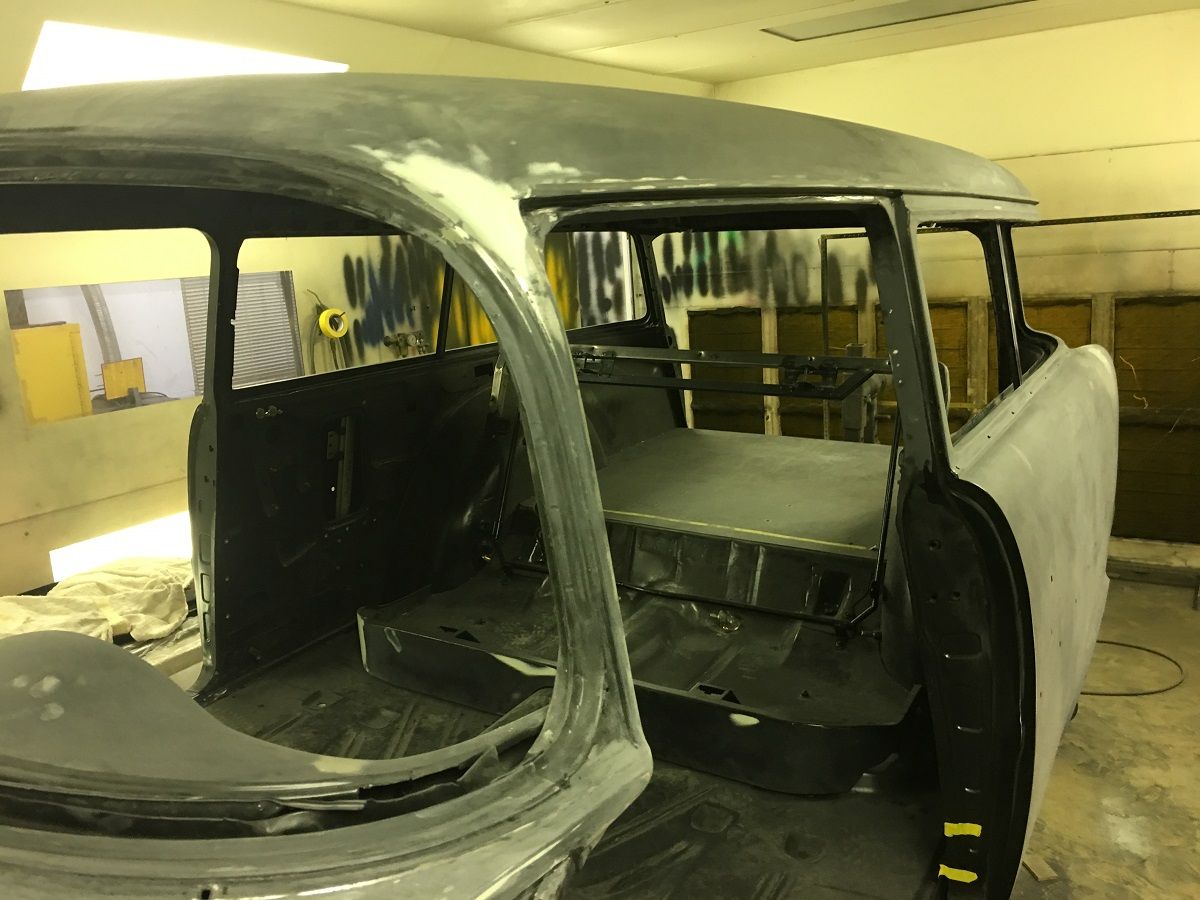 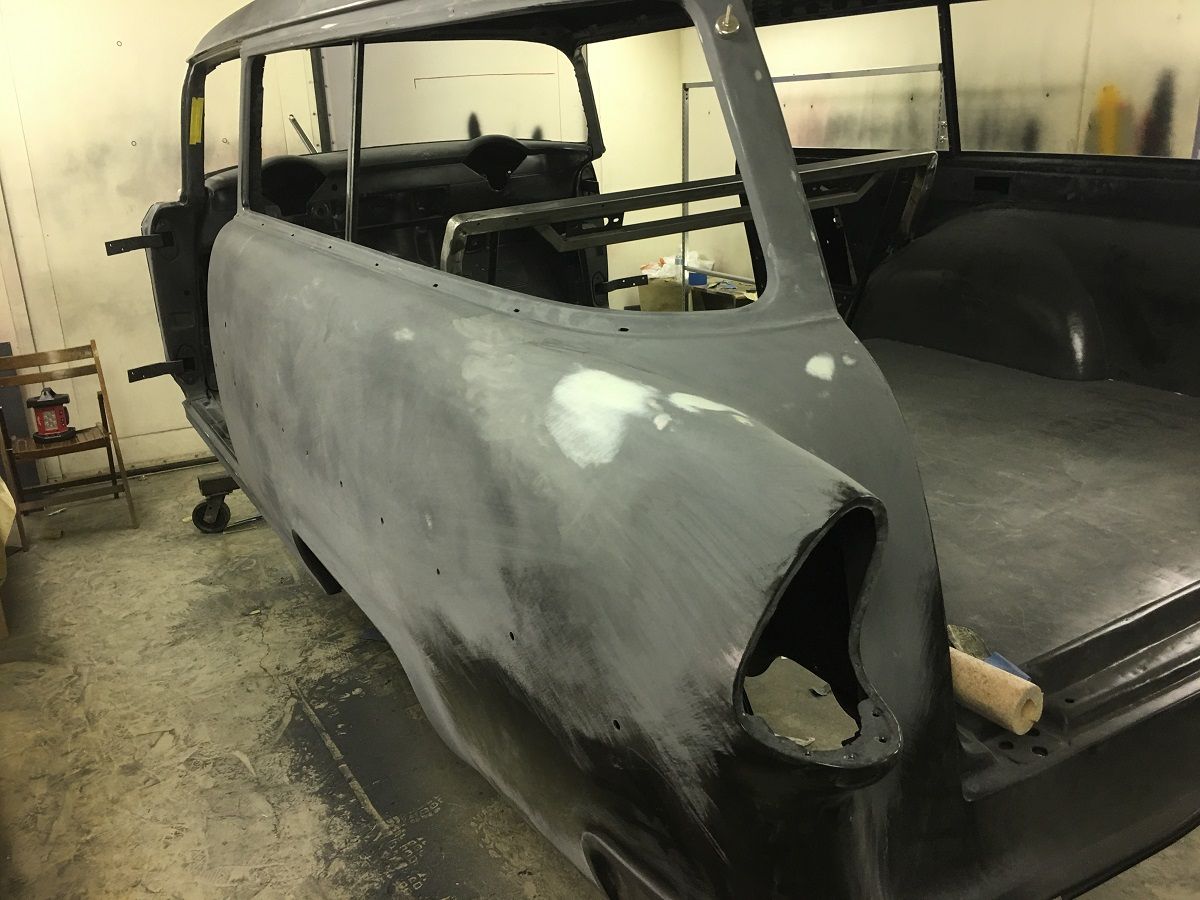 Honing up on my painting skills with brush on seam sealer 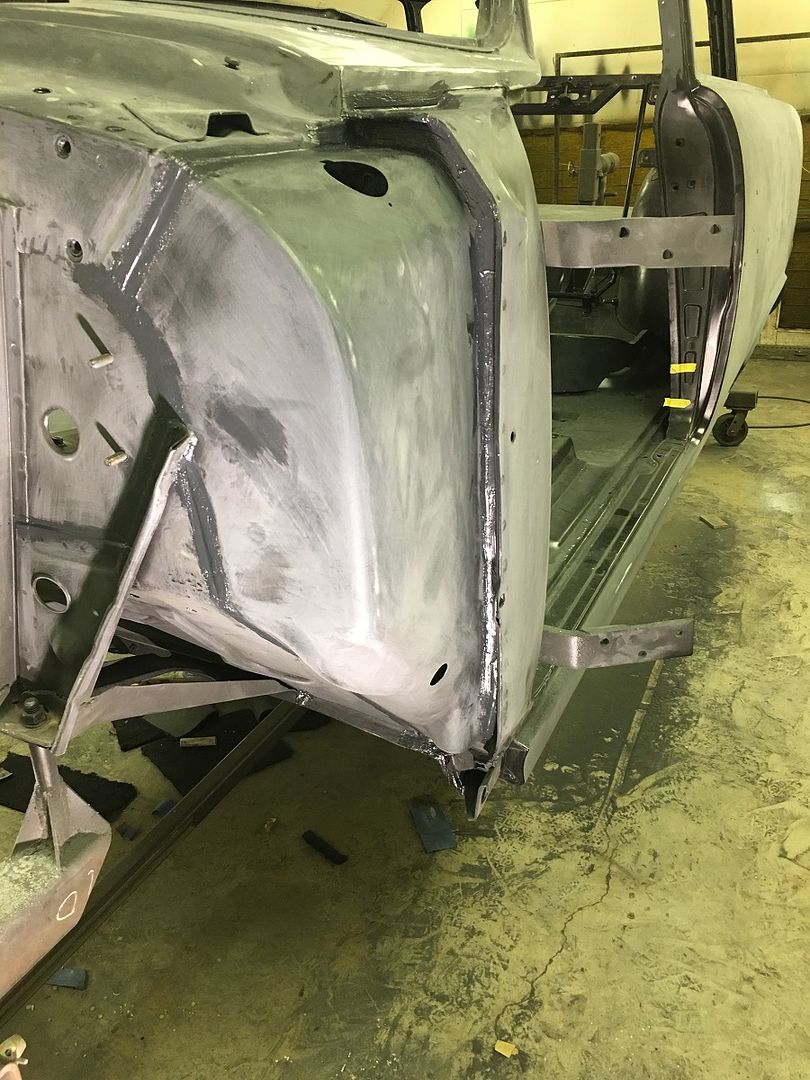 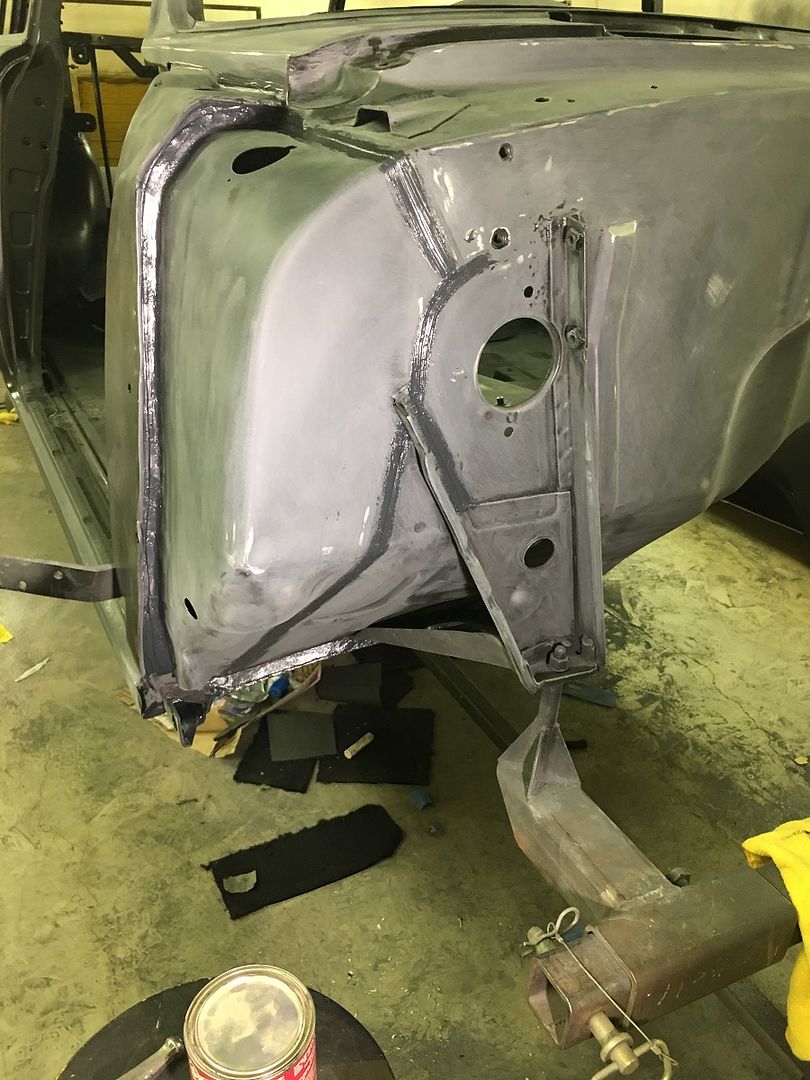 Today's lesson is on media blasting and stretch damage that occurs. Here’s what a sand blaster will do to a roof skin when blasting the braces underneath.  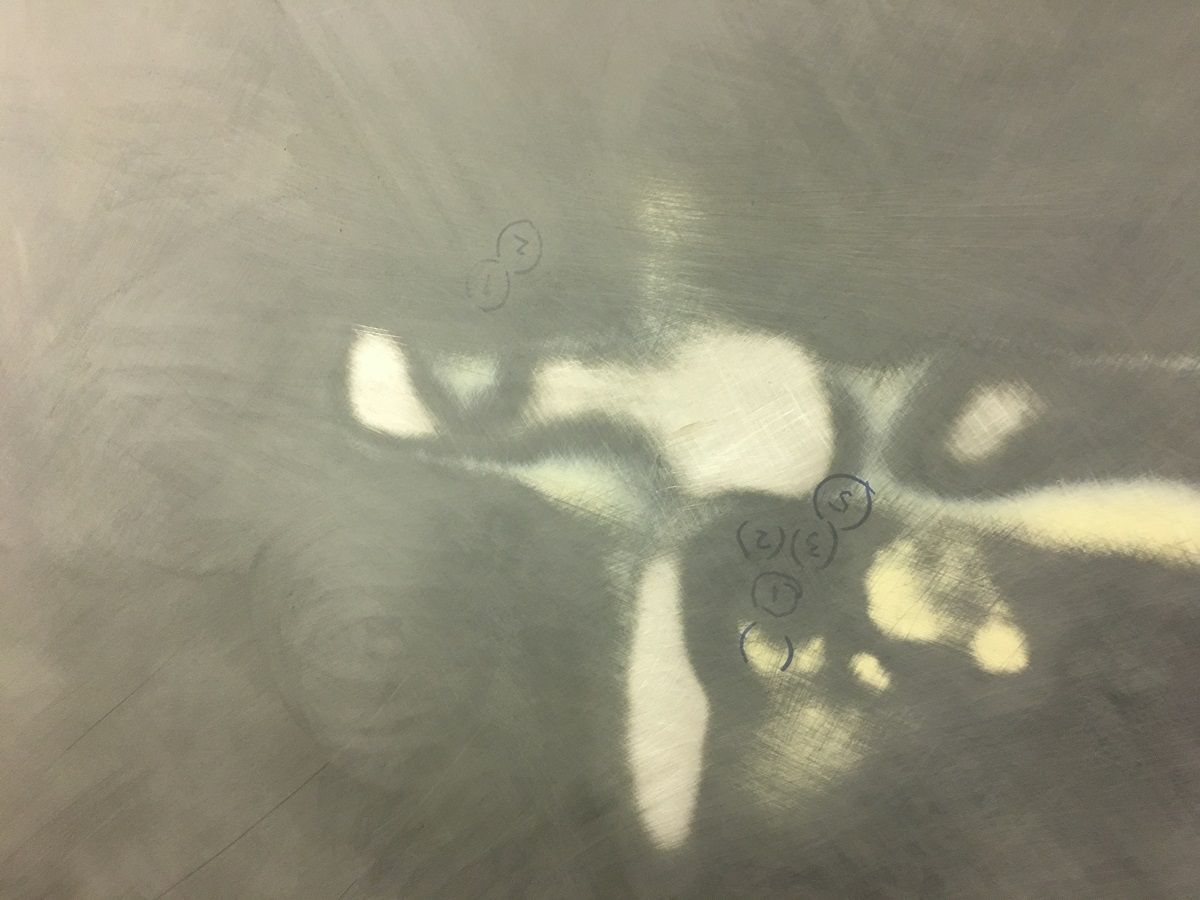 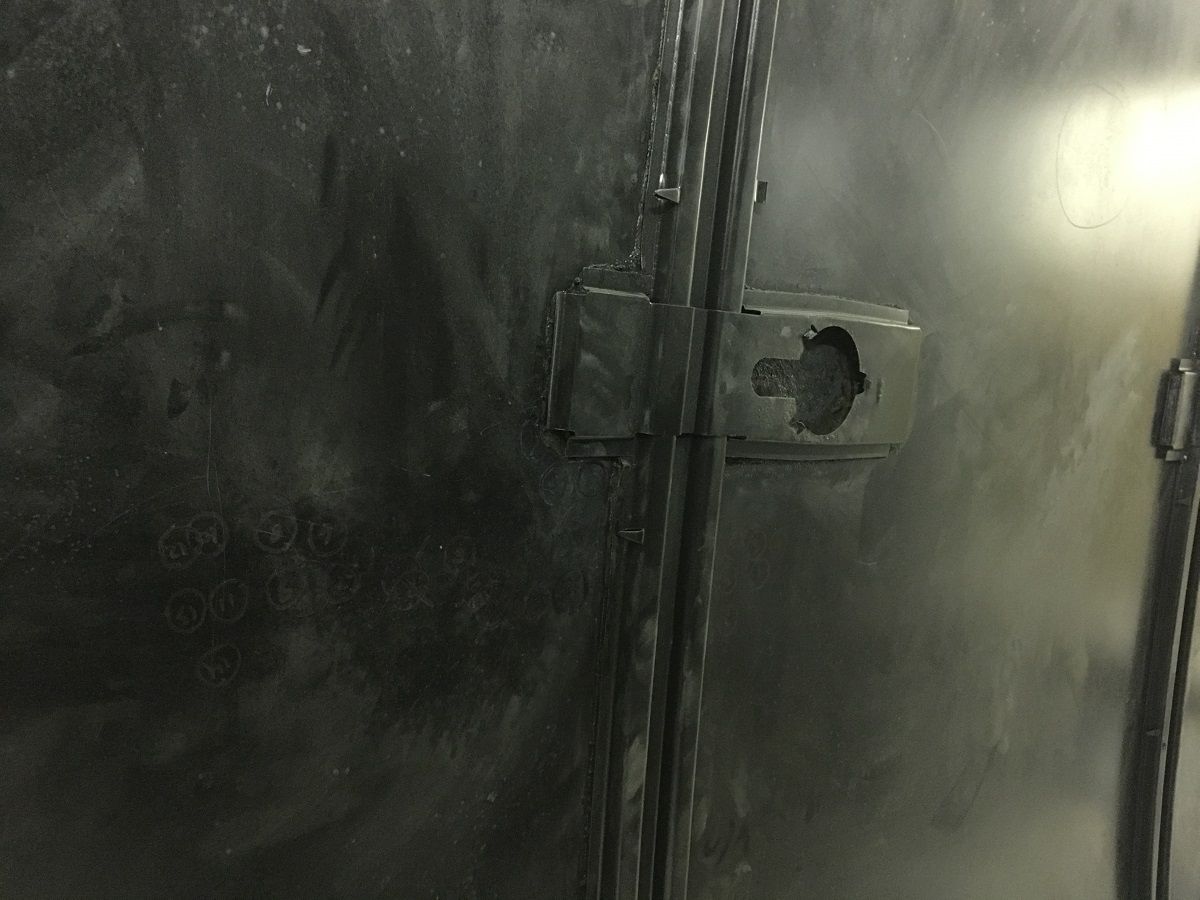 Our blaster was doing the brace from underneath/inside and the inadvertent stray media hitting the adjacent roof skin stretched it, pulling it inward toward the media stream . On the outside the “unstretched” area shows as a high spot, the stretched part that needs shrinking is seen as a low. So if you must media blast any braces or internal structure, block off the skin next to it so no media touches it. Save yourself the extra body work. We fixed the lows by locating the exact spots on the inside that needed shrinking and tapping outward into a small shot bag. To locate, a rare earth magnet is placed outside on the roof skin in each low spot, and some grinding dust finds the magnet on the inside where we can mark the perimeter both inside and out, and work with one person on either side to remove the lows. (See video, magnet marks highs or lows, it doesn’t care) For multiple lows, mark both sides of all spots and number them, so you can move from one spot to the next, calling out the number desired to your shrinking assistant. If your car is too clean to have grinding dust, look under your bench grinder. Magnet use video: https://www.youtube.com/watch?v=HHHTKiWZ2Xo Note on the inside roof skin picture the multiple numbered circles where we found low spots to address. .
__________________
Robert |
|
|

|
|
|
#1078 |
|
Registered User
Join Date: Jan 2013
Location: Leonardtown, MD
Posts: 1,648
|
Re: 55 Wagon Progress
So we've been blocking out epoxy primer, it sure is nice to be able to rotate the car where you need it instead of sanding upside down on the bottoms of drip rails.
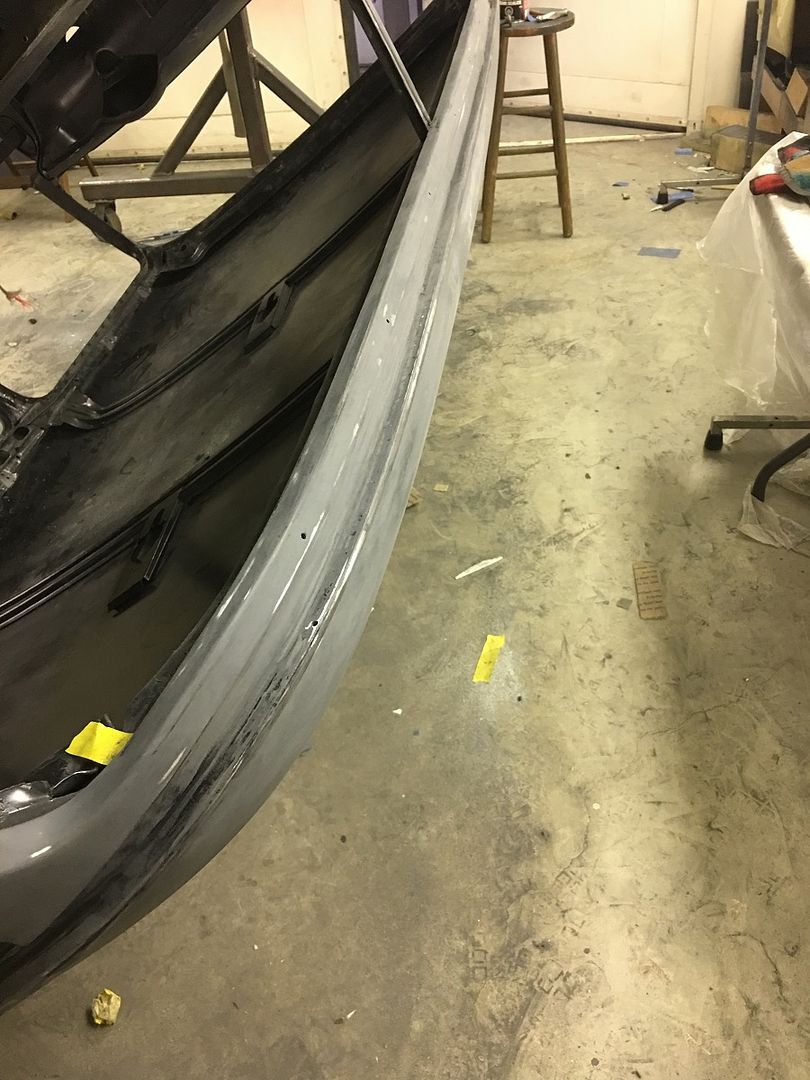 But then you walk past the Driver's A pillar and see holes that shouldn't be there.  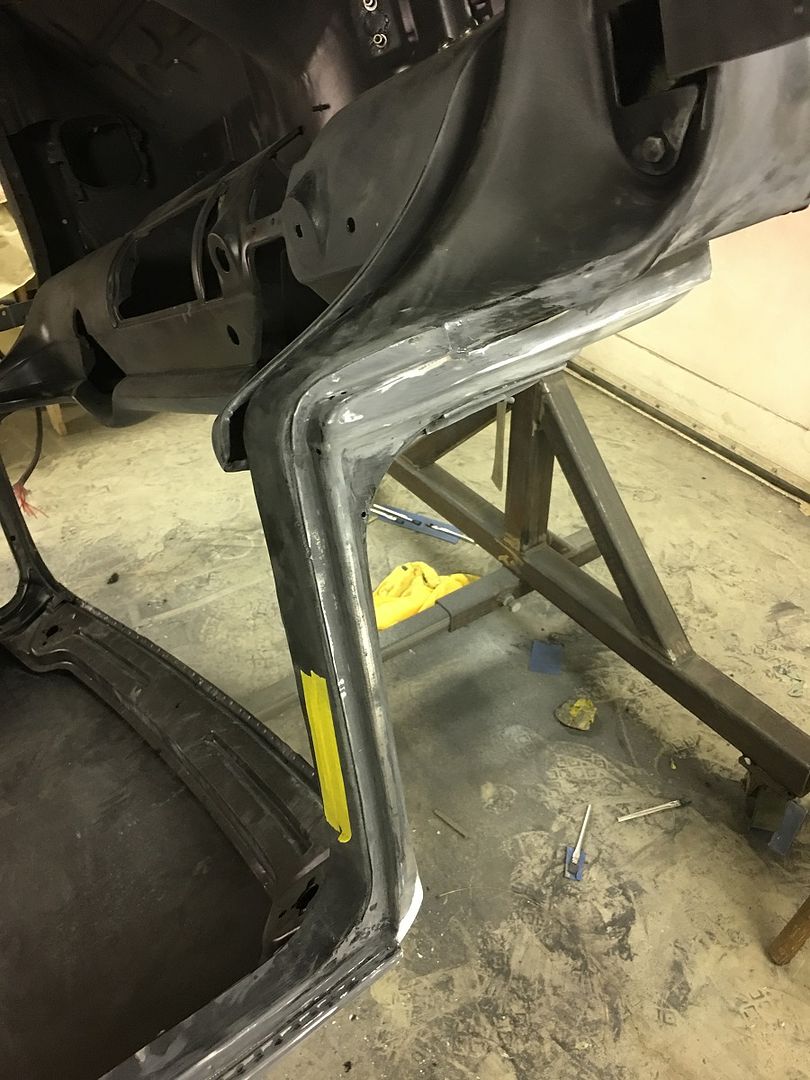 I don't know how I've missed this before. We did have this same repair done to the other side, I guess with the roof damage confined to that same side I must have not thought this side was suspect. Goes to show, check ALL problem areas, especially if issues show on one side. 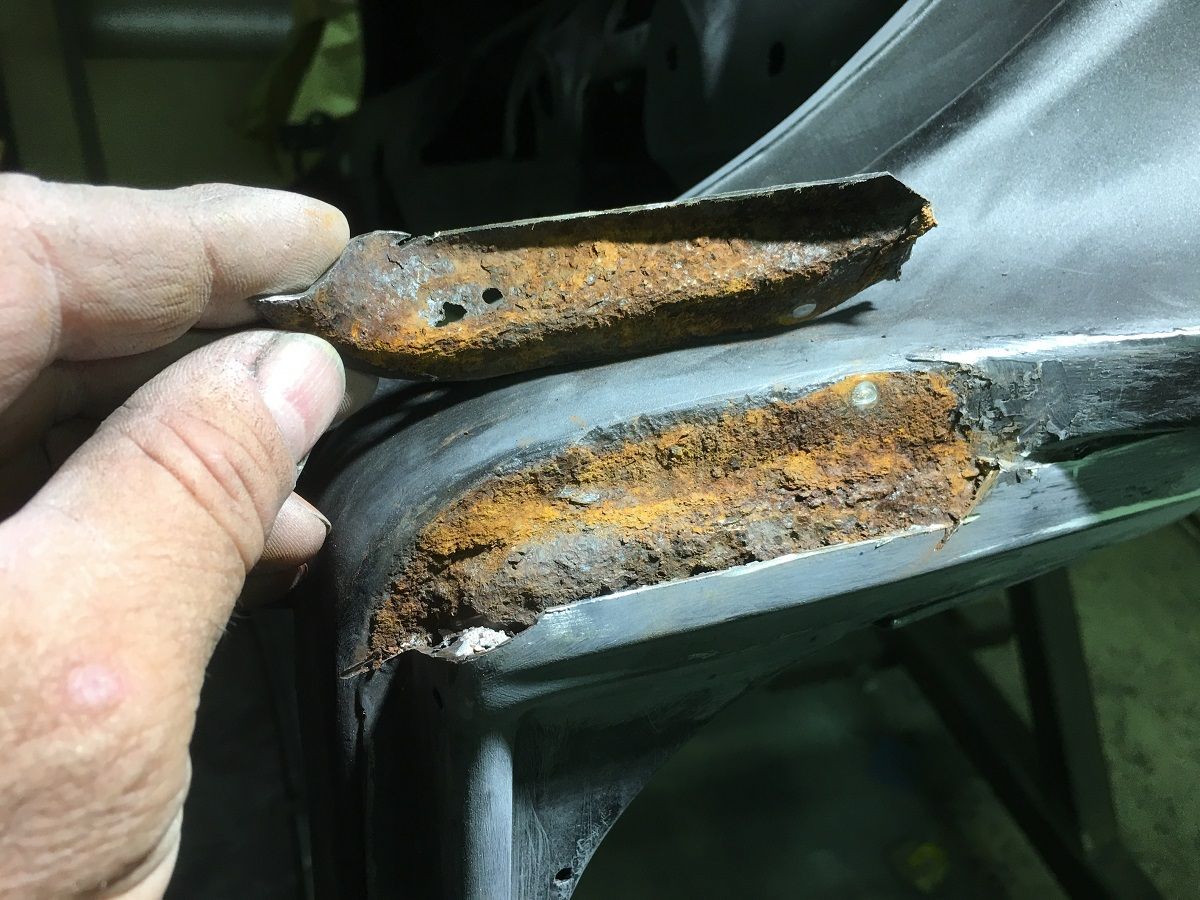   Inside the hole has a minimal amount of surface rust, especially for 64 years old. Safe to say the damage was caused by water/dirt accumulation between the center structure (the one we're remaking) and the outer skin. Oh well, it's been a while since I've had a back up and punt moment. Glad this was found before the green kandy went on. Starting to make the new replacement for the inside, using 14 gauge cold rolled steel. https://www.youtube.com/watch?v=G7xV0t4WaVY https://www.youtube.com/watch?v=0gpH2WfqWVc Quite a bit if stretch added for the part to match the original.. 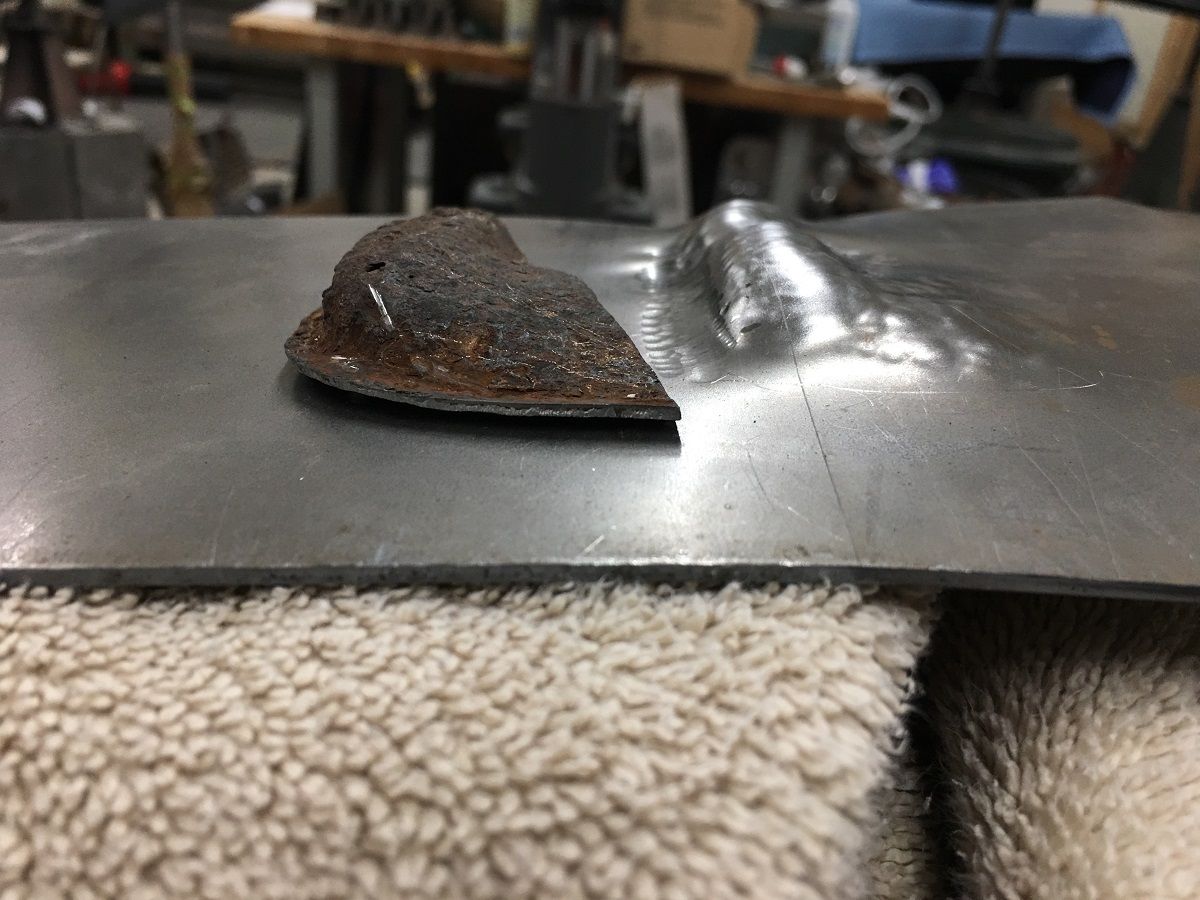 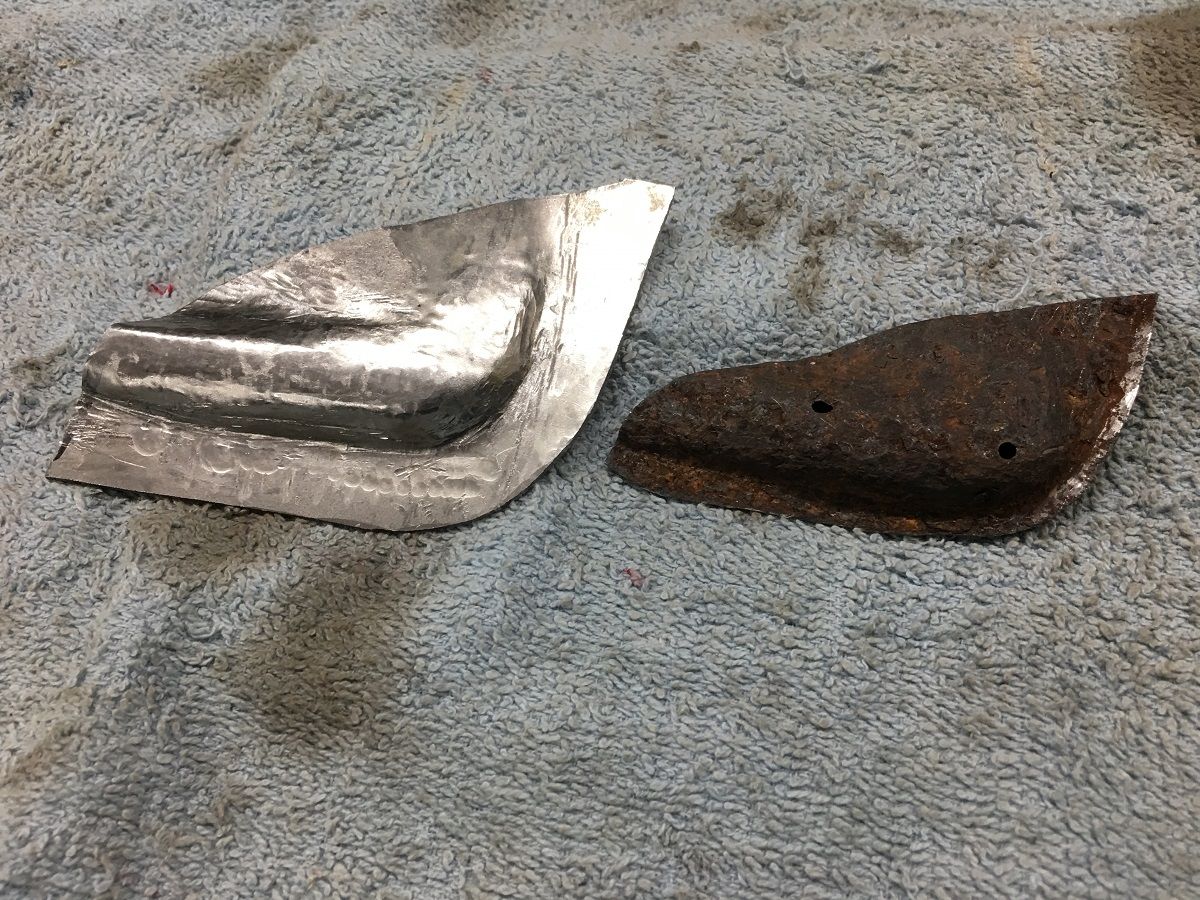 Rough shaped on the MH19, tuned up a bit with body hammers, punches used as anvils, and various other implements of destruction. Trimmed and fitted: 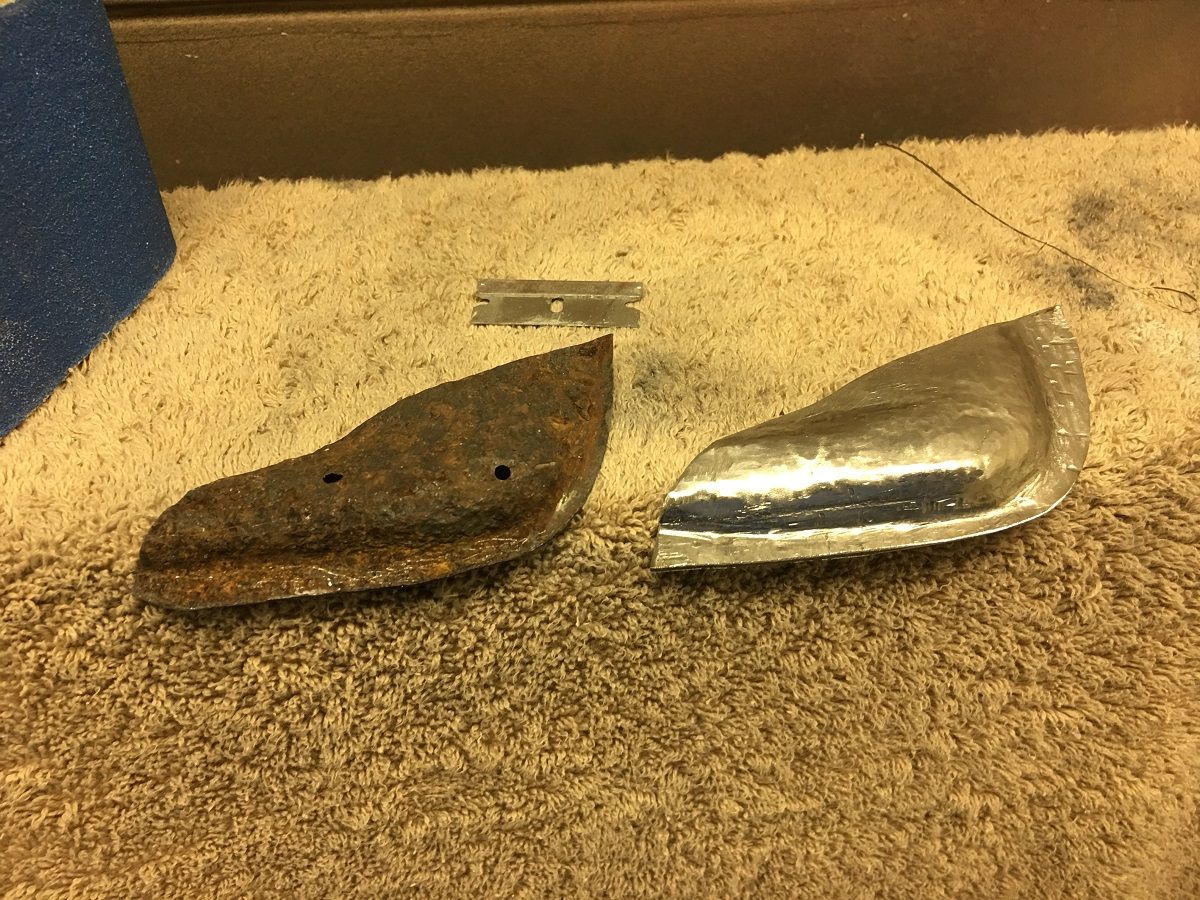 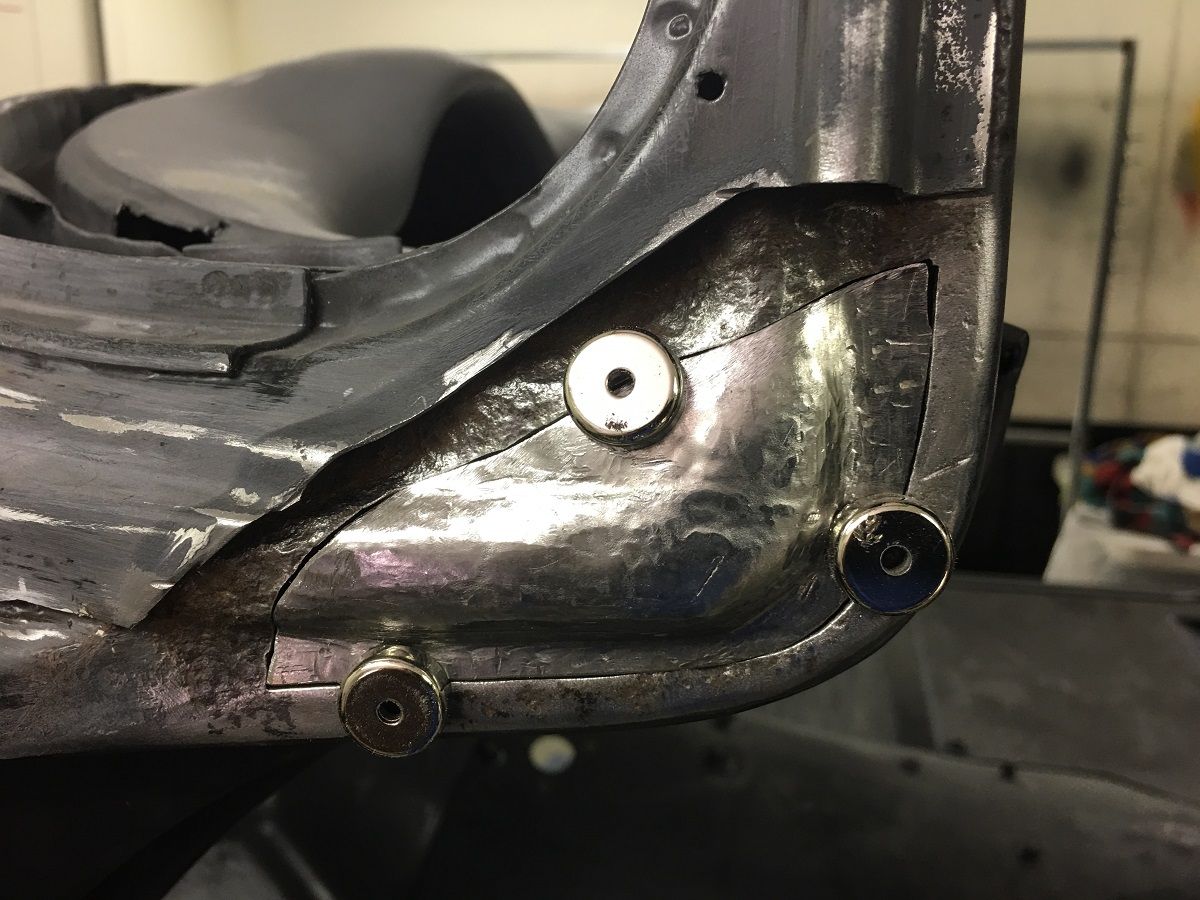 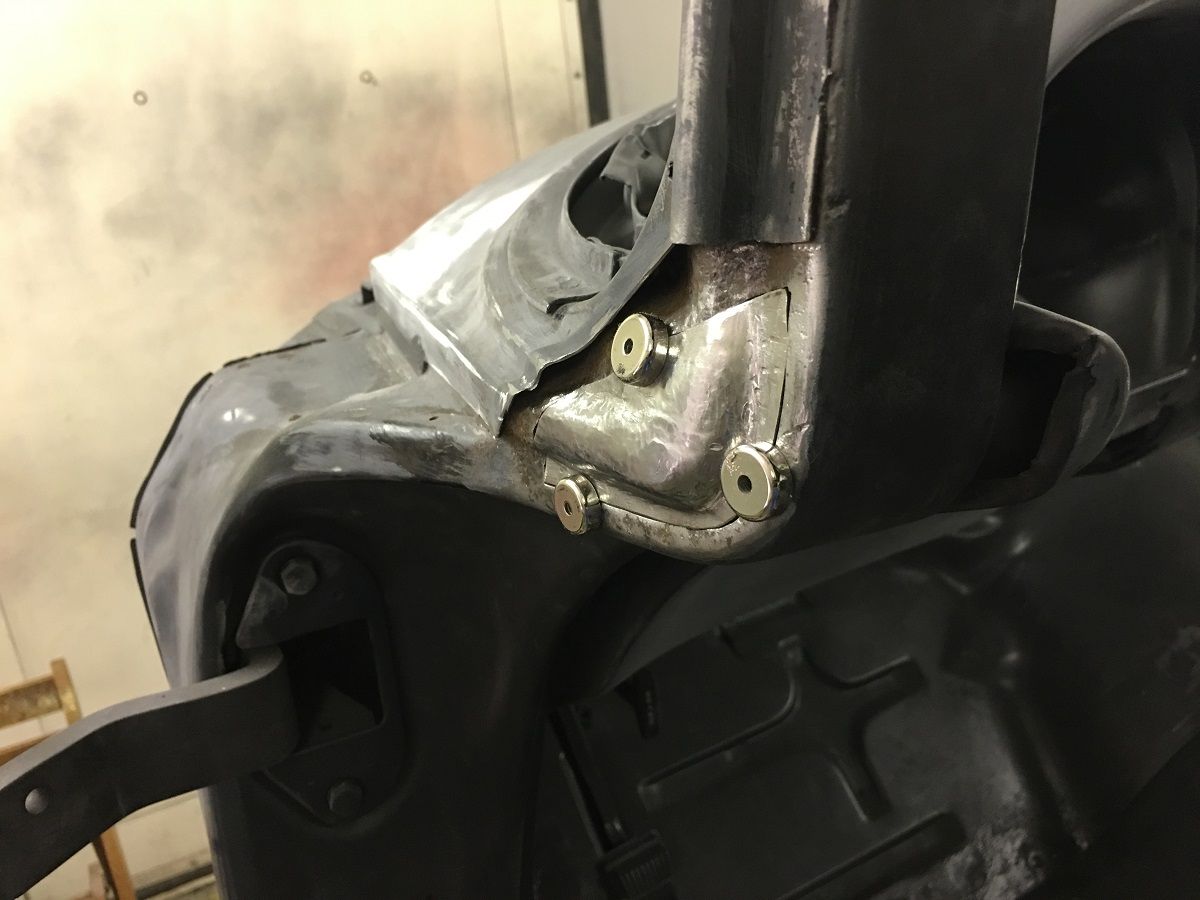 All ready for welding. Meanwhile, Mike has been working on the pointy end of the arrow, here stretching an inside corner to better fit the housing.... https://www.youtube.com/watch?v=ohC3TdJKy1o And adding holes for the plug welds.... 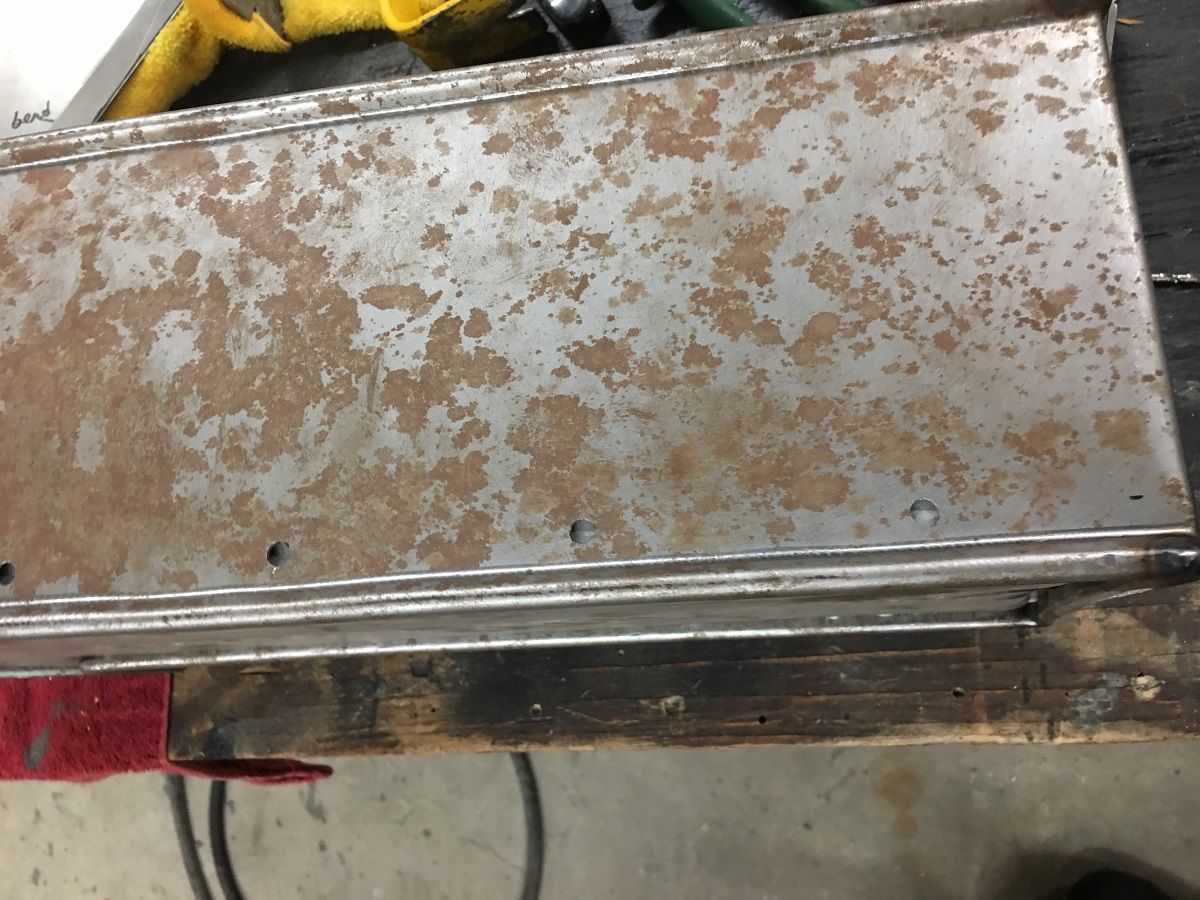 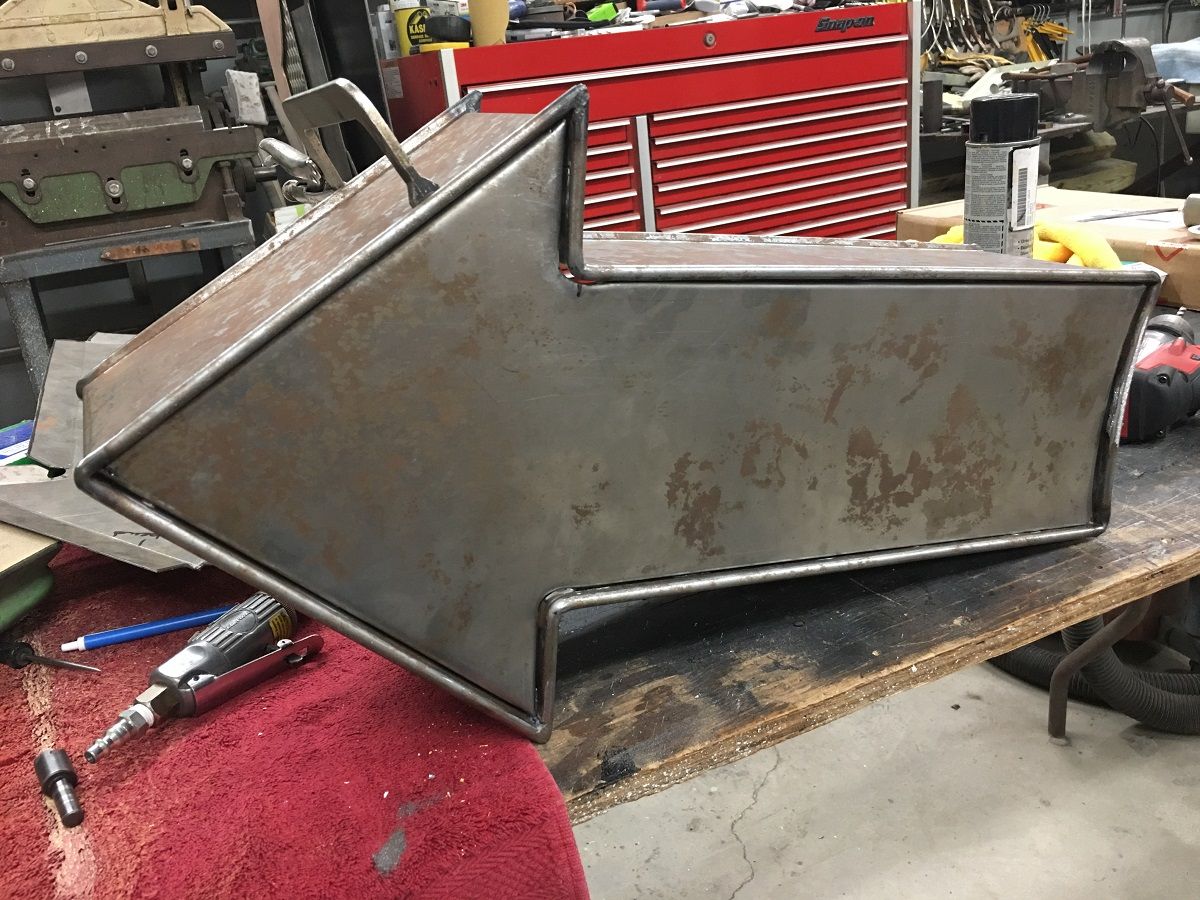 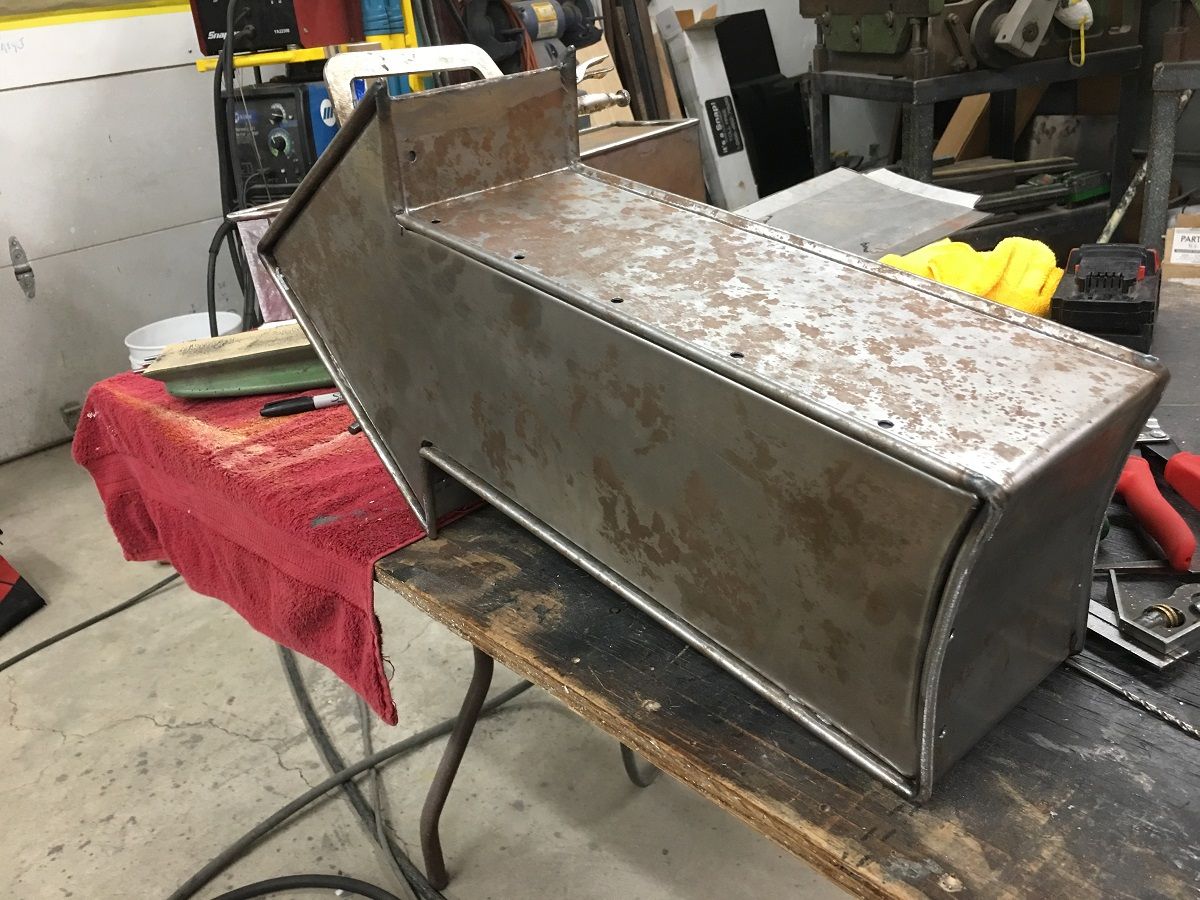
__________________
Robert |
|
|

|
|
|
#1079 |
|
Post Whore
  Join Date: May 2015
Location: Alabama
Posts: 14,670
|
Re: 55 Wagon Progress
good catch Robert ....were those drain holes in those pieces?
__________________
Mongo...aka Greg RIP Dad RIP Jesse 1981 C30 LQ9 NV4500..http://67-72chevytrucks.com/vboard/s...d.php?t=753598 Mongos AD- LS3 TR6060...http://67-72chevytrucks.com/vboard/s...34#post8522334 Columbus..the 1957 IH 4x4...http://67-72chevytrucks.com/vboard/s...63#post8082563 2023 Chevy Z71..daily driver |
|
|

|
|
|
#1080 |
|
Registered User
Join Date: Jan 2013
Location: Leonardtown, MD
Posts: 1,648
|
Re: 55 Wagon Progress
I believe the one hole was factory and for drainage, it is too perfectly round. The other was not..... but it warranted investigation nonetheless.
__________________
Robert |
|
|

|
|
|
#1081 |
|
Senior Member
 Join Date: Mar 2011
Location: West Plains, Missouri
Posts: 7,559
|
Re: 55 Wagon Progress
Nice repair piece...Jim
__________________
my build thread: http://67-72chevytrucks.com/vboard/s...d.php?t=459839 Jimbo's long bed step build:http://67-72chevytrucks.com/vboard/s...t=464626<br /> |
|
|

|
|
|
#1082 |
|
Registered User
Join Date: Jan 2013
Location: Leonardtown, MD
Posts: 1,648
|
Re: 55 Wagon Progress
Thanks Jim!
After a week in FL for the day job, time to get the inner patch welded in place. Tacked using the TIG: 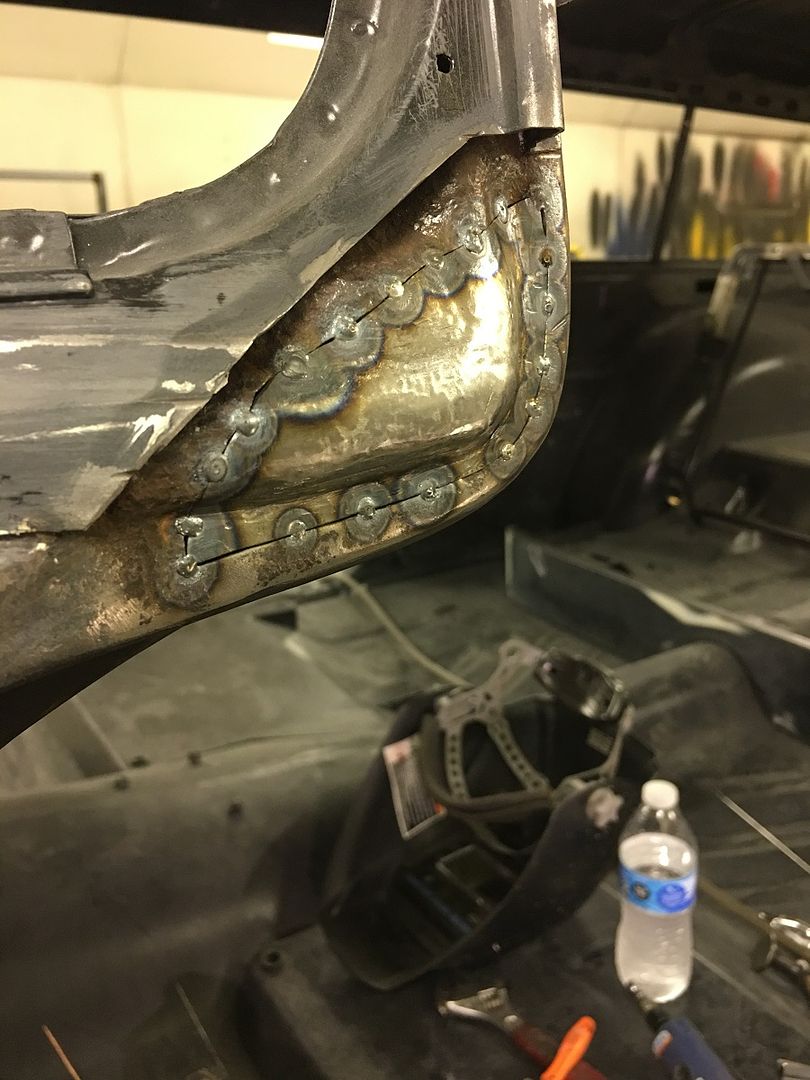 video: https://youtu.be/UixLOAZejMI 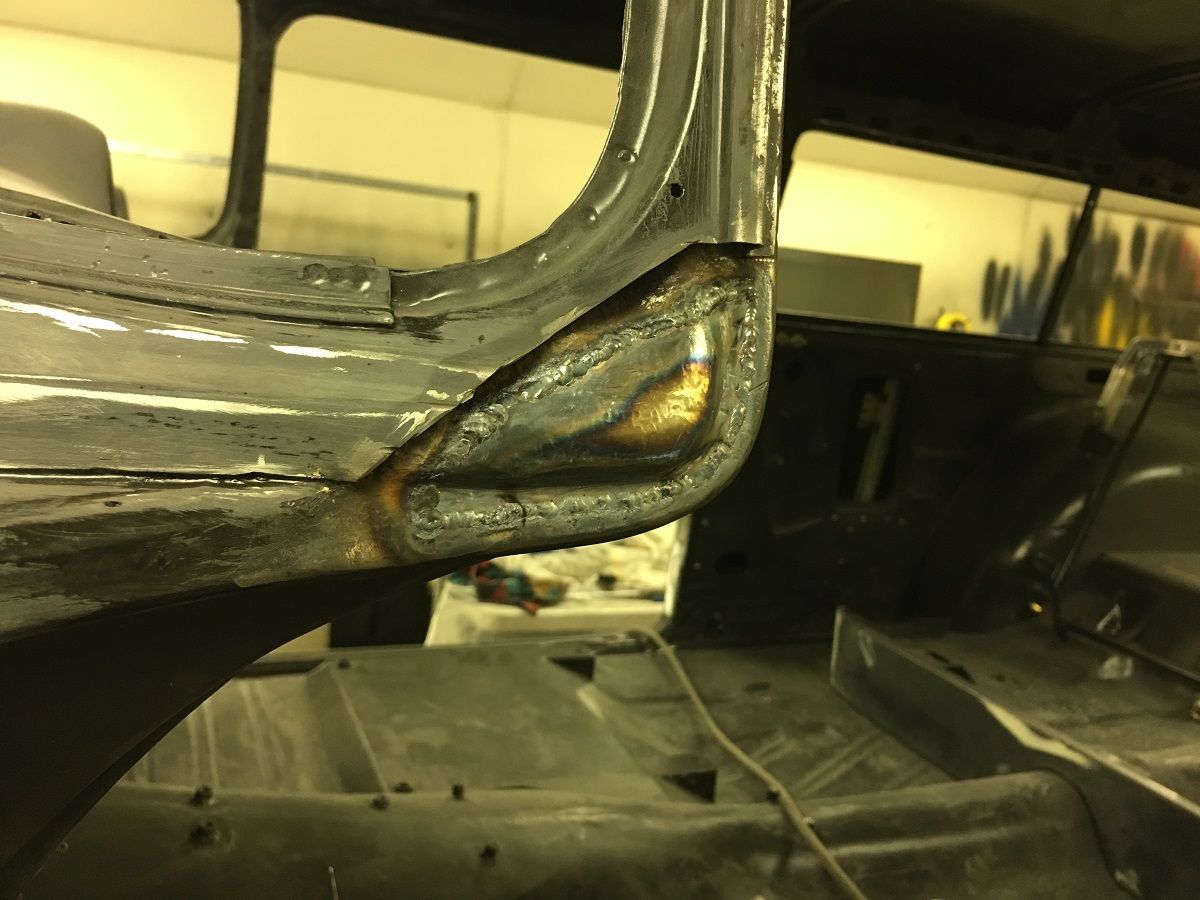 welds dressed: 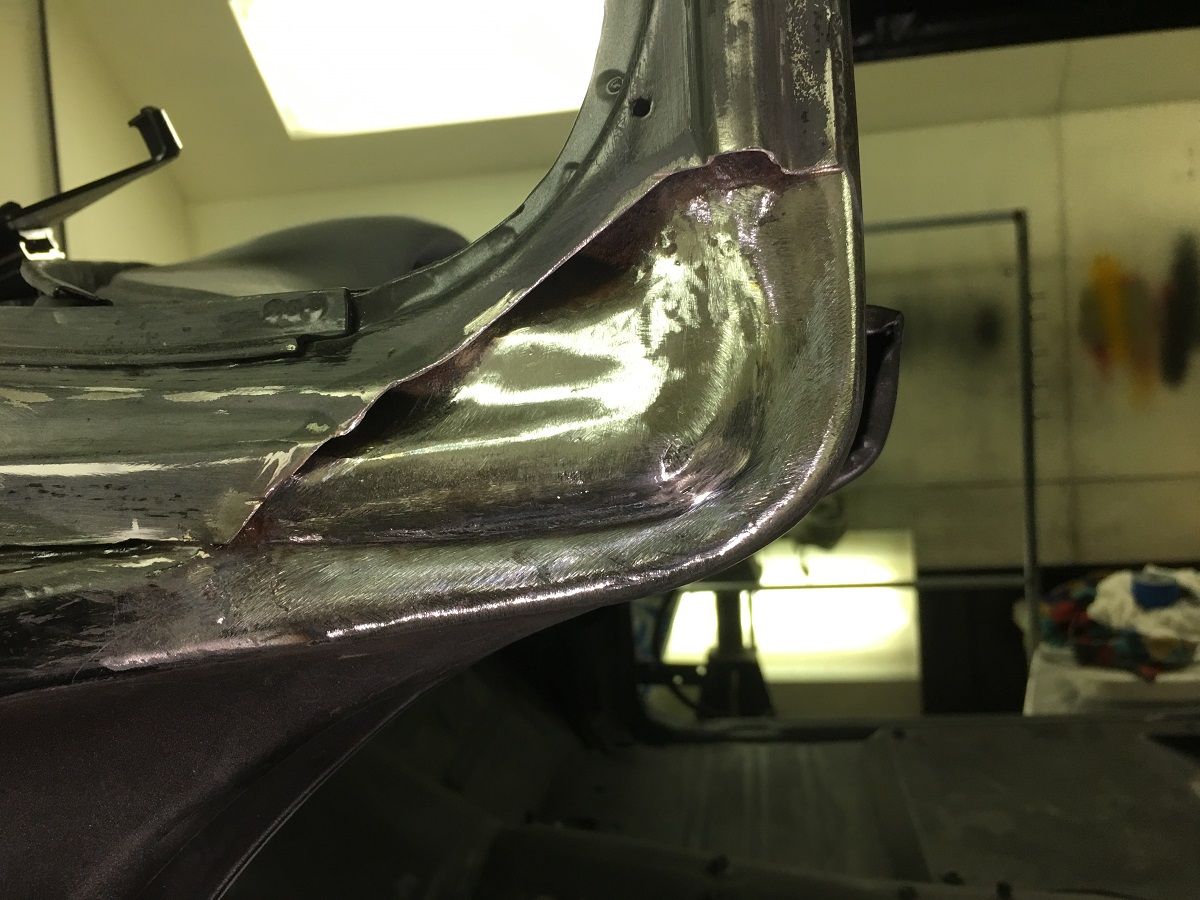 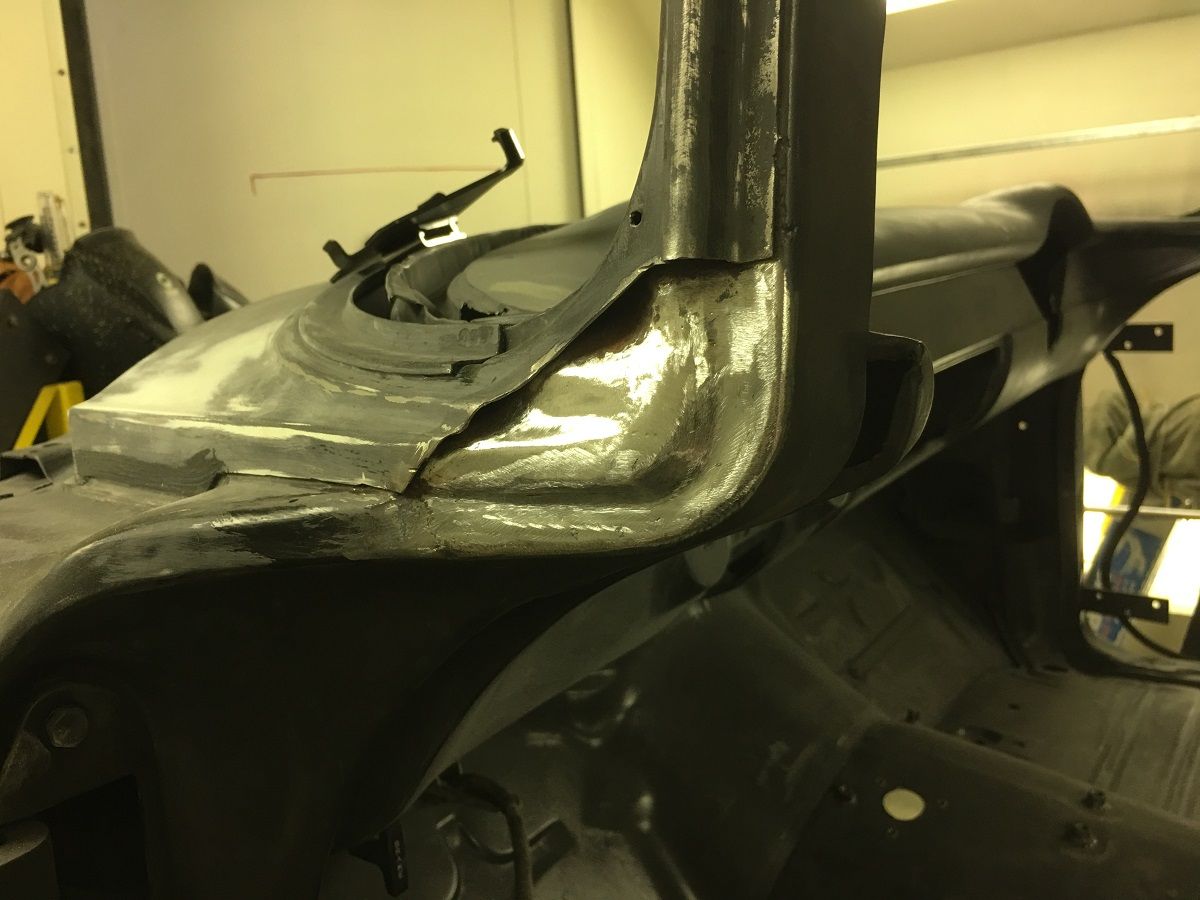 Epoxy primer added: 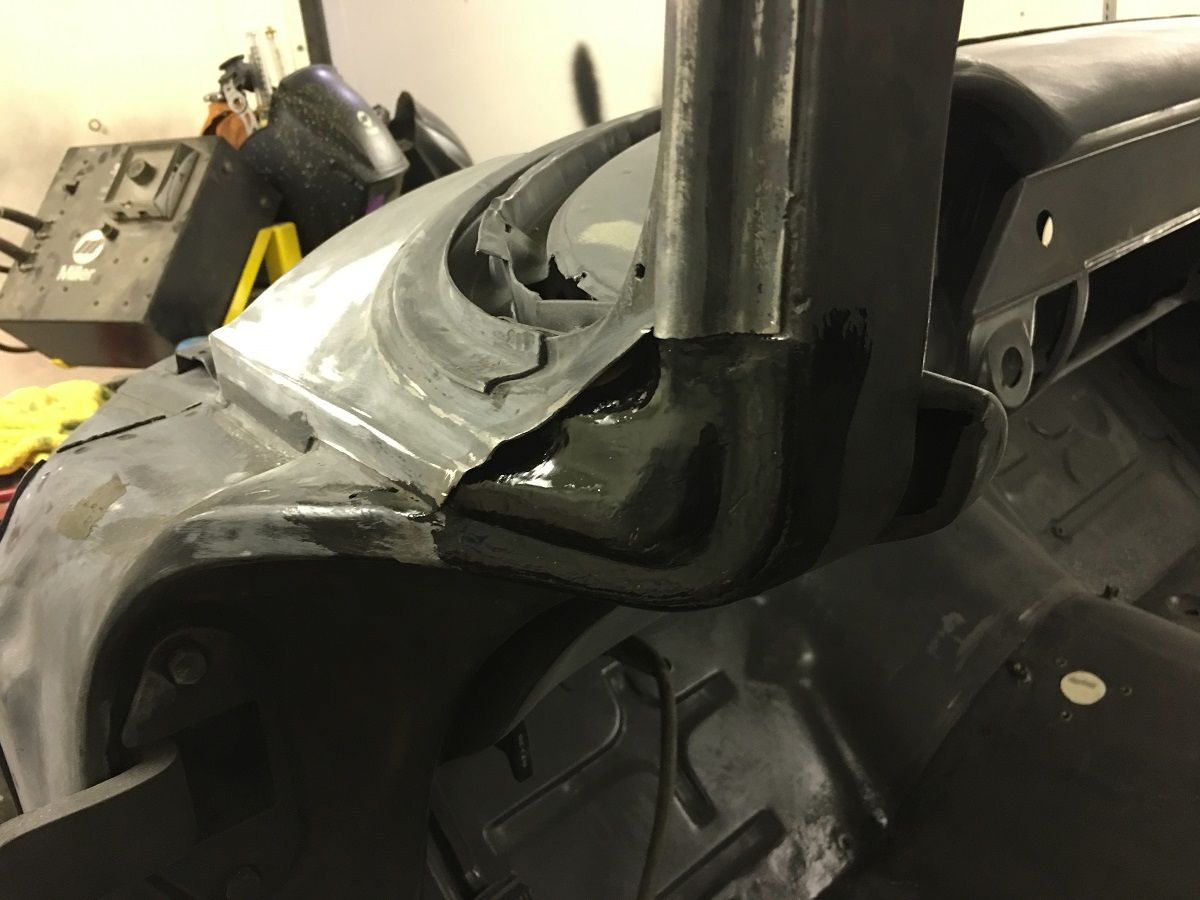
__________________
Robert |
|
|

|
|
|
#1083 |
|
Post Whore
  Join Date: May 2015
Location: Alabama
Posts: 14,670
|
Re: 55 Wagon Progress
wow ..great work on something thatll never be seen..shows commitment...
__________________
Mongo...aka Greg RIP Dad RIP Jesse 1981 C30 LQ9 NV4500..http://67-72chevytrucks.com/vboard/s...d.php?t=753598 Mongos AD- LS3 TR6060...http://67-72chevytrucks.com/vboard/s...34#post8522334 Columbus..the 1957 IH 4x4...http://67-72chevytrucks.com/vboard/s...63#post8082563 2023 Chevy Z71..daily driver |
|
|

|
|
|
#1084 |
|
Registered User
 Join Date: Jan 2003
Location: Safford,AZ
Posts: 3,625
|
Re: 55 Wagon Progress
nice!
__________________
1969  307, t350 307, t3501950 Chevy Wagon 1978 Big 10 1967 C10, 250,3-OTT |
|
|

|
|
|
#1085 |
|
Registered User
Join Date: Jan 2013
Location: Leonardtown, MD
Posts: 1,648
|
Re: 55 Wagon Progress
Thanks Guys!
Now to get our outer patch fabricated.. The corner is going to need a GRUNCH of shrinking.. We started on the Baileigh, but the dies are only going to get us so far. So some tuck shrinking with some heat for persuasion was used.. 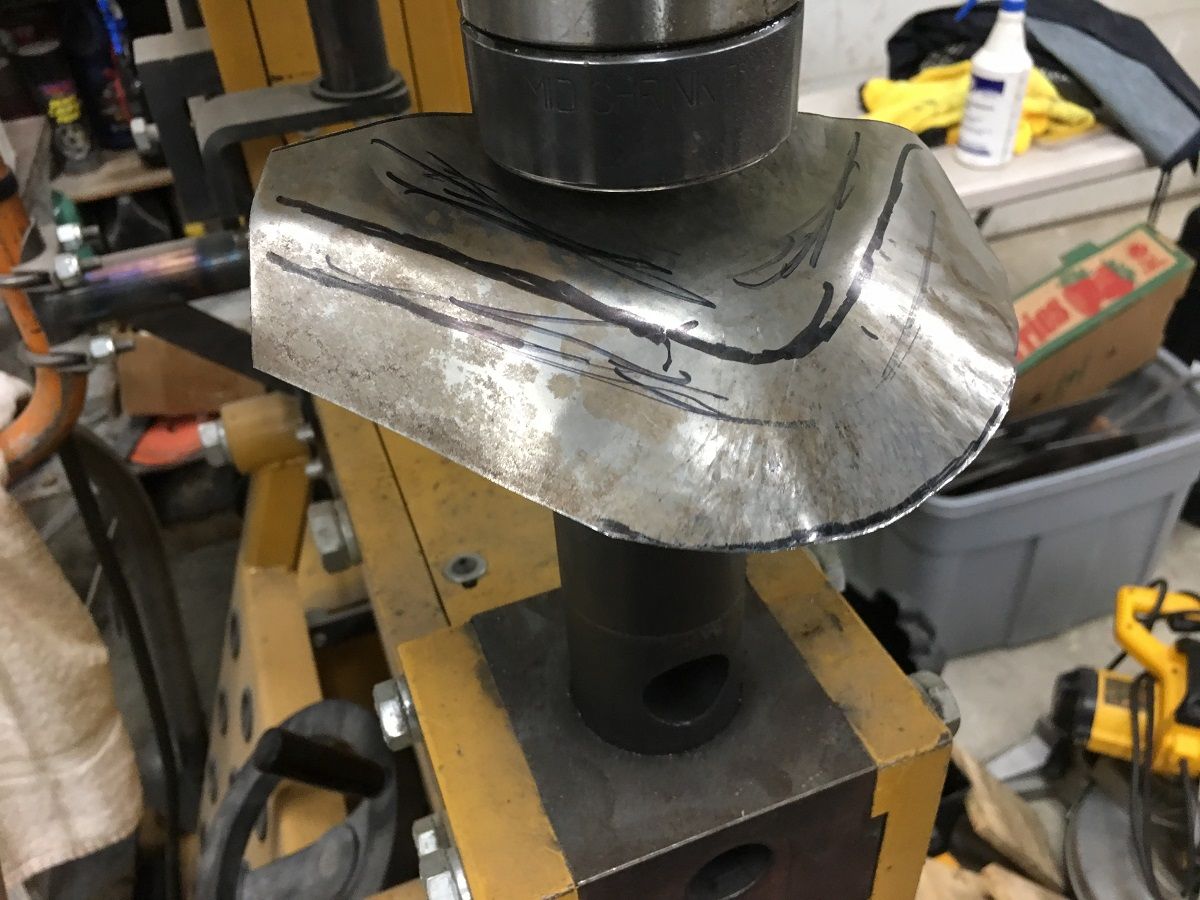 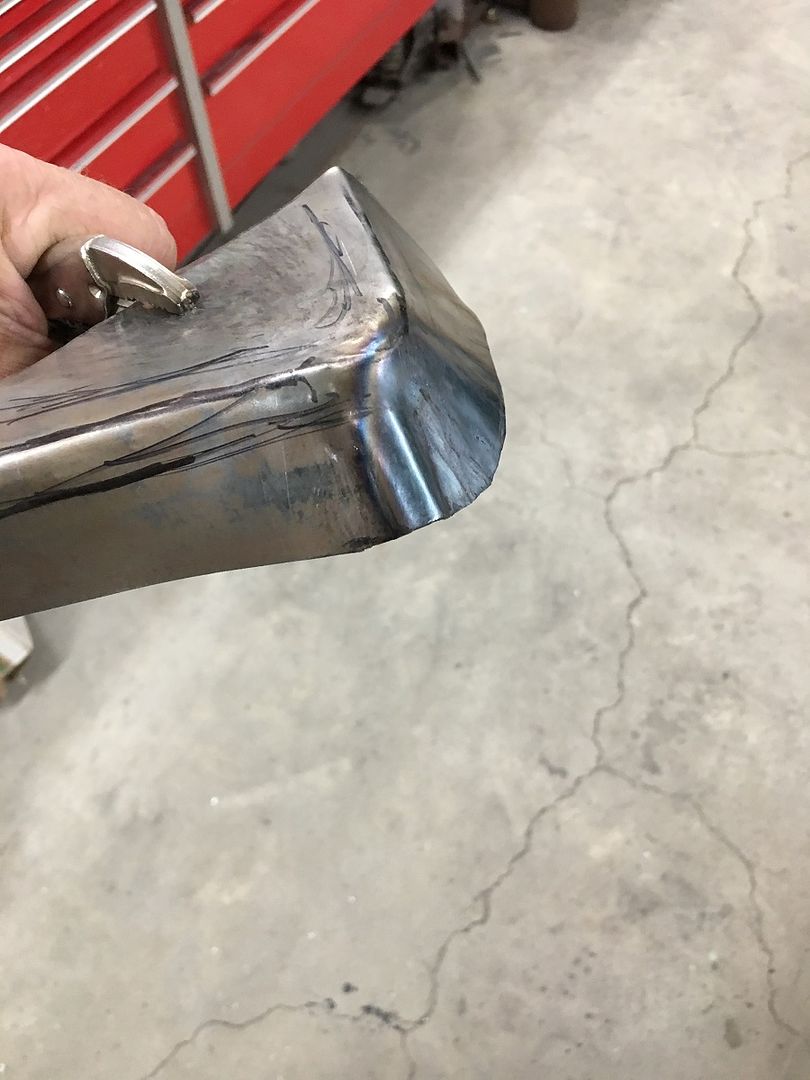 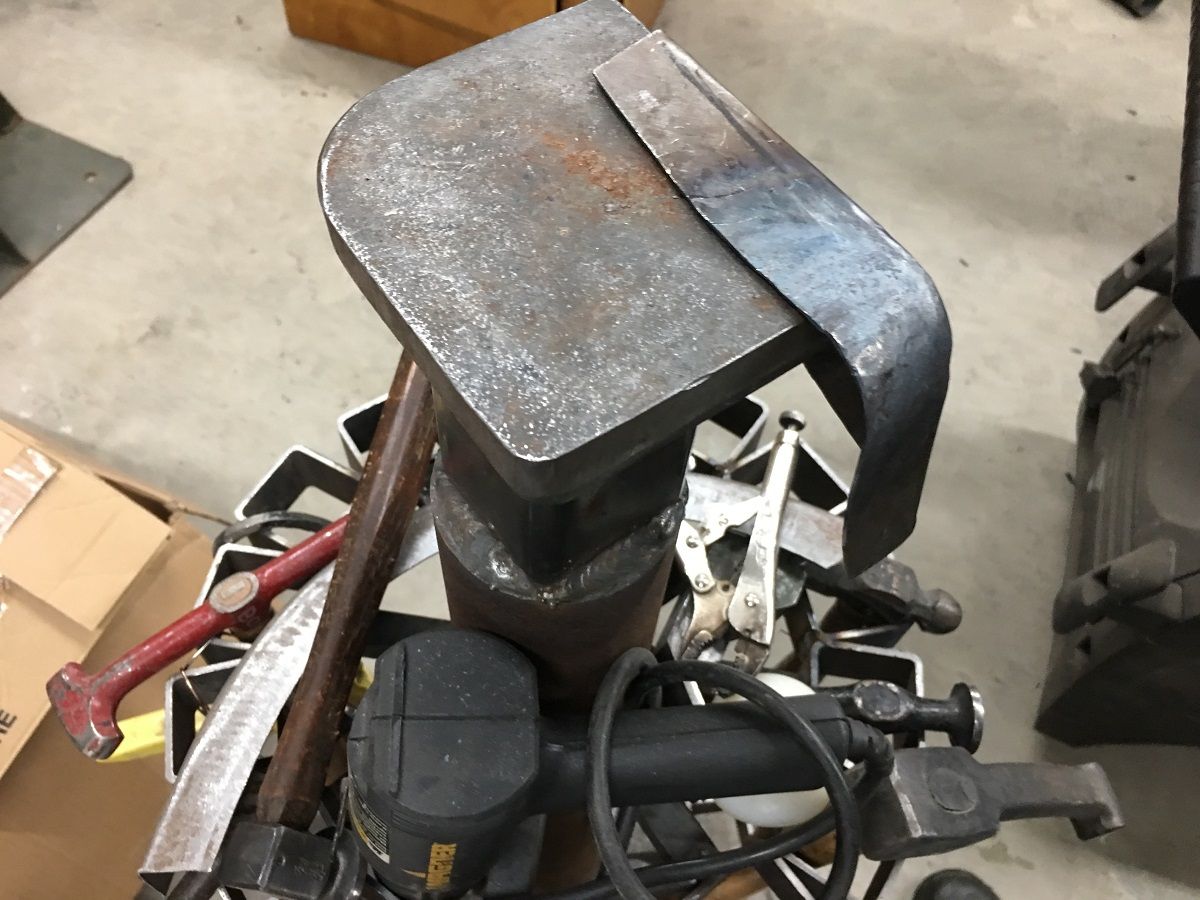 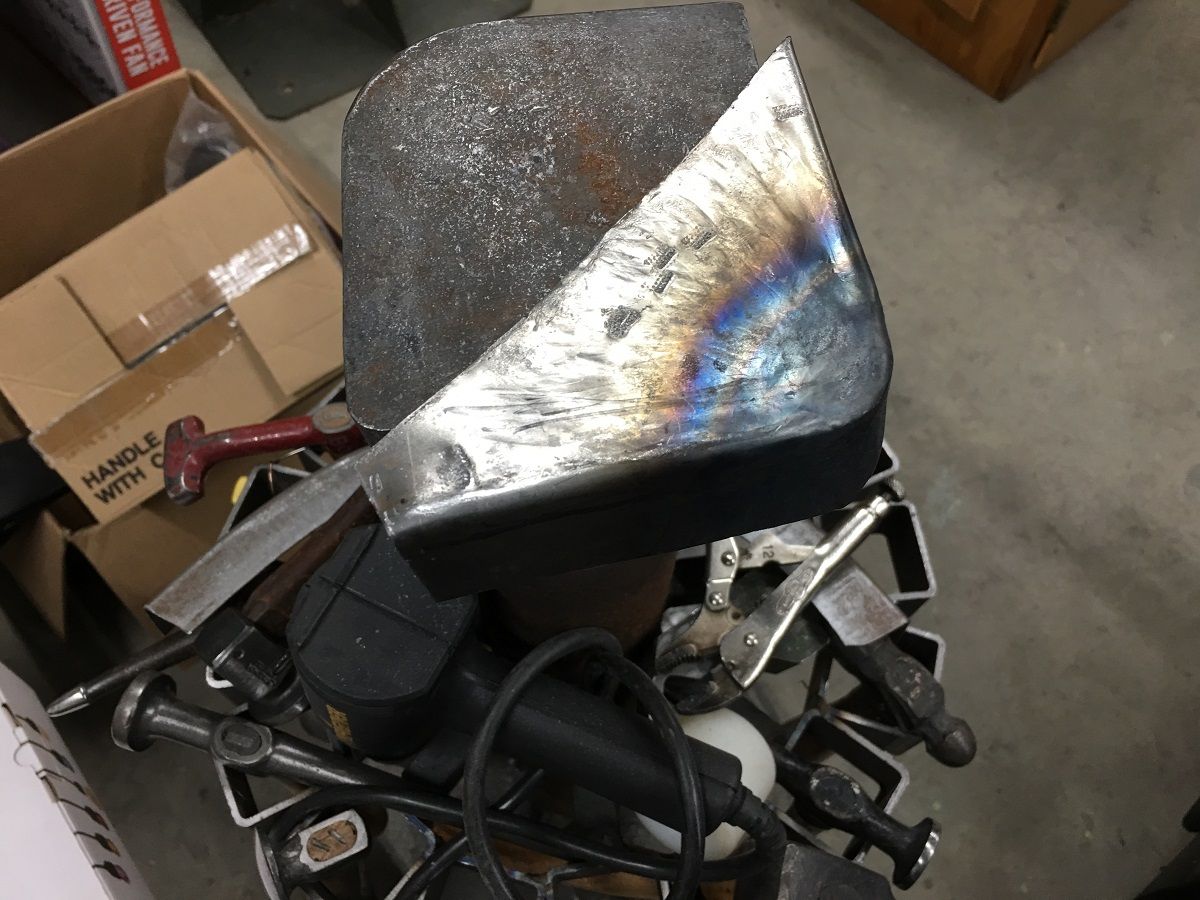 A tipping wheel in the bead roller was used to mark our bend line, and an upper press brake die used as an anvil to hammer the flanges over.. 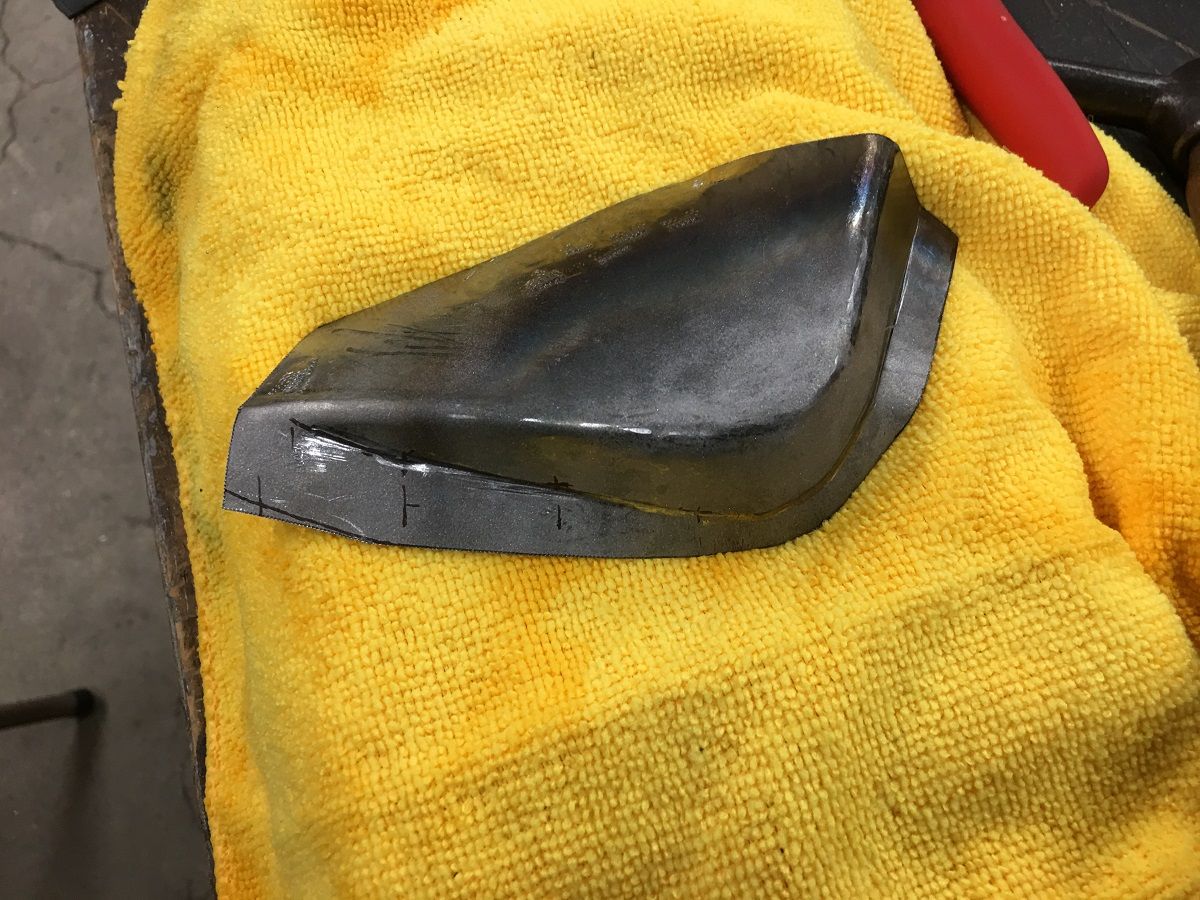 Some hammer action to stretch the corner flange so it will tip the full 90* https://www.youtube.com/watch?v=_FEIEQoGzdg 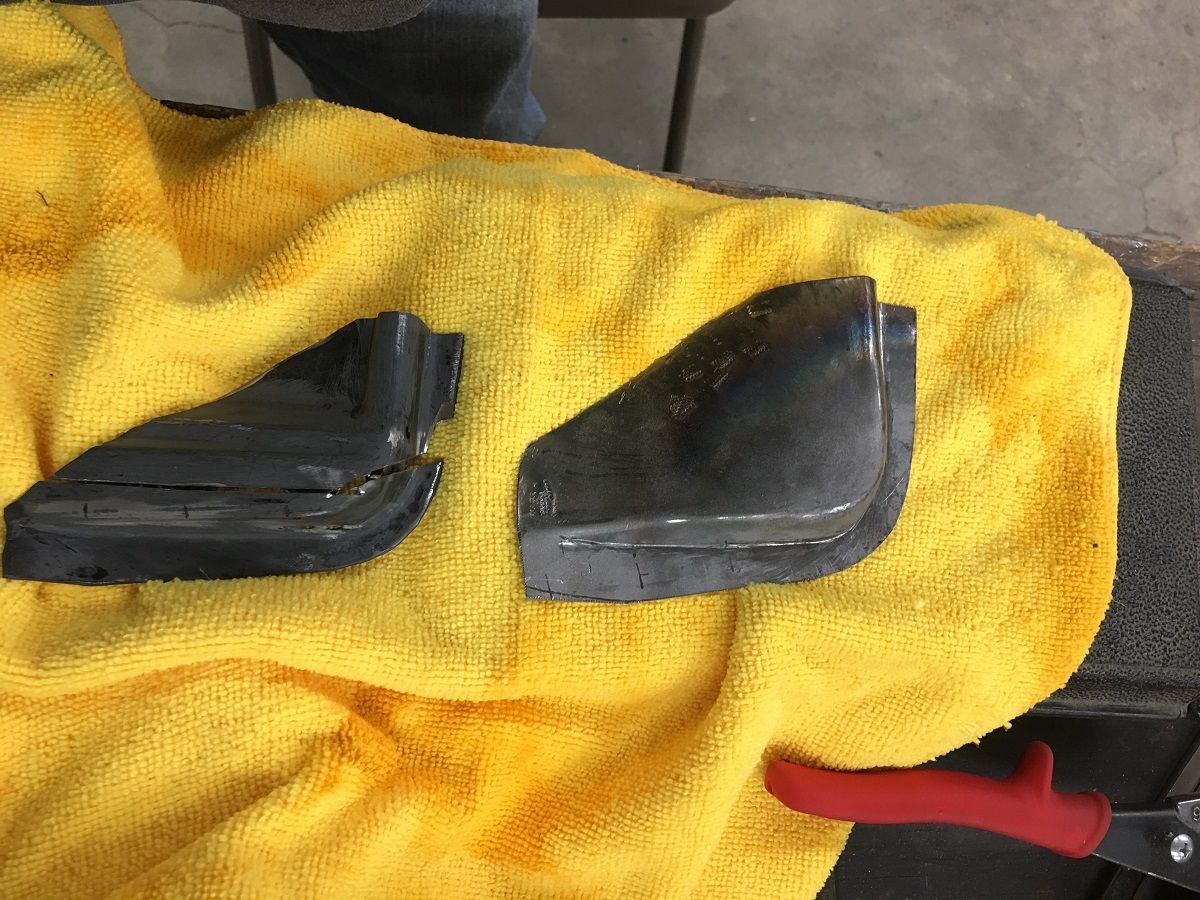 I missed some in process pictures here, but various hammers, anvils, punches, and other implements of destruction were employed to give us our basic shape... 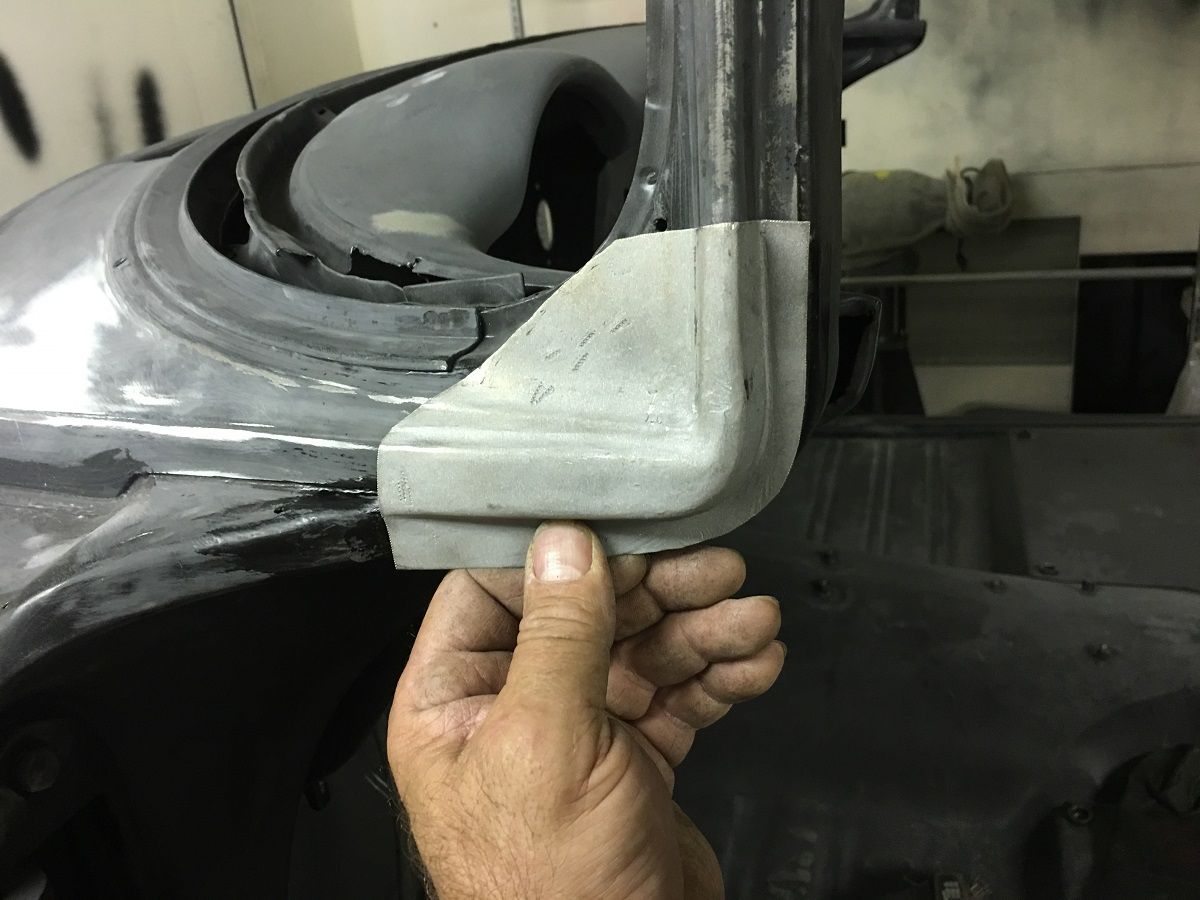 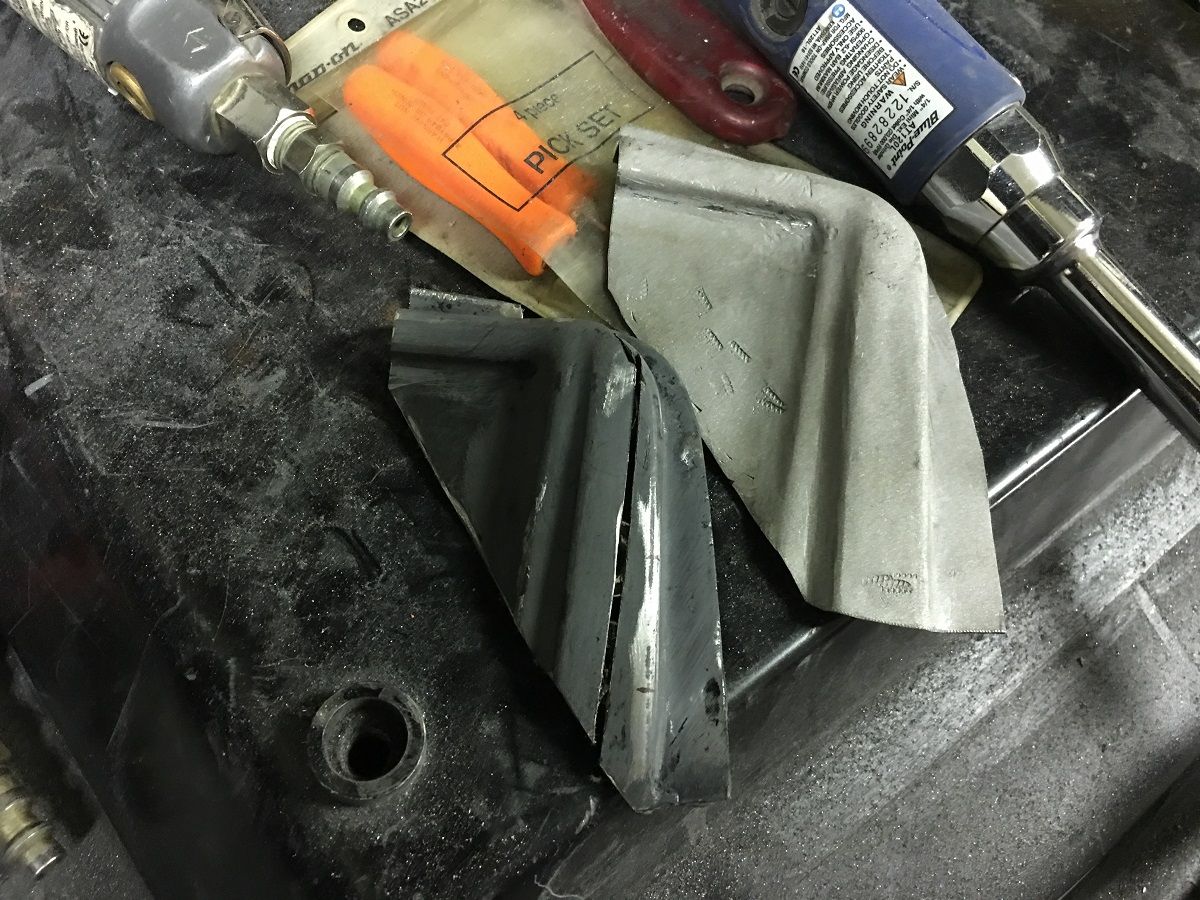 After a bit of fine tuning, it is trimmed and fitted into the A Pillar... https://www.youtube.com/watch?v=HCDRj5uOU3s and the windshield stainless is test fit for good measure.. 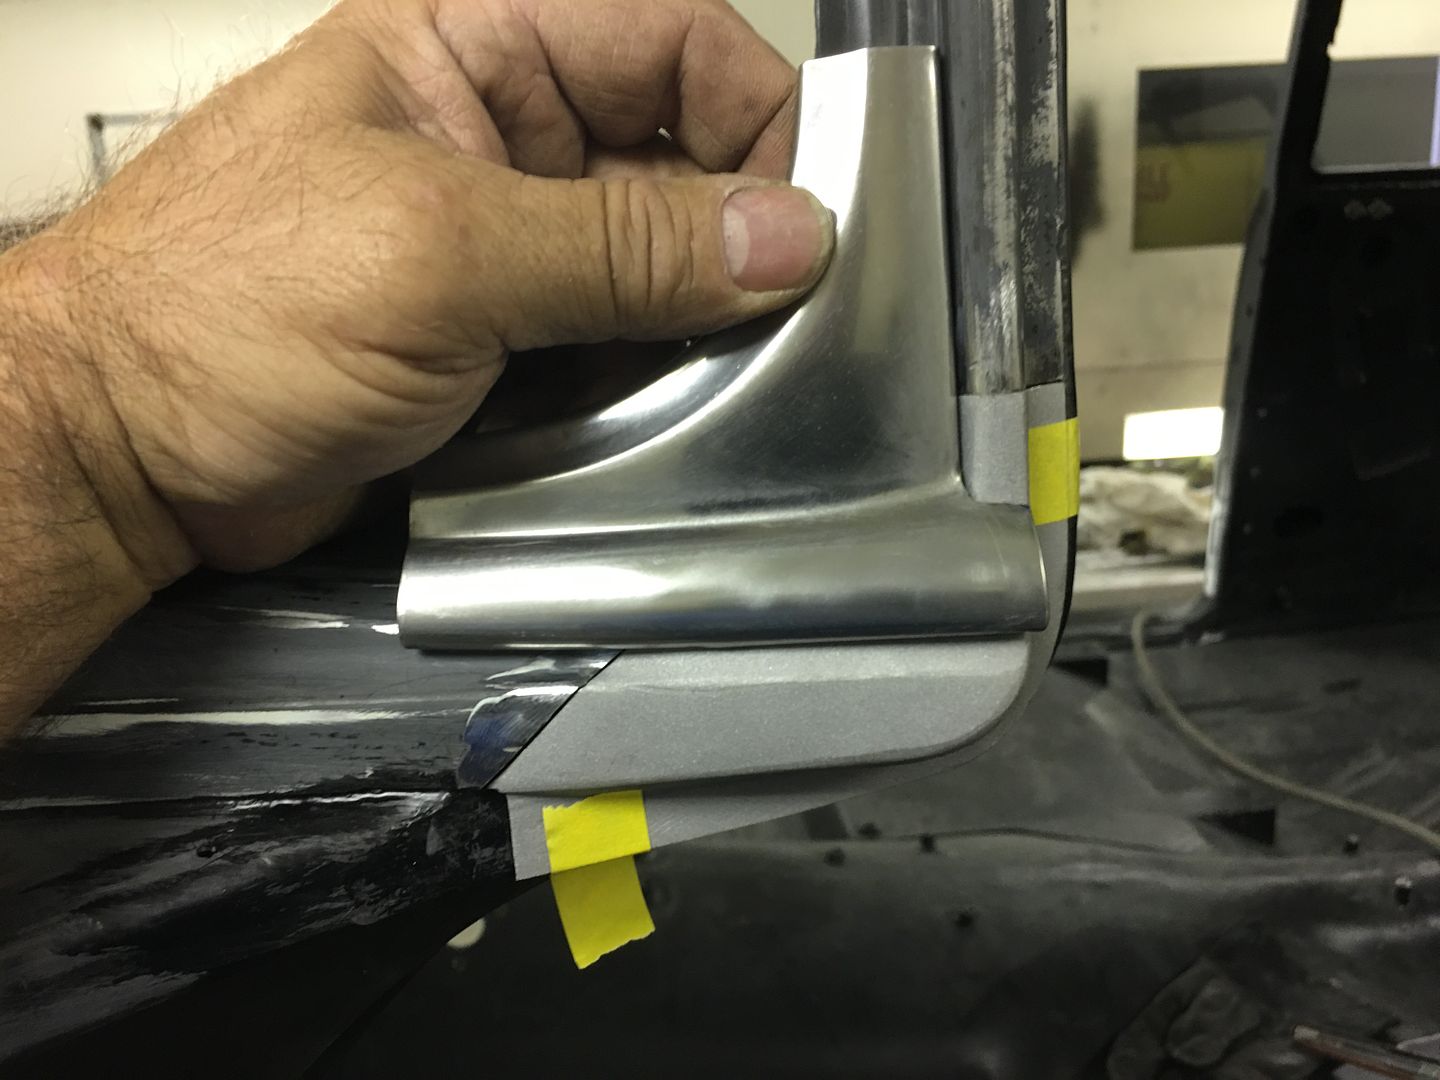 The finished piece is media blasted (Barton Garnet) so the SPI epoxy primer will have a good bite. The inside is primed as a bit more preventative measure over factory.... 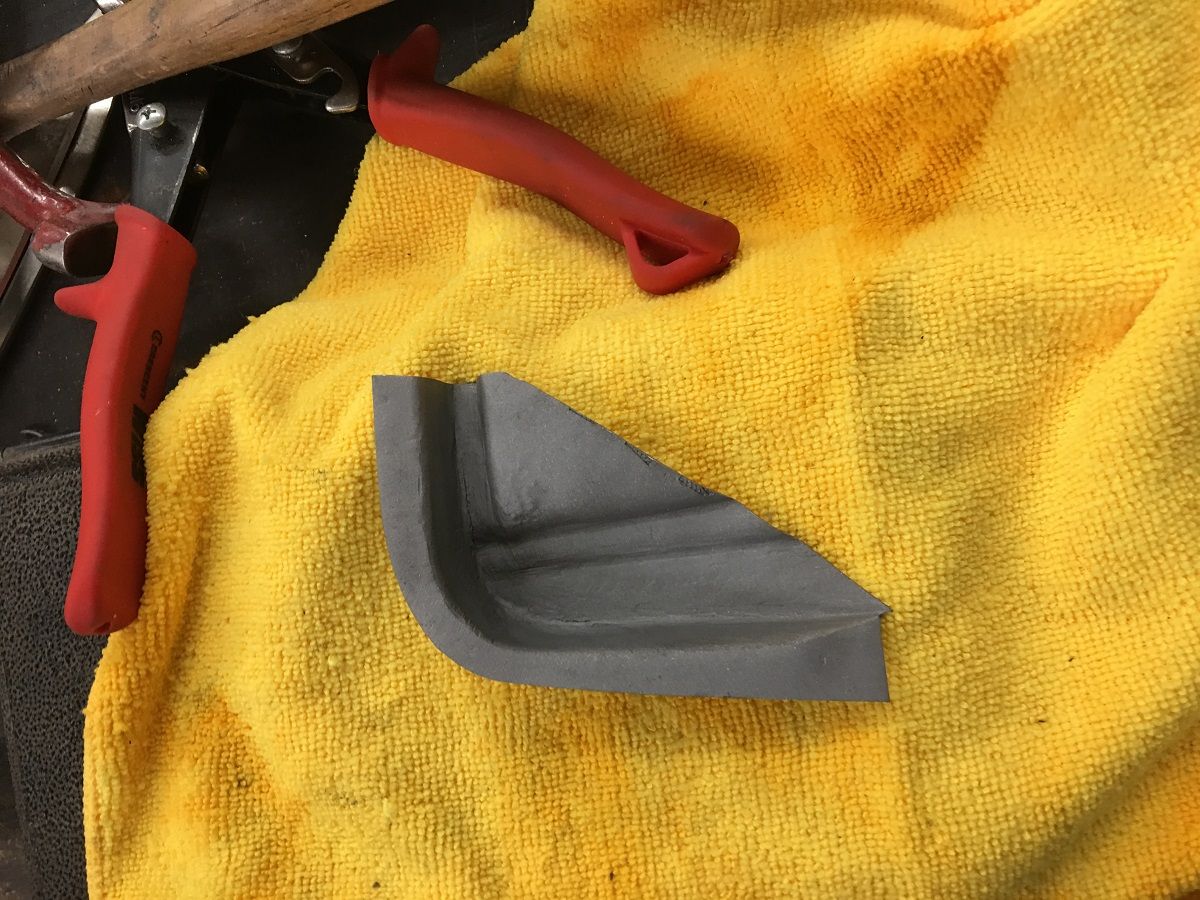 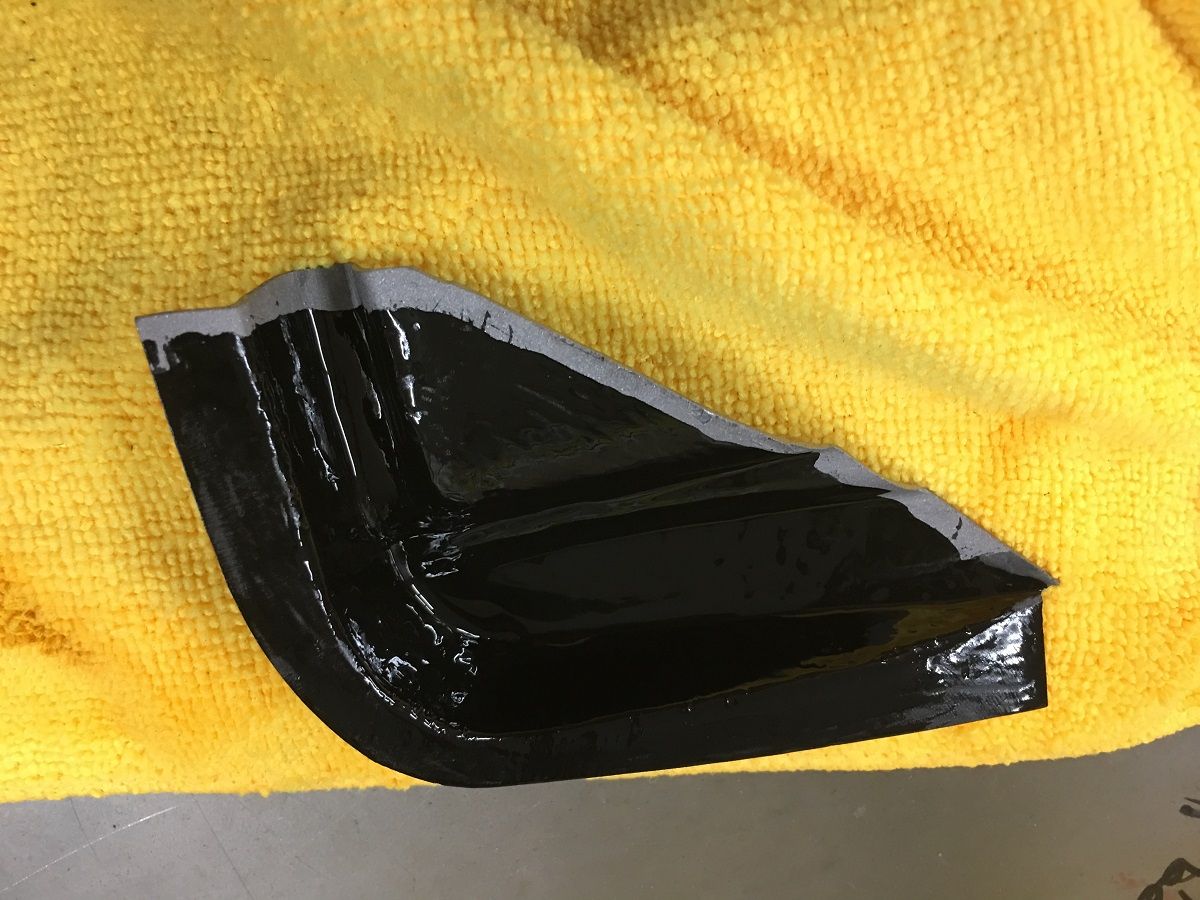 The flange is quite small compared to what we normally plug weld, so we opted for a .169 drill bit to keep the heat away from the edge... 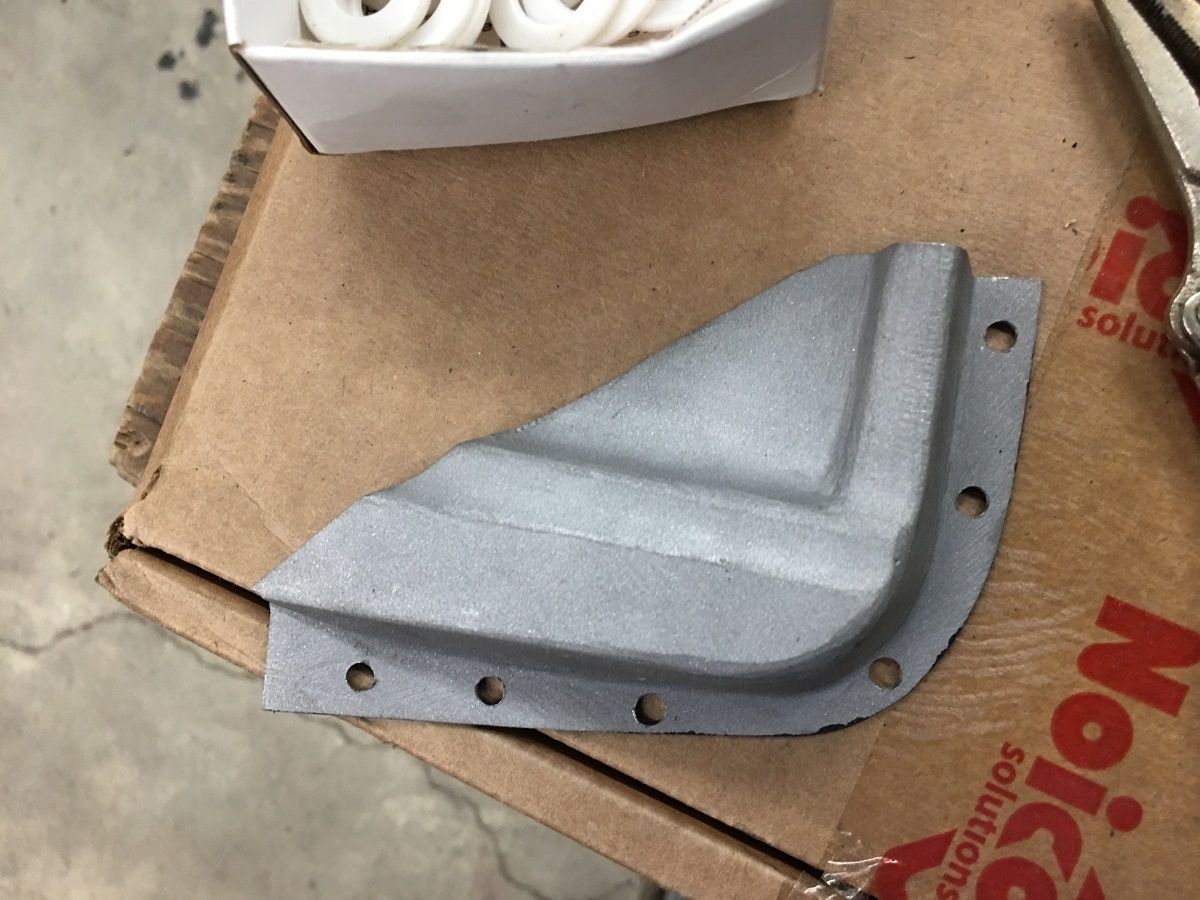 In order to clean he primer out the inside of our plug weld holes, we flattened and backfaced our drill bit to mimic an end mill.... 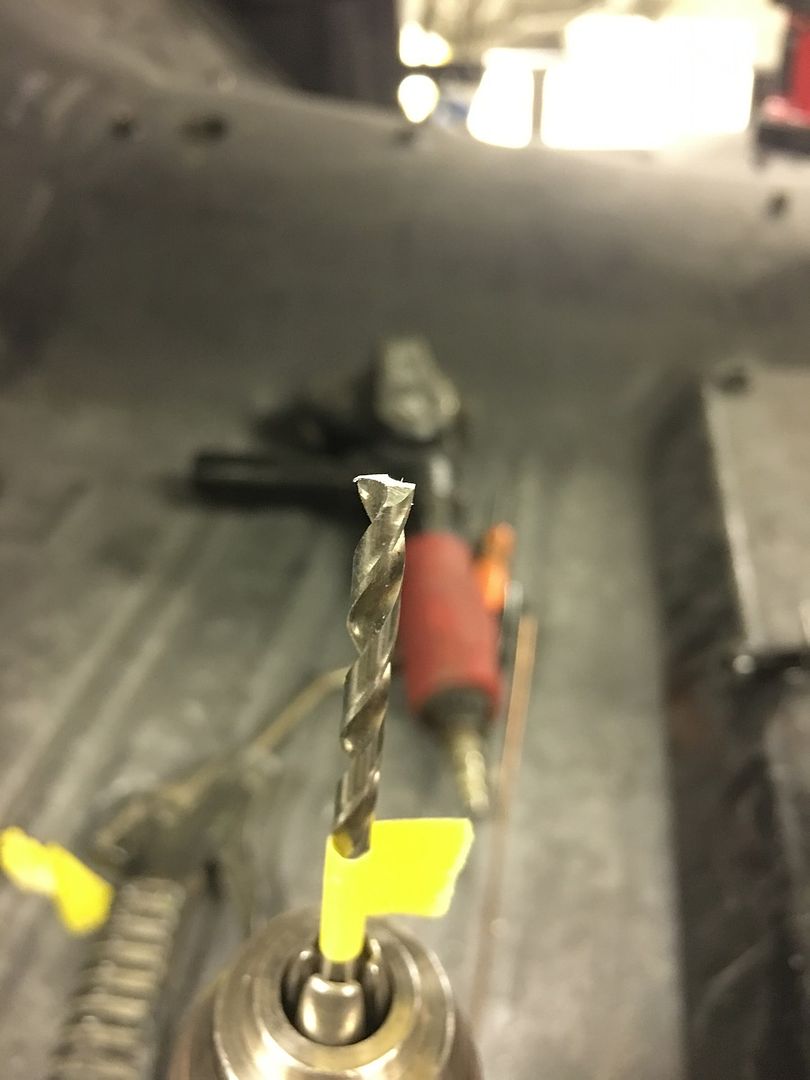 Does a good job of giving us nice clean metal for a good weld.. 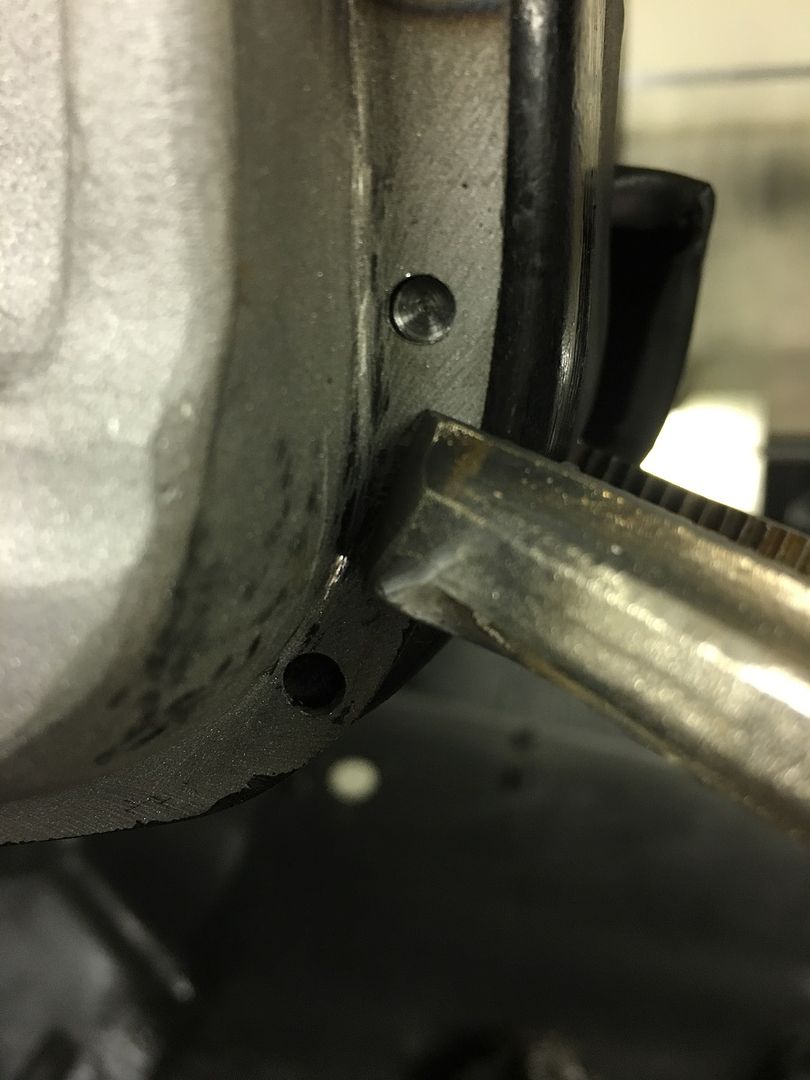  much better.... https://www.youtube.com/watch?v=T8ajeDMzOJ0 .
__________________
Robert |
|
|

|
|
|
#1086 |
|
Senior Member
 Join Date: Mar 2011
Location: West Plains, Missouri
Posts: 7,559
|
Re: 55 Wagon Progress
Just great work...Jim
__________________
my build thread: http://67-72chevytrucks.com/vboard/s...d.php?t=459839 Jimbo's long bed step build:http://67-72chevytrucks.com/vboard/s...t=464626<br /> |
|
|

|
|
|
#1087 |
|
Post Whore
  Join Date: May 2015
Location: Alabama
Posts: 14,670
|
Re: 55 Wagon Progress
Unreal.....
__________________
Mongo...aka Greg RIP Dad RIP Jesse 1981 C30 LQ9 NV4500..http://67-72chevytrucks.com/vboard/s...d.php?t=753598 Mongos AD- LS3 TR6060...http://67-72chevytrucks.com/vboard/s...34#post8522334 Columbus..the 1957 IH 4x4...http://67-72chevytrucks.com/vboard/s...63#post8082563 2023 Chevy Z71..daily driver |
|
|

|
|
|
#1088 |
|
Registered User
Join Date: Dec 2015
Location: Beaver Falls, Pa
Posts: 168
|
Re: 55 Wagon Progress
Robert, Let me start with: WOW, just WOW! As an autobody craftsman for over 30 years, I can sure appreciate the level of workmanship!
I'd like to mention something that came to me while looking at the photos of the sign you guys are working on. A little late to the party, but it may still be of value at some point. I realize that metal glue is not something a person at your level of skills would commonly use, however in the case of that sign...it would be THE way to go! I prefer the Fusor 208 for things like that. Everywhere the gaps are where sheetmetal is attached to the beaded area & where you put the plug welds on the overlapping areas...that would be MUCH easier with glue & because it is a solid attachment it is far superior, doesn't create heat damage & nothing to grind, ect. The uniform nature of the seam makes it where with a bit of care with a finger or a bodyfiller spreader ground to a rounded corner...a near perfect "rolled edge" transition can be made rather easy while sealing it all up. I can only say: "Please discus what Im suggesting with your paint/material jobber & give it a try!" Its not a "cure-all", but it has its place & that sign is a PERFECT example! Take Care, Lorne |
|
|

|
|
|
#1089 |
|
Registered User
Join Date: Jan 2013
Location: Leonardtown, MD
Posts: 1,648
|
Re: 55 Wagon Progress
Thanks for the comments guys! Lorne, appreciate the insight, but like you said, I'm a bit far along on the sign at this point. The two "permanent" sides are welded, the opposite sides will be a screw and rivnut assembly to allow removal of one side for access to the electrics.. Have to keep that option open for the next project like that..
Thanks!!
__________________
Robert Last edited by MP&C; 09-24-2019 at 07:43 AM. |
|
|

|
|
|
#1090 |
|
Registered User
Join Date: Jan 2013
Location: Leonardtown, MD
Posts: 1,648
|
Re: 55 Wagon Progress
Here's some of the forming process of our A-Pillar fabrication that I missed the other day. Did a couple time lapse videos, first shows the shrinking of the corner. The Vise Grip tucking tool, torch, and hammer is used to get the corner to come down about a 20* angle, then the two flanges were folded, which gives us one big tuck. At that point wide VEE is heated up and the high spots of the flange corner is hammered back into itself. Repeat for the next high spot, until the corner is folded where you want it.
https://www.youtube.com/watch?v=jH6lybdj94A Here's the corner shrink complete... 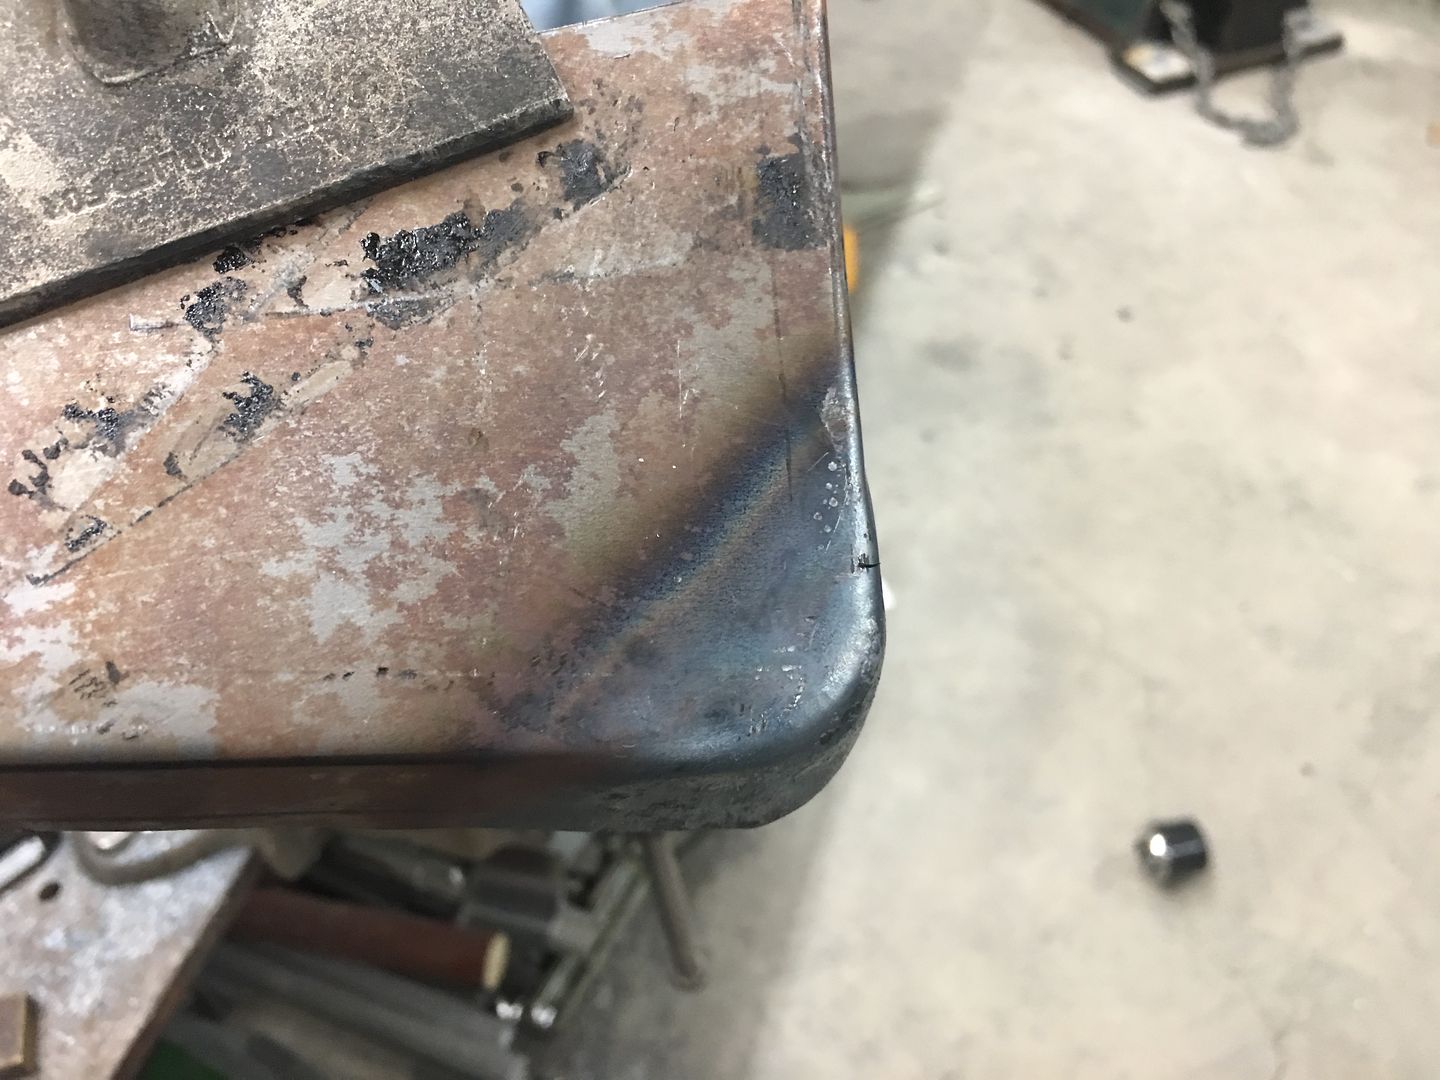 Then the barrel end hammer is used to make the joggle creases by using an upper die from our press brake as a post dolly. That’s the basic process. https://www.youtube.com/watch?v=-ZBpjeUw6us If you find the time lapse too fast, you can change playback speed on YouTube to slow things down a bit.. . .
__________________
Robert |
|
|

|
|
|
#1091 |
|
Post Whore
  Join Date: May 2015
Location: Alabama
Posts: 14,670
|
Re: 55 Wagon Progress
Robert,,,yall gonna have to quit mixing redbull and 5hr energys..haha...thats a neat process though
__________________
Mongo...aka Greg RIP Dad RIP Jesse 1981 C30 LQ9 NV4500..http://67-72chevytrucks.com/vboard/s...d.php?t=753598 Mongos AD- LS3 TR6060...http://67-72chevytrucks.com/vboard/s...34#post8522334 Columbus..the 1957 IH 4x4...http://67-72chevytrucks.com/vboard/s...63#post8082563 2023 Chevy Z71..daily driver |
|
|

|
|
|
#1092 |
|
Registered User
Join Date: Jan 2013
Location: Leonardtown, MD
Posts: 1,648
|
Re: 55 Wagon Progress
I may need a few more....
 Today we worked on some rust prevention up inside the roof. This is between the roof skin and the perimeter structure just above the windows. 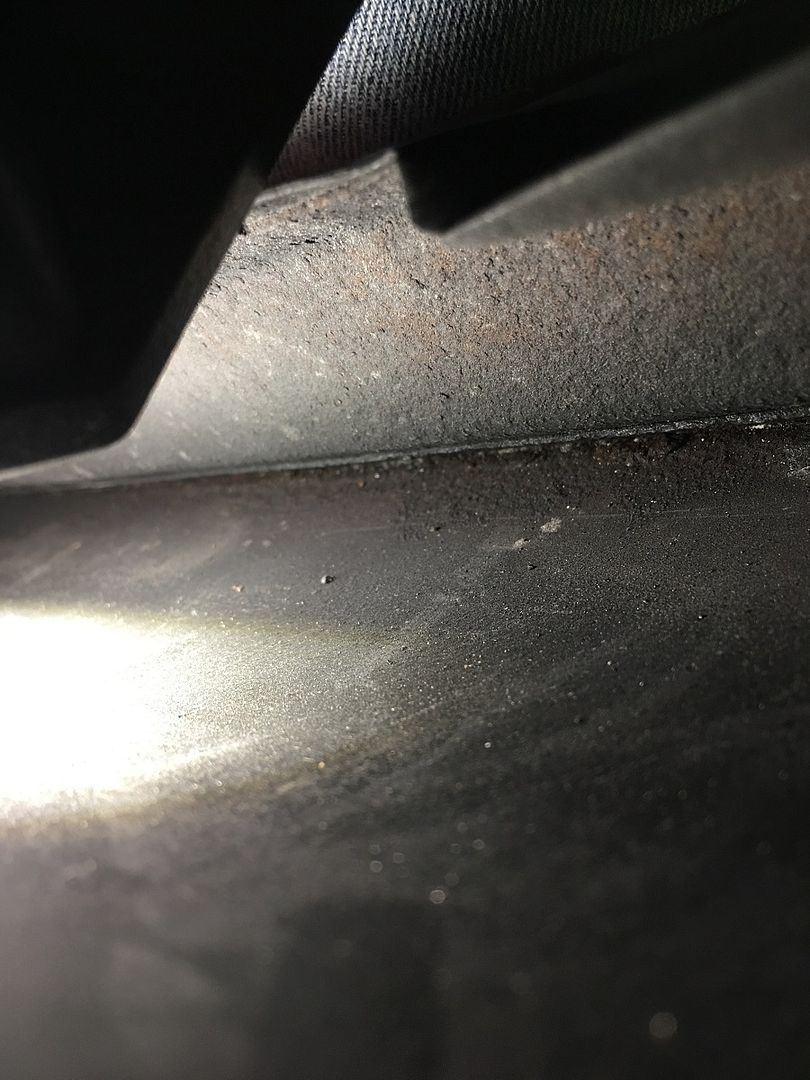 The car was rolled on it's side and SPI epoxy poured into the area, acid brush was used to cover everything we could.. 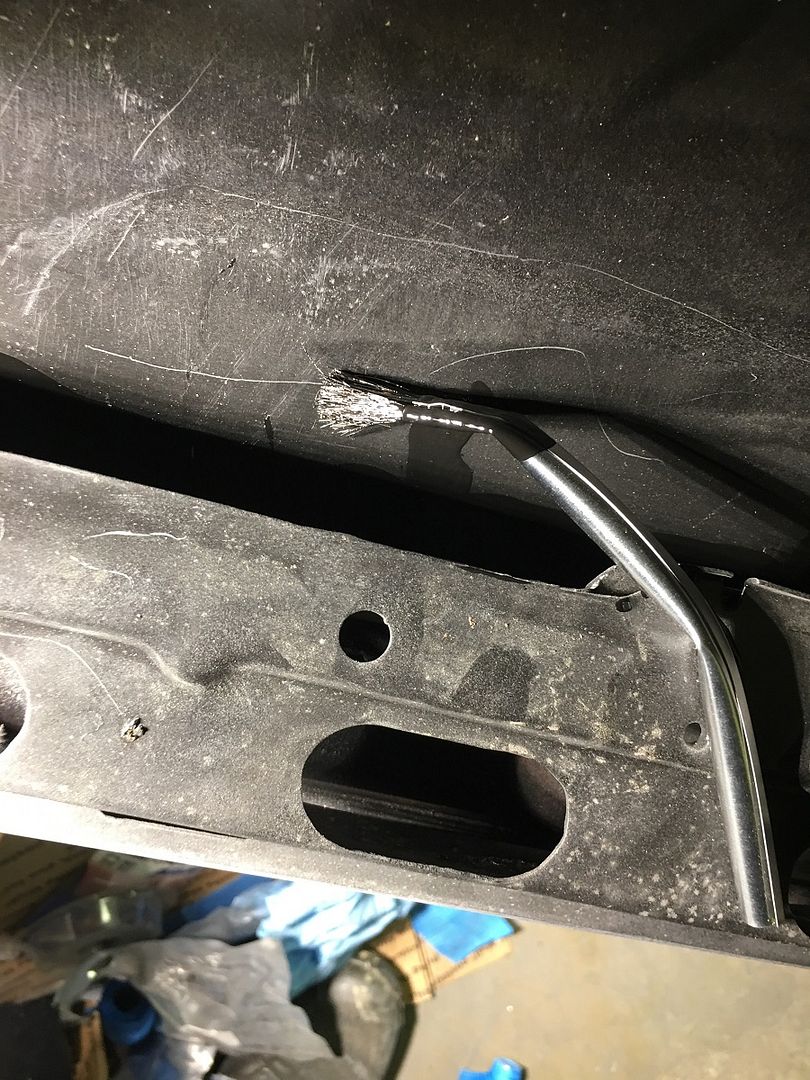 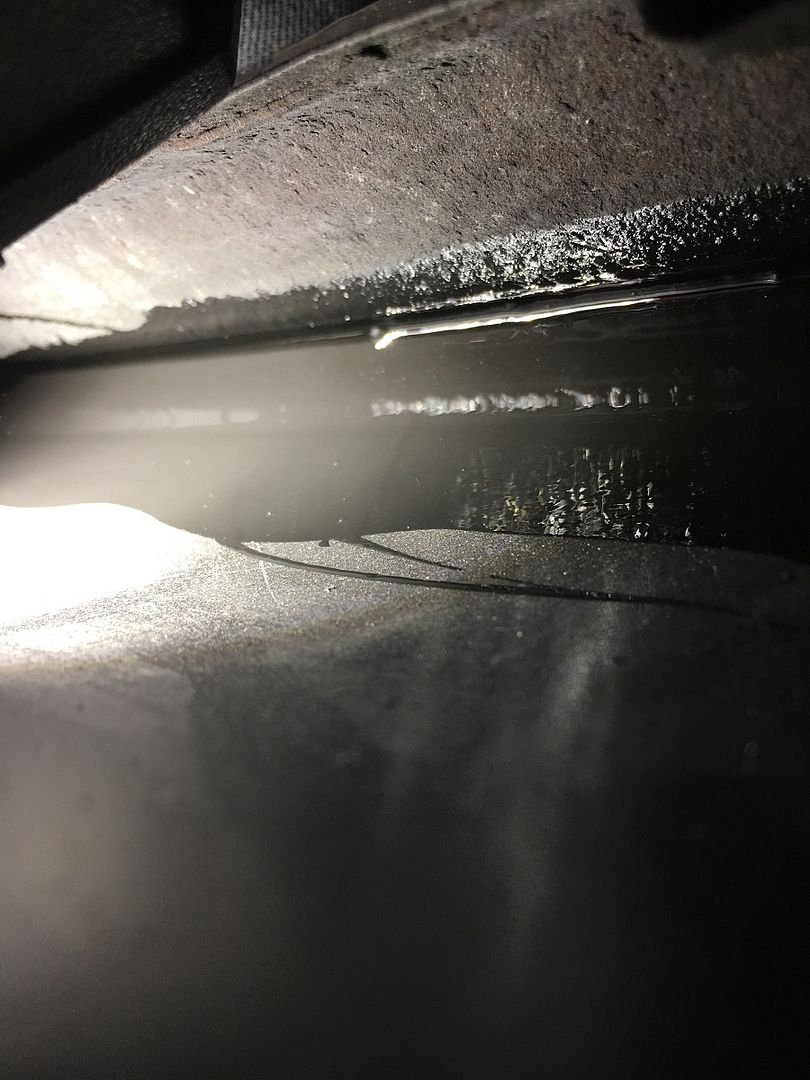 Once the entire passenger side had been flooded around to the liftgate hinge, we rolled the car right side up again. It wasn't long that we had paint dripping on the top of the rocker panel.. It was running down inside the A Pillar and running out the bottom of the dogleg. This is a good indicator of exactly where the roof condensation runs to when it reaches the A Pillar, and why we had rust issues there. 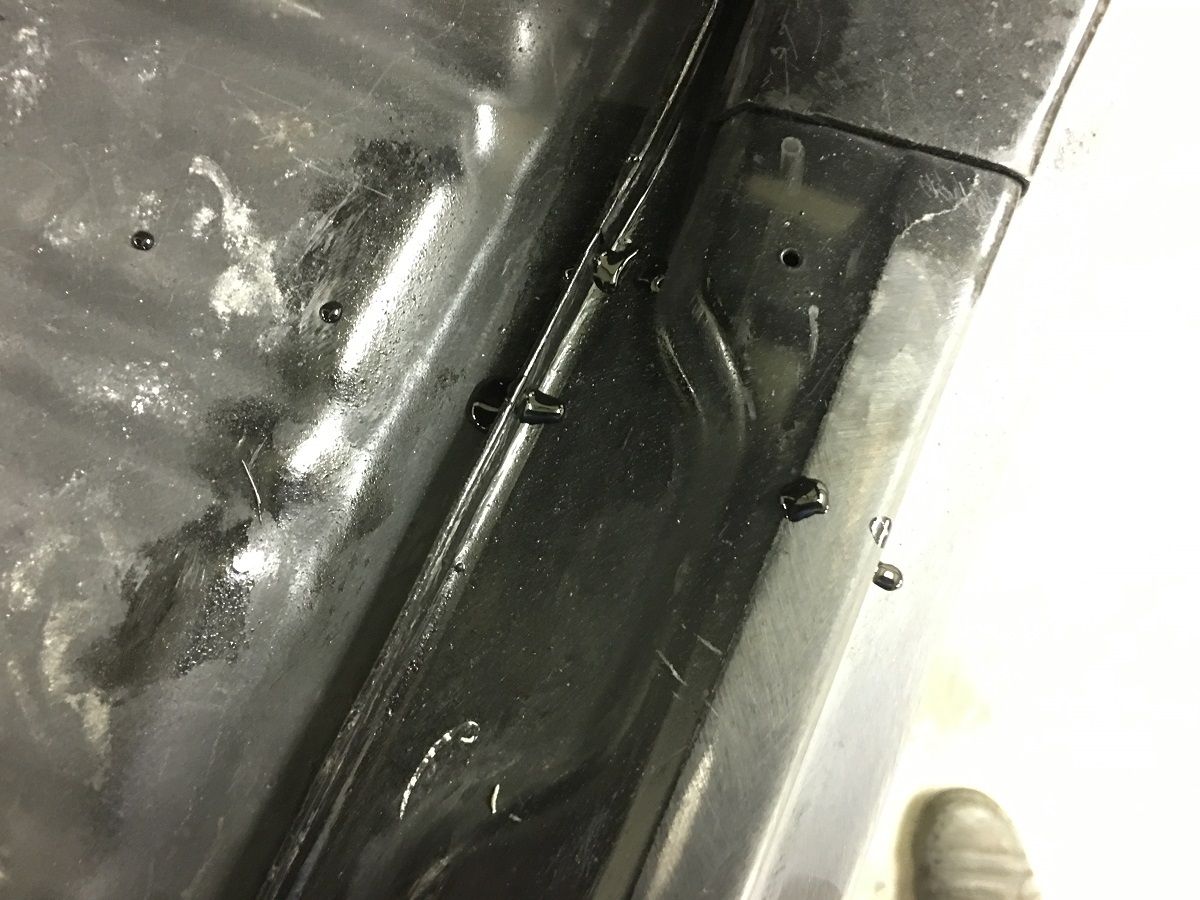 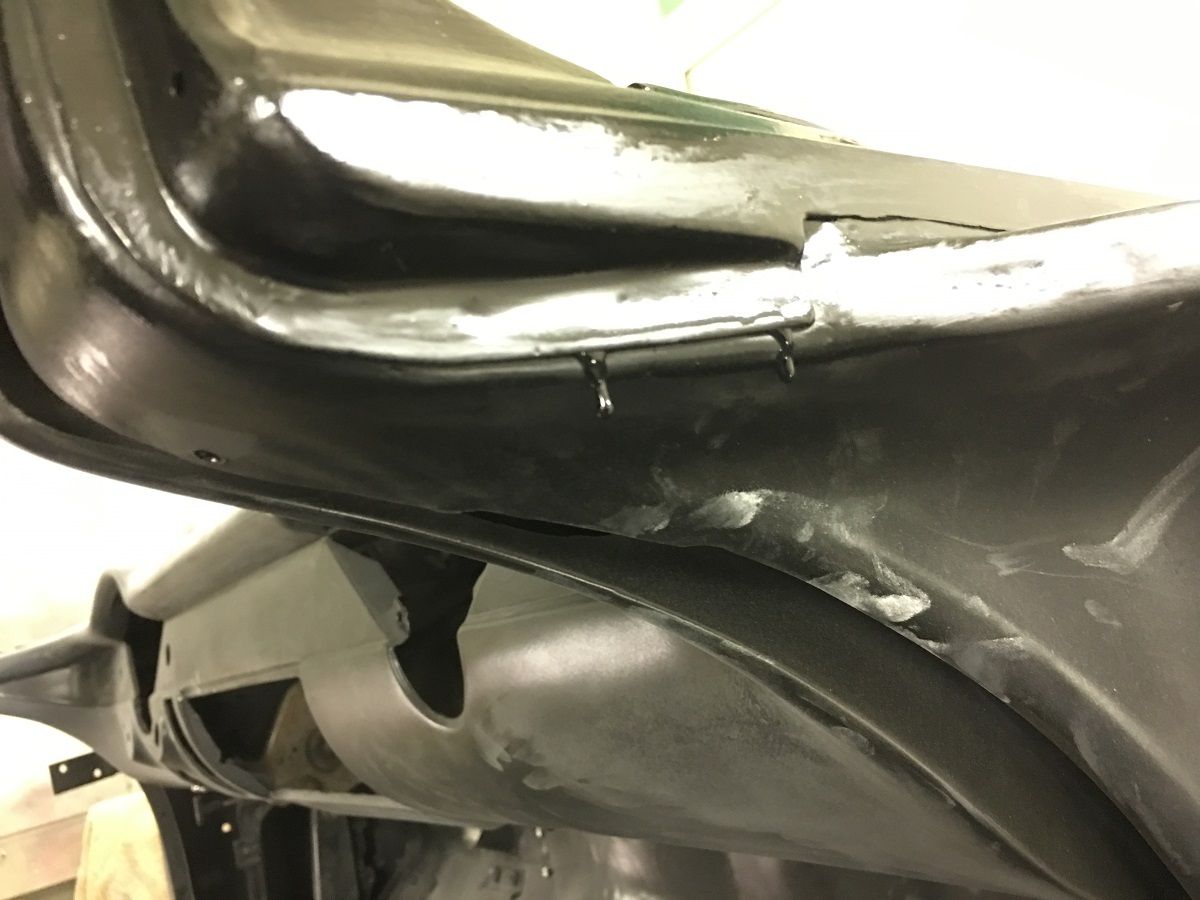 Here's a picture of when we opened the roof for rust repair, showing what the condensation did for us.. 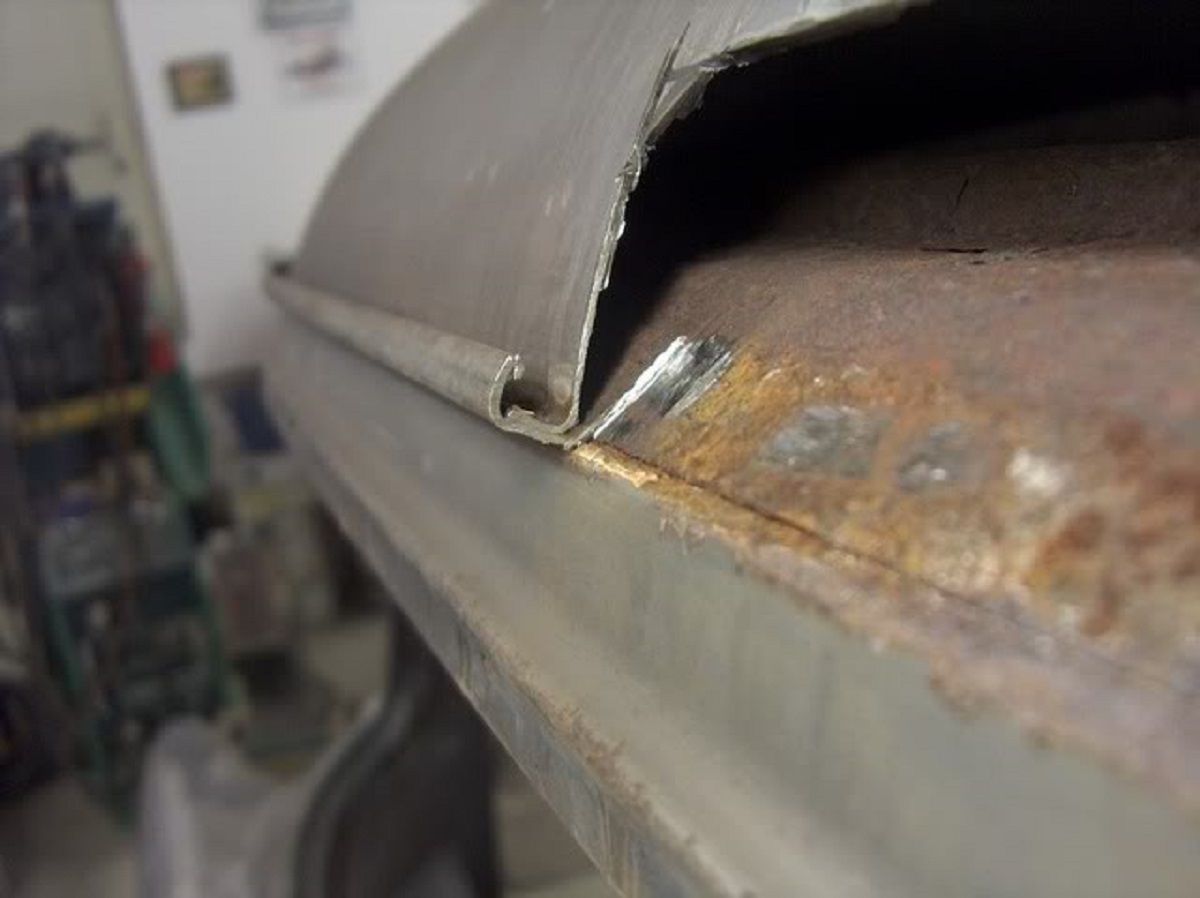 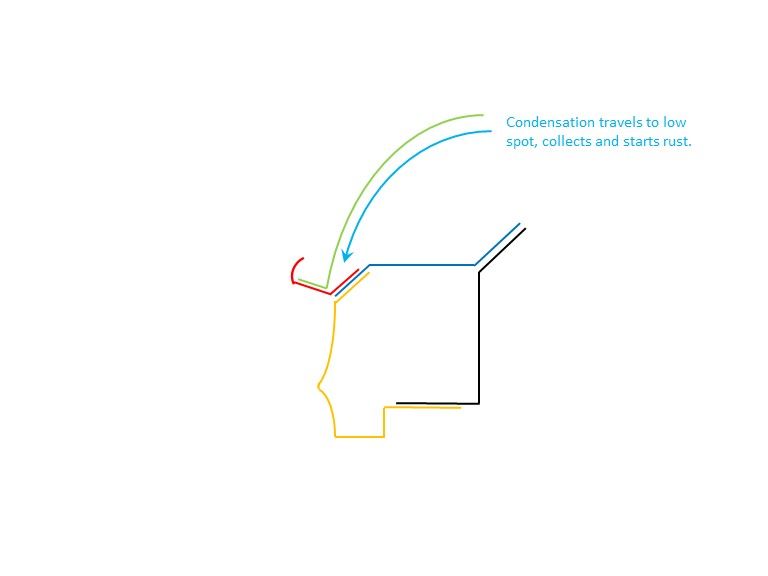 So our primer is sealing the joint between the roof skin and the structure.. We found an opening above the windshield that would help us to flood the front seam.... 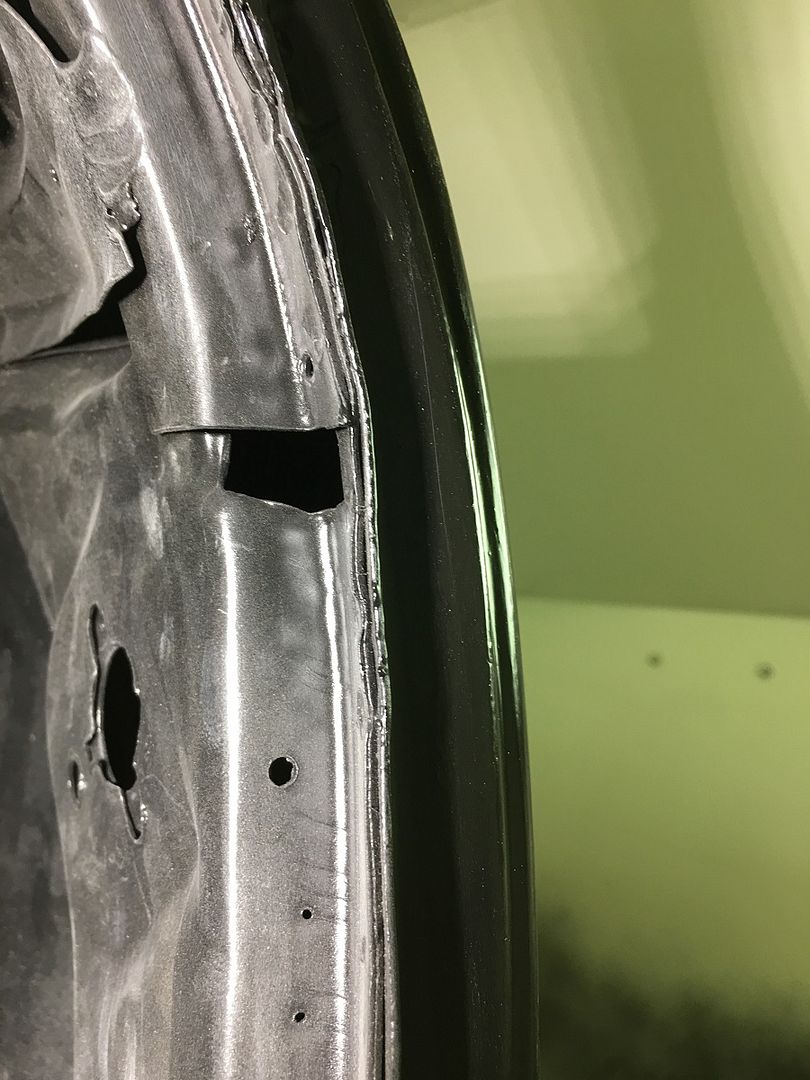 We opened up an acid brush to form a funnel, and poured SPI Epoxy in the area.. 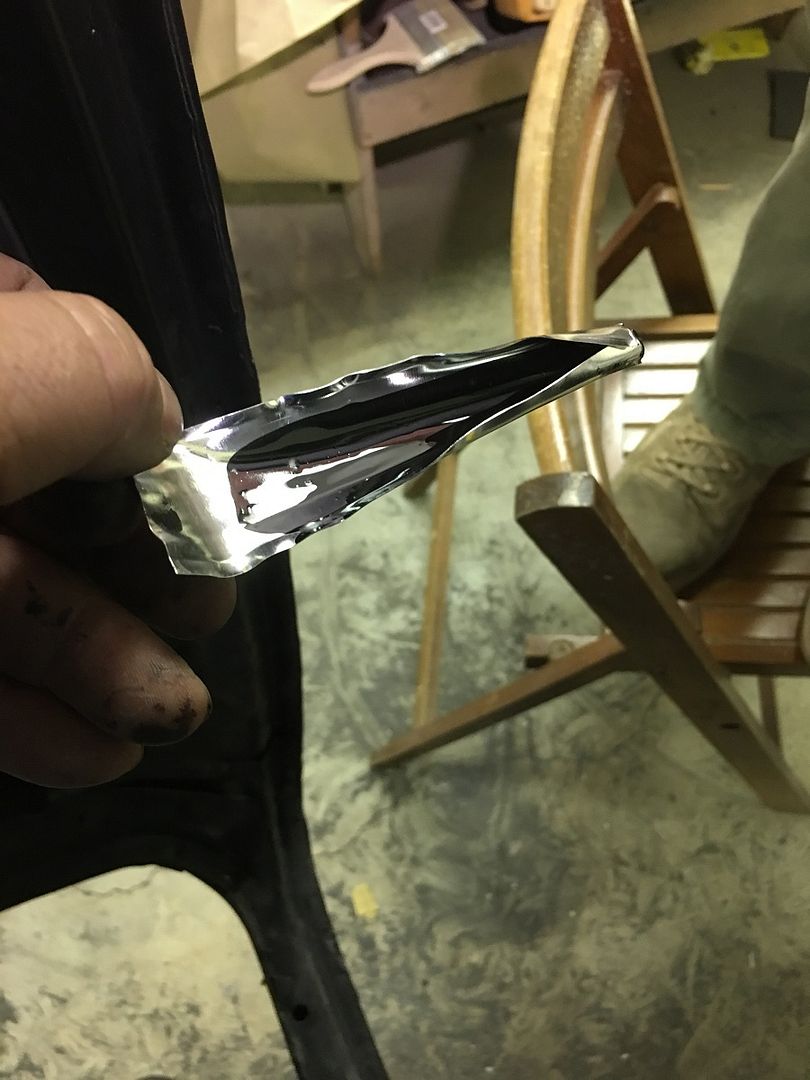 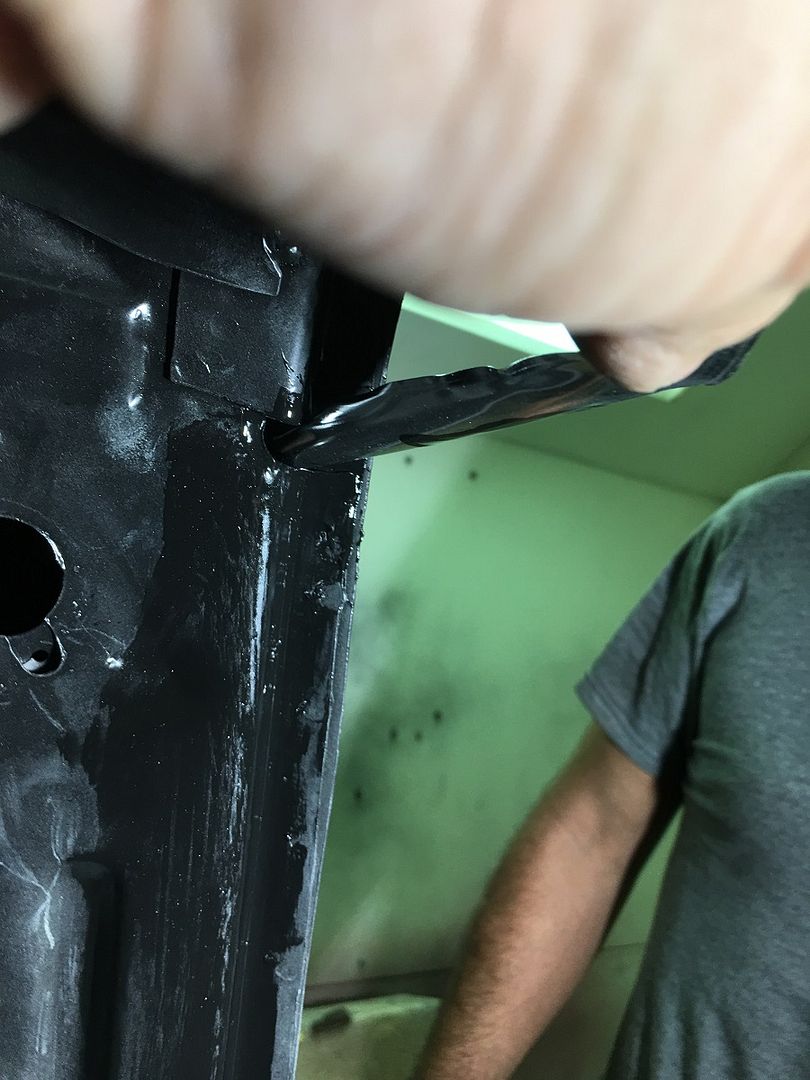 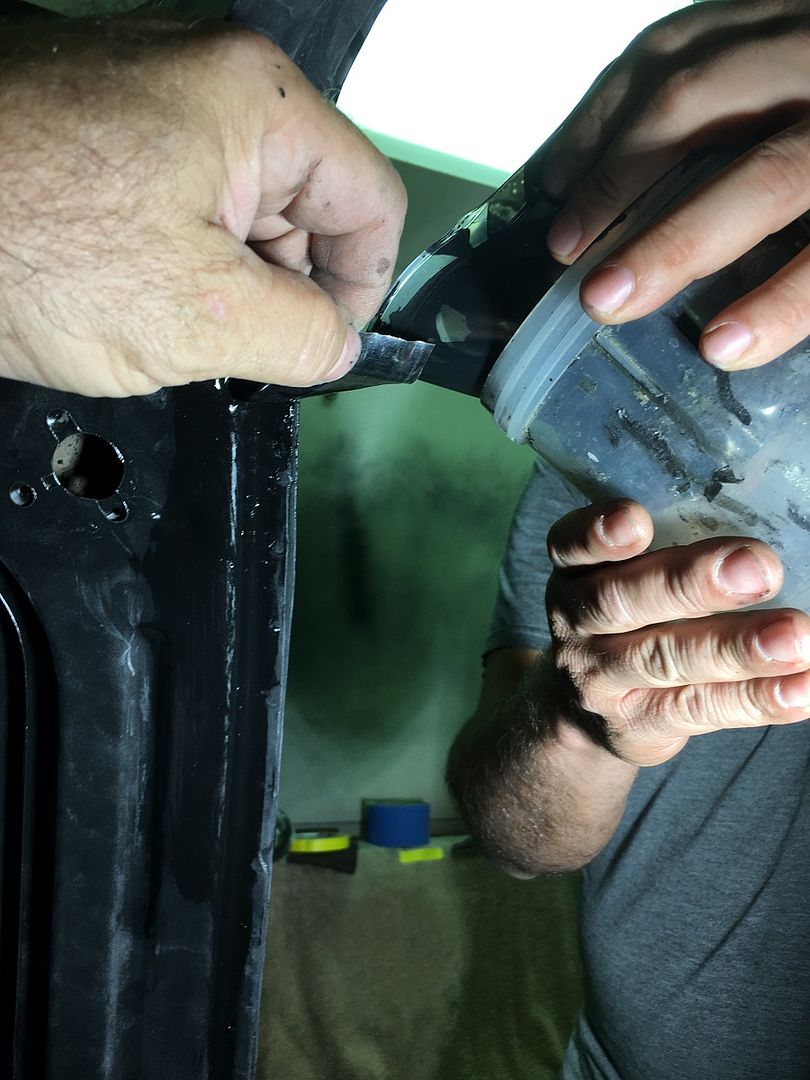 A puddle out of the A Pillar dogleg shows we have good flow through the windshield... 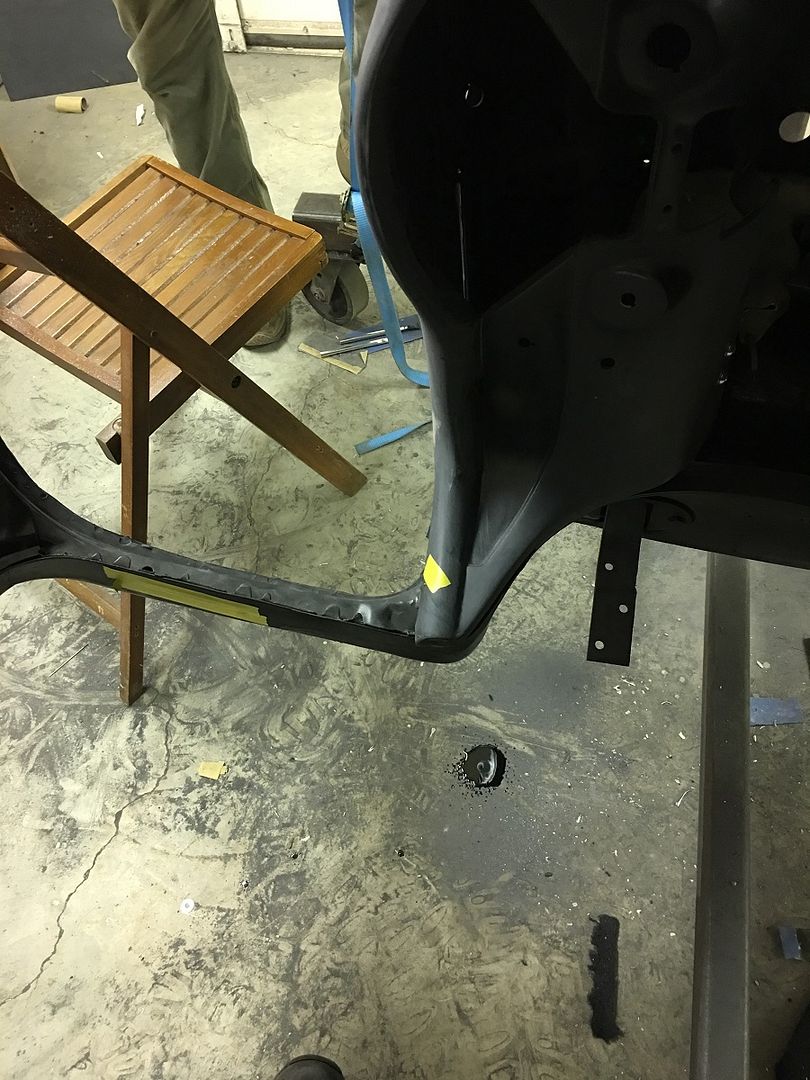 To insure everything was covered above the windshield header, we joined two acid brushes for an extended reach over the header, and bent to match the roof skin profile.... 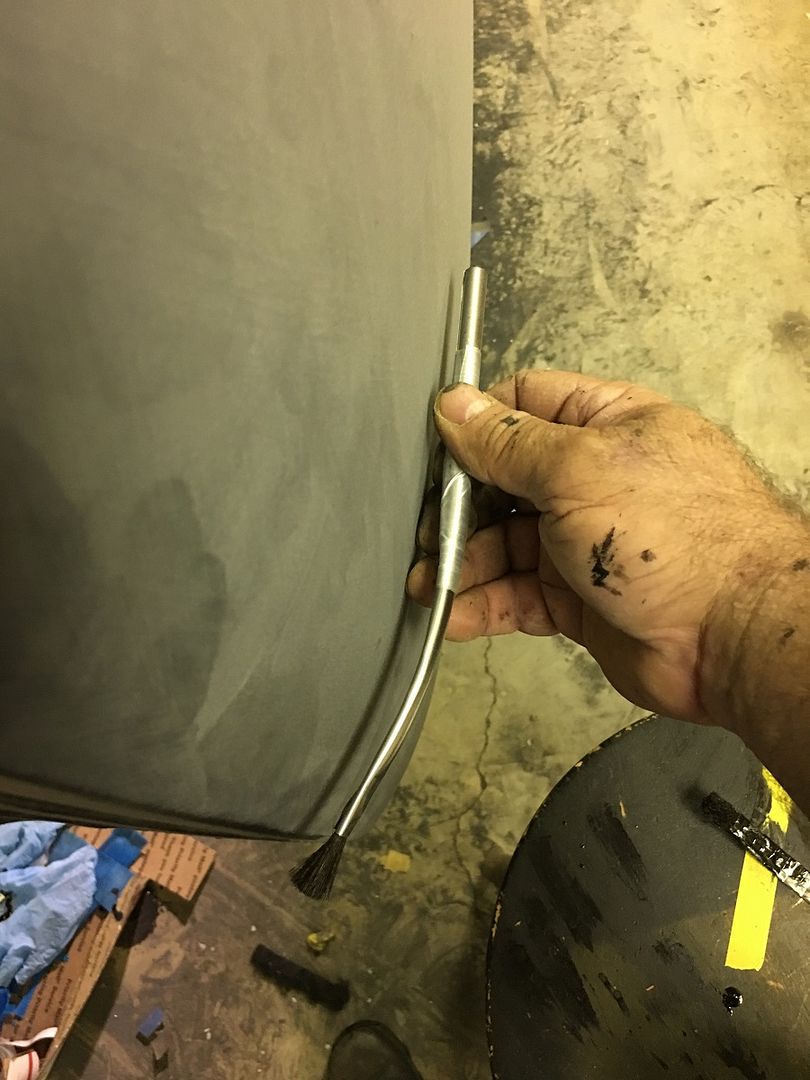 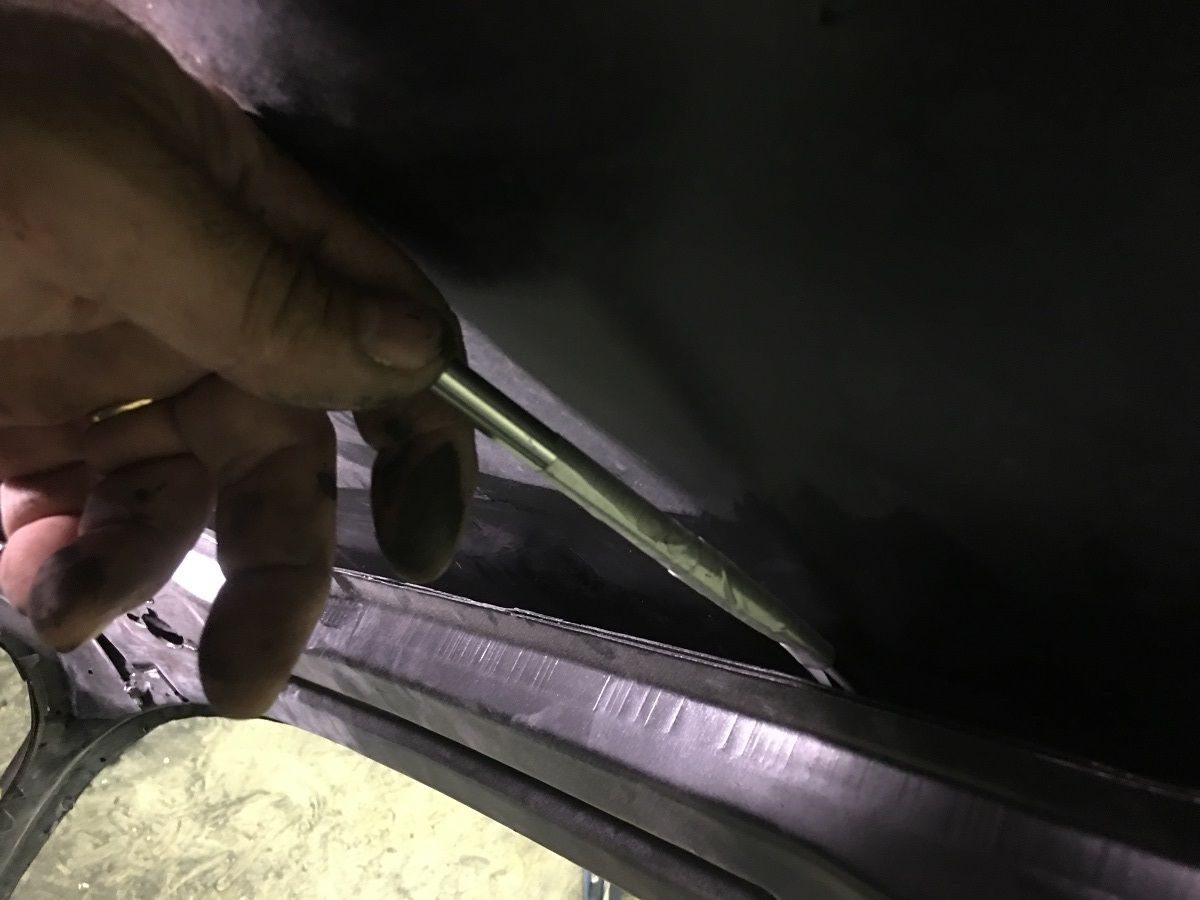
__________________
Robert |
|
|

|
|
|
#1093 |
|
Senior Member
 Join Date: Mar 2011
Location: West Plains, Missouri
Posts: 7,559
|
Re: 55 Wagon Progress
Robert, that should take care of any problems, later down the road. Nice work as always...Jim
__________________
my build thread: http://67-72chevytrucks.com/vboard/s...d.php?t=459839 Jimbo's long bed step build:http://67-72chevytrucks.com/vboard/s...t=464626<br /> |
|
|

|
|
|
#1094 |
|
Registered User
Join Date: Mar 2015
Location: Castle Rock, CO
Posts: 534
|
Re: 55 Wagon Progress
Unbelievable work!
I do have a question - if you want to get back in tight or mostly enclosed spaces where rust grows but either donít have the skills or it just doesnít make sense for a particular project, what do you think of using a product like Eastwoodís internal coating and rust encapsulation? https://www.eastwood.com/eastwood-in...z-aerosol.html For ex., I have an old Jeep pickup and i know there has to some level of rust in the rockers, pillars, inside roof edges, etc. with this product and their flex hose I can get in many spaces and spray them reasonably well and that has to be certainly better than nothing? Are there other better products or ways to deal with these areas? Thanks for allowing us to follow along! I have been encouraged to try some metal work I wouldnít have if I didnít see what you do.
__________________
Scott ______________ my '51 build: http://67-72chevytrucks.com/vboard/s...d.php?t=677979 |
|
|

|
|
|
#1095 |
|
Post Whore
  Join Date: May 2015
Location: Alabama
Posts: 14,670
|
Re: 55 Wagon Progress
cavity wax maybe?
__________________
Mongo...aka Greg RIP Dad RIP Jesse 1981 C30 LQ9 NV4500..http://67-72chevytrucks.com/vboard/s...d.php?t=753598 Mongos AD- LS3 TR6060...http://67-72chevytrucks.com/vboard/s...34#post8522334 Columbus..the 1957 IH 4x4...http://67-72chevytrucks.com/vboard/s...63#post8082563 2023 Chevy Z71..daily driver |
|
|

|
|
|
#1096 |
|
Registered User
Join Date: Jan 2013
Location: Leonardtown, MD
Posts: 1,648
|
Re: 55 Wagon Progress
Scott, Iíve never used the Eastwood product to speak to how well it works. I would say if you think there are rust issues I would check into whether replacement rockers or other panels are needed. I try to encapsulate the rust in a trash can as I install new metal.

__________________
Robert |
|
|

|
|
|
#1097 | |
|
Registered User
Join Date: Mar 2015
Location: Castle Rock, CO
Posts: 534
|
Re: 55 Wagon Progress
Quote:
I already bought several parts trucks or major sections and cut all the good metal out of them I could find. I will be trimming parts and replacing rusty sections where I can, as long as the rust doesn't spread further before I get there! Anyway, I'll just continue to watch you do your artistry and magic and try to dance that line between weenie work and something better! 
__________________
Scott ______________ my '51 build: http://67-72chevytrucks.com/vboard/s...d.php?t=677979 |
|
|
|

|
|
|
#1098 |
|
Registered User
Join Date: Jan 2013
Location: Leonardtown, MD
Posts: 1,648
|
Re: 55 Wagon Progress
Scott, we all started somewhere. Recognizing room for improvement will normally prompt one to improve skills as you learn.
Progress this weekend, We had originally left the factory jute insulation under the roof supports, thinking we could just butt up to it with the new stuff. After installing the Noico inside the doors, I guess my OCD wasn't about to leave the old stuff in the roof. So the bottom edge of the roof supports were scribed on the driver's side for relocation purposes, de-spot welded, and pulled downward enough to scrape off the old jute.. 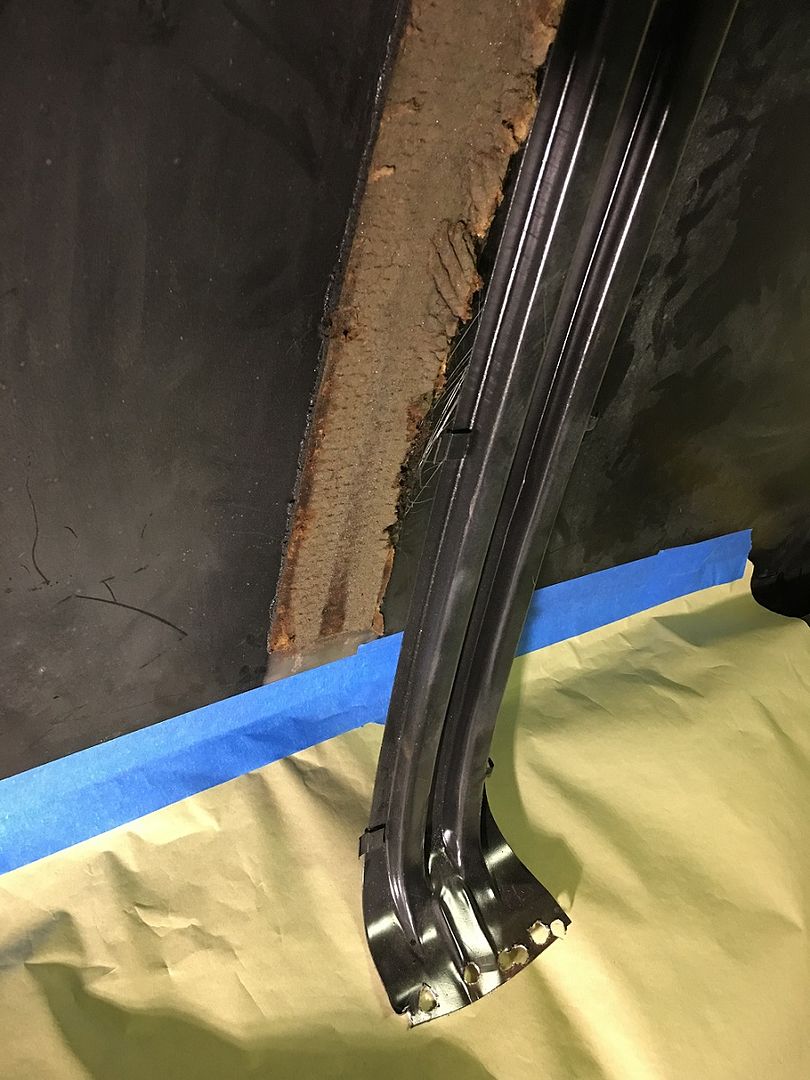 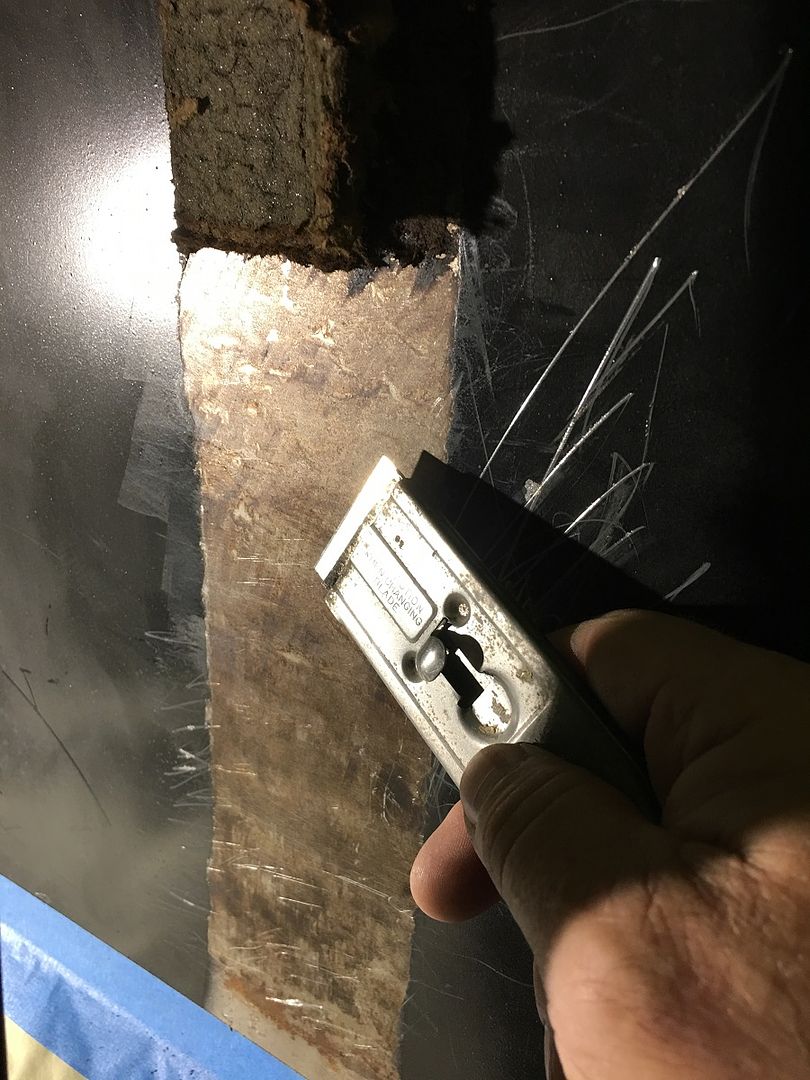 https://www.youtube.com/watch?v=ZOj1...ature=youtu.be 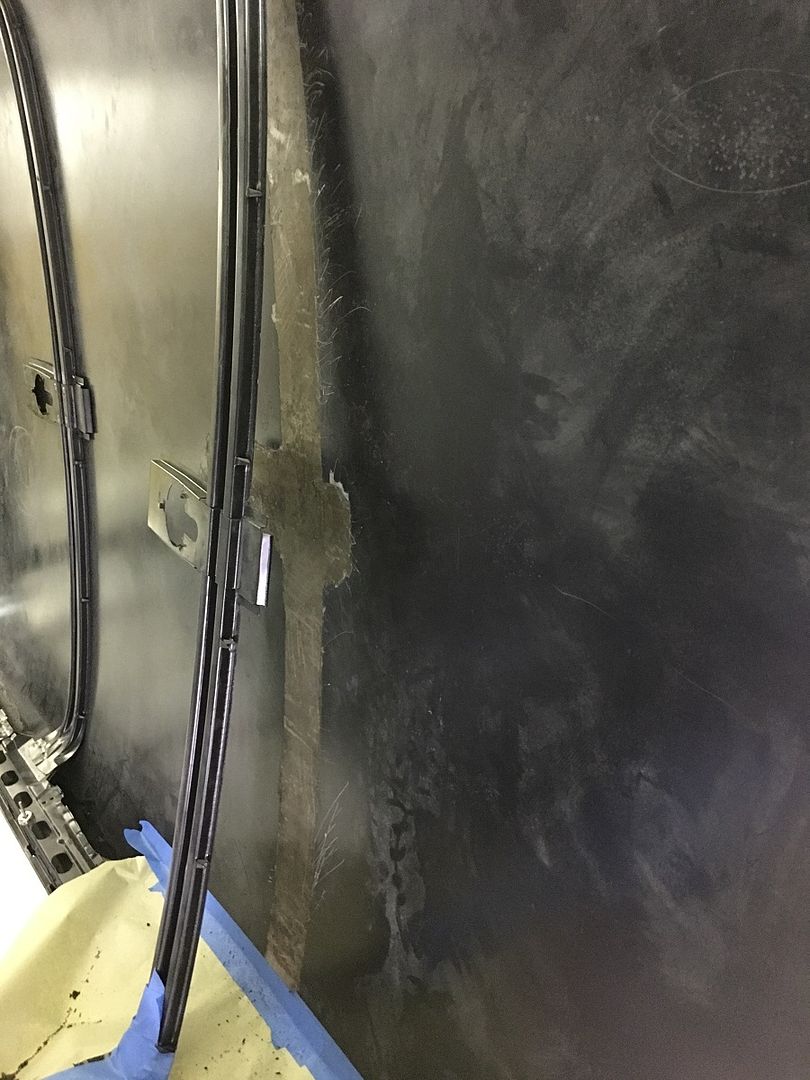 The bare area is then scuffed with 80 grit and two coats of SPI epoxy primer applied.. After that sets up we applied the Noico sound deadening mat to the inside of the roof skin. Then the roof supports are aligned with our scribed marks and plug welded in place.. 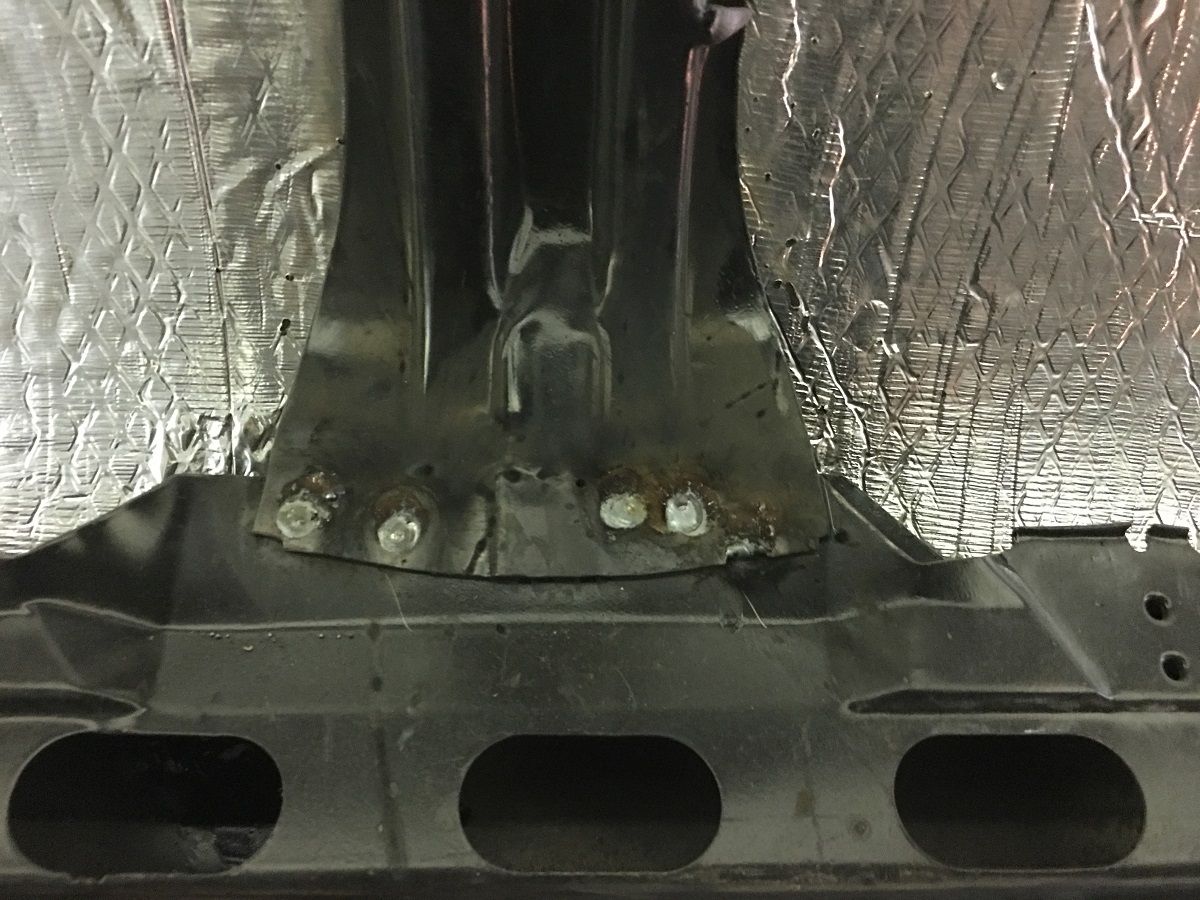 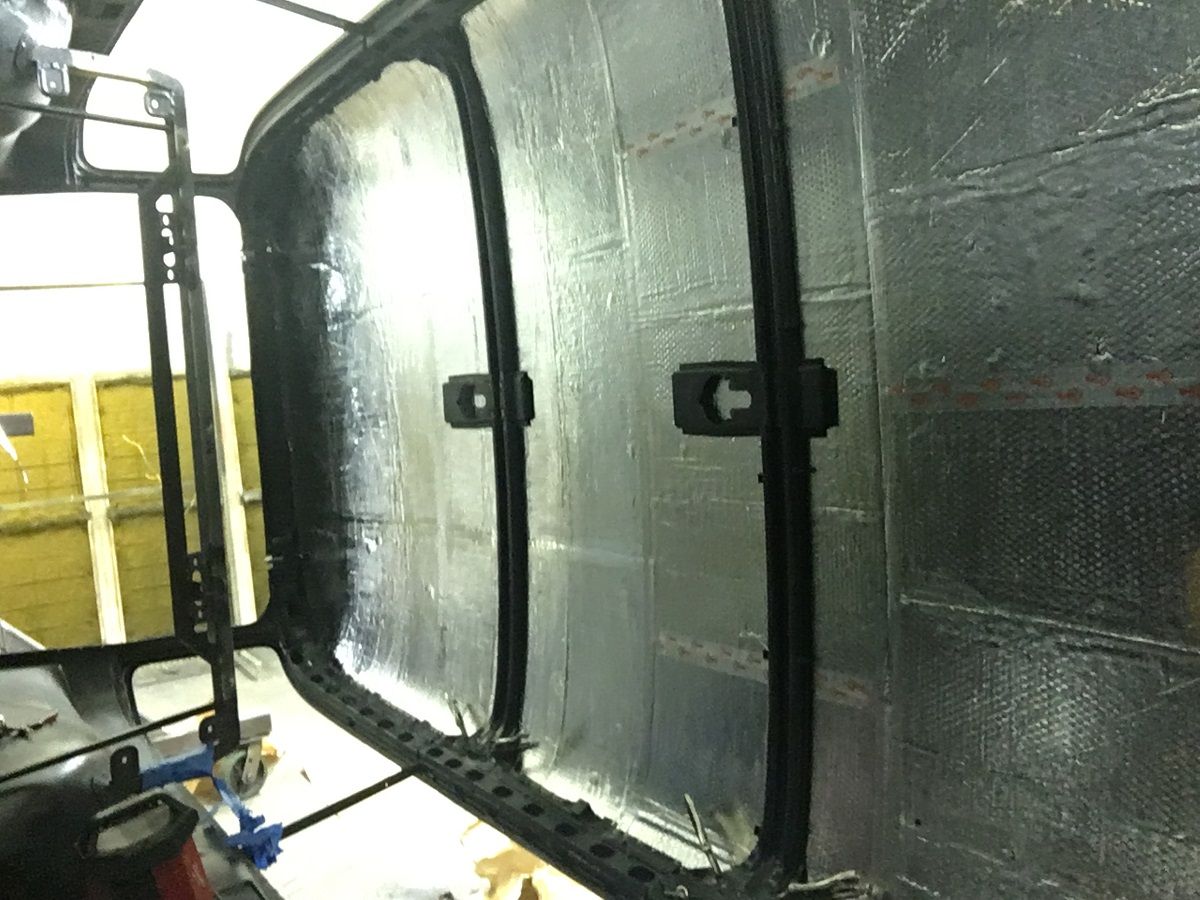 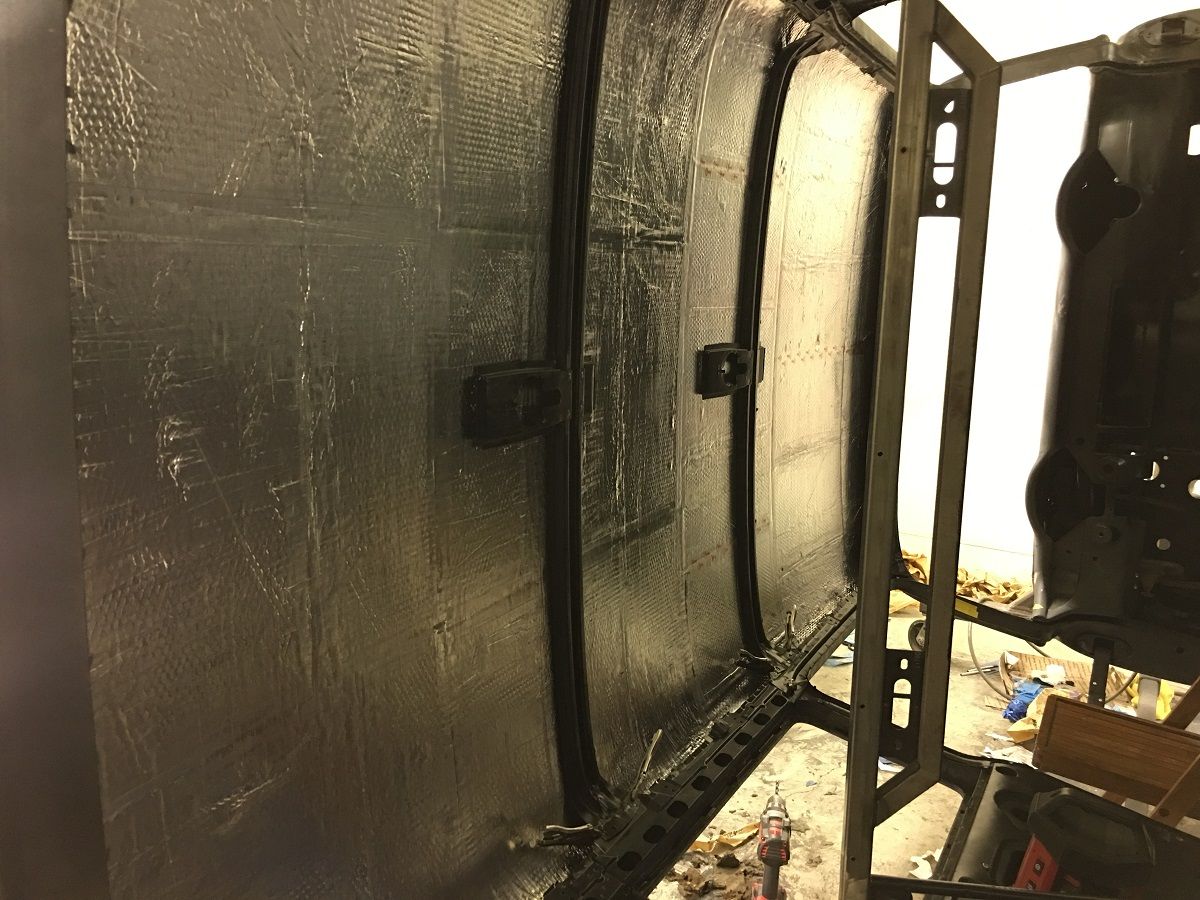 Mike has been plugging along on the Drummers Lounge sign, the arrow is close to done, it still needs fastening hardware added for the access panels, and holes added for the lights.. 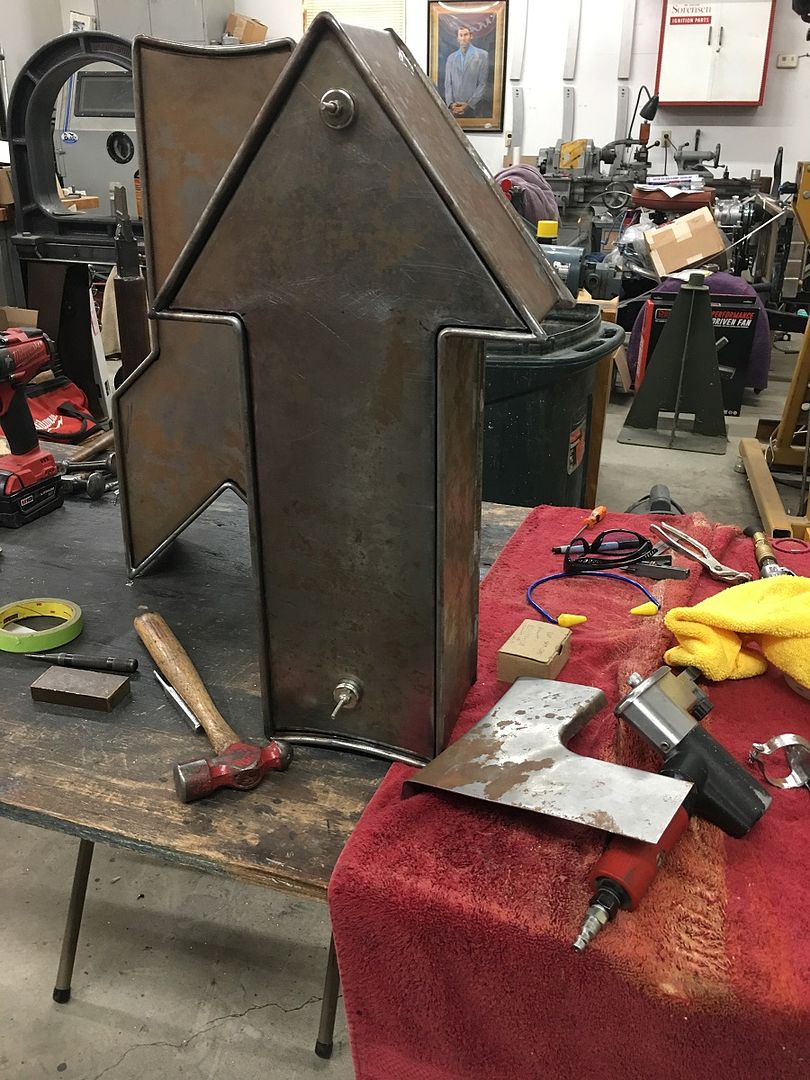 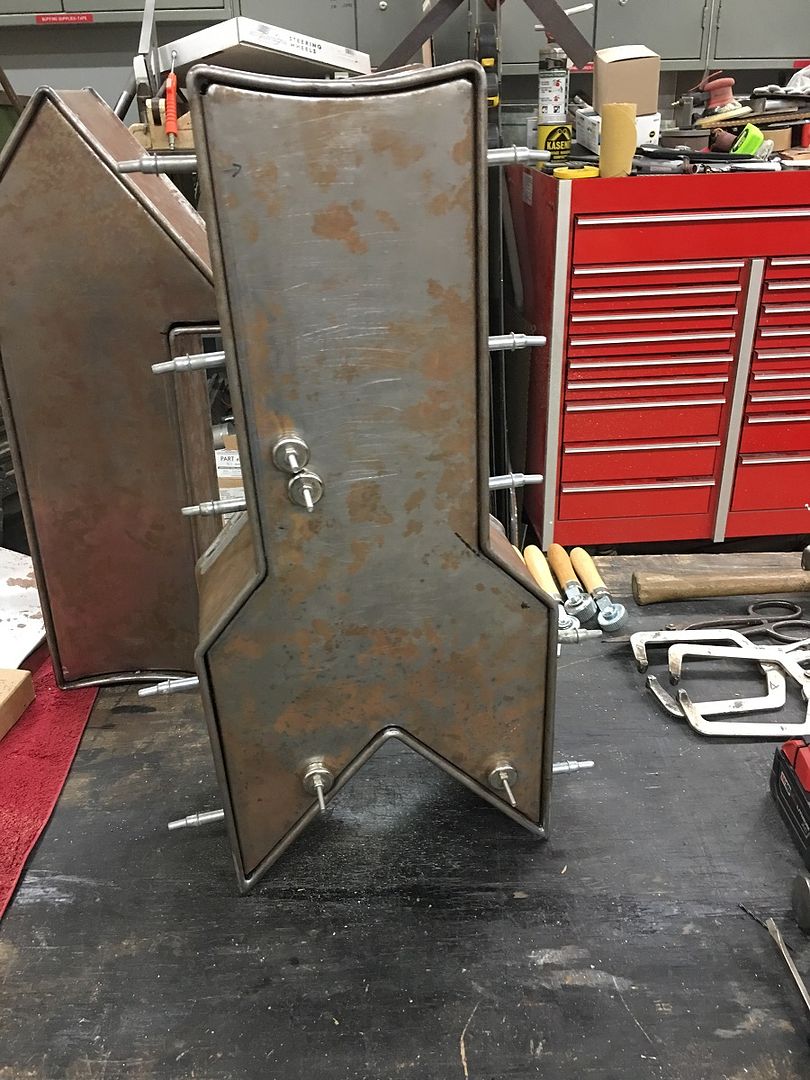 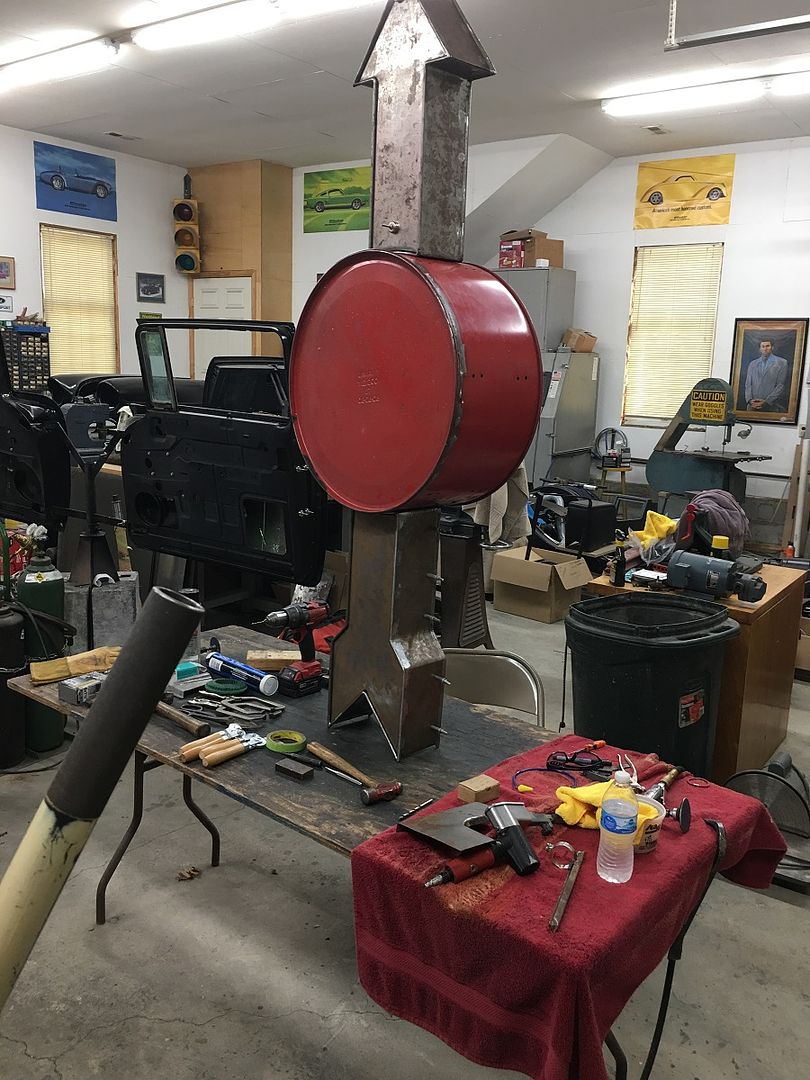
__________________
Robert Last edited by MP&C; 10-06-2019 at 10:56 PM. |
|
|

|
|
|
#1099 |
|
Senior Member
 Join Date: Mar 2011
Location: West Plains, Missouri
Posts: 7,559
|
Re: 55 Wagon Progress
Robert, hope you don't get tired of me saying the same thing over and over "Great work as always"...Jim
__________________
my build thread: http://67-72chevytrucks.com/vboard/s...d.php?t=459839 Jimbo's long bed step build:http://67-72chevytrucks.com/vboard/s...t=464626<br /> |
|
|

|
|
|
#1100 |
|
Registered User
 Join Date: Jan 2003
Location: Safford,AZ
Posts: 3,625
|
Re: 55 Wagon Progress
Drummers sign getting neon?
__________________
1969  307, t350 307, t3501950 Chevy Wagon 1978 Big 10 1967 C10, 250,3-OTT |
|
|

|
 |
| Bookmarks |
|
|