
 |
|
|
#151 |
|
Senior Member
 Join Date: May 2007
Location: Doodah Kansas
Posts: 7,774
|
Re: 1941 1/2 ton project Hannah
I got the front end off this morning and tapped around on the air director. I didnt want to cut it up like I did on fenix so I mounted the cab 1" higher and used a mallet to reshape the area without cutting it.
 IMG_8456 by Joe Doh, on Flickr IMG_8456 by Joe Doh, on Flickrafter doing that, the front end almost fell into the right position. no issues at all, everything lined up perfectly. 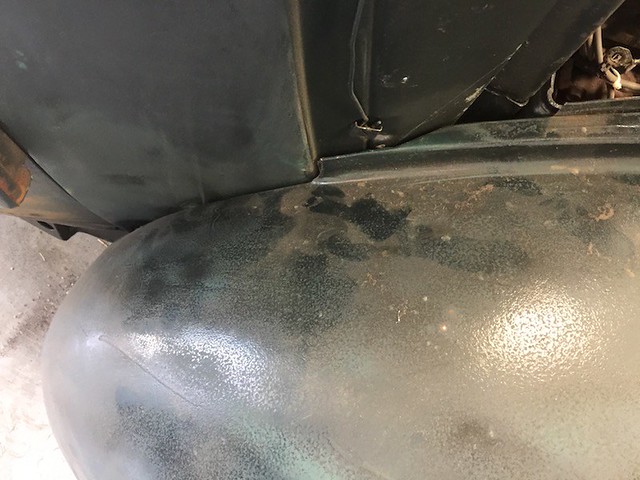 IMG_8455-1 by Joe Doh, on Flickr IMG_8455-1 by Joe Doh, on Flickr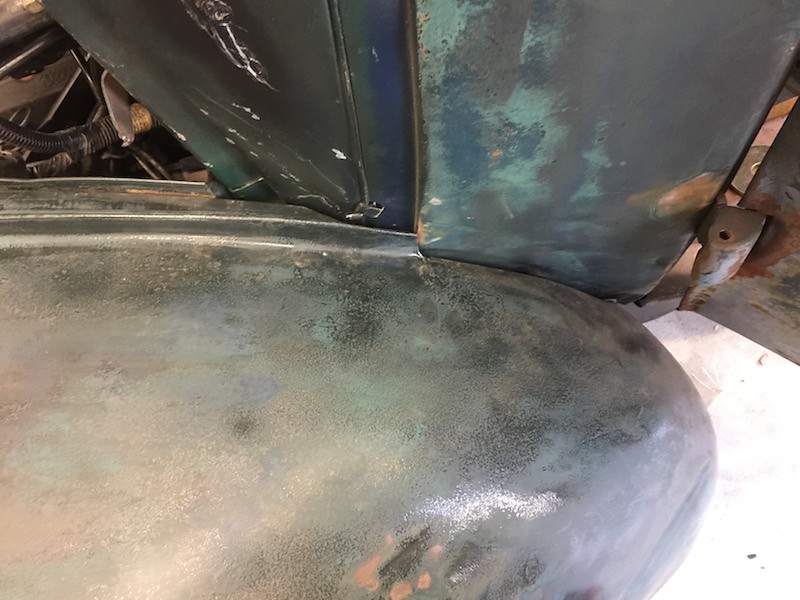 IMG_8453-1 by Joe Doh, on Flickr IMG_8453-1 by Joe Doh, on Flickr IMG_8454-1 by Joe Doh, on Flickr IMG_8454-1 by Joe Doh, on Flickryes I need to drill out the broken bolts, not a priority yet. the front clip is lined up left to right correctly, and the drivers side headlight is 3/8" higher than the passenger side, wonder what that is from? oh right, the cab spacer haha. 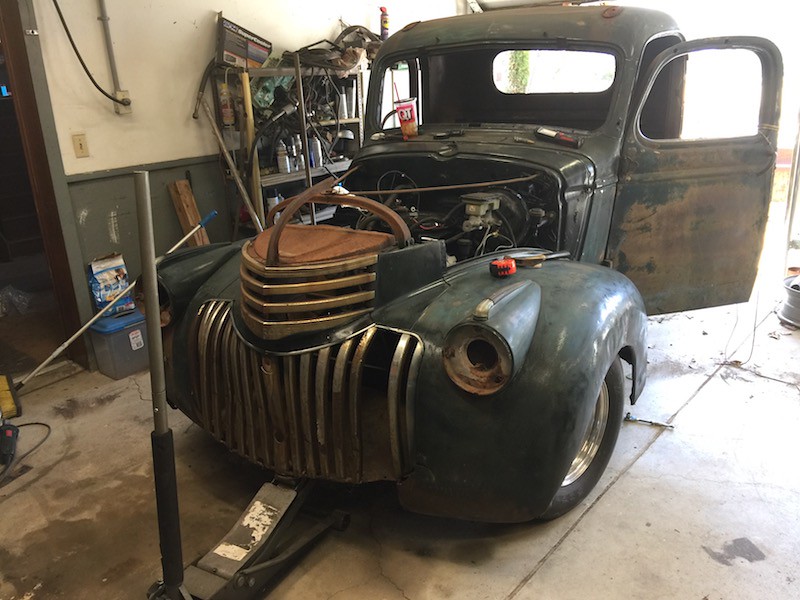 IMG_8457 by Joe Doh, on Flickr IMG_8457 by Joe Doh, on Flickrpardon my vice grip mount for the core support, and the electrical tape rad mount. just trial fitting. worked out great.  IMG_8458 by Joe Doh, on Flickr IMG_8458 by Joe Doh, on Flickr IMG_8459 by Joe Doh, on Flickr IMG_8459 by Joe Doh, on Flickr IMG_8460 by Joe Doh, on Flickr IMG_8460 by Joe Doh, on Flickr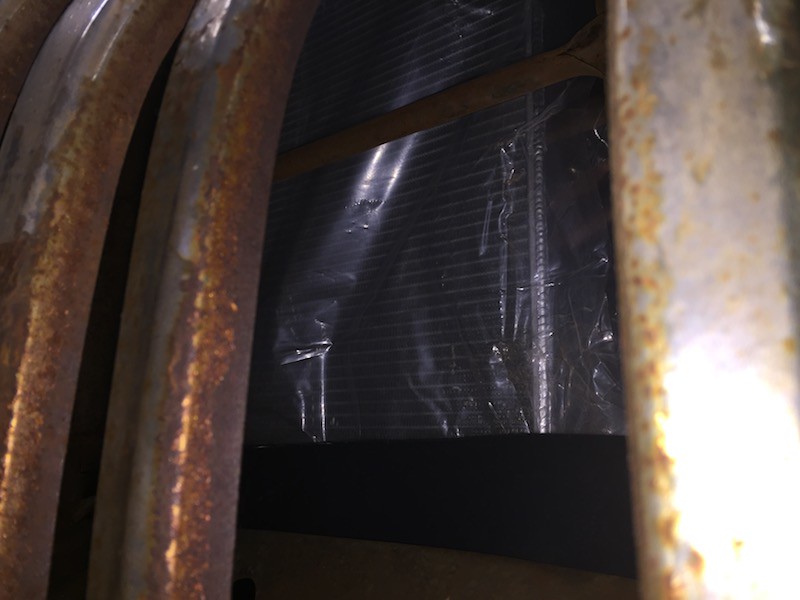 IMG_8461 by Joe Doh, on Flickr IMG_8461 by Joe Doh, on Flickrremember that I have a complete grille to replace this one, although I am partial to the look of this one and maybe I will just put it back together, I have the spare parts needed. more to come! eating a late lunch.
__________________
the mass of men live lives of quiet desperation if there is a problem, I can have it. new project WAYNE http://67-72chevytrucks.com/vboard/s...d.php?t=844393 |
|
|

|
|
|
#152 |
|
Senior Member
 Join Date: May 2007
Location: Doodah Kansas
Posts: 7,774
|
Re: 1941 1/2 ton project Hannah
front clip is mounted permanently, I had a return fitting on the steering box causing the return line to have a slight kink in it. normally a little bit of kink is just enough but I am not dating the truck. it was after 4 on friday so the hyspeco was closed and ordering a fitting would have taken till tuesday at least, so I cut it with a hack saw and gave it about 45 degrees. it doesnt leak, and with the return hose on it looks great.
I used an old trick to mount the front clip with screws so I could accurately drill the mounts and it was rock solid with just tacks and the screw. once I got the bolts in it was great. bled the brakes. old cardboard freight bleeder still kicking it. 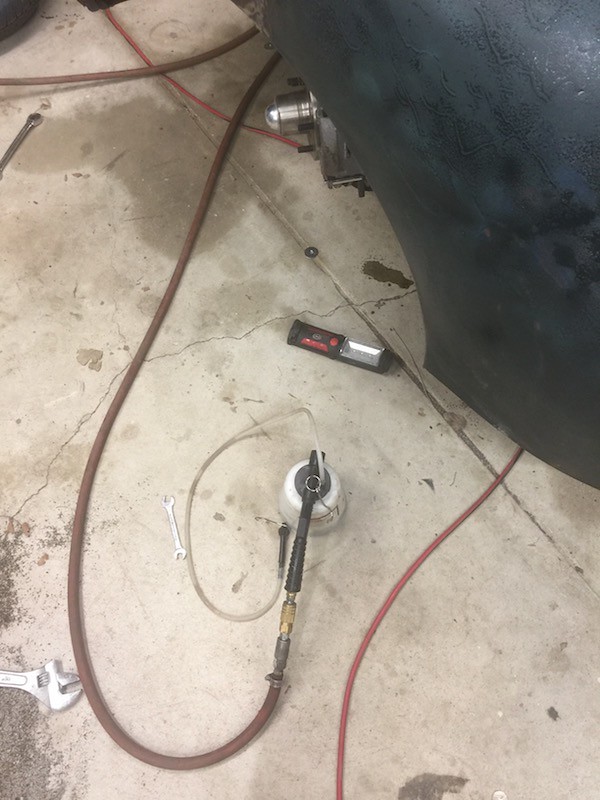 IMG_8725 by Joe Doh, on Flickr IMG_8725 by Joe Doh, on FlickrI want the filler to be easier than it has been, normally I tuck it right up against the bed side but without some kind of slip fitting its really hard to install especially when the fenders and running boards are installed. I decided I would make an oblong hole in the bed side and let it poke through naturally, easy enough to get in the right spot on the bed side and seal it with a grommet. I eyeballed it and cut and welded it... before I noticed the bed floor had shifted probably when I was bleeding the brakes. well, I already knew how to do it the first time right? pretty, but two inches too long 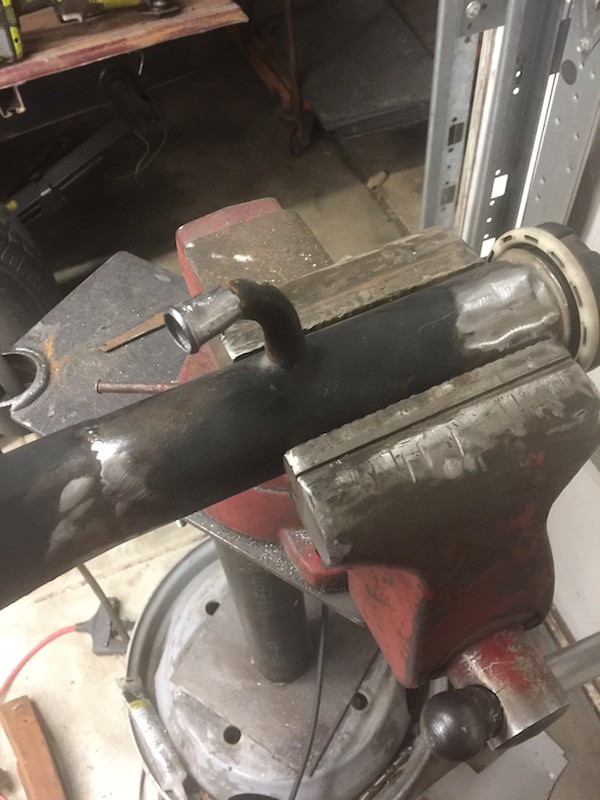 IMG_8723 by Joe Doh, on Flickr IMG_8723 by Joe Doh, on Flickr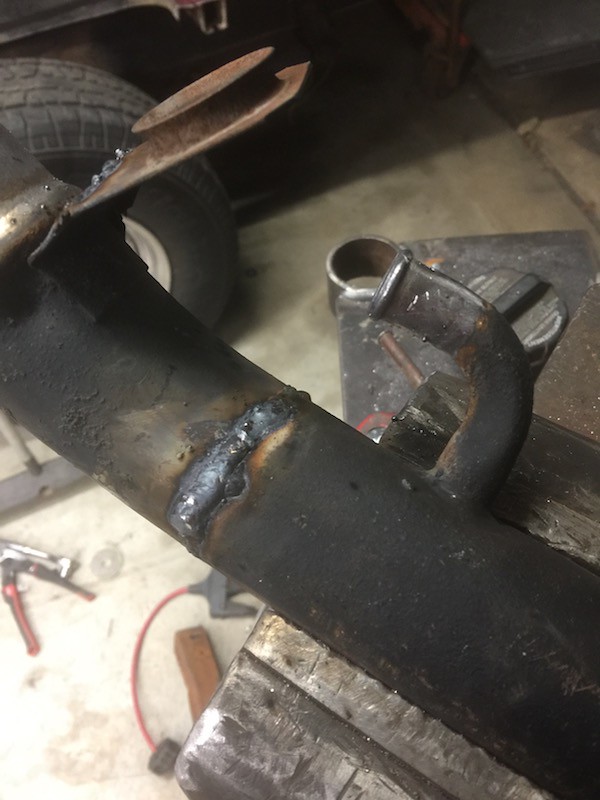 IMG_8724 by Joe Doh, on Flickr IMG_8724 by Joe Doh, on Flickrmucho bueno 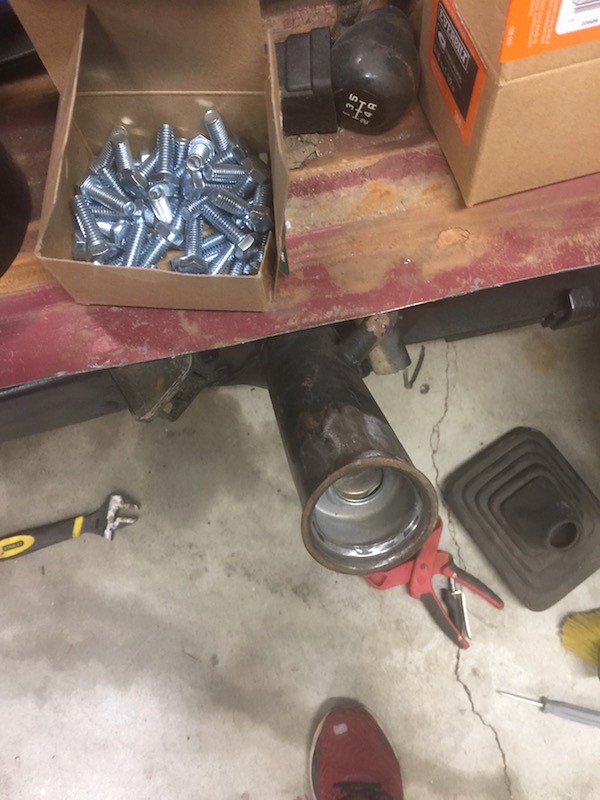 IMG_8726 by Joe Doh, on Flickr IMG_8726 by Joe Doh, on Flickrincidentally, I thought I would show how I kept the gas fumes away from my exuberant grinding and welding. I stuffed paper towels in the tank tube and then thought, sheesh thats not very safe either, I just made a fuse. so the paper towels sealed the fumes and the shifter boot protected the towels. 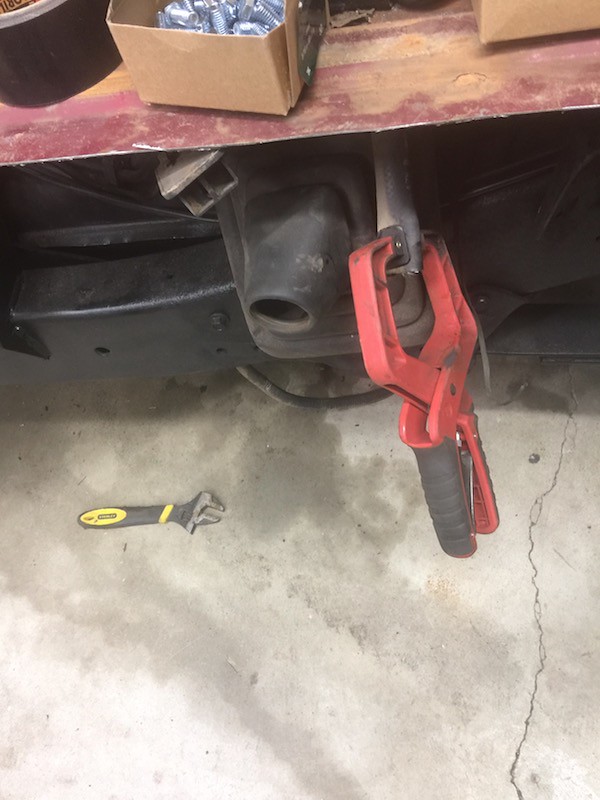 IMG_8722 by Joe Doh, on Flickr IMG_8722 by Joe Doh, on FlickrI ordered the correct front spacers but need the truck on the ground, so tomorrow I will mount the running boards and the bed. I am alomost out of welding gas though, so maybe a field trip.
__________________
the mass of men live lives of quiet desperation if there is a problem, I can have it. new project WAYNE http://67-72chevytrucks.com/vboard/s...d.php?t=844393 |
|
|

|
|
|
#153 |
|
Senior Member
 Join Date: Jul 2012
Location: Oblong, Illinois
Posts: 7,028
|
Re: 1941 1/2 ton project Hannah
The comment in first paragraph gave me a good chuckle! Needed that.
Gas fumes? Back seat driving here... there is gas in the tank? |
|
|

|
|
|
#154 |
|
Post Whore
  Join Date: May 2015
Location: Alabama
Posts: 14,674
|
Re: 1941 1/2 ton project Hannah
looking good....
I learned my lesson the hard way on gas ...I had 5gal blow up in my face once..something I wouldn't wish on anybody.... so now any welding I do on a truck the gas tank is pulled and taken outta the shop...
__________________
Mongo...aka Greg RIP Dad RIP Jesse 1981 C30 LQ9 NV4500..http://67-72chevytrucks.com/vboard/s...d.php?t=753598 Mongos AD- LS3 TR6060...http://67-72chevytrucks.com/vboard/s...34#post8522334 Columbus..the 1957 IH 4x4...http://67-72chevytrucks.com/vboard/s...63#post8082563 2023 Chevy Z71..daily driver |
|
|

|
|
|
#155 |
|
Senior Member
 Join Date: May 2007
Location: Doodah Kansas
Posts: 7,774
|
Re: 1941 1/2 ton project Hannah
there is gas in the tank, I keep the fluid systems of the donor sealed and complete as possible. brakes, coolant, transmission fluid. When I do the filler neck (or move the engine back) is the only time the fuel system is open to air.
gas fumes are heavier than air, they "pool" and crawl along the concrete. this is why an open container of gas is the best deterrent to spiders because they suffocate in the fumes. I had both garage doors open, a carpet fan making positive pressure through the basement door, a sealed fan blowing on the floor out the garage doors (this also vented the bad fumes from the galvanized filler neck), the vent line clamped, and the tank fill neck plugged with paper towels and then covered against an accidental spark. I am only in a 20x20 and would have pushed the truck out for the work but the wheels are off in front. it was a risk for sure, but a calculated risk. if I ever have the system open for any length of time the tank goes outside and gets rinsed. fumes are more dangerous than the liquid!
__________________
the mass of men live lives of quiet desperation if there is a problem, I can have it. new project WAYNE http://67-72chevytrucks.com/vboard/s...d.php?t=844393 |
|
|

|
|
|
#156 |
|
Senior Member
 Join Date: May 2007
Location: Doodah Kansas
Posts: 7,774
|
Re: 1941 1/2 ton project Hannah
now comes the times when I need more hands. without any forethought at all, I had all daughters. not only do they abhor giving any help on rusty trucks but they also stopped bringing their boyfriends around because they disappear into the garage with me at the first ring of a hammer on steel, like catholics to a church bell, slavering to grind and weld and just talk shop. sometimes the boyfriends still come around as just regular guys, one guy I consider a true son-in-law makes the 60 mile trek to help when he can, without any promise beyond a hot sandwich and a cold pop. I am almost a complete teetotaler lately, a man can have only so many vices and I already have a wife and a truck.
so I do the running boards and bed installs with my adopted sons (floor jacks). everything lined up really well but 77 years had taken their toll on the running board mounts. 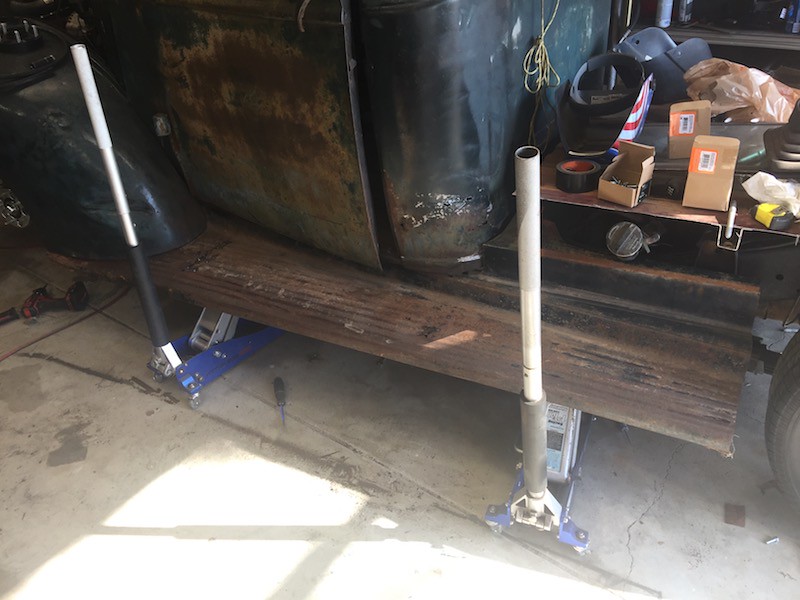 IMG_8729 by Joe Doh, on Flickr IMG_8729 by Joe Doh, on Flickr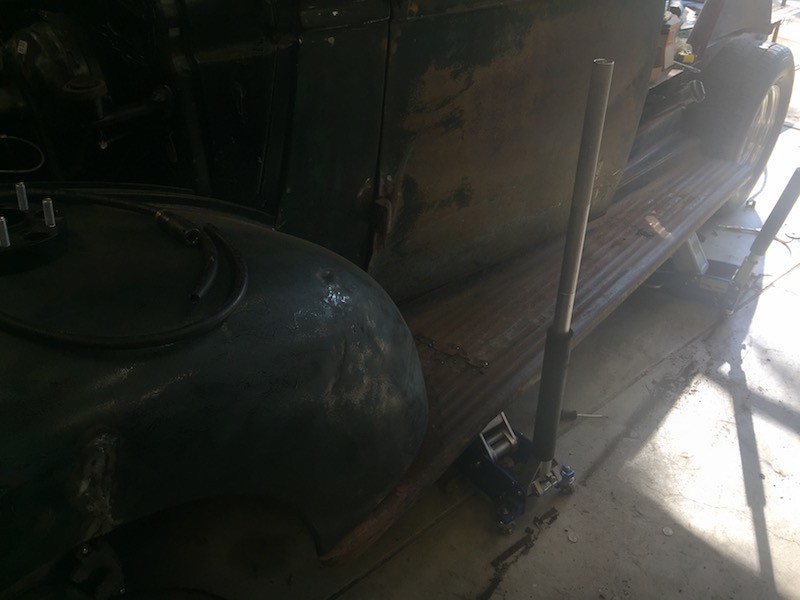 IMG_8730 by Joe Doh, on Flickr IMG_8730 by Joe Doh, on Flickr IMG_8732 by Joe Doh, on Flickr IMG_8732 by Joe Doh, on Flickr IMG_8733 by Joe Doh, on Flickr IMG_8733 by Joe Doh, on Flickrthose holes are where the mounts you cant see are. I whipped up some 1x2 mounts and tacked the bolts in the right spot. 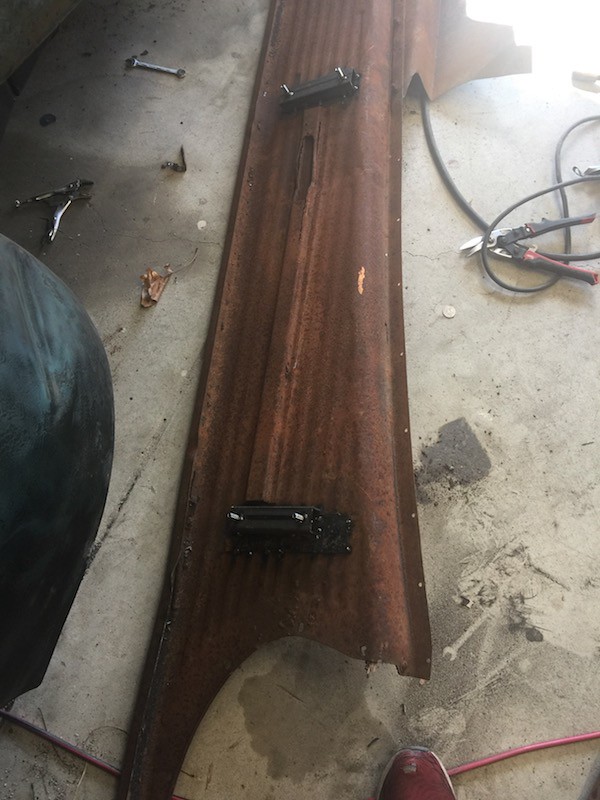 54327441893__4B93E526-95F8-4F60-BDE8-28F8B4C58861 by Joe Doh, on Flickr 54327441893__4B93E526-95F8-4F60-BDE8-28F8B4C58861 by Joe Doh, on Flickrthen it was a simple matter of trimming the factory running board mounts (that I thoughtfully chopped off the old frame) and welding them to the frame. I had to make sure to get the bed aprons in the right spot and level, on the last truck I put the bed on first and it was a nightmare trying to get the running boards to line up with the cab and the bed. this should be easier. at the current depth I will only lose a 1/2 inch out of the bed depth 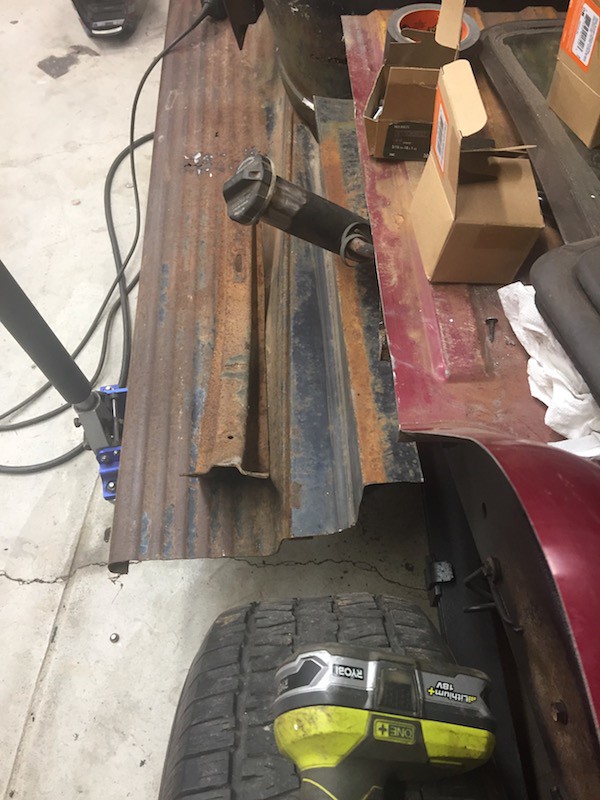 IMG_8736 by Joe Doh, on Flickr IMG_8736 by Joe Doh, on FlickrI got the drivers side done and bolted. I took a break between sides and drilled out the bulb holders on the clearance lights. The s10 harness has a 10w slave corner light bulb that only lights when the parking lights are on and flashes opposite the turn signal bulb, I figure that will be just the right look on the roof. 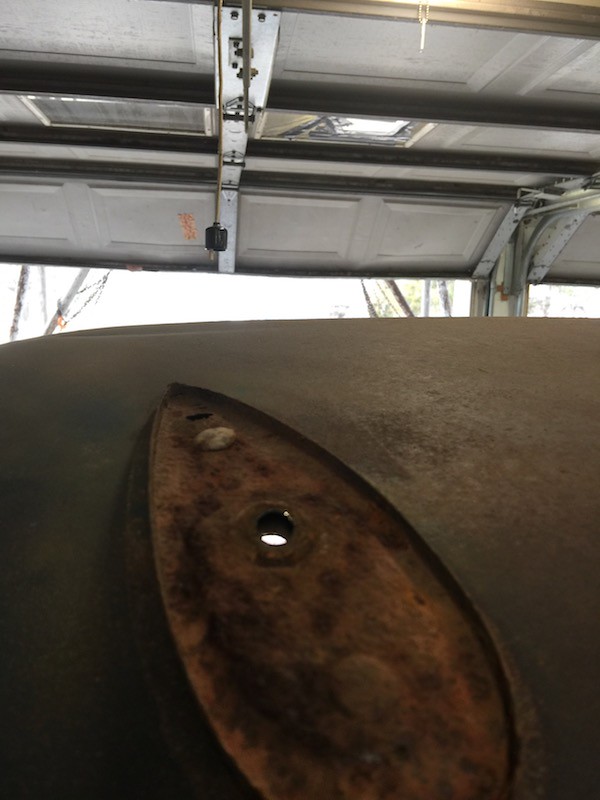 IMG_8516 by Joe Doh, on Flickr IMG_8516 by Joe Doh, on Flickron the last truck 2" spacers were too much on the front, but I found the set I had on the shelf and tried em out, knowing the wheels had different backspacing and the tires were a tiny bit narrower (215 instead of 225). whaddaya know, they fit. you can see I jacked the wheel up to check the clearance.  IMG_8739 by Joe Doh, on Flickr IMG_8739 by Joe Doh, on Flickr IMG_8740 by Joe Doh, on Flickr IMG_8740 by Joe Doh, on Flickr IMG_8741 by Joe Doh, on Flickr IMG_8741 by Joe Doh, on Flickrits spring break so my youngest is home all week but I am still managing to get things done in fits and spurts between chasing her around the house like a dinosaur and backyard swing sessions. I have been considering my next project and I think I will go boring with just a 49 GMC 100 shortbed and save the neat new idea I have been hinting about for the fall build schedule.
__________________
the mass of men live lives of quiet desperation if there is a problem, I can have it. new project WAYNE http://67-72chevytrucks.com/vboard/s...d.php?t=844393 |
|
|

|
|
|
#157 |
|
Registered User
Join Date: Aug 2012
Location: Northeast KS
Posts: 1,791
|
Re: 1941 1/2 ton project Hannah
There is nothing boring about a '49 GMC....

__________________
1999 GMC Suburban K2500 SLT, 454/4L80E 1991 Z/28, 6.0L/T56 1949 GMC 250, S10 Frame, 6.0L/4L80E Instagram @aceshighspeedshop |
|
|

|
|
|
#158 |
|
Senior Member
 Join Date: May 2007
Location: Doodah Kansas
Posts: 7,774
|
Re: 1941 1/2 ton project Hannah
ha! dont misunderstand. I am a little disappointed in myself and maybe lashing out, I have everything except a drivers door here to make a 49 shortbed, a pretty nice one actually, the floor isnt gone like most and the bed is super nice too. I would need a lot of parts I dont already have to pull off my new idea and I am being a big old wuss, which isnt really like me.
 but I also want to have the shop up this summer, and some other stuff too like visiting the oldest girl in phoenix.
__________________
the mass of men live lives of quiet desperation if there is a problem, I can have it. new project WAYNE http://67-72chevytrucks.com/vboard/s...d.php?t=844393 |
|
|

|
|
|
#159 |
|
Registered User
Join Date: Aug 2012
Location: Northeast KS
Posts: 1,791
|
Re: 1941 1/2 ton project Hannah
I've got a sister in Mesa, don't visit in the summer! My nephew knows all the good car spots, and where to dig. He also has ties to a good desert salvage yard.
__________________
1999 GMC Suburban K2500 SLT, 454/4L80E 1991 Z/28, 6.0L/T56 1949 GMC 250, S10 Frame, 6.0L/4L80E Instagram @aceshighspeedshop |
|
|

|
|
|
#160 | |
|
Senior Member
 Join Date: May 2007
Location: Doodah Kansas
Posts: 7,774
|
Re: 1941 1/2 ton project Hannah
Quote:
we were thinking around thanksgiving maybe.
__________________
the mass of men live lives of quiet desperation if there is a problem, I can have it. new project WAYNE http://67-72chevytrucks.com/vboard/s...d.php?t=844393 |
|
|
|

|
|
|
#161 |
|
Senior Member
 Join Date: May 2007
Location: Doodah Kansas
Posts: 7,774
|
Re: 1941 1/2 ton project Hannah
got the running boards done, the passenger board needed quite a bit of support that had rusted away. bolted up all the spacers and wheels and put the truck on the ground to check the rake. its almost perfect! when the bed weight is added and with the wood floor the rear should drop another inch or inch and a half.
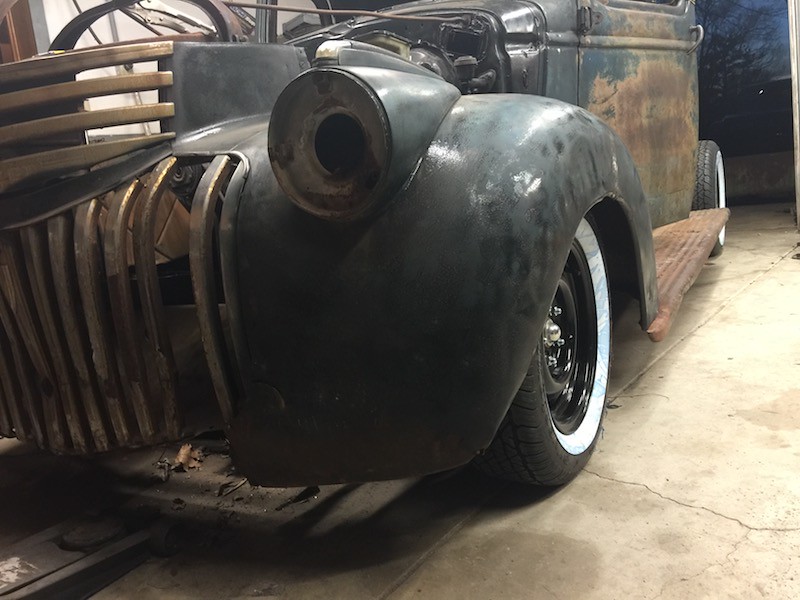 IMG_8780 by Joe Doh, on Flickr IMG_8780 by Joe Doh, on Flickr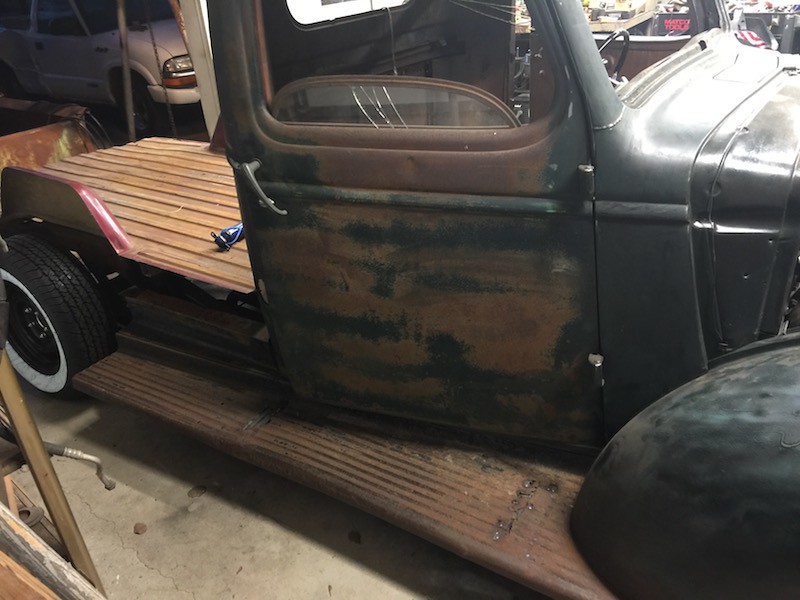 IMG_8778 by Joe Doh, on Flickr IMG_8778 by Joe Doh, on Flickr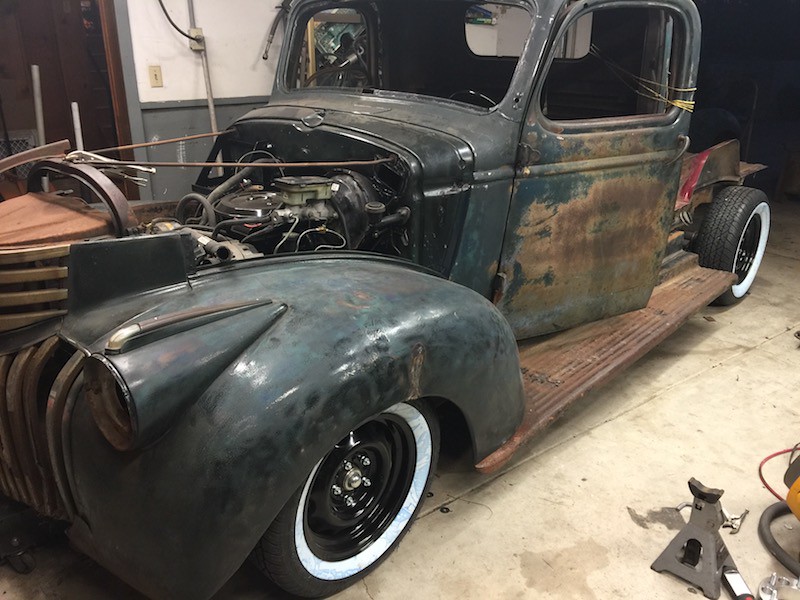 IMG_8774 by Joe Doh, on Flickr IMG_8774 by Joe Doh, on Flickron the last 41 the bed was a little further away from the cab and that made the gap exaggerated because of the big curve of the back of the cab. so on this one I tucked it right up. all that measuring really paid off, the running boards are level with the frame, level with the cab, level with the front fenders, and the aprons are exactly square with the bed floor and 6" away from the floor. I need to cut the filler hole in the bed side and tomorrow I can get the bed on and welded. (I still need welding gas, the needle is a single hair off the stop!) 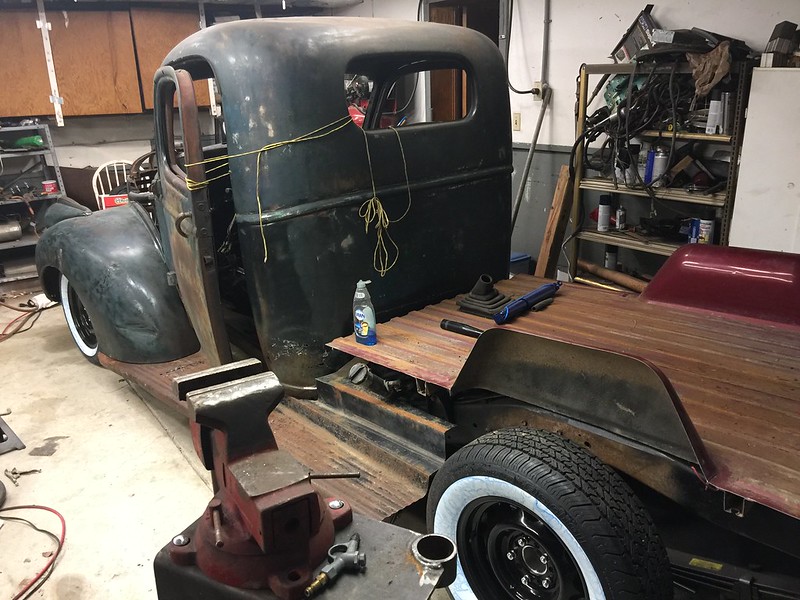 IMG_8776 by Joe Doh, on Flickr IMG_8776 by Joe Doh, on Flickrpopped the boyds on the loudmouth, which I moved up to the on deck circle to start dismantling. the front clip is sold and so are the (s10) wheels, I have to get the parts off now. loudmouth because the PO cut the cat off, last night when I moved it my wife who never swears yelled down the basement stairs "WHAT THE HELL WAS THAT" 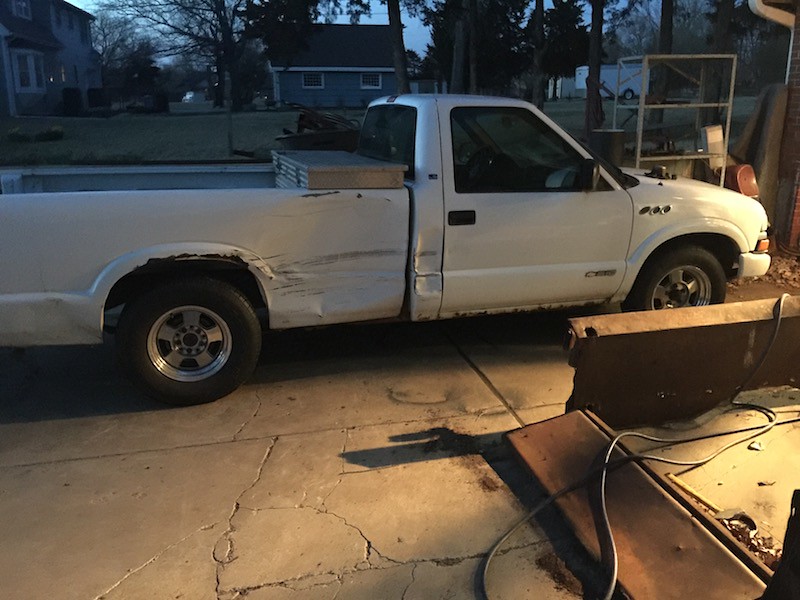 IMG_8777 by Joe Doh, on Flickr IMG_8777 by Joe Doh, on Flickrmore to come!
__________________
the mass of men live lives of quiet desperation if there is a problem, I can have it. new project WAYNE http://67-72chevytrucks.com/vboard/s...d.php?t=844393 |
|
|

|
|
|
#162 |
|
SAVING ONE TRUCK AT A TIME
 Join Date: Feb 2010
Location: sherwood oregon
Posts: 1,141
|
Re: 1941 1/2 ton project Hannah
Getting real close. Looking good
__________________
53-suburban (99% done) 40-pick up (99.9% done) 12-cc lb dually D-max (dd) 61-crew cab D-max "PAY LESS FOR WHAT YOU NEED PAY MORE FOR WHAT YOU WANT" 53 BURBAN BARN FIND:http://67-72chevytrucks.com/vboard/s...d.php?t=404091 1940 PROJECT MOON SHINE:http://67-72chevytrucks.com/vboard/s...d.php?t=551088 1961 CREW MAX: http://67-72chevytrucks.com/vboard/s....php?p=6957999 |
|
|

|
|
|
#163 |
|
Senior Member
 Join Date: May 2007
Location: Doodah Kansas
Posts: 7,774
|
Re: 1941 1/2 ton project Hannah
thanks man!
today I drilled out the broken bolts on the nose, which actually was only one bolt, two were long enough and poked out the bottom that I got some vice grips on them and was able to turn them out, so the last one needed a drill and when I bore down on the drill bit it popped the whole mounting plate off. I drilled a couple holes and spot welded it back on. 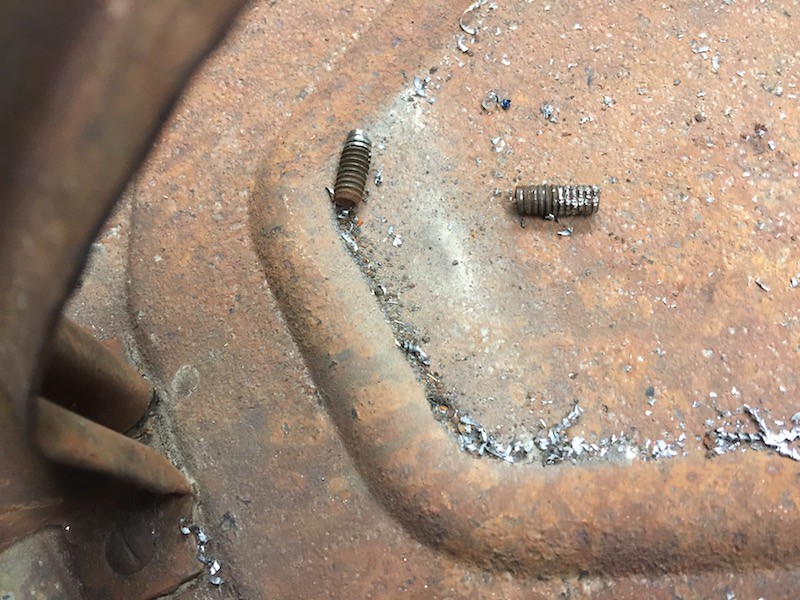 IMG_8855 by Joe Doh, on Flickr IMG_8855 by Joe Doh, on Flickr IMG_8856 by Joe Doh, on Flickr IMG_8856 by Joe Doh, on FlickrI checked the fit of the floor in the bed, worked great after I squared up the end cuts. 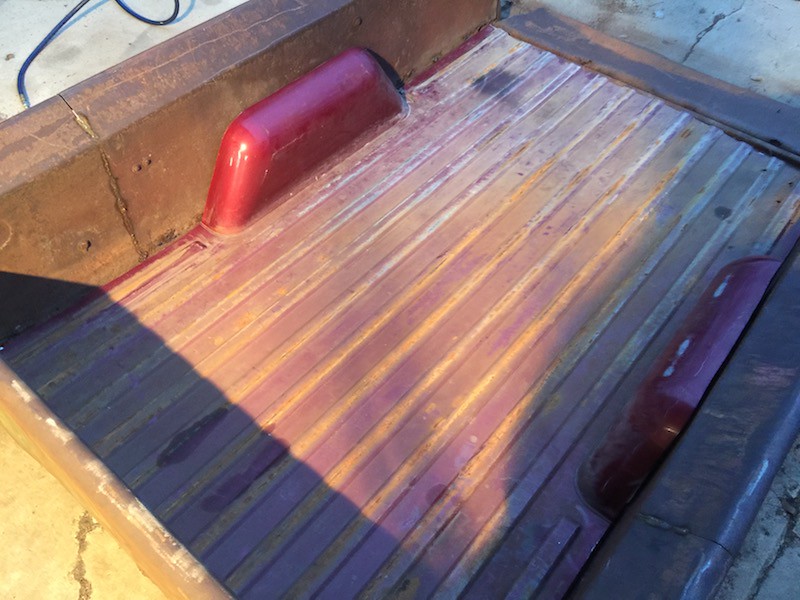 IMG_8853 by Joe Doh, on Flickr IMG_8853 by Joe Doh, on Flickr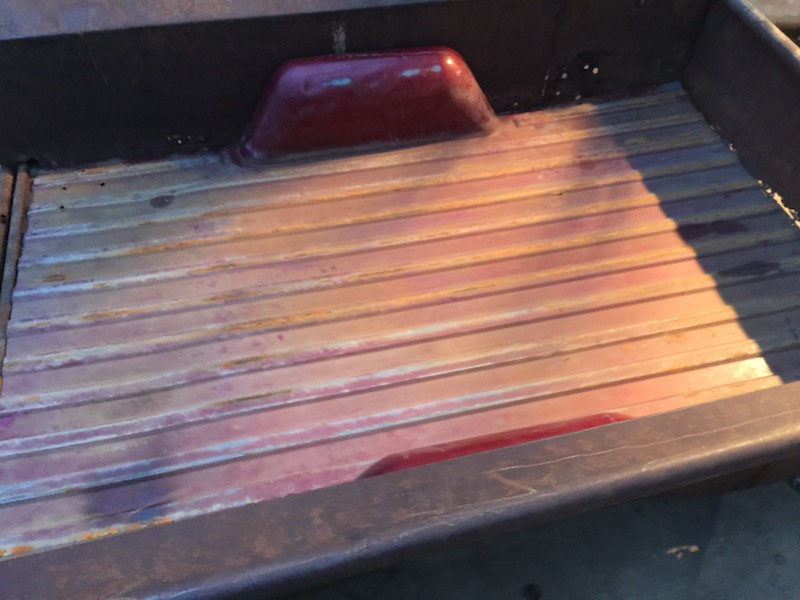 IMG_8852 by Joe Doh, on Flickr IMG_8852 by Joe Doh, on Flickrthen I broke off a bed bolt in the floor. so instead of swearing about it a while I went and sold a bunch more parts off the next donor (shes paying me now), took a sunday drive, and then picked up the kittens my wife had picked out a couple weeks ago.  IMG_8851-3 by Joe Doh, on Flickr IMG_8851-3 by Joe Doh, on Flickrthat little black one has a fist full of knives, she is legitimately scary when she stretches. the orange one is just the same temperament and even shade of orange as the old cat that disappeared. my 4 year old is in heaven.
__________________
the mass of men live lives of quiet desperation if there is a problem, I can have it. new project WAYNE http://67-72chevytrucks.com/vboard/s...d.php?t=844393 |
|
|

|
|
|
#164 |
|
Registered User
Join Date: Apr 2015
Location: Wichita Kansas
Posts: 455
|
Re: 1941 1/2 ton project Hannah
I like how the bed floor turned out. I'm wanting to do that with my 57 long bed. I need to find a decent bed floor from a 73-87 long bed for a donor. Your truck is coming along. You'll be driving it before long!
__________________
My 57 GMC build |
|
|

|
|
|
#165 |
|
Senior Member
 Join Date: May 2007
Location: Doodah Kansas
Posts: 7,774
|
Re: 1941 1/2 ton project Hannah
thanks I havent welded it in yet but its a perfect fit. tomorrow I will drill out the broken bolt because no good deed goes unpunished haha.
__________________
the mass of men live lives of quiet desperation if there is a problem, I can have it. new project WAYNE http://67-72chevytrucks.com/vboard/s...d.php?t=844393 |
|
|

|
|
|
#166 |
|
Senior Member
 Join Date: Jul 2012
Location: Oblong, Illinois
Posts: 7,028
|
Re: 1941 1/2 ton project Hannah
Truck is coming along nicely! Is it just me, or does the black cat have attitude eyes? Like don’t mess with me.
|
|
|

|
|
|
#167 |
|
Senior Member
 Join Date: May 2007
Location: Doodah Kansas
Posts: 7,774
|
Re: 1941 1/2 ton project Hannah
she has that look, but she is the sweetheart of the two! those claws give freddy kruger envy, though.
the upholstery shop that did the seat shined me on the carpet and underlayment and I am sad to say that is the last straw. so went to the Yard Store today, man I love that place. of course they had jute, and they also had some aircraft sound barrier material I didnt pick up but thinking about it I will tomorrow. 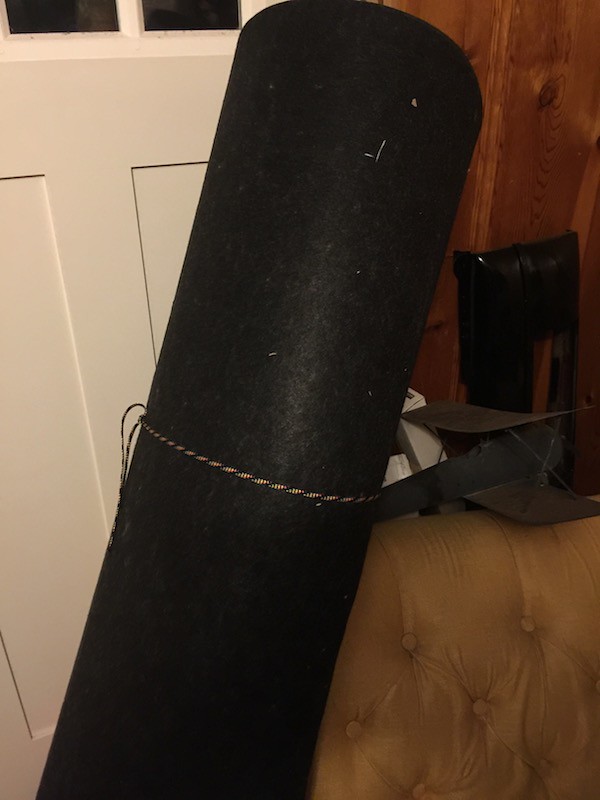 IMG_8879 by Joe Doh, on Flickr IMG_8879 by Joe Doh, on Flickralso got some drill bits and a 10x1.5 tap to fix my bed bolt problem. drilled out the broken bolt and chased all the threads.  IMG_8872 by Joe Doh, on Flickr IMG_8872 by Joe Doh, on Flickrrain dampened my bed ambitions so I went to the next item on the punch list, rebuilding the doors and windows. here is a trick, if you have clutch head screws on a 39-46 truck that are... recalcitrant, I take a cutoff wheel and cut a slot in them, the little bit of heat and vibration lets me take them out with a flat bladed screwdriver instead of that low torque clutch head driver. only had to do that to about 7.  IMG_8873 by Joe Doh, on Flickr IMG_8873 by Joe Doh, on FlickrI rebuilt the door latches, here is a how-to if you have-to. 1. remove the door handle, mine was rusted fast to the latch assembly and required some persuasion, namely a hammer and a punch to push the handle out. this actually separated the upper part of the latch assembly but it had to come off anyway. 2. separate the latch assembly from the door support that also holds the window regulator. there are 4 big slotted screws that hold that piece to the door and then two more clutch head screws that hold the latch assembly. picture below is the latch assembly in the vice, you can see the missing parts that fell off when I beat on the door handle, and the four tabs you have to grind off to release the door latch  IMG_8874 by Joe Doh, on Flickr IMG_8874 by Joe Doh, on Flickr3. unscrew the inner release rod from the latch, there is a (probably broken) spring on the shaft, this is what holds the outside handle level when latched so it will need replaced. I got a generic stainless spring assortment from home cheapo, and found one with the right tension. 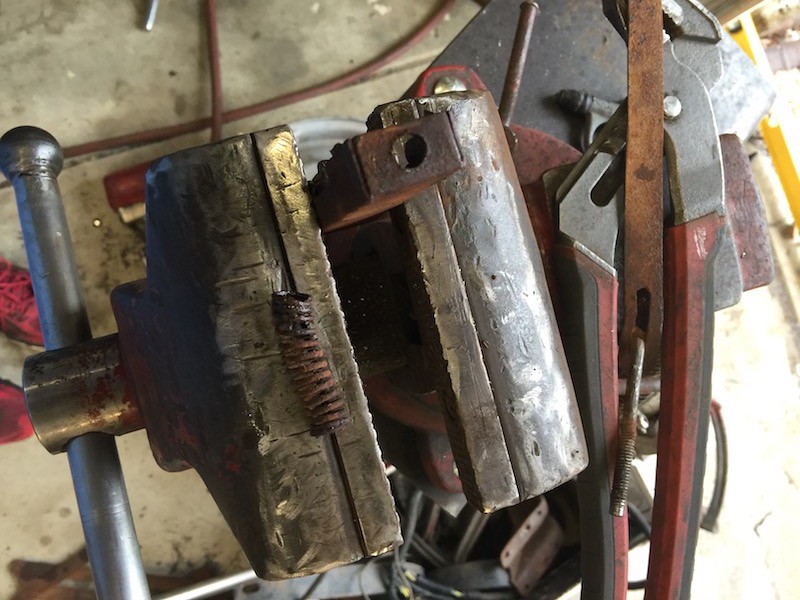 IMG_8875 by Joe Doh, on Flickr IMG_8875 by Joe Doh, on Flickr4. clean and free up all the linkages. you dont want to sand on them even though its tempting, they have worn into a comfortable position after almost 80 years and if you clean them up too much they will stick and catch. after that reassembly is reverse of disassembly, and I use a couple tack welds to hold it all shut for the next 80 years.  IMG_8876 by Joe Doh, on Flickr IMG_8876 by Joe Doh, on Flickrhere is the door handle assembly that was dislodged by the handle removal, reinstalled. it is possible to snap it back in. 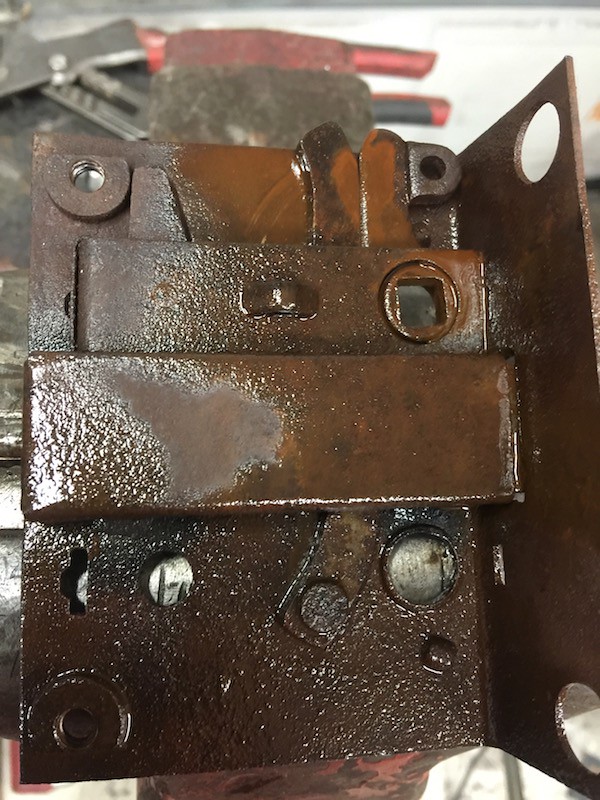 IMG_8878 by Joe Doh, on Flickr IMG_8878 by Joe Doh, on Flickrlube it all up and work it a few hundred times, this smooths the mechanism, and you can make sure the handle is springing back (this one is)  IMG_8877 by Joe Doh, on Flickr IMG_8877 by Joe Doh, on Flickrtomorrow I will rebuild the window felts and the passenger latch, and maybe get the bed together finally.
__________________
the mass of men live lives of quiet desperation if there is a problem, I can have it. new project WAYNE http://67-72chevytrucks.com/vboard/s...d.php?t=844393 |
|
|

|
|
|
#168 |
|
Registered User
Join Date: Aug 2012
Location: Northeast KS
Posts: 1,791
|
Re: 1941 1/2 ton project Hannah
Your dedication is unwaivering! I need to get back on finishing my bed on the '49.
__________________
1999 GMC Suburban K2500 SLT, 454/4L80E 1991 Z/28, 6.0L/T56 1949 GMC 250, S10 Frame, 6.0L/4L80E Instagram @aceshighspeedshop |
|
|

|
|
|
#169 |
|
Senior Member
 Join Date: May 2007
Location: Doodah Kansas
Posts: 7,774
|
Re: 1941 1/2 ton project Hannah
I'm a little punch drunk from all these side tracks but its still moving forward.
I vacuumed out the door today and found most of southwest kansas, but more importantly, the three parts of the original door check mount. so I welded them all together. waste not want not! 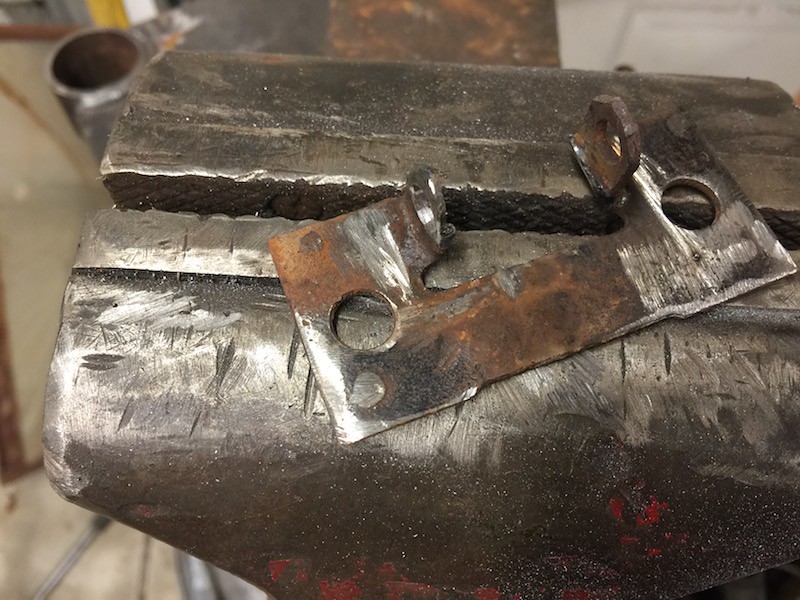 IMG_8893 by Joe Doh, on Flickr IMG_8893 by Joe Doh, on Flickr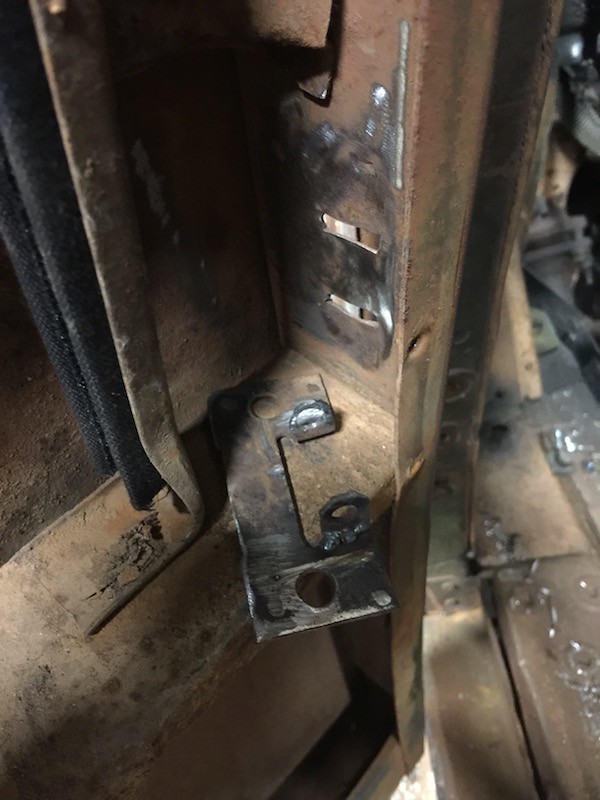 IMG_8892 by Joe Doh, on Flickr IMG_8892 by Joe Doh, on Flickrbefore I could hook it back up though I needed to install the door pins. the PO at some point in history had put a bolt through the top hinge and a nail through the lower. the nail gave me the most grief, the head was small enough to have fallen through the top hole but was too perfect a fit to push back up through. what I ended up doing was staring at it a while and then I pulled it as far through the bottom as I could, then cut as much of the bottom off as I could. this left it just long enough to push up into the center of the hinge, which let the hinge separate and then I got it up from the bottom again. then it was just a matter of course to install new top and bottom pins.  IMG_8881 by Joe Doh, on Flickr IMG_8881 by Joe Doh, on Flickr IMG_8882 by Joe Doh, on Flickr IMG_8882 by Joe Doh, on Flickr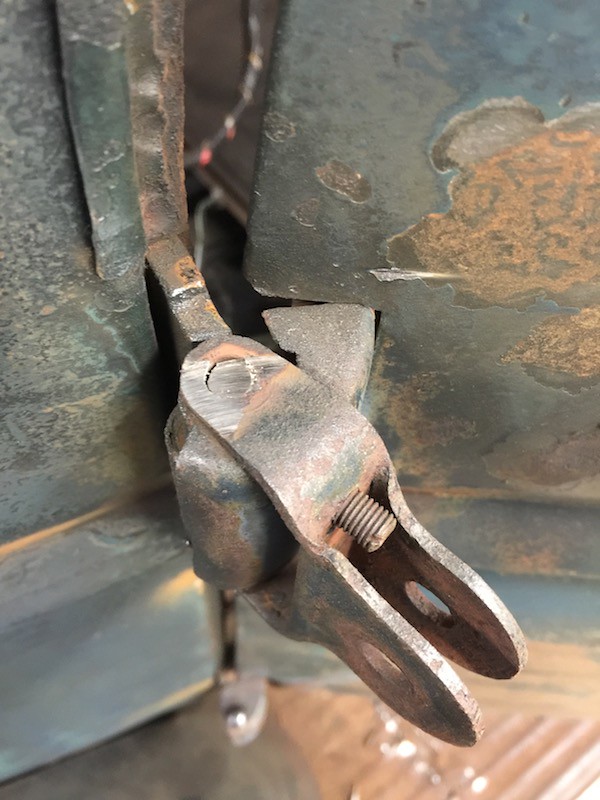 IMG_8883 by Joe Doh, on Flickr IMG_8883 by Joe Doh, on Flickr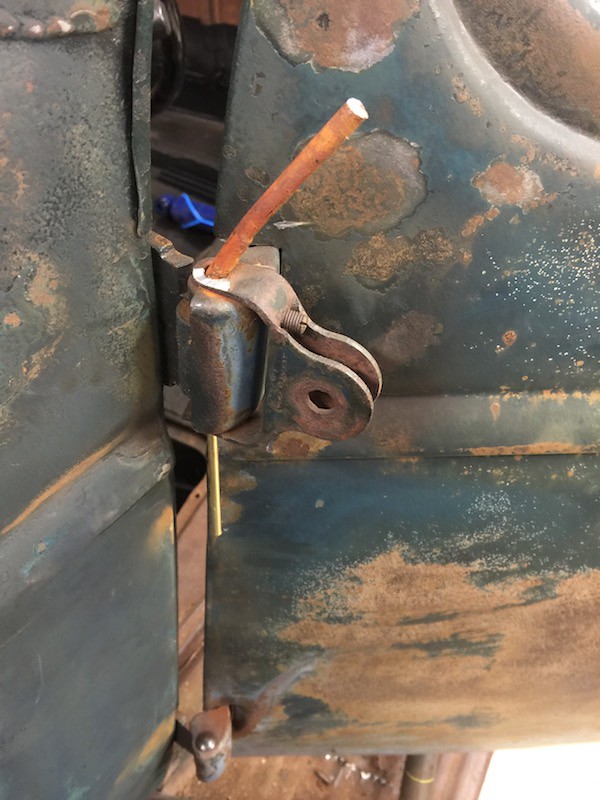 IMG_8884 by Joe Doh, on Flickr IMG_8884 by Joe Doh, on FlickrI am trying to decide between the two mirror heads, I think the black one is the best. 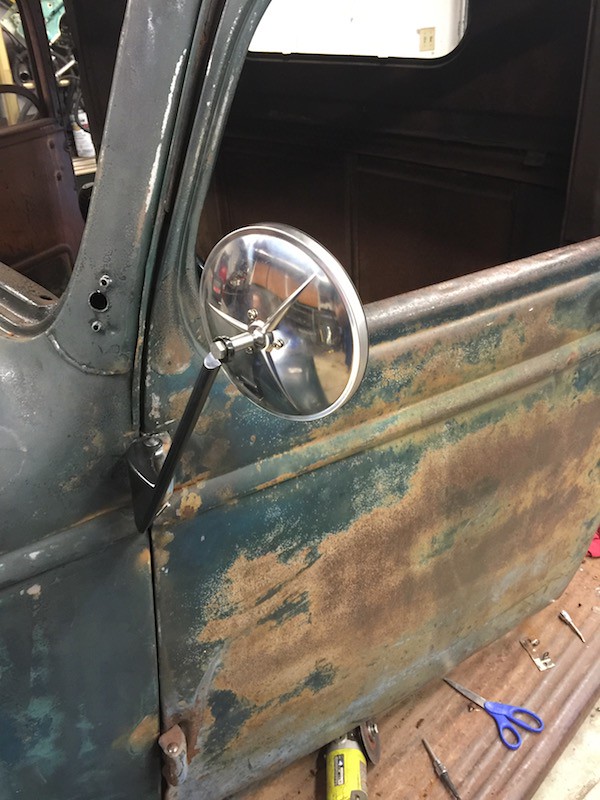 IMG_8887 by Joe Doh, on Flickr IMG_8887 by Joe Doh, on Flickr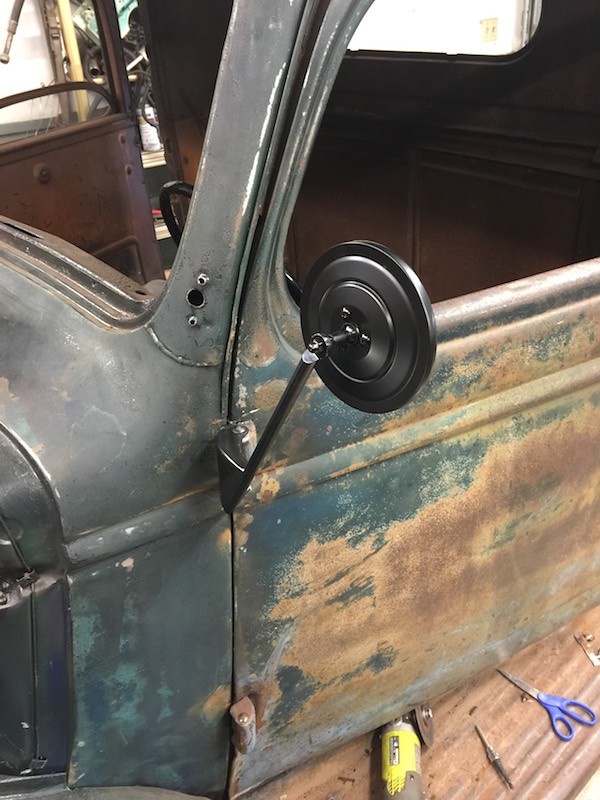 IMG_8888 by Joe Doh, on Flickr IMG_8888 by Joe Doh, on FlickrI thought I was done, but a couple decades of the door swinging without a check had tweaked the upper hinge, so the door didnt shut all that well. I thought the hinges had some adjustment so I spent some time drilling out the bolts to find out they werent. 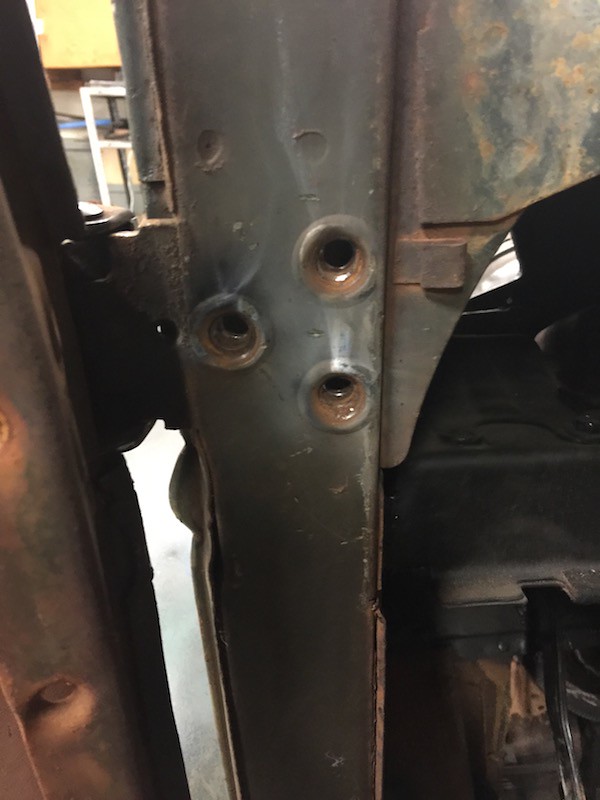 IMG_8889 by Joe Doh, on Flickr IMG_8889 by Joe Doh, on Flickrso I have the body and the door jigged with some jacks and I am trying to get the sheet back in line instead of changing the hinge. a little at a time, I have the door propped at the rear with a jack and the frame on the opposite side propped with a jack and every once in a while I will jump on the floorboard. maybe tomorrow I will get to the passenger side haha.
__________________
the mass of men live lives of quiet desperation if there is a problem, I can have it. new project WAYNE http://67-72chevytrucks.com/vboard/s...d.php?t=844393 |
|
|

|
|
|
#170 |
|
Registered User
Join Date: Aug 2012
Location: Northeast KS
Posts: 1,791
|
Re: 1941 1/2 ton project Hannah
I am unable to give you an opinion on the mirror without seeing a good left front corner/side shot.
Your finesse tactics to door alignment sound familiar, I have used similar methods in the past.
__________________
1999 GMC Suburban K2500 SLT, 454/4L80E 1991 Z/28, 6.0L/T56 1949 GMC 250, S10 Frame, 6.0L/4L80E Instagram @aceshighspeedshop |
|
|

|
|
|
#171 |
|
Registered User
Join Date: Sep 2012
Location: Midway, NC
Posts: 3,275
|
Re: 1941 1/2 ton project Hannah
The Black is too nice and the chrome almost looks out of place. How about aging the black one. Then maybe it will look more fittingly.
__________________
http://67-72chevytrucks.com/vboard/s...d.php?t=581873 The low buck build threads. Check'em out! http://67-72chevytrucks.com/vboard/s...d.php?t=666022 My build thread Crossmembers CC |
|
|

|
|
|
#172 |
|
Senior Member
 Join Date: Sep 2016
Location: Hershey, PA
Posts: 1,005
|
Re: 1941 1/2 ton project Hannah
I was just dealing with my door latch last weekend. Amazing how a few rusted bolts can eat up your whole day. I still have some tapping to do to install the new door latch. I don't have the ambition to pull the old one apart and fix it up like you've done. I guess I should put it aside in the event someone on the forum wants to rebuild them.
Oh and I second the idea of scuffing up the black mirrors to give them a bit of wear and tear. They also match the black wheels.
__________________
Current Build Thread 1930 Ford Model A Modern Twist: Ford Model A Rat Rod With a Modern Twist Build Thread Phase 1 "The Swap": 1949 3100 with S10 swap. Beginner build with ambition! Build Thread Phase 2 "The Drop": Beginner Build with Ambition gets Air Ride |
|
|

|
|
|
#173 | |
|
Senior Member
 Join Date: May 2007
Location: Doodah Kansas
Posts: 7,774
|
Re: 1941 1/2 ton project Hannah
Quote:
it has nothing to do with ambition, they dont repop them, otherwise I would have bought two new ones and moved on with life.  morris and mabel. mabel is getting the fuzzy capri pants and poof tail my beloved turkish angora had at 2.5 months. I am partial to turks, and its a dominant gene, they are truly beautiful cats, so agile and trim, like a ballerina. maybee prefers me best too, she likes laying on me when others are bothering her, which is awesome.  IMG_8943 by Joe Doh, on Flickr IMG_8943 by Joe Doh, on Flickrgot the front clip pulled for the next project before the cold front came in, its sold and I needed it off. its super easy to pull a clip when you just cut the rails! 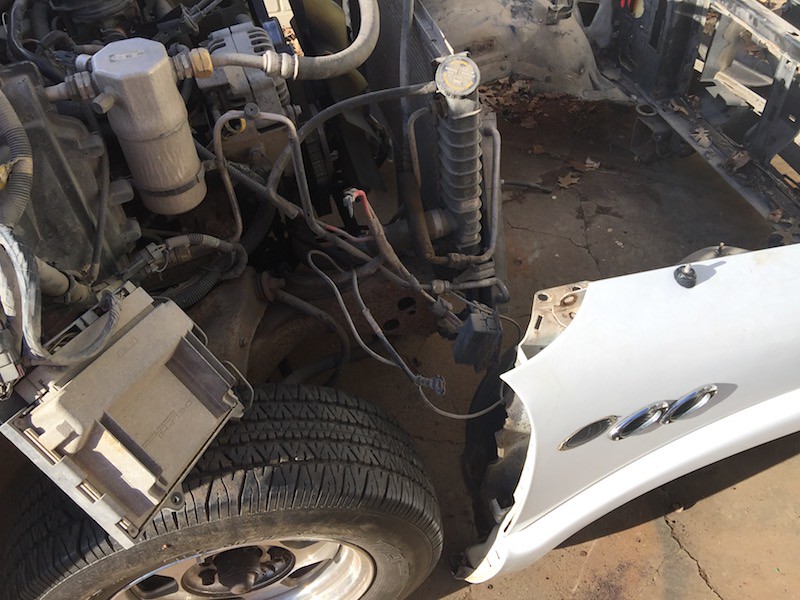 IMG_8945-1 by Joe Doh, on Flickr IMG_8945-1 by Joe Doh, on Flickr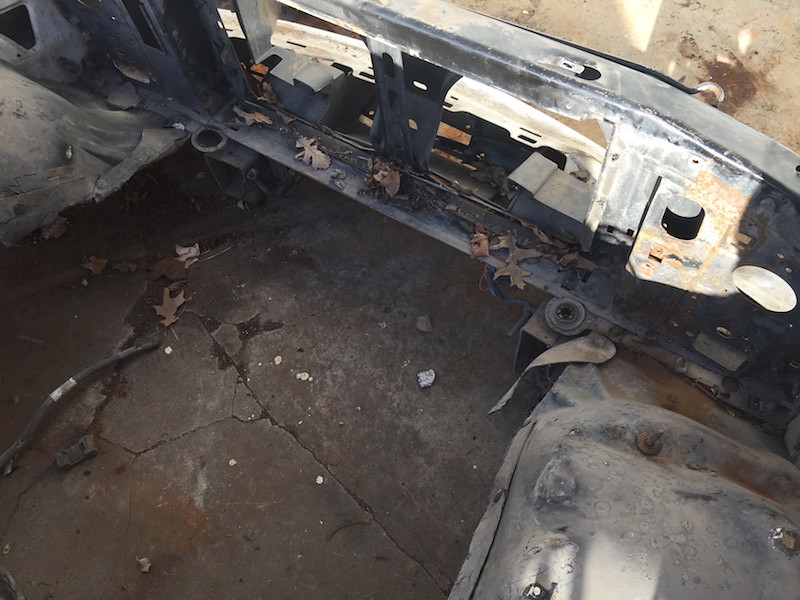 IMG_8946 by Joe Doh, on Flickr IMG_8946 by Joe Doh, on Flickrgot tired of wishing the bed was on and just tacked the floor in the right spot and put it on. the gas filler worked out perfect, so did the cab alignment. I am pretty freaking happy. 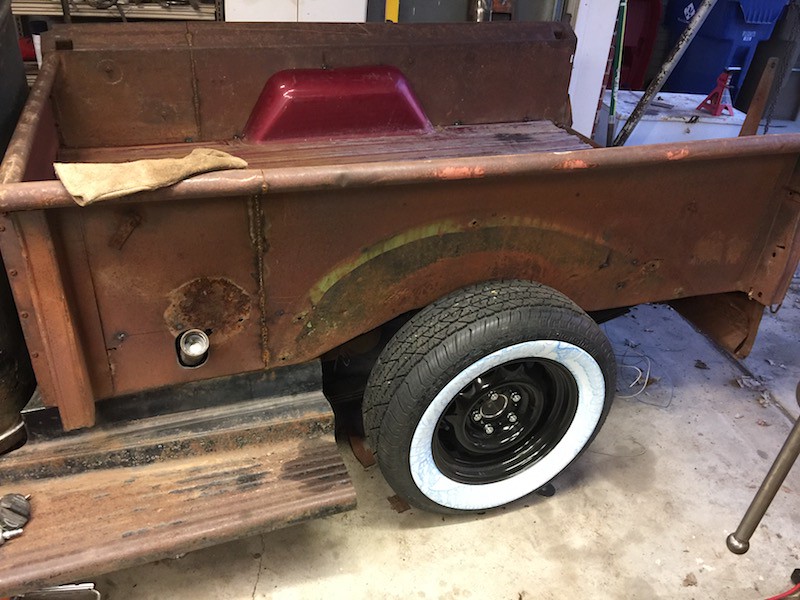 IMG_8948 by Joe Doh, on Flickr IMG_8948 by Joe Doh, on Flickr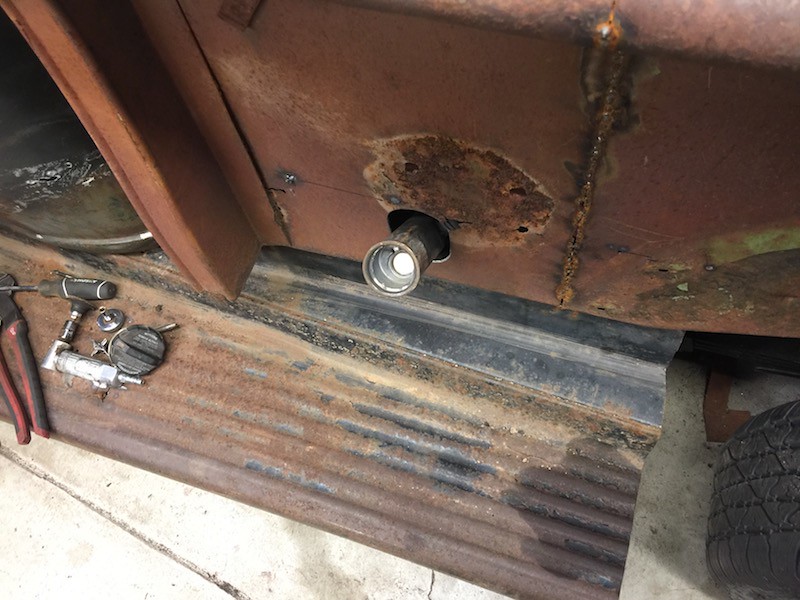 IMG_8949 by Joe Doh, on Flickr IMG_8949 by Joe Doh, on Flickr IMG_8950-1 by Joe Doh, on Flickr IMG_8950-1 by Joe Doh, on Flickr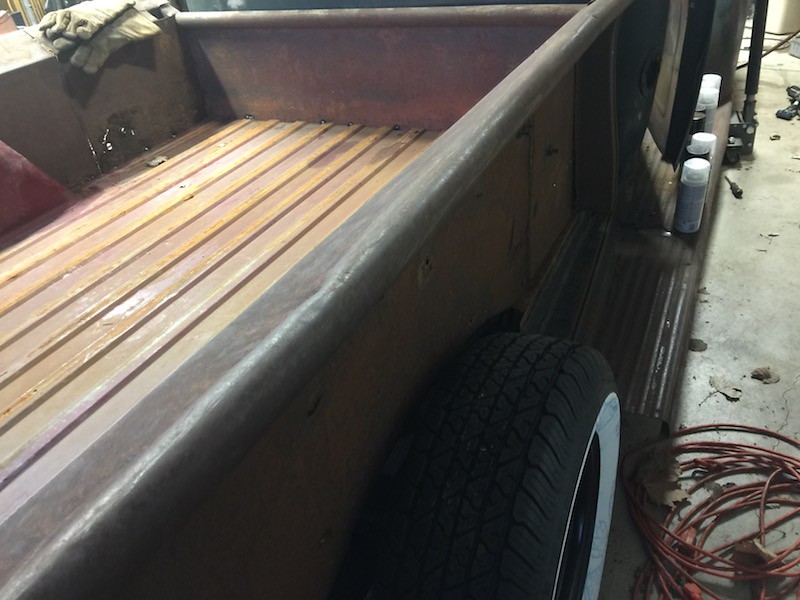 IMG_8951 by Joe Doh, on Flickr IMG_8951 by Joe Doh, on Flickr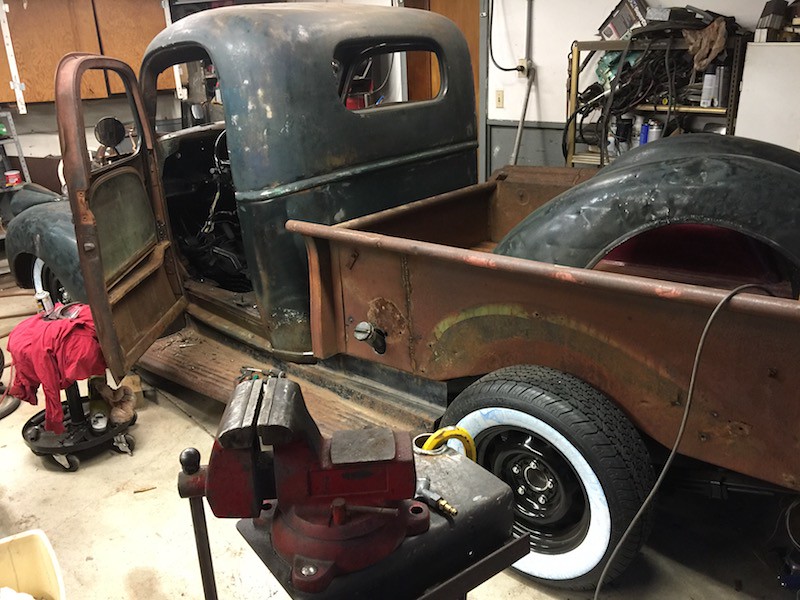 IMG_8952-1 by Joe Doh, on Flickr IMG_8952-1 by Joe Doh, on Flickr IMG_8953-1 by Joe Doh, on Flickr IMG_8953-1 by Joe Doh, on Flickrbut again there is no joy in mudville! I noticed the other day on the door parts that my welds were looking a little weird. I figured it was just rusty old metal but when I was tacking the bed floor today the welds looked really weird, a dark steel color. when I picked up the welding tank they were out of the 3ft bottles I usually get and so they gave me a 4 ft bottle. I didnt pay much attention but noted that the tank was older looking and was painted a light green, normally my tanks are maroon. I am 90% certain the guy at the welding shop has given me a 4ft bottle of OXYGEN and the only reason I havent blown myself up is I am only doing tacks. I suspect this because the guy in front of me was a fireman and was getting oxy, and I hope to heaven he didnt get my argon/CO2 because that would be one (or more!) dead fireman. I will straighten it out monday but I cant do anything else till I do. glad I got the bed test fit though, time to weld it up and move on. you can see I need to trim the running boards for the fenders, and I am going to move the fenders up on the bed a little too, the wheel would be too far back in the wheel arch in that position.
__________________
the mass of men live lives of quiet desperation if there is a problem, I can have it. new project WAYNE http://67-72chevytrucks.com/vboard/s...d.php?t=844393 |
|
|
|

|
|
|
#174 |
|
Senior Member
 Join Date: Jul 2012
Location: Oblong, Illinois
Posts: 7,028
|
Re: 1941 1/2 ton project Hannah
A 4 foot green bottle does sound like oxygen. Guessing the bottle isn’t labeled?
The welding gas bottles I have seen are typically labeled with contents. Congrat’s on the bed fitting properly. I enjoyed it when you said ... you were tired of wishing it was on there so you tacked it on there. |
|
|

|
|
|
#175 | |
|
Senior Member
 Join Date: May 2007
Location: Doodah Kansas
Posts: 7,774
|
Re: 1941 1/2 ton project Hannah
Quote:
there is no label, but someone has mentioned that the oxy bottle wouldnt fit my regulator. I do wonder whats in there to give such terrible welds. maybe I am the terrible weld! 
__________________
the mass of men live lives of quiet desperation if there is a problem, I can have it. new project WAYNE http://67-72chevytrucks.com/vboard/s...d.php?t=844393 |
|
|
|

|
 |
| Bookmarks |
|
|