
|
Register or Log In To remove these advertisements. |
|
|
|
|||||||
 |
|
|
Thread Tools | Display Modes |
 02-05-2020, 11:09 AM
|
#51 |
|
Registered User
 Join Date: Jan 2018
Location: Durham, North Carolina
Posts: 782
|
Re: 1970 C30 Car hauler Buildish thread.
"So that really expensive clear coat that was supposed to be formulated to be painted directly to bare metal and not rust... well it rusted."
Oof, that sucks to hear since you put so much work into getting it to bare metal. I know it isn't for everyone but I think fauxtina (when not overdone) looks nice and saves a ton on a paint job and more importantly the stress that comes with having a full done paint job and driving a vehicle. I think it is a reasonable option if you have an original survivor and want a truck to just drive and not have to worry about.
__________________
My Daily Driver Build: http://67-72chevytrucks.com/vboard/s...d.php?t=755668 |

|

|
|
03-28-2020, 09:04 AM
|
#52 |
|
Registered User
Join Date: Dec 2010
Location: konawa ok/oakdale Ca.
Posts: 1,653
|
Re: 1970 C30 Car hauler Buildish thread.
Nice work.
|
|
|
|
|
04-12-2020, 01:13 AM
|
#53 | ||
|
Registered User
Join Date: Sep 2017
Location: Patriot IN
Posts: 163
|
Re: 1970 C30 Car hauler Buildish thread.
Quote:
The way I see it with the way I painted the truck I can just rattle can over the patina spots or touch it up with a can of spray paint and not have to worry about it getting scratched or dented. I built a rock crawler a few years ago It was a 97 tj that was stretched into a lj. I took it all over the place I would beet it off trees and rocks bury it in the mud. It was spray painted flat black and I would just touch it up when needed. Then I put a nice paint job on it. At first I didn't even want to take it out, then I tried to be careful in the trails I just could not bring myself to scratch it up and I no longer enjoyed it like I had and ended up selling it. I don't want to do the same to this truck. I want it to look good but I don't want to stress out over it when I mess it up. If it already looks ratty then a few more dings and scratches won't matter and it will be easy and cheap to touch up if I want and for now I like the look. Pic of the jeep 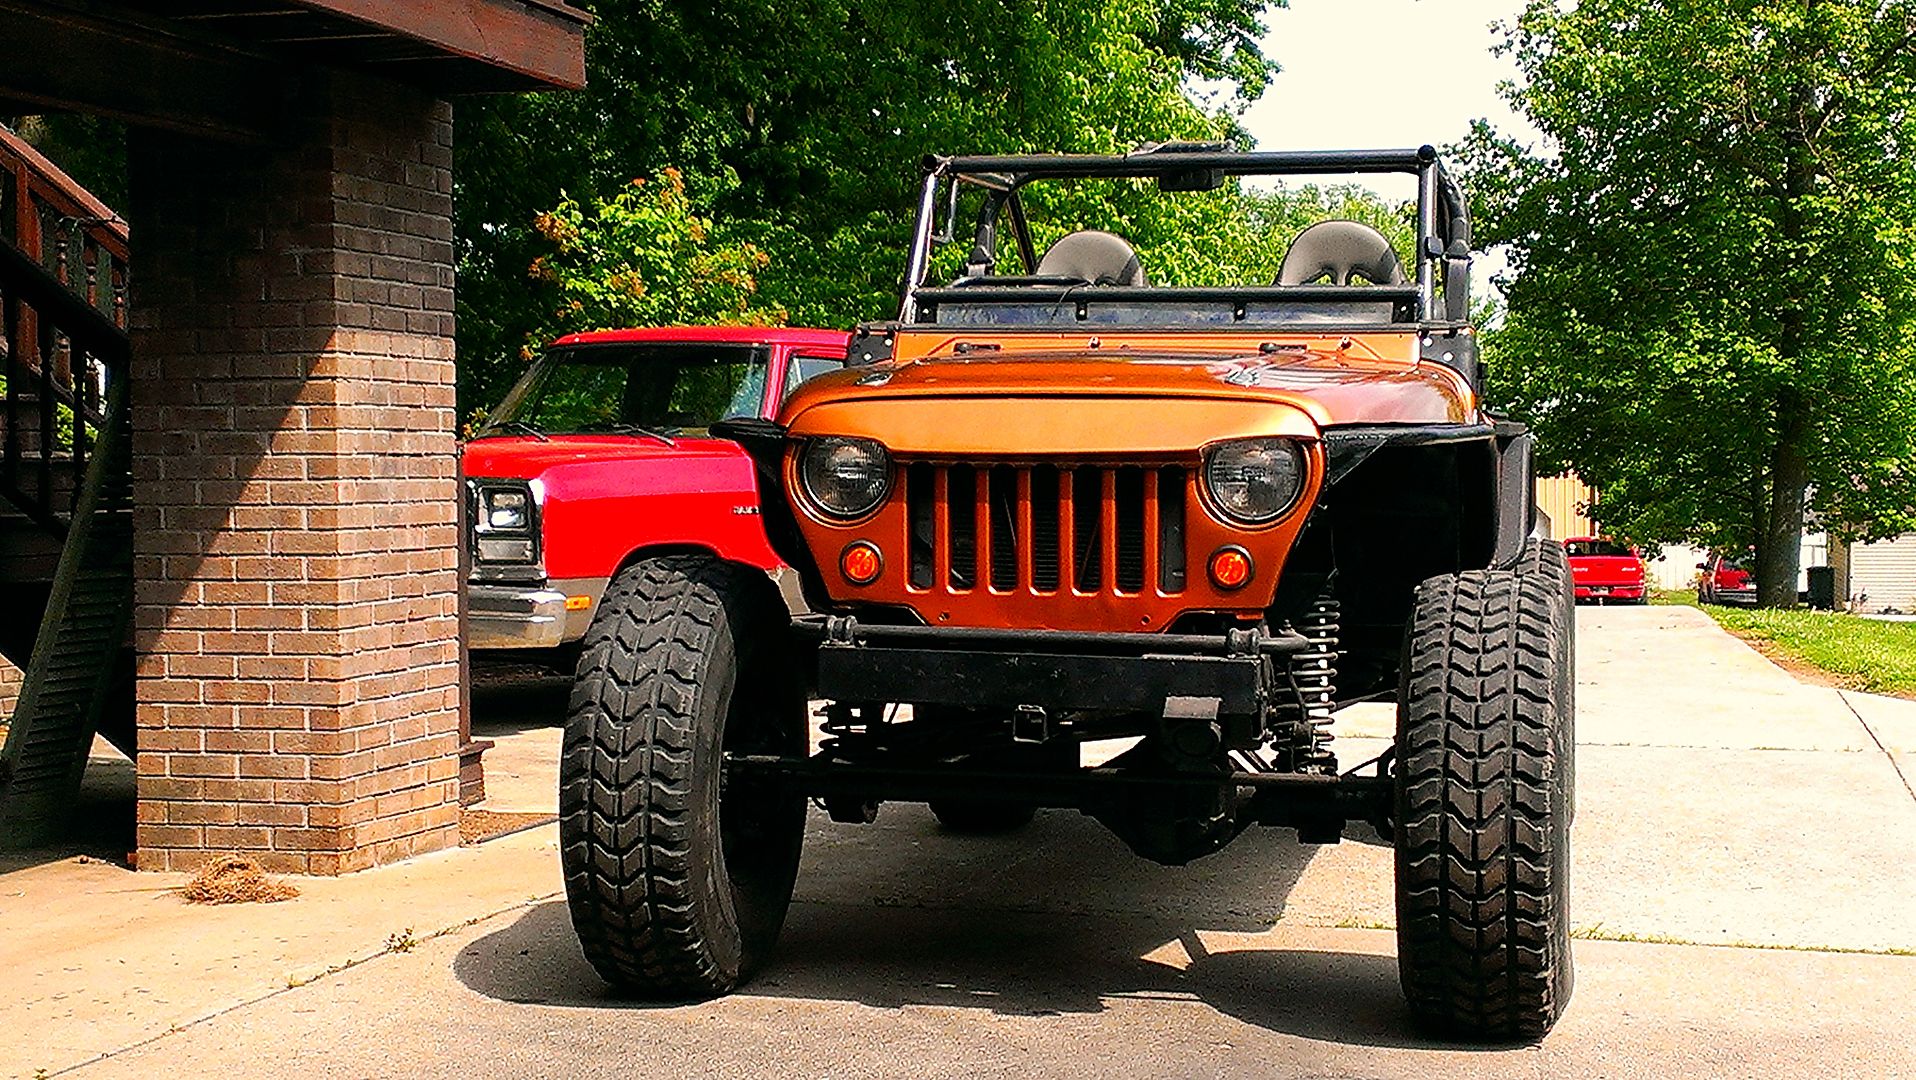 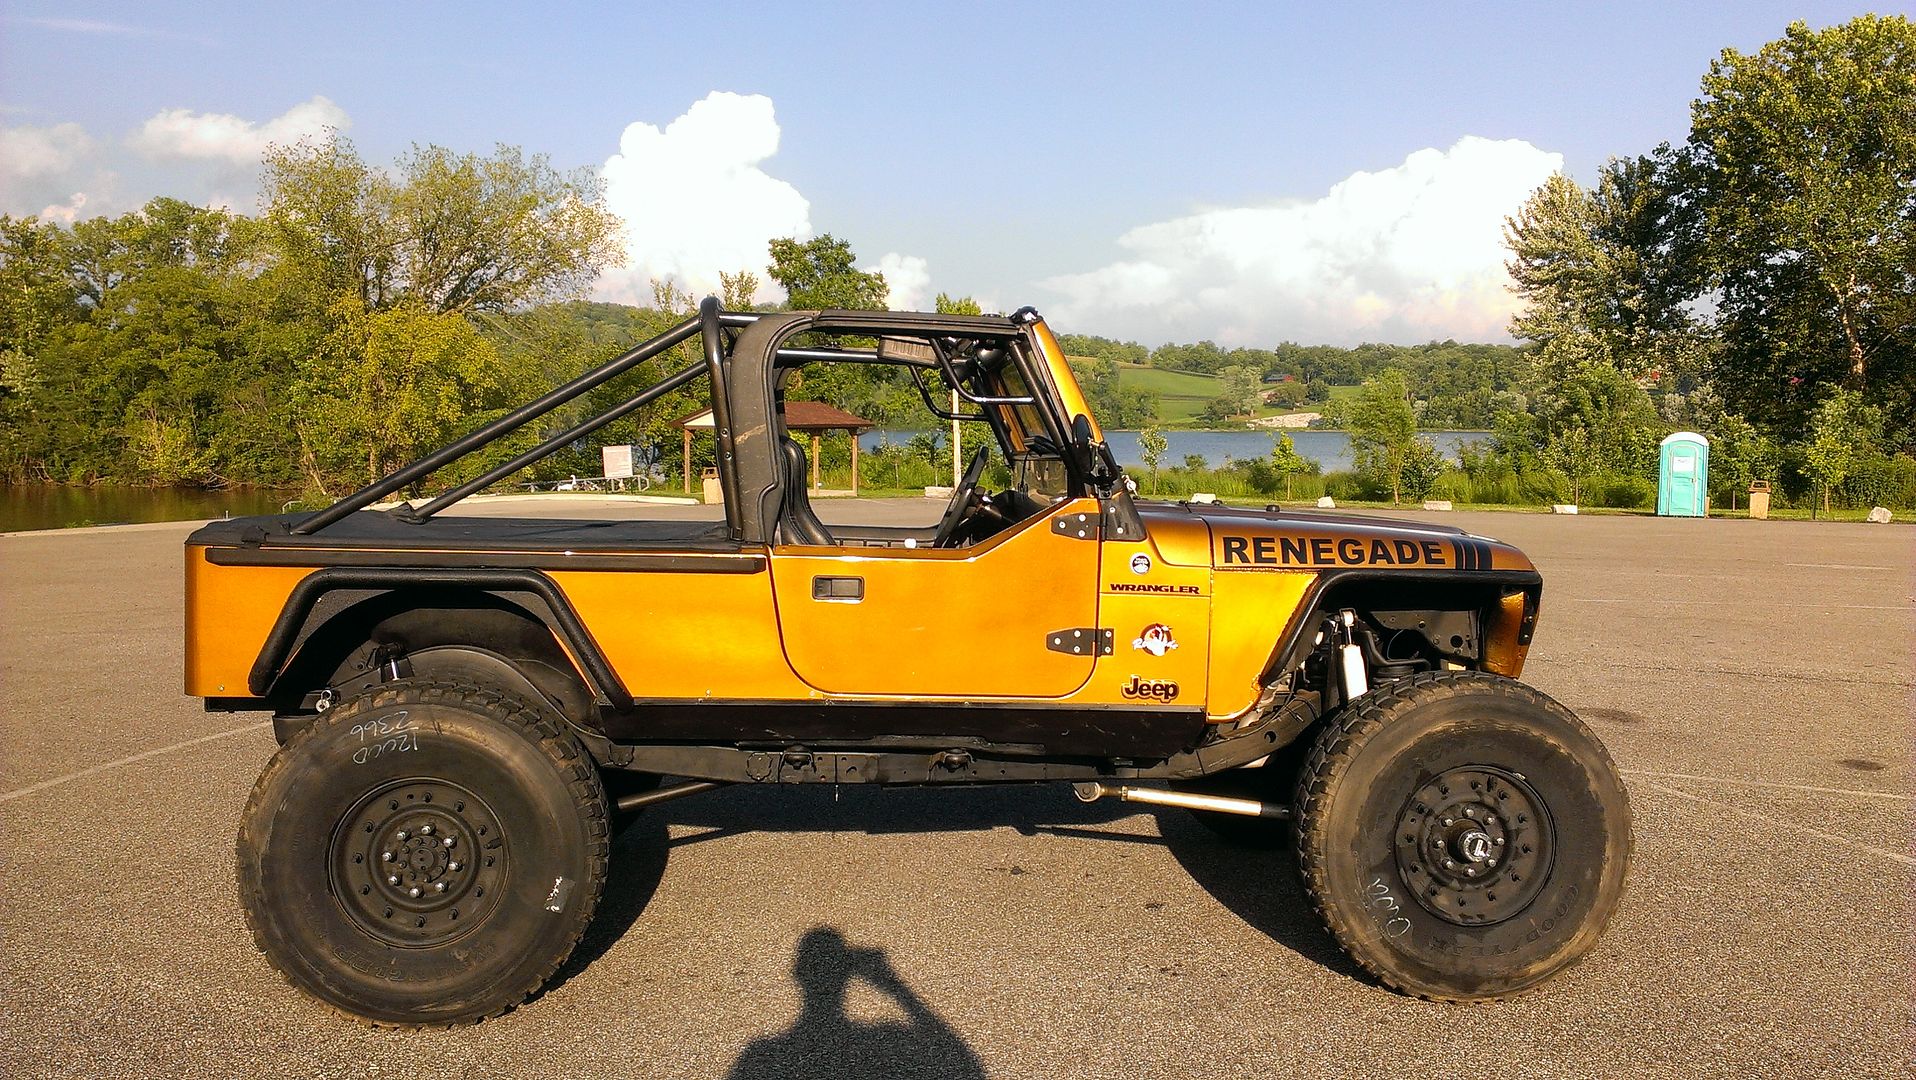 Before I made it pretty. 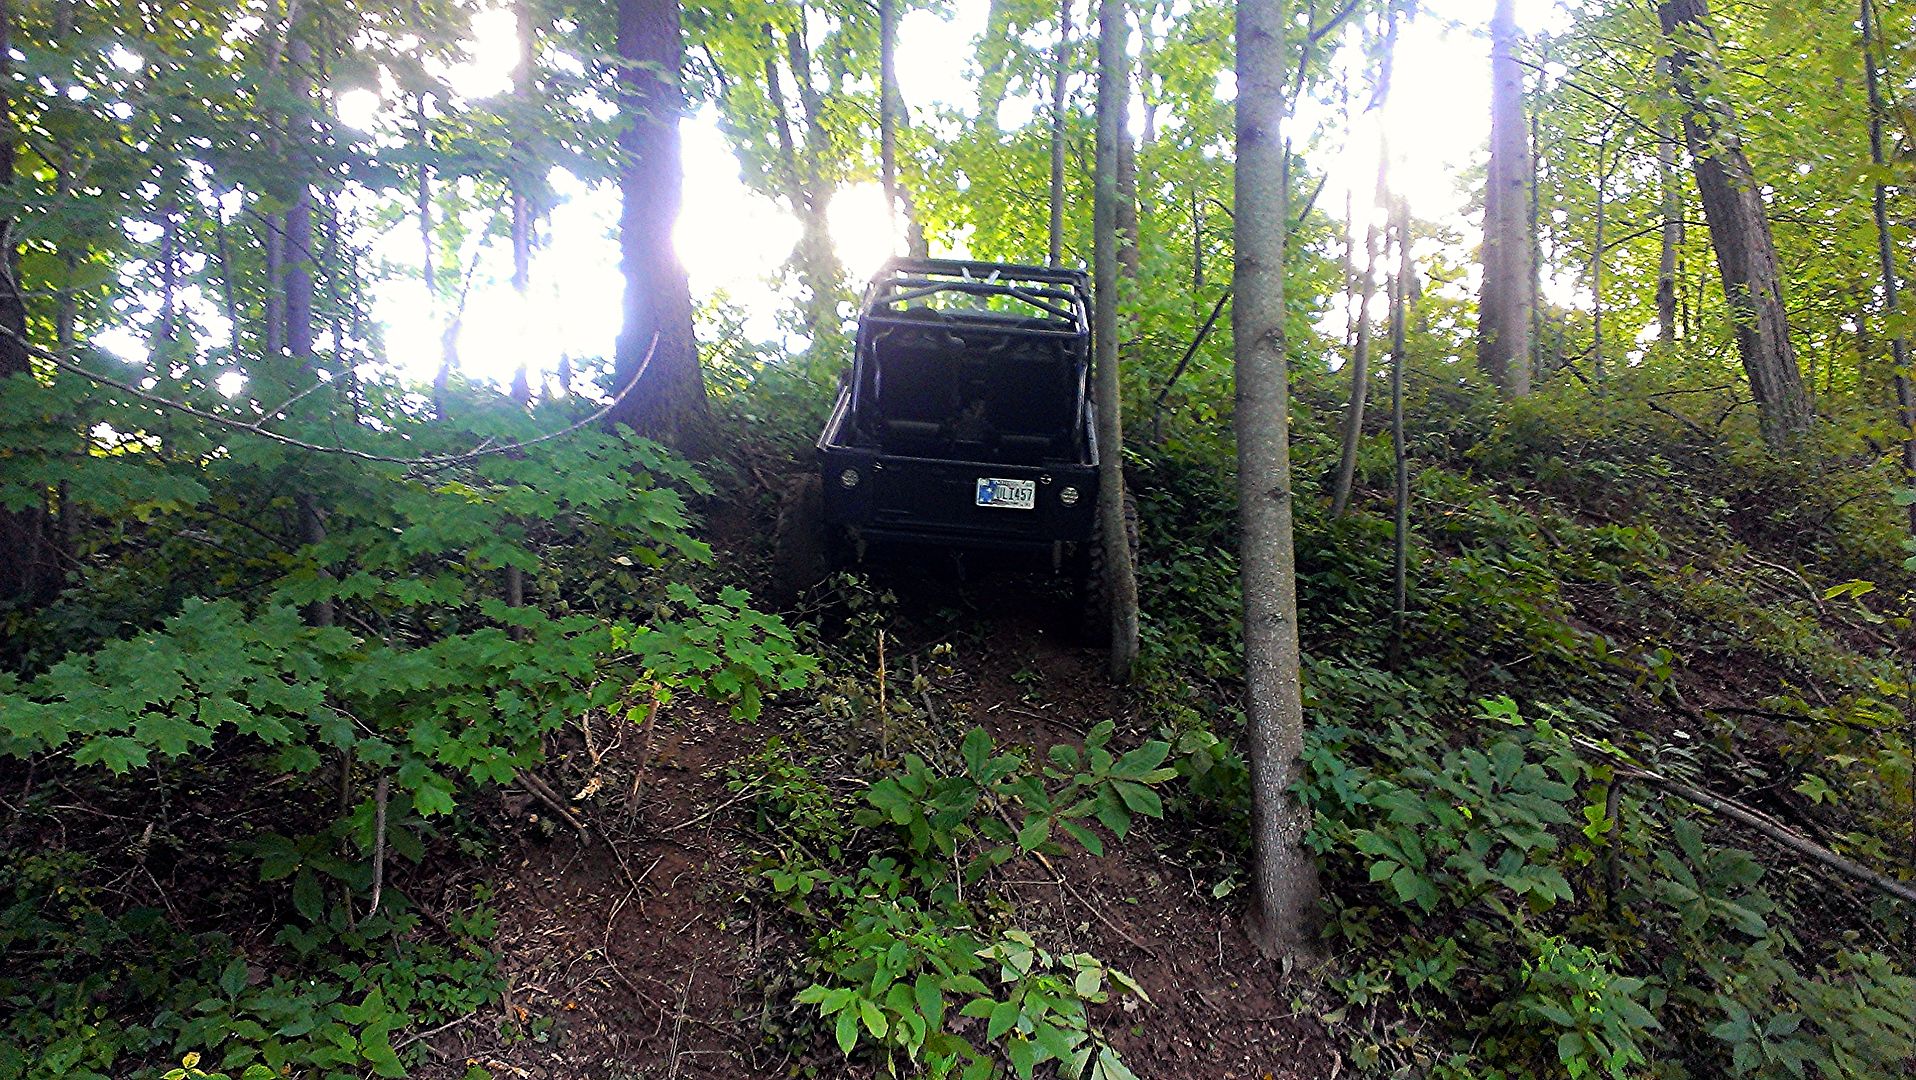  Quote:
A few weeks ago I made filler panels for the headache rack I made them bolt in just in case I needed to remove them they are made from the metal from the old side box.  IMAG2686 by jarrod vanwinkle, on Flickr IMAG2686 by jarrod vanwinkle, on Flickr IMAG2687 by jarrod vanwinkle, on Flickr IMAG2687 by jarrod vanwinkle, on Flickr IMAG2688 by jarrod vanwinkle, on Flickr IMAG2688 by jarrod vanwinkle, on FlickrI rebuilt the hydrobooster  IMAG2697 by jarrod vanwinkle, on Flickr IMAG2697 by jarrod vanwinkle, on Flickr IMAG2699 by jarrod vanwinkle, on Flickr IMAG2699 by jarrod vanwinkle, on FlickrI cleaned and painted the power steering box. 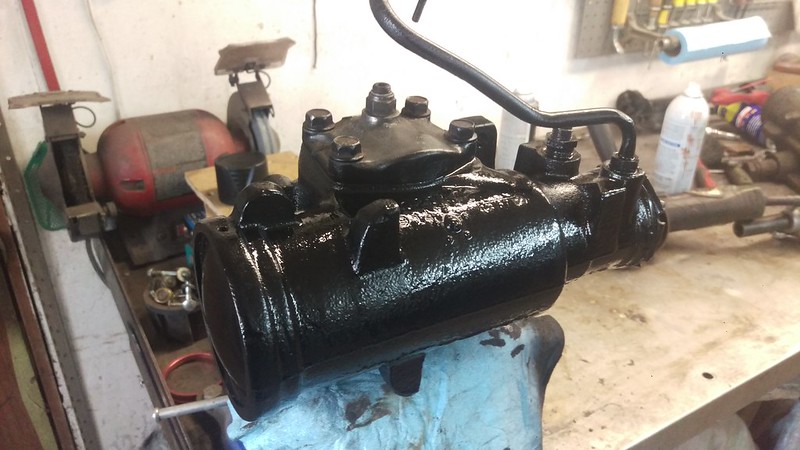 IMAG2698 by jarrod vanwinkle, on Flickr IMAG2698 by jarrod vanwinkle, on FlickrI repaired the radiator support  IMAG2704 by jarrod vanwinkle, on Flickr IMAG2704 by jarrod vanwinkle, on Flickr IMAG2706 by jarrod vanwinkle, on Flickr IMAG2706 by jarrod vanwinkle, on Flickr IMAG2707 by jarrod vanwinkle, on Flickr IMAG2707 by jarrod vanwinkle, on Flickr IMAG2708 by jarrod vanwinkle, on Flickr IMAG2708 by jarrod vanwinkle, on Flickr IMAG2710 by jarrod vanwinkle, on Flickr IMAG2710 by jarrod vanwinkle, on Flickr IMAG2713 by jarrod vanwinkle, on Flickr IMAG2713 by jarrod vanwinkle, on Flickr IMAG2714 by jarrod vanwinkle, on Flickr IMAG2714 by jarrod vanwinkle, on Flickr IMAG2715 by jarrod vanwinkle, on Flickr IMAG2715 by jarrod vanwinkle, on FlickrI had a flag made for my headache rack.  IMAG2719 by jarrod vanwinkle, on Flickr IMAG2719 by jarrod vanwinkle, on Flickr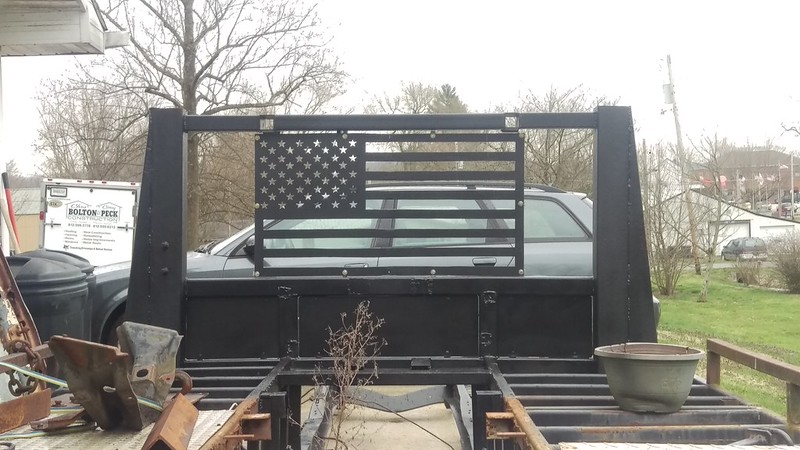 IMAG2720 by jarrod vanwinkle, on Flickr IMAG2720 by jarrod vanwinkle, on Flickr IMAG2722 by jarrod vanwinkle, on Flickr IMAG2722 by jarrod vanwinkle, on FlickrI installed the cab a front suspension.  IMAG2725 by jarrod vanwinkle, on Flickr IMAG2725 by jarrod vanwinkle, on Flickr IMAG2726 by jarrod vanwinkle, on Flickr IMAG2726 by jarrod vanwinkle, on Flickr IMAG2727 by jarrod vanwinkle, on Flickr IMAG2727 by jarrod vanwinkle, on FlickrI moved the front cross member forward a few inches to clear the front cummins.  IMAG2730 by jarrod vanwinkle, on Flickr IMAG2730 by jarrod vanwinkle, on Flickr IMAG2733 by jarrod vanwinkle, on Flickr IMAG2733 by jarrod vanwinkle, on Flickr IMAG2734 by jarrod vanwinkle, on Flickr IMAG2734 by jarrod vanwinkle, on FlickrI temporary ran the air lines into the cab I plan on installing a bulkhead fitting to connect the air lines.  IMAG2732 by jarrod vanwinkle, on Flickr IMAG2732 by jarrod vanwinkle, on Flickr IMAG2735 by jarrod vanwinkle, on Flickr IMAG2735 by jarrod vanwinkle, on Flickr IMAG2736 by jarrod vanwinkle, on Flickr IMAG2736 by jarrod vanwinkle, on FlickrI installed the 1975 c30 motor mount brackets so I can run the first gen cumming motor mounts.  IMAG2737 by jarrod vanwinkle, on Flickr IMAG2737 by jarrod vanwinkle, on FlickrI installed all the steering components  IMAG2740 by jarrod vanwinkle, on Flickr IMAG2740 by jarrod vanwinkle, on FlickrI temporarily installed the astro van brake master so I could run the brake lines. I plan on running a 05 chevy 3500 brake master  IMAG2748 by jarrod vanwinkle, on Flickr IMAG2748 by jarrod vanwinkle, on FlickrI installed copper coated lines.  IMAG2749 by jarrod vanwinkle, on Flickr IMAG2749 by jarrod vanwinkle, on Flickr IMAG2750 by jarrod vanwinkle, on Flickr IMAG2750 by jarrod vanwinkle, on Flickr IMAG2751 by jarrod vanwinkle, on Flickr IMAG2751 by jarrod vanwinkle, on Flickr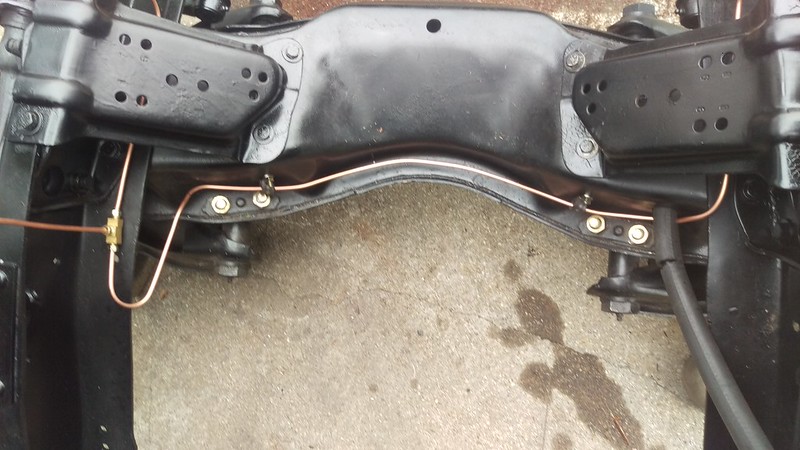 IMAG2752 by jarrod vanwinkle, on Flickr IMAG2752 by jarrod vanwinkle, on FlickrI installed the brake JB8 calipers  IMAG2753 by jarrod vanwinkle, on Flickr IMAG2753 by jarrod vanwinkle, on Flickr IMAG2754 by jarrod vanwinkle, on Flickr IMAG2754 by jarrod vanwinkle, on Flickr IMAG2756 by jarrod vanwinkle, on Flickr IMAG2756 by jarrod vanwinkle, on FlickrI installed the flag with stainless security tamper proof bolts  IMAG2762 by jarrod vanwinkle, on Flickr IMAG2762 by jarrod vanwinkle, on Flickr IMAG2763 by jarrod vanwinkle, on Flickr IMAG2763 by jarrod vanwinkle, on FlickrIt was a pain to the rear brake line I installed it in one piece I ordered a 25 foot 1/4 line.  IMAG2764 by jarrod vanwinkle, on Flickr IMAG2764 by jarrod vanwinkle, on FlickrToday I installed the wheels to make it easier to get the engine hoist under the crossmember. There is 5 psi in the bags in this pic the fender is just resting on the tire it's not bolted on. On a side note I looked up the date code on the tires it was 034 = Date of production: 1993-01-25 that means they are 27 years 2 months 18 days old and they have 70 psi in them. That's kinda terrifying I had a 6,800lb tractor on the back of this thing with thouses tires and drove it almost 3 hours home when I bought it.  IMAG2767 by jarrod vanwinkle, on Flickr IMAG2767 by jarrod vanwinkle, on FlickrI painted the trans  IMAG2768 by jarrod vanwinkle, on Flickr IMAG2768 by jarrod vanwinkle, on FlickrI will be replacing the rear main seal tomorrow.  IMAG2769 by jarrod vanwinkle, on Flickr IMAG2769 by jarrod vanwinkle, on Flickr
|
||
|
|
|
|
04-15-2020, 10:21 PM
|
#54 |
|
Registered User
Join Date: Sep 2017
Location: Patriot IN
Posts: 163
|
Re: 1970 C30 Car hauler Buildish thread.
Well I was hoping to get the engine installed this week, But I forgot I did not have the hardware for the pressure plate. I had to talk myself out of using grade 8 bolts and ordered a set of ARP pressure plate bolts. Thankfully summit is still open and have super fast shipping, They came in today, unfortunately I did not have the nuts I needed for the motor mounts and who know how long it will take amazon to ship them.
Any ways on monday I replaced the rear main seal. Installed the flywheel.  IMAG2770 by jarrod vanwinkle, on Flickr IMAG2770 by jarrod vanwinkle, on Flickr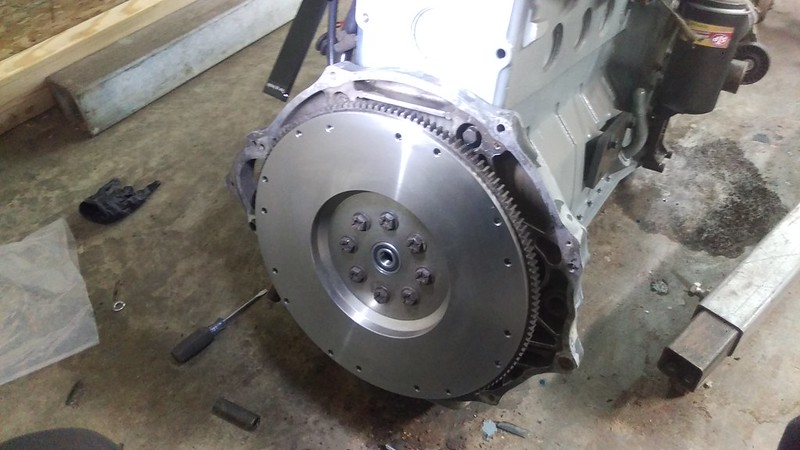 IMAG2771 by jarrod vanwinkle, on Flickr IMAG2771 by jarrod vanwinkle, on Flickr IMAG2772 by jarrod vanwinkle, on Flickr IMAG2772 by jarrod vanwinkle, on FlickrToday I installed the pressure plate with the ARP bolts.  IMAG2774 by jarrod vanwinkle, on Flickr IMAG2774 by jarrod vanwinkle, on Flickr IMAG2775 by jarrod vanwinkle, on Flickr IMAG2775 by jarrod vanwinkle, on Flickr IMAG2776 by jarrod vanwinkle, on Flickr IMAG2776 by jarrod vanwinkle, on FlickrI also did the Fuel Shutoff Solenoid delete. I removed the pin and spring. I plan on installing a manual choke cable on the gauge bezel. I'm hoping I can find a stock replacement like what was used in the 67-68 trucks. Then I will connect it to the fuel shutoff lever on the ve pump.  IMAG2777_BURST002_COVER by jarrod vanwinkle, on Flickr IMAG2777_BURST002_COVER by jarrod vanwinkle, on FlickrApparently I have a slow leak somewhere in my lines both bags where down when I went to measure for the transmission crossmember. So I need to find it before I install the engine.  IMAG2778 by jarrod vanwinkle, on Flickr IMAG2778 by jarrod vanwinkle, on Flickr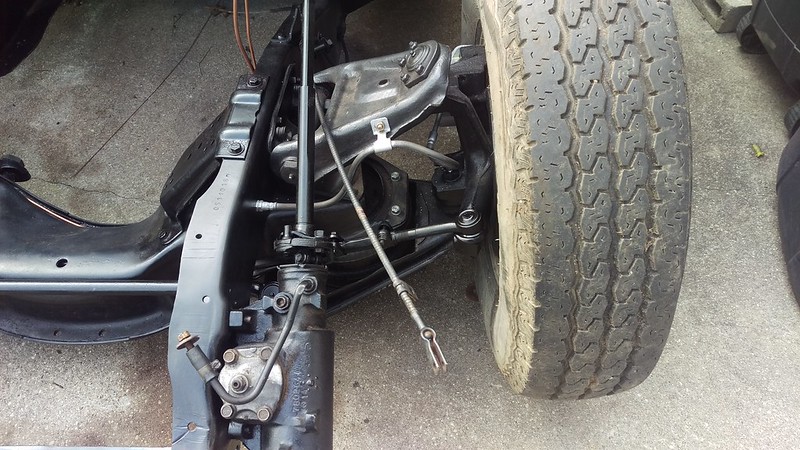 IMAG2780 by jarrod vanwinkle, on Flickr IMAG2780 by jarrod vanwinkle, on Flickr
|
|
|
|
|
04-18-2020, 08:08 PM
|
#55 |
|
Registered User
Join Date: Sep 2017
Location: Patriot IN
Posts: 163
|
Re: 1970 C30 Car hauler Buildish thread.
I aired the truck all the way up. So I could mark where the transmission crossmember will be sitting. Having the bags being able to go this high will help with all kinds of stuff like changing the oil, working under the truck and loading lowered cars like my track car or auto cross car.
 IMAG2781 by jarrod vanwinkle, on Flickr IMAG2781 by jarrod vanwinkle, on Flickr IMAG2782 by jarrod vanwinkle, on Flickr IMAG2782 by jarrod vanwinkle, on Flickr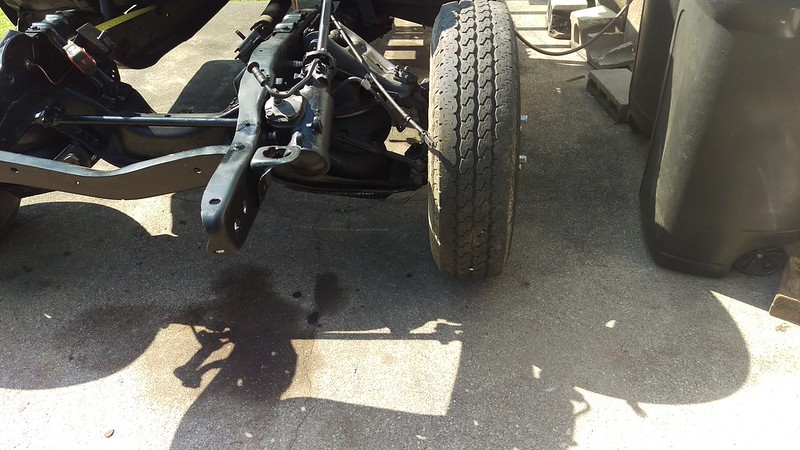 IMAG2783 by jarrod vanwinkle, on Flickr IMAG2783 by jarrod vanwinkle, on Flickr IMAG2784 by jarrod vanwinkle, on Flickr IMAG2784 by jarrod vanwinkle, on Flickr IMAG2785 by jarrod vanwinkle, on Flickr IMAG2785 by jarrod vanwinkle, on FlickrI finally got the engine in. I still have to make motor mounts and get it in to its final spot. At the moment I have a 2x6 on top of the crossmember to give me a decent amount of space between the oil pan and the cross member. It will sag a little when I do the final install. Hopefully I will start on the mounts tomorrow.  IMAG2786 by jarrod vanwinkle, on Flickr IMAG2786 by jarrod vanwinkle, on Flickr IMAG2787 by jarrod vanwinkle, on Flickr IMAG2787 by jarrod vanwinkle, on FlickrThis side is where I want it but the engine is not straight at the moment so the driver side mount it off. The sun was going down and my back was killing me so I had to call it quits for today. 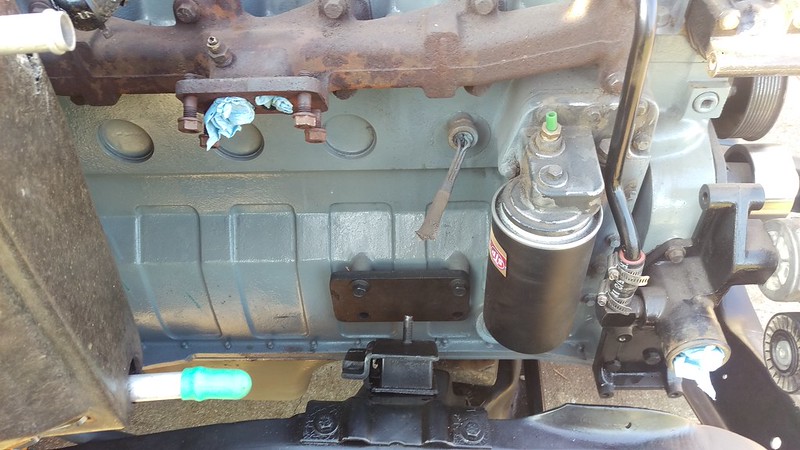 IMAG2788 by jarrod vanwinkle, on Flickr IMAG2788 by jarrod vanwinkle, on Flickr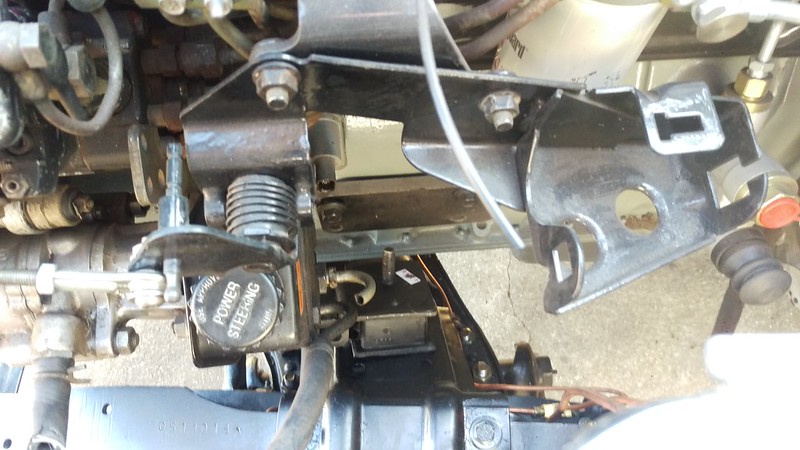 IMAG2789 by jarrod vanwinkle, on Flickr IMAG2789 by jarrod vanwinkle, on Flickr
|
|
|
|
|
04-20-2020, 10:45 PM
|
#56 |
|
Registered User
Join Date: Sep 2017
Location: Patriot IN
Posts: 163
|
Re: 1970 C30 Car hauler Buildish thread.
I made a set of motor mounts yesterday. I made them out of 1/2 and 1/4 plate.
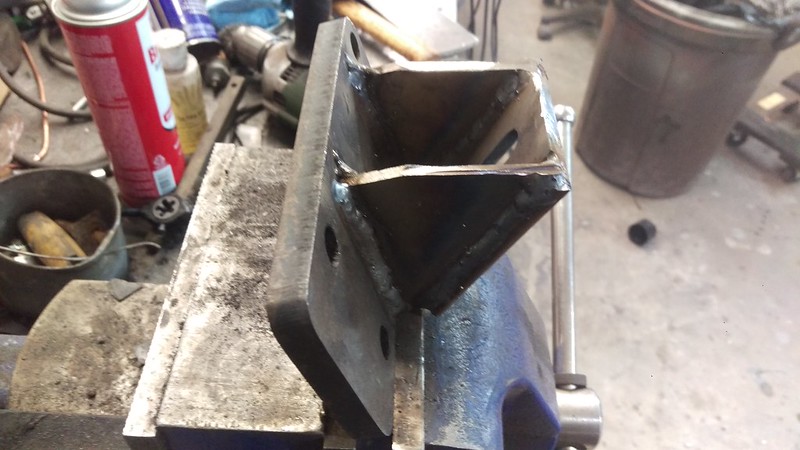 IMAG2790 by jarrod vanwinkle, on Flickr IMAG2790 by jarrod vanwinkle, on Flickr IMAG2791 by jarrod vanwinkle, on Flickr IMAG2791 by jarrod vanwinkle, on Flickr IMAG2792 by jarrod vanwinkle, on Flickr IMAG2792 by jarrod vanwinkle, on Flickr IMAG2793 by jarrod vanwinkle, on Flickr IMAG2793 by jarrod vanwinkle, on FlickrI removed the block of wood I had spacing the engine from the crossmember.  IMAG2795 by jarrod vanwinkle, on Flickr IMAG2795 by jarrod vanwinkle, on Flickr IMAG2794 by jarrod vanwinkle, on Flickr IMAG2794 by jarrod vanwinkle, on FlickrHopefully the master cylinder I plan on using is a bit shorter than this one. I know its taller Ideale I would use a 45 off the intake, but I may have to use a 90.  IMAG2797 by jarrod vanwinkle, on Flickr IMAG2797 by jarrod vanwinkle, on Flickr IMAG2798 by jarrod vanwinkle, on Flickr IMAG2798 by jarrod vanwinkle, on FlickrI wonder if there are any drive shaft shops open around me. Ideally I would just have them shorten it for me than replace it. If there is not one open near me I may end up shorting it myself.  IMAG2799 by jarrod vanwinkle, on Flickr IMAG2799 by jarrod vanwinkle, on FlickrI made the transmission crossmember today out of scrap I cut off the bed of the truck.  IMAG2800 by jarrod vanwinkle, on Flickr IMAG2800 by jarrod vanwinkle, on Flickr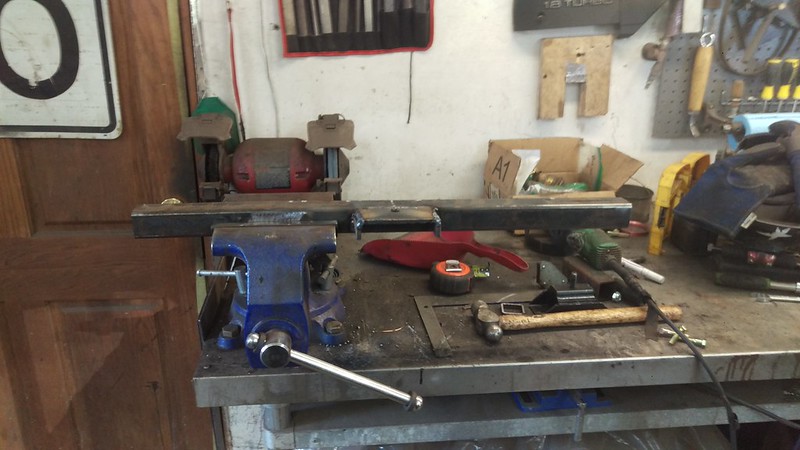 IMAG2801 by jarrod vanwinkle, on Flickr IMAG2801 by jarrod vanwinkle, on Flickr IMAG2802 by jarrod vanwinkle, on Flickr IMAG2802 by jarrod vanwinkle, on FlickrThere were two 3/8 holes on each side of the frame in almost the perfect place.  IMAG2804 by jarrod vanwinkle, on Flickr IMAG2804 by jarrod vanwinkle, on Flickr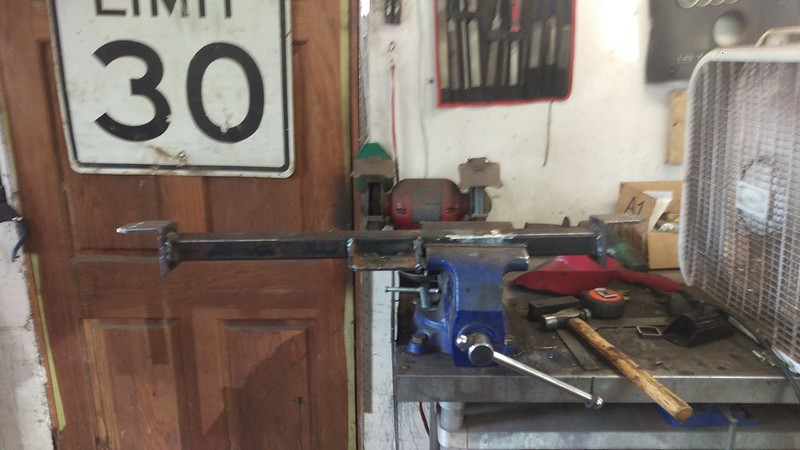 IMAG2803 by jarrod vanwinkle, on Flickr IMAG2803 by jarrod vanwinkle, on Flickr IMAG2807 by jarrod vanwinkle, on Flickr IMAG2807 by jarrod vanwinkle, on FlickrI wonder if I will be able to remove the rear valve cover without removing the trans crossmember.  IMAG2809 by jarrod vanwinkle, on Flickr IMAG2809 by jarrod vanwinkle, on Flickr
|
|
|
|
|
04-21-2020, 05:45 PM
|
#57 |
|
Registered User
Join Date: Nov 2011
Location: Yuma, AZ
Posts: 320
|
Re: 1970 C30 Car hauler Buildish thread.
Nice build just read through the whole thread. I dig it.
__________________
65 C-10 Times gone by(Sons truck)http://67-72chevytrucks.com/vboard/s...92#post6164692 70 C-30 Tow truck AKA Highlighter 02 Silverado 2500 HD CUCVII Tow Rig/DD 1968 C10 Project Quarantine http://67-72chevytrucks.com/vboard/s...d.php?t=804800 1980 Buick Regal Dirt Stock car |
|
|
|
|
04-26-2020, 03:15 PM
|
#58 | |
|
Registered User
Join Date: Sep 2017
Location: Patriot IN
Posts: 163
|
Re: 1970 C30 Car hauler Buildish thread.
Quote:
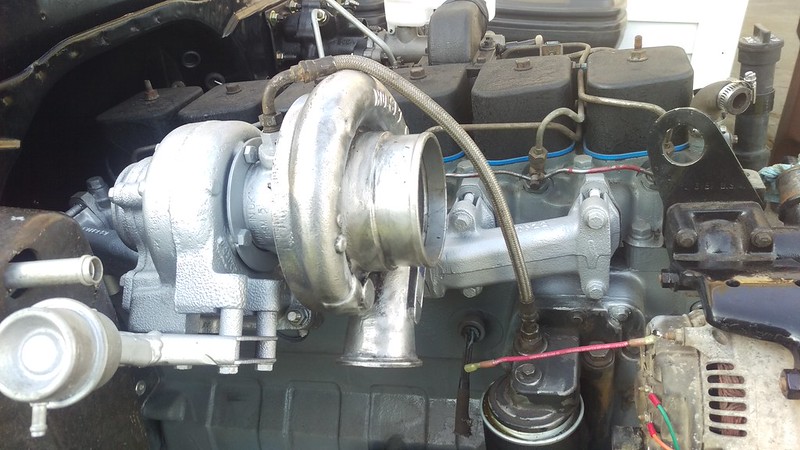
Well I moved the shifter hole the other day. 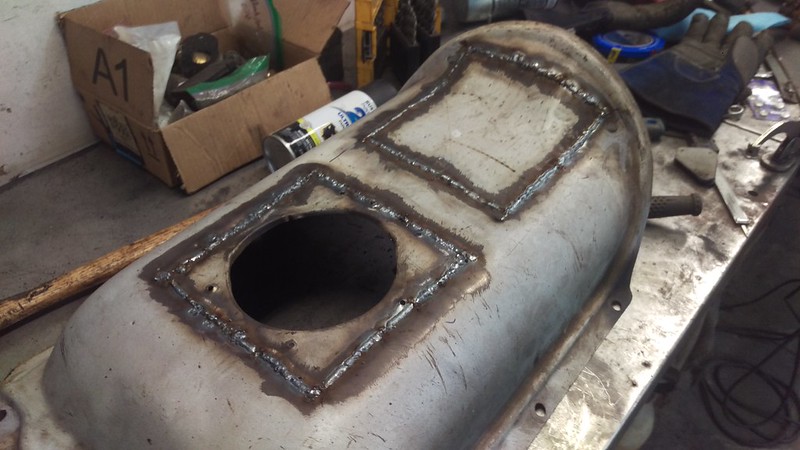 IMAG2810 by jarrod vanwinkle, on Flickr IMAG2810 by jarrod vanwinkle, on Flickr IMAG2811 by jarrod vanwinkle, on Flickr IMAG2811 by jarrod vanwinkle, on Flickr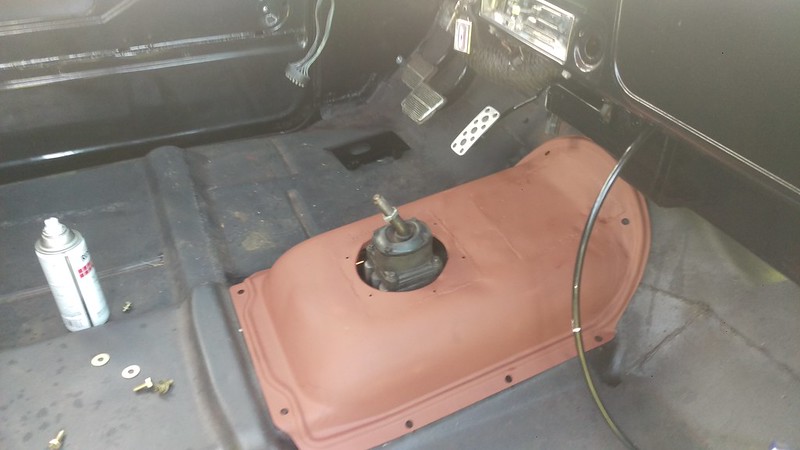 IMAG2813 by jarrod vanwinkle, on Flickr IMAG2813 by jarrod vanwinkle, on FlickrI'm going to have to move the air lines to the outside of the frame as the downpipe may melt them.  IMAG2812 by jarrod vanwinkle, on Flickr IMAG2812 by jarrod vanwinkle, on FlickrI went to fit the turbo, I have a hx35 I had bought for another project that didn't happen. I want to use the hx35 over the h1c as it will spool faster and make just a little more power through the power band. However the hx35 would not fit at all because the heater box was in the way. The h1 fit but I would not have been able to fit the downpipe. The h1c on the right and the hx35 on the left you can see the exhaust housing is bigger on the hx35 do to the waist gate. 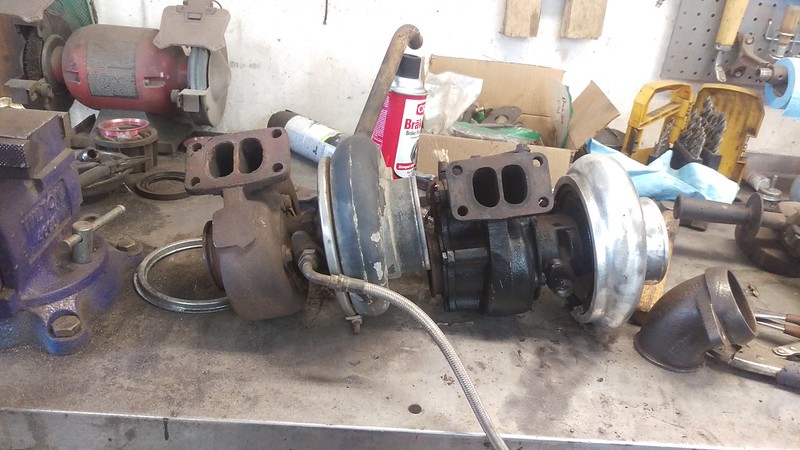 IMAG2820 by jarrod vanwinkle, on Flickr IMAG2820 by jarrod vanwinkle, on FlickrHere you can see the h1c installed and the downpipe would not clear the heater box.  IMAG2816 by jarrod vanwinkle, on Flickr IMAG2816 by jarrod vanwinkle, on Flickr IMAG2817 by jarrod vanwinkle, on Flickr IMAG2817 by jarrod vanwinkle, on Flickr IMAG2818 by jarrod vanwinkle, on Flickr IMAG2818 by jarrod vanwinkle, on FlickrI ended up flipping the exhaust manifold and now the turbo clears and I have plenty of room for the downpipe. However on the hx35 now the wastegate hits the heater box.  IMAG2821 by jarrod vanwinkle, on Flickr IMAG2821 by jarrod vanwinkle, on Flickr IMAG2822 by jarrod vanwinkle, on Flickr IMAG2822 by jarrod vanwinkle, on Flickr IMAG2823 by jarrod vanwinkle, on Flickr IMAG2823 by jarrod vanwinkle, on FlickrSo I modified the wastegate bracket to clear the heater box. I only took one pic I forgot to take more of it finished.  IMAG2824 by jarrod vanwinkle, on Flickr IMAG2824 by jarrod vanwinkle, on FlickrI wire wheeled the exhaust housing and the center section on the hx35 and painted it with high temp paint. I believe it has already been rebuild as it has very little shaft play compared to the h1c, and the way it was painted it has been apart. I going to wait until the high temp nickel anti seize comes in before reassembling it as I broke one of the bolts on the exhaust housing and don't want to do that again when I do need to rebuild it.  IMAG2832 by jarrod vanwinkle, on Flickr IMAG2832 by jarrod vanwinkle, on Flickr IMAG2833 by jarrod vanwinkle, on Flickr IMAG2833 by jarrod vanwinkle, on FlickrI am going to temporary install the stock fuel tank, as like most of the us I am a non esensial worker don't have the money to spend the the 40 gallon tank I am planning on running. But I would like to get it up and running as soon as possible. And it would nice to have a running project. So I modified the stock fuel tank to a gravity fed tank, as 1 I did not have a return line and 2 I wanted to run a bigger fuel line to the pump for better flow and volume. I had some stainless 3/8 NPT weld on bungs left over from another build so I ordered a set of 1/2" Hose ID to 3/8" Male NPT 90s that will run to a aluminum 1/2 ID fuel line. it will go to a 1/2 ID T fitting to a 1/2 ID valve so I can manually shut the fuel off to the tank when I upgrade down the road. 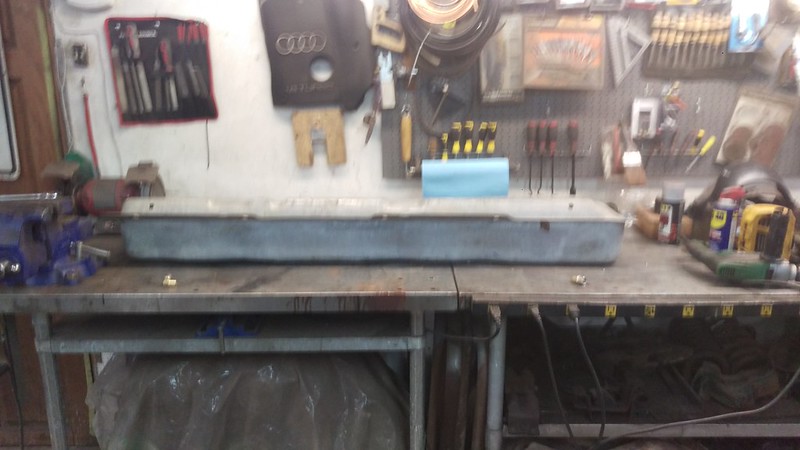 IMAG2825 by jarrod vanwinkle, on Flickr IMAG2825 by jarrod vanwinkle, on FlickrI cut the old fuel sender that is now the return line off below the level sensor and I also cut three slits in the return to make it easier for the fuel to return to the tank when its full, or at least that was my thoughts on it.  IMAG2826 by jarrod vanwinkle, on Flickr IMAG2826 by jarrod vanwinkle, on Flickr IMAG2827 by jarrod vanwinkle, on Flickr IMAG2827 by jarrod vanwinkle, on FlickrI also painted the tank as it had some surface rust from sitting that I cleaned up and did not want it to come back.  IMAG2828 by jarrod vanwinkle, on Flickr IMAG2828 by jarrod vanwinkle, on Flickr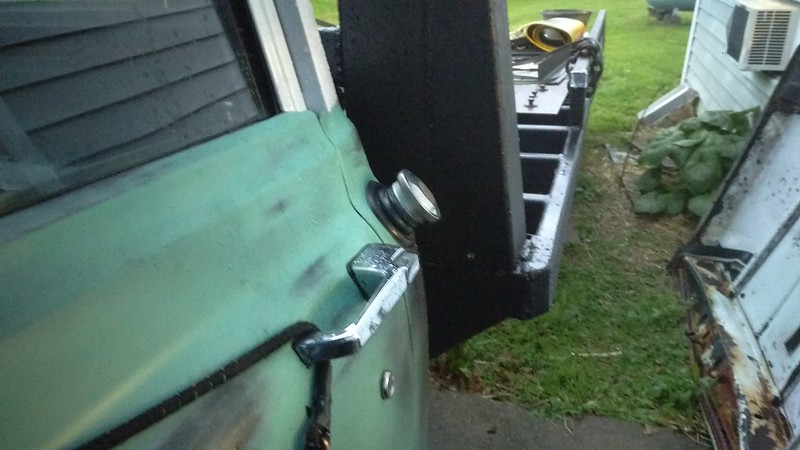 IMAG2829 by jarrod vanwinkle, on Flickr IMAG2829 by jarrod vanwinkle, on Flickr IMAG2830 by jarrod vanwinkle, on Flickr IMAG2830 by jarrod vanwinkle, on FlickrThe fuel lines will fit no problem.  IMAG2831 by jarrod vanwinkle, on Flickr IMAG2831 by jarrod vanwinkle, on Flickr
|
|
|
|
|
|
04-27-2020, 02:41 AM
|
#59 |
|
Registered User
Join Date: Jun 2010
Location: aurora colo
Posts: 211
|
Re: 1970 C30 Car hauler Buildish thread.
Right no,
can't wait to see it done.
__________________
70 c10 2wd crashed Suburban 67 c10 2wd sb truck 67 c10 4wd lb truck |
|
|
|
|
04-28-2020, 11:33 PM
|
#60 | |
|
Registered User
Join Date: Sep 2017
Location: Patriot IN
Posts: 163
|
Re: 1970 C30 Car hauler Buildish thread.
Quote:
I bought a set of Russell 640281 -3 AN SAE Adapter Fitting for my clutch master and slave. I am using the master and slave from a 95 chevy 3500. I had to extend the master cylinder rod and cut about a half inch off the slave cylinder and drill out the holes on the slave as the mounting holes are slightly farther apart on the dodge bellhousing. But one cool thing about the Russell Adapter Fittings is, I can buy a first gen clutch slave and it uses the same adapter fittings. So when the salve goes bad I can just bolt on the dodge slave and I wont have to mod anything.  IMAG2834 by jarrod vanwinkle, on Flickr IMAG2834 by jarrod vanwinkle, on Flickr IMAG2835 by jarrod vanwinkle, on Flickr IMAG2835 by jarrod vanwinkle, on Flickr IMAG2836 by jarrod vanwinkle, on Flickr IMAG2836 by jarrod vanwinkle, on Flickr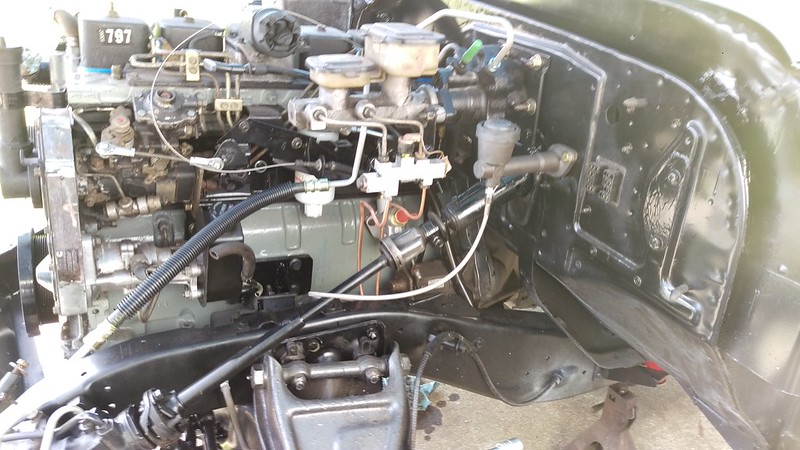 IMAG2837 by jarrod vanwinkle, on Flickr IMAG2837 by jarrod vanwinkle, on Flickr IMAG2839 by jarrod vanwinkle, on Flickr IMAG2839 by jarrod vanwinkle, on FlickrI installed a power steering line from a 95 chevy 3500 the fitting to the hydroboost bolted on but I had to cut off the fitting and use the stock fitting with a flared end.  IMAG2838 by jarrod vanwinkle, on Flickr IMAG2838 by jarrod vanwinkle, on Flickr IMAG2840 by jarrod vanwinkle, on Flickr IMAG2840 by jarrod vanwinkle, on FlickrI did the one wire conversion to the alternator and I also installed a wire for the W terminal for a diesel tachometer. So techanely I will have to run 3 wires. 1 to the battery/ starter 2 to ignition switched power, 3 to the tachometer.  IMAG2842 by jarrod vanwinkle, on Flickr IMAG2842 by jarrod vanwinkle, on FlickrInstalled the belt.  IMAG2841 by jarrod vanwinkle, on Flickr IMAG2841 by jarrod vanwinkle, on FlickrI made a battery tray out of some 3/4 and 1 inch angle iron and some 3/4 flat bar I had left over from another project. My plan is to install it to the frame behind the cab until I get some underside boxes, then I will mount it in there. I wish I had made the tray 3/8 wider and deeper as its a tight fit.  IMAG2843 by jarrod vanwinkle, on Flickr IMAG2843 by jarrod vanwinkle, on Flickr IMAG2844 by jarrod vanwinkle, on Flickr IMAG2844 by jarrod vanwinkle, on Flickr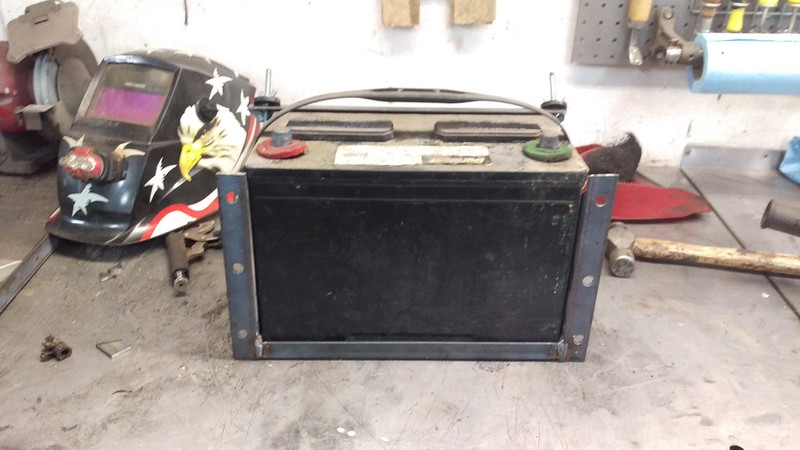 IMAG2845 by jarrod vanwinkle, on Flickr IMAG2845 by jarrod vanwinkle, on Flickr IMAG2846 by jarrod vanwinkle, on Flickr IMAG2846 by jarrod vanwinkle, on Flickr IMAG2847 by jarrod vanwinkle, on Flickr IMAG2847 by jarrod vanwinkle, on Flickr
|
|
|
|
|
|
04-29-2020, 10:57 AM
|
#61 |
|
Registered User
Join Date: Sep 2011
Location: Ark City, Kansas
Posts: 3,449
|
Re: 1970 C30 Car hauler Buildish thread.
Man-o-man, a lot of great work going on there. Making stuff work on an ordinary 1/2 ton pickup is a walk in the park, compared to ALL that you are doing!!!
Job well done... Some thoughts from me, thoughts, if nothing else... I'm sure you know Vintage Air AC units, have the AC and heater stuff ALL under the dash, and in the cab, nothing under hood. Of course, it's only money. You not working for the moment, that's a future thought. I like the group 31 batteries with the threaded studs on them. Less worries about battery connections, and more power out of them, and not much more than a car battery....just a thought for when you get your end result battery box(s) finished... Carry On, Man!! |
|
|
|
|
05-02-2020, 02:16 AM
|
#62 | |
|
Registered User
Join Date: Sep 2017
Location: Patriot IN
Posts: 163
|
Re: 1970 C30 Car hauler Buildish thread.
Quote:
Thanks! I enjoy custom fabrication this build is super tame compared to what I usually build. But this build was supposed to be a quick and easy build, But between my back injury and not working it's been way drawn out. There will be more fab work in V2 and V3 of the build. With that said Vintage Air is on my list but it won't be until V2 or V3 of the build along with compound turbos and a 4 link in the rear. but for now I just want it make it a driving project So I can get back to my other builds. I have never thought about using group 31 batteries. I ran a optima in my last rock crawler that I Built/ It had internal threads and normal post, I ended up using both. But I think a threaded stud would be very beneficial and simpler. I'll have to look into it when I have to replace this battery. I think this one should be enough for what I am running, it's a 900 cold cranking amp battery. I think first gen cummins only ran one battery, But down the road I want to install a 20 gallon air tank to run my bags and I want to have on board air to run air tools. I'm thinking of running 3 electric air compressors and may need two batteries, But I also have a old York air compressor that I may try and fit, then I would only need one electric compressor and not need a second battery, but only time will tell. Now back to the build. So I bought a 2005 chevy 3500 master cylinder, another member is running one on his build with the jb8 brakes. Unfortunately assumed all hydro boosters were the same, I was wrong. The hydroboost I am running is out of a 1995 astro van I assumed it was the same as the the one out of the 1995 chevy 3500 as I am using the power steering lines from the 3500 and the 3500 had Jb8 brakes as well. So I just assumed It would be the same as the 05 3500 just a few slight changes. It turns out the 95 astro and the 95 3500 hydroboost uses a 1.25 bore master cylinder and the 05 3500 uses a 1.456 bore master cylinder, and the 1975 C30 I got the JB8 brakes from uses a 1.312 bore master cylinder. So I thought about returning the master cylinder and just run the 95 3500 as I know it will be a direct bolt on and work with the jb8 brakes. But at 3 am I cant sleep and I don't like the idea of running a smaller bore master than what the original Jb8 system from the 75 c30 had, So I'm thinking how can I make the master cylinder fit My first thought was to bore out the hydroboost but it would make it week as it would be super thin. Then I started researching if any one made an adapter plate. I could not find one, however I came across several on adapting a chevy master cylinder to a toyota brake booster. And it was just a simple spacer with the two bolt patterns. I had thought I had some 1/2 aluminum plate but I didn't. So I got to thinking, I could just use the old astro van master cylinder flange as the the spacer. So I cut it off and milled it down and bored it out to 1.456. its a perfect fit!  IMAG2849 by jarrod vanwinkle, on Flickr IMAG2849 by jarrod vanwinkle, on Flickr IMAG2850 by jarrod vanwinkle, on Flickr IMAG2850 by jarrod vanwinkle, on FlickrSo now the push rod is 1/2 to short. My plan is to use a 3/8 6.5 inch grade 8 bolt and cut it down to work as the push rod. So as a temporary solution and proof of concept I threaded the stock pushrod and a piece of aluminum round bar and cut off the head of a bolt to keep it centered. it works great so the next time I go to town I need to pick up a grade 8 bolt. I had thought of just welding an extension on the pushrod but If i do end up having to use the 95 3500 master I can still use the stock pushrod. 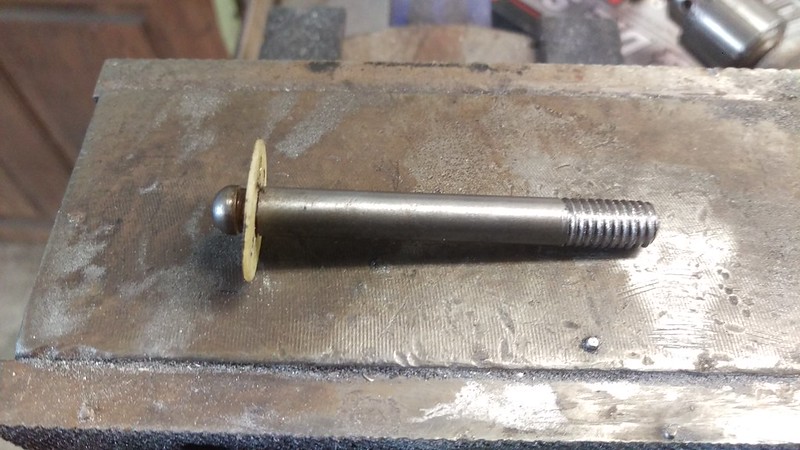 IMAG2848 by jarrod vanwinkle, on Flickr IMAG2848 by jarrod vanwinkle, on Flickr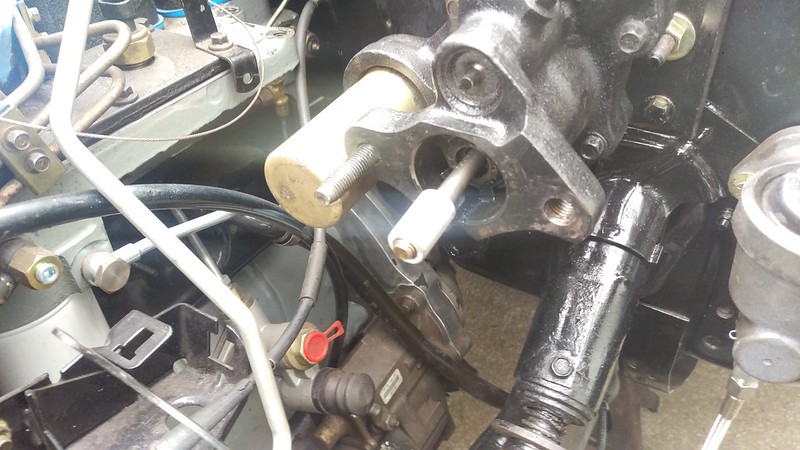 IMAG2851 by jarrod vanwinkle, on Flickr IMAG2851 by jarrod vanwinkle, on FlickrI had to make a new line as the front fitting was different.  IMAG2855 by jarrod vanwinkle, on Flickr IMAG2855 by jarrod vanwinkle, on FlickrAnother problem is it maybe to tall but I think it will fit.  IMAG2856 by jarrod vanwinkle, on Flickr IMAG2856 by jarrod vanwinkle, on FlickrThe throttle cable linkage end finally showed up.  IMAG2857 by jarrod vanwinkle, on Flickr IMAG2857 by jarrod vanwinkle, on FlickrI also started on the fuel tank lines the valve is for when I upgrade to the 40 gallon tank to make it easier to remove it with fuel in the tank as I made the tank gravity feed.  IMAG2858 by jarrod vanwinkle, on Flickr IMAG2858 by jarrod vanwinkle, on Flickr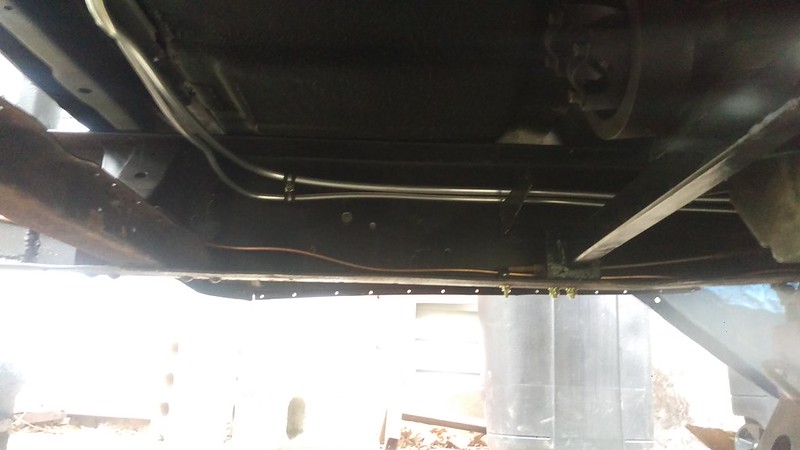 IMAG2859 by jarrod vanwinkle, on Flickr IMAG2859 by jarrod vanwinkle, on FlickrThe 95 3500 power steering line was almost perfect. I just had to bend it very slightly to clear the pump housing.  IMAG2860 by jarrod vanwinkle, on Flickr IMAG2860 by jarrod vanwinkle, on Flickr IMAG2861 by jarrod vanwinkle, on Flickr IMAG2861 by jarrod vanwinkle, on FlickrNow I just need to order some power steering hose and a t fitting for now. I plan on running a power steering cooler and a filter. the filter will also be used as the t fitting as it will have two inlets and one out. |
|
|
|
|
|
05-02-2020, 08:07 PM
|
#63 |
|
Senior Member
Join Date: Mar 2008
Location: tyler texas
Posts: 1,553
|
Re: 1970 C30 Car hauler Buildish thread.
This is one of the Coolest builds on this site. i love it.
__________________
NHRA Super Street 469C It only runs 10.90 at 156 mph I was Dragtruck when Dragtruck wasn't Cool! |
|
|
|
|
05-04-2020, 11:56 PM
|
#64 | |
|
Registered User
Join Date: Sep 2017
Location: Patriot IN
Posts: 163
|
Re: 1970 C30 Car hauler Buildish thread.
Quote:
I wirewheeled the exhaust manifold and painted it. I'm still waiting on extended studs as I am going to have to run a 1/2 spacer for the turbo to clear the manifold. I tried chearincing the manifold with the grinder but the manifold was really thin there. It was mabe 1/8 thick so I had to reweld it with stainless wire to fill it back in hopefully it does not crack.  IMAG2862 by jarrod vanwinkle, on Flickr IMAG2862 by jarrod vanwinkle, on Flickr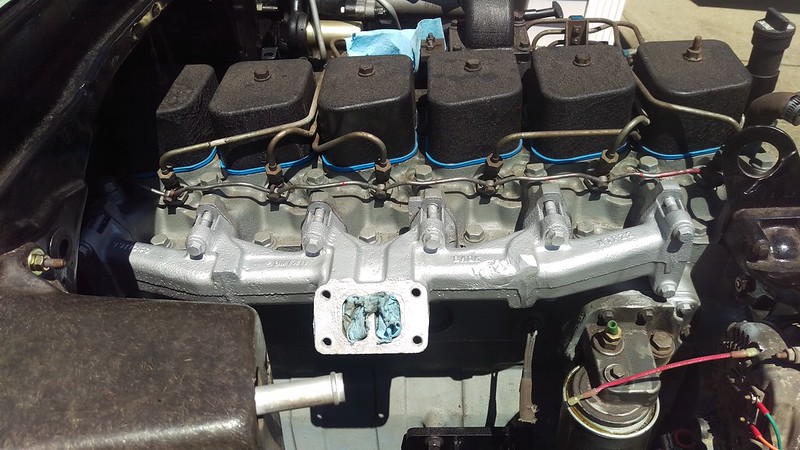 IMAG2869 by jarrod vanwinkle, on Flickr IMAG2869 by jarrod vanwinkle, on FlickrI got the front shocks in they are just KYB replacements. 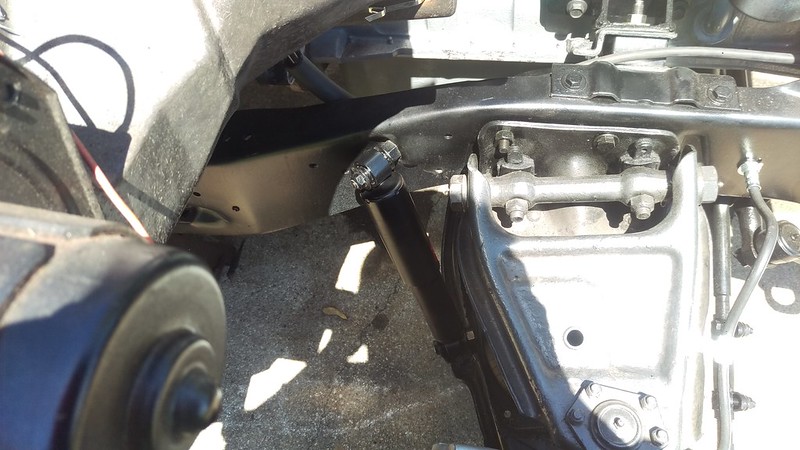 IMAG2868 by jarrod vanwinkle, on Flickr IMAG2868 by jarrod vanwinkle, on FlickrSince I am waiting on amazon I decided to paint the hood I plan on getting a new hood at some point. But for now I'm going to use the old one. I really wanted to keep the patina on the hood but I don't want a white hood on the truck. I have been thinking about doing this for awhile now I did not know how it would turn out But I think it turned out great. I took a paint brush and a old bucket of grease and used the paint brush to paint on grease where I wanted to keep the original patina. Then I painted the whole hood green then pressure washed off all the grease that was covering the original patina. I think it came out great. Befor 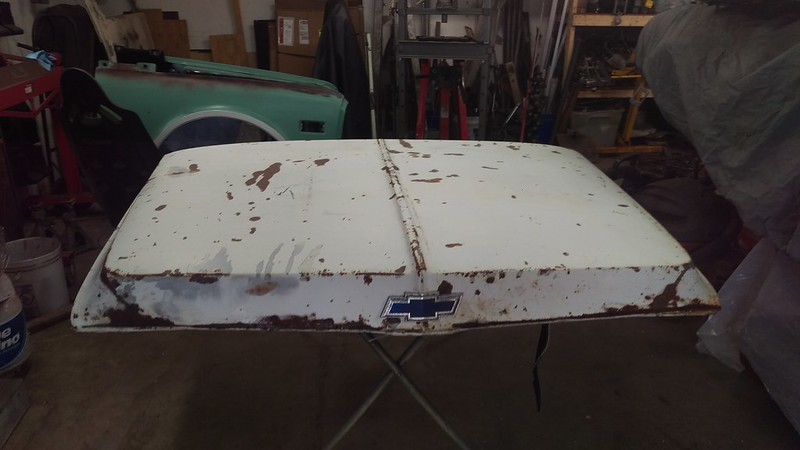 IMAG2863 by jarrod vanwinkle, on Flickr IMAG2863 by jarrod vanwinkle, on Flickr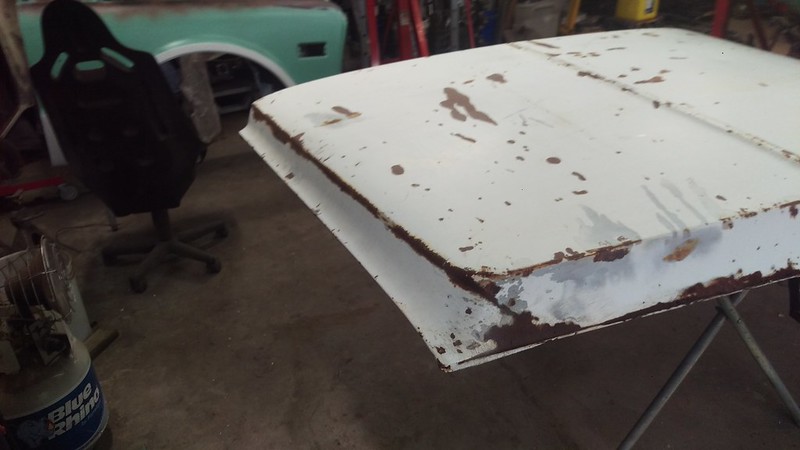 IMAG2864 by jarrod vanwinkle, on Flickr IMAG2864 by jarrod vanwinkle, on Flickr IMAG2865 by jarrod vanwinkle, on Flickr IMAG2865 by jarrod vanwinkle, on Flickr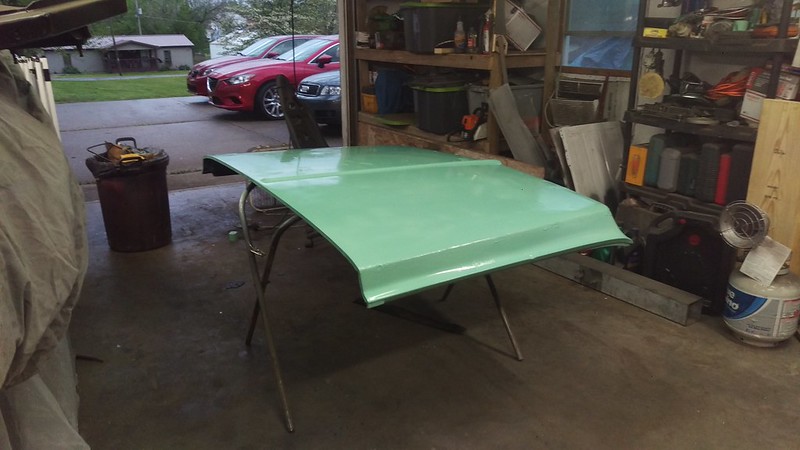 IMAG2866 by jarrod vanwinkle, on Flickr IMAG2866 by jarrod vanwinkle, on FlickrAfter, the pressure washer added a little more patina as some of the paint chipped off but it still has its original 50 years of patina  IMAG2872 by jarrod vanwinkle, on Flickr IMAG2872 by jarrod vanwinkle, on Flickr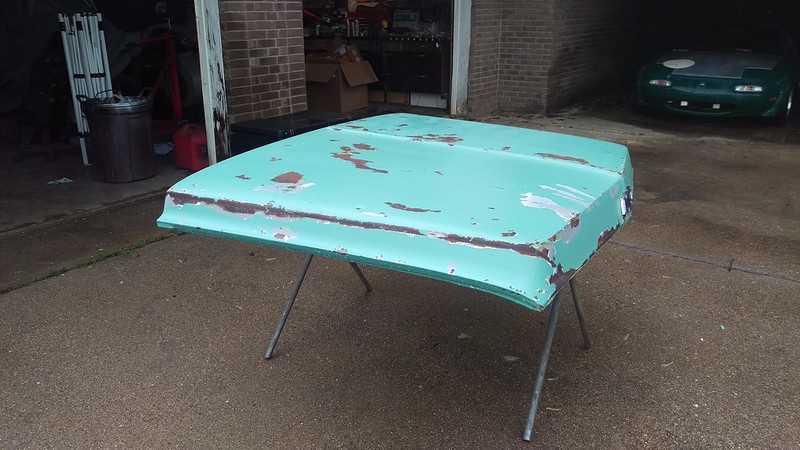 IMAG2873 by jarrod vanwinkle, on Flickr IMAG2873 by jarrod vanwinkle, on Flickr IMAG2874 by jarrod vanwinkle, on Flickr IMAG2874 by jarrod vanwinkle, on FlickrI also added some fake patina to the fenders  IMAG2867 by jarrod vanwinkle, on Flickr IMAG2867 by jarrod vanwinkle, on Flickr
|
|
|
|
|
|
05-08-2020, 10:44 PM
|
#65 |
|
Registered User
Join Date: Sep 2017
Location: Patriot IN
Posts: 163
|
Re: 1970 C30 Car hauler Buildish thread.
The turbo flange extended studs came in today so I was finally able to mount the turbo with the spacer. Also with the mods I did the to wastegate actuator it now clears the heater box. I also need to get a line extension or get a longer line for the oil feed it fits but its tight and has very little play.
 IMAG2876 by jarrod vanwinkle, on Flickr IMAG2876 by jarrod vanwinkle, on Flickr IMAG2877 by jarrod vanwinkle, on Flickr IMAG2877 by jarrod vanwinkle, on Flickr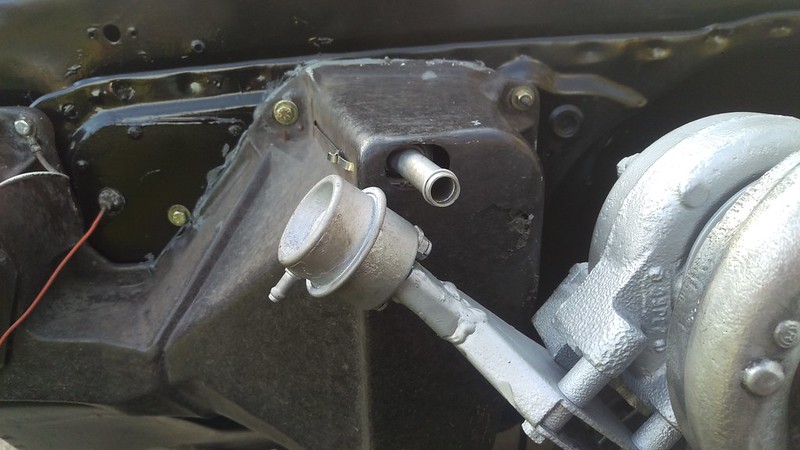 IMAG2878 by jarrod vanwinkle, on Flickr IMAG2878 by jarrod vanwinkle, on FlickrI also modified the turbo oil drain line to fit the new location 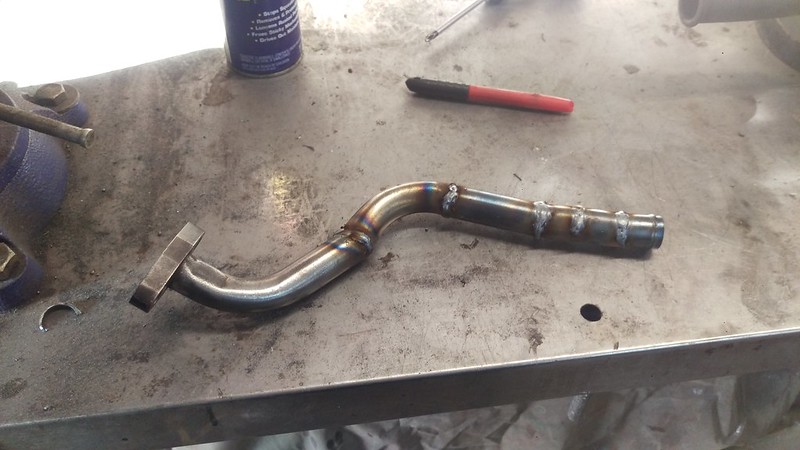 IMAG2875 by jarrod vanwinkle, on Flickr IMAG2875 by jarrod vanwinkle, on Flickr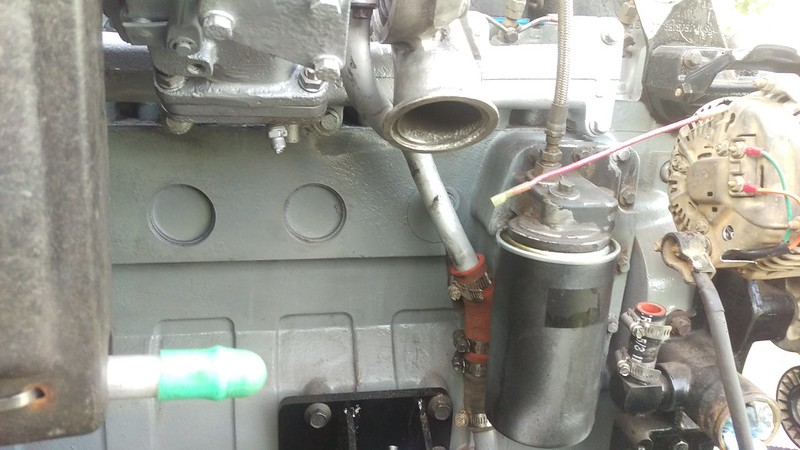 IMAG2880 by jarrod vanwinkle, on Flickr IMAG2880 by jarrod vanwinkle, on Flickr IMAG2881 by jarrod vanwinkle, on Flickr IMAG2881 by jarrod vanwinkle, on Flickr IMAG2883 by jarrod vanwinkle, on Flickr IMAG2883 by jarrod vanwinkle, on Flickr IMAG2884 by jarrod vanwinkle, on Flickr IMAG2884 by jarrod vanwinkle, on Flickr IMAG2885 by jarrod vanwinkle, on Flickr IMAG2885 by jarrod vanwinkle, on FlickrI also install the power steering and hydroboost return line. At the moment I just have a t fitting in to the reservoir. I plan on running a oil cooler and maybe even a power steering filter. but for now this will be enough for the first start and to be able pull it into the garage.  IMAG2886 by jarrod vanwinkle, on Flickr IMAG2886 by jarrod vanwinkle, on Flickr IMAG2887 by jarrod vanwinkle, on Flickr IMAG2887 by jarrod vanwinkle, on Flickr
|
|
|
|
|
05-21-2020, 01:53 AM
|
#66 |
|
Registered User
Join Date: Sep 2017
Location: Patriot IN
Posts: 163
|
Re: 1970 C30 Car hauler Buildish thread.
Two weeks ago I started on the core support mounting the radiator and electric fans.
I made a set of lower mounts  IMAG2889 by jarrod vanwinkle, on Flickr IMAG2889 by jarrod vanwinkle, on Flickr IMAG2888 by jarrod vanwinkle, on Flickr IMAG2888 by jarrod vanwinkle, on Flickr IMAG2891 by jarrod vanwinkle, on Flickr IMAG2891 by jarrod vanwinkle, on Flickr IMAG2892 by jarrod vanwinkle, on Flickr IMAG2892 by jarrod vanwinkle, on FlickrI made a set of brackets to mount the fans. I used 1/4 20 rivnuts  IMAG2893 by jarrod vanwinkle, on Flickr IMAG2893 by jarrod vanwinkle, on Flickr IMAG2894 by jarrod vanwinkle, on Flickr IMAG2894 by jarrod vanwinkle, on FlickrThe fans where almost a perfect fit they needed a slight amount of trimming. I think I got them out of a late 90s or mid 2000s ford windstar.  IMAG2896 by jarrod vanwinkle, on Flickr IMAG2896 by jarrod vanwinkle, on FlickrAll last week I started on a raised garden. I used 10 foot 4x4s and 12 foot 4x4s as we get a lot of deer on our property. A neighbor up the road has a raised bed garden that they built last year with a 5 foot fence. They have had deer jump there's so we built it to be 8 foot. We have always had a small garden on the other side of the barn and we have tried rope and wire and a few other things to keep deer out and it was better than nothing but with everything going on and the possibility of a food shortage we decided to finally build a fenced in garden and with all my extra time we have we should get started on it now while I can. It looks like my work won't be reopening until june 14 or july 4th.  IMAG2898 by jarrod vanwinkle, on Flickr IMAG2898 by jarrod vanwinkle, on Flickr IMAG2899 by jarrod vanwinkle, on Flickr IMAG2899 by jarrod vanwinkle, on Flickr IMAG2900 by jarrod vanwinkle, on Flickr IMAG2900 by jarrod vanwinkle, on Flickr IMAG2901 by jarrod vanwinkle, on Flickr IMAG2901 by jarrod vanwinkle, on Flickr IMAG2904 by jarrod vanwinkle, on Flickr IMAG2904 by jarrod vanwinkle, on Flickr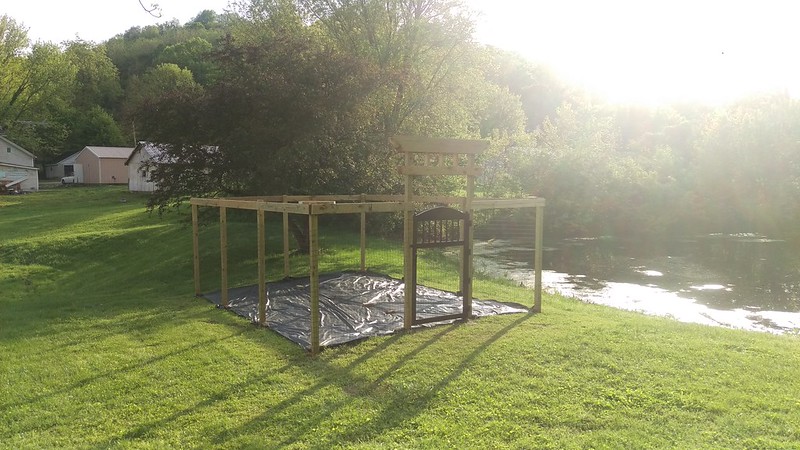 IMAG2905 by jarrod vanwinkle, on Flickr IMAG2905 by jarrod vanwinkle, on Flickr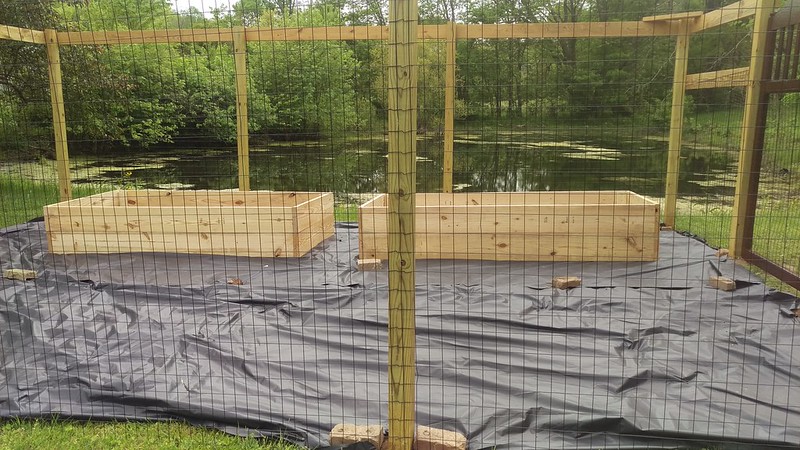 IMAG2906 by jarrod vanwinkle, on Flickr IMAG2906 by jarrod vanwinkle, on Flickr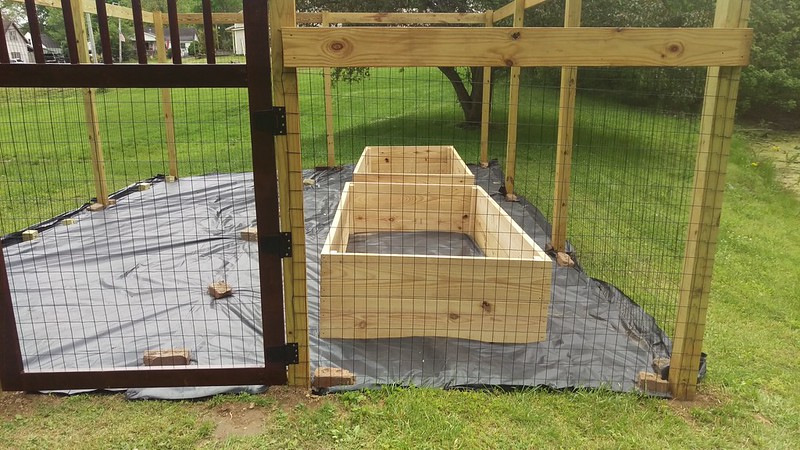 IMAG2907 by jarrod vanwinkle, on Flickr IMAG2907 by jarrod vanwinkle, on FlickrI did however get a chance to mount my battery tray.  IMAG2903 by jarrod vanwinkle, on Flickr IMAG2903 by jarrod vanwinkle, on FlickrThe other day I was able to pick up a second gen cummins intercooler for cheap. Now I will finally be able to get the front end mounted.  IMAG2908 by jarrod vanwinkle, on Flickr IMAG2908 by jarrod vanwinkle, on FlickrI ended up mounting the intercooler 1/2 lower than the core support to clear the hood latch.  IMAG2909 by jarrod vanwinkle, on Flickr IMAG2909 by jarrod vanwinkle, on Flickr IMAG2910 by jarrod vanwinkle, on Flickr IMAG2910 by jarrod vanwinkle, on FlickrThe intercooler only has about an 1/8 of clearance so I notched the frame.  IMAG2912 by jarrod vanwinkle, on Flickr IMAG2912 by jarrod vanwinkle, on Flickr IMAG2913 by jarrod vanwinkle, on Flickr IMAG2913 by jarrod vanwinkle, on Flickr IMAG2915 by jarrod vanwinkle, on Flickr IMAG2915 by jarrod vanwinkle, on FlickrAfter that I finally fixed the core support mount. It turns out that a 43mm knockout punch is the exact size need for the mount. 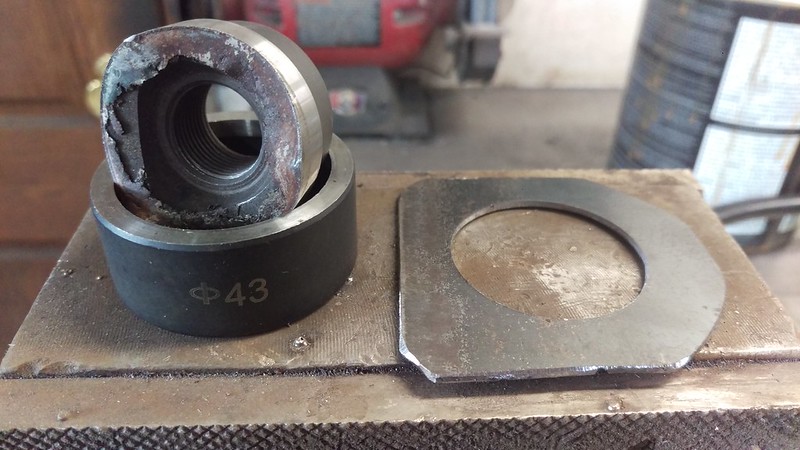 IMAG2916 by jarrod vanwinkle, on Flickr IMAG2916 by jarrod vanwinkle, on Flickr IMAG2917 by jarrod vanwinkle, on Flickr IMAG2917 by jarrod vanwinkle, on Flickr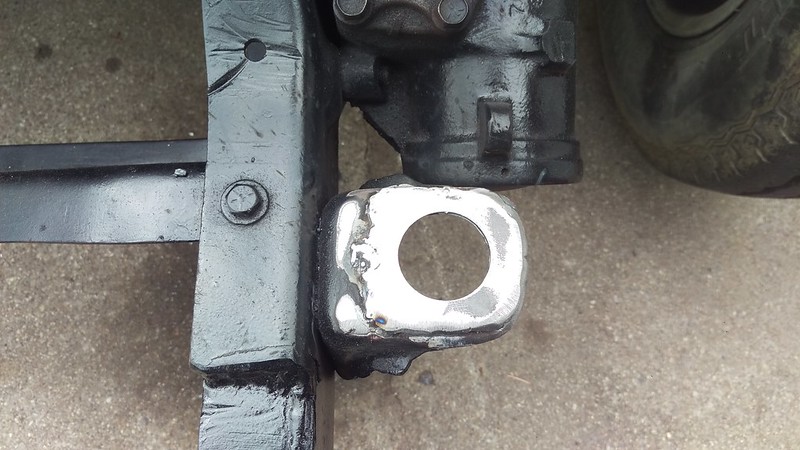 IMAG2919 by jarrod vanwinkle, on Flickr IMAG2919 by jarrod vanwinkle, on FlickrI got the core support and radiator and fans mounted.  IMAG2920 by jarrod vanwinkle, on Flickr IMAG2920 by jarrod vanwinkle, on FlickrI just have enough room to be able to change the belt.  IMAG2921 by jarrod vanwinkle, on Flickr IMAG2921 by jarrod vanwinkle, on FlickrThe main fan just clears the timing cover and oil fill.  IMAG2923 by jarrod vanwinkle, on Flickr IMAG2923 by jarrod vanwinkle, on FlickrI mounted the intercooler. 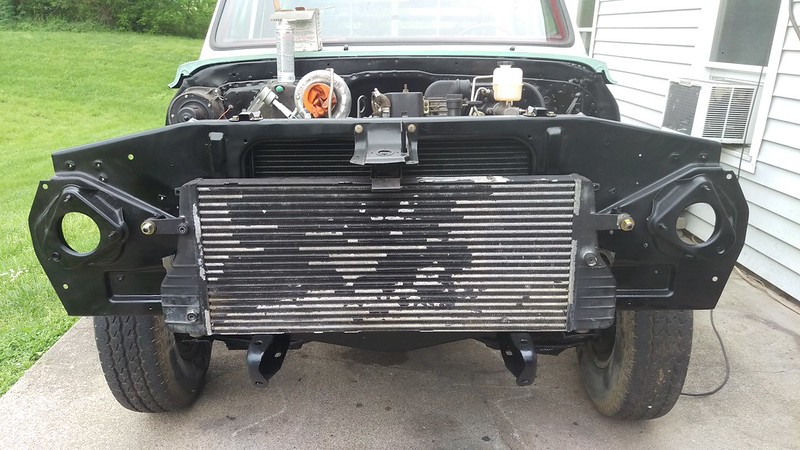 IMAG2924 by jarrod vanwinkle, on Flickr IMAG2924 by jarrod vanwinkle, on Flickr IMAG2925 by jarrod vanwinkle, on Flickr IMAG2925 by jarrod vanwinkle, on FlickrI also fixed the passenger side fender bracket as someone smashed it up and cut it to fix a bigger battery. 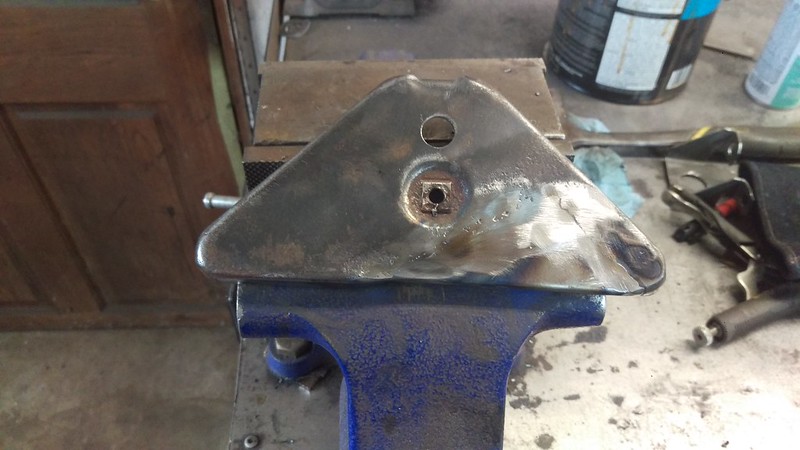 IMAG2926 by jarrod vanwinkle, on Flickr IMAG2926 by jarrod vanwinkle, on FlickrI also added a crankcase breather filter to the vacuum pump as I wont be using it and dont want to suck dirt dust.  IMAG2911 by jarrod vanwinkle, on Flickr IMAG2911 by jarrod vanwinkle, on Flickr
|
|
|
|
|
05-21-2020, 09:15 AM
|
#67 |
|
Registered User
Join Date: Nov 2015
Location: Smethport, PA
Posts: 1,213
|
Re: 1970 C30 Car hauler Buildish thread.
Lots of good things going on here. I love the entrance to the garden.
__________________
85 K30 crew cab dually - Project http://67-72chevytrucks.com/vboard/s...d.php?t=694939 87 Wrangler Rock Crawler - Reason for the project http://www.wranglerforum.com/f330/da...ld-122601.html 04 1500 crew cab http://67-72chevytrucks.com/vboard/s...d.php?t=786514 |
|
|
|
|
05-28-2020, 12:12 AM
|
#68 | |
|
Registered User
Join Date: Sep 2017
Location: Patriot IN
Posts: 163
|
Re: 1970 C30 Car hauler Buildish thread.
Quote:
So last week I went to install the fenders and they were way off. The core support was too far forward and needed to come up like two inches to get the front of the fenders to bolt in place. I knew that had to be wrong. So I tried to move the cab forward but the body mounts where all the way forward in the slots. Then I remembered when I bought the cab the front floor pans and floor braces and front mounts, inner and outer rockers had already been replaced. I remember adding metal to the inner rocker panel to meet the new outer rocker panel as who ever installed the rockers had it way off as the doors did not fit right. That and they were a little beat up. So when I fit the rockers I knew the inners where off but the thought that the whole front of the floor pan was off as well never crossed my mind. So at first I cut a 1/2 spacer and installed them on top of the rear cab mounts. it was slightly better but I still needed more so I had a set of polyurethane body mounts for a willys jeep. They were about a inch thick so I installed them on top of the 1/2 spacer I had made and finally the the fenders fit in place perfectly. But now the radiator fan motor hits the oil fill on the gear cover on the cummins and the wastegate actuator on the turbo that I modded to clear the heater box now hits the heater box again. Also on a side note I did replace the complete rear floor and crossmember I just want to say I got it perfect as if it was off the gas tank would not have bolted in place. As that was my first thought. I thought I messed up, then realized the gas tank would not have bolted up if it was off. So anyways I decided to modify the coresupport so the fan motor would clear the oil fill. The radiator has a slight rake to it. So I modified it to sit vertical in the coresupport to create more room.  IMAG2930 by jarrod vanwinkle, on Flickr IMAG2930 by jarrod vanwinkle, on Flickr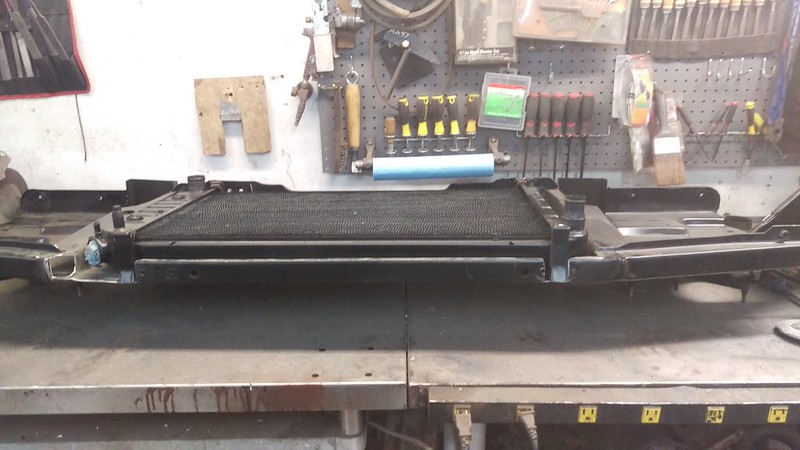 IMAG2931 by jarrod vanwinkle, on Flickr IMAG2931 by jarrod vanwinkle, on FlickrI cut the lower mounts so it would sit vertical. 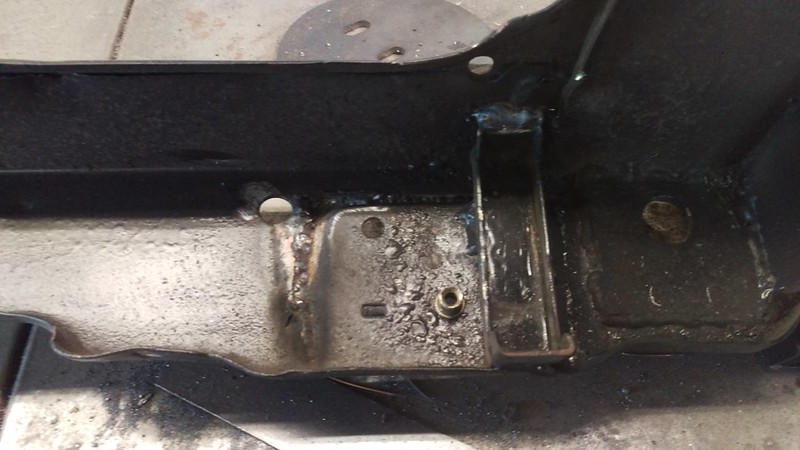 IMAG2932 by jarrod vanwinkle, on Flickr IMAG2932 by jarrod vanwinkle, on Flickr IMAG2933 by jarrod vanwinkle, on Flickr IMAG2933 by jarrod vanwinkle, on FlickrNow I need the upper mounts to sit inside of the coresupport so I made two raised humps so they would clear.  IMAG2934 by jarrod vanwinkle, on Flickr IMAG2934 by jarrod vanwinkle, on FlickrNow I need to clear the radiator cap.  IMAG2935 by jarrod vanwinkle, on Flickr IMAG2935 by jarrod vanwinkle, on Flickr IMAG2936 by jarrod vanwinkle, on Flickr IMAG2936 by jarrod vanwinkle, on Flickr IMAG2937 by jarrod vanwinkle, on Flickr IMAG2937 by jarrod vanwinkle, on Flickr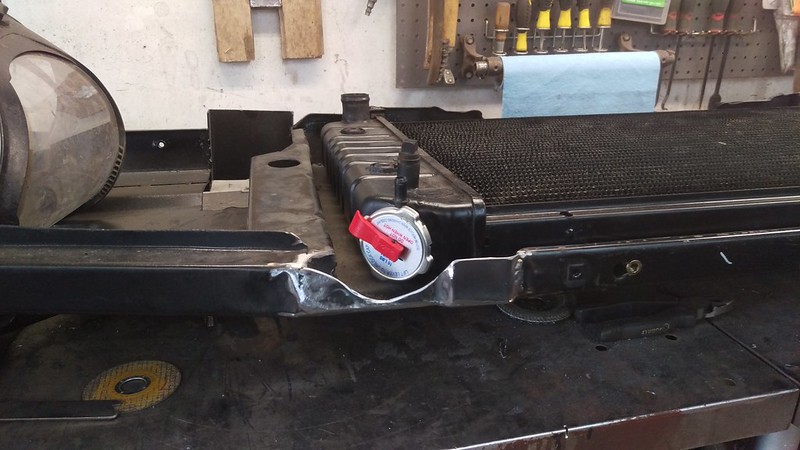 IMAG2938 by jarrod vanwinkle, on Flickr IMAG2938 by jarrod vanwinkle, on FlickrIt took me a while to find the best way to make the upper mounts work. I ended up taking some 3/4 1/8 angle iron and welded it to the upper mounts then I took the mounting bracket that I removed from the upper mounts and moved them inward to clear the the humps and they work perfectly. I have 1/4 of clearance all the way around the radiator to the coresupport and they sandwich the radiator nicely.  IMAG2939 by jarrod vanwinkle, on Flickr IMAG2939 by jarrod vanwinkle, on Flickr IMAG2940 by jarrod vanwinkle, on Flickr IMAG2940 by jarrod vanwinkle, on Flickr IMAG2941 by jarrod vanwinkle, on Flickr IMAG2941 by jarrod vanwinkle, on FlickrI have more room  IMAG2943 by jarrod vanwinkle, on Flickr IMAG2943 by jarrod vanwinkle, on FlickrBut I only have a 1/4 of clearance on the motor to the oil fill. So I am going to delete the oil fill and add one to the front valve cover. Then I am gong to see if I can move the cab and coresupport back a little to clear the wastegate to the heater box.  IMAG2945 by jarrod vanwinkle, on Flickr IMAG2945 by jarrod vanwinkle, on Flickr IMAG2946 by jarrod vanwinkle, on Flickr IMAG2946 by jarrod vanwinkle, on FlickrMy back was killing me, so hopefully tomorrow I will get the hood installed. I does look like the cab is sitting level to the frame.  IMAG2947 by jarrod vanwinkle, on Flickr IMAG2947 by jarrod vanwinkle, on Flickr IMAG2948 by jarrod vanwinkle, on Flickr IMAG2948 by jarrod vanwinkle, on Flickr
|
|
|
|
|
|
05-28-2020, 10:17 PM
|
#69 |
|
Registered User
Join Date: Sep 2017
Location: Patriot IN
Posts: 163
|
Re: 1970 C30 Car hauler Buildish thread.
Sometimes I wonder if there is something wrong with me. So I was having problems with clearance with the radiator fan motor being to close to the oil fill neck on the cummins. I don't know how I did not think of this sooner. I lossend the brackets I made and slid the fan over a little bit. I only had to make one new bracket and do a little trimming to clear the upper water neck. Now I have just enough room between the fan motor and oil fill neck. Then I scooted the cab back as far as I could I have about 3/16 of clearance between the wastegate and the heater box now.
I also installed the hood today.  IMAG2950 by jarrod vanwinkle, on Flickr IMAG2950 by jarrod vanwinkle, on Flickr IMAG2949 by jarrod vanwinkle, on Flickr IMAG2949 by jarrod vanwinkle, on Flickr IMAG2952 by jarrod vanwinkle, on Flickr IMAG2952 by jarrod vanwinkle, on Flickr IMAG2951 by jarrod vanwinkle, on Flickr IMAG2951 by jarrod vanwinkle, on Flickrunder hood clearance  IMAG2953 by jarrod vanwinkle, on Flickr IMAG2953 by jarrod vanwinkle, on Flickr IMAG2954 by jarrod vanwinkle, on Flickr IMAG2954 by jarrod vanwinkle, on FlickrI have about an inch between the hood and cap in the brake fluid reservoir. 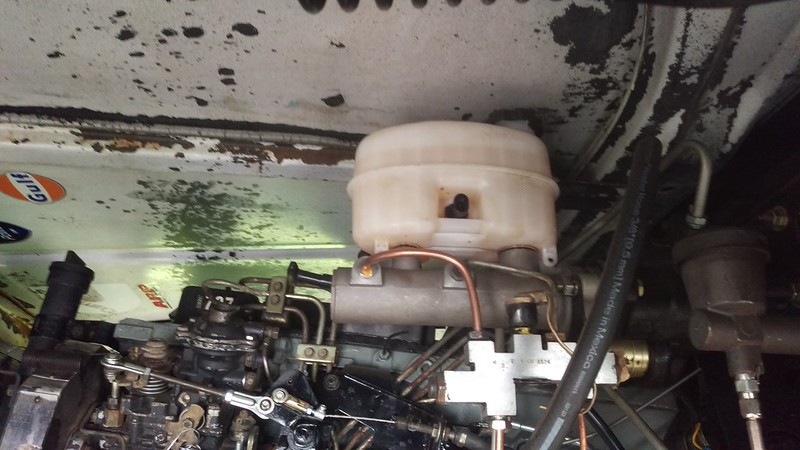 IMAG2955 by jarrod vanwinkle, on Flickr IMAG2955 by jarrod vanwinkle, on FlickrI just realised I never took a pic of the cab dollies I made I used 4 scissor jacks and two furniture dollies and some wood bracing. I used them to remove and install the cab on the frame. I use them to adjust the cab on the frame. 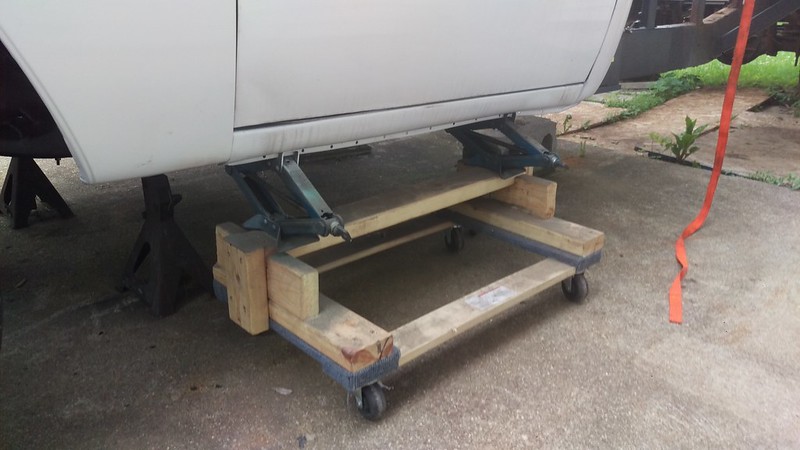 IMAG2956 by jarrod vanwinkle, on Flickr IMAG2956 by jarrod vanwinkle, on Flickr IMAG2957 by jarrod vanwinkle, on Flickr IMAG2957 by jarrod vanwinkle, on Flickr
|
|
|
|
|
05-28-2020, 11:34 PM
|
#70 |
|
Registered User
Join Date: Jul 2014
Location: South East Ohio
Posts: 644
|
Re: 1970 C30 Car hauler Buildish thread.
Really impressive thread. Great pics, lots of info, good work. Cool projects in the works. Really like the barn in the pics at the start of the thread.
|
|
|
|
|
06-23-2020, 01:45 AM
|
#71 | |
|
Registered User
Join Date: Sep 2017
Location: Patriot IN
Posts: 163
|
Re: 1970 C30 Car hauler Buildish thread.
Quote:
I have been slacking on uploads. I ended up making a set of Diy led turn signals. I needed a way to make more room behind the turn signal housings to clear my cummins intercooler. The intercooler mounting brackets where hitting the turn signal bulb sockets. At first I tried using a set of sockets from a 1990s mazda that I had laying around. They were a little more low profile but they were still too long. I ended up ordering a set of cheap led Surface Mount Oval Amber Turn Signal lights for a truck or trailer. https://www.amazon.com/gp/product/B0...?ie=UTF8&psc=1  IMAG3010 by jarrod vanwinkle, on Flickr IMAG3010 by jarrod vanwinkle, on Flickr IMAG3011 by jarrod vanwinkle, on Flickr IMAG3011 by jarrod vanwinkle, on FlickrI started bending the black housing away from the clear lense with my hands, the lense if just glued on. Once it started to separate I went in with a flat head and popped the lense off. 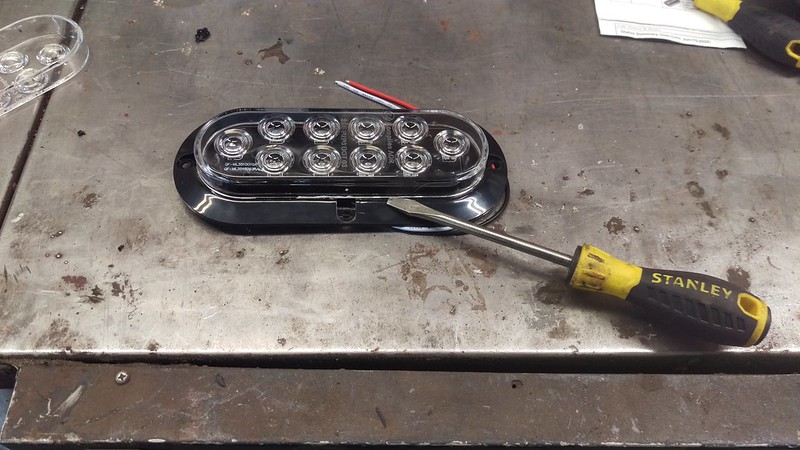 IMAG3022 by jarrod vanwinkle, on Flickr IMAG3022 by jarrod vanwinkle, on FlickrI then trimmed the black bousing to fit in the turn signals.  IMAG3013 by jarrod vanwinkle, on Flickr IMAG3013 by jarrod vanwinkle, on FlickrI ended up putting the turn signal lense from the c30 in the mill and milled out a little bit of the lense to fit the leds as the two outer leds are just a little two wide to fit in the lense. You could do the same with a dremel or a grinder.  IMAG3012 by jarrod vanwinkle, on Flickr IMAG3012 by jarrod vanwinkle, on FlickrIts sits flush in the lense now.  IMAG3014 by jarrod vanwinkle, on Flickr IMAG3014 by jarrod vanwinkle, on Flickr IMAG3015 by jarrod vanwinkle, on Flickr IMAG3015 by jarrod vanwinkle, on FlickrTesting the lights. 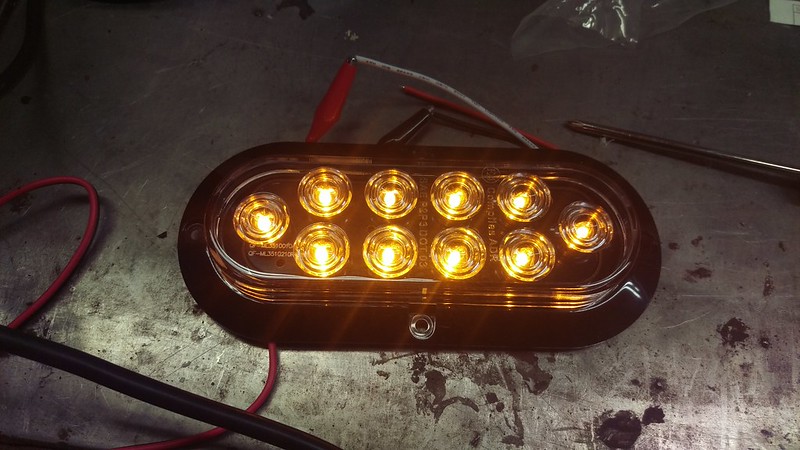 IMAG3016 by jarrod vanwinkle, on Flickr IMAG3016 by jarrod vanwinkle, on Flickr IMAG3017 by jarrod vanwinkle, on Flickr IMAG3017 by jarrod vanwinkle, on Flickrhigh or flash  IMAG3019 by jarrod vanwinkle, on Flickr IMAG3019 by jarrod vanwinkle, on Flickrlow or running lights  IMAG3020 by jarrod vanwinkle, on Flickr IMAG3020 by jarrod vanwinkle, on FlickrI trimmed the second one a little bit better.  IMAG3023 by jarrod vanwinkle, on Flickr IMAG3023 by jarrod vanwinkle, on Flickr IMAG3025 by jarrod vanwinkle, on Flickr IMAG3025 by jarrod vanwinkle, on FlickrI'm just going to connect my stock connecter to the lights. you can see how much room I have now the stock bulb sockets stuck out like a inch and a half.  IMAG3027 by jarrod vanwinkle, on Flickr IMAG3027 by jarrod vanwinkle, on FlickrIf you wanted to make it plug and play you could get a set of 2057 or 1157 Male Head Extension Connector Plug Socket with Wire Harness and make them plug and play. https://www.amazon.com/Redcolourful-...omotive&sr=1-1 I plan on getting a set of new lenses as mine are the originals and one is cracked. After I do that I plan on apoxing them in to make them a bit more waterproof. At the moment they just have tape on the back. They still use the stock seal but mine lenses had dirt in them when I took them off. I also started on my engine bay harness. The new lay out  cummins c30 alt wiring by jarrod vanwinkle, on Flickr cummins c30 alt wiring by jarrod vanwinkle, on FlickrStock  stock v8 c30 engine bay wiring by jarrod vanwinkle, on Flickr stock v8 c30 engine bay wiring by jarrod vanwinkle, on FlickrI wired up a Dedicated under hood relay box. It houses 10 40 amp relays and 15 blade fuses. I need to add a lot of accessories and do a few upgrades. Things I am adding to the box 1. Electric Fan 1 2. Electric Fan 2 3. Headlight high 4. Headlight Low 5. Starter 6. Fog lights 7. Flat bed work lights 8. Headache rack bed light bar 9. Roof rack work lights 10. Open for now Things I am going to add to the mounting panel I built to mount the box. 4 heavy duty 100 amp relays 2 for the grid heater and 2 for my onboard air. One 200 amp relay for the switched power items. Finished up the wiring all the main power wire are 12 gauge, except the two fan wires are 10 gauge. The trigger wires and ground wires are 18 gauge.  IMAG2986 by jarrod vanwinkle, on Flickr IMAG2986 by jarrod vanwinkle, on Flickr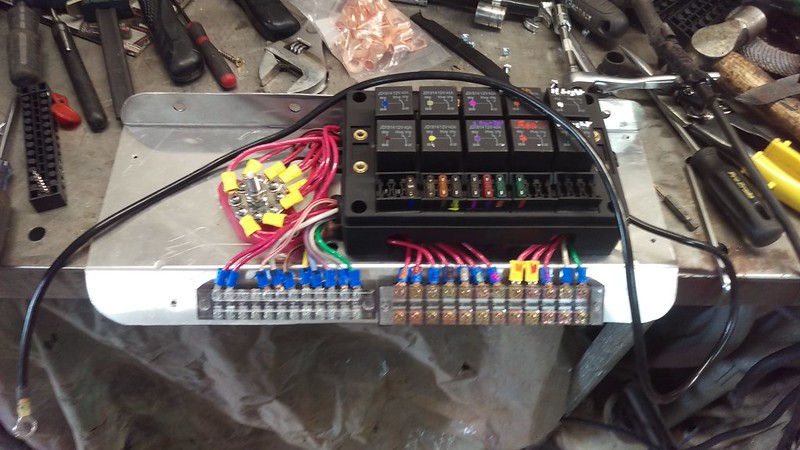 IMAG2996 by jarrod vanwinkle, on Flickr IMAG2996 by jarrod vanwinkle, on Flickr IMAG2997 by jarrod vanwinkle, on Flickr IMAG2997 by jarrod vanwinkle, on FlickrI used nutserts on the fender 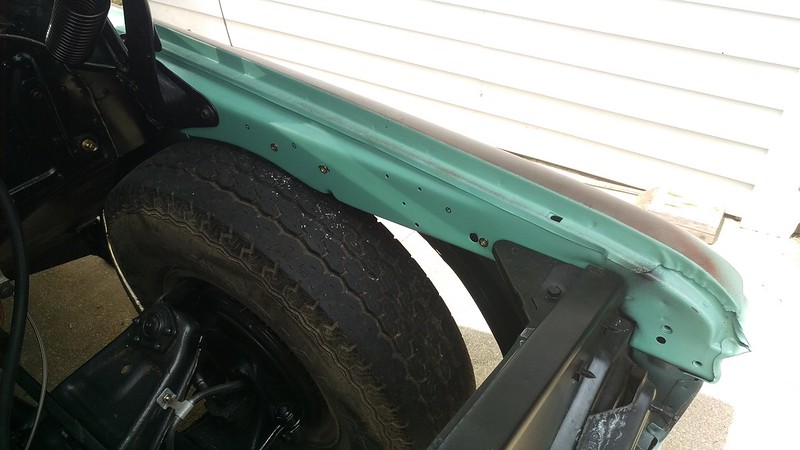 IMAG2998 by jarrod vanwinkle, on Flickr IMAG2998 by jarrod vanwinkle, on Flickr IMAG2999 by jarrod vanwinkle, on Flickr IMAG2999 by jarrod vanwinkle, on FlickrA little intermission gardon up date A few weeks ago we got a load of fill dirt for the raised beds  Screensho1 by jarrod vanwinkle, on Flickr Screensho1 by jarrod vanwinkle, on Flickr IMG_18601 by jarrod vanwinkle, on Flickr IMG_18601 by jarrod vanwinkle, on Flickrit took 7 loads for each bed of the fill dirt.  IMAG2958 by jarrod vanwinkle, on Flickr IMAG2958 by jarrod vanwinkle, on Flickr IMAG2961 by jarrod vanwinkle, on Flickr IMAG2961 by jarrod vanwinkle, on Flickr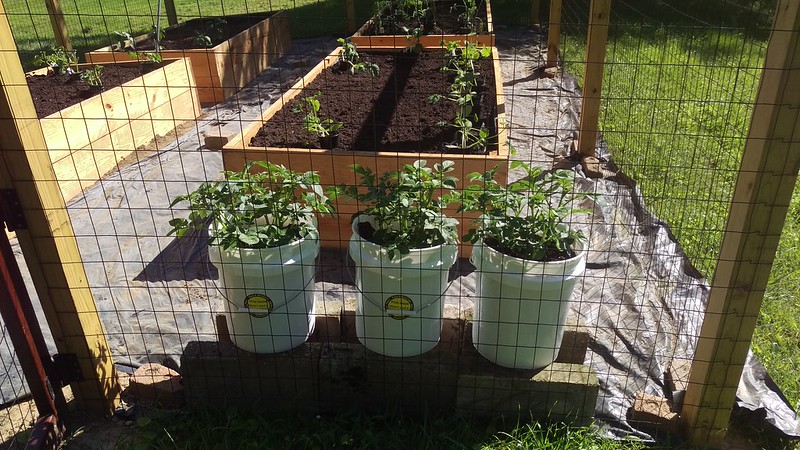 IMAG2962 by jarrod vanwinkle, on Flickr IMAG2962 by jarrod vanwinkle, on Flickr IMAG2963 by jarrod vanwinkle, on Flickr IMAG2963 by jarrod vanwinkle, on Flickr IMAG2964 by jarrod vanwinkle, on Flickr IMAG2964 by jarrod vanwinkle, on Flickr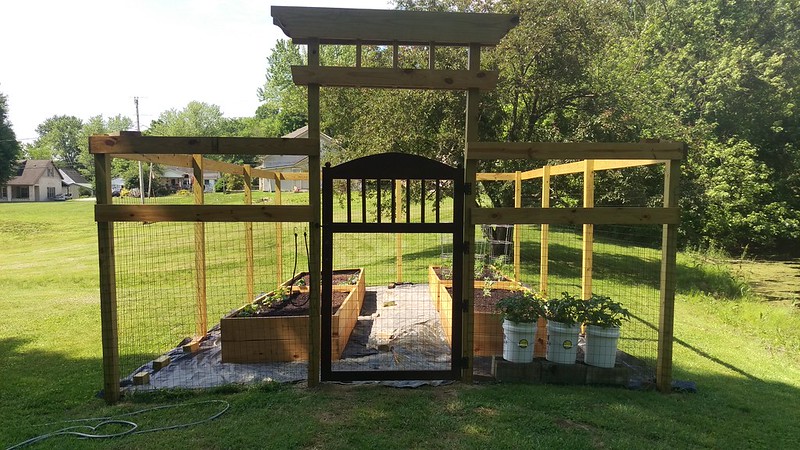 IMAG2970 by jarrod vanwinkle, on Flickr IMAG2970 by jarrod vanwinkle, on Flickr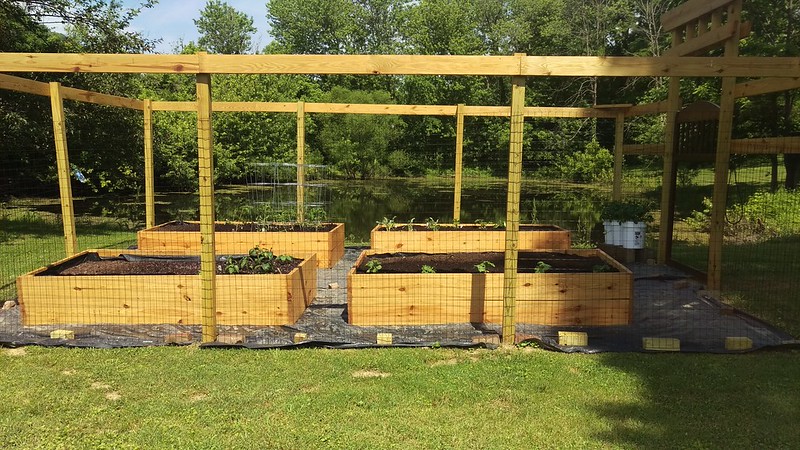 IMAG2969 by jarrod vanwinkle, on Flickr IMAG2969 by jarrod vanwinkle, on Flickr IMAG2973 by jarrod vanwinkle, on Flickr IMAG2973 by jarrod vanwinkle, on Flickr IMAG3009 by jarrod vanwinkle, on Flickr IMAG3009 by jarrod vanwinkle, on Flickr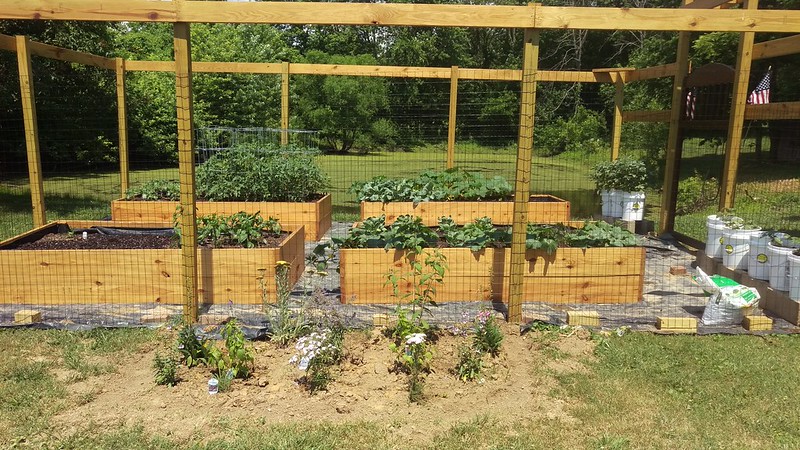 IMAG3008 by jarrod vanwinkle, on Flickr IMAG3008 by jarrod vanwinkle, on FlickrI aired out the truck to make it easier to work in the engine bay.  IMAG2989 by jarrod vanwinkle, on Flickr IMAG2989 by jarrod vanwinkle, on Flickr IMAG2990 by jarrod vanwinkle, on Flickr IMAG2990 by jarrod vanwinkle, on Flickr IMAG2991 by jarrod vanwinkle, on Flickr IMAG2991 by jarrod vanwinkle, on Flickr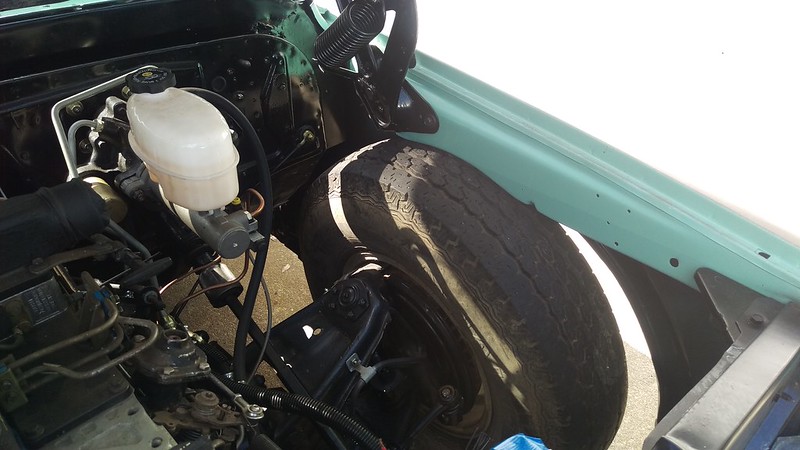 IMAG2992 by jarrod vanwinkle, on Flickr IMAG2992 by jarrod vanwinkle, on FlickrI installed quick disconnect battery terminals.  IMAG2965 by jarrod vanwinkle, on Flickr IMAG2965 by jarrod vanwinkle, on Flickr IMAG2966 by jarrod vanwinkle, on Flickr IMAG2966 by jarrod vanwinkle, on FlickrI also shortened the drive shaft. Hopeful it doesn't vibrate.  IMAG2980 by jarrod vanwinkle, on Flickr IMAG2980 by jarrod vanwinkle, on Flickr IMAG2981 by jarrod vanwinkle, on Flickr IMAG2981 by jarrod vanwinkle, on FlickrLast week I started the truck for the first time. I had never had the engine running since I got it. I wish I had test started it before I put it into the truck. When I first started it up I thought it was going to run away. Before I got the truck someone had gone through the pump before me. As when I went to install the new fuel pin and governor spring someone had already removed the tamper proof caps off of everything and some of the seals looked new. That and someone had messed up the idle adjustment screw. and at the time I could not turn it so I just left it where it was at. Well when I started it up I thought it was going to run away. unfortunately I had to pull the top of the pump off to adjust the idle screw. I had to put it in the vice and use a pair of pliers to remove it as when I tried to use a normal flat head like your supposed to I ended up snapping the tip off the flat head. Unfortunately the threads where mangled and I had to retap the top housing and I got a long full thread m6 bolt instead of the piece of all thread with a slot in the end. That said when I got it back together I had the idle bolt backed out all the way and It idles fine I don't know what its idling at but it sounds high maybe 1000 rpm But it may just sound high with no exhaust. Anyways I ended up replacing the seals on the top and installing a new throttle shaft bushing. As when I took the throttle nut off it was damp I don't know if it was the seal or the shaft itself as its a common problem and since I had the top off I figur I should replace it while I can. I also replaced the allen bolts as they were a bit loose and as I have to use a ball end allen socket I did not want to strip them out if I ever have to remove the top again. I ended up replacing them with a grade 12.9 allen bolt. So hopeful I will never have to worry about them striping out.  IMAG3004 by jarrod vanwinkle, on Flickr IMAG3004 by jarrod vanwinkle, on FlickrI don't know if this is the stock adjustment for the smoke screw or not the paint looks untouched and it doesn't smost at all. if its stock adjustment i'm going to leave it alone.  IMAG3005 by jarrod vanwinkle, on Flickr IMAG3005 by jarrod vanwinkle, on Flickr IMAG3007 by jarrod vanwinkle, on Flickr IMAG3007 by jarrod vanwinkle, on FlickrThe old throttle shaft bushing. I don't know if it had been replaced or not I though the stock one was brass as that is what it looks like in some pics. But this one was steel.  IMAG3028 by jarrod vanwinkle, on Flickr IMAG3028 by jarrod vanwinkle, on FlickrHere it is running I tried to rev it a few times but I think it had air still in the lines because after I let it idle for a few minutes it reved fine, but it was getting dark so I did not record it. Maybe tomorrow. I have a leak in the return line and the power steering has a few leaks but it was getting too dark.  VIDEO0052 by jarrod vanwinkle, on Flickr VIDEO0052 by jarrod vanwinkle, on Flickr
|
|
|
|
|
|
06-23-2020, 08:39 AM
|
#72 |
|
Registered User
Join Date: Nov 2015
Location: Smethport, PA
Posts: 1,213
|
Re: 1970 C30 Car hauler Buildish thread.
Congrats on getting her to run. That is always an exciting step.
__________________
85 K30 crew cab dually - Project http://67-72chevytrucks.com/vboard/s...d.php?t=694939 87 Wrangler Rock Crawler - Reason for the project http://www.wranglerforum.com/f330/da...ld-122601.html 04 1500 crew cab http://67-72chevytrucks.com/vboard/s...d.php?t=786514 |
|
|
|
|
06-23-2020, 08:45 PM
|
#73 |
|
Registered User
Join Date: Apr 2014
Location: Azle,Texas
Posts: 2,248
|
Re: 1970 C30 Car hauler Buildish thread.
Ya gotta love those milestone days! It makes up for months and months of nose to the grindstone work...

__________________
Brian 1972 C10, "Loyd", LWB to SWB, 5.3, L83/6L80e, 4:11 Tru Trac, Air Ride, VA, DD, 20" Coys, 4 wheel disc, A quick LS swap turned into a 6 year frame off resto-mod. |
|
|
|
|
08-05-2020, 10:16 PM
|
#74 | ||
|
Registered User
Join Date: Sep 2017
Location: Patriot IN
Posts: 163
|
Re: 1970 C30 Car hauler Buildish thread.
Quote:
Quote:
After I got it running I installed a power steering cooler as I am running hydroboost and it needs a little more cooling. That said I went a little overboard on the cooler I bought the biggest trans cooler I could find, the trans cooler I used is rated to cool a truck with a (GVW (GROSS VEHICLE WEIGHT) RATING of 26,000 LBS. It is 15 1/2" LONG 10" HIGH 3/4" THICK ) I think it should be adequate for my power steering.  IMAG3029 by jarrod vanwinkle, on Flickr IMAG3029 by jarrod vanwinkle, on Flickr IMAG3030 by jarrod vanwinkle, on Flickr IMAG3030 by jarrod vanwinkle, on Flickr IMAG3031 by jarrod vanwinkle, on Flickr IMAG3031 by jarrod vanwinkle, on FlickrIntermission garden update. Sometime last month I added gourd trellis to two of the beds. If I can remember I will add a updated pic, Things are getting out of hand the cucumbers on the trellis completely took it over. Unfortunately the summer squash cross pollinated with the zucchini on the other trellis and grew these monster cross breeds but they are inedible. And the tomatoes have become a forest.  IMAG3032 by jarrod vanwinkle, on Flickr IMAG3032 by jarrod vanwinkle, on Flickr IMAG3033 by jarrod vanwinkle, on Flickr IMAG3033 by jarrod vanwinkle, on Flickr IMAG3034 by jarrod vanwinkle, on Flickr IMAG3034 by jarrod vanwinkle, on Flickr IMAG3035 by jarrod vanwinkle, on Flickr IMAG3035 by jarrod vanwinkle, on Flickr IMAG3036 by jarrod vanwinkle, on Flickr IMAG3036 by jarrod vanwinkle, on Flickr IMG_24551 by jarrod vanwinkle, on Flickr IMG_24551 by jarrod vanwinkle, on Flickr IMG_28171 by jarrod vanwinkle, on Flickr IMG_28171 by jarrod vanwinkle, on Flickr IMG_24561 by jarrod vanwinkle, on Flickr IMG_24561 by jarrod vanwinkle, on Flickr IMG_24571 by jarrod vanwinkle, on Flickr IMG_24571 by jarrod vanwinkle, on FlickrBack to the truck. I bought a cheap air ride setup, I mainly wanted it for the compressor and gauges. It came with a 3 gallon tank but it is too small for my monster bags, they hold a little over a gallon each.  IMAG3037 by jarrod vanwinkle, on Flickr IMAG3037 by jarrod vanwinkle, on FlickrI made a bracket for the compressor and tank I made it so it can hold up to 4 air compressors.  IMAG3053 by jarrod vanwinkle, on Flickr IMAG3053 by jarrod vanwinkle, on Flickr IMAG3054 by jarrod vanwinkle, on Flickr IMAG3054 by jarrod vanwinkle, on FlickrI also bought a set of stock cummins radiator hoses they were a little too short but it worked out as I needed to reduce the outlet sizes anyways.  IMAG3038 by jarrod vanwinkle, on Flickr IMAG3038 by jarrod vanwinkle, on Flickr IMAG3039 by jarrod vanwinkle, on Flickr IMAG3039 by jarrod vanwinkle, on FlickrNow that is runs and moves under its own power I pulled it in to the driveway and pressure washed the bed a removed all the wasp and mud dauber nests.  IMAG3044 by jarrod vanwinkle, on Flickr IMAG3044 by jarrod vanwinkle, on FlickrI had to rearrange a few things but I got it to fit in the garage with a few inches to spare. It was good timing to as at the time it was in the upper 90s for a few weeks. 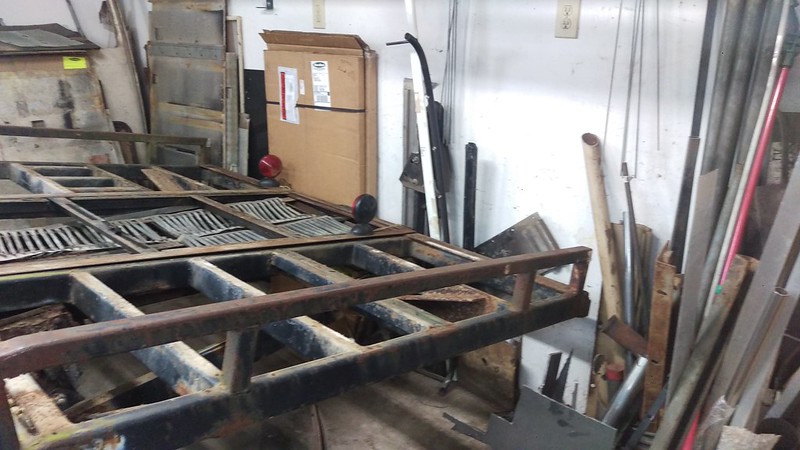 IMAG3045 by jarrod vanwinkle, on Flickr IMAG3045 by jarrod vanwinkle, on Flickr IMAG3046 by jarrod vanwinkle, on Flickr IMAG3046 by jarrod vanwinkle, on Flickr IMAG3047 by jarrod vanwinkle, on Flickr IMAG3047 by jarrod vanwinkle, on FlickrI cut the railing off  IMAG3048 by jarrod vanwinkle, on Flickr IMAG3048 by jarrod vanwinkle, on FlickrI removed the ramp storage bracket and burned the license plate Thankfully I needed to get a new one anyways.  IMAG3050 by jarrod vanwinkle, on Flickr IMAG3050 by jarrod vanwinkle, on FlickrI had to reseal the vacuum pump.  IMAG3049 by jarrod vanwinkle, on Flickr IMAG3049 by jarrod vanwinkle, on Flickr IMAG3051 by jarrod vanwinkle, on Flickr IMAG3051 by jarrod vanwinkle, on Flickr IMAG3052 by jarrod vanwinkle, on Flickr IMAG3052 by jarrod vanwinkle, on FlickrI reused the railing to make some sides to attach some trailer jacks to, to make installing and removing the dove tail eiser.  IMAG3056 by jarrod vanwinkle, on Flickr IMAG3056 by jarrod vanwinkle, on Flickr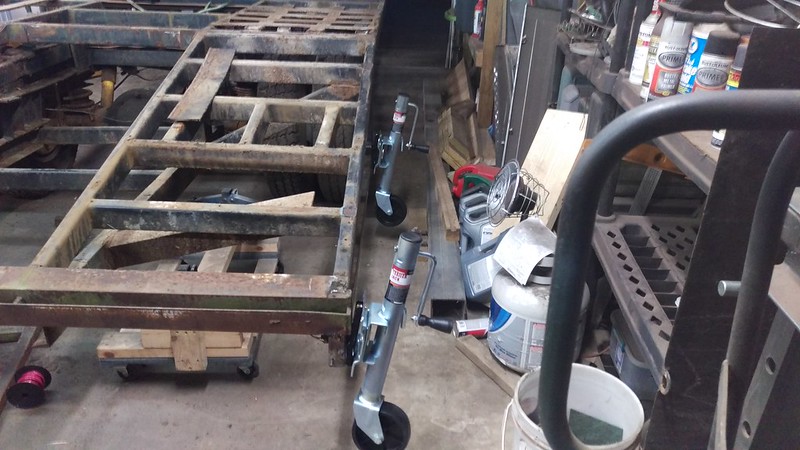 IMAG3057 by jarrod vanwinkle, on Flickr IMAG3057 by jarrod vanwinkle, on Flickr IMAG3058 by jarrod vanwinkle, on Flickr IMAG3058 by jarrod vanwinkle, on FlickrAnd it's free!  IMAG3059 by jarrod vanwinkle, on Flickr IMAG3059 by jarrod vanwinkle, on Flickr IMAG3060 by jarrod vanwinkle, on Flickr IMAG3060 by jarrod vanwinkle, on Flickr IMAG3061 by jarrod vanwinkle, on Flickr IMAG3061 by jarrod vanwinkle, on Flickr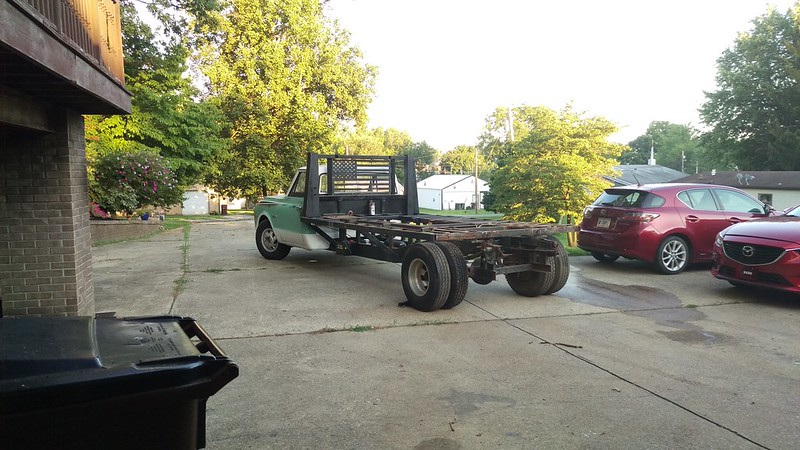 IMAG3062 by jarrod vanwinkle, on Flickr IMAG3062 by jarrod vanwinkle, on Flickr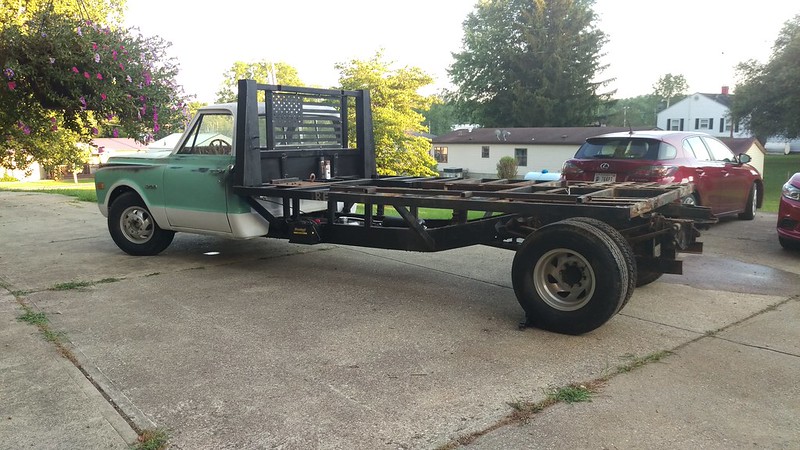 IMAG3063 by jarrod vanwinkle, on Flickr IMAG3063 by jarrod vanwinkle, on Flickr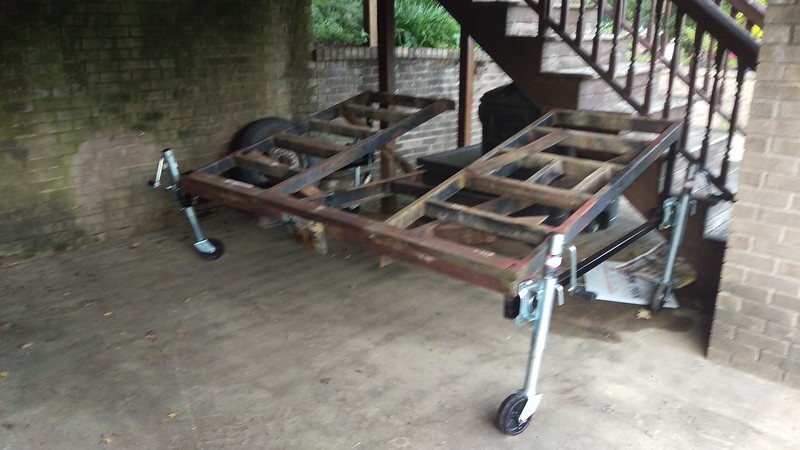 IMAG3064 by jarrod vanwinkle, on Flickr IMAG3064 by jarrod vanwinkle, on FlickrNow I can walk around the truck in the garage  IMAG3065 by jarrod vanwinkle, on Flickr IMAG3065 by jarrod vanwinkle, on FlickrI don't know what kind of monster did this or why but the welded two c channels and a piece of rectangle tube to the end of the frame. Nothing attaches back there, and then they cut the top half off because it hit the dove tail. I cleaned it up a bit and made them all sit flush.  IMAG3067 by jarrod vanwinkle, on Flickr IMAG3067 by jarrod vanwinkle, on Flickr IMAG3066 by jarrod vanwinkle, on Flickr IMAG3066 by jarrod vanwinkle, on FlickrI also cut out all the centers as I am going to move them down as I want to run wood in the center of the bed.  IMAG3068 by jarrod vanwinkle, on Flickr IMAG3068 by jarrod vanwinkle, on Flickr IMAG3071 by jarrod vanwinkle, on Flickr IMAG3071 by jarrod vanwinkle, on FlickrToday I installed a second gen 24 valve intake manifold plate to move the intake forward to clear the brake master cylinder.  IMAG3072 by jarrod vanwinkle, on Flickr IMAG3072 by jarrod vanwinkle, on Flickr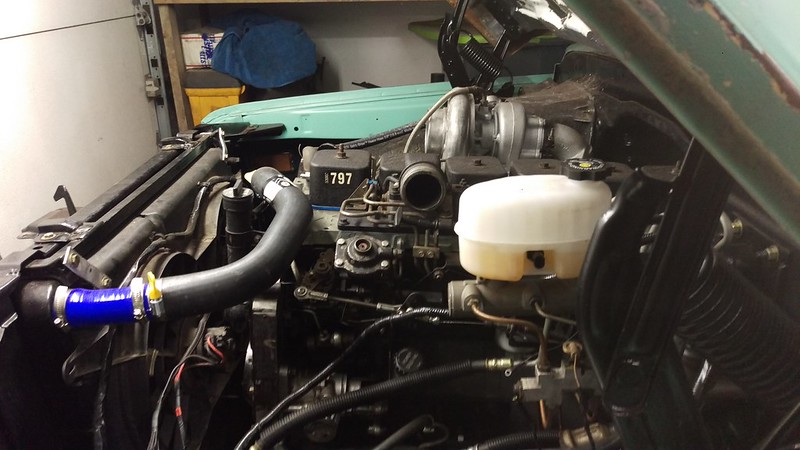 IMAG3073 by jarrod vanwinkle, on Flickr IMAG3073 by jarrod vanwinkle, on Flickr
|
||
|
|
|
|
08-09-2020, 02:08 PM
|
#75 |
|
BlahBlahBlah
Join Date: Feb 2002
Location: Wa.
Posts: 20,148
|
Re: 1970 C30 Car hauler Buildish thread.
This is a great build to watch. Im curious what the wheel base is on your truck. I have a 157" wheel base and yours looks longer. Maybe an optical illusion? And if you dont mind can you tell me your bed length is without the dovetail please. I love the idea of the removable dovetail! What length ride can you get up there with the dovetail installed?
__________________
... |
|
|
|
|
| Bookmarks |
| Tags |
| air ride, c30, cummins, nv4500, ramp truck |
|
|


 Linear Mode

