
 |
Register or Log In To remove these advertisements. |
|
|
|
|||||||
 |
|
|
Thread Tools | Display Modes |
|
|
#1 |
|
Registered User
 Join Date: Mar 2005
Location: apple valley, ca
Posts: 2,670
|
1960-1966 Brake Pedal Mod
I have been working on the brake system on my '64, and there is a design issue with the '60-'66 trucks that has always bugged me and I decided to do something about it. I have never liked the brake pedal height (way too high) and I have always thought that the trucks that have had the disc brake conversion have the wrong pedal ratio. There's too much brake pedal travel. After some thought, research, and fabrication, I may have come up with the answer.
I'm not a fan of buying expensive aftermarket parts because I try to stretch my "project money" as far as possible. I was adamant that this mod had to be inexpensive and utilize as many factory parts as possible. First of all, about the brake pedal ratio: Instead of going through a long discussion about theory, here's a link that explains it easily: http://www.piratejack.net/index.php?...d=14&Itemid=21 I calculated the pedal ratio of the stock, manual brake pedal on my '64 and came up with 6.8-1. That's just fine for manual brakes, but wrong for power brakes. After some calculation, I determined that if you move the linkage attach point on the pedal down 1.5", you can get a brake ratio of 4.1-1, perfect for power brakes. So, I got a 3/8" drill bit and drilled the new hole. I mocked everything up, but I didn't like what I saw. Now, the linkage from the pedal to the booster would be going up at a steep angle to depress the plunger in the booster. This was not going to work: 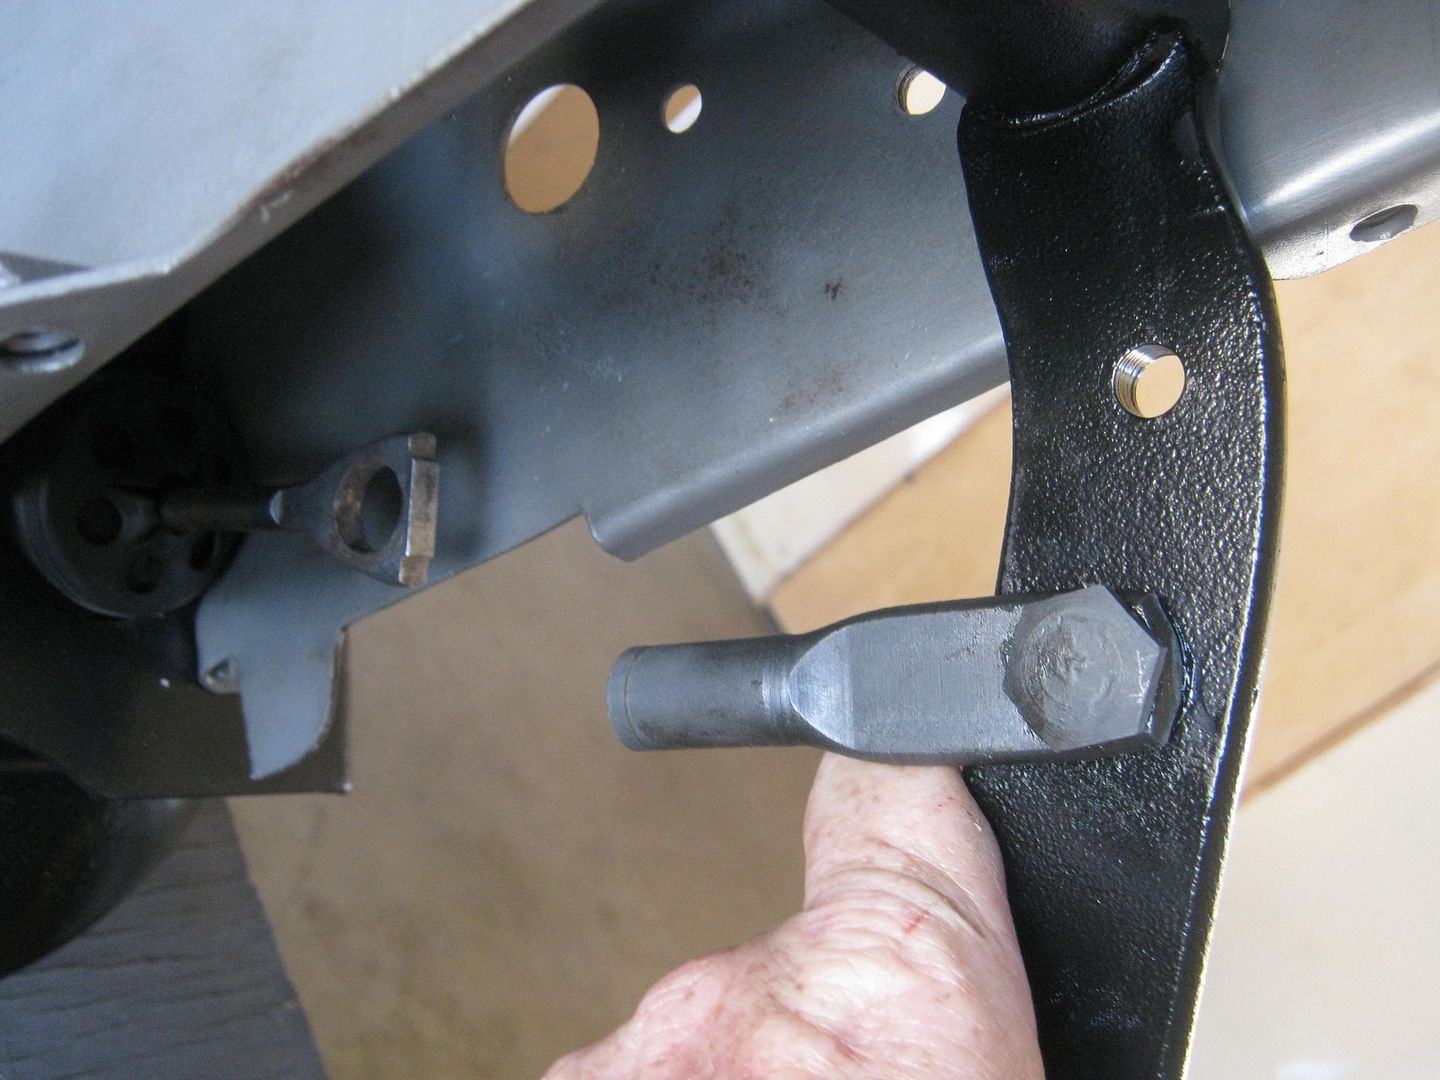 I have one of Capt. Fab's booster adapter brackets (HIGHLY recommended) and have a 1996 S-10 booster. The biggest issue (at least to me) about using a late model booster is what to do with the eyelet on the end of the booster rod. A lot of guys will chop them off and re-thread the rod for a clevis or a heim joint. I actually LIKE the eyelet, but just couldn't figure out how to integrate it into my linkage. The only way for it to work was that it had to be supported so the booster rod would stay in a stationary arc. I pulled the pedal/clutch pedal assembly out of the truck and noticed that there was an unused hole about 3" back from the brake pedal hinge pin. It was obviously used on another truck application, probably the C60 and up models. I measured the i.d. of the hole, and came to the conclusion that it was the exact same size hole as the brake pedal hinge pin. Thank You, GM!! 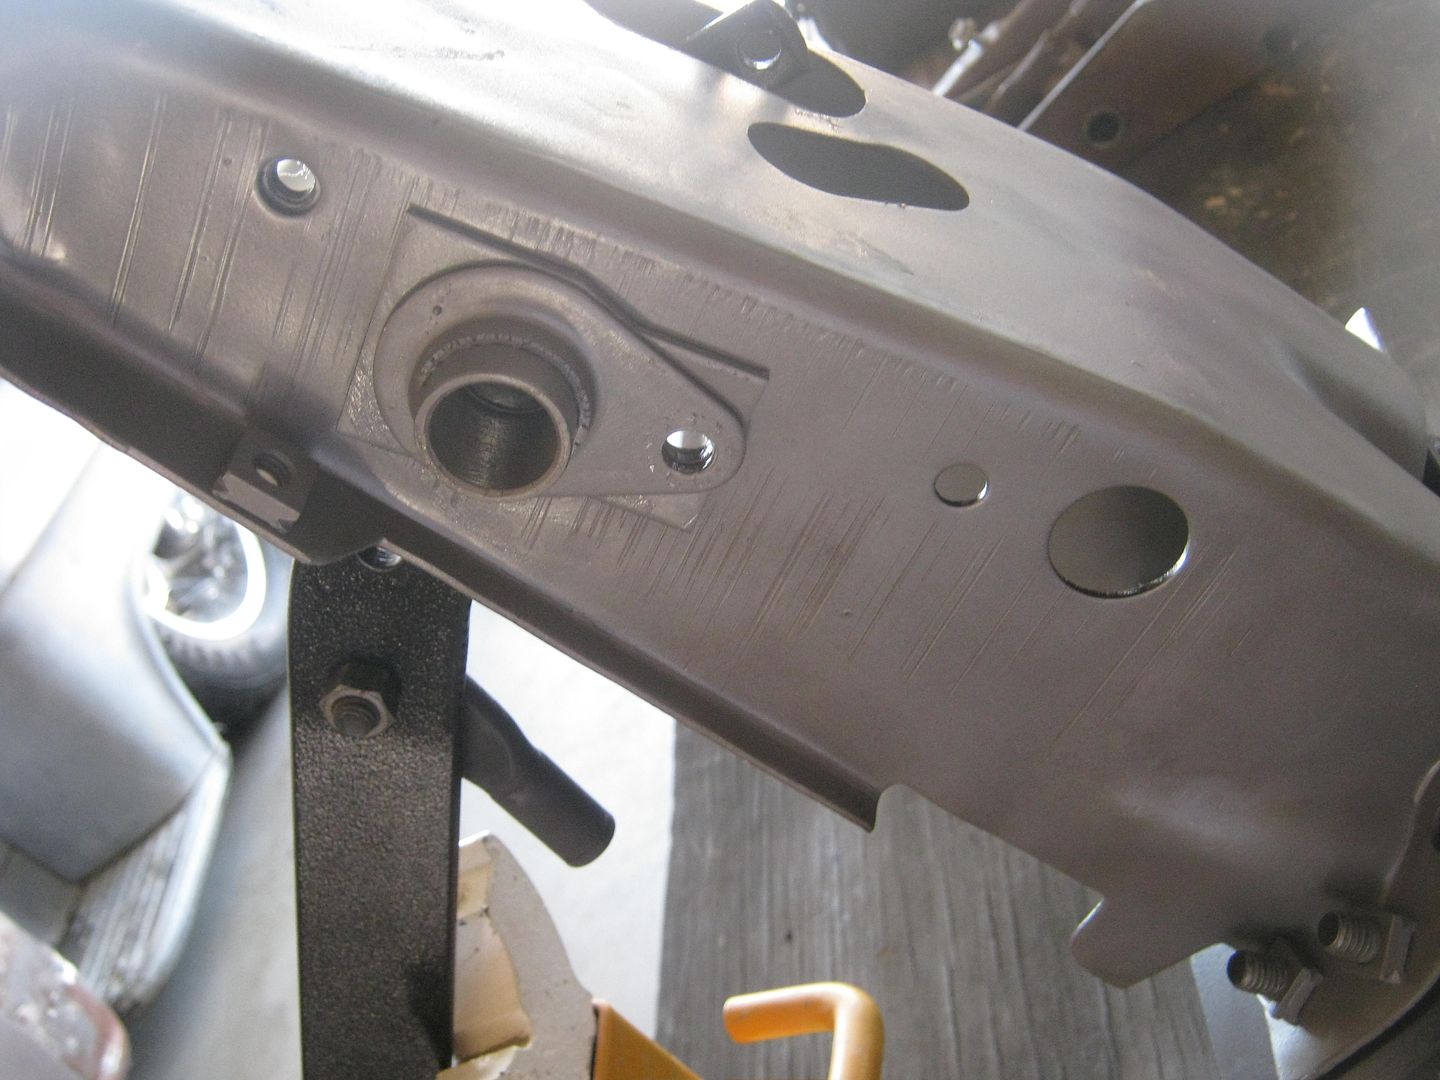 Now, I knew how I was going to support the booster eyelet. I went to the wrecking yard and got another brake pedal and hinge pin. I wound up getting the entire assembly for $12.50. In this picture, you can see the pin slid into the previously un-used hole, and the attach bolt lined right up. 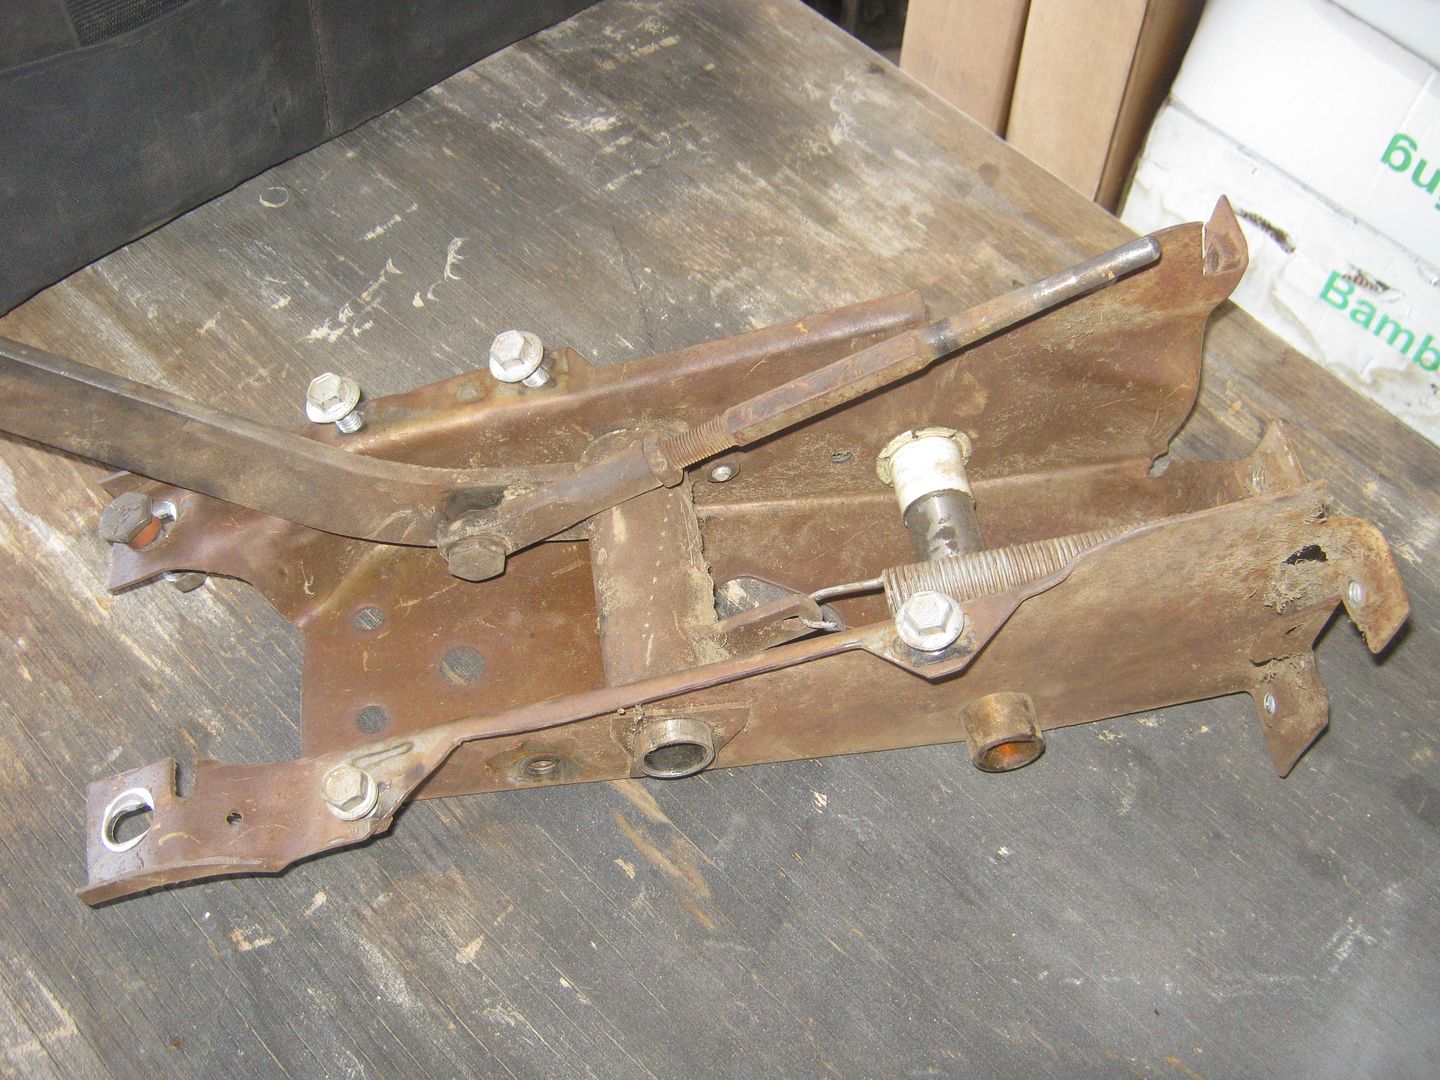 Here's the trial run mock-up. I did a quick chop on the extra brake pedal and basically turned it into a bellcrank. The existing hole in the brake pedal for the factory brake linkage worked out fine. You can see that the clevis on the brake pedal (the pedal painted black) will now attach to the tab on the chopped pedal. 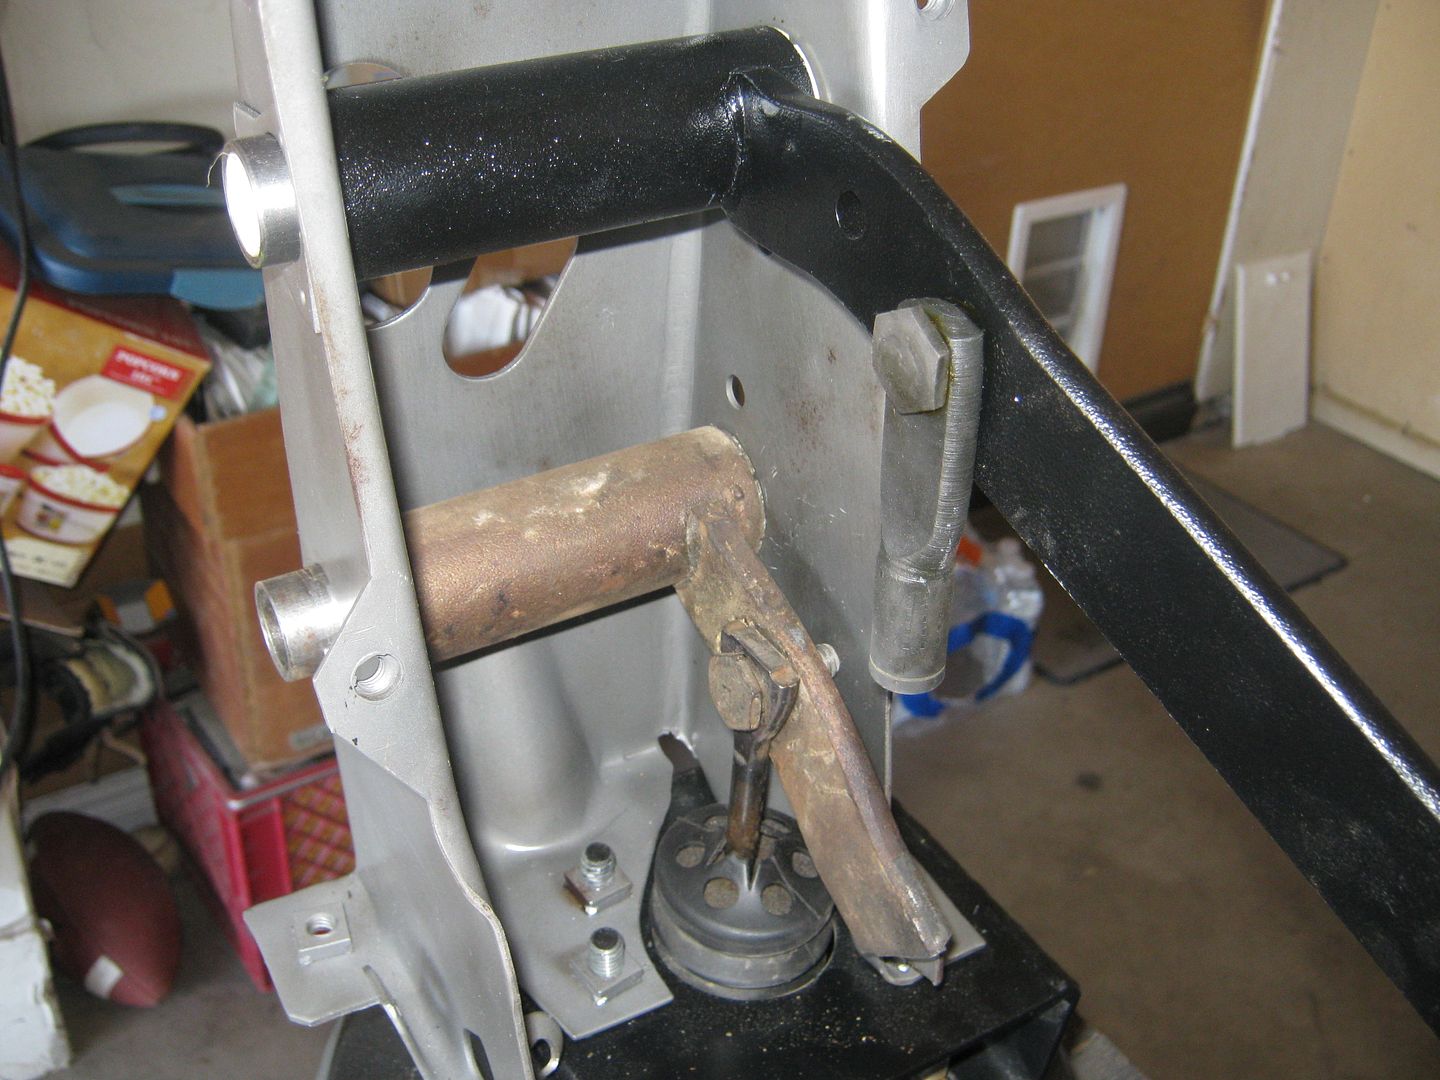 Here's what the chopped pedal looks like after a little grinding and some paint. I want this to look 100% factory. 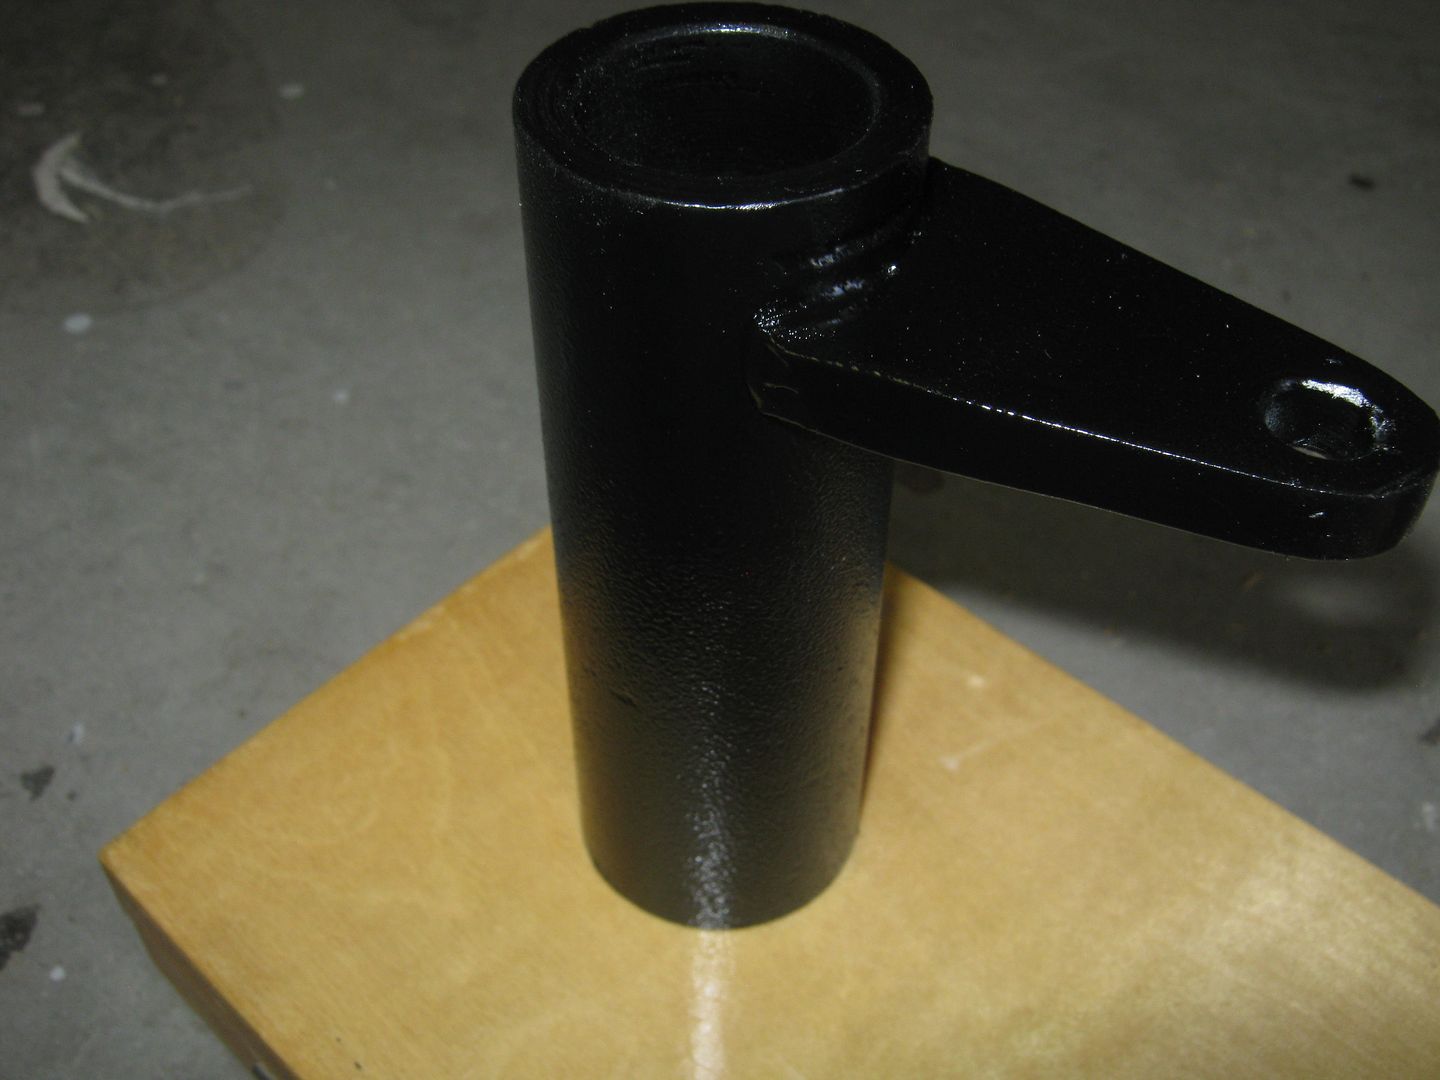 Here's a picture of the set-up mocked in place. You can see how the bellcrank now supports the eyelet. You can also see the reinforcement pieces around the penetration holes for the hinge pin on the rear pin. I drilled out the spot welds on the piece I got from the wrecking yard and spot-welded the plates to the pedal support in order to make it all look factory. The issue now is how to attach the bellcrank to the stock brake pedal. 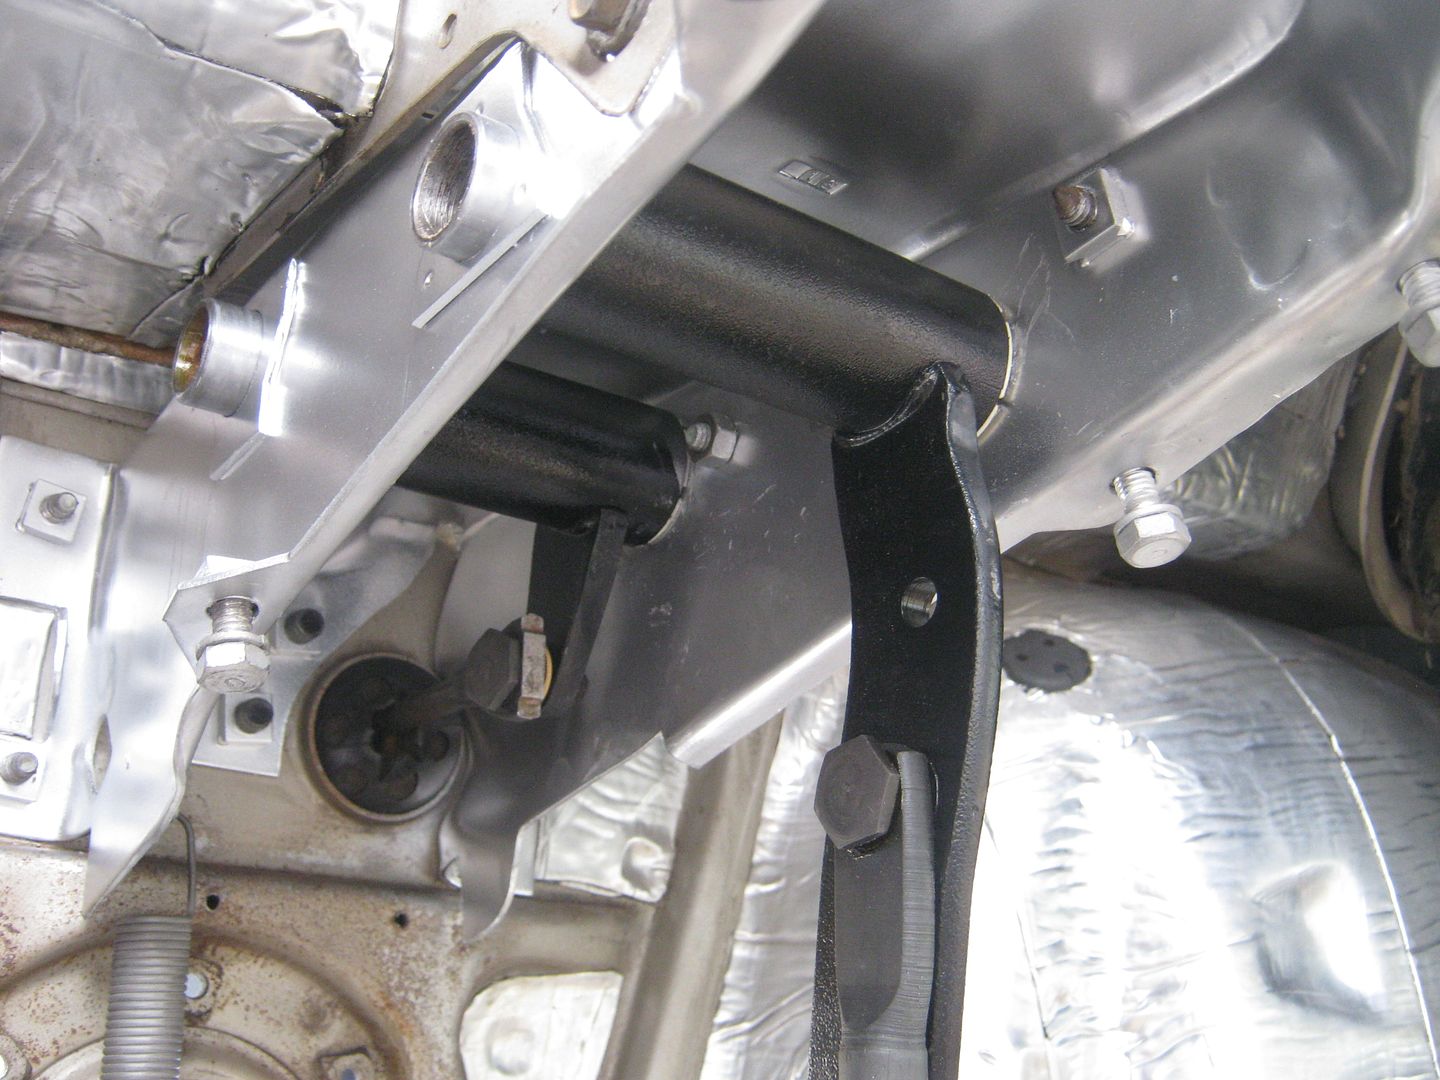 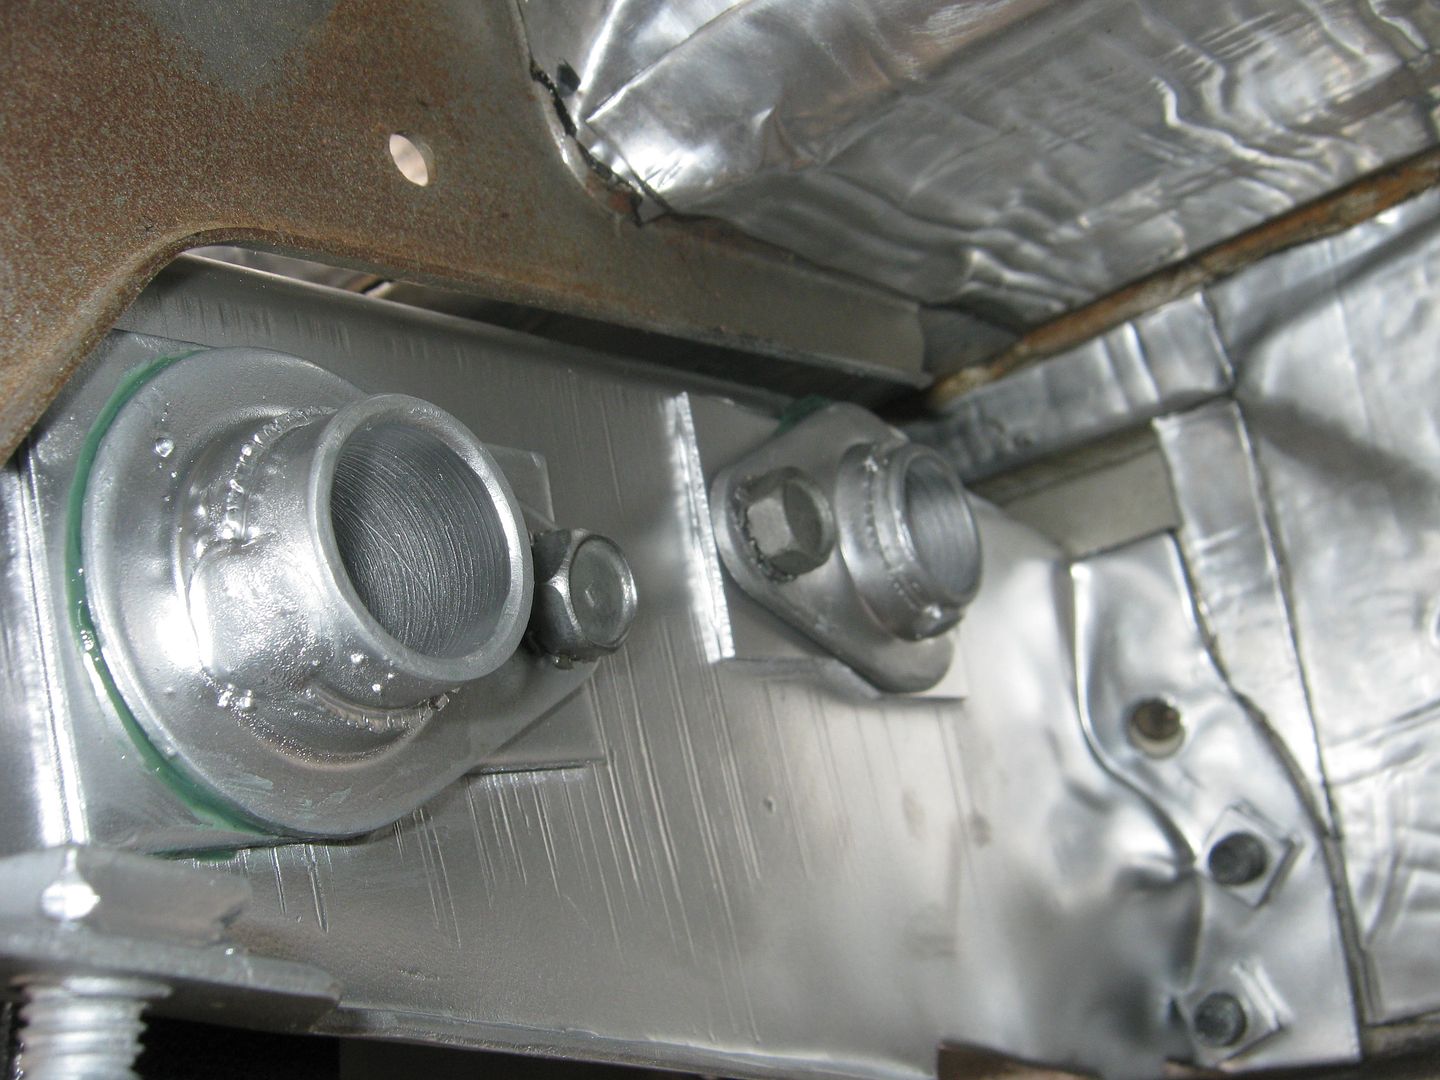 It had to be a clevis of some sort, preferably one that captured both sides of the bellcrank/booster rod connection. My buddy Brad was at the bolt shop and they had the perfect clevis. It's about 2.5" long, and the span of the jaw was .500", and it was a whopping $5. I measured the total width of the booster eyelet and the bellcrank tab, and it was .585", so the jaw was opened up slightly. The clevis is threaded on the end to accept a 7/16-20 fine thread bolt, just like the factory linkage. The only goofy thing about the clevis is that the eyelet holes are 7/16", so the factory hole in the brake pedal (which is now the bellcrank) needed to be opened up to 7/16". The eyelet in the booster is .640", which means that you will need to find or fab a bushing with an outer diameter of .640 and have an inner diameter of .437 (7/16"). I found a bronze bushing at Lowes with an o.d. of 5/8" (.625) and an i.d. of 3/8" (.375)., and it cost $3.88. The o.d. would work, but I opened the i.d. to 7/16" and chopped the total end to end length to .275. It worked perfectly. The linkage rod is merely a 2.5" 7/16-20 set screw, and it cost $1.80. The through-bolt is a Grade 8, 2" long. The bolt head had to be ground down to about .250" tall in order to clear the side of the structure when the brake pedal is depressed. After all of the attach points were greased, the linkage works like butter, and the booster rod depresses the plunger with very little change in height. Another thing that this mod did was move the brake pedal closer to the floor. No longer will you have to lift your leg completely off of the seat to push the brake. Mission accomplished! 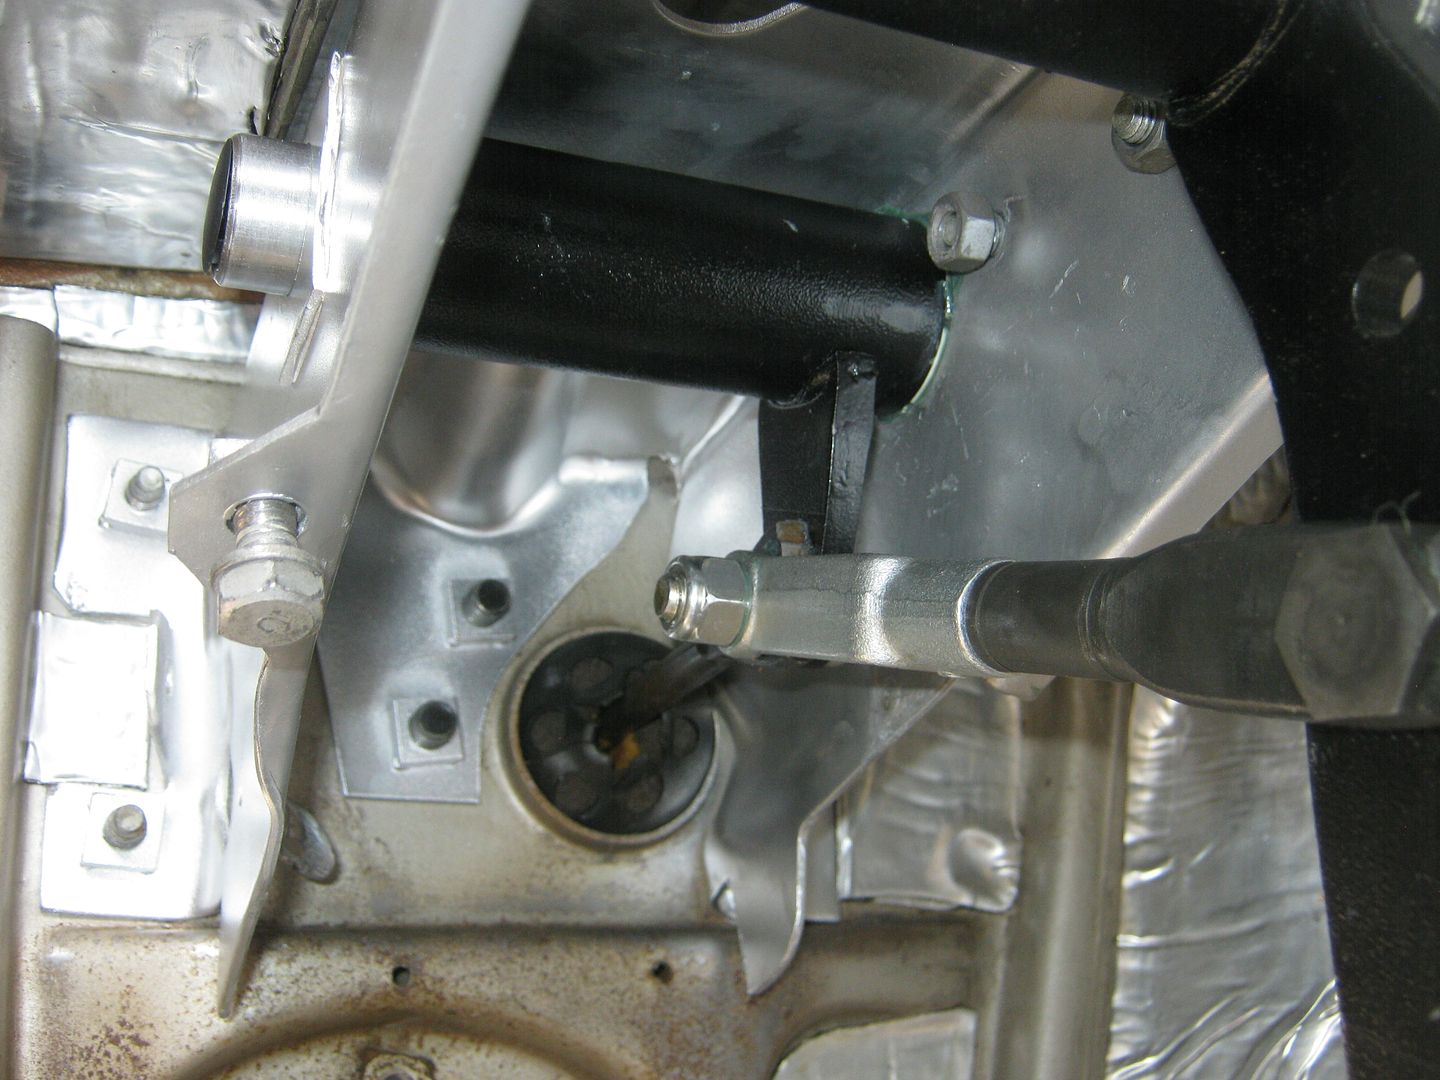 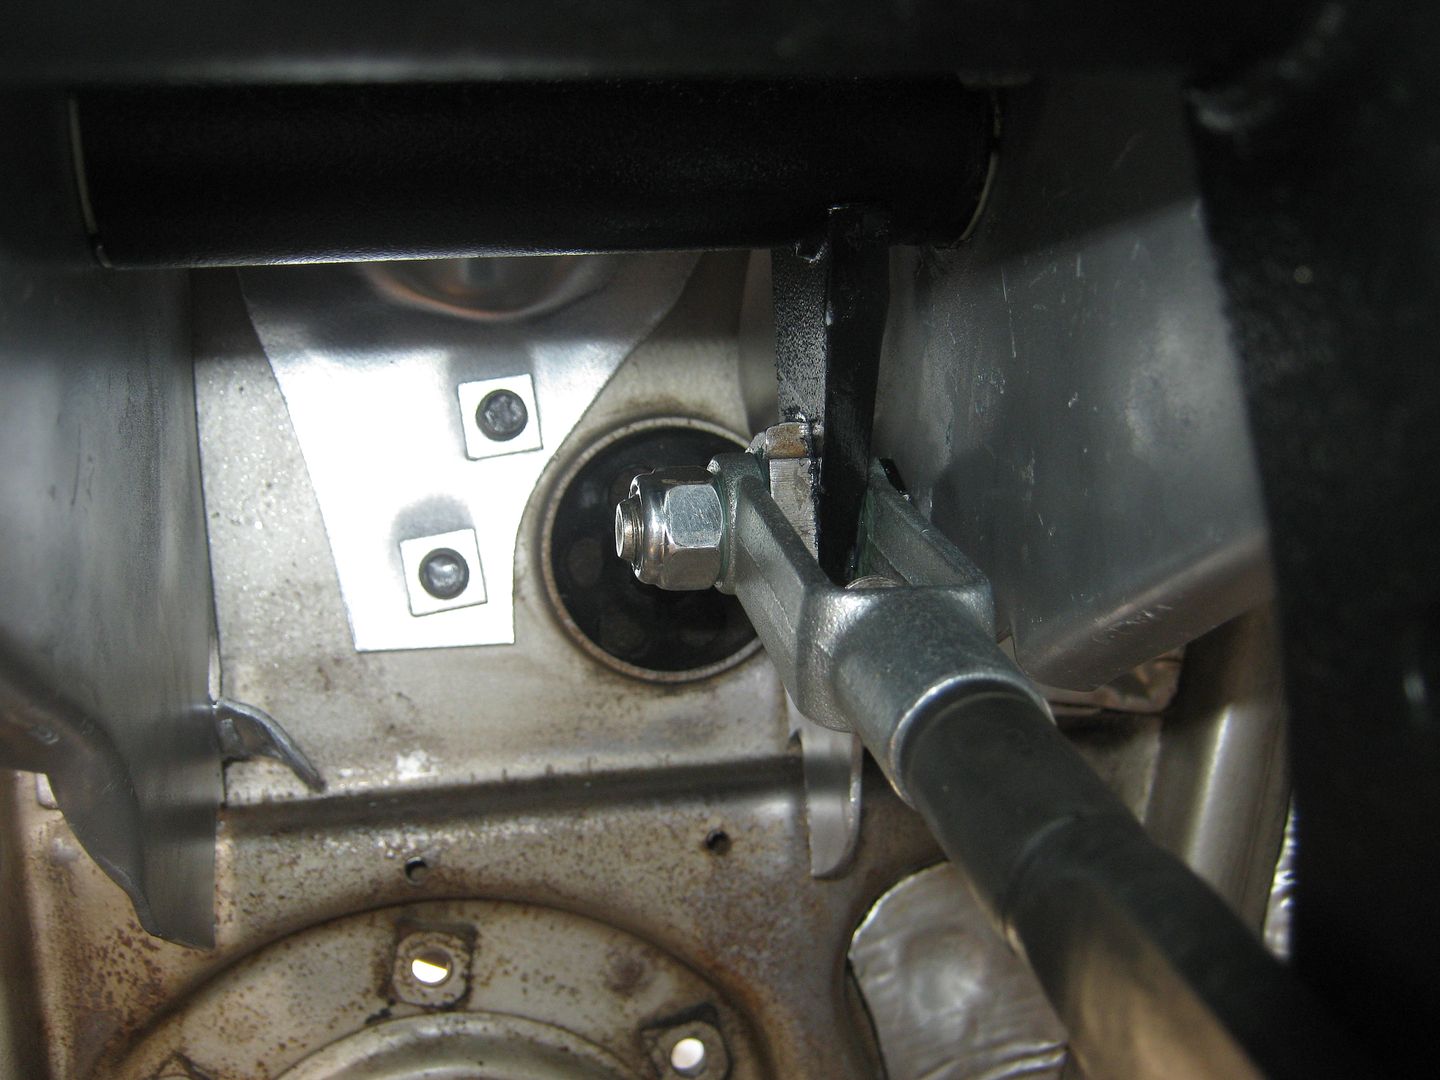 Sorry for the long explanation, but I think that this mod will help anybody wanting to make their brakes work better and have vastly improved ergonomics. Plus, it was cheap, and that's always a good thing!! Now, I'm wondering if the '67-'72 trucks have a similar, unused hole in their pedal assembly box?
__________________
Check out my latest endeavor: https://roundsixpod.com My build threads: '55 Chevy: http://67-72chevytrucks.com/vboard/s...d.php?t=247512 '64 C-20: http://67-72chevytrucks.com/vboard/s...d.php?t=446527 |
|
|

|
|
|
#2 |
|
67-72 parts collector,Ö
 Join Date: Nov 2002
Location: Mid-MO
Posts: 22,701
|
Re: 1960-1966 Brake Pedal Mod
Great write-up.
__________________
Keith Convert to disc brakes. http://67-72chevytrucks.com/vboard/s...d.php?t=444823 |
|
|

|
|
|
#3 |
|
Registered User
Join Date: Jan 2011
Location: Tulsa, OK
Posts: 32
|
Re: 1960-1966 Brake Pedal Mod
I agree, Great write up, great price, and great look. Looks like factory to me!
__________________
I like More's Law 'If more is better, then too much is just right.' http://s1238.photobucket.com/albums/...20chevy%20k10/ 1971 Chevelle - sbc 350 TH350 1961 K10 - sbc 400 4 spd M/T short stepside |
|
|

|
|
|
#4 |
|
Registered User
Join Date: Sep 2010
Location: Lake Havasu City Arizona
Posts: 863
|
Re: 1960-1966 Brake Pedal Mod
How do the brakes feel? Pedal travel now vs with old ratio?
How much did your pedal ratio change from your original measurements? Looks great. Thanks Posted via Mobile Device
__________________

|
|
|

|
|
|
#5 |
|
Registered User
Join Date: Jan 2010
Location: Evensville, TN
Posts: 236
|
Re: 1960-1966 Brake Pedal Mod
Great write-up. Thanks for taking the time to post.
|
|
|

|
|
|
#6 |
|
Registered User
Join Date: Jul 2018
Location: SANTA FE, NM
Posts: 13
|
Re: 1960-1966 Brake Pedal Mod
Long time reader, first time poster...
Thank you chevyrestoguy for posting your pedal modification, it got me fired up and motivated to modify my brake and clutch leverage ratios using your mod as a guideline. I found a compete pedal bracket assembly on ebay and began chopping. I decided to use heim joints as the MC power booster from CPP came equipped with one. I also used the clutch arm from the ebay score and fabricated a pivot arm to replace the pivot arm that came with the hydraulic clutch kit; just saw too much potential for failures/short life in the design. The linkage is ok and I am positive they work, but I cant leave anything alone. Last edited by warrfarr; 03-30-2019 at 08:52 PM. |
|
|

|
|
|
#7 |
|
Registered User
Join Date: Jul 2018
Location: SANTA FE, NM
Posts: 13
|
Re: 1960-1966 Brake Pedal Mod
Placed a slight bend (maybe 10 degrees) in the input shaft for the brake booster to align properly when fully compressed.
All so decided to move both pedals back 1 1/2" as it was not comfortable for me at 6'1" too quickly and effectively hit the brake pedal while driving in modern traffic. |
|
|

|
|
|
#8 |
|
Registered User
Join Date: Jul 2018
Location: SANTA FE, NM
Posts: 13
|
Re: 1960-1966 Brake Pedal Mod
Utilized the factory pedal bumpers. All so moved the brake switch back to meet the new pedal position.
|
|
|

|
|
|
#9 |
|
Registered User
Join Date: Jul 2018
Location: SANTA FE, NM
Posts: 13
|
Re: 1960-1966 Brake Pedal Mod
Now, the clutch was something along the same lines changing the leverage ration for the clutch from 4:1 to 6:1, the exact opposite of the leverage ratio change on the brake pedal.
Through hours of mocking up the clutch pedal and the pivot arm I came up with the proper geometry, chopped up the remainder of the spare brake pedal to make the swing/pivot arm for the clutch. I wanted to replace the pivot linkage that came with the hydraulic clutch kit; I just saw too much potential for failures/short life in the design. The linkage is ok and I am positive it works, but I cant leave anything alone as well as and seeing a better alternative. Last edited by warrfarr; 03-31-2019 at 01:32 PM. |
|
|

|
|
|
#10 |
|
Registered User
Join Date: Jul 2018
Location: SANTA FE, NM
Posts: 13
|
Re: 1960-1966 Brake Pedal Mod
The pivot arm now divides some of the pedal throw and allows for complete stroke (adjustable too) of the clutch MC
|
|
|

|
|
|
#11 |
|
Registered User
Join Date: Jul 2018
Location: SANTA FE, NM
Posts: 13
|
Re: 1960-1966 Brake Pedal Mod
Assembled and ready for installation back into cab to check it all once more before sending off to powder coat. Will add some zert fittings to each end of the cross shafts to allow for lubrication down the road when/if they start squeaking.
|
|
|

|
|
|
#12 |
|
Registered User
Join Date: Jul 2018
Location: SANTA FE, NM
Posts: 13
|
Re: 1960-1966 Brake Pedal Mod
Changing the clutch pedal position to match the brake pedals required a change in the bumper mount. I also wanted to add a clutch switch for future use as a possible anti theft relay switch (horn honks if the clutch pedal isn't depressed). Removed the original bumper mount and filled the hole. Made a new mount for the bumper and a repurposed brake light switch. Added some supports to prevent bending as the factory mounts do.
|
|
|

|
|
|
#13 |
|
Registered User
Join Date: Oct 2015
Location: El Reno, OK
Posts: 12
|
Re: 1960-1966 Brake Pedal Mod
Warrfarr - very nice! I really like the clutch mod you did, it seems much more sturdy. Iíve been putting off the brake pedal mod on my Ď63 but I think itís finally time to loose the mushy pedal. Thanks for sharing the photos!
Posted via Mobile Device |
|
|

|
|
|
#14 |
|
Registered User
Join Date: Feb 2019
Location: Dunbar, PA
Posts: 13
|
Re: 1960-1966 Brake Pedal Mod
How did you move the whole assembly back 1"- 1 1/2"? I'm not that tall but I have a heck of a time trying to get my foot on the brake and clutch.
|
|
|

|
|
|
#15 |
|
Registered User
Join Date: Feb 2019
Location: Dunbar, PA
Posts: 13
|
Re: 1960-1966 Brake Pedal Mod
How did you move the whole assembly back 1 1/2" ? I'm not that tall but have a heck of a time moving my foot for the brake and clutch.
|
|
|

|
|
|
#16 |
|
Registered User
Join Date: Jul 2018
Location: SANTA FE, NM
Posts: 13
|
Re: 1960-1966 Brake Pedal Mod
Kcenderjim, I moved the bump stops forward roughly a 1/2" which effectively moved the pedals an 1 1/2" towards the floor. The addition of the extra pivot is what allowed for the pedal position change. There is quite a bit of adjustability with the heim joints. :-)
|
|
|

|
 |
| Bookmarks |
|
|