
 |
Register or Log In To remove these advertisements. |
|
|
|
|||||||
 |
|
|
Thread Tools | Display Modes |
|
|
#1 |
|
Senior Member
Join Date: Apr 2004
Location: sw colorado
Posts: 2,720
|
Making an engine stand, the overkill way
I had been adding pics of this in my build thread as it progressed, but thought maybe it warranted its own thread. hopefully it will be a good reference for someone else.
I looked, albeit briefly, for options that could be purchased. i didnt find anything and of what i saw, i got a little scared about the cost. so i decided to dive in and build my own. Goal is to support a 6BT with head(and maybe more, we'll see) from the crankshaft end of the engine. for you non diesel guys, that is the 5.9 cummins from a dodge truck. it weighs about 975 pounds engine, head and IP. sans manifold and turbo. its also about 40 inches from rear face to front. i spent an evening on the computer getting a rough design hammered out 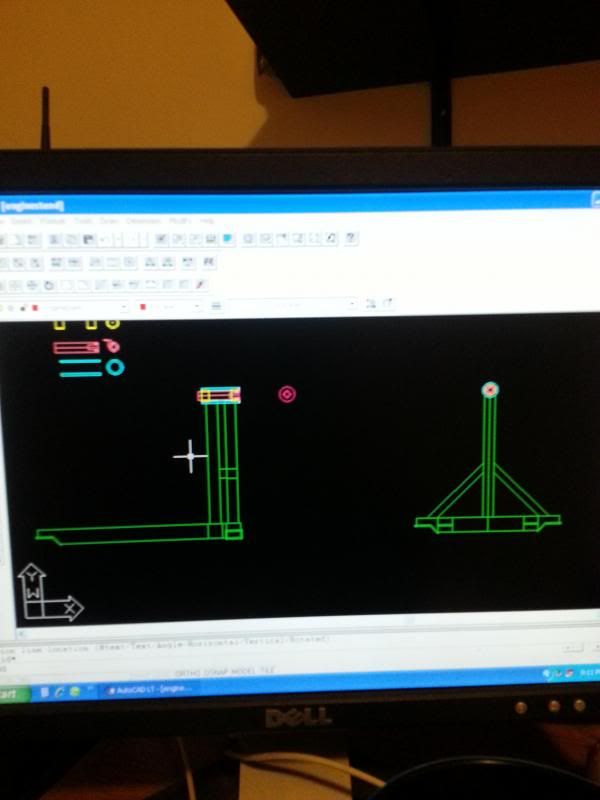 this is a confusing but closer look at the headstock 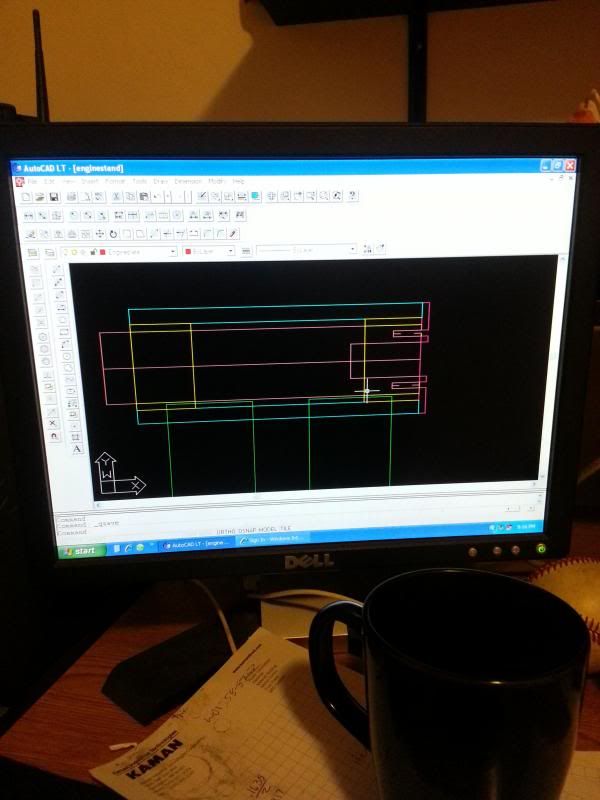 to start, i whittled a chunk of 4" x .500" wall DOM to 10.5" in length. it is faced in the lathe, and if my memory is good, it finished at 10.502" ill excuse the extra 2 thou as i am an amateur. the ID was also bored to 3.122" 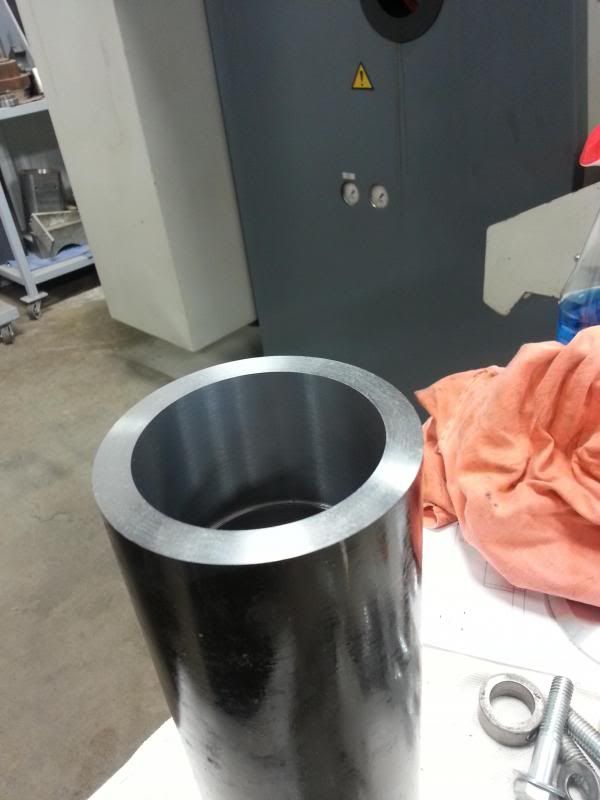 i forgot to collect photographical evidence, but i have also rough cut the two 3"x.250" wall square tubes that will comprise the separated column that supports the headstock. they still need to be cut for the saddles for the DOM I ordered a 3.125"x 2.625"x 6" bronze bushing. this thing is manly 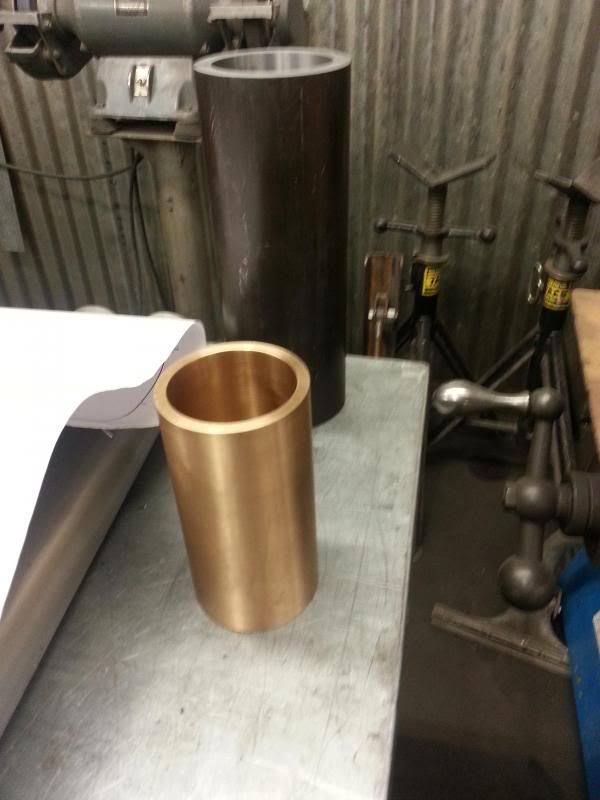 i will finish boring the DOM to the appropriate ID for a press fit, now that i have the bushing . then ill cut the bushing in half and press half into either side of the DOM. I have a 3" round of cold rolled 1045 bar on the way that for the shaft. that is supposed to be here tomorrow. I also have this 60:1 worm drive gear box that will be used to turn the engine over. as the project progresses, ill show you how that goes together. 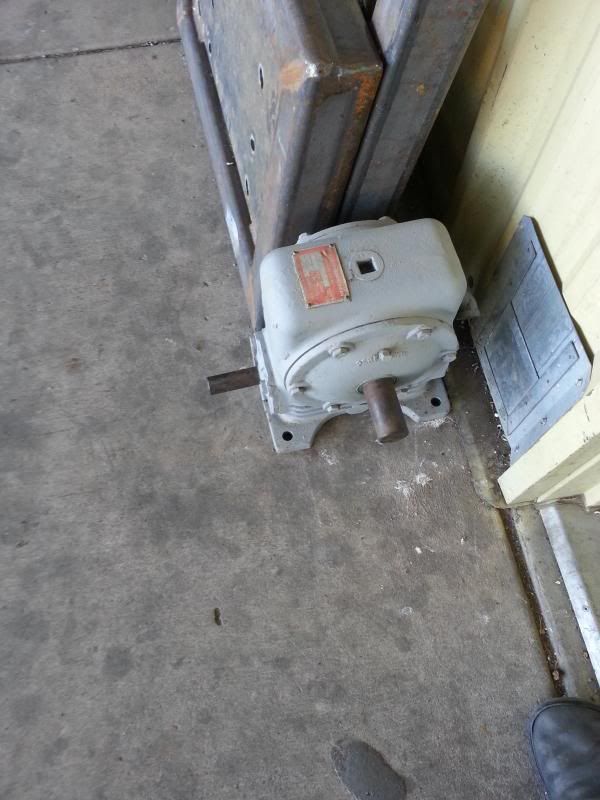
|
|
|

|
|
|
#2 |
|
Senior Member
Join Date: Apr 2004
Location: sw colorado
Posts: 2,720
|
Re: Making an engine stand, the overkill way
mild progress here
got the bushing split and pressed into the headstock. my 3" bar stock showed up as well. i may begin roughing the od on that tomorrow. ill have to weld the uprights on and finish bore the bushings before i know for sure what my finnish OD will be though. maybe ill weld tomorrow... you can see the exagerated stick out on the bushings. they will be faced back until there is a few thou stick out. this will act as a thrust surface for the engine plate and the retaining plate on the other side. 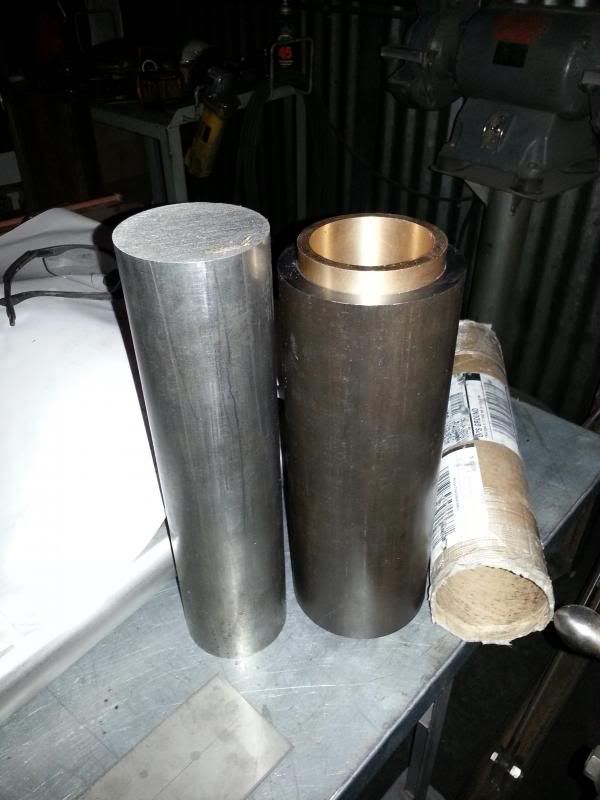 and i cut the saddles into the uprights. 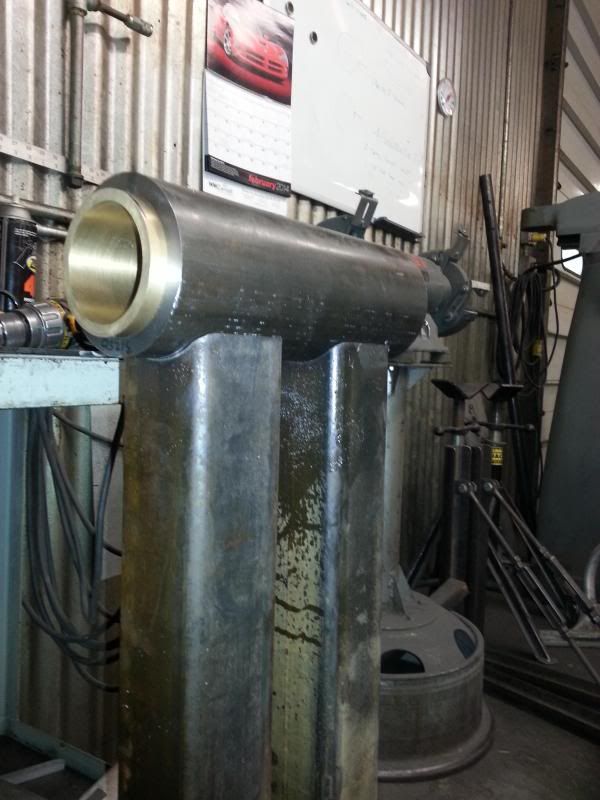
|
|
|

|
|
|
#3 |
|
60-66 Nut
  Join Date: Mar 2007
Location: Coeur d'Alene, Idaho
Posts: 23,252
|
Re: Making an engine stand, the overkill way
You're doing some nice work. It looks like this should an awesome engine stand. I've always build my own engine stands.
__________________
Power Steering Box Adapter Plates For Sale HERE Power Brake Booster Adapter Brackets For Sale '63-'66 HERE and '67-'72 HERE and '60-'62 HERE and "60-'62 with clutch HERE Rear Disc Brake Brackets For Sale. Impala SS calipers HERE Camaro Calipers HERE D52 Calipers HERE 6 Lug HERE Hydroboost Mounting Plates HERE |
|
|

|
|
|
#4 |
|
Registered User
Join Date: Feb 2007
Location: Marana, Arizona
Posts: 3,458
|
Re: Making an engine stand, the overkill way
Subscribed!
__________________
"I feel the need for speed!"... as soon as I am done with my nap. |
|
|

|
|
|
#5 |
|
Senior Member
Join Date: Apr 2004
Location: sw colorado
Posts: 2,720
|
Re: Making an engine stand, the overkill way
Thanks guys!
put a little time into this today. hucked it back in the lathe and faced the bushing back. i left .002 stickout on one end and .007 on the other for thrust. one side will see little to no thrust pressure. thats why they are different. not sure that makes sense in the real world, but it did in the happy place in my head. 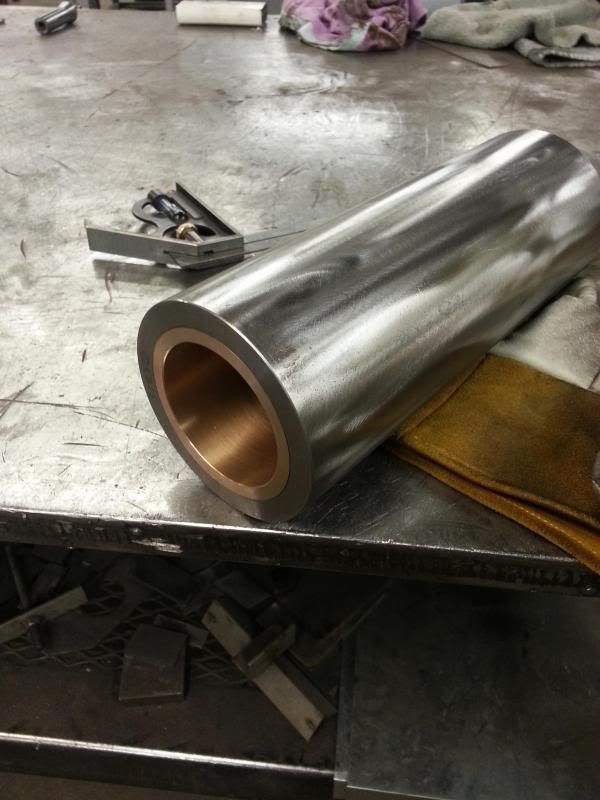 cleaned the scale off the DOM too i ran around the 3" square with the synchrowave 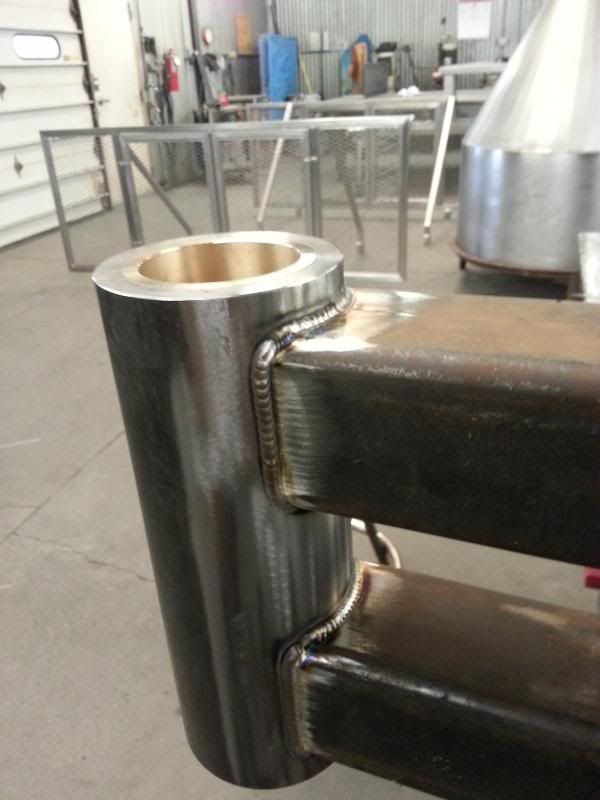 this is the upright and headstock. the table is 4'x8' for reference 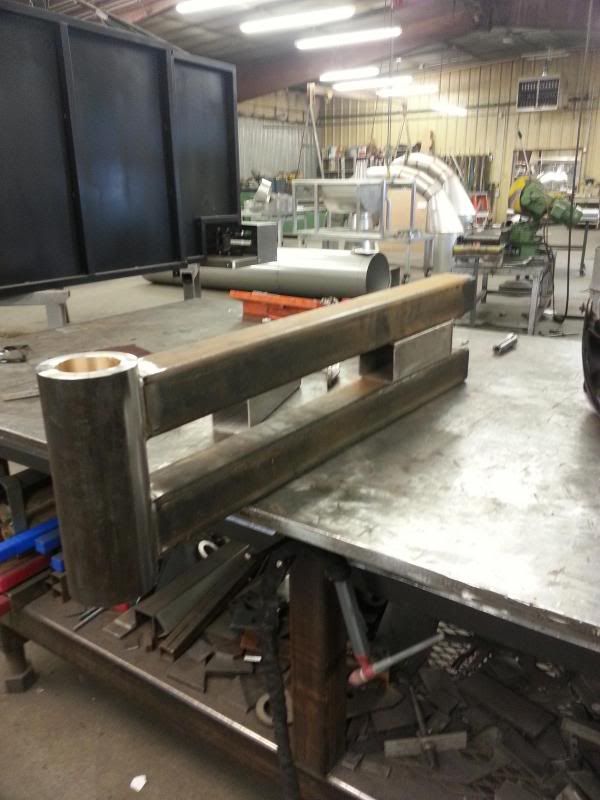 and then i decided to do another pass on the welds for posterity 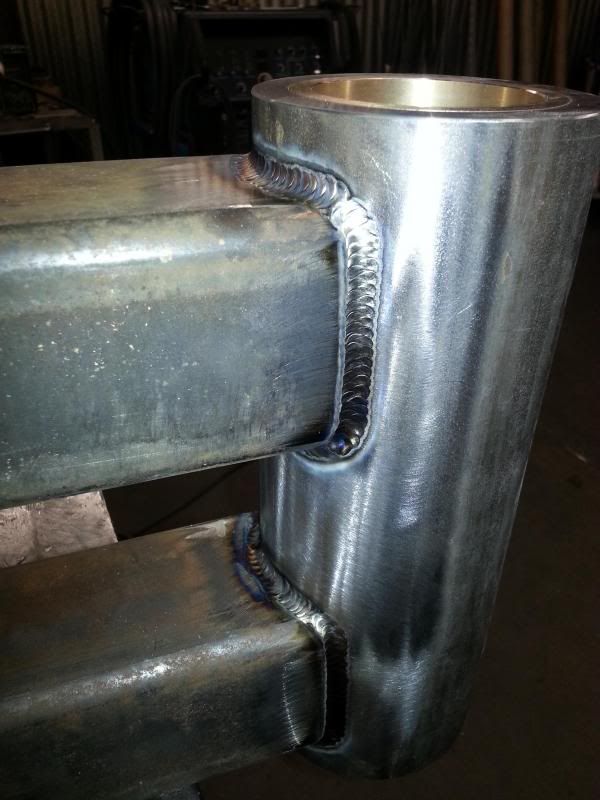
|
|
|

|
|
|
#6 |
|
Registered User
 Join Date: Jan 2003
Location: Safford,AZ
Posts: 3,625
|
Re: Making an engine stand, the overkill way
Nice.
__________________
1969  307, t350 307, t3501950 Chevy Wagon 1978 Big 10 1967 C10, 250,3-OTT |
|
|

|
|
|
#7 |
|
60-66 Nut
  Join Date: Mar 2007
Location: Coeur d'Alene, Idaho
Posts: 23,252
|
Re: Making an engine stand, the overkill way
Very nice
 Which Syncrowave do you have?
__________________
Power Steering Box Adapter Plates For Sale HERE Power Brake Booster Adapter Brackets For Sale '63-'66 HERE and '67-'72 HERE and '60-'62 HERE and "60-'62 with clutch HERE Rear Disc Brake Brackets For Sale. Impala SS calipers HERE Camaro Calipers HERE D52 Calipers HERE 6 Lug HERE Hydroboost Mounting Plates HERE |
|
|

|
|
|
#8 |
|
Senior Member
Join Date: Apr 2004
Location: sw colorado
Posts: 2,720
|
Re: Making an engine stand, the overkill way
Thanks guys.
its a 350lx i think. i forget the letters. |
|
|

|
|
|
#9 |
|
Registered User
Join Date: Aug 2013
Location: Marion AR
Posts: 33
|
Re: Making an engine stand, the overkill way
All the guys at work are waiting to see how this turns out. We rebuild 5.9 and 6.7 all day long for our company. All our stands bolt on the side of the block. This works fine but you can't hook the exhaust or turbo on till its off the stand. With your design , you can build a complete drop in right there on the stand. Looking great. Can't wait to see it done.
|
|
|

|
|
|
#10 |
|
60-66 Nut
  Join Date: Mar 2007
Location: Coeur d'Alene, Idaho
Posts: 23,252
|
Re: Making an engine stand, the overkill way
Oh! You've got the big one.
__________________
Power Steering Box Adapter Plates For Sale HERE Power Brake Booster Adapter Brackets For Sale '63-'66 HERE and '67-'72 HERE and '60-'62 HERE and "60-'62 with clutch HERE Rear Disc Brake Brackets For Sale. Impala SS calipers HERE Camaro Calipers HERE D52 Calipers HERE 6 Lug HERE Hydroboost Mounting Plates HERE |
|
|

|
|
|
#11 | |
|
Senior Member
Join Date: Apr 2004
Location: sw colorado
Posts: 2,720
|
Re: Making an engine stand, the overkill way
Quote:
I certainly hope it turns out. i still haven't seen the results of the simulation program, but at this rate, ill get to test it in the real world before they get to that. my biggest concern is that it not be bouncy when its loaded. that is when engine stands creep me out. My seat of the pants feeling after several years of fabricating, is that it will be fine. it is still a lot of weight overhung pretty far. so far my tendency to overbuild hasnt failed me. lets hope it continues! Yessir. our real old back up welder blew its guts out about 18 months ago. so my old 250 got shuffled to the backup position and i got a shiny new one. it certainly is nice. plus the built in cooler is so much quieter than the bernard that was on the 250. all things considered, i would prefer the older style 250 in my garage. mostly because they are so much cheaper and a little more compact. since it was on the boss and our shop is plenty big, i am all game! |
|
|
|

|
|
|
#12 |
|
Registered User
Join Date: Aug 2013
Location: Marion AR
Posts: 33
|
Re: Making an engine stand, the overkill way
Our only suggestion is to make a plate that you can add different attachments too. You might like the side mount better than the rear mount. Plus you can only rebuild a 6.7 from the side. Is your plan to bolt it right to the block or with the bellhousing on? The reason I'm asking is because of the rear main seal. You might not have enough room to install it. I give the guys an update every morning.
|
|
|

|
|
|
#13 | |
|
Senior Member
Join Date: Apr 2004
Location: sw colorado
Posts: 2,720
|
Re: Making an engine stand, the overkill way
Quote:
for now my plan is to grab the 6bt by the upper four flywheel housing adapter bolts and the two bolts that are up by the rear coolant plug. hopefully this will put the pivot closer to the weight center line when the head is on. it will also give me some space at the rear main seal housing to work on that as well. as you said, it may be handy to have the side mount for it too, and that one will be easy to make. i sure appreciate the advice of someone who has to deal with these heavy SOBs every day. glad to hear you and your crew are interested too! |
|
|
|

|
|
|
#14 |
|
Senior Member
Join Date: Apr 2004
Location: sw colorado
Posts: 2,720
|
Re: Making an engine stand, the overkill way
i hope i can get a little more done to this during the week, but my next big step is getting the bushings finish bored. i may have some time to play with it, but the set up is a little time consuming and i will be out of town all weekend. i also need to order the 4" square tube for the rest of the frame. usually we have that laying around at work, but i looked the other day and we are fresh out. we have a project coming that will use the same size i need, so i wont have to pay shipping at least!
|
|
|

|
|
|
#15 | |
|
60-66 Nut
  Join Date: Mar 2007
Location: Coeur d'Alene, Idaho
Posts: 23,252
|
Re: Making an engine stand, the overkill way
I've had my hopes of upgrading to a Syncrowave 250 for a while now. For most of what I do I might be able to get by with the new 210, but I'd rather have the 250 for the little extra $$. Right now I'm using an old Airco 250. If it gives up before funds are available for a new machine, I'll just put a HF unit on my Shopmaster 300........sorry for the derail
 Quote:
__________________
Power Steering Box Adapter Plates For Sale HERE Power Brake Booster Adapter Brackets For Sale '63-'66 HERE and '67-'72 HERE and '60-'62 HERE and "60-'62 with clutch HERE Rear Disc Brake Brackets For Sale. Impala SS calipers HERE Camaro Calipers HERE D52 Calipers HERE 6 Lug HERE Hydroboost Mounting Plates HERE |
|
|
|

|
|
|
#16 |
|
Senior Member
Join Date: Apr 2004
Location: sw colorado
Posts: 2,720
|
Re: Making an engine stand, the overkill way
No problem, conversation is welcome.
i agree on holding out till you can get the bigger machine. it generally doesn't matter on stainless and mild. but its really nice to have some amperage available if you want to glue some bigger aluminum. ive run this 350 with over 300 amps a few times on AL. couldnt do that with the 210. i never did run out of juice with the 250 |
|
|

|
|
|
#17 |
|
Senior Member
Join Date: Apr 2004
Location: sw colorado
Posts: 2,720
|
Re: Making an engine stand, the overkill way
here is a lonely pic of not that much progress!
i finished bored half of the headstock. picture is crap but it sure finished up nice! i got a little neurotic and decided to stop here and machine a mandrel/jig to locate the headstock on the mill. i am being a little over critical, but it wont take long to machine it and i will feel better about the bores in the bushings being concentric. so after i machine the jig i will be able to indicate it on the mill bed and slip the finished bore over it. clamp it down and bore the other side. should get me close enough for this thing. i got laughed at and heard the comment, "yeah cause this engine stand will be spinning 10k rpm..." hahaha. 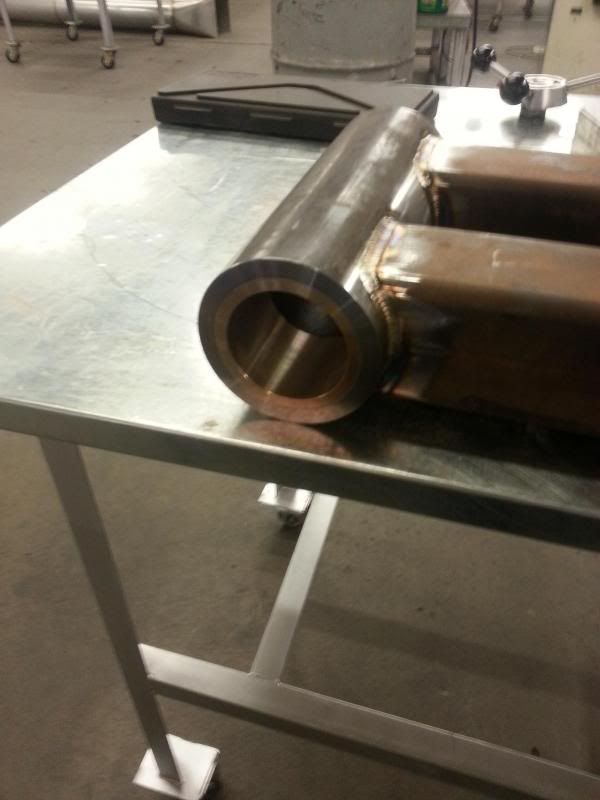
|
|
|

|
|
|
#18 |
|
Senior Member
Join Date: Apr 2004
Location: sw colorado
Posts: 2,720
|
Re: Making an engine stand, the overkill way
oh, i forgot, i placed the order for the 4" square today along with the tubing needed for our real work. hope to see it early next week. it will be cool to get the frame all put together. as soon as i get these bushings finished up, i can start hogging material off of the 3" bar stock!
|
|
|

|
|
|
#19 |
|
60-66 Nut
  Join Date: Mar 2007
Location: Coeur d'Alene, Idaho
Posts: 23,252
|
Re: Making an engine stand, the overkill way
I'd have a hard time working in an area that I'd have to wait a week to get 4" x .250" square tube. Here, I'd have that delivered tomorrow morning. I guess I'm just spoiled.
__________________
Power Steering Box Adapter Plates For Sale HERE Power Brake Booster Adapter Brackets For Sale '63-'66 HERE and '67-'72 HERE and '60-'62 HERE and "60-'62 with clutch HERE Rear Disc Brake Brackets For Sale. Impala SS calipers HERE Camaro Calipers HERE D52 Calipers HERE 6 Lug HERE Hydroboost Mounting Plates HERE |
|
|

|
|
|
#20 |
|
Senior Member
Join Date: Apr 2004
Location: sw colorado
Posts: 2,720
|
Re: Making an engine stand, the overkill way
Yeah, there are some disadvantages to living in paradise! Not that you are suffering in Coeur d'Alene... actually there is a small steel supplier here in town that i am sure would have it. its just cheaper if i buy it from work and they buy it from a big material company. the deliveries come out of utah and usually hit on monday or tuesday. generally we have a pretty significant stock in house. just not this time.
|
|
|

|
|
|
#21 |
|
Senior Member
Join Date: Apr 2004
Location: sw colorado
Posts: 2,720
|
Re: Making an engine stand, the overkill way
i did get the bores finished. i made my little jig to locate the hole concentrically.
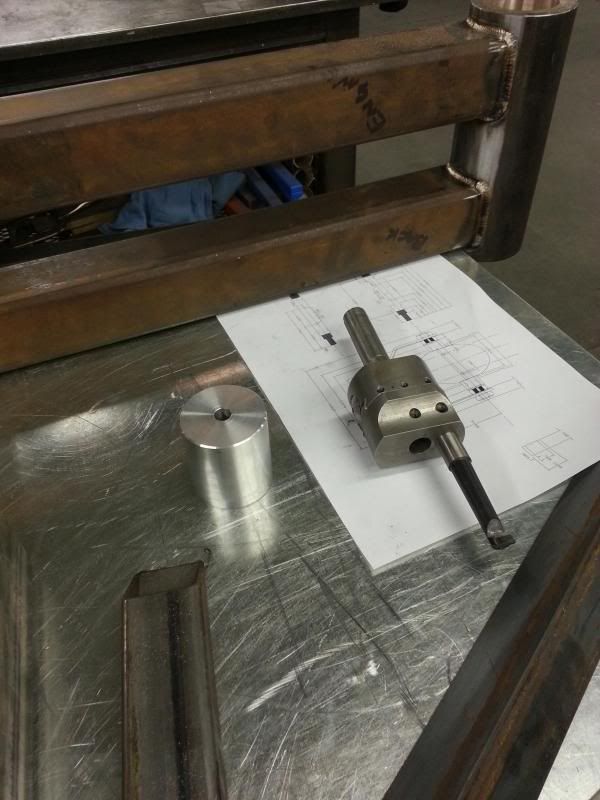 it fits! i got it machined to within a half or one thou, depending how warm the aluminum was. 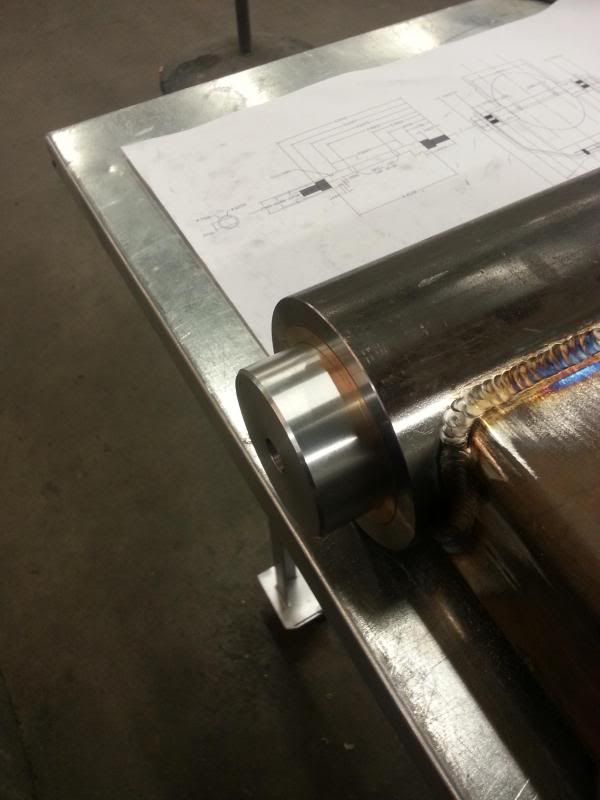 crappy pic but here they are. i eyeballed the bores with a strait edge and it looked well. not that that counts for much. 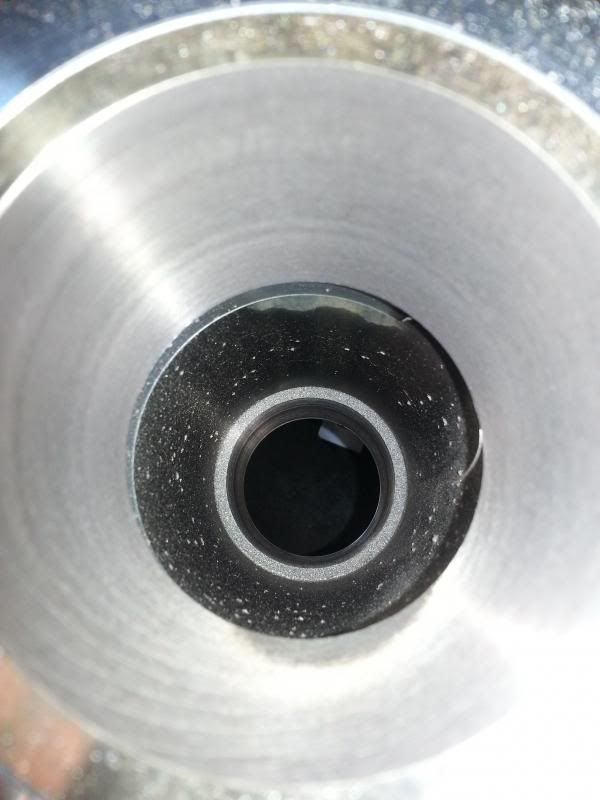
|
|
|

|
|
|
#22 |
|
Senior Member
Join Date: Apr 2004
Location: sw colorado
Posts: 2,720
|
Re: Making an engine stand, the overkill way
|
|
|

|
|
|
#23 |
|
Junk Yartist
Join Date: Jul 2009
Location: Greeley, CO
Posts: 2,203
|
Re: Making an engine stand, the overkill way
I have absolutely no doubt that you've underestimated your design's capacity. That thing is STOUT looking. What I am wondering is how strong are the bolt holes the flywheel housing bolts to? I'm picturing the mounting plate you are fabricating to sit flush on the block, not with "legs" like most off-the shelf .5T jobbers have. Am I understanding your explanation correctly?
The stand you are building Looks about the same size as the ones I used for Big Cam rebuilds. By the way, did you get all the PDF files from Chassis Fab at Wyocheck?
__________________
-Jeremy YOU ONLY FAIL IF YOU STOP TRYING 70 Crew Cab Build Link 70 GMC Suburban 4X4 build thread 95 Yukon Daily Driver Rebuilding an NP205 |
|
|

|
|
|
#24 |
|
Registered User
Join Date: Oct 2007
Location: Spanaway
Posts: 8,451
|
Re: Making an engine stand, the overkill way
Man i wish i could do stuff like that where i work.... Nope! equipment is off limits for personal stuff. Cant afford to buy the equipment ether.. Nice work!
__________________
Mike. Swamp Rat build thread : http://67-72chevytrucks.com/vboard/s...d.php?t=595019 72 3/4T 4X4 4" BDS Lift 33" BFG's |
|
|

|
|
|
#25 | ||
|
Senior Member
Join Date: Apr 2004
Location: sw colorado
Posts: 2,720
|
Re: Making an engine stand, the overkill way
Quote:
the stand will have a universal mounting plate. it will just have a round bolt pattern in it. i will build an adapter to go from that plate to the back of the block. it will probably amount to a couple of inches from the face of the mount plate to the back face of the block. i have an idea in my head for the adapter, but i have not started on that yet. my ideas have a tendency to evolve as start building. but it will not be thin little tubes like a parts house engine stand. i am not worried about the mounting bosses in the block. i have seen these engines hung off of them several times with less beefy stands. there is a significant amount of material in the casting and plenty of threads. i don't have a clue about the PDF files you are asking about. was this a recent thing? i don't communicate with the Tech at all. i don't even now if they have my contact info anymore. i still talk to one of the instructors that was a really cool guy, but he is no longer there. are you talking about the plans for the tools you could build as projects? Quote:
that does suck. i know i am lucky. it is beneficial for the shop in a way though. the more of my own stuff i piddle with the better i am as a fabricator for them too. i already cover the machining when it is something that needs done quickly. our machinist is more of a weekend guy since he has a M-F job elsewhere. It also helps that the boss is usually pretty interested in stuff like this and he also likes automotive related projects. mostly he is just a generous type and helps out whenever he can. |
||
|
|

|
 |
| Bookmarks |
|
|